Deployment Guide
Deployment Prerequisite
Before the start of this guide, please make sure that the JS CTI Toolbar Application is deployed, You can deploy the Cisco CTI Toolbar by following the steps:
Install Cisco CTI for ServiceNow CRM
This middle layer can be deployed on any Windows server in any web server of the user's choice (IIS, Tomcat, etc). The following section lists the steps to deploy the application on an IIS server.
Download the JavaScript Cisco CTI Connector and extract it. From the extracted folder, copy the files and place them in the (c:\inetpub\wwwroot\CTI_Connector) or any desired directory.
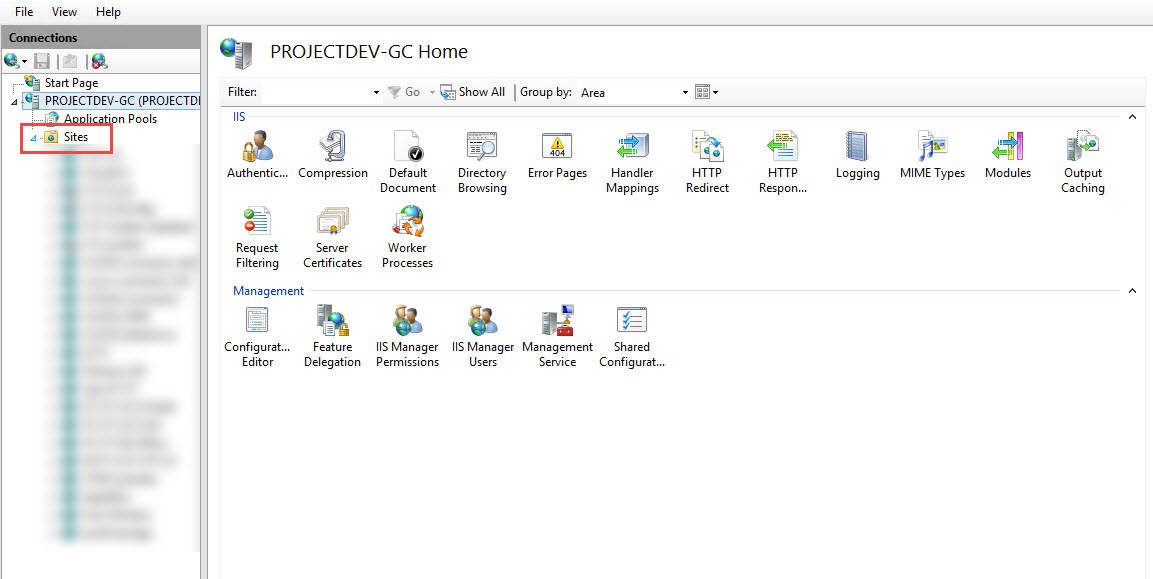
Open IIS. It can be opened by pressing window+R, writing inetmgr, and clicking OK. It will run IIS Manager.
Right-click on Sites to Add a new Site.
Add new Site, Site name
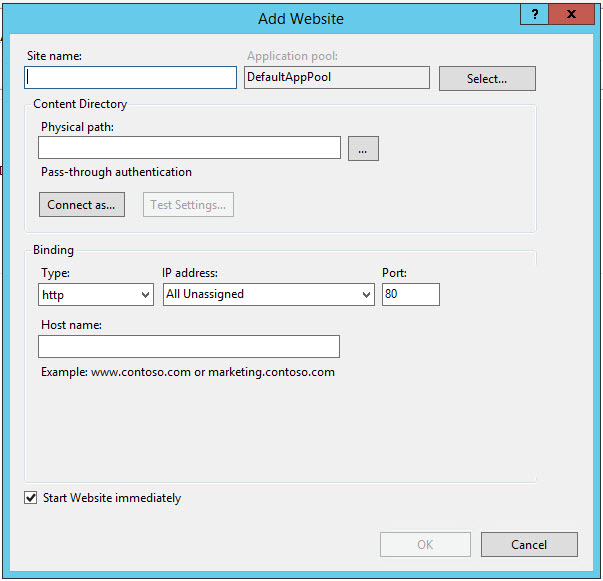
Physical path (c:\inetpub\wwwroot\CTI_Connector) or any given name
The Port, the default value is 80 but any other value can be assigned e.g. 4430, 443* etc.
Please follow this guide to install and configure the SSL certificates on IIS to run the CTI Connector on HTTPS.
If the FQDN after the deployment e.g https://www.<*server_ip*>:443* or whatever is configured.
CTI Configurations
Open the new_config.js file located on `c:\inetpub\wwwroot\CTI_Connector\new_config.js` path. Set the properties as per the below table.
S.No | Property Name | Value | Description |
|---|---|---|---|
1 | adminUserName | admin | The Finesse Admin Username, This username is used to call the different Finesse APIs |
2 | adminPassword | ******* | The Finesse Admin Password. |
3 | domain | https://<finesseFQDN>:8445 | The domain name for finesse with which we are integrating |
4 | subDomain | https://<subscriberfinesseFQDN>:8445 | The domain name for subscriber finesse with which we are integrating |
5 | boshURL | https://<finesseFQDN>:7443/http-bind / | The bosh URL variable basically append the same Finesse Domain with a predefined URL |
6 | subBoshUrl | https://<subscriberfinesseFQDN>:7443/http-bind/ | The sub bosh URL variable basically appends the same subscriber Finesse Domain with a predefined URL |
7 | finesseFlavor | UCCE/UCCX | This property can have 2 values
Note: In the case of PCCE, we need to provide value UCCE. |
8 | callVariable | callVariable1 | Our Connector required an empty one variable which it needs to use for some internal mechanism. That variable can be any callVariable like callVariable1,callVariable2, callVariable3....callVariable10, or any ECC variable as well. In the case of the ECC variable, we need to provide names like ECC.variableName |
9 | powered_by | True | System variable should always remain True |
10 | disableEndCallBtn | false | This should always remain false |
11 | CRM | 0/1 | A possible value for this key would be 0 or 1 0= When web CTI is deployed as a standalone project without any CRM Integration 1= When Web CTI is deployed with some CRM, The CRM can be any. If the value for this property is 1, then the crmFilePath variable must be set |
12 | crmFilepath | The predefined path of the CRM file | To make this property work, the above property CRM must be set 1 . Value for this property depends on the CRM you are using. Possible values are crm:1, // 0 = none, 1 = for crm |
13 | organizationDomain | https://expertflow.dynamics.com | This is the organization domain of your online CRM This value can only be set when you are using Microsoft CRM Online (CIF enabled) else you can ignore this property. |
14 | entities | "contact" | The customer’s ANI is searched against Phone fields of Contact entity only. INFOIn online CRM entities name should be in the small latter entities: "Contact" |
15 | noMatchEntity | "Contact" | In case there is no record found in the entities searched, then we need to tell the CRM which entity should be created. For example, as per this configuration, the CTI connector will open the Contact entity form, then you can save it by providing necessary information like name etc. |
16 | sso | true | This configuration is for auto-login in CTI connector. It is a boolean field, it can have 2 values:
Note: For mobile agent this configuration value will always remains false. |
17 | sso_prefix | "new" | This is a CRM prefix for custom fields in the user entity. It is "new" by default. |
18 | agent_field_name | "new_agentid" | Id of custom field in CRM for agent id in user entity |
19 | password_field_name | "new_password" | Id of custom field in CRM for the password in user entity |
20 | extension_field_name | "new_extension" | Id of custom field in CRM for extension in user entity |
21 | ssoAgent_field_name | "new_ssoagent" | Id of custom field in CRM for SSO agent in user entity |
22 | licenseKey | "licenseKey" | License key generated by Expertflow |
23 | getQueuesDelay | 6000 | This is only applicable for UCCE/PCCE deployment. This is the time by which CTI Toolbar queries the UCCE Database to display the Queue Stats |
24 | logoutFlag | True | Used in Team Performance gadget, to display the logout agent as well. |
25 | ssoBackendURL | https://192.168.:8084*.* | Javascript CTI Toolbar supports Finesse SSO login as well, and for that EF has developed its own Utility which needs to be deployed First. The Deployment Guide for SSO is available here. Once you deploy that Utility, you can then provide the link here. If Finesse is not SSO enabled, please ignore this property |
26 | isGadget | False | A System property should remain false always. |
CTI Installation and configuration
Before the phone communication channel between customer service agents and external customers can be used, Customer Service Management and Openframe plugins must be activated and configured.
Before you begin
Role required: admin
Procedure
Activate the Customer Service plugin (com.sn_customerservice).
Activate the Openframe plugin (com.sn_openframe).
Create an OpenFrame Configuration or use the default CTI configuration by enabling the Default field.
*plugins are installed by default when deploying the application from the marketplace.
Create an OpenFrame configuration
This configuration specifies the OpenFrame window settings as well as the URL to be launched within OpenFrame.
Before you begin
Role required: admin
As part of the OpenFrame configuration, users with the admin role can select one or more user groups. Access to the configuration is limited to the users who have the open-frame user role and that belong to the selected groups.
OpenFrame user roles
The OpenFrame window is available to agents who belong to one of the user groups specified in the OpenFrame configuration and with any of the following roles:
sn_openframe_user ( This is a minimum role that is required)
sn_customerservice_agent
sn_customerservice.consumer_agent admin (This is only required for the installation and configuration not required for the agents)
x_expe4_expertflow_cti.do.CTI_Role (Mandatory Role required)
Adding the OPEN Frame Configurations
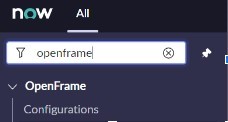
Click on All >>Openframe >> select configurations & then ‘New’
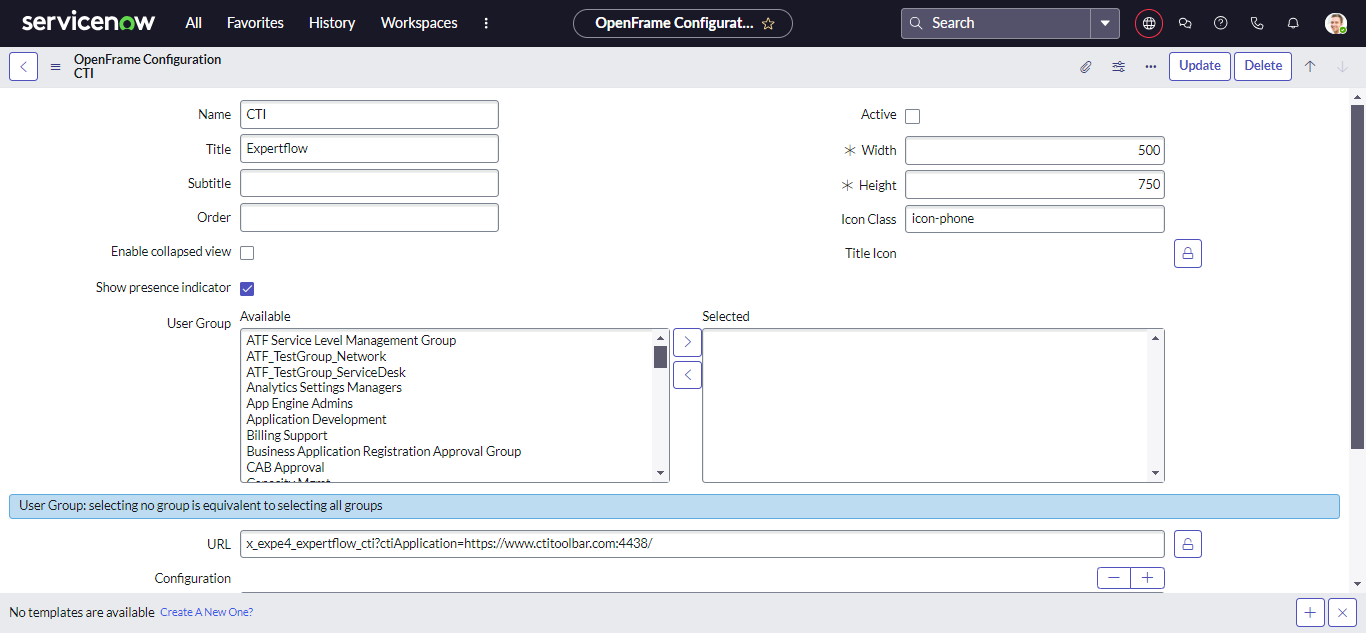
OPEN Frame Configurations
*Show presence indicator when checked Only the agent can see the phone icon.
*When the above roles are provided no user group should be selected or the above-mentioned roles must be part of some user group when selected.
*x_expe4_expertflow_cti.do?ctiApplication=<Your instance URL>.
Fill the configuration according to the mentioned configuration.URL represents the CTI installation path. The activate checkbox must be selected. Update and save the form.
When clicked on the phone icon in the top window the integration will look like
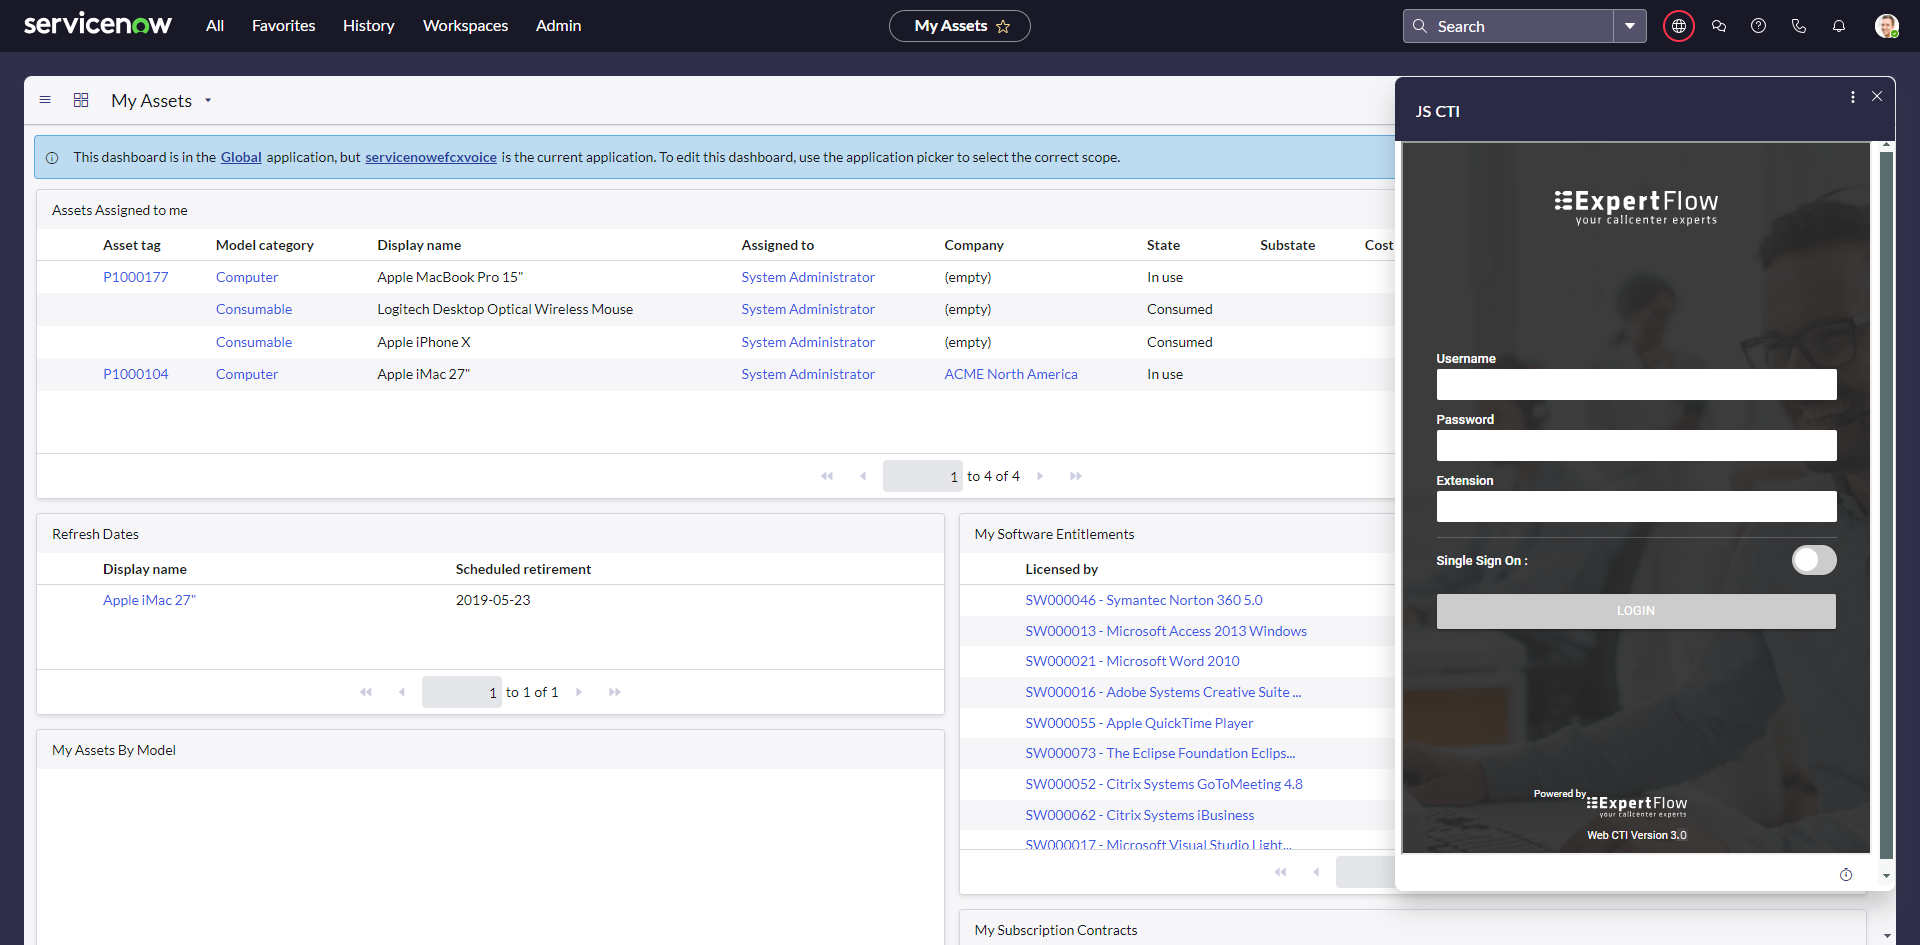
ServiceNow Dashboard
If we open the CTI application from All >> Agent workspace then it will look like this
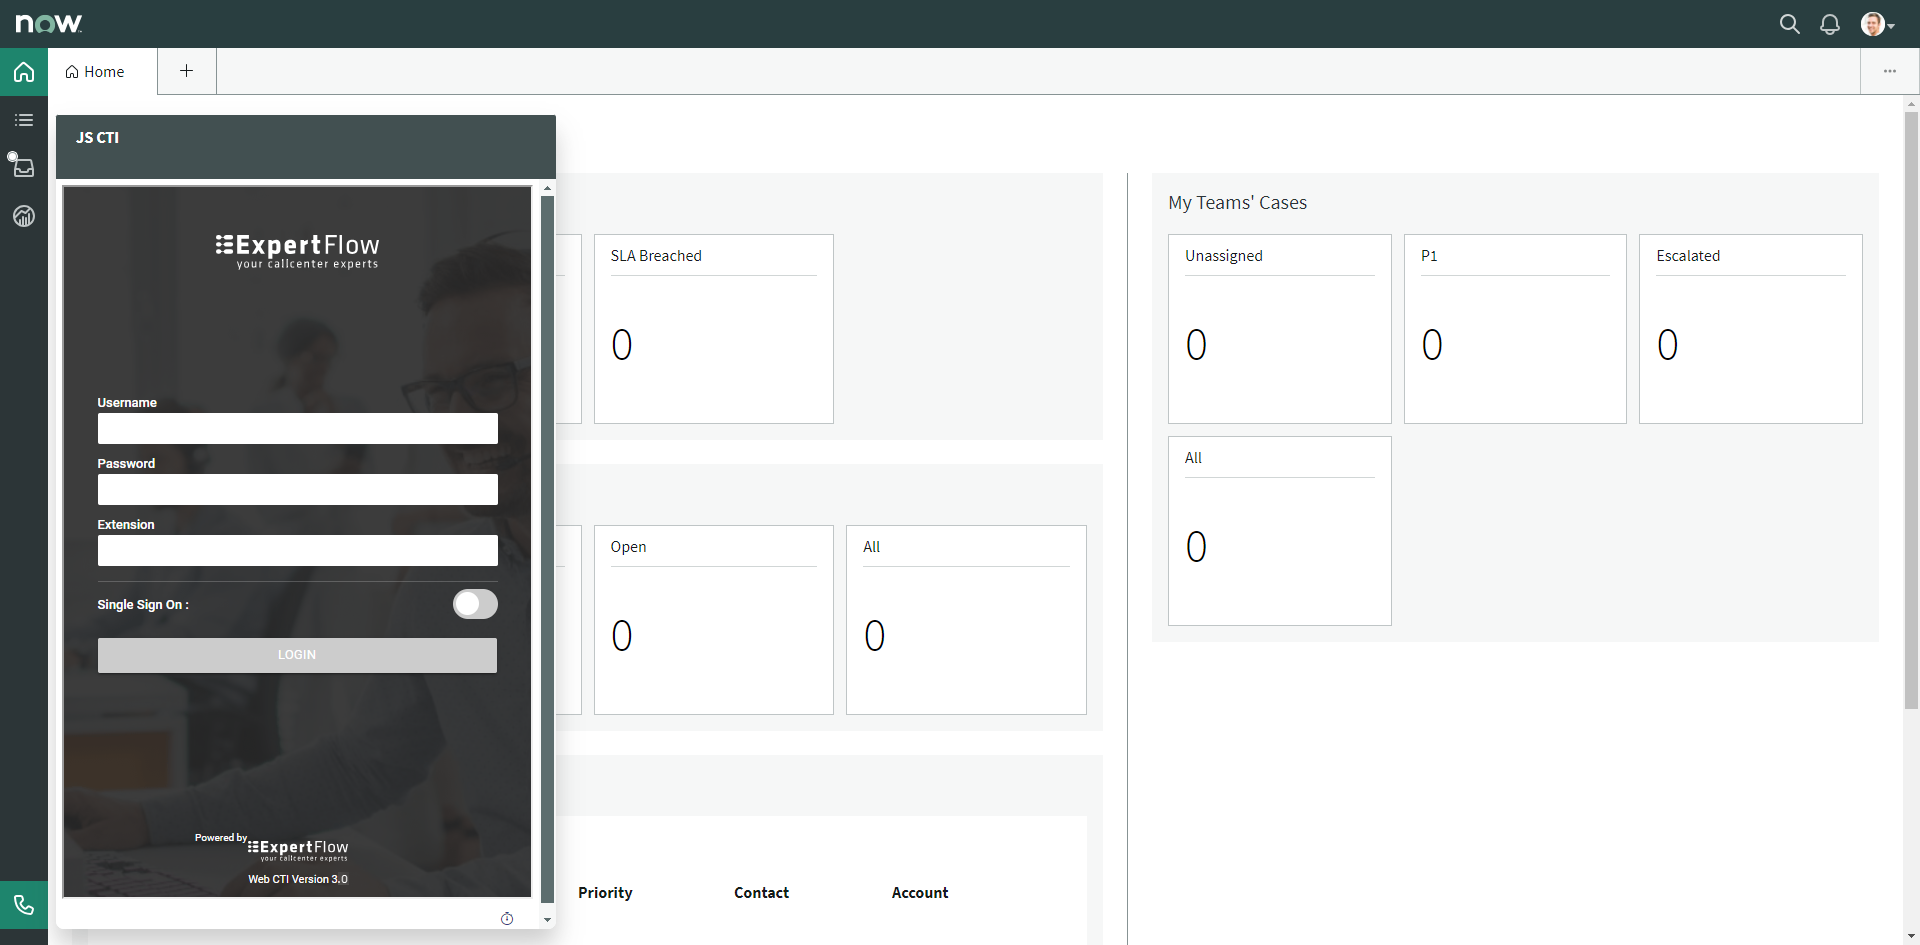
Agent Workspace