This document covers the steps to follow to install EF WrapUp.
Intended Audience
Technical implementation team either from ExpertFlow or its Partner responsible for installing and configuring EF Wrapup and its related components.
Installation Prerequisites
The following are the system prerequisites for the installation of the EF Wrapup Gadget and its related components.
Install MS SQL Server Standard version or above
Install SQL Server 2017/2019 Standard / Enterprise (user mode).
IIS
Install IIS 7.0 or above with 4.5 dot-net framework
Self Signed Certificate
Install self-signed certificate in IIS. It will allow us to hit the link with https.
Install Firefox/Chrome
Install firefox/chrome browser for wrapup web application and finesse.
Hardware Requirements
For a simplex (single server) deployment, minimum and recommended hardware requirements are as following:
|
|
Minimum |
Recommended |
|---|---|---|
|
vCPU |
2 Cores |
4 Cores |
|
vRAM |
4 GB |
8 GB |
|
vDISK |
20 GB |
160 GB |
For a redundant deployment, two servers of the same specifications (as mentioned above) are needed.
Software Prerequisites
|
Windows Server 2016/2019 Standard Edition (x64) |
Windows Server 2016/2019 Standard Edition (x64) |
|---|---|
|
Locale Settings |
English (recommended) |
|
Java Runtime (64 bit) |
Java Runtime (JRE) 8 is required |
|
Antivirus |
Any of the antivirus as mentioned in Software License Requirements |
|
WinRAR |
A package extractor to modify embedded configuration properties |
|
.Net Framework |
.Net Framework 4.5 or above |
|
NotePad |
NotePad ++ latest version |
Network Prerequisites
EF Wrapup requires communication with following:
-
<Client Server>
-
Cisco Finesse
-
Secondary EF Wrapup- only needed for a redundant deployment
Access & Privileges Requirements
-
Administrative access (LocalSystem account or domain administrator) on the WrapUp Server is required to do the installation and configuration.
Web Application Deployment
-
Download EF WrapUp web application Installer from Google Drive named WrapupApp.zip.
Open the following location, extract WrapupApp.zip.
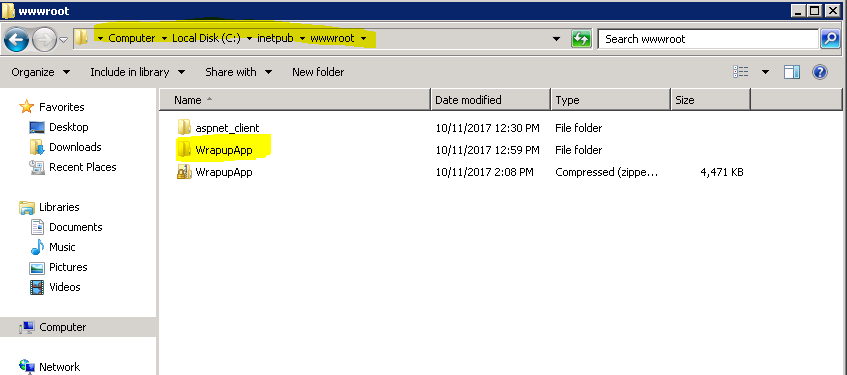
2. Open “WrapupApp” and change in web.config file.
<add name="WrapUpDB" connectionString="Data Source=192.168.1.104;Initial Catalog=Wrapup_database4.0;User ID=sa; Password=Expertflow461" providerName="System.Data.SqlClient"/>
|
Name |
Description |
|
|---|---|---|
|
name |
do not change this variable, name="WrapUpDB" |
|
|
connectionString
|
|
|
|
Data Source |
The IP address of the SQL Server machine, for example, Data Source=192.168.1.104
IP address of SQL Server machine\InstanceOfSQLServer, for example, Data Source=192.168.2.147\SQL2014 |
|
|
Initial Catalog |
The Name of the Database, for example, Initial Catalog=Wrapup_database_4.0 |
|
|
User ID |
Username of the Database, for example, User ID=sa |
|
|
Password |
The password of the Database, for example, Password=Expertflow461 |
|
|
providerName |
do not change this variable, providerName="System.Data.SqlClient" |
|
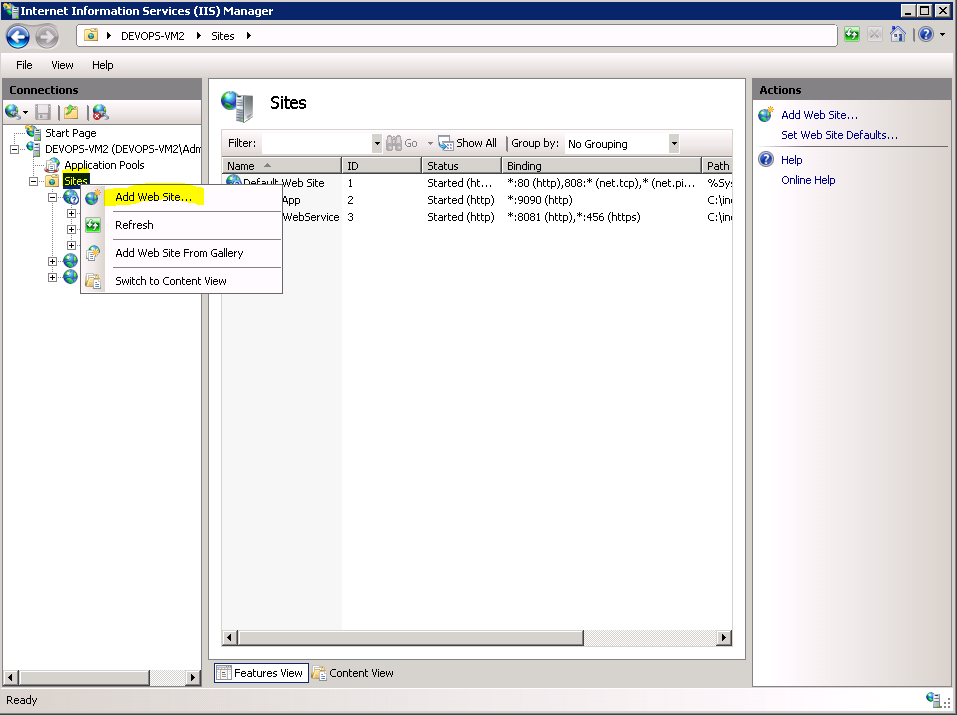
3. Now Create a web site using IIS.
-
-
Right-click on “Sites”
-
Click on “Add Web Site”. Add the Sitename and physical path as following
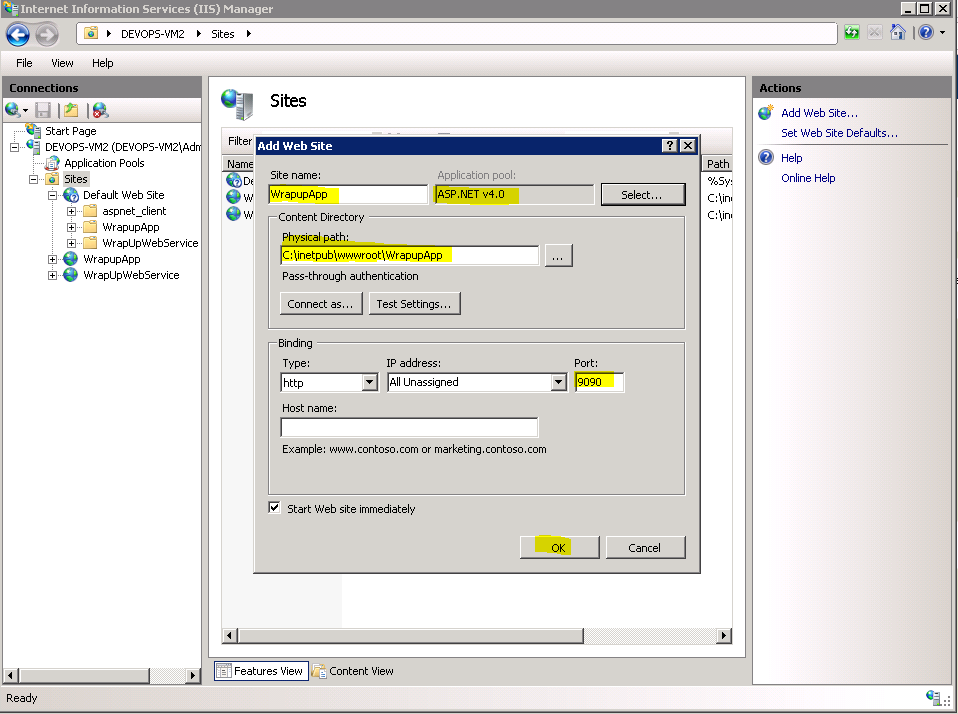
-
Browse the application
The application should be started. Default user “admin” as the default username and password for login. This application must be logged in to create the tables used by gadgets.
-
Web Service Deployment
Download EF Wrapup web service from Google Drive named WrapUpService.zip. Follow the same steps as Web Application deployment. Create a folder named WrapUpService.
Open “WrapUpService” and change in web.config
<add name="DBCS" connectionString="Data Source=192.168.2.147\SQL2014;Initial Catalog=Wrapup_database_4.0;User ID=sa; Password=Expertflow464" providerName="System.Data.SqlClient" />
|
Name |
Description |
|
|---|---|---|
|
name |
do not change this variable name="DBCS" |
|
|
connectionString
|
|
|
|
Data Source |
The IP address of the SQL Server machine, for example, Data Source=192.168.1.104
IP address of SQL Server machine\InstanceOfSQLServer, for example, Data Source=192.168.2.147\SQL2014 |
|
|
Initial Catalog |
The Name of the Database, for example, Initial Catalog=Wrapup_database_4.0 |
|
|
User ID |
Username of the Database, for example, User ID=sa |
|
|
Password |
The password of the Database, for example, Password=Expertflow461 |
|
|
providerName |
do not change this variable, providerName="System.Data.SqlClient" |
|
Add Self Signed Certificate
Add self-signed certificate by following these steps:
-
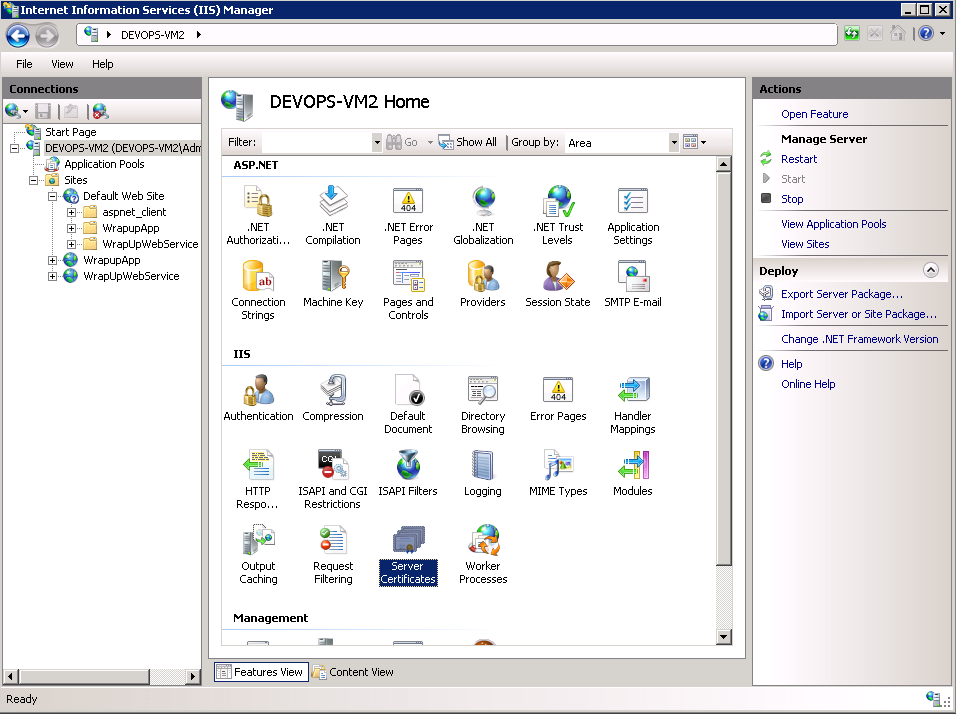
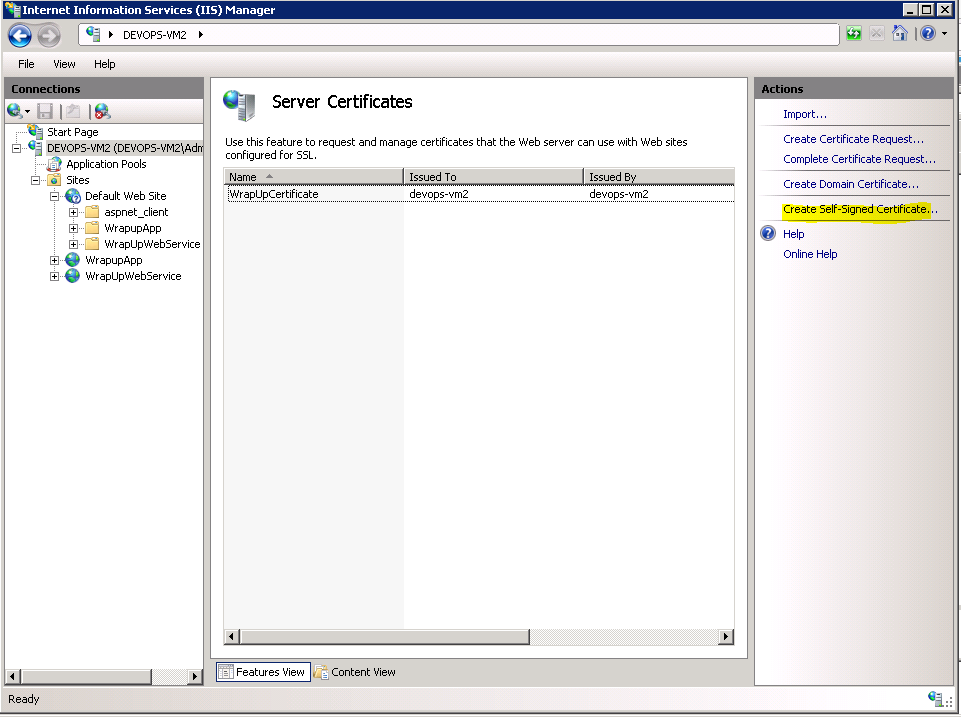
Open IIS and click on Server Certificate
-
Click on Create Self Signed Certificate
-
Write the name and select Web Hosting and click ok

-
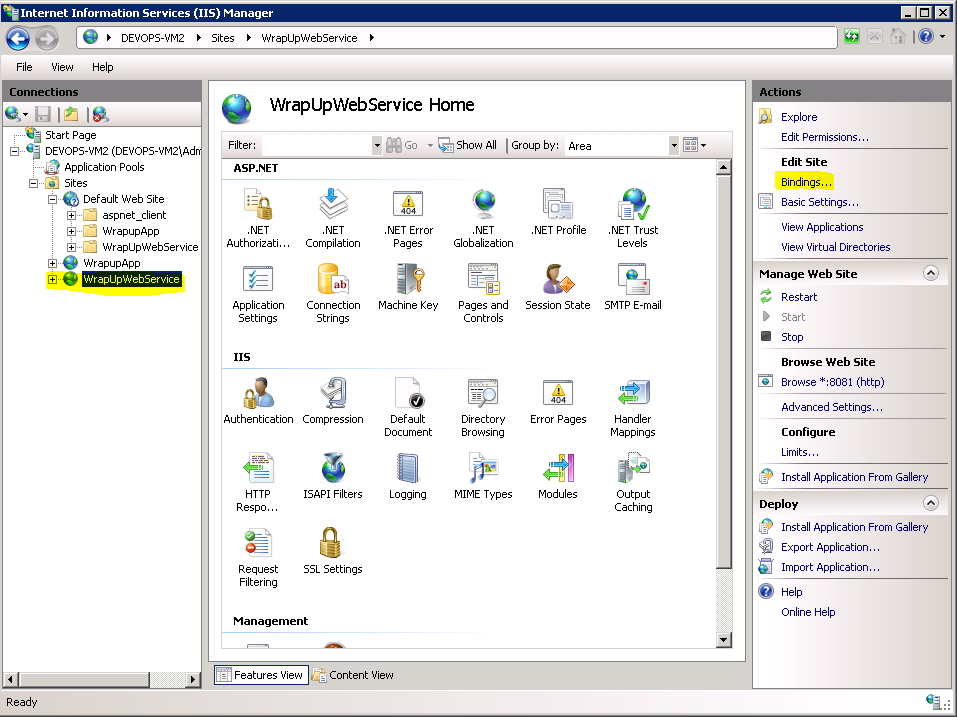
Select WrapUpWebService and click on Bindings
-
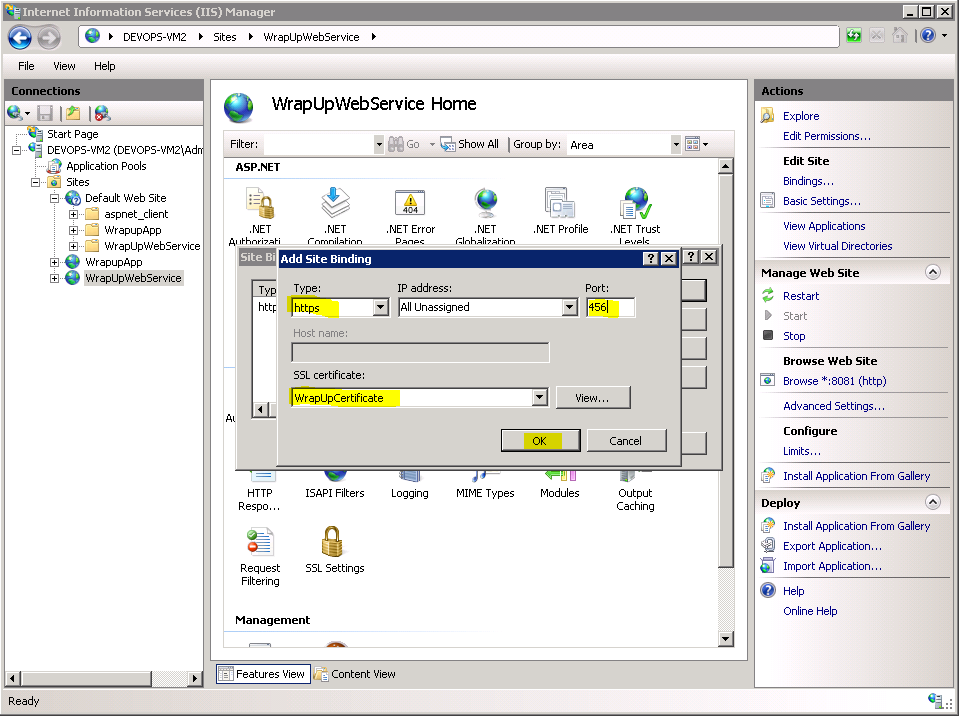
Click on Add and then select type and SSL Certificate and port and click ok
-
Self Signed Certificate has been added
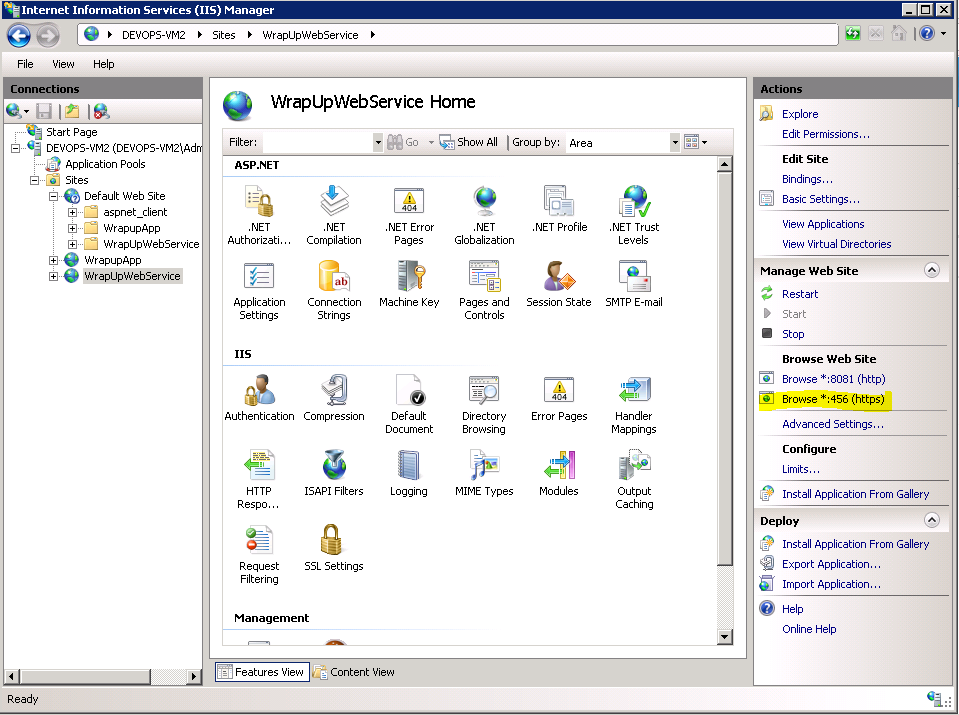
After successfully adding SSL Certificate, click on browse and verify that the web service is working with the HTTPS link. “https://localhost:456/WrapUp.svc”.
-
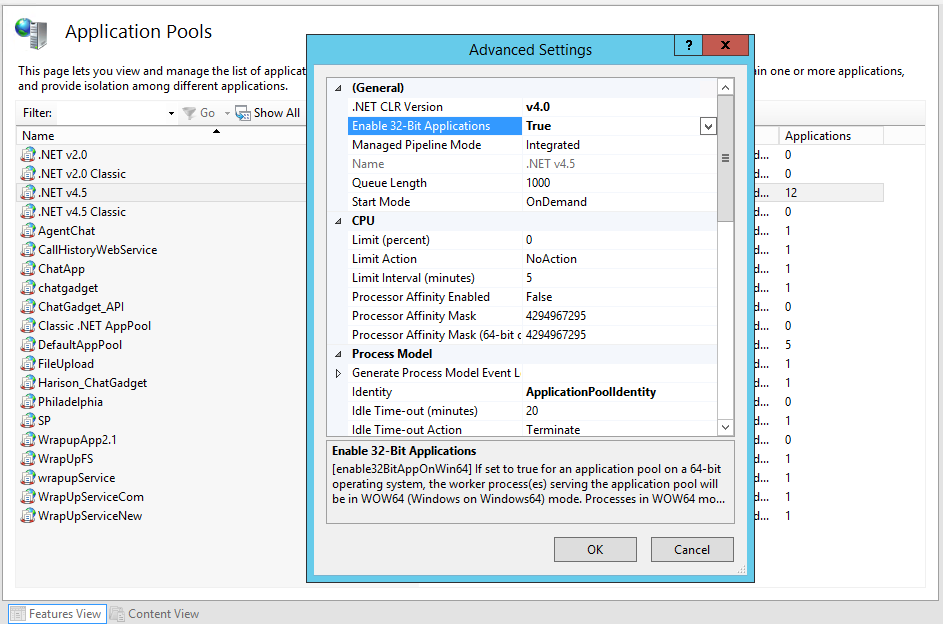
To “Enable 32-bit pool”. Select the “Application pool >.Net v4.5> Advanced Settings”.
-
-
Set “Enable 32-Bit Applications” to “True”
-
Add reporting table
-
Make sure you have browsed the Web App deployed in the first step. If not, browse the application before proceeding.
-
Log in to SQL Management studio and execute this script. This will create the WrapUp_Reporting in the existing DB created by the WebApp application
Deployment Modes
Simplex Mode
In simplex deployment, the application is installed on a single server with no failover support of EF Wrap Up. However, the same EF Wrapup can still communicate with primary and secondary Finesse servers.
Duplex Mode
In Duplex mode, there are only types of supported configurations.
|
Active-Passive |
A primary/secondary configuration setup where one Application works as a primary server while the other (secondary) is available as a stand-by server (from a Disaster Recovery site) |
Gadget Deployment
Deploy the gadget by following these steps via Filezilla:
-
Install Filezilla client on your machine from which finesse is accessible.
-
Download the gadget files from here
-
Extract the files at any location
-
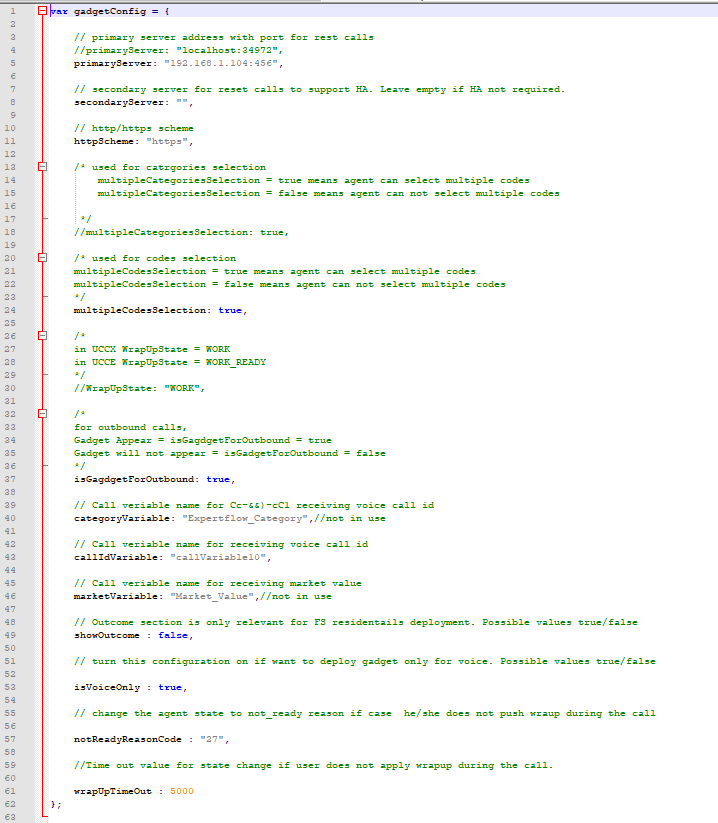
Change the configuration from config.js according to your needs.
-
-
Change the following parameters and set the web service’s server IPs.
-
Get Not ready reason codes from API. It can be accessed via https://fdqn:8445/finesse/api/ReasonCodes?category=NOT_READY. Provide credentials for admin to access Reason codes.
From the list of reason codes choose a reason code from uri tag, for example <uri>/finesse/api/ReasonCode/19</uri> then in this case code will be 19.
Once you have the reason code, place it in config.js property notReadyReasonCode. So if your reason code is 19 then in config.js you will provide this as notReadyReasonCode : "19".
5. Open Filezilla client and connect with finesse server, Add finesse IP in the host, the username should be “3rdpartygadget”, the password you can retrieve/change using putty. Port should be 22
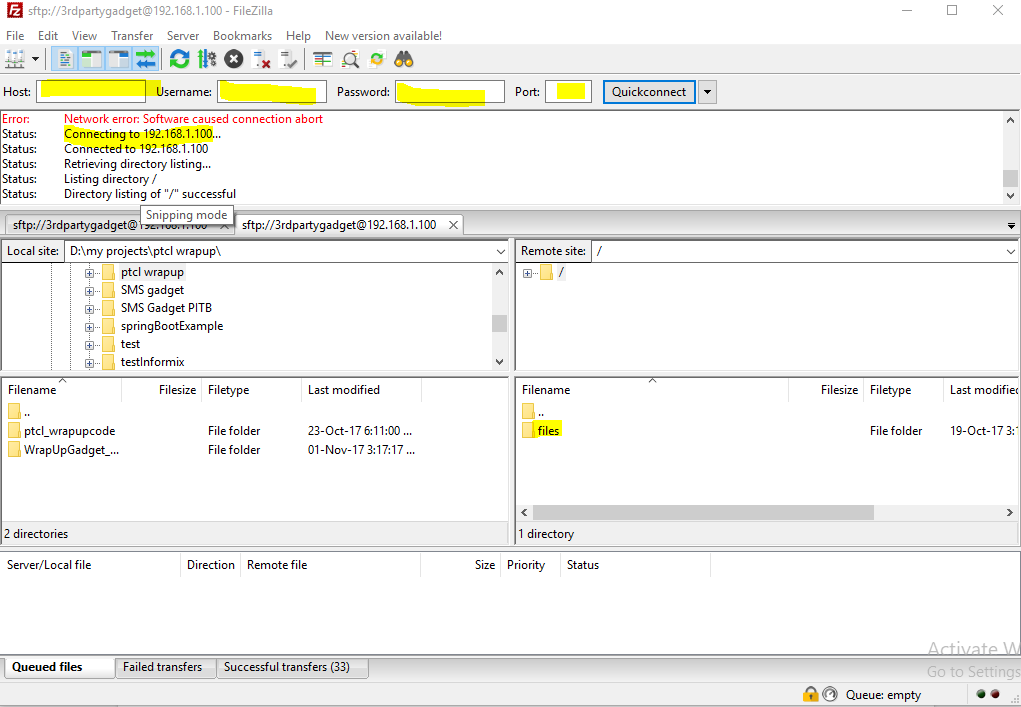
6. After successful connectivity with the finesse server you will see the folder “files” highlighted above.
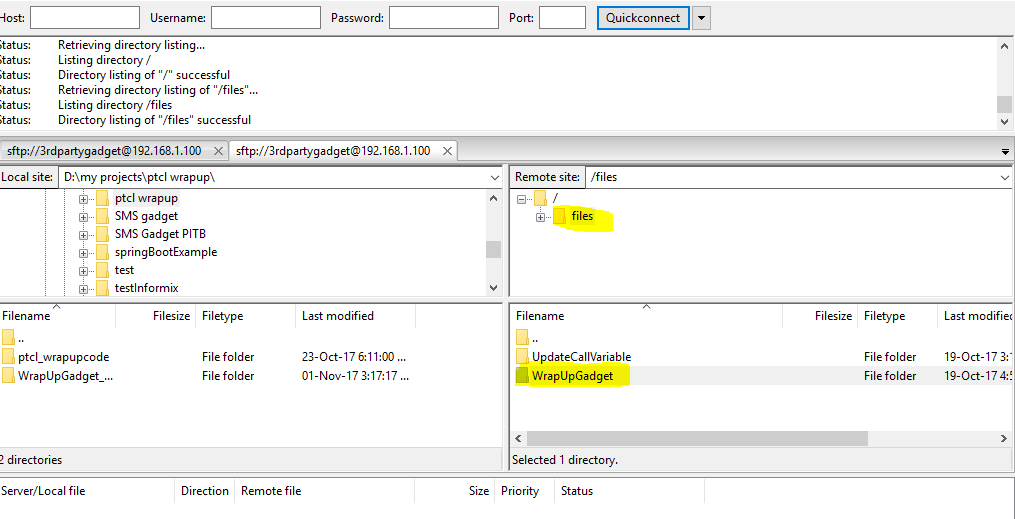
7. Create a new folder under file with the name “WrapUpGadget”
8. Open the newly created folder and paste all the extracted files into that folder.
9. Open finesse cfadmin, go to desktop layout and add “<gadget>/3rdpartygadget/files/WrapUpGadget/WrapupGadget.xml</gadget>” and save the settings.
10. Login the agent, you will see the wrapup gadget here.
-