Skip table of contents

Kubernetes Backup/Restore using Velero

WARNING: this guide is for references only, as it is not verified and tested. Currently it is in DRAFT mode. Any actions performed using this guide may result in data loss.

Requirements

Please go through the Backup and Restore Recommendations before implementing the solution available at the link Backup and Restore Strategies and Recommendations for Expertflow CX

Backups using Velero require at least one of the storage locations available where backup can be saved. Below is the list of these options that are needed and must be catered to before proceeding with a backup solution. 

Backup Type

Deployment Aspects

Distributed

DR

Minio as S3 Compatible Cloud Storage 

  • any Kubernetes deployment  with persistent storage enabled 

  • helm for Kubernetes-based deployment

  • alternatively, docker-compose-based deployments can also be used if Kubernetes is not possible at the DR site with docker volume used to persist backups.

  • minio can be deployed without Kubernetes or docker-compose and requires advanced expertise to maintain it.

  • All minio should be deployed at the DR sites. deploying at the same location is not recommended

Yes

Yes

DigitialOcean S3 Object Storage

  • A valid account with billing enabled

  • the backup endpoint is reachable from deployment

Yes

N/A

hostpath

  • native to Kubernetes.

  • Backups will be available on the host file system

  • customer should take regular backups off this file system to a safer location

No

No

Deploy Velero

Velero is the application used for managing all the backups and should be deployed on the cluster where the CIM solution is deployed.

For HA-based deployments, the Velero should  be deployed on any of the Control-Plane nodes

 Download the compatible version of Velero 

CODE
wget https://github.com/vmware-tanzu/velero/releases/download/v1.14.0/velero-v1.14.0-linux-amd64.tar.gz

untar + uncompress it

CODE
tar zxvf velero-v1.14.0-linux-amd64.tar.gz

and copy the Velero binary to /usr/local/bin

CODE
cp velero-v1.14.0-linux-amd64/velero /usr/local/bin/

make it executable  by running

CODE
chmod 777 /usr/local/bin/velero

Select Backup Location

Option # 1 Using HostPath

Backup to hostPath

Host-Path as Backup Destination ( Optional )

To use the host-Path of the host for the backup location. This section expects that you have completed the Velero deployment in step 1. Please follow these steps. 

for a hostpath based backups, this should be considered only for single-node deployment

Create a fake Velero entry so that we can add the local-path  plugin and initialize it

CODE
velero install --use-restic --use-volume-snapshots=false --namespace velero --plugins velero/velero-plugin-for-aws:v1.2.0 --no-default-backup-location --no-secret

Install the Velero host-path plugin

CODE
velero plugin add replicated/local-volume-provider:v0.3.3

confirm the host-path plugin is deployed successfully by running

CODE
velero plugin get

The sample output will look like 

CODE
# velero plugin get
NAME                                        KIND
velero.io/crd-remap-version                 BackupItemAction
velero.io/pod                               BackupItemAction
velero.io/pv                                BackupItemAction
velero.io/service-account                   BackupItemAction
replicated.com/hostpath                     ObjectStore
replicated.com/nfs                          ObjectStore
replicated.com/pvc                          ObjectStore
velero.io/aws                               ObjectStore
velero.io/add-pv-from-pvc                   RestoreItemAction
velero.io/add-pvc-from-pod                  RestoreItemAction
velero.io/admission-webhook-configuration   RestoreItemAction
velero.io/apiservice                        RestoreItemAction
velero.io/change-pvc-node-selector          RestoreItemAction
velero.io/change-storage-class              RestoreItemAction
velero.io/cluster-role-bindings             RestoreItemAction
velero.io/crd-preserve-fields               RestoreItemAction
velero.io/init-restore-hook                 RestoreItemAction
velero.io/job                               RestoreItemAction
velero.io/pod                               RestoreItemAction
velero.io/restic                            RestoreItemAction
velero.io/role-bindings                     RestoreItemAction
velero.io/service                           RestoreItemAction
velero.io/service-account                   RestoreItemAction
velero.io/aws                               VolumeSnapshotter

Once the plugin is fully deployed ( it may take a while to deploy the plugin ) create the destination directory on the host using.

CODE
mkdir /var/my-host-path-to-snaps

and change its permission to 777 so that anyone can write to it.

CODE
chmod 777 /var/my-host-path-to-snaps

Add the backup location in Velero

CODE
velero backup-location create default --default --bucket my-hostpath-snaps --provider replicated.com/hostpath --config path=/var/my-host-path-to-snaps,resticRepoPrefix=/var/velero-local-volume-provider/my-hostpath-snaps/restic

make sure the backup location is added and made available by looking through the logs 

CODE
kubectl logs deployment/velero -n velero	

get the backup locations where backups will be saved

CODE
velero backup-location get

Option # 2 Minio as S3 Compatible Storage

Minio As S3 Compatible Storage

Minio as S3 Compatible Storage

if S3 compatible cloud storage is available, please use appropriate version of Velero’s plugins for them. In the following section, we will be using onsite s3 storage using minio. Further details are available here

We will deploy minio as S3 storage compatible storage locally and direct all backups via velero to the minio storage. Minio can be deployed in different regions to make a complete DR fault tolerant backup/restore solution.

Kubernetes based deployment

If minio is to be deployed on any of Kubernetes cluster, please use this helm command to deploy the minio

deploy the default backup location

CODE
helm install minio-default     \
--namespace velero     \
--create-namespace     \
--set resources.requests.memory=1Gi     \
--set persistence.size=32Gi \
--set auth.rootUser=minio \
--set auth.rootPassword=minio123  \
--set service.type=NodePort  \
--set service.nodePorts.api=30100  \
--set service.nodePorts.console=30200  \
--set provisioning.enabled=true \
--set provisioning.buckets[0].name=velero    \
--set provisioning.buckets[0].policy=public \
--set provisioning.buckets[0].purge=true  \
oci://registry-1.docker.io/bitnamicharts/minio

Minio multi-region setup ( optional )

If more than 1 locations are needed, you can install multiple instances of minio in different locations (Optional )

DR Site1

CODE
helm install minio-primary     \
--namespace velero     \
--create-namespace     \
--set resources.requests.memory=1Gi     \
--set persistence.size=32Gi \
 --set auth.rootUser=minio \
--set auth.rootPassword=minio123  \
--set service.type=NodePort  \
--set service.nodePorts.api=30101  \
--set service.nodePorts.console=30201  \
--set provisioning.enabled=true   \
--set provisioning.buckets[0].name=velero    \
--set provisioning.buckets[0].policy=public \
--set provisioning.buckets[0].purge=true \
oci://registry-1.docker.io/bitnamicharts/minio

DR Site2

CODE
helm install minio-secondary     \
--namespace velero     \
--create-namespace     \
--set resources.requests.memory=1Gi     \
--set persistence.size=32Gi \
 --set auth.rootUser=minio \
--set auth.rootPassword=minio123  \
--set service.type=NodePort  \
--set service.nodePorts.api=30102  \
--set service.nodePorts.console=30202  \
--set provisioning.enabled=true \
--set provisioning.buckets[0].name=velero    \
--set provisioning.buckets[0].policy=public  \
--set provisioning.buckets[0].purge=true  \
oci://registry-1.docker.io/bitnamicharts/minio

Commission the backup Destination 

Create Credentials for Backup 

CODE
cat <<EOF > credentials-velero
[default]
aws_access_key_id = minio
aws_secret_access_key = minio123
EOF

Install Velero and Add Default Backup-location

change the <host ip> parameter in command given below

CODE
velero install \
    --secret-file=./credentials-velero \
    --provider=aws \
    --bucket=velero \
    --backup-location-config region=minio-default,s3ForcePathStyle=true,s3Url=http://minio-default.velero.svc.cluster.local:9000,publicUrl=http://<host ip>:30100 region=minio-default \
    --plugins=velero/velero-plugin-for-aws:v1.10.0 \
    --use-volume-snapshots=true \
    --use-node-agent=true \
    --features=EnableCSI \
    --snapshot-location-config region=minio-default \
    --wait

and wait for the confirmation message from the above command to finish the deployment on your production cluster.

verify the backup-location status

CODE
velero get backup-locations
CODE
~# velero get backup-locations
NAME      PROVIDER   BUCKET/PREFIX   PHASE       LAST VALIDATED                  ACCESS MODE   DEFAULT
default   aws        velero          Available   2024-07-16 10:38:40 +0000 UTC   ReadWrite     true

Add DR1 site as backup location for Velero ( Optional )

This is where all your backups will be saved in case you don't provide any specific location 

Add other location (Optional )

minio-primary

CODE
velero backup-location create primary \
    --provider aws \
    --bucket velero \
    --config region=minio-primary,s3ForcePathStyle=true,s3Url=http://minio-primary.velero.svc.cluster.local:9000,publicUrl=http://<host ip>:30201

Add DR2 site as backup location for Velero ( Optional )

CODE
velero backup-location create secondary \
    --provider aws \
    --bucket velero \
    --config region=minio-secondary,s3ForcePathStyle=true,s3Url=http://minio-secondary.velero.svc.cluster.local:9000,publicUrl=http://<host ip>:30102

you can verify the status of backup locations using

CODE
velero get backup-locations
CODE
# velero get backup-locations
NAME        PROVIDER   BUCKET/PREFIX   PHASE       LAST VALIDATED                  ACCESS MODE   DEFAULT
default     aws        velero          Available   2024-07-16 10:47:40 +0000 UTC   ReadWrite     true
primary     aws        velero          Available   2024-07-16 10:47:40 +0000 UTC   ReadWrite
secondary   aws        velero          Available   2024-07-16 10:47:51 +0000 UTC   ReadWrite

Option# 3 Using DigitalOcean’s S3 Object Storage

Using DigitalOcean S3 Object Storage

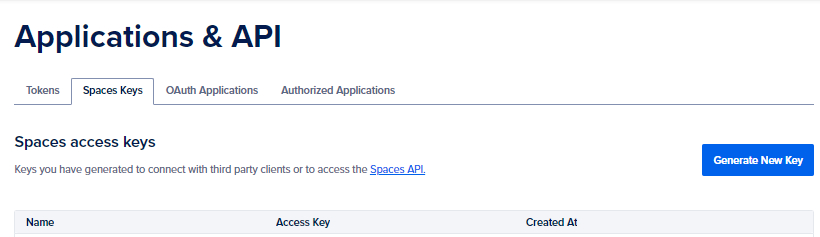
DigitalOcean Spaces Object Storage

Create a bucket by navigating to the “Spaces Object Storage” and click “Create Spaces Bucket “, select appropriate region and bucket name

image-20240723-153143.png

Things to note:

#1 Region ( in short form )

#2 bucket name

Create AccessKey and Secret Key

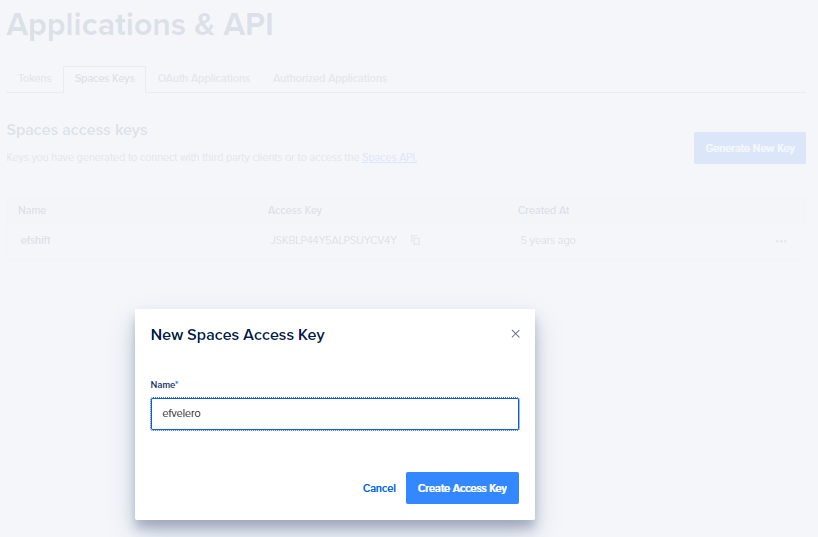
In the left panel, click on “API” Section and then click on the “New Spaces Key” under “spaces key” tab

image-20240723-153716.png

Give a name of the new key

image-20240723-153755.png

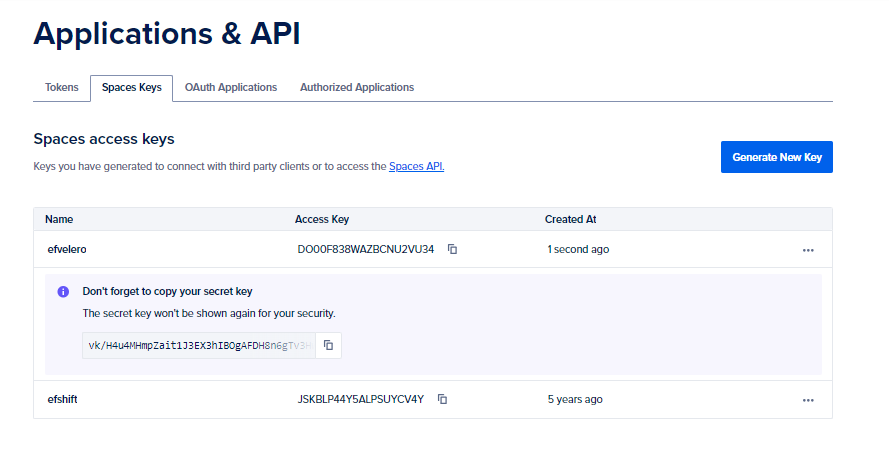
Make note of both AccessKey and SecretKey shown below

image-20240723-153833.png

Commission the backup Destination 

Create Credentials for Backup 

CODE
cat <<EOF > credentials-velero
[default]
aws_access_key_id = DO00MRUNWUBSOBHKLAVFU7WK3
aws_secret_access_key = VBJnvEKSjt8QFpgtwaUs4yEwX1ZdfrwWyuZKK7aivUFsBioiYKoqwlFMc
EOF

Install Velero and Add Default Backup-location

Update the region and bucket name in the command below with your values

CODE
BUCKETNAME=<EnterBucketName>
DOREGIONNAME=<RegionName>
velero install \
    --secret-file=./credentials-velero \
    --provider=aws \
    --bucket=${BUCKETNAME} \
    --backup-location-config region=${DOREGIONNAME},s3ForcePathStyle=true,checksumAlgorithm="",s3Url=https://${DOREGIONNAME}.digitaloceanspaces.com,publicUrl=https://${DOREGIONNAME}.digitaloceanspaces.com region=${DOREGIONNAME} \
    --plugins=velero/velero-plugin-for-aws:v1.10.0 \
    --use-volume-snapshots=true \
    --use-node-agent=true \
    --features=EnableCSI \
    --snapshot-location-config region=${DOREGIONNAME}\
    --wait

and wait for the confirmation message from the above command to finish the deployment on your production cluster.

verify the backup-location status

CODE
velero get backup-locations
CODE
~# velero get backup-locations
NAME      PROVIDER   BUCKET/PREFIX   PHASE       LAST VALIDATED                  ACCESS MODE   DEFAULT
default   aws        efvelero          Available   2024-07-16 10:38:40 +0000 UTC   ReadWrite     true

Expertflow External Componenets Backup Procedure

MongoDB Backup

to backup MongoDB in ef-external namespace

annotate the pod
CODE
kubectl -n ef-external  annotate pod/mongo-mongodb-0 backup.velero.io/backup-volumes=datadir
create backup
CODE
velero create backup ef-mongo \
--include-namespaces ef-external \
--include-resources=pods,persistentvolumeclaims,persistentvolumes,secrets,configmaps,serviceaccounts,service \
--selector app.kubernetes.io/name=mongodb

PostgreSQL Backup

annotate the Postgresql Pod
CODE
kubectl -n ef-external  annotate pod/ef-postgresql-0 backup.velero.io/backup-volumes=data
create backup
CODE
velero create backup ef-pgsql \
--include-namespaces ef-external \
--include-resources=pods,persistentvolumeclaims,persistentvolumes,secrets,configmaps,serviceaccounts,service \
--selector app.kubernetes.io/name=ef-postgresql

minio backup

annotate the minio Pod
CODE
kubectl -n ef-external  annotate pod/ef-postgresql-0 backup.velero.io/backup-volumes=minio
create backup
CODE
velero create backup ef-minio \
--include-namespaces ef-external \
--include-resources=pods,persistentvolumeclaims,persistentvolumes,secrets,configmaps,serviceaccounts,service \
--selector app.kubernetes.io/name=minio

Restore 

On the Target cluster,

Install velero

Install the velero on the target cluster using the same procedure, as performed on the source cluster.

verify all the backups

get the list of backups to verify that all the backups from the source cluster are available

CODE
velero get backups

All the backups taken on the source cluster will be visible on the target cluster.

Sample out velero backup-locations
CODE
# velero get backup-locations  # identify the backup-location is active and available
NAME      PROVIDER   BUCKET/PREFIX   PHASE       LAST VALIDATED                  ACCESS MODE   DEFAULT
default   aws        efvelero        Available   2024-07-31 12:10:28 +0000 UTC   ReadWrite     true
#

# verify the backups are available on the target cluster.
# velero get backups
NAME        STATUS      ERRORS   WARNINGS   CREATED                         EXPIRES   STORAGE LOCATION   SELECTOR
mongo-sts   Completed   0        0          2024-07-31 10:25:24 +0000 UTC   29d       default            app.kubernetes.io/name=mongodb
pod-mongo   Completed   0        0          2024-07-31 09:35:30 +0000 UTC   29d       default            app.kubernetes.io/name=mongodb
#

Restore ( Mongo,Minio and PostgreSQL )

Procedure given below is shown only for MongoDB, this will also work for minio, postgresql unless mentioned explicitly.

Create a temporary namespace

CODE
kubectl create namepsace ef-external

Restore the POD/PVC/PV

CODE
velero restore create pod-mongo-v1  --from-backup  mongo-pod-affinity    --include-namespaces ef-external 

Wait for the restore to complete. using 

CODE
velero restore describe pod-mongo-v1
Sample output
CODE
root@devops218:~# velero restore describe pod-mongo-v1
Name:         pod-mongo-v1
Namespace:    velero
Labels:       <none>
Annotations:  <none>

Phase:                       Completed
Total items to be restored:  5
Items restored:              5

Started:    2024-07-31 11:35:01 +0000 UTC
Completed:  2024-07-31 11:35:22 +0000 UTC

Backup:  pod-mongo

Namespaces:
  Included:  ef-external
  Excluded:  <none>

Resources:
  Included:        *
  Excluded:        nodes, events, events.events.k8s.io, backups.velero.io, restores.velero.io, resticrepositories.velero.io, csinodes.storage.k8s.io, volumeattachments.storage.k8s.io, backuprepositories.velero.io
  Cluster-scoped:  auto

Namespace mappings:  <none>

Label selector:  <none>

Or label selector:  <none>

Restore PVs:  auto

kopia Restores (specify --details for more information):
  Completed:  1

CSI Snapshot Restores: <none included>

Existing Resource Policy:   <none>
ItemOperationTimeout:       4h0m0s

Preserve Service NodePorts:  auto

Uploader config:


HooksAttempted:   0
HooksFailed:      0
root@devops218:~#

Once the Restore is completed, you will get mongodb pod as running and both PVC, and PV are available.

CODE
kubectl -n mongo-temp get pods,pvc,pv
Sample output
CODE
kubectl  -n ef-external get pods,pvc,pv
NAME                       READY   STATUS    RESTARTS        AGE
pod/mongo-mongodb-0        1/1     Running   0               31m
pod/mongo-mongodb-client   1/1     Running   1 (4d21h ago)   7d

NAME                                            STATUS   VOLUME                                     CAPACITY   ACCESS MODES   STORAGECLASS       AGE
persistentvolumeclaim/datadir-mongo-mongodb-0   Bound    pvc-cb0f09ae-6faf-4030-923a-58bdc1e2f773   8Gi        RWO            openebs-hostpath   31m

NAME                                                        CAPACITY   ACCESS MODES   RECLAIM POLICY   STATUS   CLAIM                                 STORAGECLASS       REASON   AGE
persistentvolume/pvc-cb0f09ae-6faf-4030-923a-58bdc1e2f773   8Gi        RWO            Delete           Bound    ef-external/datadir-mongo-mongodb-0   openebs-hostpath            31m
#

Login to mongodb to verify the data

CODE
 kubectl-n ef-external exec -it mongo-mongodb-client -- bash
Sample Output
CODE
# kubectl -n ef-external exec -it mongo-mongodb-client -- bash

# connect ot the mongoDB pod
I have no name!@mongo-mongodb-client:/$ mongosh --host mongo-mongosh.mongo-temp.svc.cluster.local
Current Mongosh Log ID: 66aa242e88fa0b646052e35a
Connecting to:          mongodb://mongo-mongosh:27017/?directConnection=true&appName=mongosh+1.6.0
MongoNetworkError: getaddrinfo ENOTFOUND mongo-mongosh
I have no name!@mongo-mongodb-client:/$ mongosh --host mongo-mongodb
Current Mongosh Log ID: 66aa2438bf862f8baeab12d9
Connecting to:          mongodb://mongo-mongodb:27017/?directConnection=true&appName=mongosh+1.6.0
Using MongoDB:          6.0.2
Using Mongosh:          1.6.0

For mongosh info see: https://docs.mongodb.com/mongodb-shell/

------
   The server generated these startup warnings when booting
   2024-07-31T11:35:22.589+00:00: Using the XFS filesystem is strongly recommended with the WiredTiger storage engine. See http://dochub.mongodb.org/core/prodnotes-filesystem
   2024-07-31T11:35:24.858+00:00: You are running on a NUMA machine. We suggest launching mongod like this to avoid performance problems: numactl --interleave=all mongod [other options]
   2024-07-31T11:35:24.859+00:00: vm.max_map_count is too low
------

------
   Enable MongoDB's free cloud-based monitoring service, which will then receive and display
   metrics about your deployment (disk utilization, CPU, operation statistics, etc).

   The monitoring data will be available on a MongoDB website with a unique URL accessible to you
   and anyone you share the URL with. MongoDB may use this information to make product
   improvements and to suggest MongoDB products and deployment options to you.

   To enable free monitoring, run the following command: db.enableFreeMonitoring()
   To permanently disable this reminder, run the following command: db.disableFreeMonitoring()
------

test> show dbs;
admin   40.00 KiB
config  72.00 KiB
local   72.00 KiB
velero  40.00 KiB
test> use velero;
switched to db velero
velero> show collections;
backup
velero> db.backup.find();
[
  { _id: ObjectId("66a8f5ee48f503df96f8d44e"), Color: 'Yellow' },
  { _id: ObjectId("66a8f5f348f503df96f8d44f"), Color: 'green' },
  { _id: ObjectId("66a8f5f848f503df96f8d450"), Color: 'blue' }
]
velero> exit
I have no name!@mongo-mongodb-client:/$ exit
exit
#

Final steps

Once the pod is in running state, with PVC bound to the correct PV, you can delete the pod, and while keeping the PVC/PV pair intact.

CODE
kubectl -n ef-external delete pod mongo-mongodb-0
kubectl -n ef-external get pvc
Sample output
CODE
# kubectl -n mongo-temp delete pod mongo-mongodb-0
pod "mongo-mongodb-0" deleted
# kubectl -n ef-external get pvc
NAME                      STATUS   VOLUME                                     CAPACITY   ACCESS MODES   STORAGECLASS       AGE
datadir-mongo-mongodb-0   Bound    pvc-cb0f09ae-6faf-4030-923a-58bdc1e2f773   8Gi        RWO            openebs-hostpath   118m
#

Deploy the mongoDB on the target cluster with its values.yaml file updated to new PVC in place

CODE
persistence:
  ## @param persistence.enabled Enable MongoDB(&reg;) data persistence using PVC
  ##
  enabled: true
  ## @param persistence.medium Provide a medium for `emptyDir` volumes.
  ## Requires persistence.enabled: false
  ##
  medium: ""
  ## @param persistence.existingClaim Provide an existing `PersistentVolumeClaim` (only when `architecture=standalone`)
  ## Requires persistence.enabled: true
  ## If defined, PVC must be created manually before volume will be bound
  ## Ignored when mongodb.architecture=replicaset
  ##
  existingClaim: "datadir-mongo-mongodb-0"

Create Backup

You can create a backup for  

  • cluster

  • namespace

  • deployment

  • POD

  • label

Namespace Level Backup

Configure Velero to take a backup of the ef-external namespace. This will always go to the default backup location

CODE
velero backup create ef-external-backup --include-namespaces=ef-external 

if you want to specify a particular location of the backup  you can use

CODE
velero backup create expertflow-backup --include-namespaces=expertflow --storage-location primary
OR
velero backup create expertflow-backup --include-namespaces=expertflow --storage-location secondary

Application Level Backup

Mongo

CODE
velero backup create mongo-backup --include-resources pvc,pv --selector release=mongodb

PostgreSQL

CODE
velero backup create mongo-backup --include-resources pvc,pv --selector release=postgresql -n ef-external

Schedule backups

Velero backups can be scheduled using iteration and frequency. like

CODE
velero create schedule system-critical --include-namespaces=expertflow --schedule="@every 24h"

Or

CODE
velero create schedule thrice-daily --schedule="@every 8h"

List all Backups in Velero

CODE
velero get backups

list all schedules 

CODE
velero get schedules

Delete a specific scheduled backup

CODE
velero delete schedule velero-default

Delete backup

CODE
velero delete backups <BACKUP-NAME>

Status of backup

CODE
velero backup describe ex-backup

Logs for Backup

CODE
kubectl exec -it deploy/velero -n velero -- /velero describe backup my-backup-name --details
CODE
kubectl -n velero logs velero-pod-name | grep my-backup-name

JavaScript errors detected

Please note, these errors can depend on your browser setup.

If this problem persists, please contact our support.