Enables agents to send plain text messages, bot suggestions, formatted text messages, quoted replies, file attachments, receive delivery notifications, view typing indicators, and view and play recording links.
Send a Plain Text Message
At the extreme bottom of the Customer Conversation View, the Message Composer bar is shown. Type a message in the composer to send it over to the customer. On the top of the message composer, there's a dropdown showing the list of active channels of the customer in the conversation. By default, each message from the agent is sent to the customer on the channel from where the last message of the customer was received.
Send a Bot Suggestion
By default, the bot generates suggestions based on the latest message sent by the customer. To view the available Bot Suggestions, the agent will type '/' in the composer.
Typing / will open up the Bot Suggestions panel. The agent can choose a suggestion from the panel and either, edit and send it or directly send it to the customer.
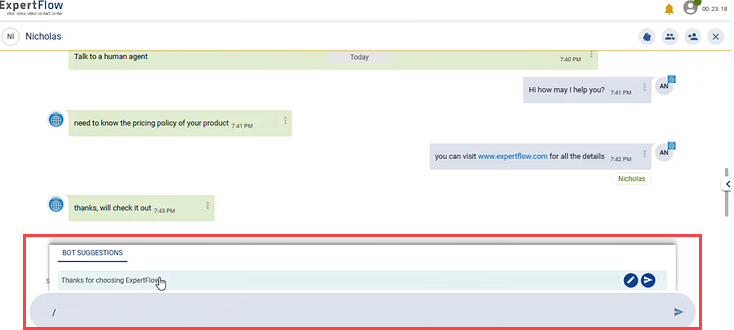
Bot suggestions are only available when a customer message is received. The option to choose a bot suggestion disappears as soon as the agent responds to the customer.
Autocomplete while composing
Send a Formatted Text
An agent can send a formatted text message in bold, italic, strikethrough, highlight a text, and hyperlinks.
-
To bold text, add asterisks * before and after the text to be bolded.
-
To italicize text, add underscores _ before and after the text, to be italicized'
-
To strike through text, add tildes ~ before and after the text to be struck through.
-
To highlight a text, add an exclamation mark! before and after the text to be highlighted.
-
Hyperlinks are automatically detected by the message composer.
Send a Quoted Reply
The agent can also send a quoted reply to the customer on the conversation. This allows the agent to quote any message sent either by the customer, by yourself (the agent), or by another agent added to the conversation.
To do this,
-
Choose the message you want to reply to.
-
Click on the three dots button on the right side of the message. A pop-up of 'reply' will appear.
-
By clicking on the Reply button, you will see that message as a quoted message in the composer bar.
-
Press 'Enter' to send the quoted reply.
Quoted replies can be seen in the conversation view with a special indication that it was a quoted reply. For visibility, agent names in the 'Quoted Reply' are visible in blue color and the customer's name is seen in grey color.
Send File Attachments
Agents can send file attachments by using the attachment icon inside the Message composer, for both images and docs. The following types of files are supported:
-
.txt,
-
.png
-
.jpg
-
.pdf
-
.ppt
-
.xlsx
-
.xls
-
.doc
-
.docx
While sending an attachment, you cannot enter a text message in the composer for now.
Receive Delivery Notifications
The agent receives the Delivery Notification in the form of the customer's name displayed right under the message. The message will not be considered to be delivered/read if there is no customer's name under the agent's message.
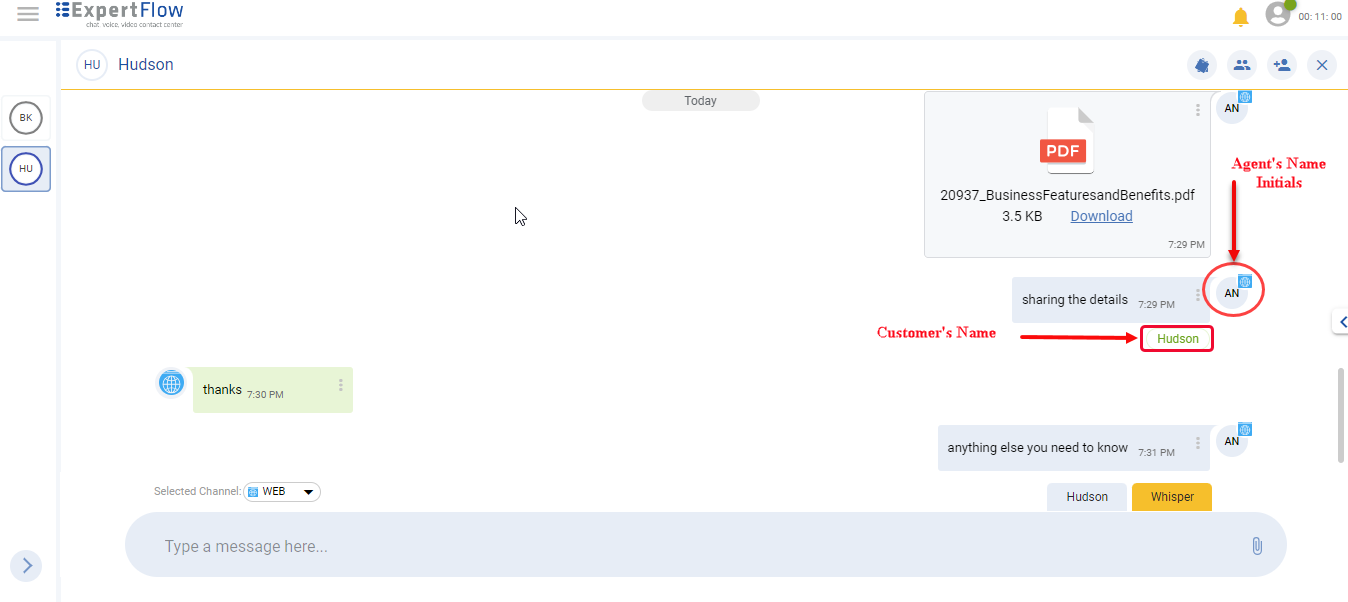
In case, the agent's message is not delivered due to any reason such as instability of the internet or power outage, the message will be blurred. This shows that the message is not delivered.
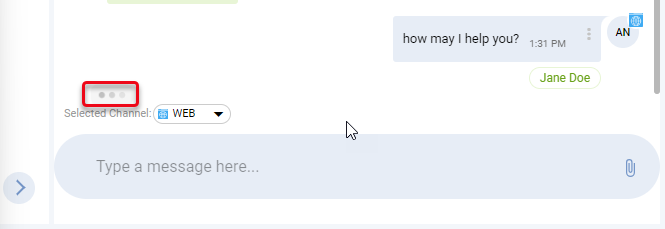
View Typing Indicator
The typing indicator is an indication for the agent to show that someone is still alive in the conversation. When the customer responds and types a message, the typing bubbles will pop up on the Message Composer bar. This allows the agent to stop and is more likely to wait for typing bubbles to stop and then respond.
In the same way, if the agent starts typing, the typing bubbles will pop up with the customer. The customer will wait for typing bubbles to stop and then can respond.
View and Play Recording Links
With this capability, agents can only see either the recording links for a voice session, they are part of or all the recording links in a conversation based on the configured permissions on KeyCloak.
Disclaimer
-
Currently, a consolidated recording link is viewable, and not individual recording for each leg. The access control is implemented accordingly.
-
For now the recording permissions are implemented only on agent permission level, and not dependent or related to individual teams.
The permissions for recording link access restrictions have been added on KeyCloak using group-based permissions. These links are accessible in a conversation based on respective permissions. Agents can access the recording links in the following way:

-
The phone icon indicates the call direction whether it is an inbound or outbound call.
-
The number 1452 indicates the customer number.
-
The next section shows the participant’s initials such as agent, IVR, or any other participant in the session.
-
The duration section indicates the total call duration.
-
This section indicates the start time of the call.
-
This section displays a clickable play button to listen to the call recording.
-
To view the details of each call leg, the activity can be expanded using the dropdown arrow.
Limitations
-
The agent should have the relevant groups assigned, for the set of permissions to work.
-
If the admin applies any changes in permissions via KeyCloak, the agent needs to re-login for the changes to be reflected.
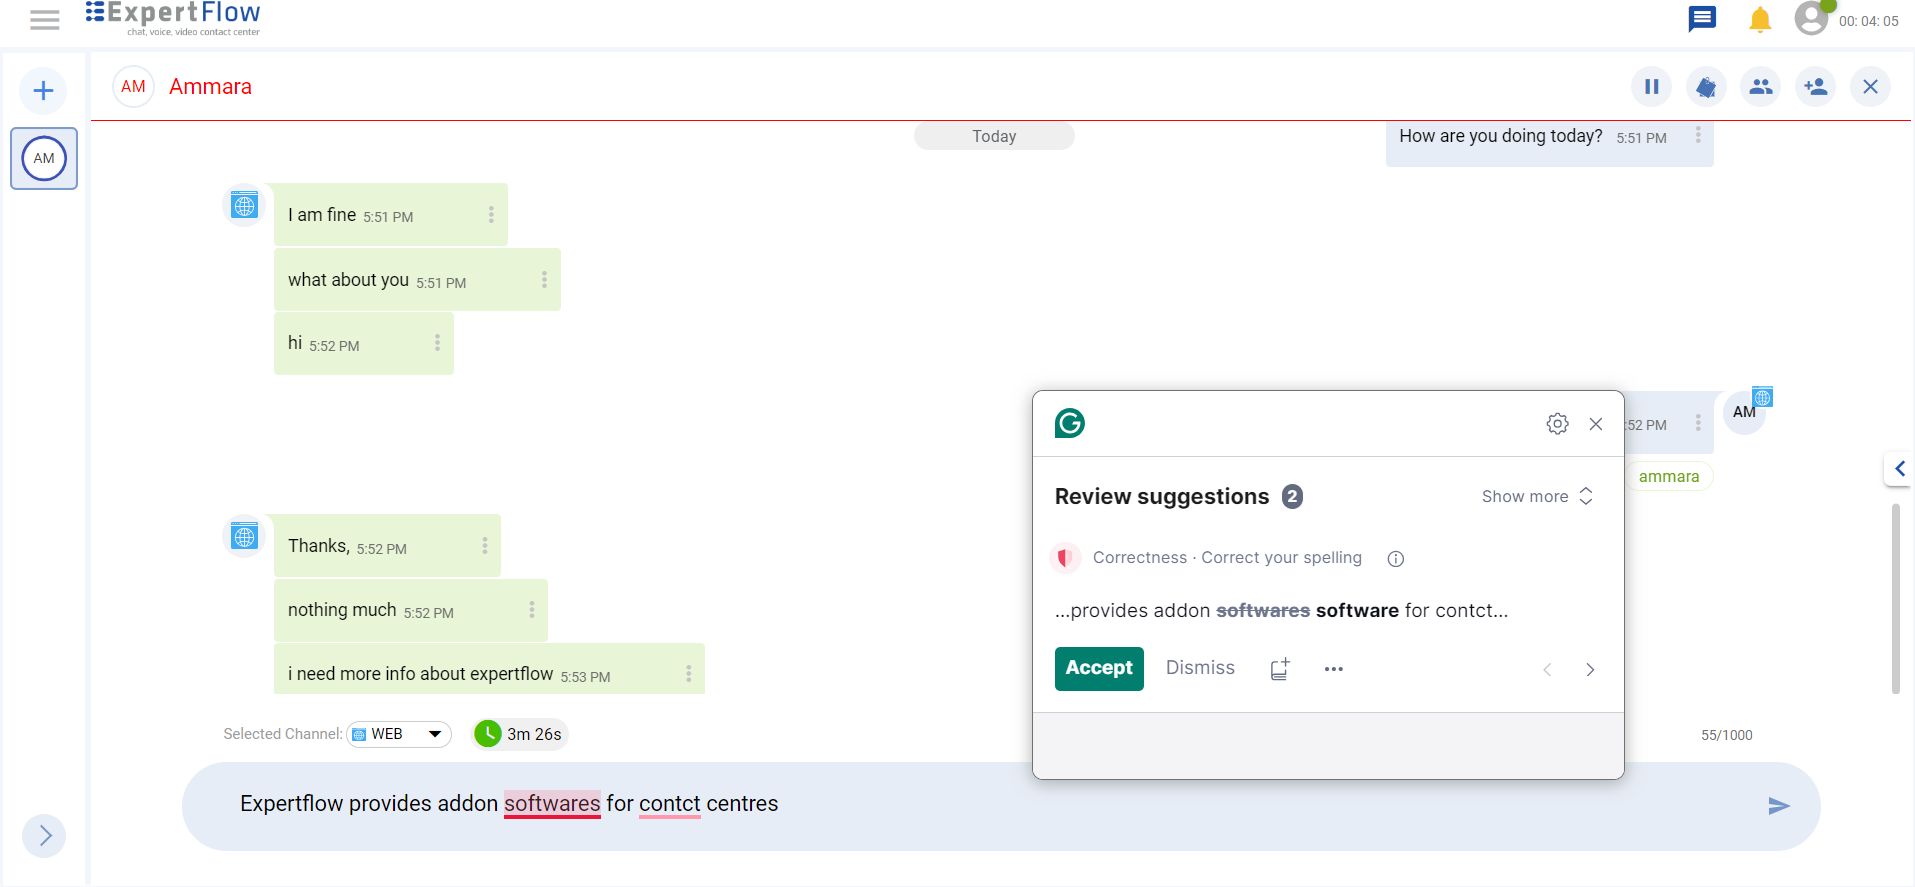
Enable Spell & Grammar Check
Agents can now have spell and grammar checks while typing a message. For this, the Grammarly extension needs to be installed in the browser. Once installed, they can see the Grammarly icon in the Message Composer.
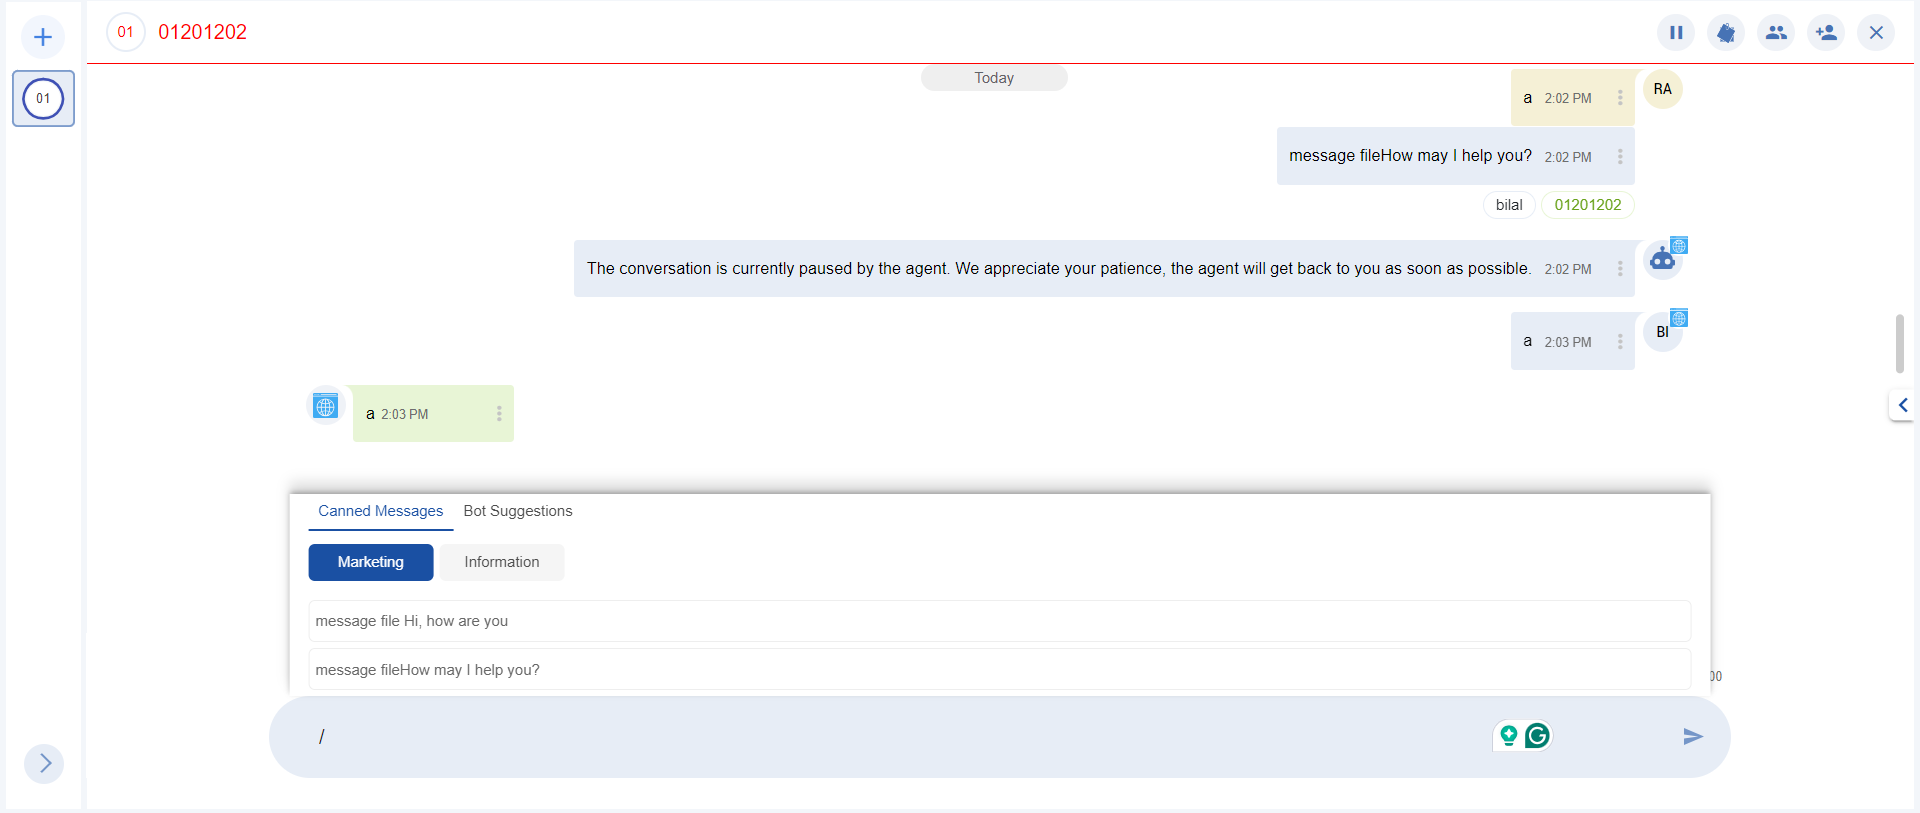
Send a Canned Message
The agent can send pre-configured, canned messages from the Message Composer. Canned Messages are organized into custom-defined categories. Therefore, for sending a canned message, search under the relevant category.
-
A maximum of three categories can be defined.
-
Canned messages can be defined in the languages only supported by the Agent Desk UI.
The agent can type a forward slash "/" in the Message Composer to send a canned message. The canned message panel will appear automatically.
How to configure
Supported Languages:
|
Sr. |
code |
Language Name |
Filename |
|---|---|---|---|
|
1 |
ar |
Arabic |
ar.json |
|
2 |
bg |
Bulgarian |
bg.json |
|
3 |
en |
English |
en.json |
|
4 |
fr |
French |
fr.json |
|
6 |
ger |
German |
ger.json |
|
7 |
ita |
Italian |
ita.json |
|
8 |
spa |
Spanish |
spa.json |
|
9 |
sw |
Swahili |
sw.json |
|
10 |
ur |
Urdu |
ur.json |
while adding content in canned messages file make sure to follow the code standards for languages provided in above table.
Canned messages sample format:
{
  "en": {
    "marketing": [
      "message file Hi, how are you ",
      "message fileHow may I help you?"
    ],
    "information": [
      "message file Info message 1",
      "message file Info message 2"
    ]
  },
  "ger": {
    "marketing": [
      "message file Hi, how are you in german",
      "message file How may I help you in german?"
    ],
    "information": [
      "message file Info message 1 german",
      "message file Info message 2 german"
    ]
  }
}
Make sure this file is present in the directory /root/cim-solution/kubernetes/pre-deployment/app-translations/unified-agent/canned-messages/canned-messages.json and their volumes should be mounted in unified-agent deployments
volumeMounts:
            - name: ef-canned-messages
              mountPath: /usr/share/nginx/html/assets/canned-messages/
      volumes:
         - name: ef-canned-messages
           configMap:
             name: ef-canned-messages-cm
create config map kubectl -n expertflow create configmap ef-canned-messages-cm --from-file=pre-deployment/app-translations/unified-agent/canned-messages
Update canned messages:
-
Change the canned messages in the following folder
/root/cim-solution/kubernetes/pre-deployment/app-translations/unified-agent/canned-messages/canned-messages.json -
Delete config map
kubectl -n expertflow delete configmap ef-canned-messages-cm -
Go to directory cim-solution/kubernetes/
-
Create config map
kubectl -n expertflow create configmap ef-canned-messages-cm --from-file=pre-deployment/app-translations/unified-agent/canned-messages -
Go to directory cim-solution/kubernetes/cim/Deployments
-
Delete unified-agent deployment
k delete -f ef-unified-agent-deployment.yaml -n expertflow -
Apply unified-agent deployment
k apply -f ef-unified-agent-deployment.yaml -n expertflow