Agents can initiate contact with a customer by clicking the '+' icon at the top. This will drop a panel carrying two options, to dial a number, or choose a customer to be contacted from the customer list.
Manual outbound is initiated using the following API: Out-Bound CIM Messages
Make an Outbound Call:
Before initiating an outbound call, agents must ensure they are connected to the EFSWITCH.
On initiating an outbound call, the agent’s MRD will automatically be changed to Not Ready state so that no inbound call conflicts with the Outbound request and the agent doesn't get reserved for that.
Once connected, follow these steps:
-
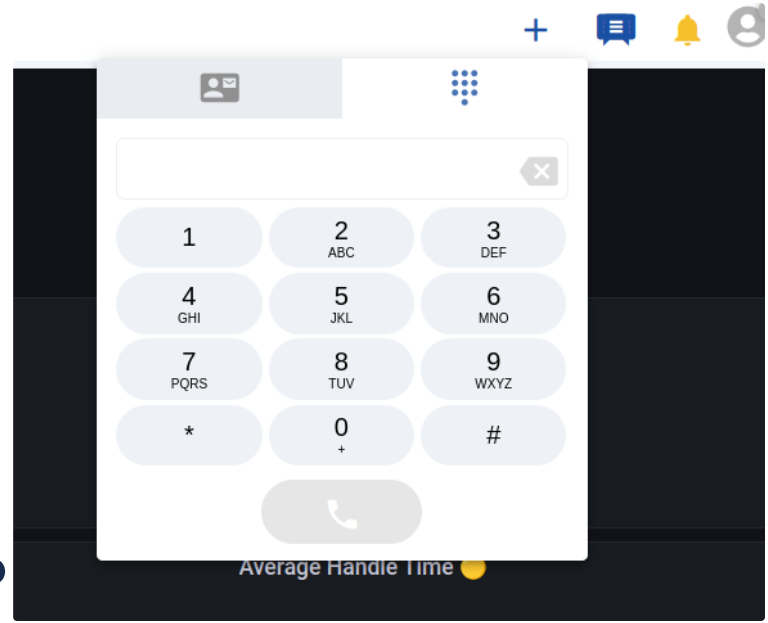
Click the '+' button on the top header.
-
A panel is dropped showing two tabs, one for selecting an existing customer from the customer list and the other, for dialing a number manually through the dialpad.
-
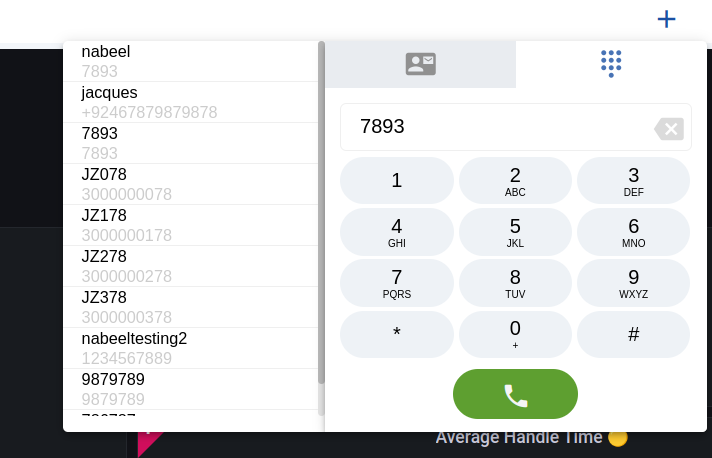
Agents can enter the number they wish to dial through the dialpad. On entering the number, a customer list will be shown matching the entered digits to find the customer along with the name if it already exists.
-
If the number is new and does not already exist, agents can dial the number manually. A new customer profile will automatically be created on the call initiation. The agent can then later, update profile information.
-
Select a customer from the suggestions list once the number is matched with any of the customer profiles. Click the 'Call' button on the dialpad to initiate an Outbound call.
-
You can also dial a call by selecting an existing customer in the Customer list tab alongside the dial pad tab.
-
Search the customer by name or number.
-
Choose a customer best matched with the specified search string.
-
Click to drop the customer details pane and choose the call button again the number field of the customer profile to dial out a call.
-
-
As the customer accepts the call, the conversation view opens and the agent can view the customer details along with the draggable CTI toolbar with three major call controls. (mute/unmute, hold/resume, end)
Agents can also establish a new call during an active conversation with a customer. For instance, if a customer and agents are communicating on WhatsApp, the Web, or any chat channel, agents can also place a new voice call to the customer number by following the same steps mentioned above. Once the call is connected, the voice session will be active and can be viewed in the “Active Channels Pane” on the right-hand side panel.
On initiating an outbound call, the agent’s Voice MRD will automatically be changed to “Not Ready” state so that no inbound call conflicts with the outbound call and the agent doesn't get reserved for that.
Limitations
-
Special characters are not supported when dialing the number except *, # and +.
-
Agent-agent manual outbound call is not supported.
Make an Outbound Chat (WhatsApp only)
Agents may initiate outbound contact with customers on other supported channels as well, such as WhatsApp. To send a WhatsApp message to a customer when there’s no active conversation going on with the customer,
-
Click the '+' button to initiate an outbound contact and click the customer list tab alongside the dialpad tab.
-
Search for the desired customer via the search bar or, choose a customer directly from the customer list.
-
If the typed string in the search bar does not match with any of the existing customers, i.e. if the customer profile does not exist, there are two options,
-
If the agent enters a valid number, two options are shown, I) Create Customer ii) Voice Call
-
On clicking this, the “Create Customer” dialogue will appear. The specified number in the search bar will automatically appear in the “Voice” attribute.
-
On clicking this, an outbound call will be initiated on the number
-
-
If the agent enters an invalid number, only the option to create a new customer will be shown.
-
-
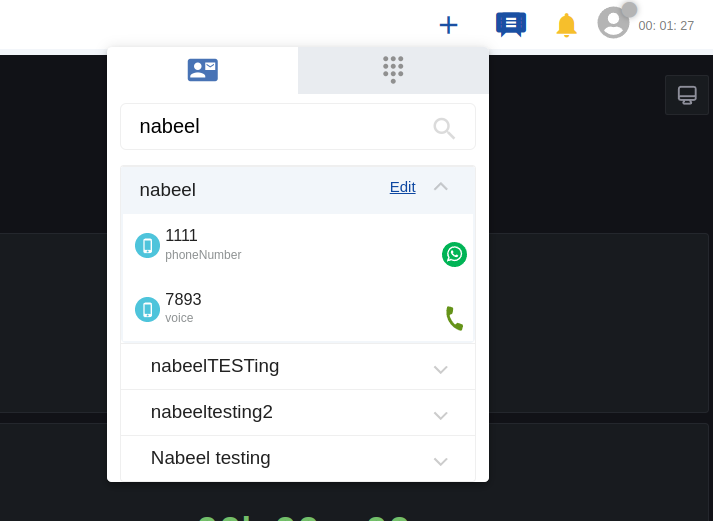
If the customer already exists, click the drop-down beside the name of the desired customer in the customer list to see the available outbound options.
-
Clicking the Voice button against the customer number will initiate a new conversation and start a call with the customer.
-
Clicking on the Whatsapp icon will start a new conversation on the Whatsapp channel.
-
Currently, the outbound can only be initiated via “WhatsApp” and “Voice” channel for now.
-
To send an outbound SMS, use the SMS icon on the top beside the '+' button and make sure that the SMS channel via twilio is properly configured for sending an outbound SMS.
Limitations related to Whatsapp OB conversation
-
To initiate a new conversation on WhatsApp or, to send a new message via WhatsApp in an existing conversation, there must already be a customer session opened with the business, in the last 24 hours.
-
To be able to initiate a conversation or sending a WhatsApp message after 24 hours time, the business would need to buy template message from WhatsApp.
-
If the customer does not join the conversation (reply to agent message) within the predefined timeout of the channel (as defined by the system administrator in Unified Admin), the conversation will automatically be closed.
Send an Outbound SMS
Agents can also send SMS messages to customers if the SMS channel is enabled.
-
To send a message, click the SMS icon on the top header on the Customer Conversation View.
-
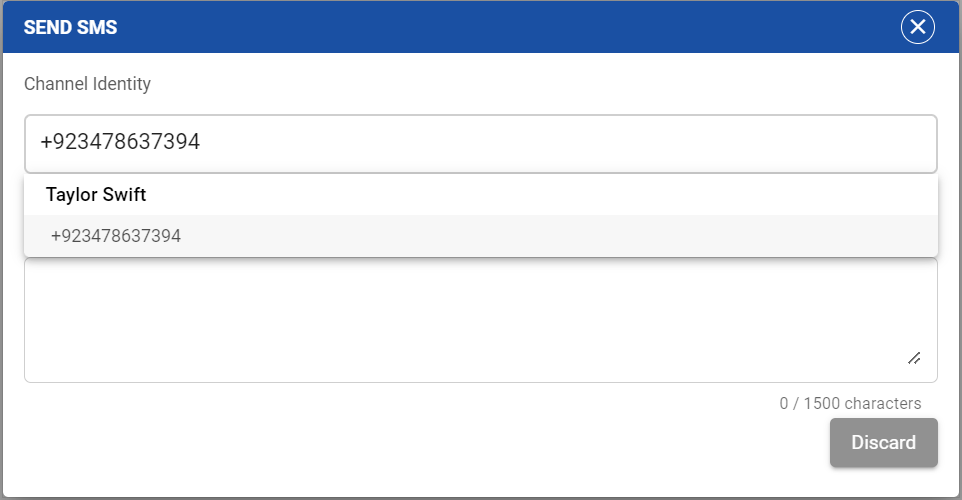
Upon clicking, a dialog box will open. Agents can enter the customer number. On entering the number, a suggestion list will pop up matching the entered digits to find the customer along with the name if it already exists.
-
Select a customer from the list if it already exists. Upon selection, another button appears on the dialogue, captioned, See Conversation History. Select this button to see the conversation history of the selected customer. Note that from this view, you can only see the history of past conversations and cannot send a message from this view directly.
-
If the entered digits do not match, a new customer profile will be created upon sending the message.
This feature works only when the SMS channel is configured via Twilio.
This feature can be enabled or disabled from Unified Admin → Agent Desk Settings.
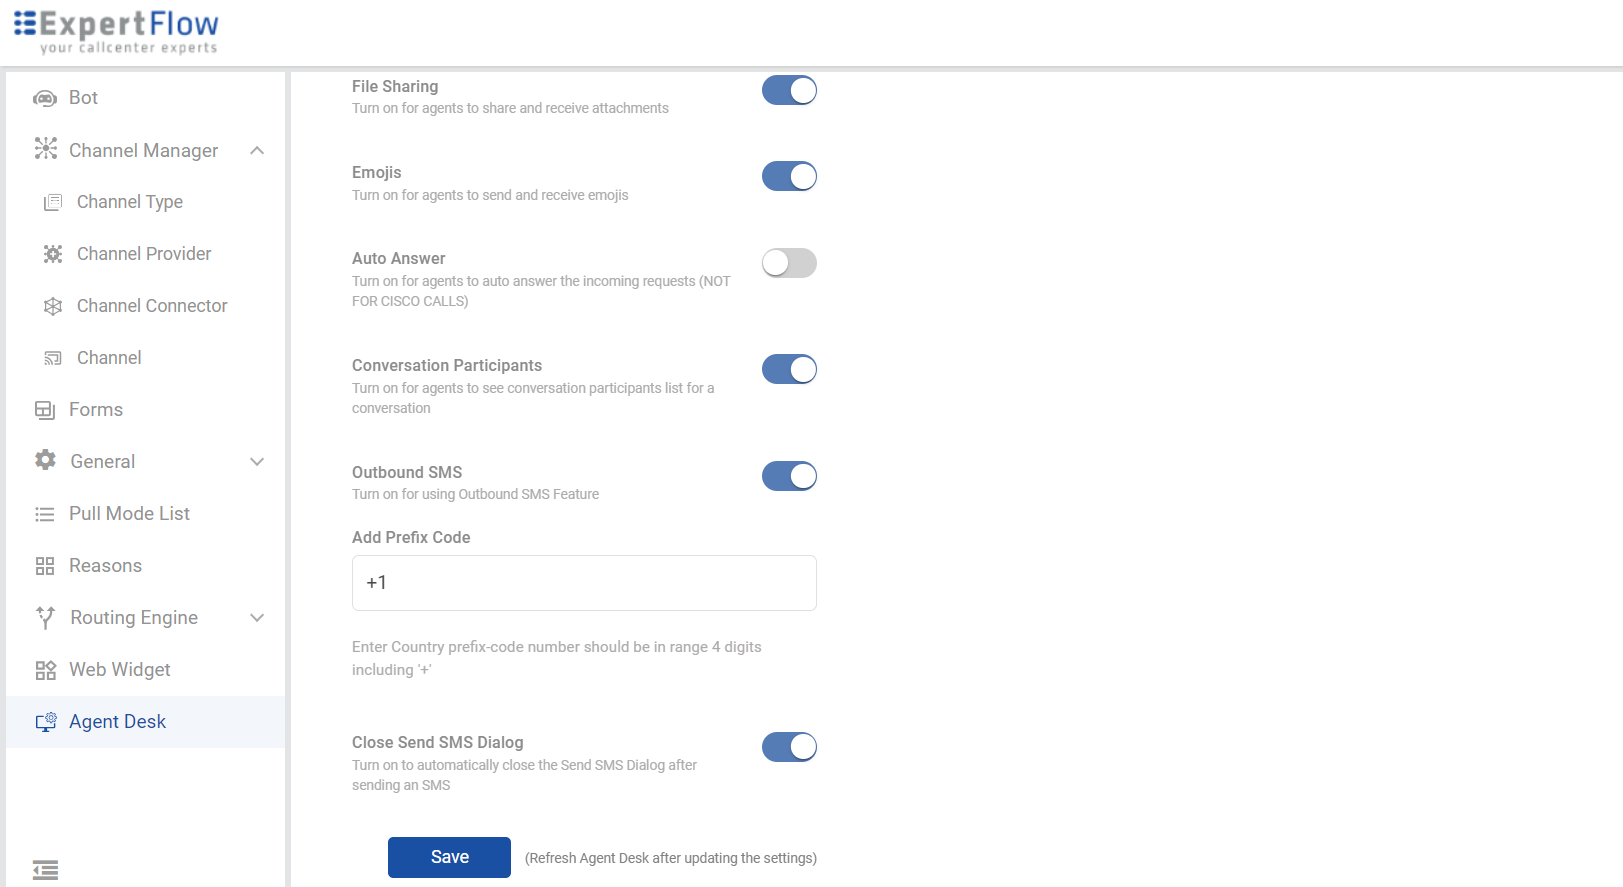
Turn on the Outbound SMS toggle to enable the feature.
Add the default prefix in the Add Prefix Code. By default, the prefix given is +1.
Enable the Close Send SMS Dialog if you want to close the dialog automatically upon sending the message. Turn it off to keep opening the dialog.
Send WhatsApp
When there is no active conversation
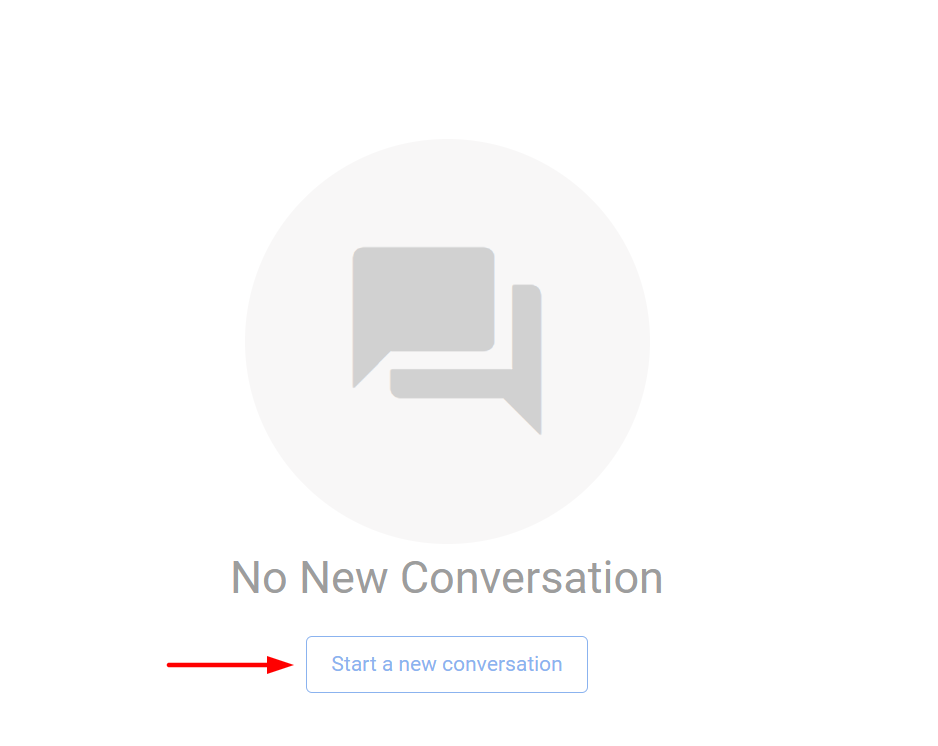
Agents can initiate new conversations with a customer via the WhatsApp channel. To do so, click the Start New Conversation button on the Conversation View in case of no conversations, and in case of other active conversations in hand, click the (+) icon on the left sidebar.
Look for the desired customer record on the Customer List that opens up and click the contact icon against the record. This will open up the customer profile on the Conversation View with Message Composer disabled. This is because no conversation is currently active with this customer. Expand the right panel and choose the WhatsApp channel icon to start a conversation over WhatsApp.
Also, by default, the customer history is hidden. Agents can load the history of the customer by clicking the link, based on the permissions to do so.
Adding a new channel session in the active conversation
Expand the right side and click the Media Channels pane. Choose the channel identity (for now, only the phone number) for the WhatsApp channel, click the dropdown, and click the chat icon against the WhatsApp channel.
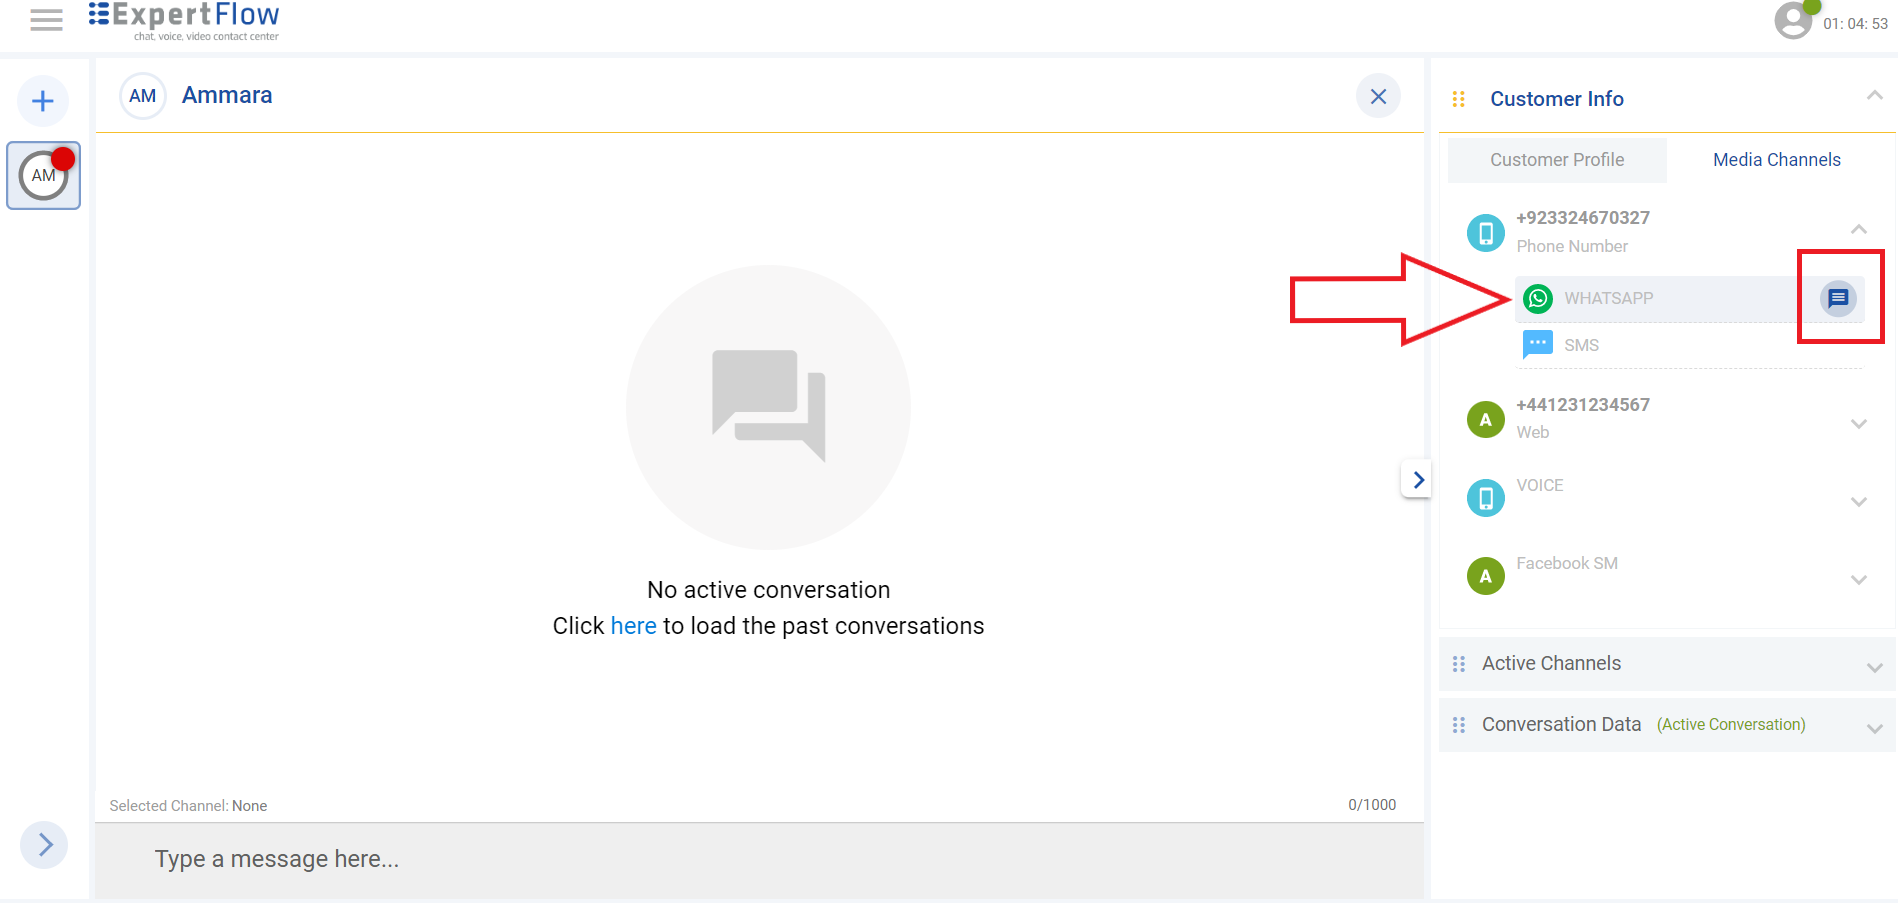
Clicking the chat icon will initiate a new conversation with the selected customer on WhatsApp.