Problem Statement:
We currently use a single Admin account for both our API implementations via the Keycloak Connector and for the Client Application user (unified-admin/keycloak-console). This approach makes it difficult to trace changes in the logs, as we cannot distinguish whether a change was made through the API or directly within the Client Application/Keycloak Console. Additionally, since there is only one admin account, it can be accessed by multiple users, leading to potential issues with accountability and security when changes are made within the targeted realm in the Keycloak client application.
Solution:
We recommend creating separate accounts for the Keycloak Admin APIs and the Keycloak Client Application. This will allow us to accurately track changes and identify the level at which they were made, as well as pinpoint the specific user responsible based on their IP address. Additionally, this approach enhances security by ensuring that the Client Application does not have access to the API Admin account, thereby providing a more secure way to manage and handle API interactions.
Creation of Admin User for Keycloak Client Application:
-
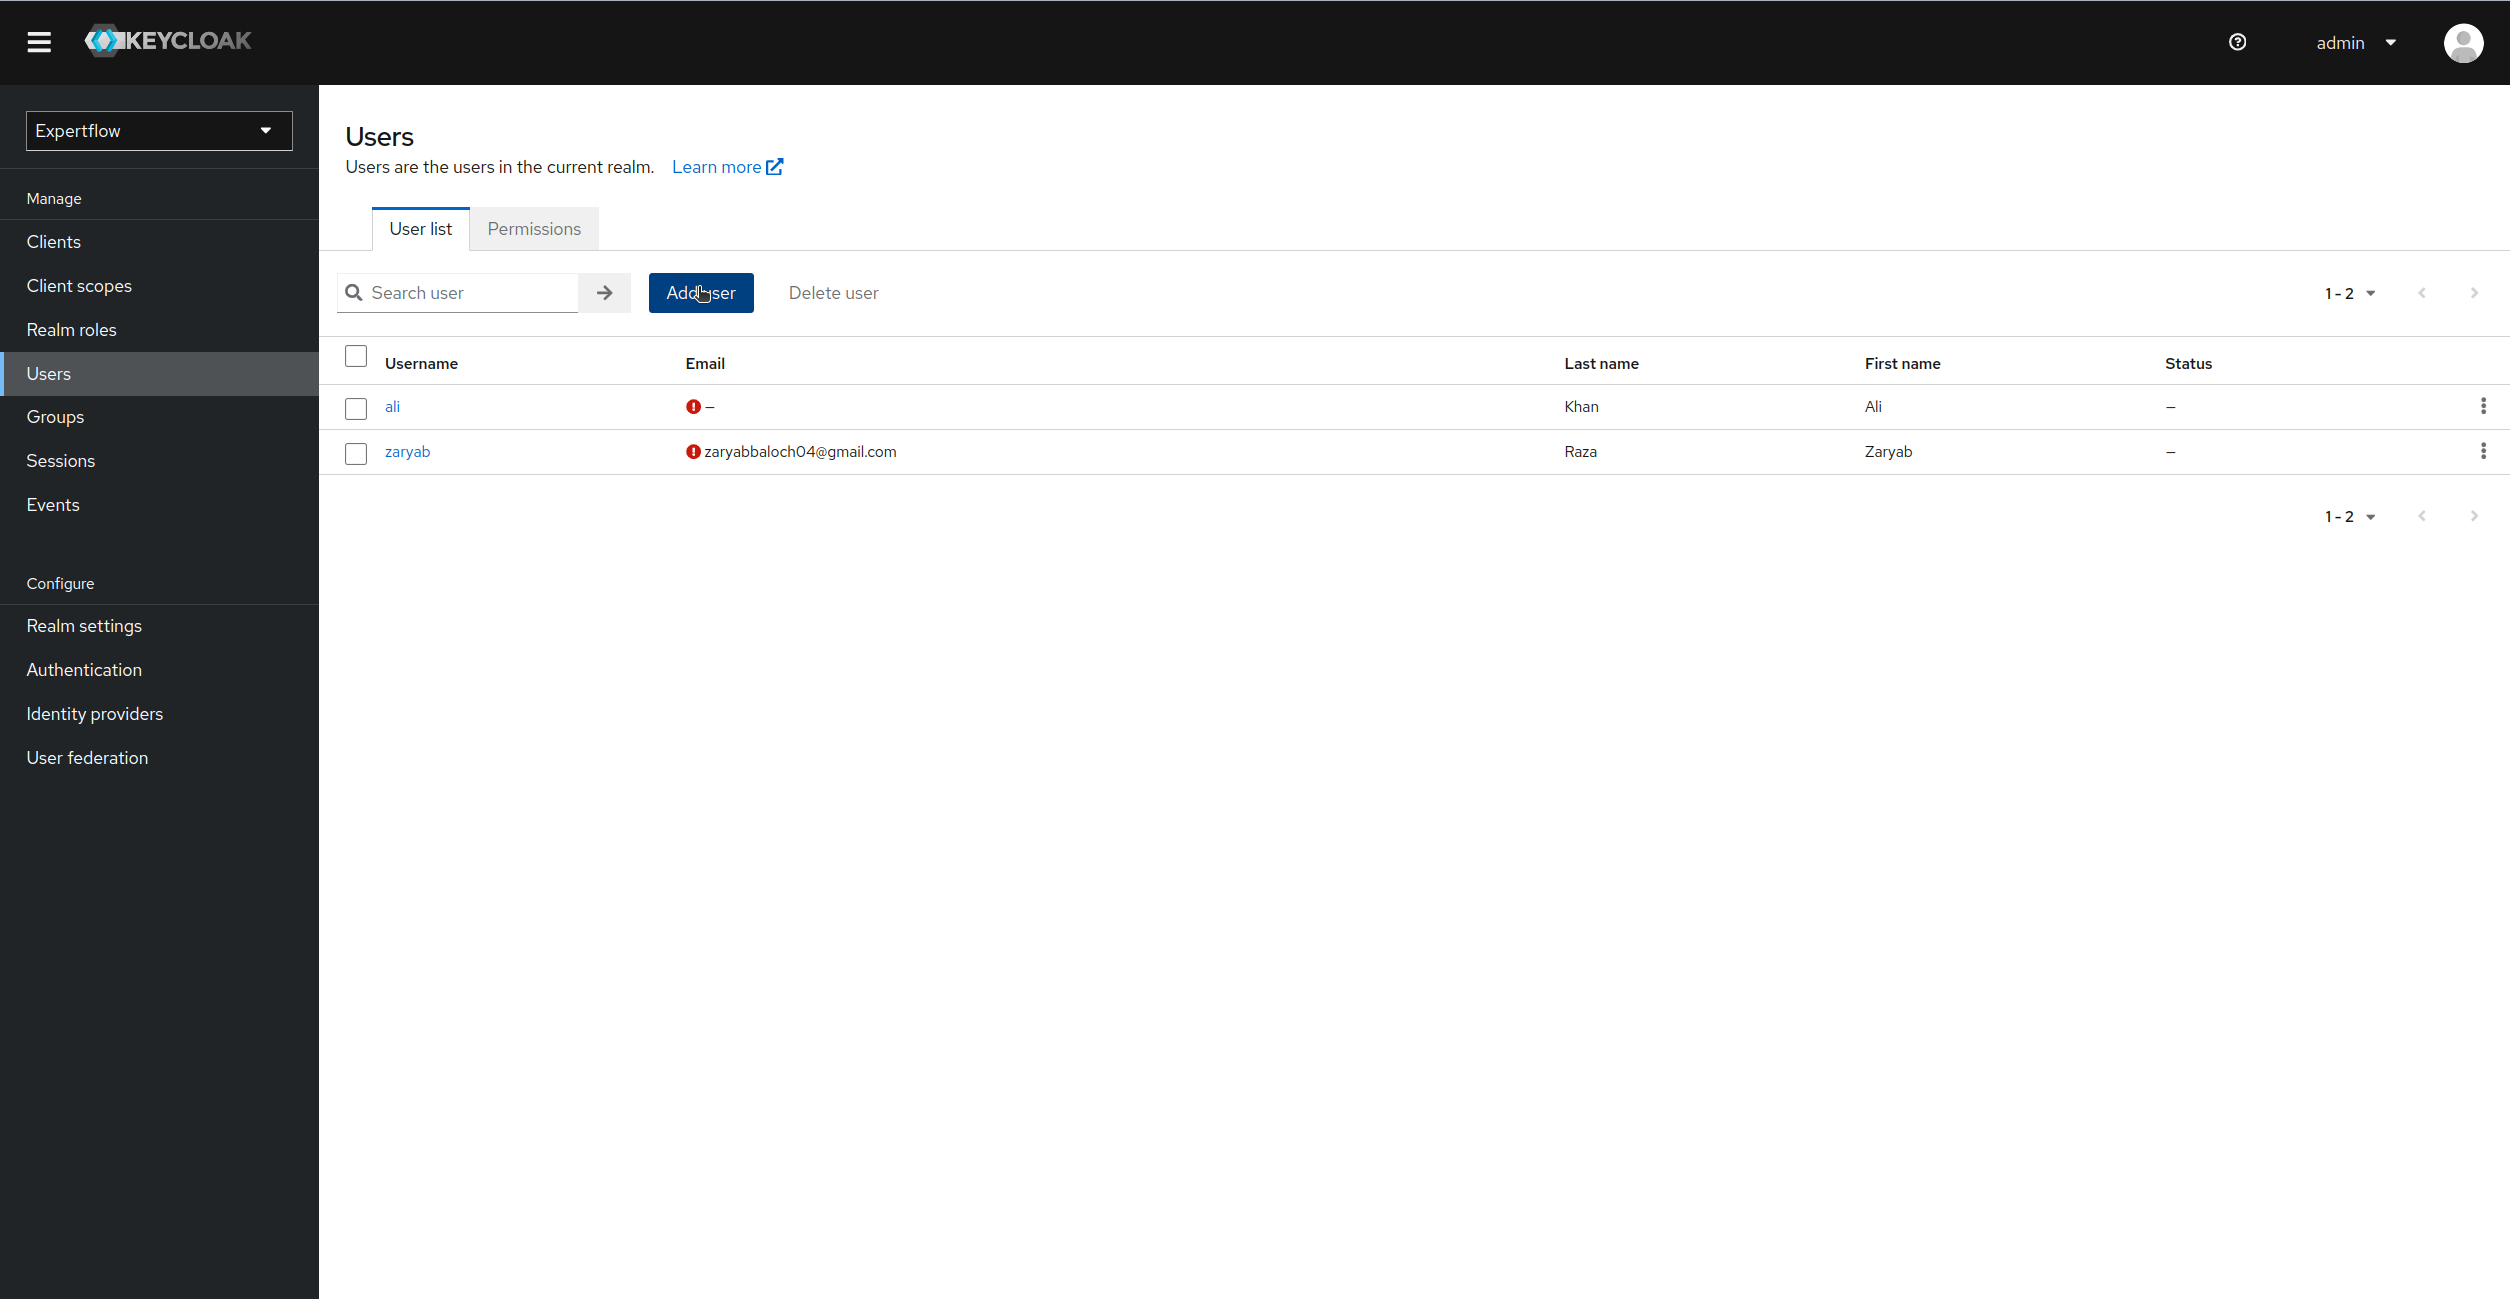
Login to Keycloak Admin Console, select your targeted realm and then go to Users tab and then click on Add User:
-
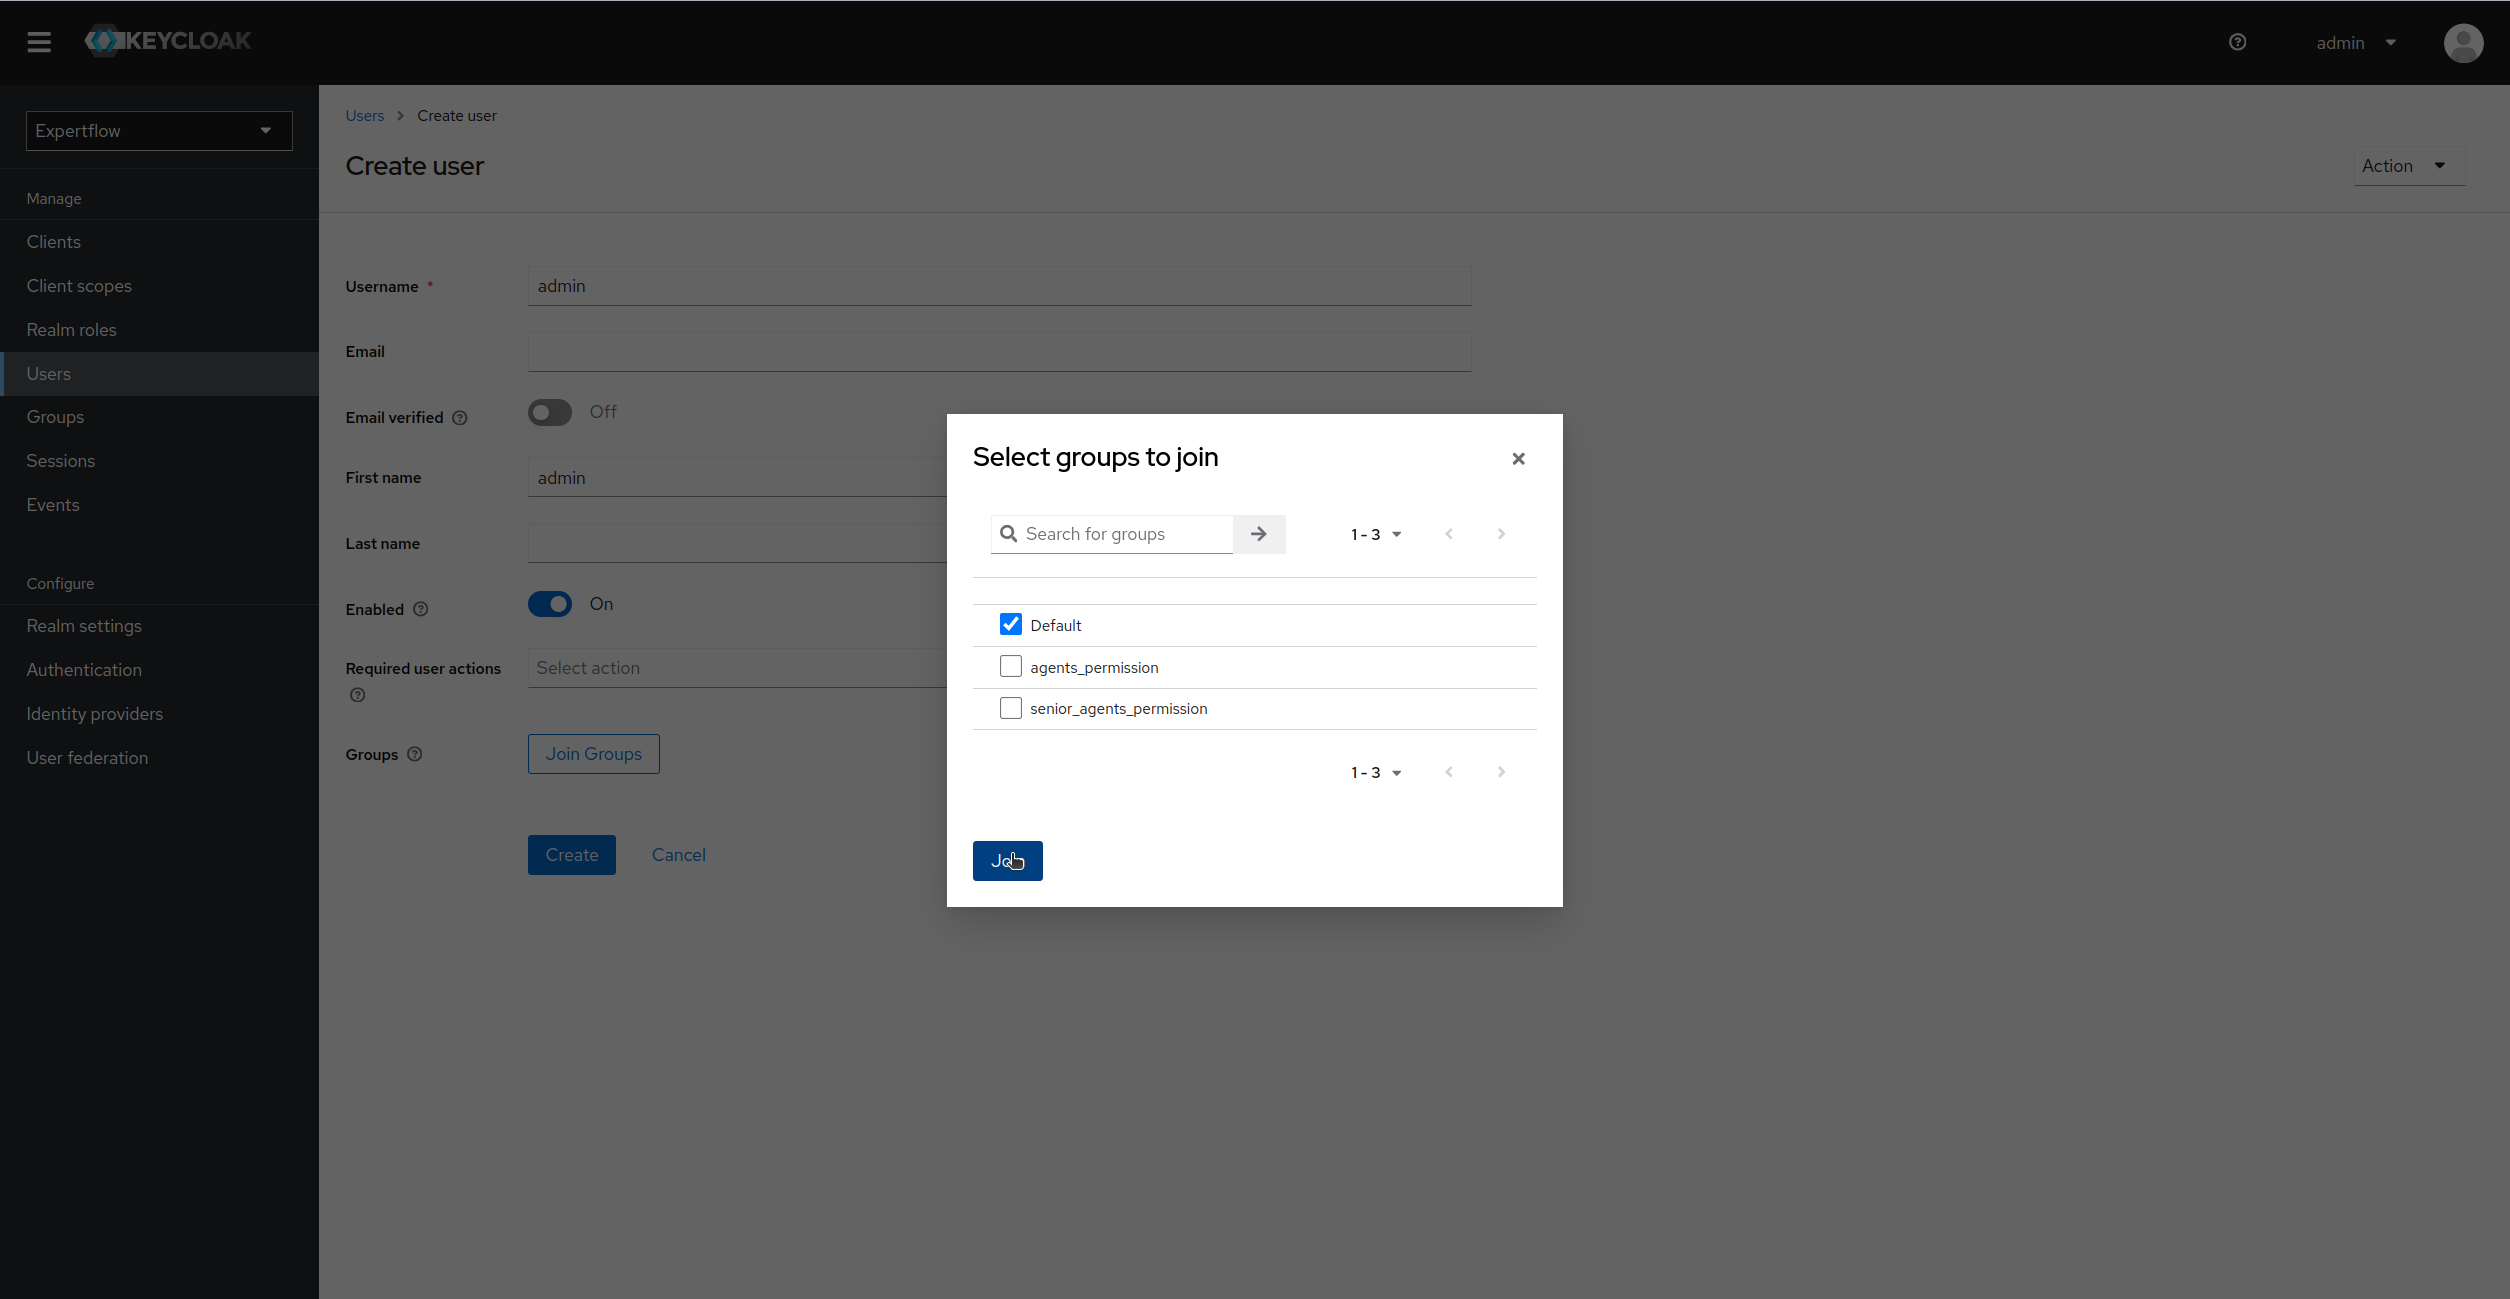
Now, provide the Username, first and last name of User and then click on Join Groups and assign a Team to user. (Default team if no other team is available)
We only need to Assign Group till 4.5.1 release. From 4.5.2 onwards, teams are moved to CX so we dont need to assign them.
-
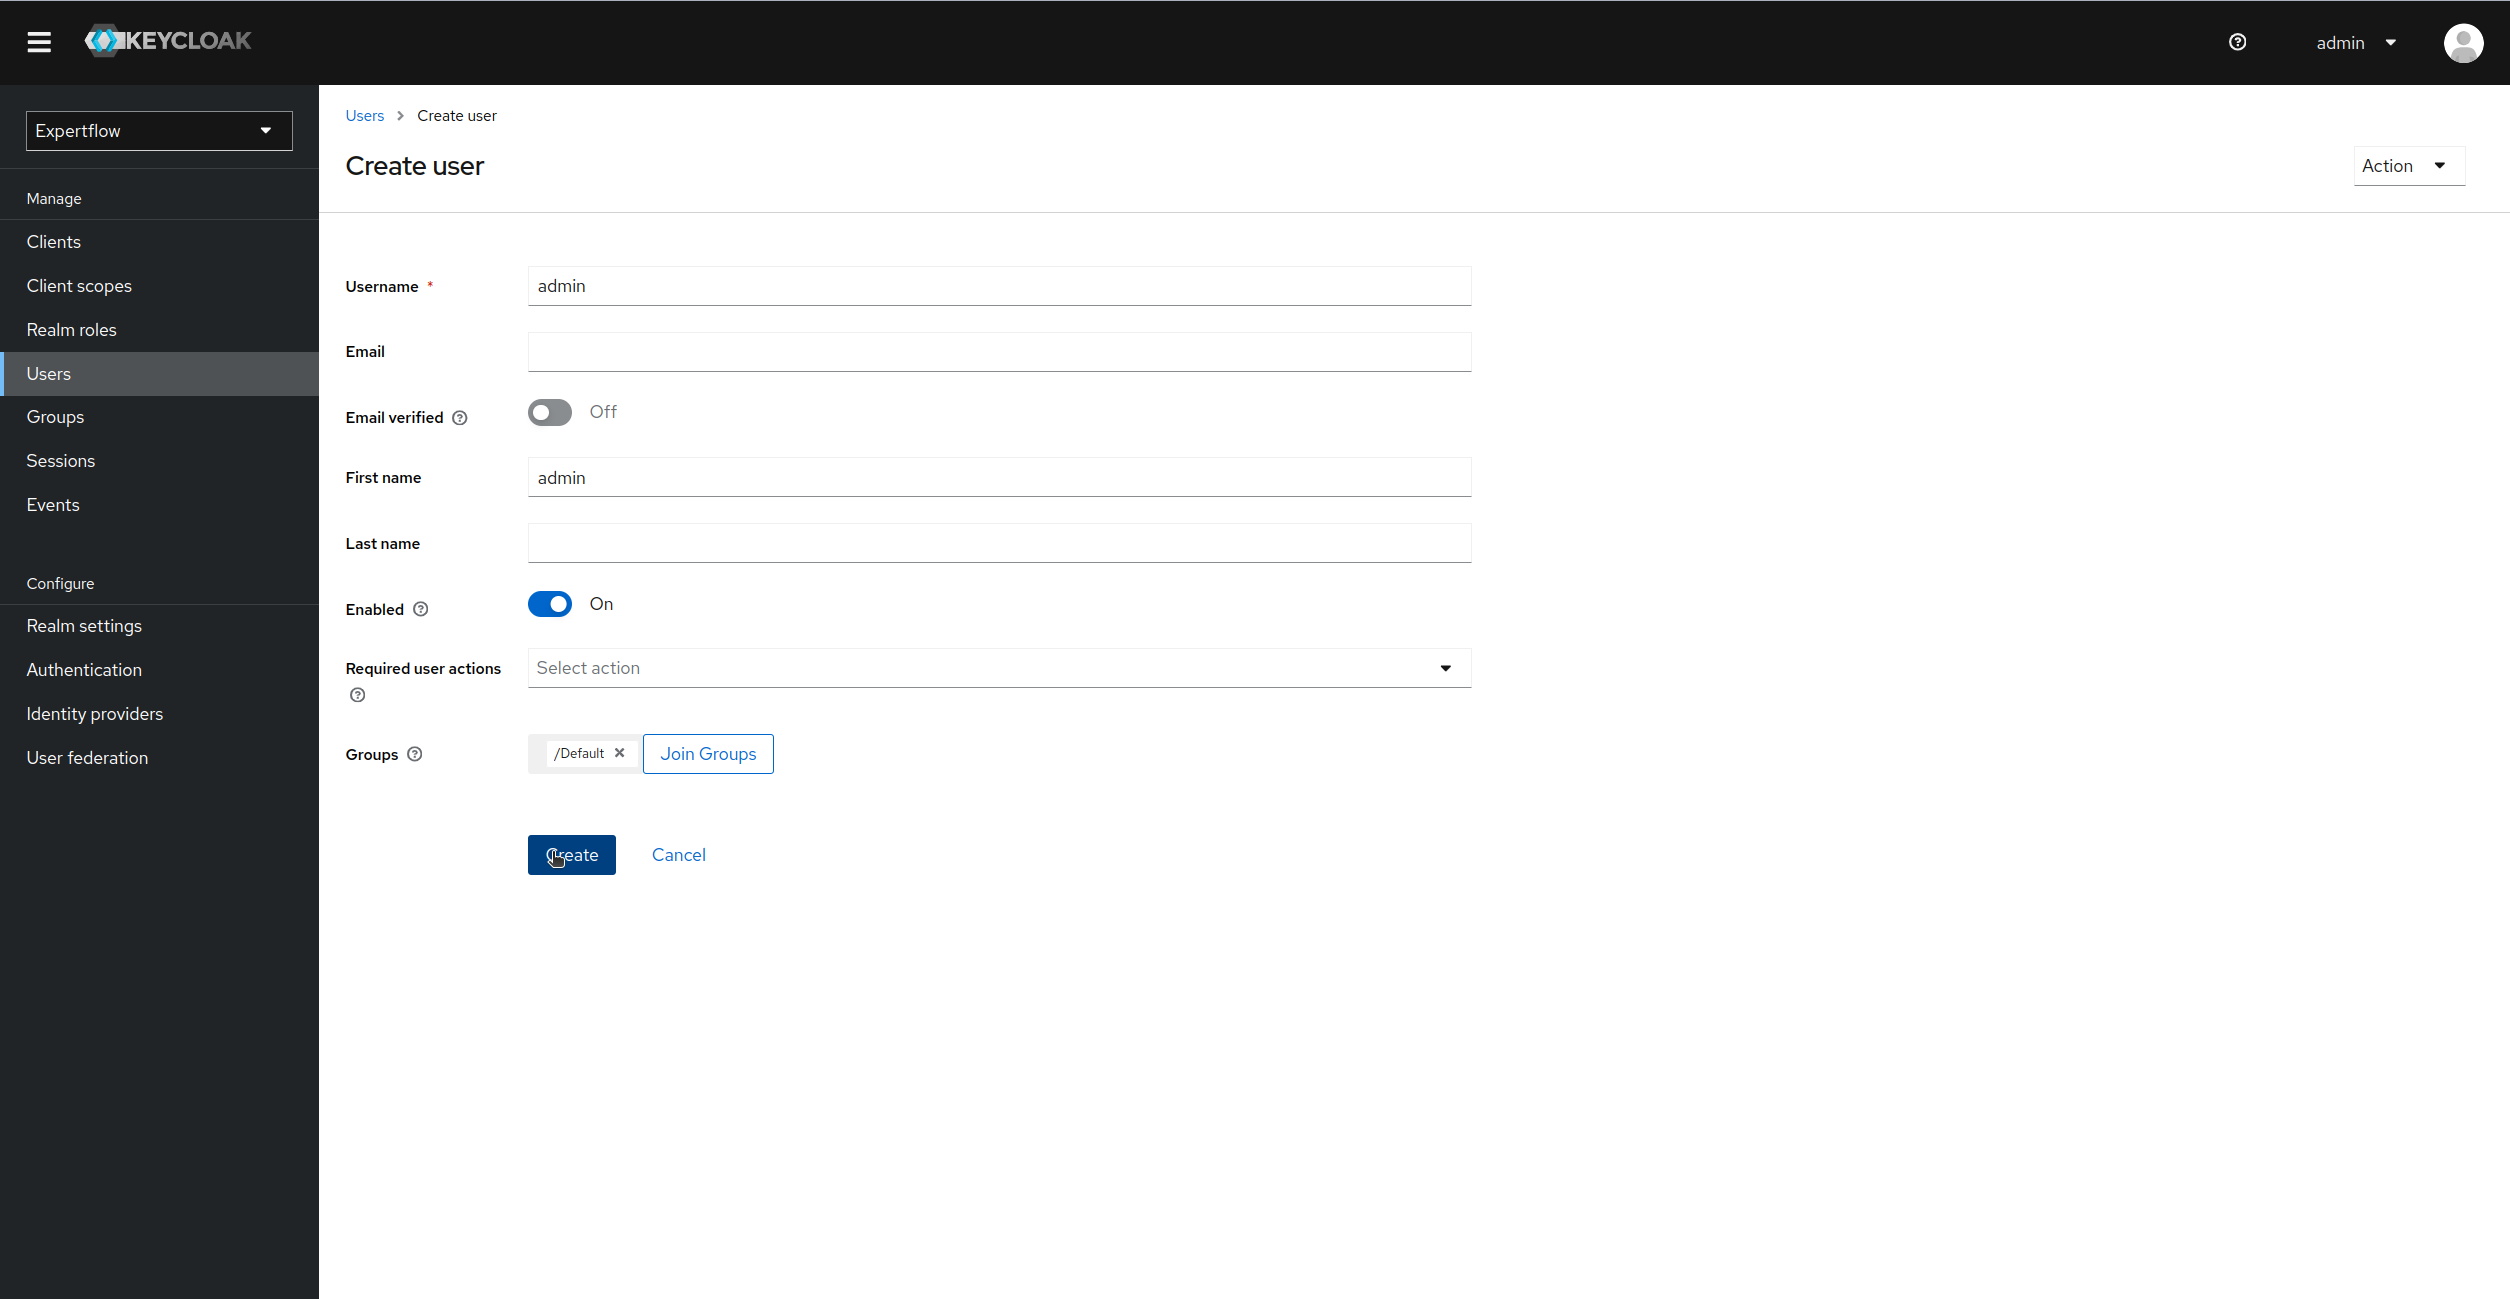
Click on Create to create a user:
-
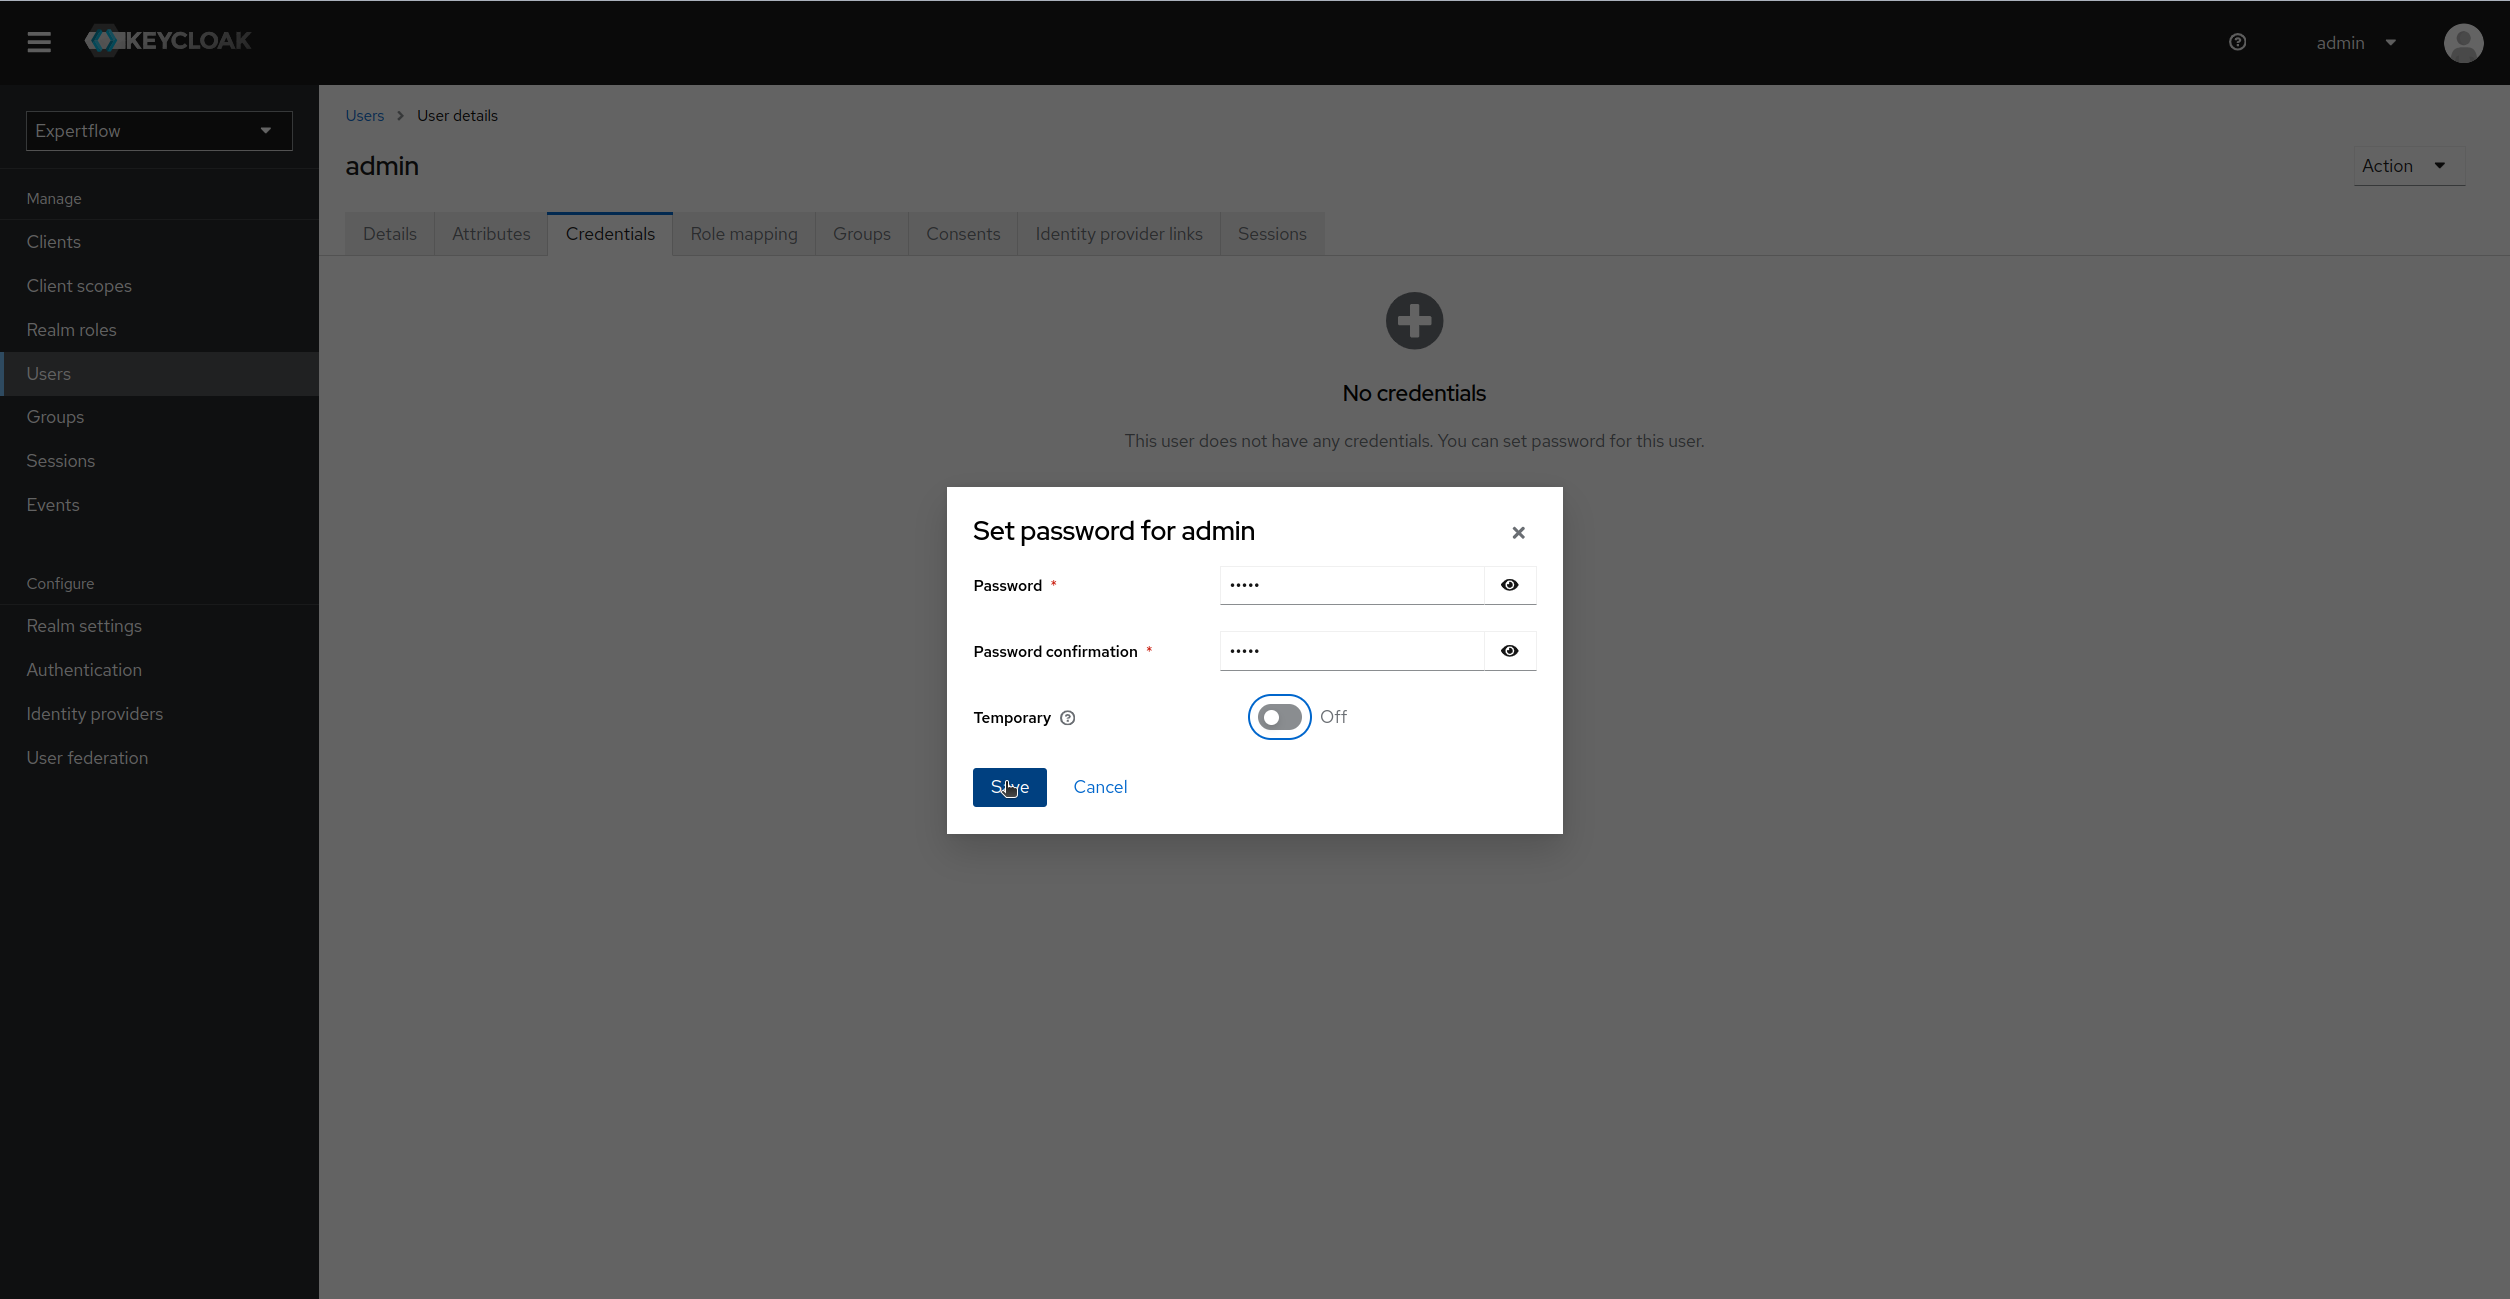
Assign Credentials to Admin user of Client Application (Set temporary as Off):
-
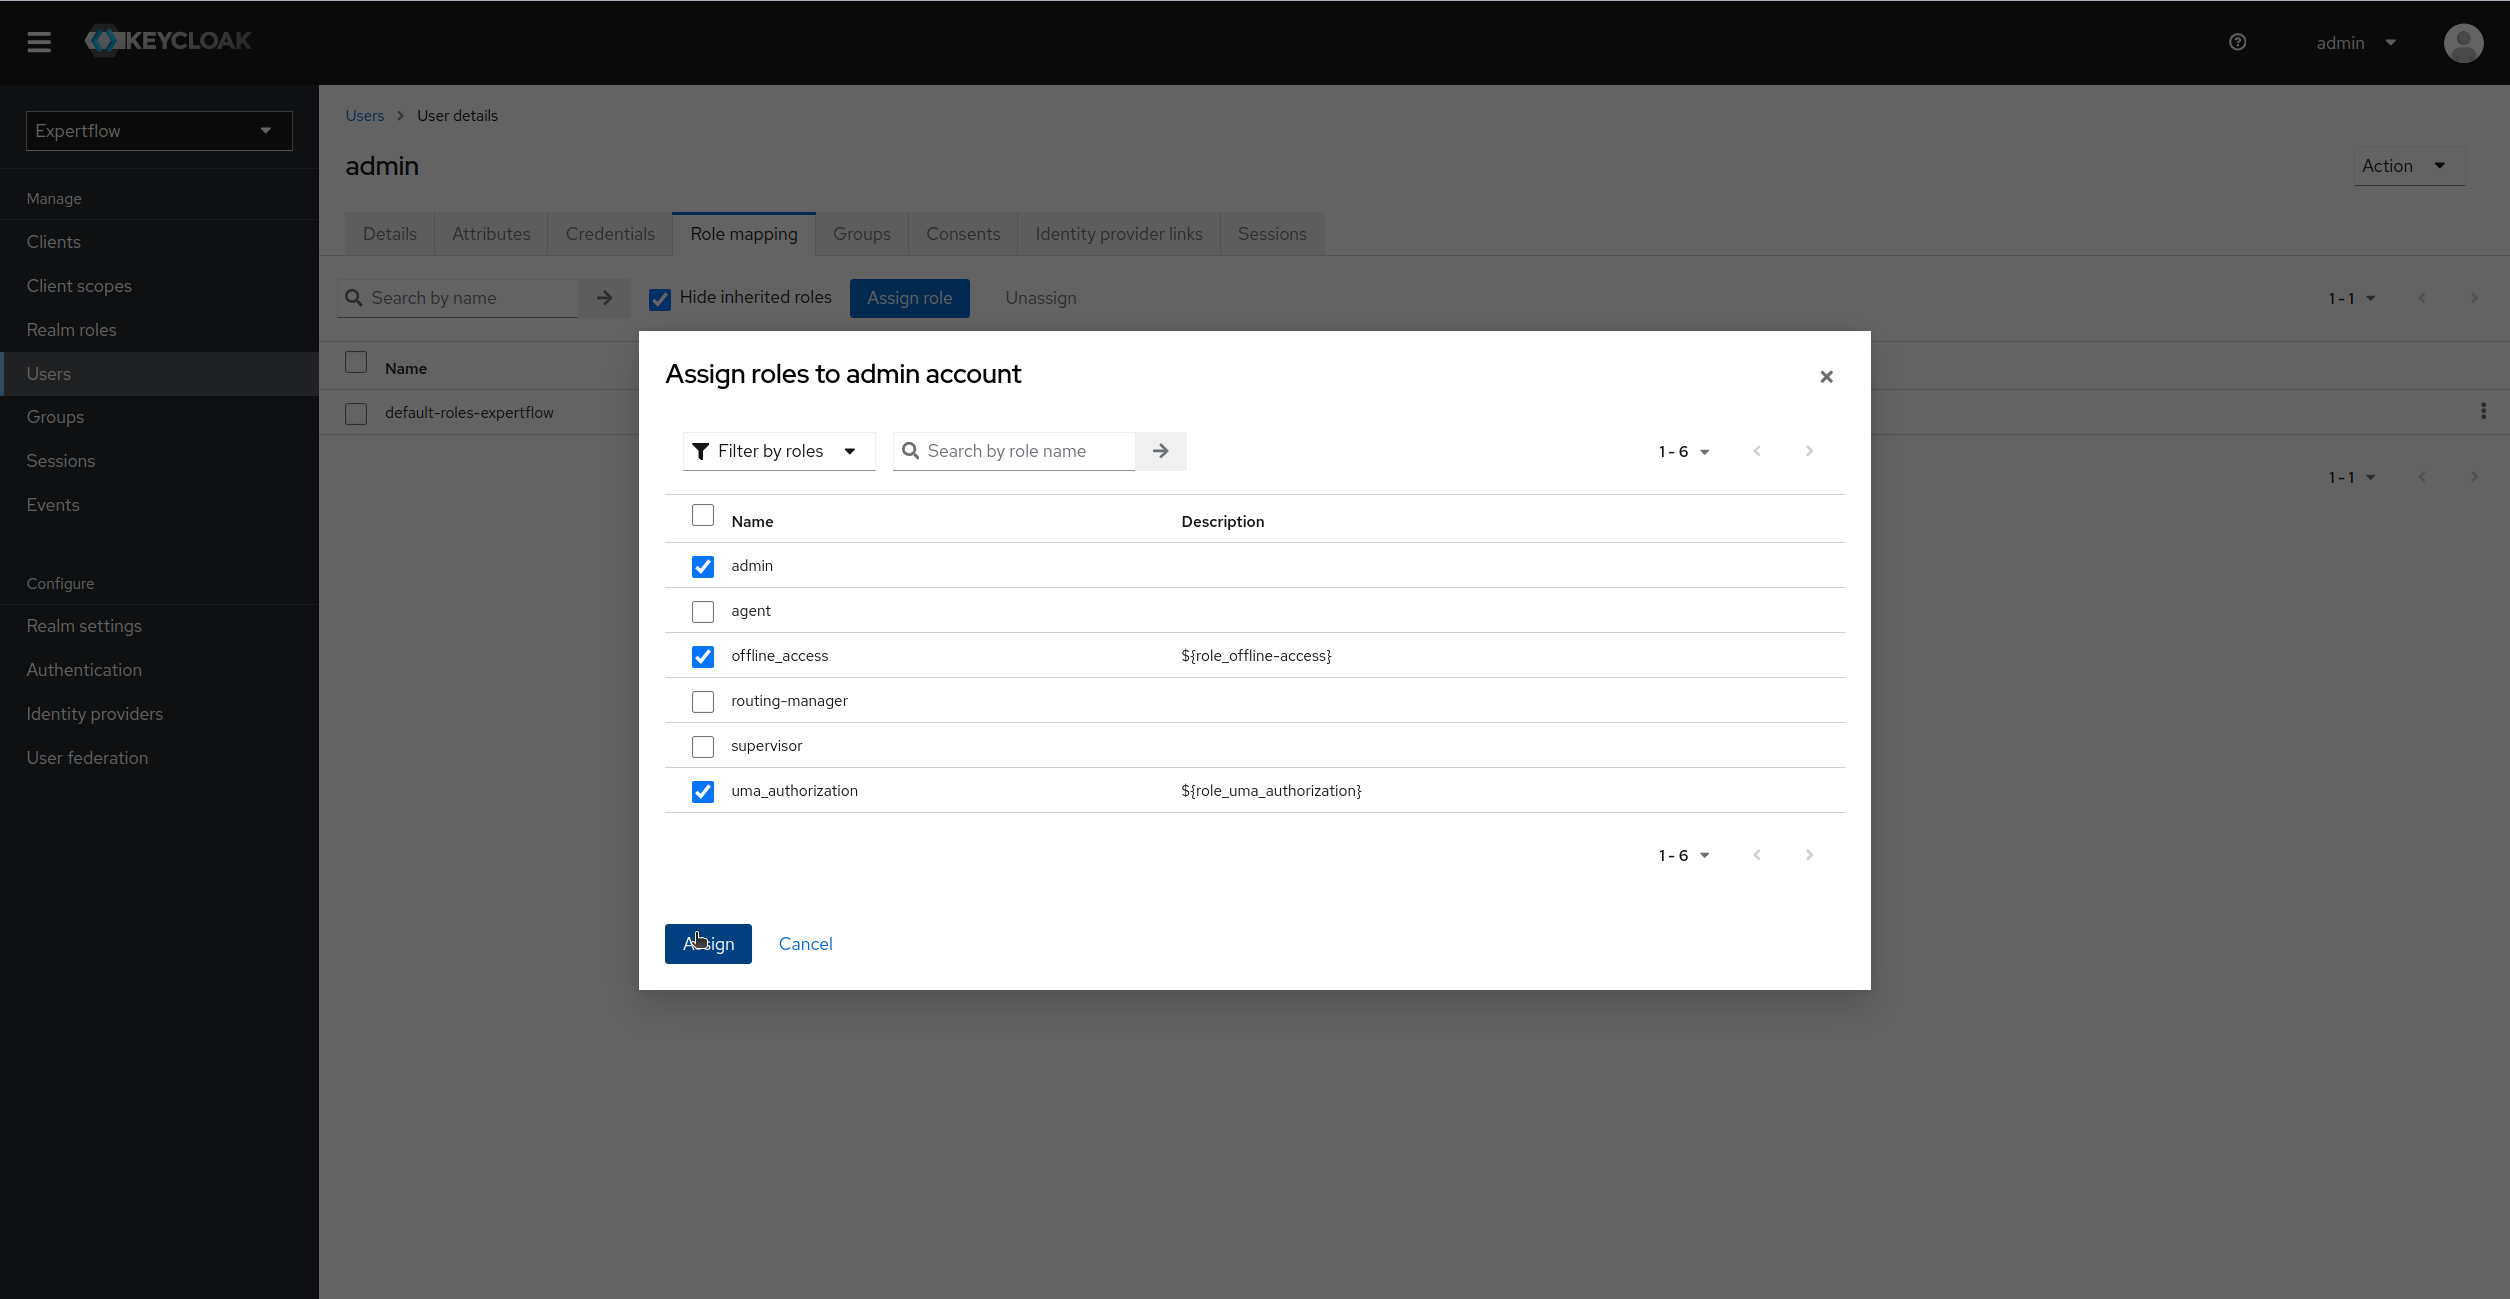
Assign the admin realm role along with offline-access and uma-authorization:
-
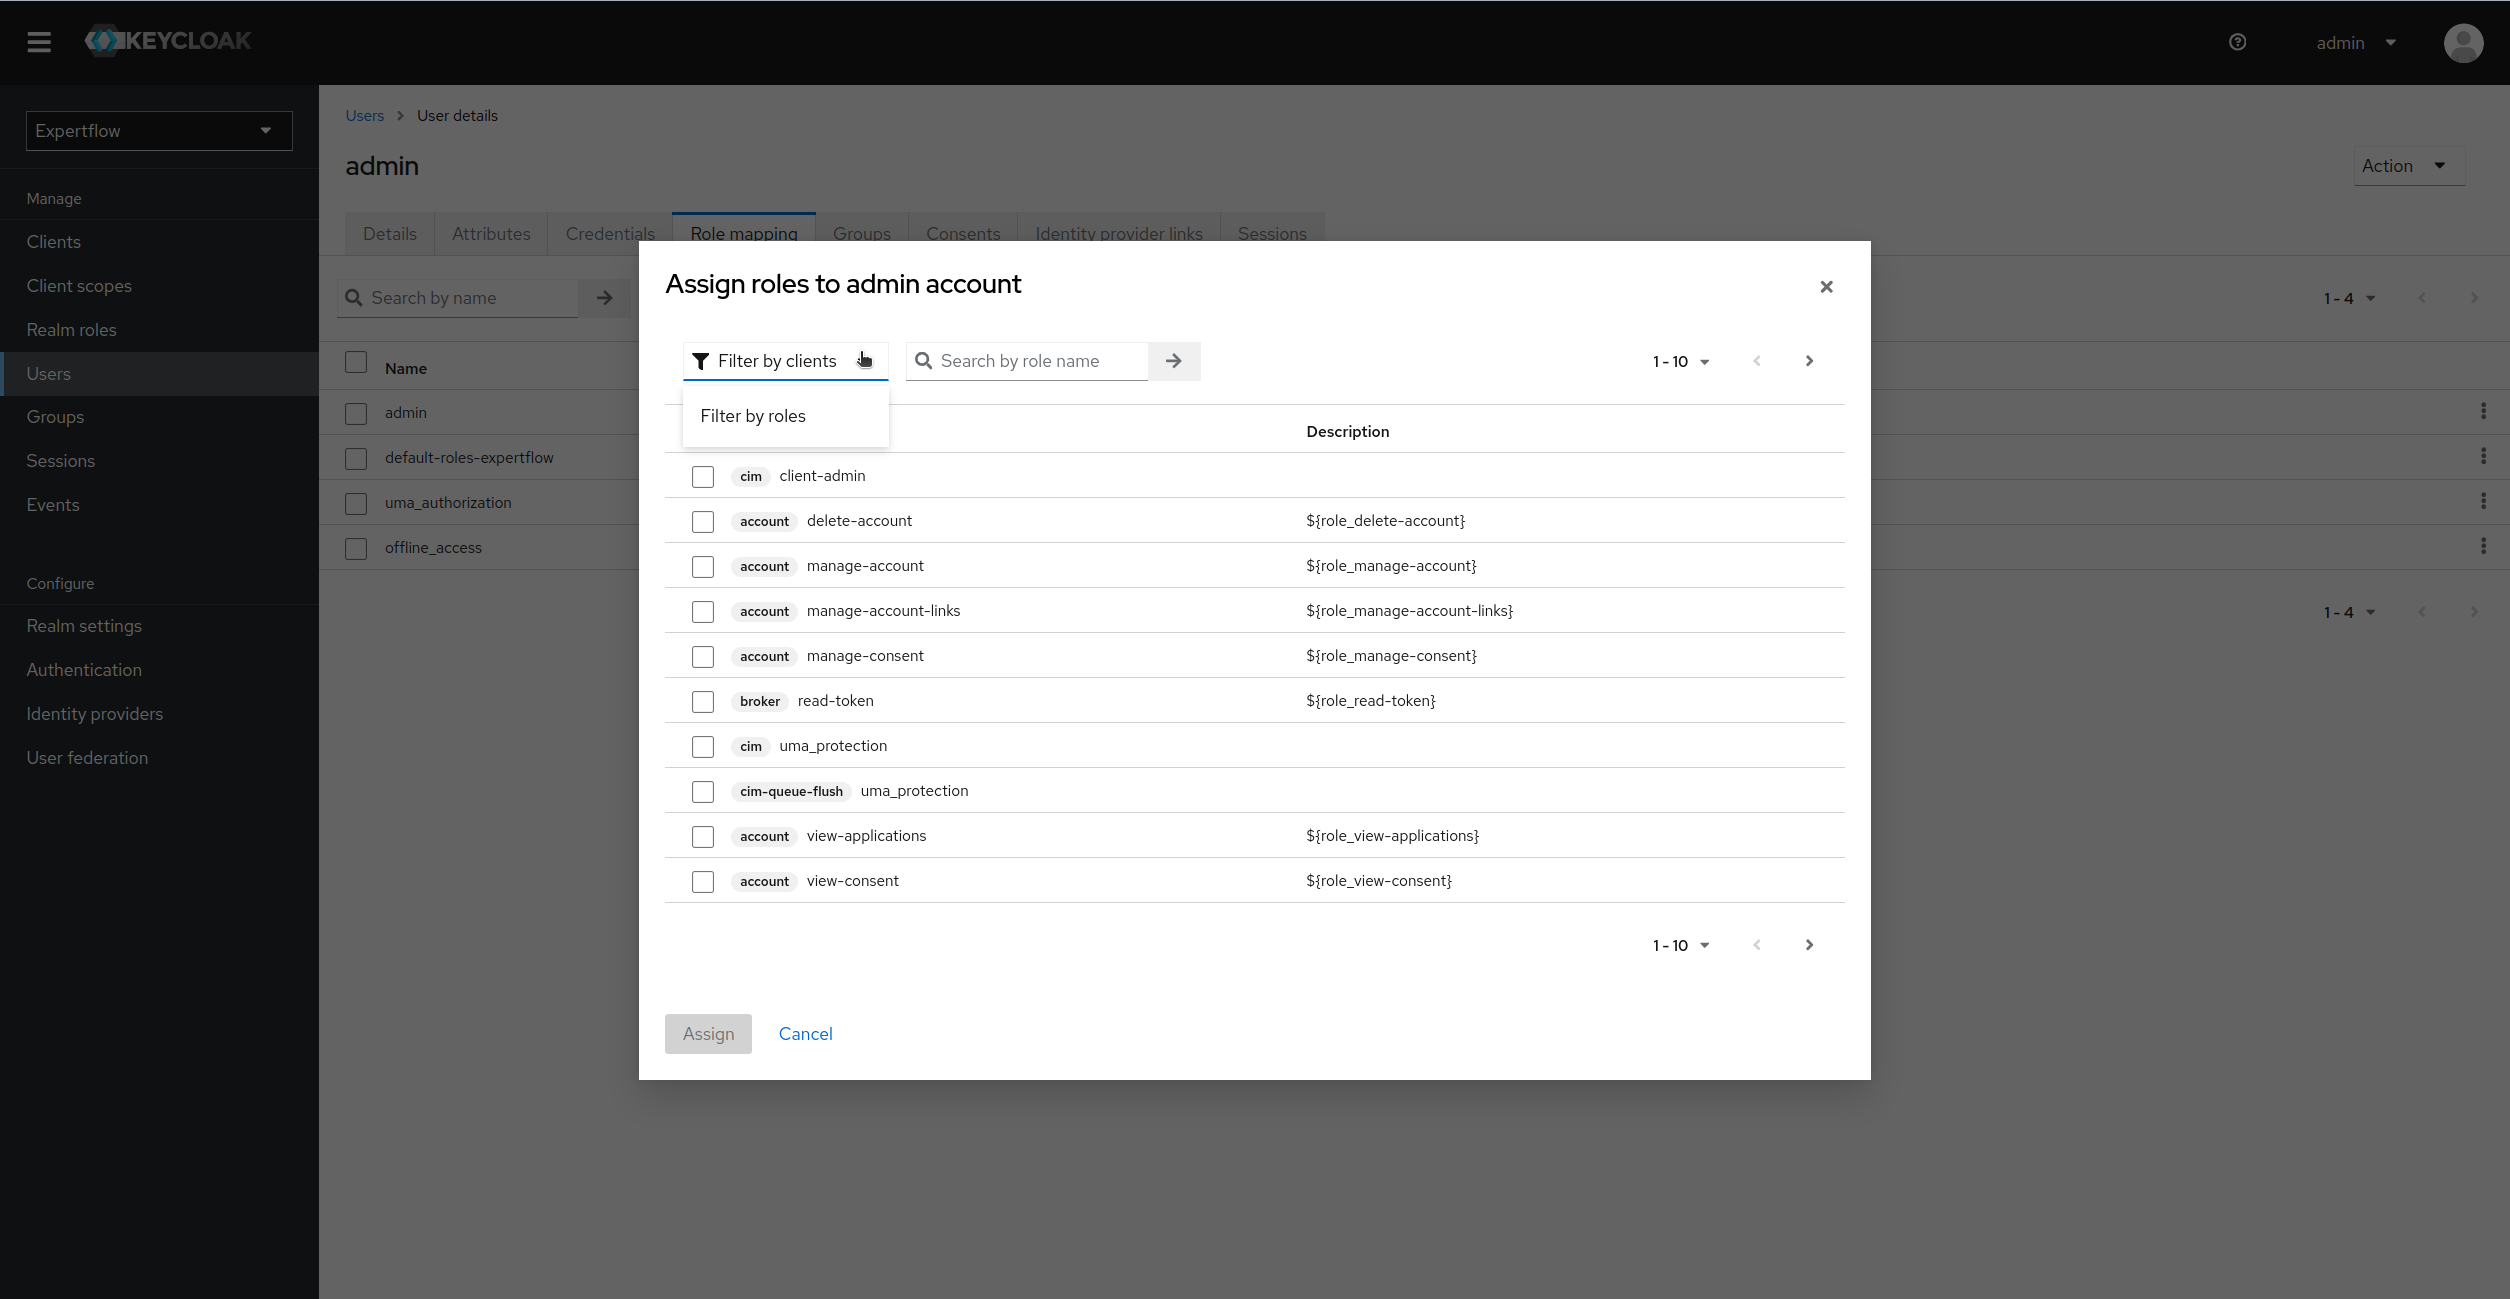
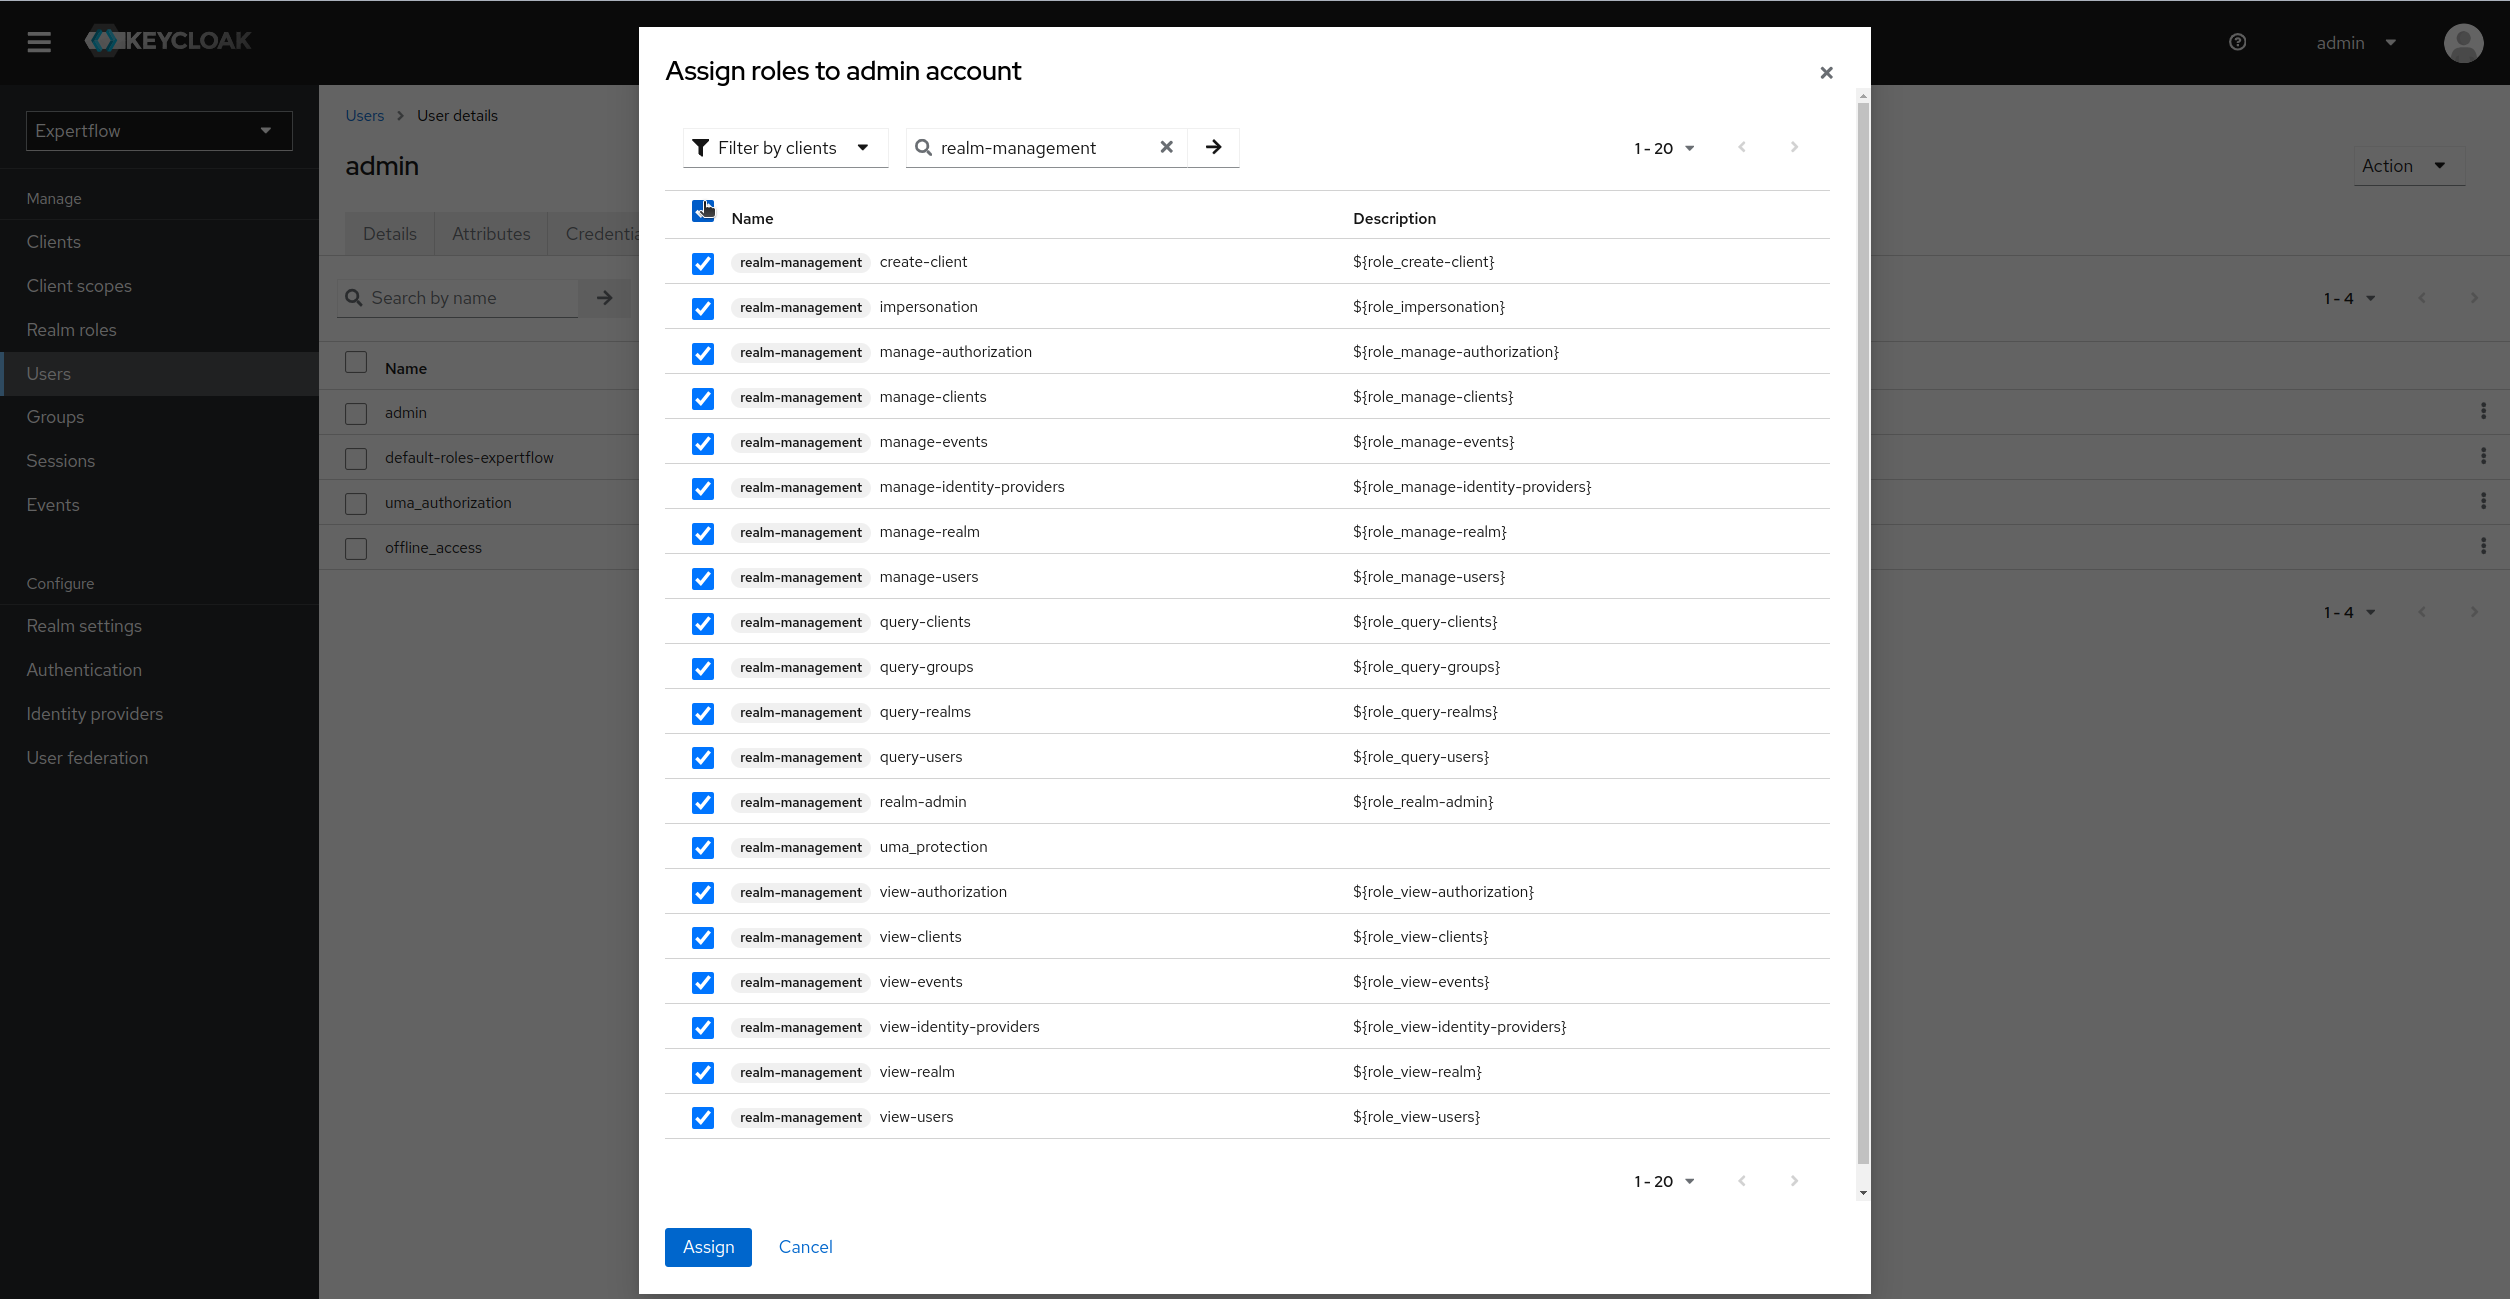
Click on Filter by Clients and select realm-management roles, select all 20 realm-management roles and assign them:
Now, our setup for Keycloak Admin user for Client Applications is completed.
Creation of Admin User for Keycloak Admin API:
-
Login to Keycloak Admin Console, select your targeted realm and then go to Users tab and then click on Add User:

-
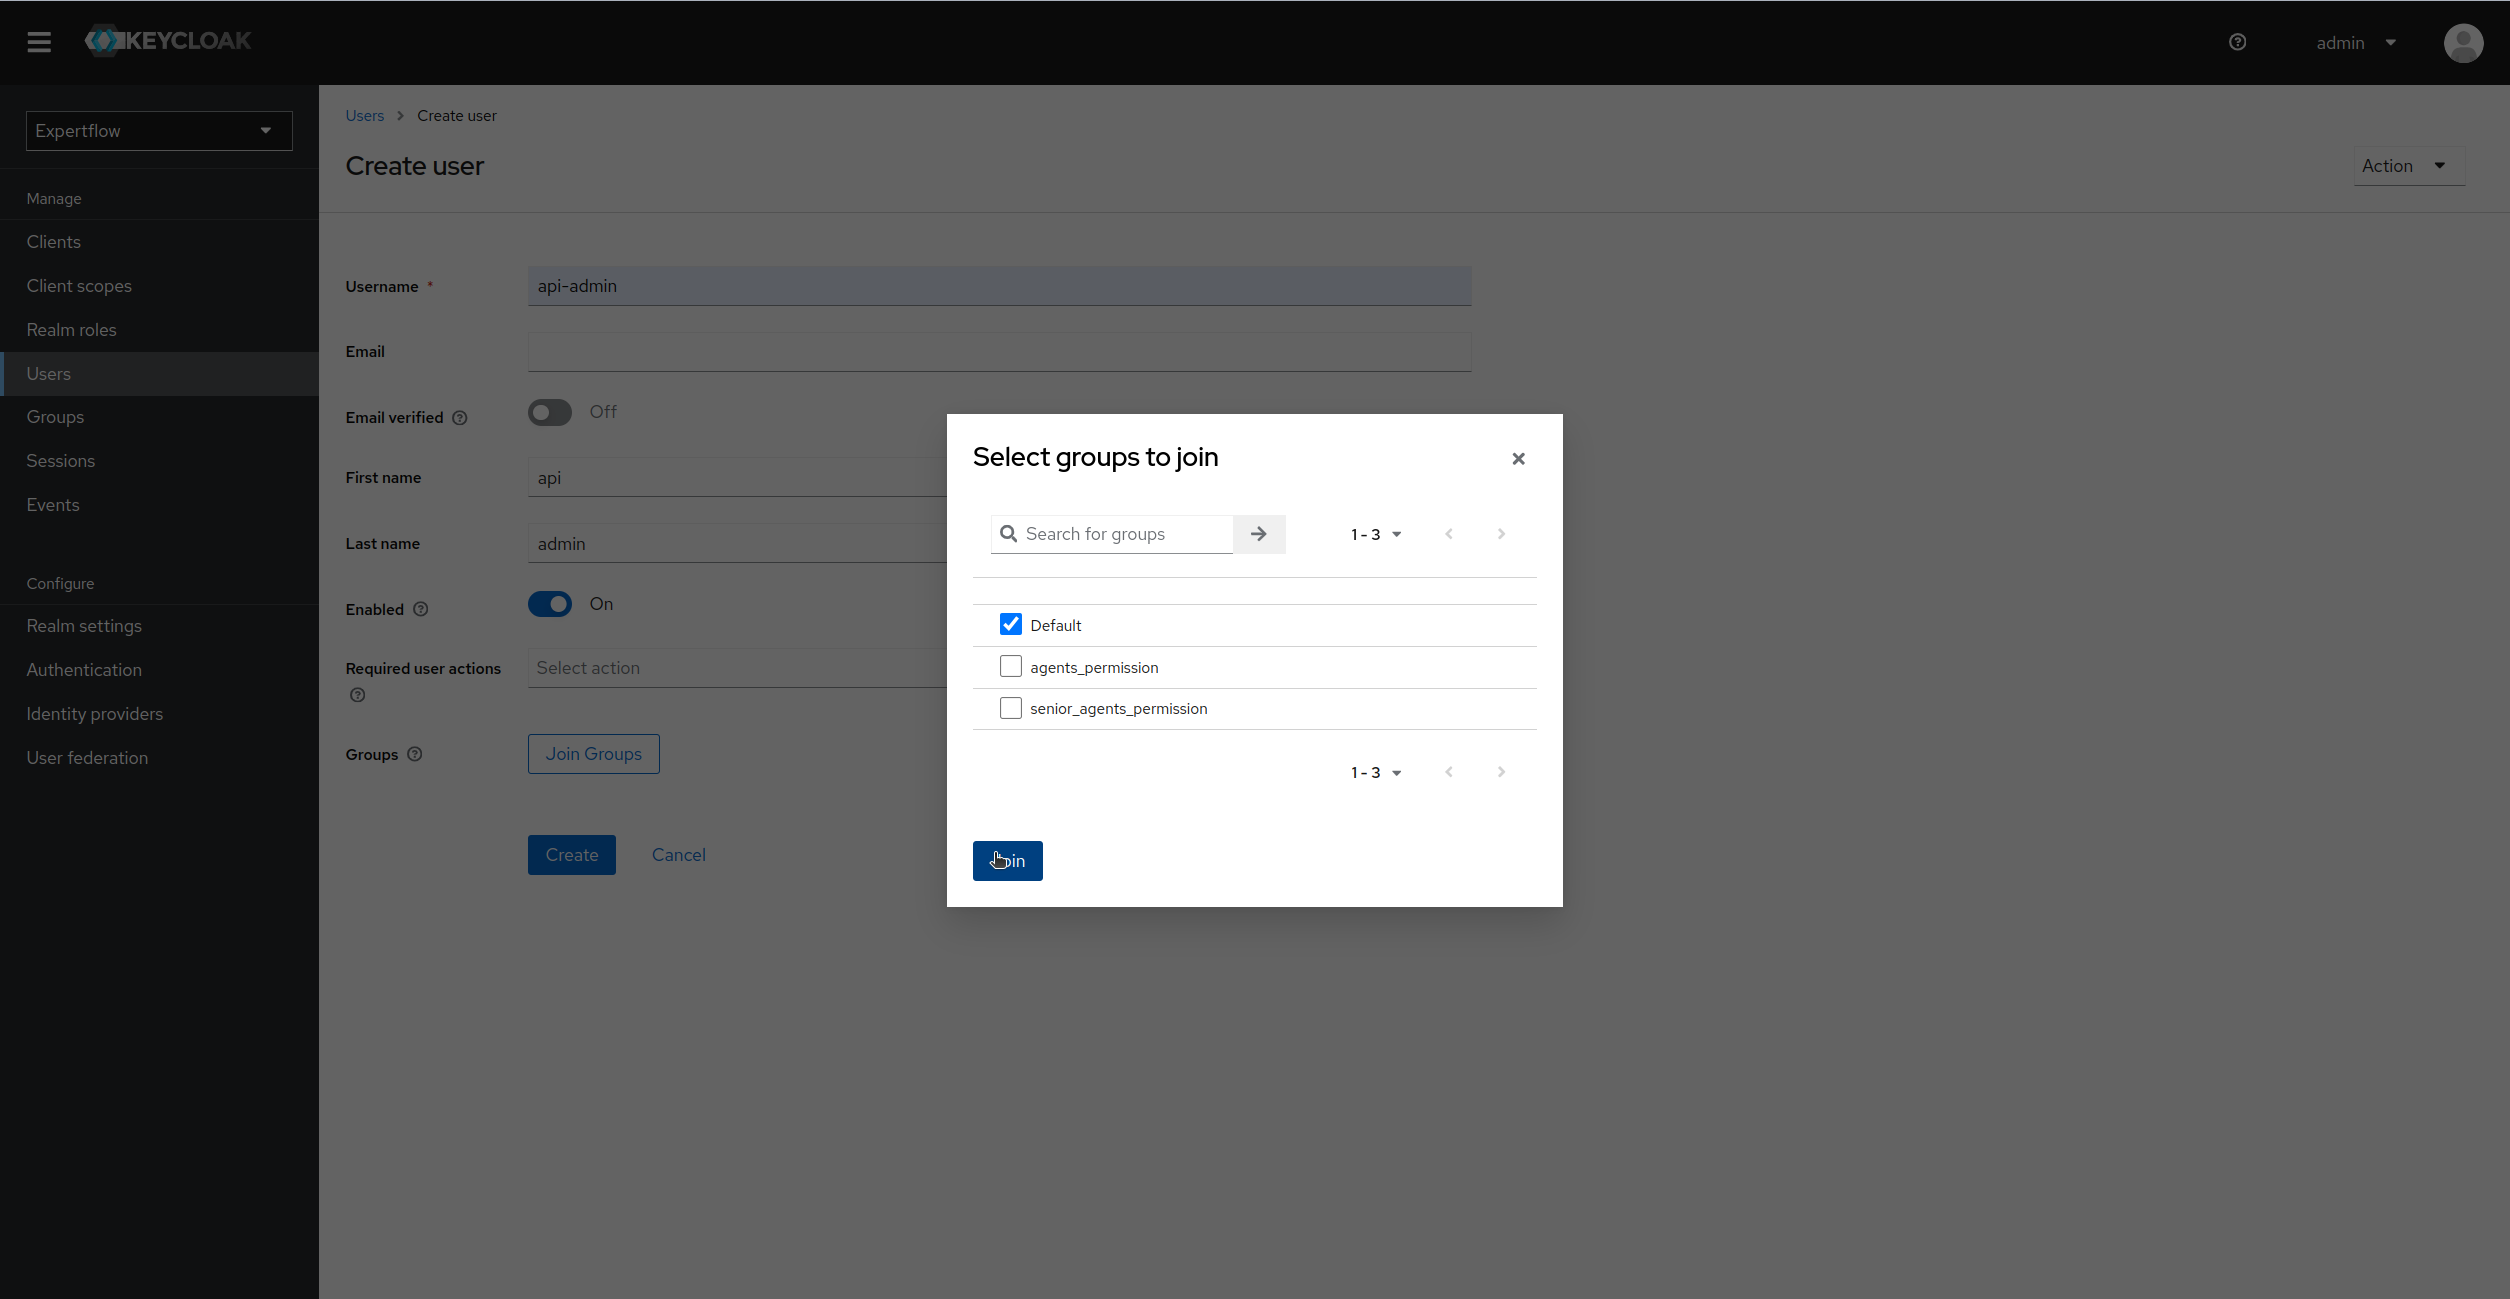
Now, provide the Username, first and last name of User and then click on Join Group and assign a Team to user, click on Create to create a user. (Default team if no other team is available)
We only need to Assign Group till 4.5.1 release. From 4.5.2, teams are moved to CX so we dont need to assign them.
-
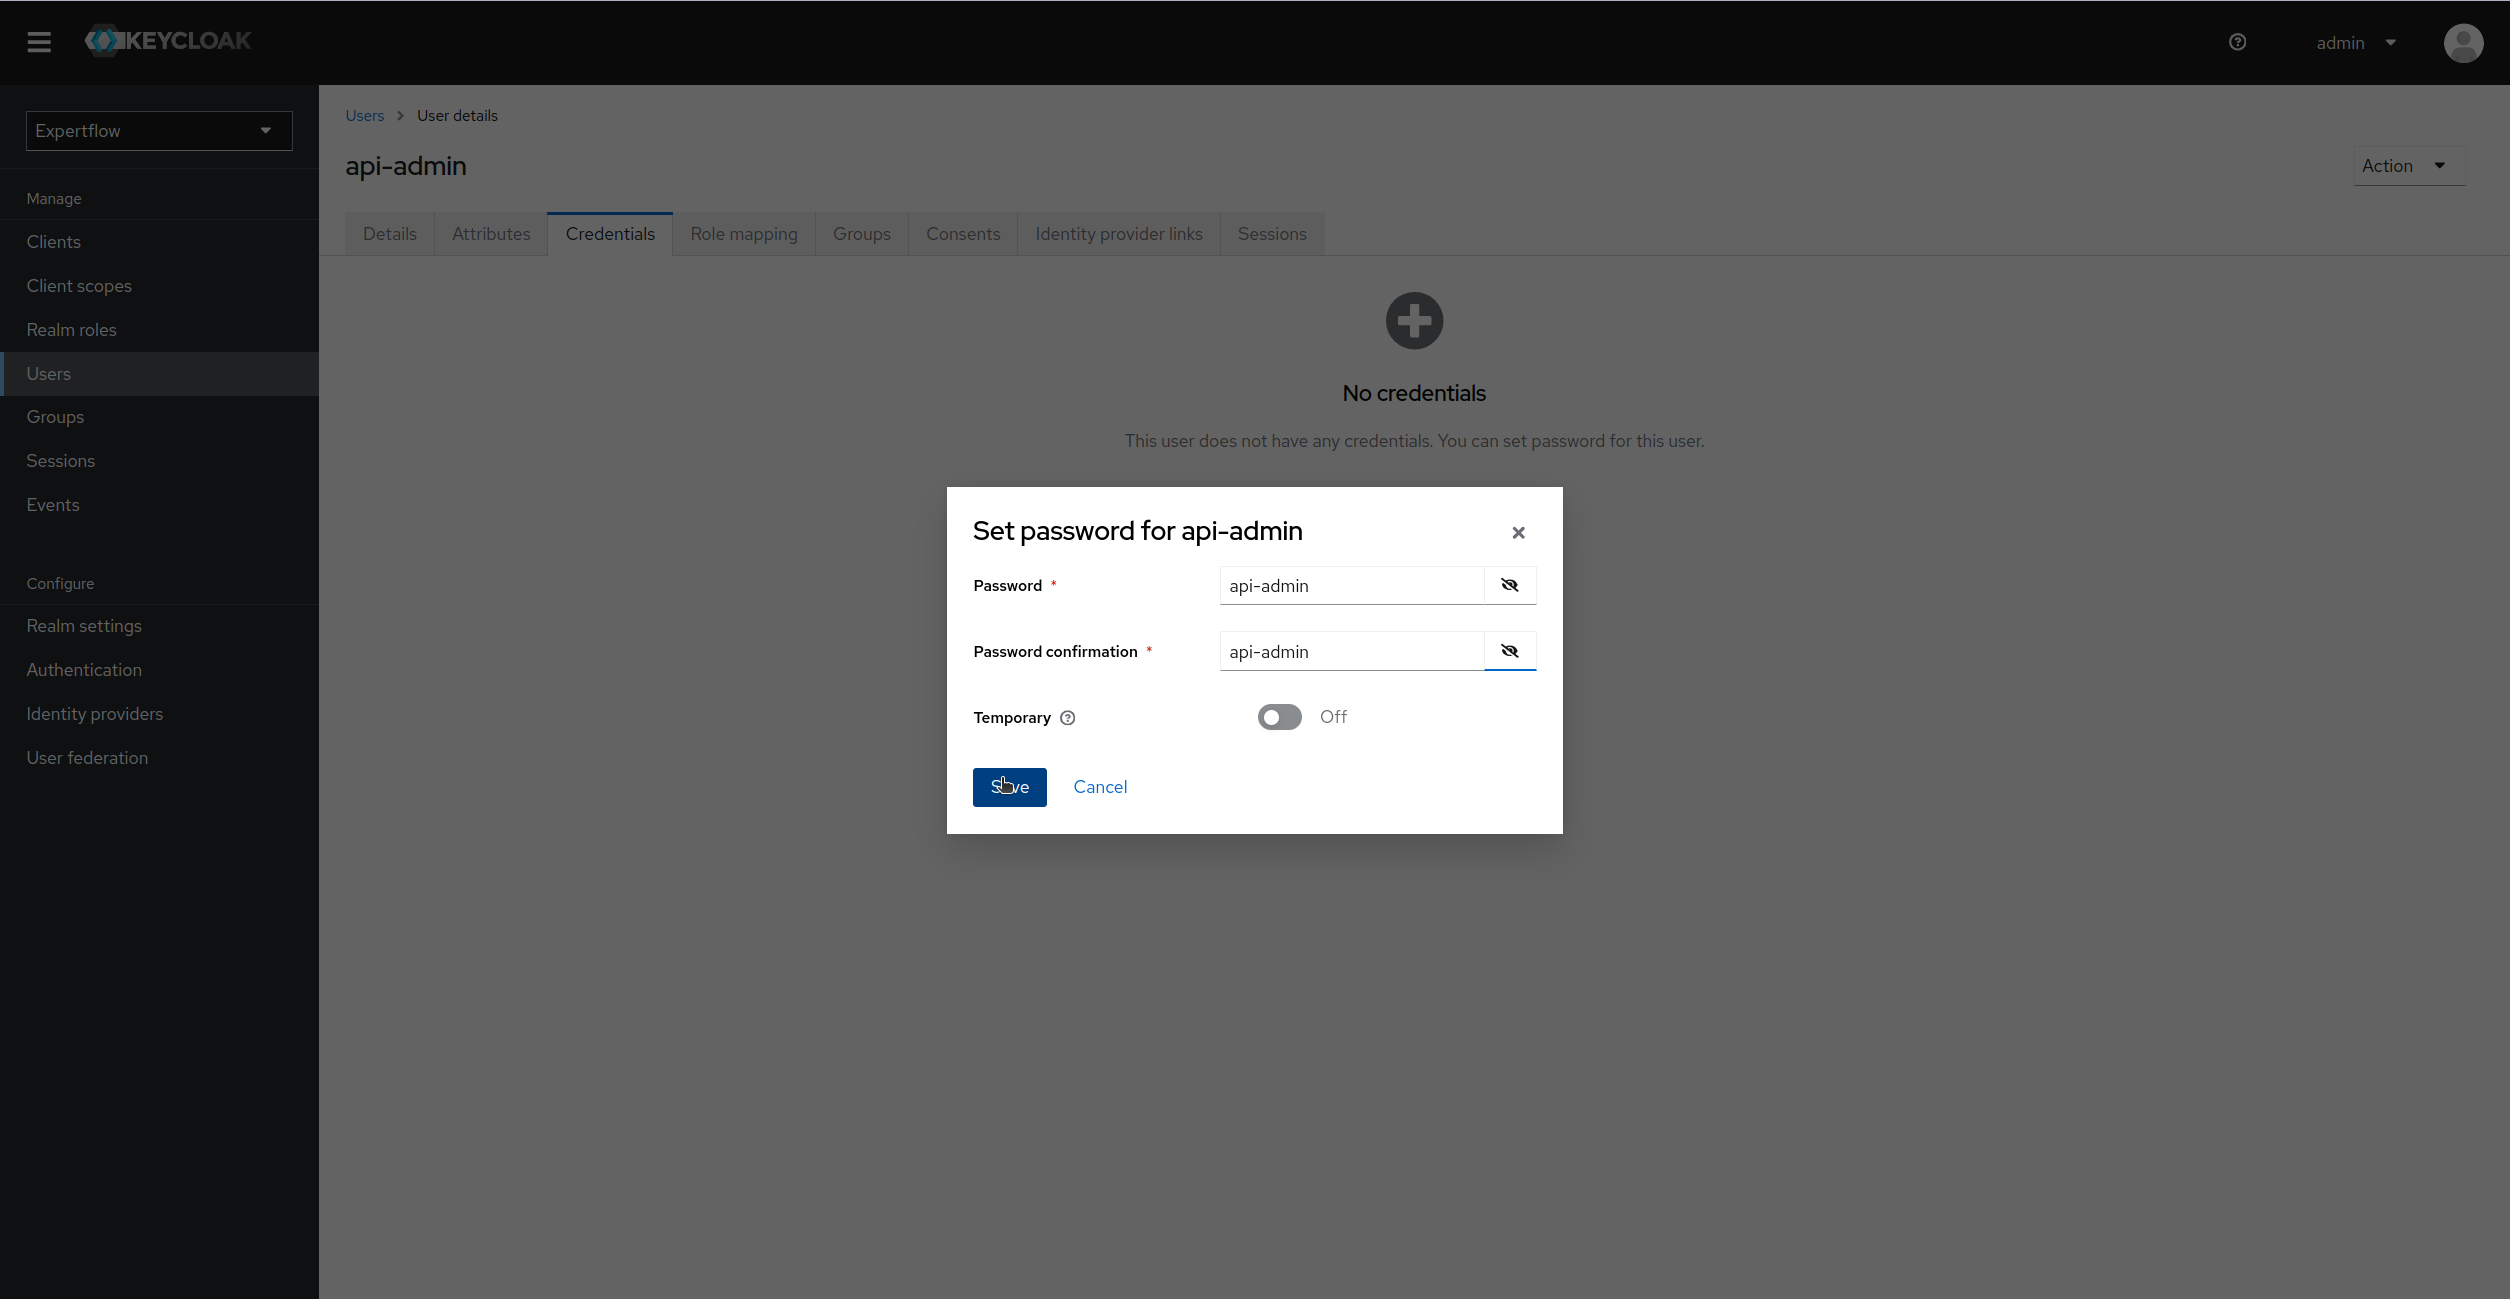
Assign Credentials to Admin user of Client Application (Set temporary as Off):
-
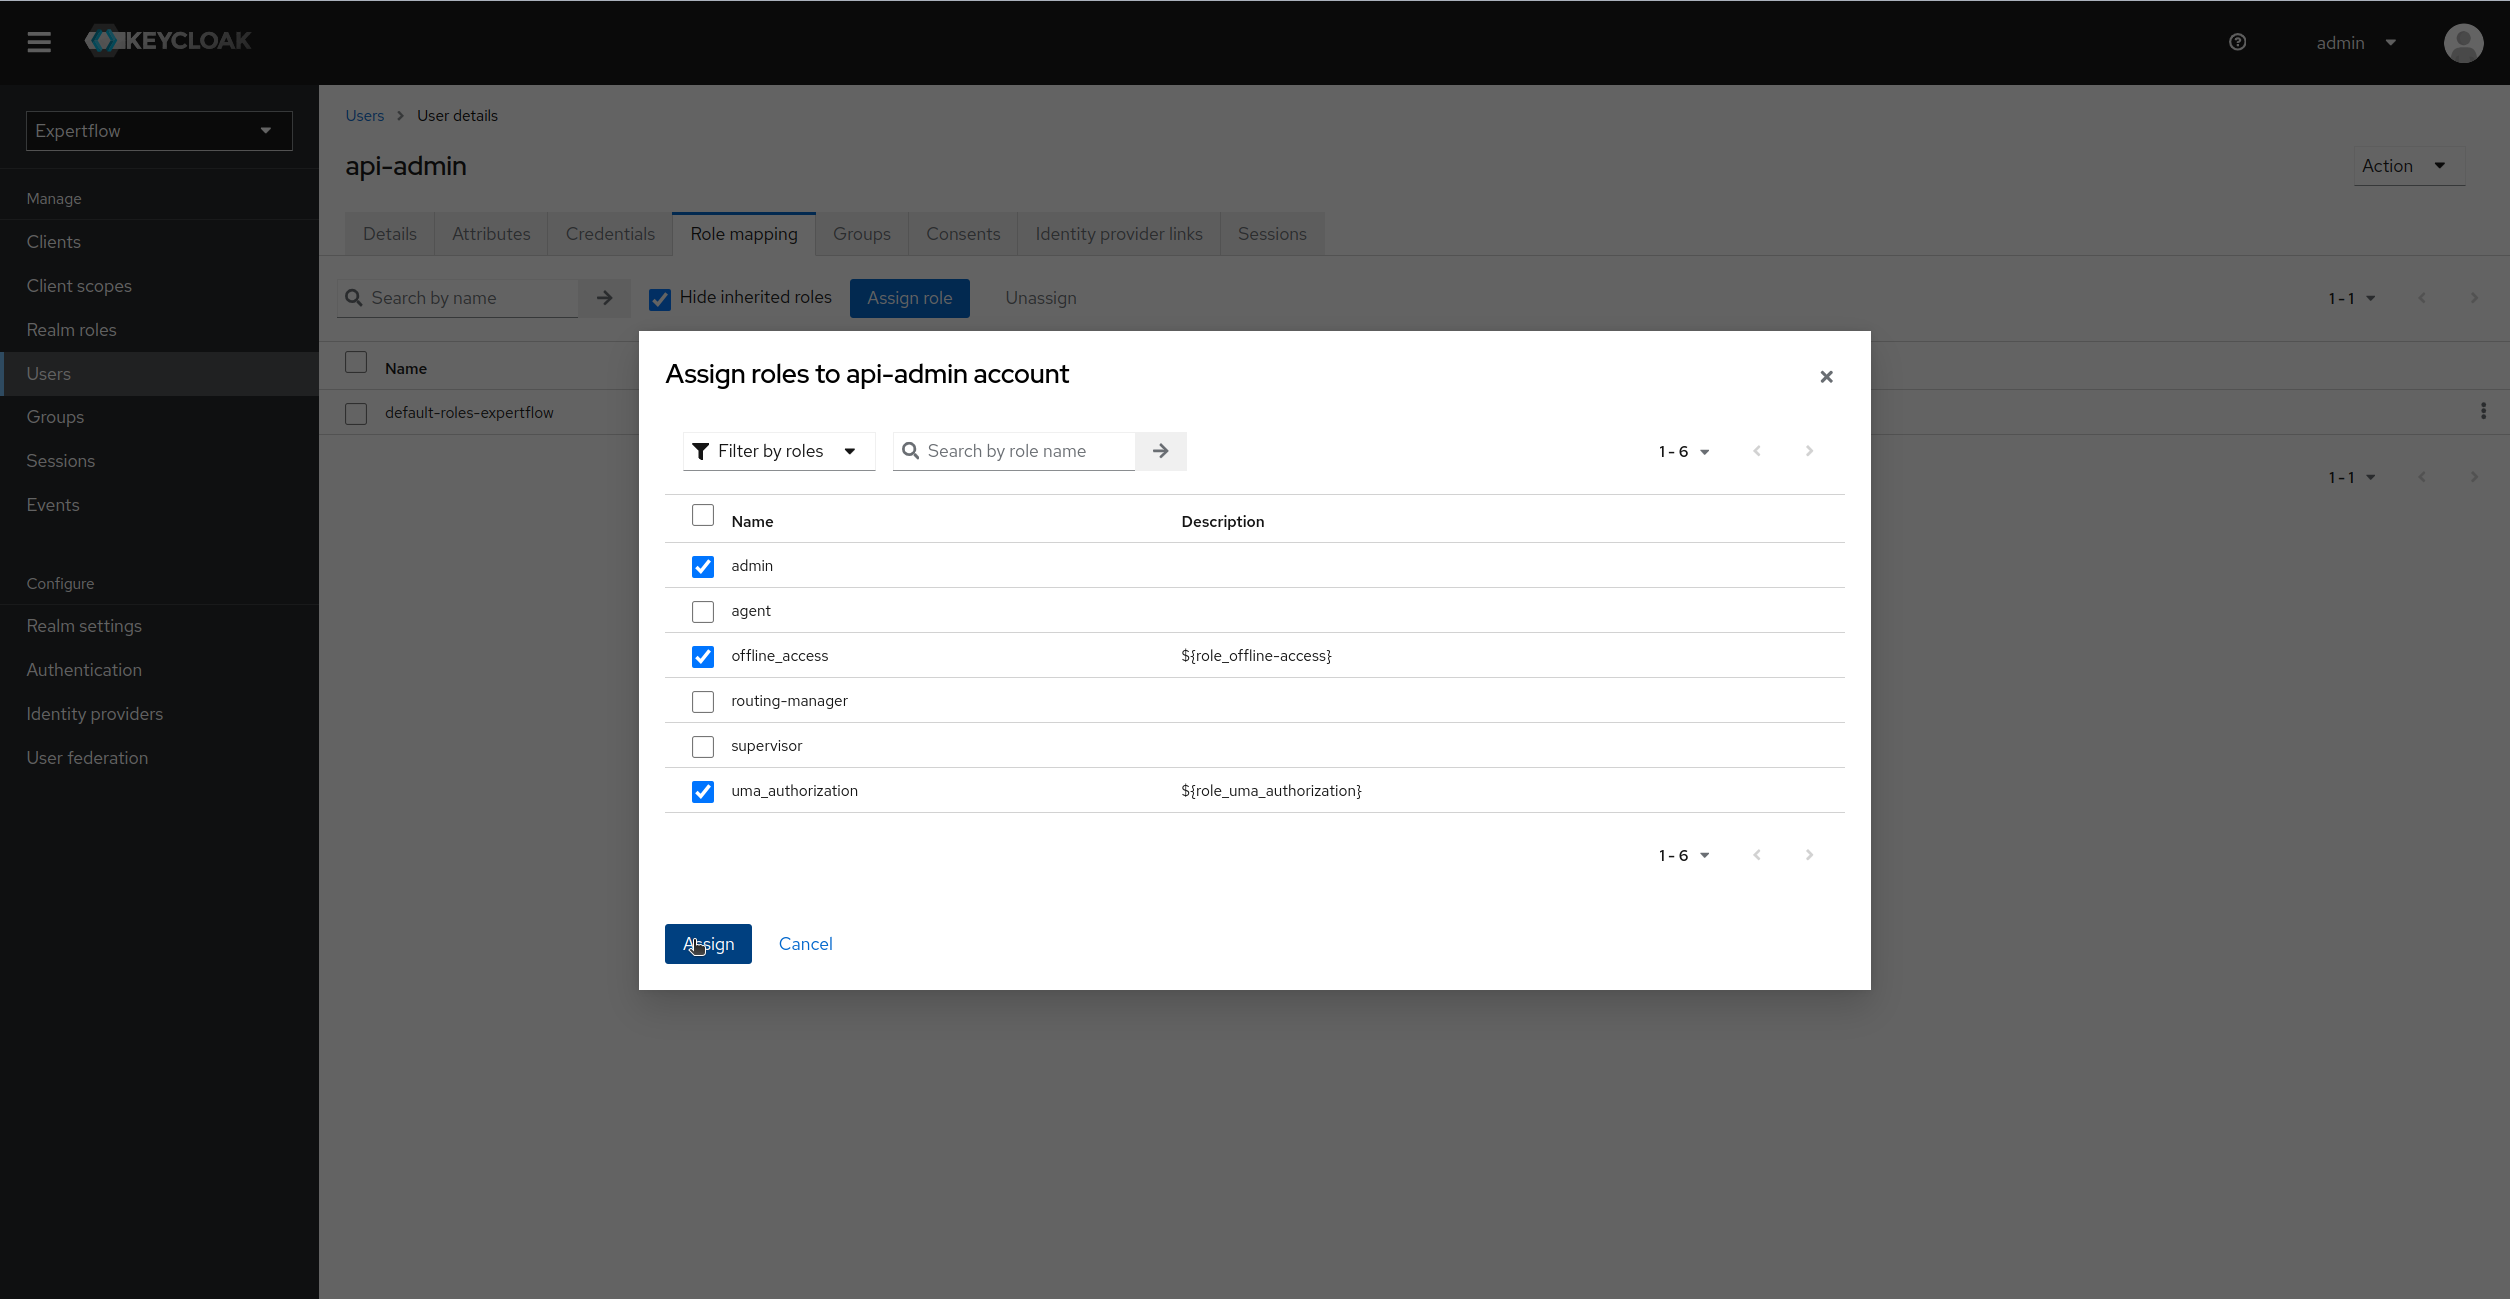
Assign the admin realm role along with offline-access and uma-authorization:
-
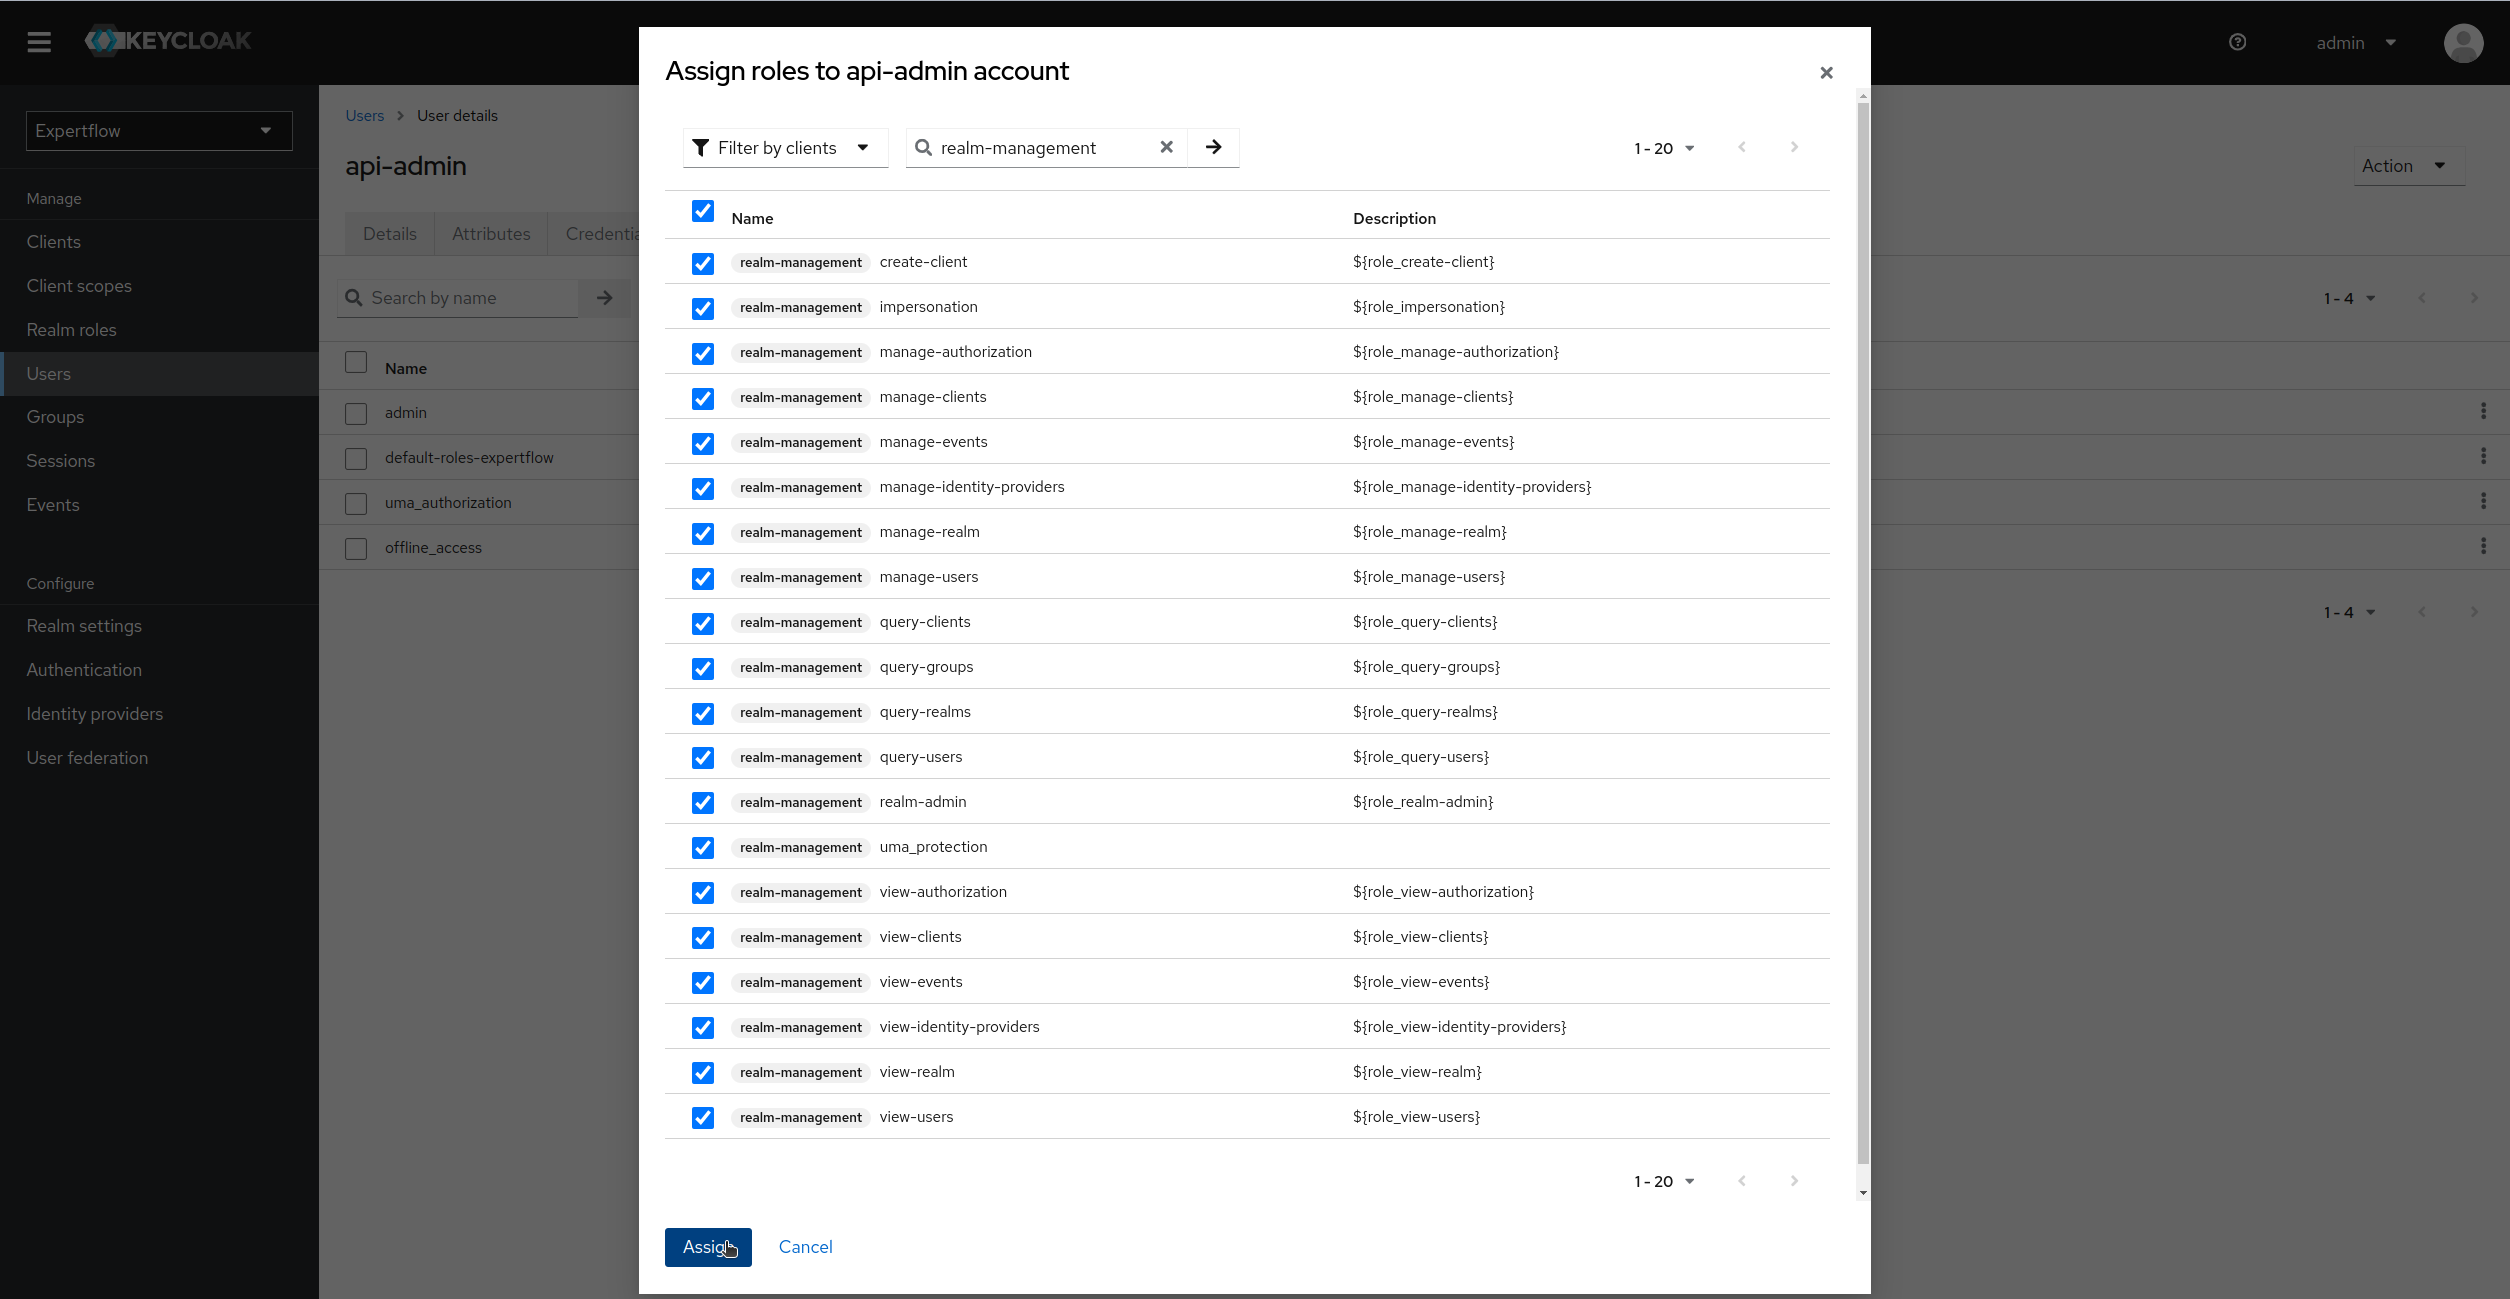
Click on Filter by Clients and select realm-management roles, select all 20 realm-management roles and assign them:
-
Update the config-map of cim-solution for correct API Admin credentials in Keycloak Configs:
-
Go to the following directory path to update config-map:
/cim-solution/kubernetes/cim/ -
delete all the deployments first using kubectl command.
kuebctl delete -f ./Deployments -
now move to the config-maps directory:
/cim-solution/kubernetes/cim/ConfigMaps -
delete the old config-map of:
ef-connection-env-configmap.yamlusing kubectl. -
edit the file:
ef-connection-env-configmap.yaml -
update the env variable
KEYCLOAK_USERNAME_ADMINwith updated API Admin User. -
update the env variable
KEYCLOAK_PASSWORD_ADMINwith updated API Admin password. -
Create the config-map
ef-connection-env-configmap.yamlagain using kubectl command. -
Move one directory back and Create the deployments again
kuebctl create -f ./Deployments
-
Now, our API Admin user is also ready to be used inside Keycloak Internal Apis.