It is essential to follow the below flow/order to achieve the desired result and avoid conflicts.
Specific Details for This Case
-
Conversation_Migration (Pipeline A): Migrates conversations data.
-
Conversation_Drop_Index (Pipeline B): Drops the index (e.g.,
customer._id) in the conversations data. This is optional and executed only after the migration of conversations data. -
Routing_Engine_and_AdminPanel_Migration (Pipeline C): Migrates data related to the
routing-engine_dbandadminPanel.
Workflow for This Case
-
Workflow 1: Routing_Engine_and_AdminPanel_Migration → Conversation_Migration → Conversation_Drop_Index
-
Workflow 2: Conversation_Migration → Conversation_Drop_Index → Routing_Engine_and_AdminPanel_Migration
How to Proceed
-
From the data_migration_config.yaml, set the following
-
mongodb credentials (
host, port, username, password, tls) -
From
bulk_repeat,start_date, end_dateas per the duration you want to run migration (details mentioned in Configurations) -
For this demonstration, we have set the
start_dateandend_dateto be “2025-01-08” to “2025-01-09”, and theintervalto 360 (6 hours)
-
It is noted that whenever the start_date and end_date are updated in the yaml file, the config map ef-transflux-config-cm is re-created and the activity will resume from here
For Conversations Migration pipeline
-
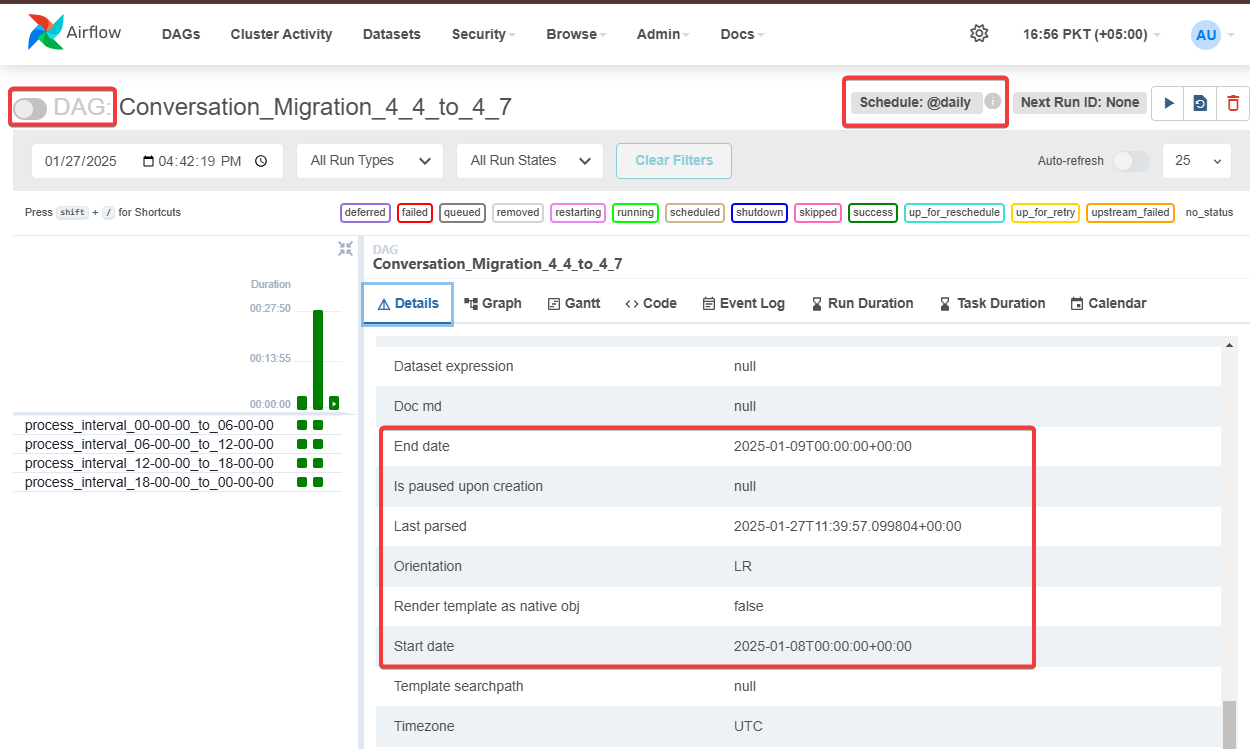
On airflow UI, within the Conversation_Migration -> Details, you should see the start and end date as set within the config from Figure 1, in the bottom. Make sure the pipeline is paused initially
-
If there are existing pipeline runs available (Green bars, to the right of figure 1.) and this is your first time running the pipeline after adjusting the configuration, then
-
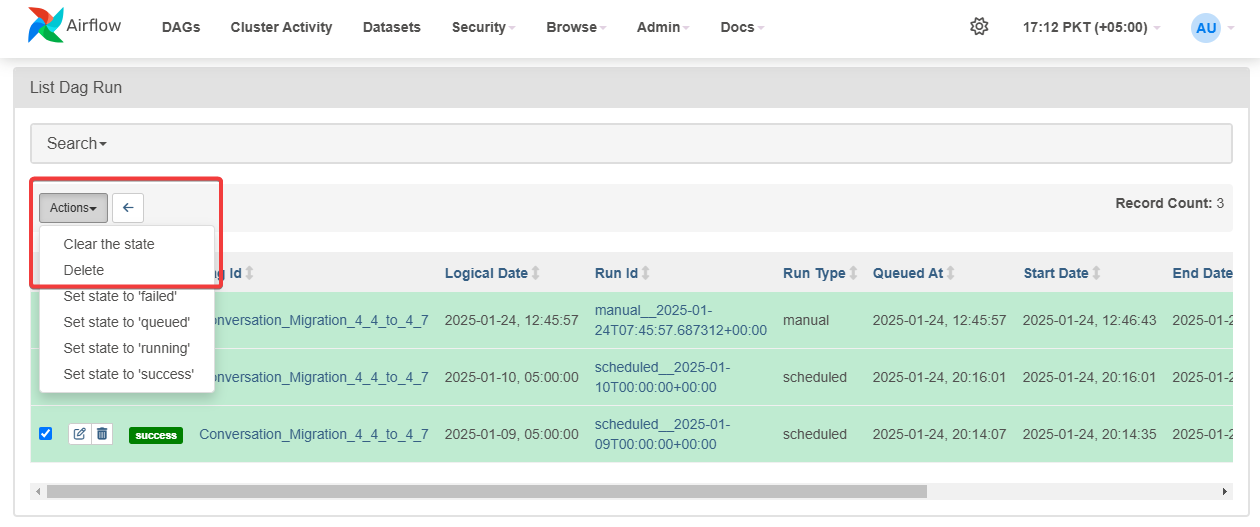
Click on Schedule (Refer to Figure 1), you will see all the instances ran, select all of them and delete from actions button (Refer to Figure 2.)
-
-
Go back to the Conversation_Migration pipeline, now you will see there will be no runs available (green bars) and the next RUN ID (next to the schedule in figure 1.) is set to the
start_dateas configured in the yaml file (Refresh the tab till the changes reflects) -
Switch to Graph, next to Details tab (Refer to figure 1.) to see the graphical view, this will show you the interval wise task as set within the config file
-
Resume the pipeline and refresh the window,/tab you will see the tasks running in the graphical view section. Make sure to turn on the auto-refresh to keep seeing the most recent state.
-
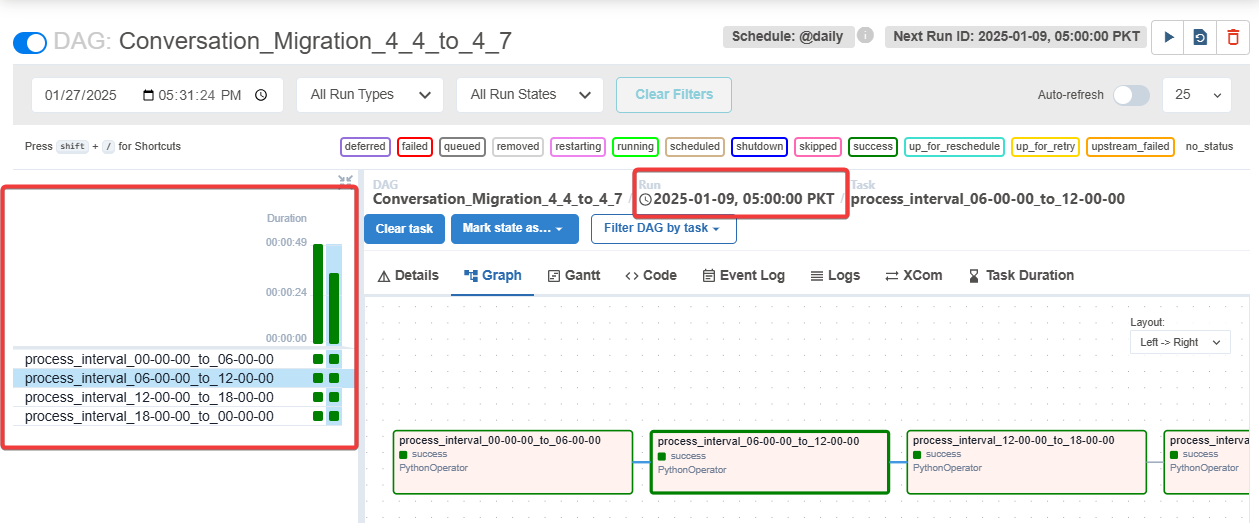
As the pipeline runs, there are few things that need to be observed (Refer to Figure 3.)
-
pipeline instance: To check whether the task instance of the specific date has run successfully (Left green bars), the square boxes highlights the task of that interval and vertical bar highlights the overall state of that pipeline instance of that date
-
Run Date: The date on which pipeline instance has been launched and completed.
-
For Conversation DropIndex and Routing Engine & adminPanel pipeline
-
The Conversation_Drop_Index and Routing_Engine_and_AdminPanel_Migration has no batching in place, as it is designed for only one time run. Therefore, you just need to un-pause the pipeline and trigger it
Rollback Plan
-
If for some reason, the data didn’t come for a specific interval, (lets say from 06:00:00 to 12:00:00 of 2025-01-09). and we want to execute that interval again,
-
Click on the small green square (Refer to figure 3.) of that interval and select “Clear task”. This will open a new dialogue, select the “Recursive” option and then Clear (Refer to figure 4). This will clear up that task at that interval and queue it up for re-run
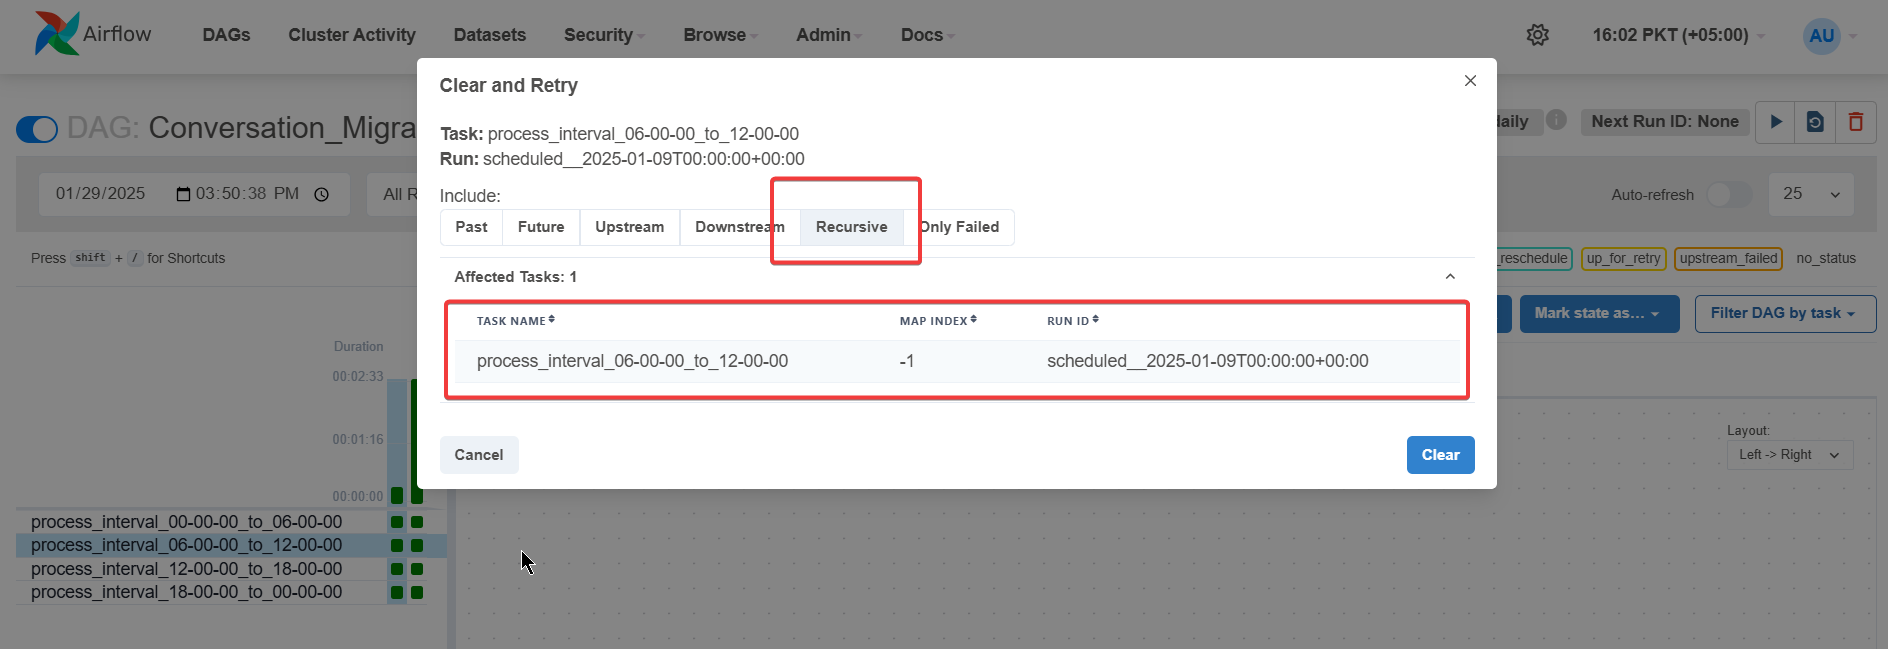
Figure 4. Highlighting the task re-run dialogue when Clear Task button is pressed
-
-
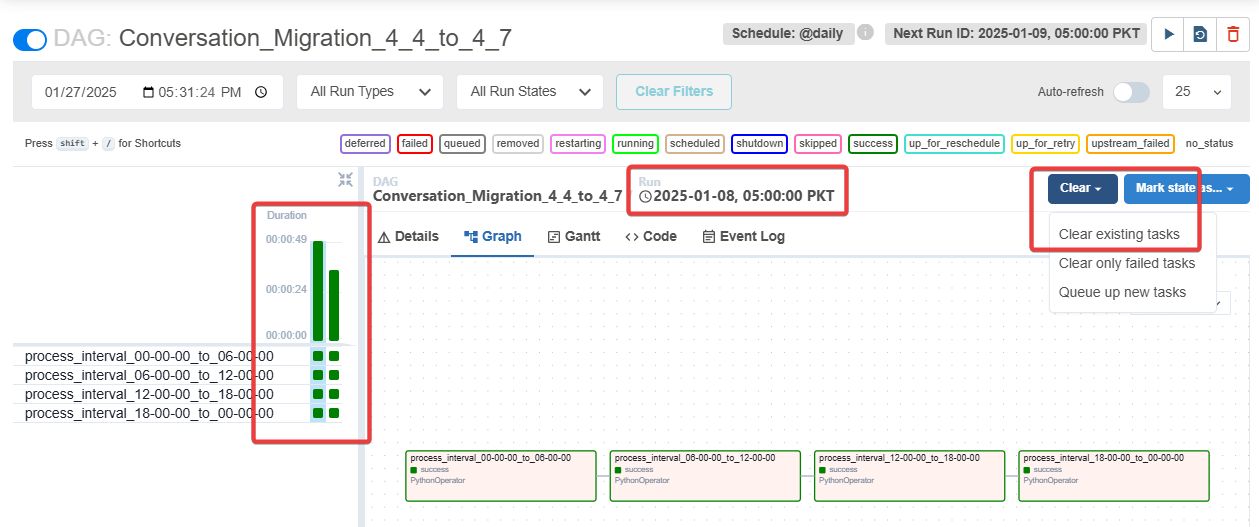
If we want to re-run for the entire day (lets say for 2025-01-08),
-
Click on the vertical bar at that time, then Clear → Clear existing tasks, this will re-run the entire instance on that date (Refer to figure 5.), refresh the tab if necessary.
-
-
It is recommended to pause the pipeline while clearing states to synchronize the schedule with the latest state.
Data Validation
To ensure the accuracy and consistency of the migrated data, follow these steps for validation:
-
Create a Separate Database:
-
Create the the database in target Database Management System using the scripts from
cim-solution/kubernetes/pre-deployment/reportingConnector/SQLScripts/dbcreationdirectory.
-
-
Deploy the Reporting Connector:
-
Deploy reporting connector to enable seamless access to the migrated data in the separate database. For helm based deployment of reporting connector refer to CX Reporting section in Helm-based Deployment for Expertflow CX
-
-
Check the Latest Migrated Data in Superset Reports:
-
Review data in Superset reports to verify the completeness and correctness of the migrated data.
-