Overview
WhatsApp is a supported customer channel that allows businesses to start a conversation with a bot, an agent and a customer to interact with each other.
Intended Audience
This document serves as a guide to the business on how to configure WhatsApp Channel and start the conversation.
Getting Started
Before You Start
You will need:
-
A Meta developer account — learn more about registering as a Meta developer.
-
A business app — learn more about creating apps. If you don't see an option to create a business app, select Other > Next > Business).
Step 1: Add The WhatsApp Product To Your App
At this point, if you created a new app, you’ll be prompted to Add products to your app. Scroll down, and under WhatsApp, select Set up. Otherwise, select your app from the My Apps screen, and you can follow the same instructions again to add WhatsApp to your app.
Step 2: Add a Recipient Number
Add a valid WhatsApp number where you can send test messages.
In the left-hand menu of the App Dashboard, navigate to WhatsApp > API Setup. Under Send and receive messages, select the To field and choose Manage phone number list.
You can add any valid WhatsApp number as a recipient. The recipient number will receive a confirmation code in WhatsApp that can be used to verify the number.
Once you verify the recipient number, it should now be selected in the To field. Repeat this process if you’d like to add another recipient, up to 5 in total for test number.
Note: The from field will contain the Test number that can be used to test conversation. Later on, you can add any business WhatsApp waba based number to make it live.
Step 3: Send a Test Message
Send the pre-approved hello_world template message to your chosen recipient number.
In the WhatsApp > API Setup panel:
-
Ensure your test business phone number is selected in the From field.
-
Ensure you have the recipient phone number you would like to message selected in the To field. If you have multiple numbers added, you can send multiple messages at once.
-
In the Send messages with the API panel, click the Send message button.
Step 4: Configure Webhook
With webhook, you can receive real-time notifications of changes to specific objects. In WhatsApp, webhook can notify you of many events in your app, like message delivery, read notifications and even account changes.
-
Go to Add Product page
-
Select Webhooks. It will add “Webhook” to your App.
-
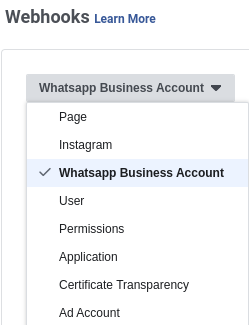
Then Select Webhooks from the left Navigation Menu.
-
Select Whatsapp Business Account as the object you want to subscribe to and click "Subscribe to this object" button
-
Provide the whatsapp connector specific configuration for the webhook endpoint exposed on the whatsapp connector. Enter the webhook URL as follows;
-
Webhook URL: https://{{SERVER-FQDN}}/whatsapp-connector/webhook/{{Phone number ID}}
-
Add Verify Token. Now, this verify token must be same as the WHATSAPP-PAGE-ACCESS-TOKEN variable in unified-admin configuration.
-
-
Click Verify & Save. This will be saved only if the webhook URL and the token are valid.
-
On the App dashboard, subscribe to "messages" field to get the updates around Messaging.
Step 5: Generate/Access the Page Access Token
Although User access tokens are supported and can be used by all app developers, you likely will only use them when you first use the App Dashboard for temporary testing.
This is because user access tokens expire quickly, so you will have to keep generating a new one every few hours.
Creation of a Short-Lived Page Access Token
Access the App Dashboard > WhatsApp > API setup panel. This panel always generates a new User access token whenever you visit it. The token is automatically scoped to your user, since you are signed into your developer account when you access the panel.
Creation of a Long-Lived Page Access Token
User access tokens come in two forms: short-lived tokens and long-lived tokens. Short-lived tokens usually have a lifetime of about an hour or two, while long-lived tokens usually have a lifetime of about 60 days.
As mentioned above, the ultimate page access token is generated using the user access token, therefore, we will start with generation of a user access token and then using the user access token, we will generate a long-lived page access token.
-
Navigate to https://developers.facebook.com/tools/explorer/ to launch the Graph API Explorer Tool which is used to generate a short-lived user access token (valid for 1hr).
-
On the Graph API Explorer window that opens on your browser, edit the from me?fields=id,name to me/accounts
-
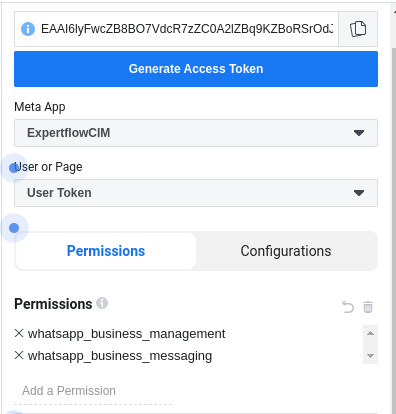
On the form to the right of your screen, select the App on the Meta App dropdown menu
-
On the User or Page select dropdown, select Get User Access Token
-
On the permissions field. Select the permissions shown in the screenshot.
-
Click Generate Access Token button and then Submit
-
Copy the access token on the Access Token field and store it somewhere as you will need it in the next step.
-
-
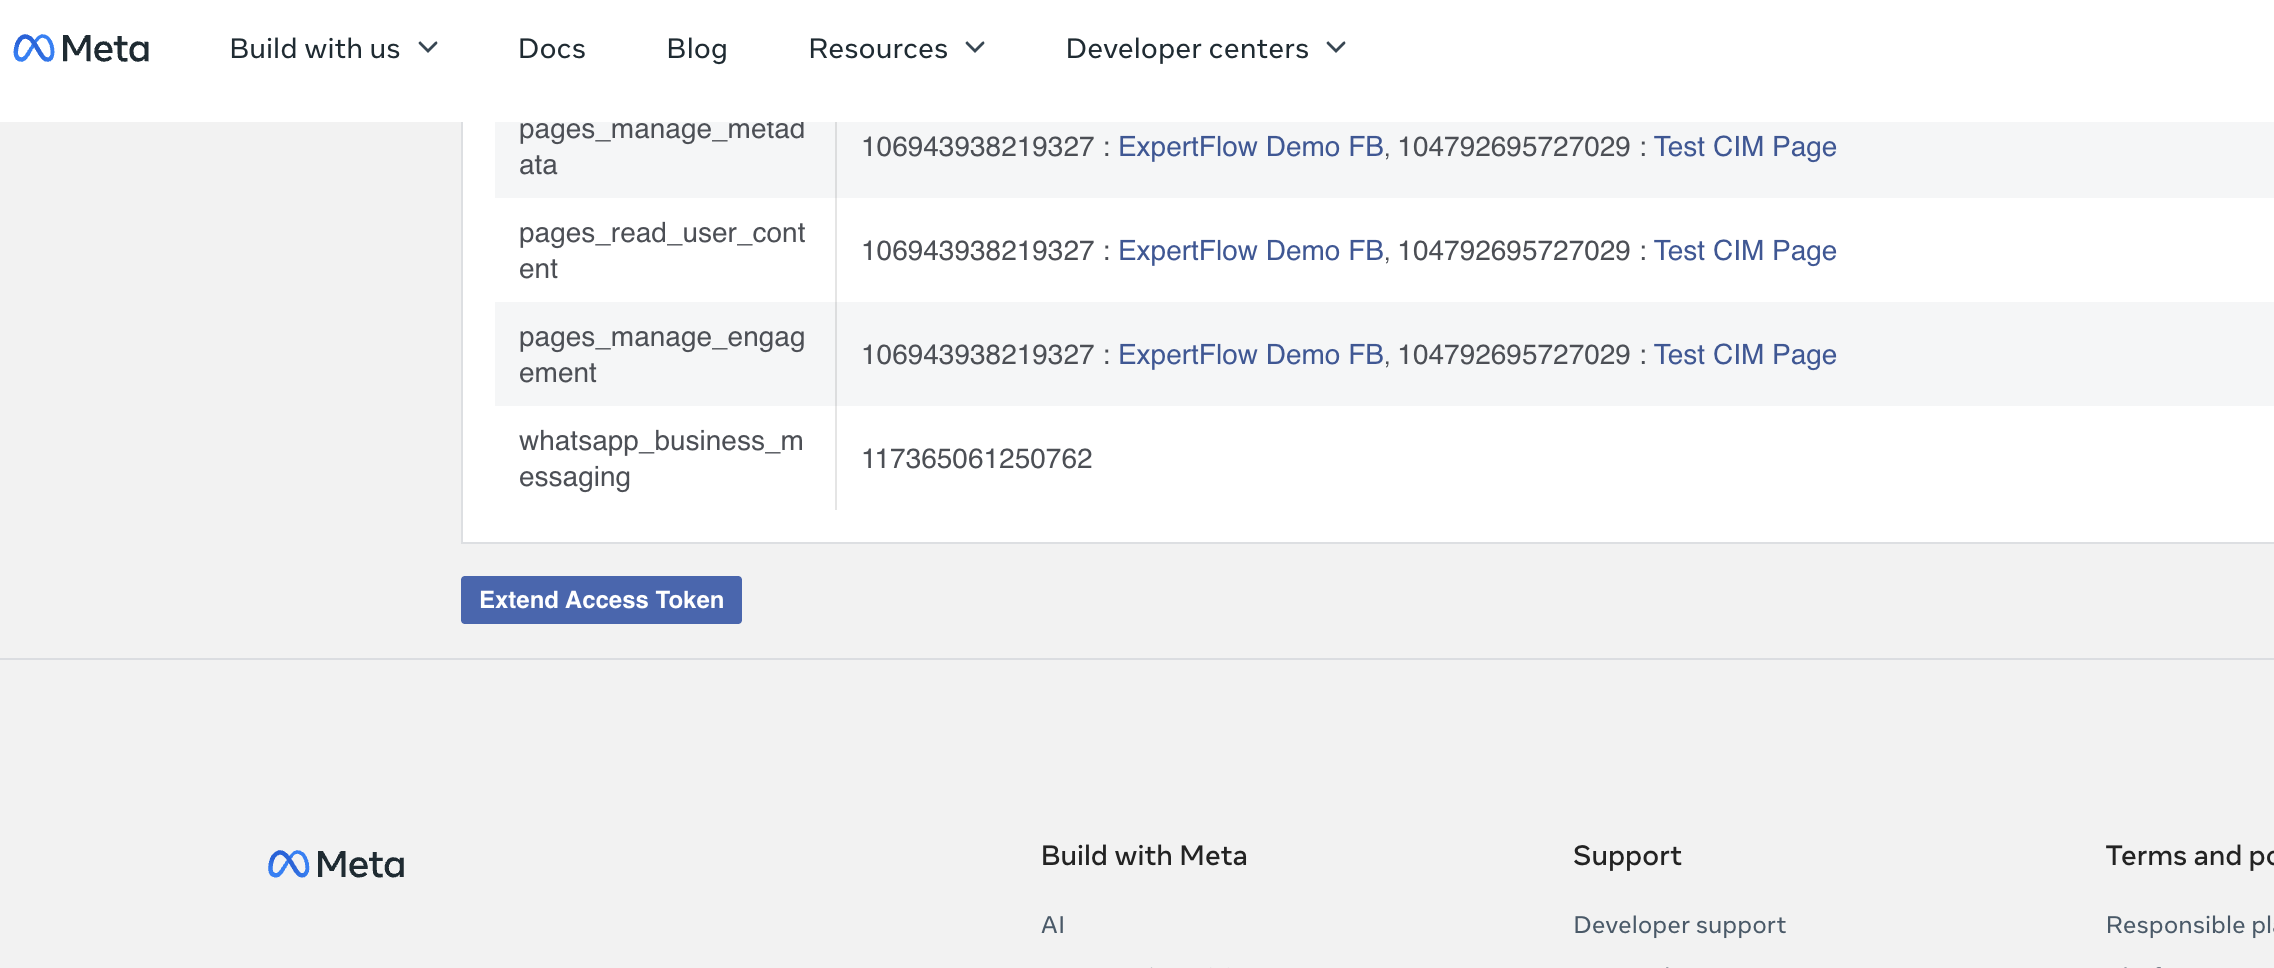
Navigate to https://developers.facebook.com/tools/debug/accesstoken and add your temporary (short-lived) access token in the search bar and press “Debug” button.
-
You will see details of that token in the table popped up.
-
At the end of it, you will see “Extend Access Token” button as shown in the screen shot below.
-
By pressing it, it will become long-lived token with no expiry.
-
Unified Admin Configuration
To set up Whatsapp Channel, the Whatsapp connector needs to be configured in the Unified Admin of the Expertflow CX's application.
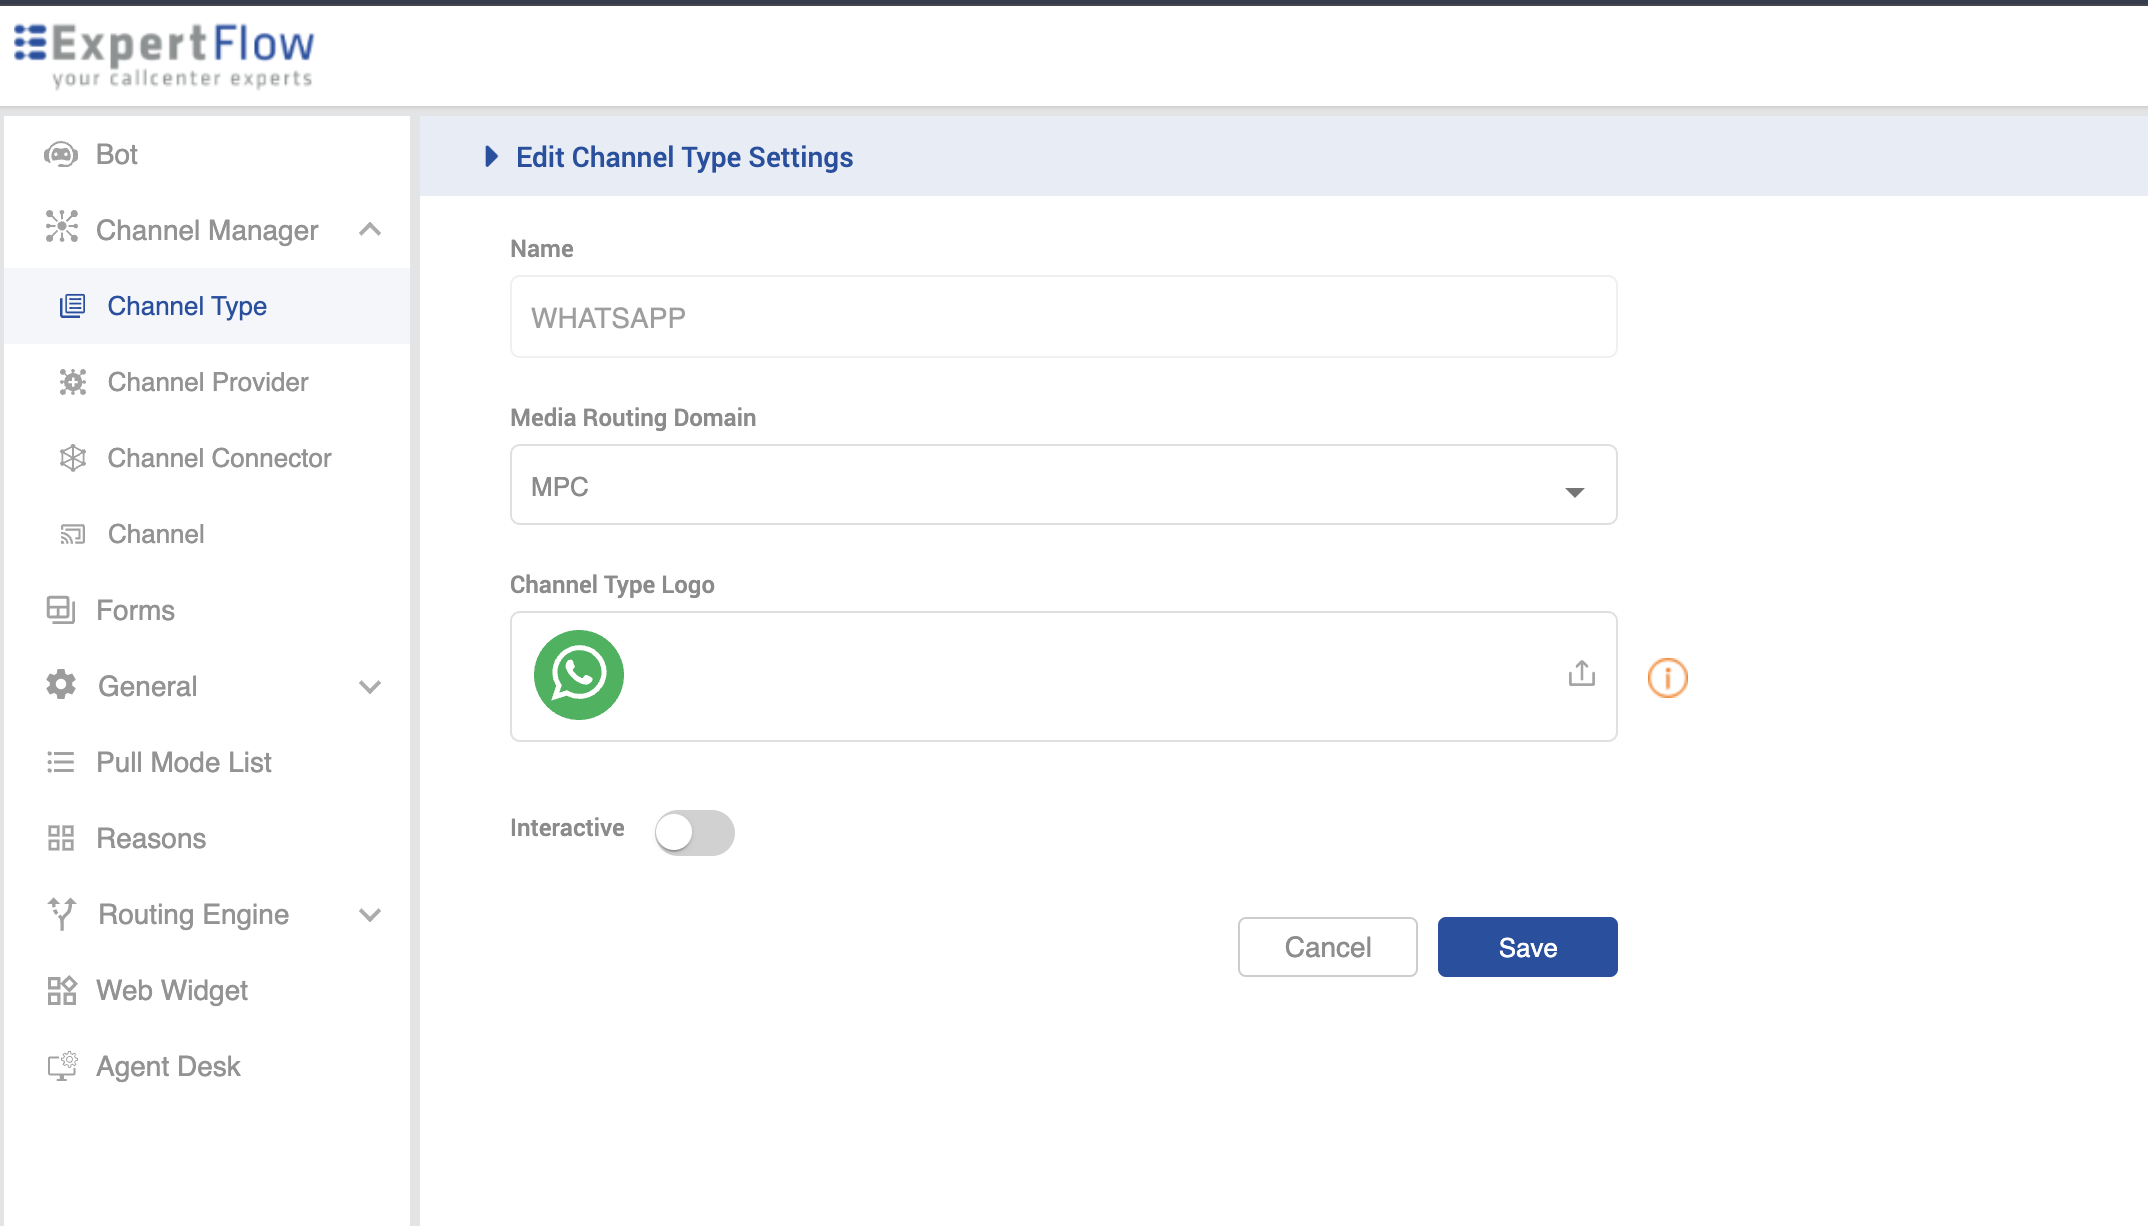
Channel Type
-
Create a new Channel Type (if doesn't exist).
-
Select a suitable MRD.
Channel Provider
It's recommended to use the service name of the component in the "Channel Provider -> Provider's Webhook" field. However, FQDN can also be used with some additional custom configurations.
-
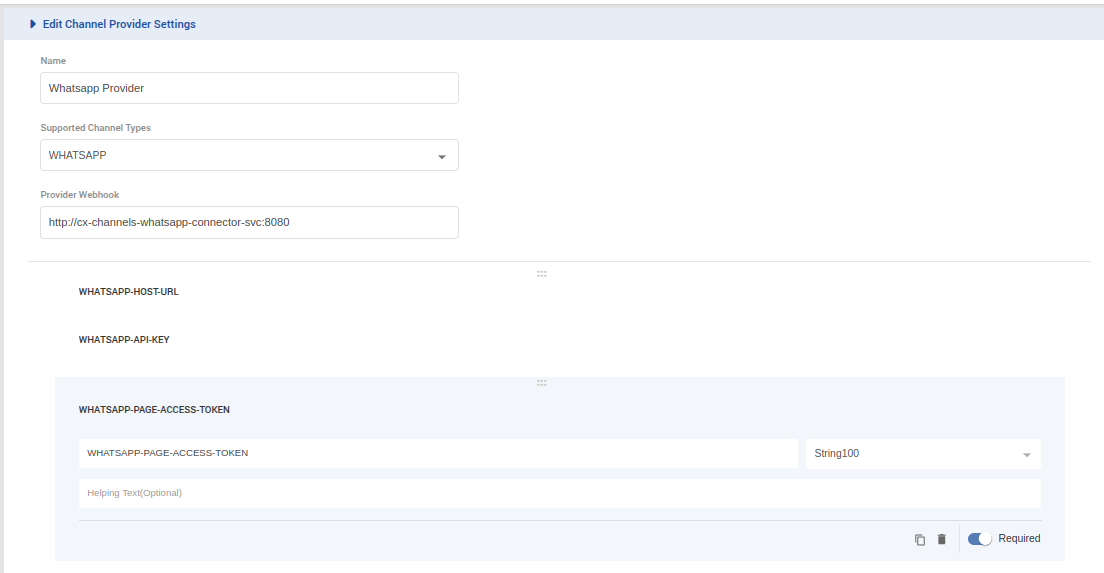
Create a Channel Provider and give it the name "WhatsApp Provider"
-
Provide the service name of Whatsapp Connector in the Provider Webhook field as http://{SERVICE-NAME}:{SERVICE-PORT}. Replace the {SERVICE-NAME} and {SERVICE-PORT} in the URL with component's k3s based service name and port (It can be fetched using k get svc -n expertflow)
-
Add the following attributes;
-
Click Add Custom Attribute button and on the form that opens, replace the dummy value "New attribute0.." in the attribute field with WHATSAPP-HOST-URL and select data-type as "URL" in the field to the right-most part of the form.
-
Click Add Custom Attribute button again, and replace the dummy value "New attribute1.." in the attribute field with WHATSAPP-API-KEY and select data-type as "String 2000".
-
Click Add Custom Attribute button again, and replace the dummy value "New attribute1.." in the attribute field with WHATSAPP-PAGE-ACCESS-TOKEN and select data-type as "String 100".
-
Click Save
-
Channel Connector
-
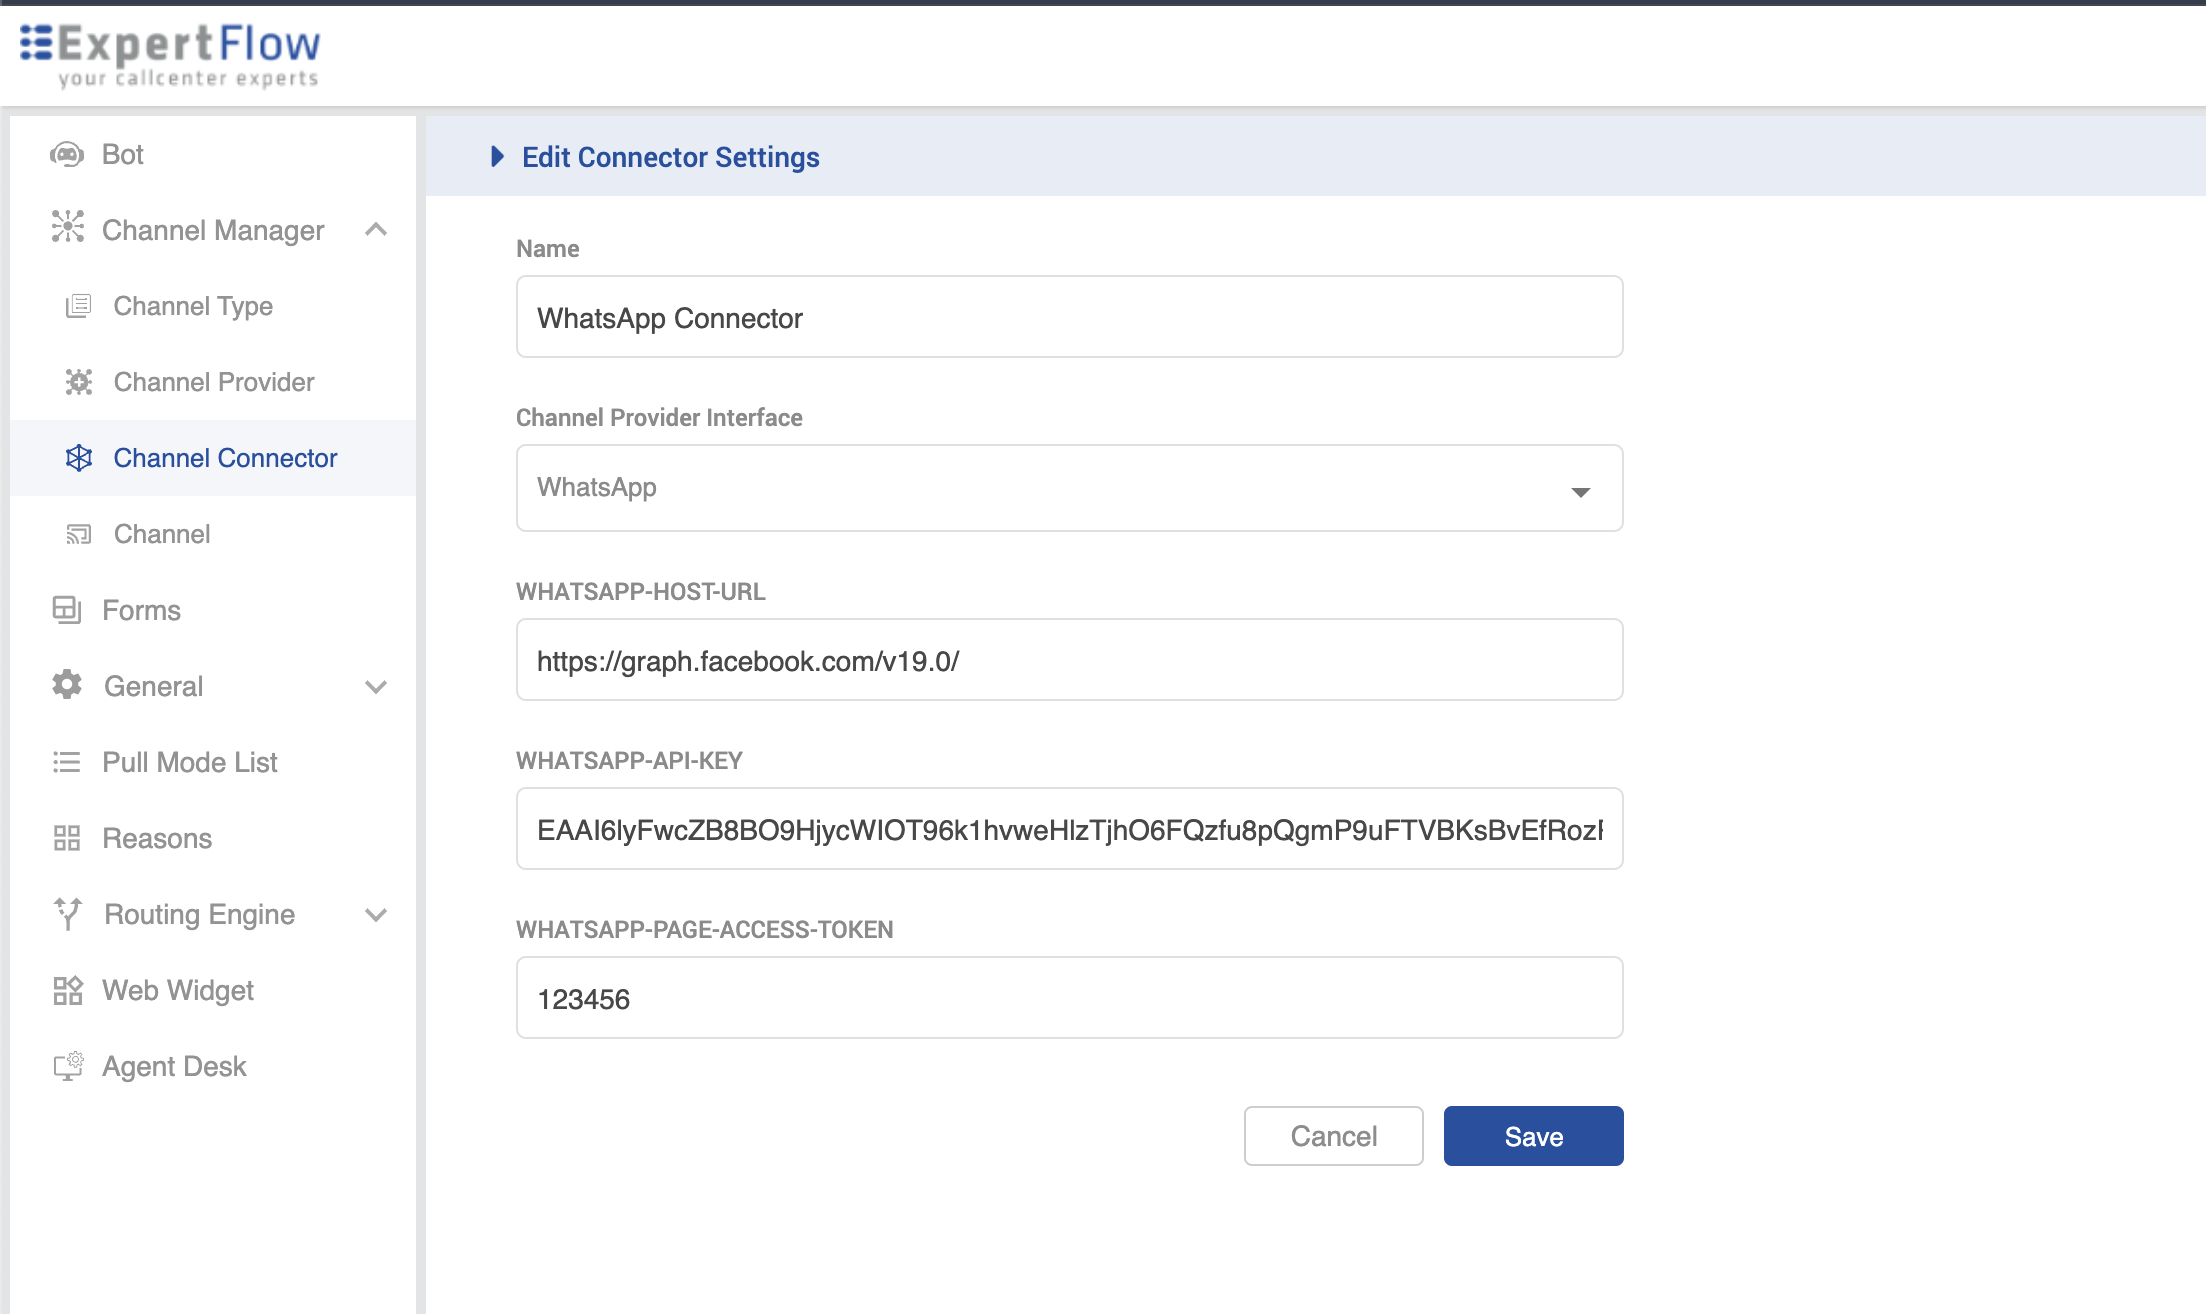
Create Channel Connector and give it the name "WhatsApp Connector"
-
Select the Channel Provider Interface.
-
Enter the Facebook URL in the WHATSAPP-HOST-URL field. For example, https://graph.facebook.com/v19.0/ (Note: ensure you add the "/" after the API version)
-
Enter the Long-Lived Page Access Token in the WHATSAPP-API-KEY field.
-
Enter the "Verify Token" value which was used while registering Webhook in the WHATSAPP-PAGE-ACCESS-TOKEN field.
-
Click Save
Channel
-
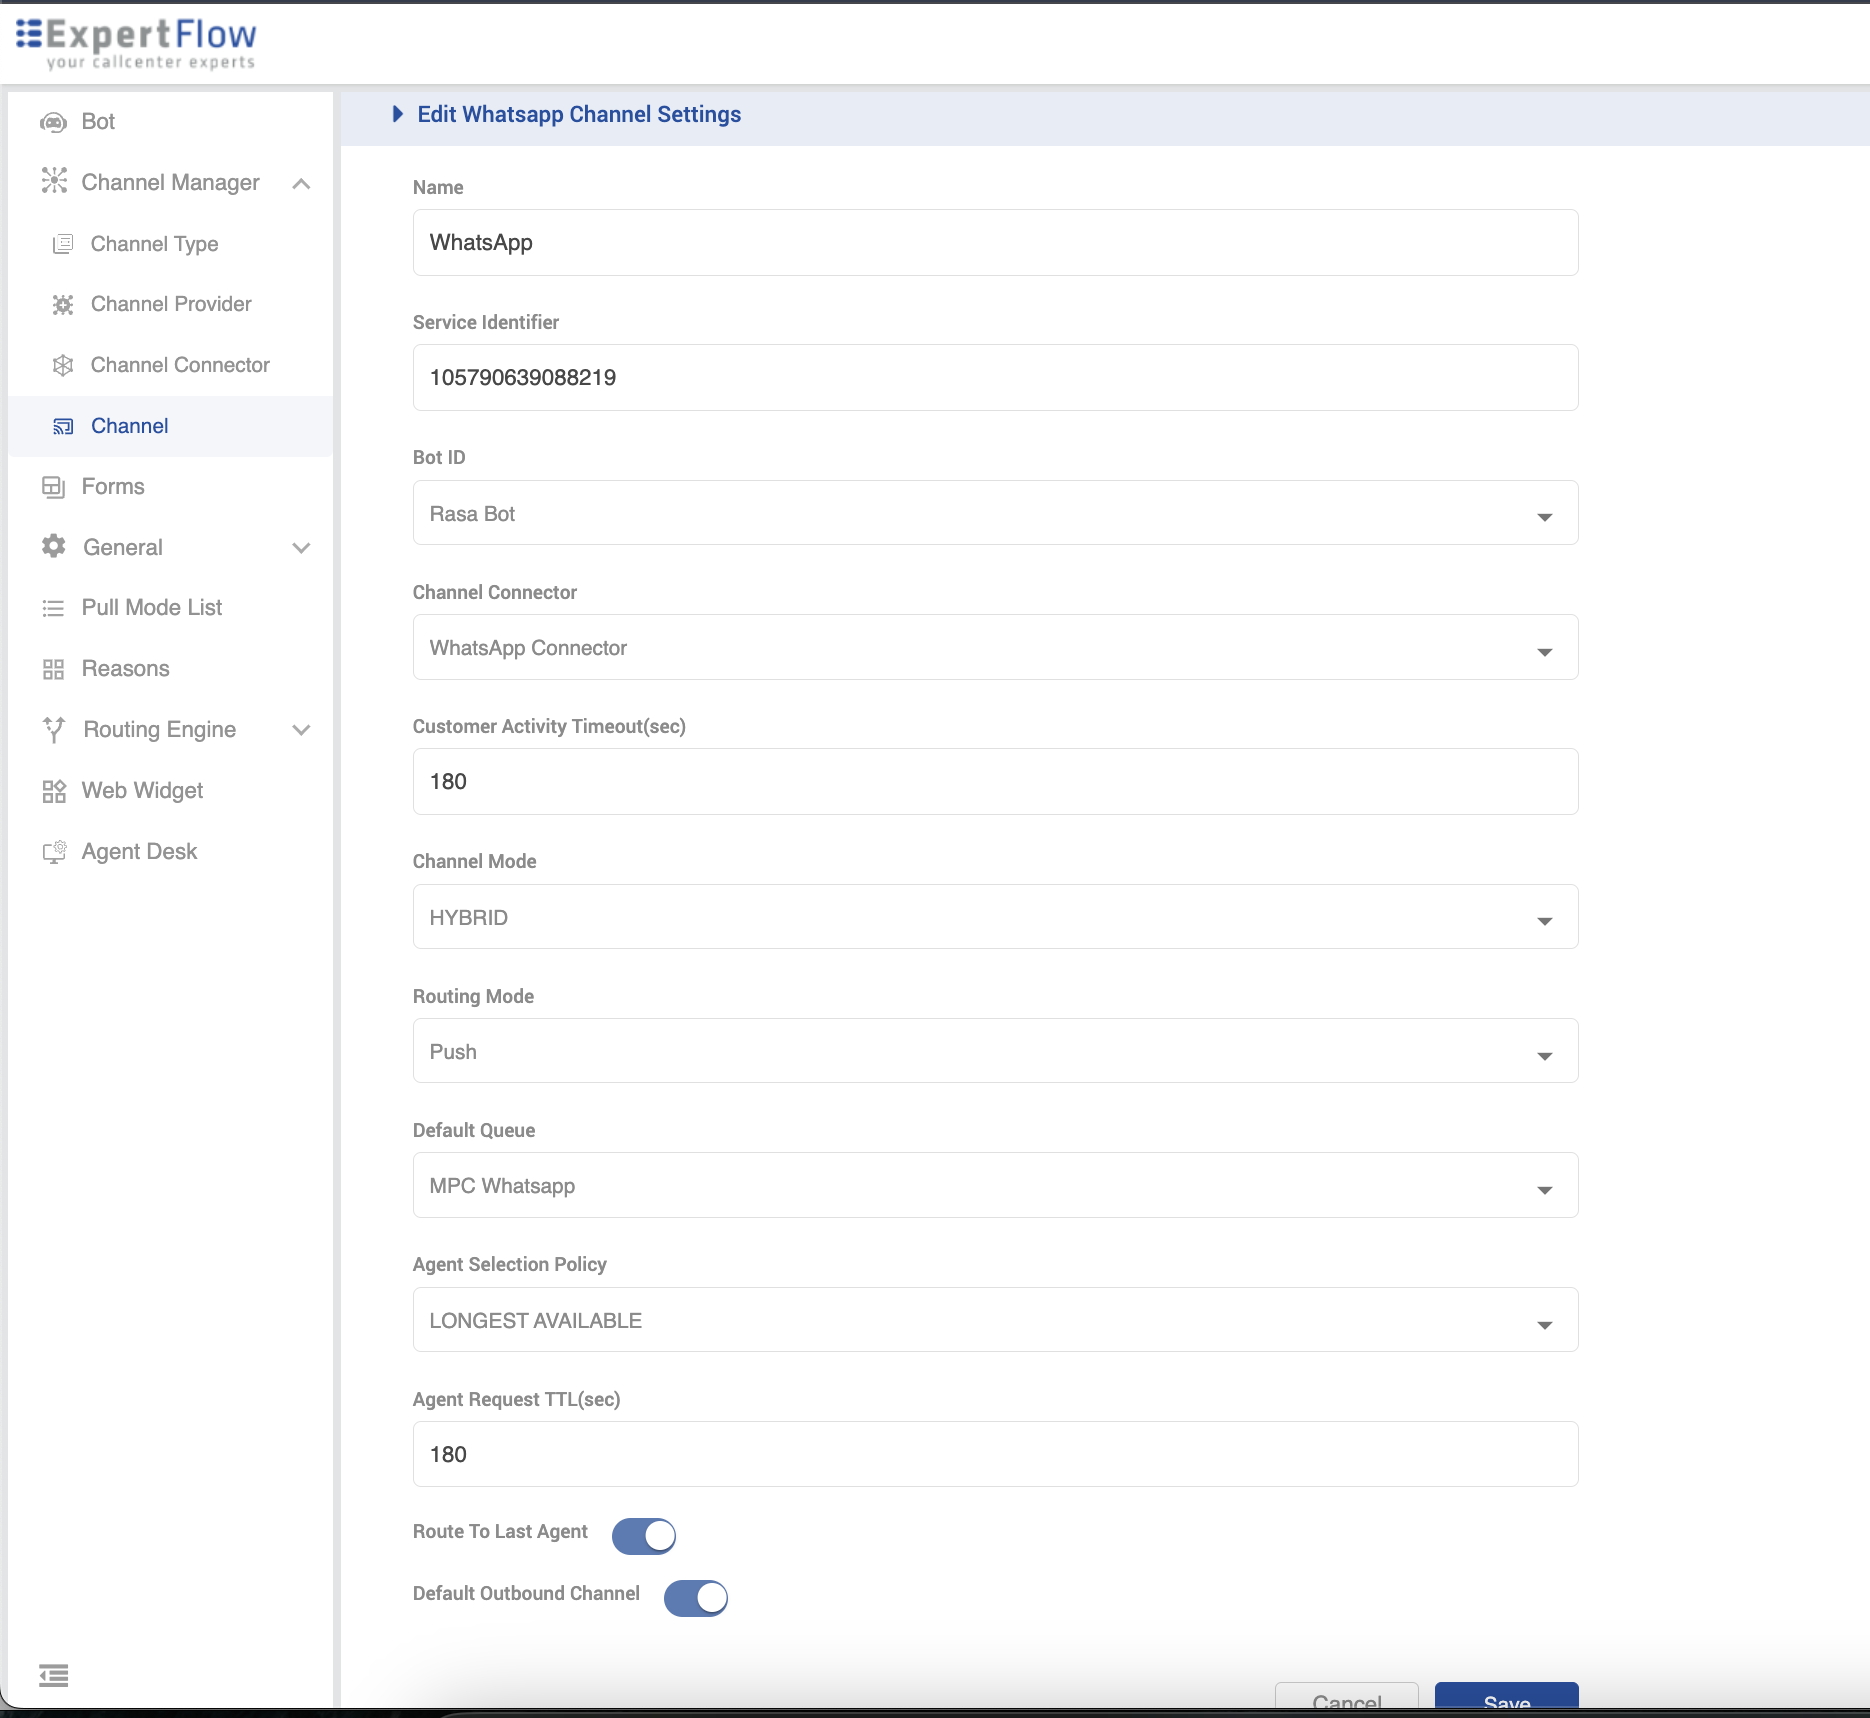
Add Channel and give it some name like “WhatsApp”.
-
Add Service Identifier as your Whatsapp Phone Number ID.
-
Select Bot ID with only available Rasa Bot.
-
Select the recently created “WhatsApp Connector” in Channel Connector.
-
Set 180sec as Customer Activity Timeout(sec).
-
Set Channel Mode as HYBRID.
-
Set Routing Mode as per your need. PUSH or PULL.
-
Set the required Queue where you want to route the Whatsapp Chats.
-
Select LONGEST AVAILABLE as Agent Selection Policy.
-
Set 180sec as Agent Response Time(sec).
-
Save.
Conclusion
So, these are all the features WhatsApp Meta Cloud API is supporting with Expertflow CX. If you want to further look into the details of other features are functionalities WhatsApp offering, please visit here.