There are two types of deployments in Genesys i-e
-
Private Deployment
-
Public Deployment
Private Deployment
The administrators can add the integration and upload the framework.js file to the company’s Genesys Cloud organization. A maximum of five different implementations of the integration in a single Genesys Cloud organization are allowed. We may want to use different implementations with various third-party products.
Following are the steps required to configure the private deployment.
Prerequisites for running the integration in Genesys
Following is the list of items required
-
An Internet browser (the latest version of Chrome, Firefox, or Microsoft Edge).To use WebRTC phones with the client, turn off the pop-up blocker in your browser.
-
Per-user licenses for Genesys Cloud (Communicate or higher).
Configure OAuth Client
In order to configure you need to log in as an administrator. The following permission is required to configure the OAuth client
-
OAuth > Client > Add permission
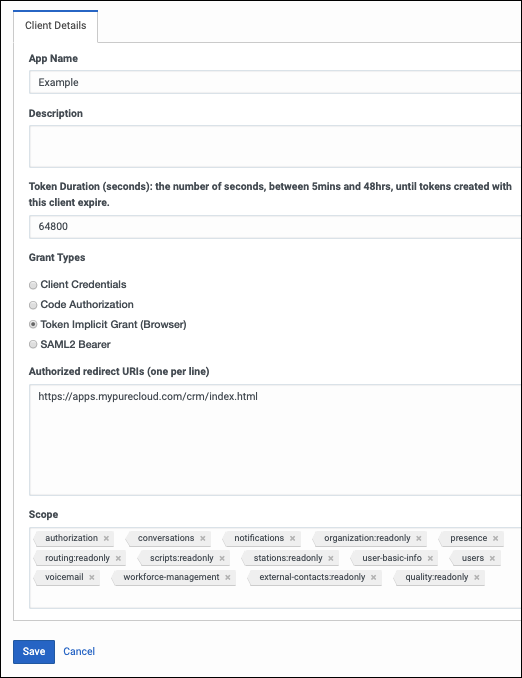
Steps to configure OAuth client
-
Click Admin.
-
Under Integrations, click OAuth.
-
Click Add Client. The Client Details tab appears.
-
Set the App Name to Expertflow or any meaningful name of the app.
-
(Optional) Type a brief description of the app in the Description box.
-
Set the duration of time until tokens created with this client expire.
Accept the default duration, or enter a value between 300 and 172800 seconds. This duration sets the lifetime of the token to a maximum of two days or less.
Tip: Genesys recommends setting the token duration to 18 hours (64800 seconds). This duration generally causes the token to expire outside an agent’s normal workday. -
Under Grant Types, select Implicit Grant (Browser).
-
Under Authorized redirect URIs, add https://apps.mypurecloud.com/crm/index.html, Customize the URI according to the customer Genesys Cloud region.
-
Under Scope, add all required scopes.
-
An OAuth client added to your Genesys Cloud organization (optional for some private versions) with the required scopes.
-
conversations
-
notifications
-
organization:readonly
-
outbound:readonly
-
presence
-
routing:readonly
-
scripts:readonly
-
stations:readonly
-
user-basic-info
-
users
-
voicemail
-
workforce-management
-
external-contacts:readonly
-
quality:readonly
-
-
Click Save.
-
A Client ID will be created that we use in the Framework.js file
Agent Permissions Required
The permission names appear in different formats. It all depends on where we access the permissions in Genesys Cloud, The integration looks for permissions, not roles, assigned to a user in Genesys Cloud.
|
Permission |
Required or optional |
Feature |
Description |
|---|---|---|---|
|
ACD Screen Share > Session > View |
Optional |
Screen share |
Allows an agent to screen share ACD interactions |
|
Analytics > Conversation Aggregate > View |
Optional |
Evaluations |
Allows an agent to view released evaluations in the User Inbox. |
|
Analytics > Conversation Aggregate > View |
Optional |
Statistics |
Allows an agent to see conversation statistics in the Agent Performance window. |
|
Analytics > Queue Observation > View |
Optional |
Statistics |
Allows an agent to see statistics for a queue before contacting the queue or transferring an interaction to the queue. |
|
Analytics > User Aggregate > View |
Optional |
Statistics |
Allows an agent to see user statistics in the Agent Performance window. |
|
Cobrowse > Chat > Escalate |
Optional |
Co-browse |
Allows an agent to use co-browse for chat interactions. |
|
Cobrowse > Session > View |
Optional |
Co-browse |
Allows an agent to use co-browse for voice or chat interactions. |
|
Cobrowse > Voice > Escalate |
Optional |
Co-browse |
Allows an agent to use co-browse for voice interactions. |
|
Conversation > Call > Record |
Optional |
Call controls |
Causes the Record icon to be clickable in the call controls in an agent’s client. |
|
Conversation > Call Forwarding > Edit |
Optional |
Call forwarding |
Allows an agent to use and edit call forwarding. |
|
Conversation > Callback > Create |
Optional |
Callbacks |
Allows an agent to schedule callbacks. |
|
Conversation > Cobrowse > Add |
Optional |
Co-browse |
Allows an agent to use co-browse for web messaging. |
|
Conversation > Email > Create |
Optional |
Emails |
Allows an agent to send emails on behalf of queues. |
|
Conversation > Message > Create |
Optional |
SMS messages |
Allows an agent to send SMS messages on behalf of queues. |
|
Integration > Custom Embeddable Framework > Agent
|
Required |
— |
This causes the client to appear in a private deployment of a Genesys Cloud Embeddable Framework integration. |
|
Outbound > Contact > View |
Optional |
Screen pop |
Allows an agent to see screen pops for outbound dialing. |
|
Quality > Evaluation > Edit Agent Sign-off |
Optional |
Evaluations |
Allows an agent to view released evaluation notifications in the User Inbox. |
|
Quality > Evaluation > Edit or Quality > Evaluation > Edit Score |
Optional |
Evaluations |
Allows a quality evaluator to view assigned evaluation notifications in the User Inbox. |
|
Quality > Evaluation > View |
Optional |
Evaluations |
Allows an agent to view released evaluation notifications in the User Inbox. |
|
Routing > Agent > On Queue |
Optional |
Statuses |
Causes On Queue to appear as a status and a status timer to appear in an agent’s client. |
|
Routing > Queue > Join |
Optional |
Queues |
Allows an agent to see which queues the agent is a member of and to select which queues to receive interactions from in the client. |
|
Scripter > Published Script > View |
Optional |
Scripts |
Allows an agent to see a script. |
|
Voicemail > Voicemail > Receive |
Optional |
Voicemails |
Allows an agent to receive personal voicemail notifications in the User Inbox. |
|
Workforce Management > Agent Schedule > View |
Optional |
Scheduling |
Allows an agent to view schedules in the client. |
|
Workforce Management > Agent Shift Trade Request > Participate |
Optional |
Scheduling |
Allows an agent to view shift trade request notifications in the User Inbox. |
|
Workforce Management > Agent Time Off Request > Submit |
Optional |
Scheduling |
Allows an agent to access time off notifications in the client. |
|
Workforce Management > Shift Trade Request > Edit |
Optional |
Scheduling |
Allows an administrator to view shift trade notifications in the User Inbox. |
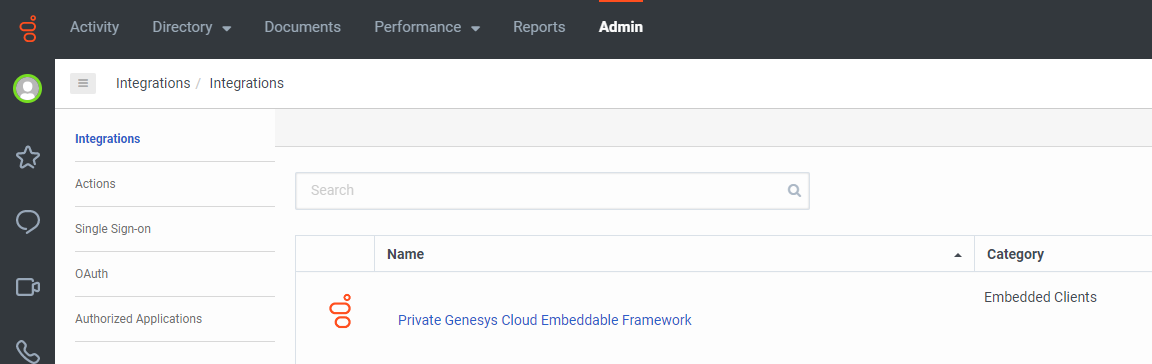
Private Genesys Cloud Embeddable Framework integration
Follow the steps to do the private deployment of the integration. Add one or more Private Genesys Cloud Embeddable Framework integrations to Genesys Cloud.
-
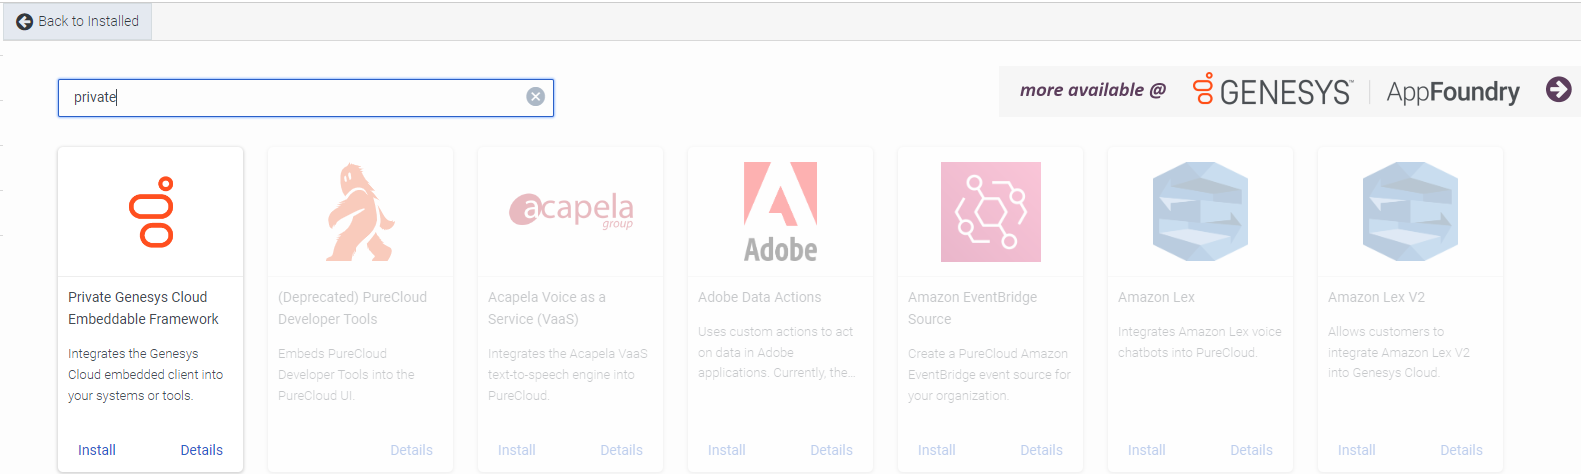
Add an integration.
-
In Genesys Cloud, click Admin.
-
Under Integrations, click Integrations. A list of all integrations that we have installed appears.
-
-
At the upper right, click Integrations. A list of available integrations appears.
-
Search for Private Genesys Cloud Embeddable Framework and click Install.
-
2. Configure the integration.
-
Click on OAuth in Integrations and click on the created app name

-
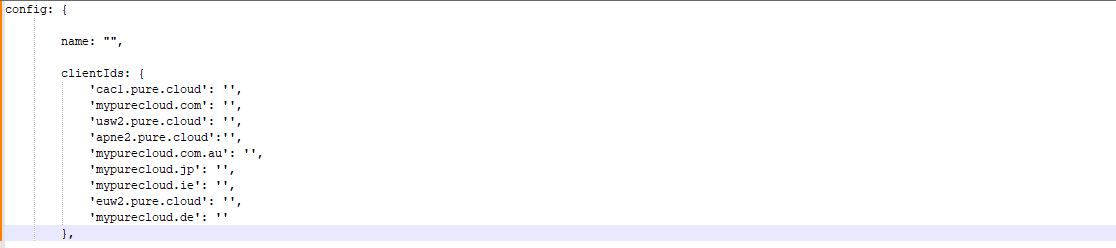
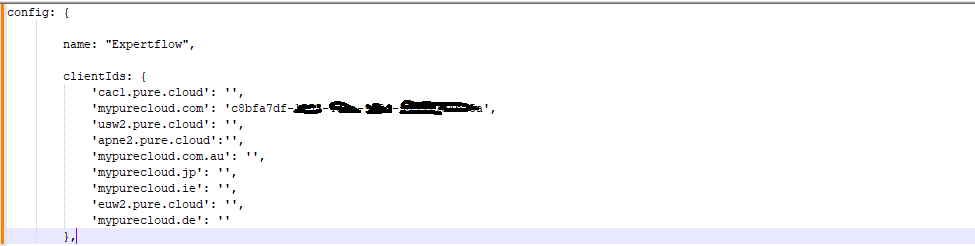
Download the framework.js file.
-
Open the framework.js file in some editor. Edit and update the App name & Client ID (Configured above in the document) in the file
-
After editing and updating the framework.js file will look like the following
-
Click on the installed Private Genesys Cloud Framework
-
Click the Configuration tab.
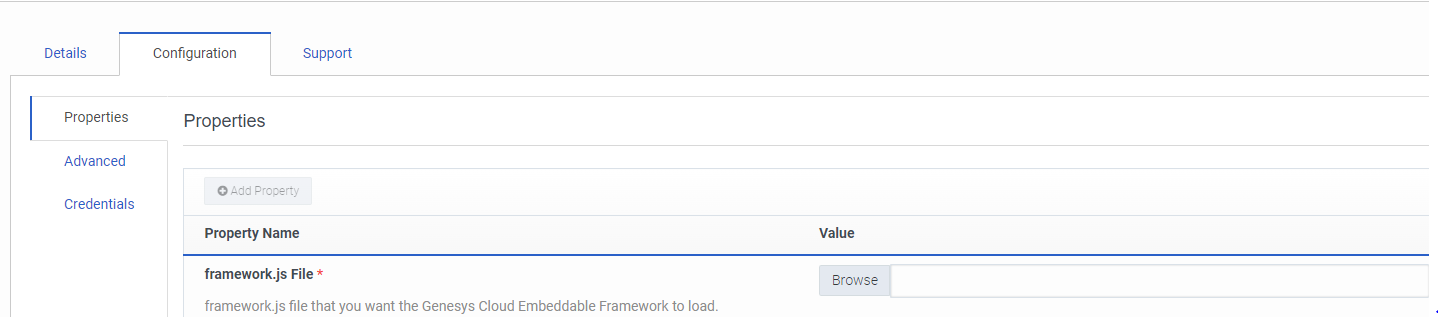
-
framework.js File: Click Browse and upload a framework.js file.
-
Note: The framework.js File Due to caching, users must refresh their client to see the effect of the new file. Any changes to the integration may take several minutes to appear.
-
Click Save.
-
Activate the integration.
-
Under the integration that we just added, click the Status toggle to change it from Inactive to Active.
-

-
Edit, Delete, Activate\Deactivate the integration
-
If we click in the last column the following options appear We can edit, Activate\Deactivate or delete the integration.
-
If we click on the delete option, a pop-up box will appear requiring the confirmation of the deletion.
-

Adding the multiple Private Deployments.
The following steps need to be done to produce multiple private deployments.
-
Configure a separate OAuth Client for multiple deployments. (for creating the OAuth client described above)
-
Add a separate Private Genesys Cloud Embeddable Framework (for creating the Private Genesys Cloud Embeddable Framework described above)
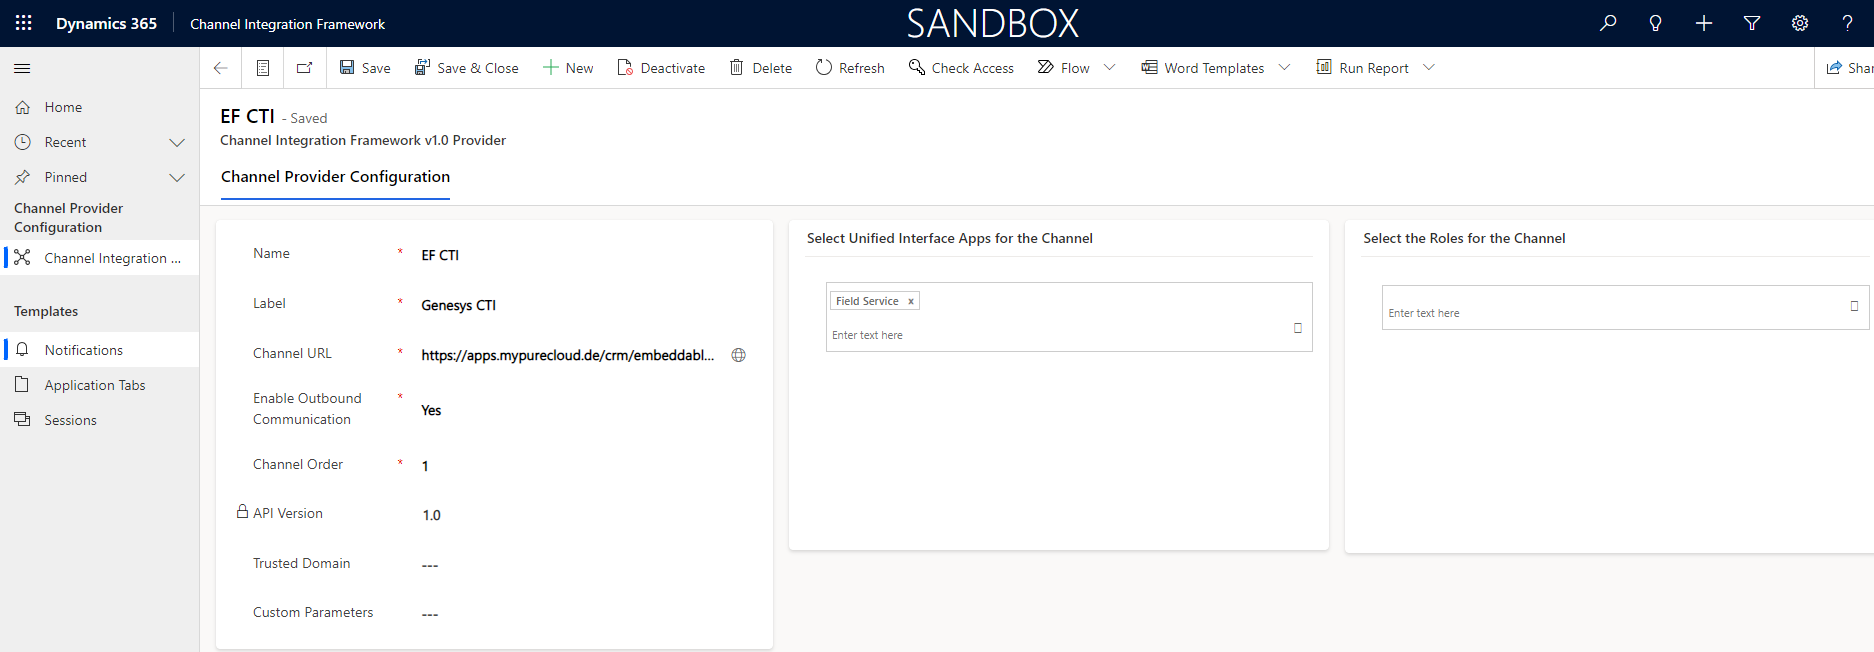
Configure CIF on Dynamics CRM
Login to the CRM. Go to the published apps. Select the ‘ channel integrated framework’.
If CIF is not installed then follow this guide to install it on your CRM.
Click on the new button to create a new active channel provider and fill in the details as given in the screenshot below.
-
Name: EFCTI
-
Label: Genesys CTI
-
Channel Url : https://apps.mypurecloud.de/crm/embeddableFramework.html?enableFrameworkClientId=true
-
Enabled outbound Communication: Yes
-
Channel Order: 1
-
Select Unified Interface Apps for the Channel
-
Select the Unified app where you want to embed the CTI.
-
Assign roles according to your requirements.
-
Click on Save Button.
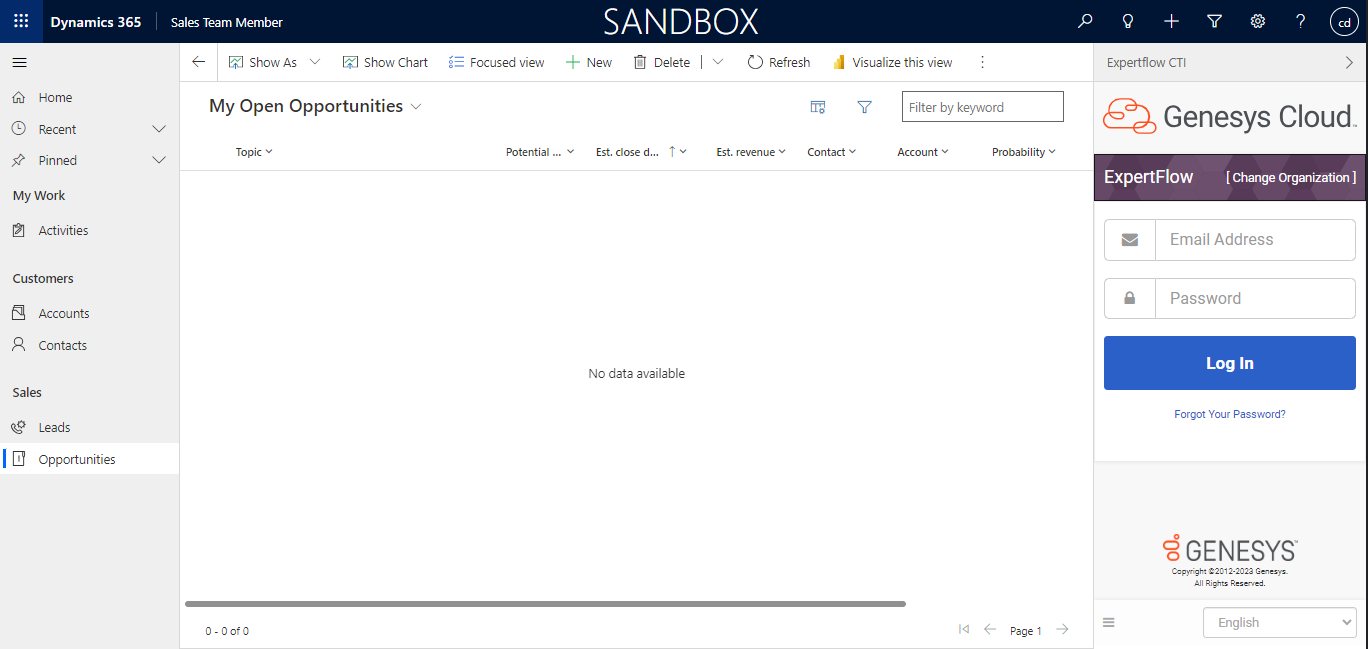
Go to the Unified app that you selected. It will look like the following screenshot.
Public Deployment
AppFoundry partners develop integrations and publish the integrations to the AppFoundry for public use. (We have already sent the publication to Genesys for approval. Waiting for their final feedback)
Any company that has the correct permissions can enable the integration in the AppFoundry.
Prerequisites
The following are the prerequisites for the deployment of the Genesys CTI customization.
-
The user must have administrative rights
Installation of Genesys CTI Customization
This middle layer can be deployed on any window server in any application server of the user's choice (IIS, Tomcat, etc). The following section lists the steps to deploy the application on an IIS server.
-
Download the GenesysCTIDynamics and extract. In the extracted folder, There will be an index.html file. Copy the file and place them in the (c:\inetpub\wwwroot\GenesysCTIDynamics) or any desired directory.
-
Open IIS. It can be opened by pressing window+R, writing inetmgr, and clicking OK. It will run IIS Manager.
-
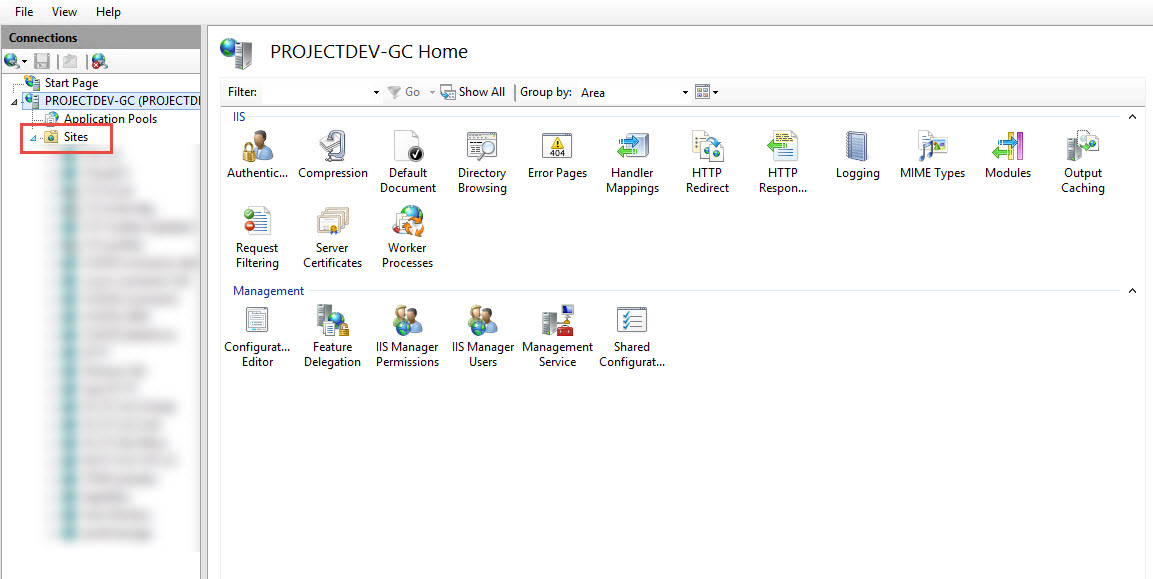
Right-click on Sites to Add a new Site.
-
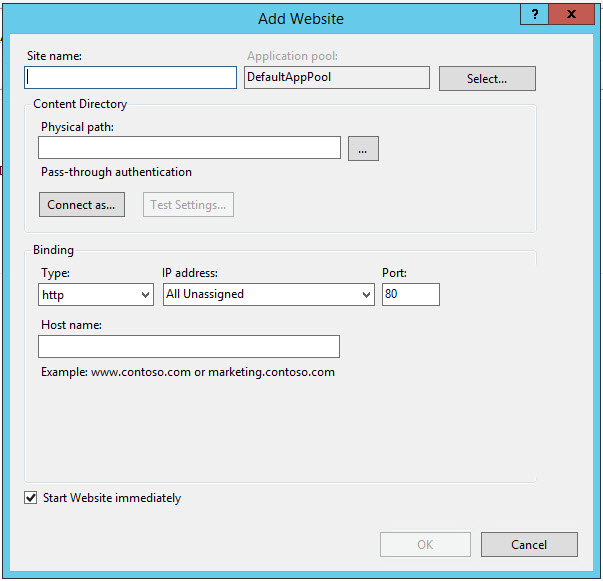
259pxAdd new Site, Site name (GenesysCTIDynamics).
-
Physical path (cc:\inetpub\wwwroot\GenesysCTIDynamics).
-
The Port, the default value is 80 but any other value can be assigned.
-
Please follow this guide to install and configure the SSL certificates on IIS in order to run the cti_toolbar on HTTPS.
-
If the FQDN after the deployment e.g https://www.GenesysCTIDynamics:5539 or whatever is configured
-
-
Open an index.html file and locate the iframe tag in the file.
-
The parameter ctiApplication has the value https://www.gctoolbar.com:5539/. Change it to the current FQDN e.g https://www.GenesysCTIDynamics:5539/
-
Similarly update the parameter clientID to the configured clientID.
Configure CIF on Dynamics CRM
Login to the CRM. Go to the published apps. Select the ‘ channel integrated framework’.
Note: If CIF is not installed then follow this guide to install it on your CRM.
Click on the new button to create a new active channel provider and fill in the details as given in the screenshot below.
-
Name: EFCTI
-
Label: Genesys CTI
-
Channel Url : https://www.GenesysCTIDynamics:5539 (same as the deployed FQDN)
-
Enabled outbound Communication: Yes
-
Channel Order: 1
-
Select Unified Interface Apps for the Channel
-
Select the Unified app where you want to embed the CTI.
-
Assign roles according to your requirements.
-
Click on Save Button.
Go to the Unified app that you selected. It will look like the following screenshot.