Purpose
This deployment guide provides detailed instructions for installing, configuring, and using the Webex Contact Center connector within Hubspot CRM. It is designed to ensure a smooth integration process, enabling users to effectively utilize the connector within their Hubspot CRM.
Intended Audience
This document is intended for customers who want to deploy a Webex Contact Center connector within Hubspot CRM.
Prerequisites
-
You must have Webex Contact Center set up and configured before integrating with Hubspot CRM.
-
A Hubspot CRM account is required. You can access Hubspot CRM here to create an account.
Hubspot Public App Creation
-
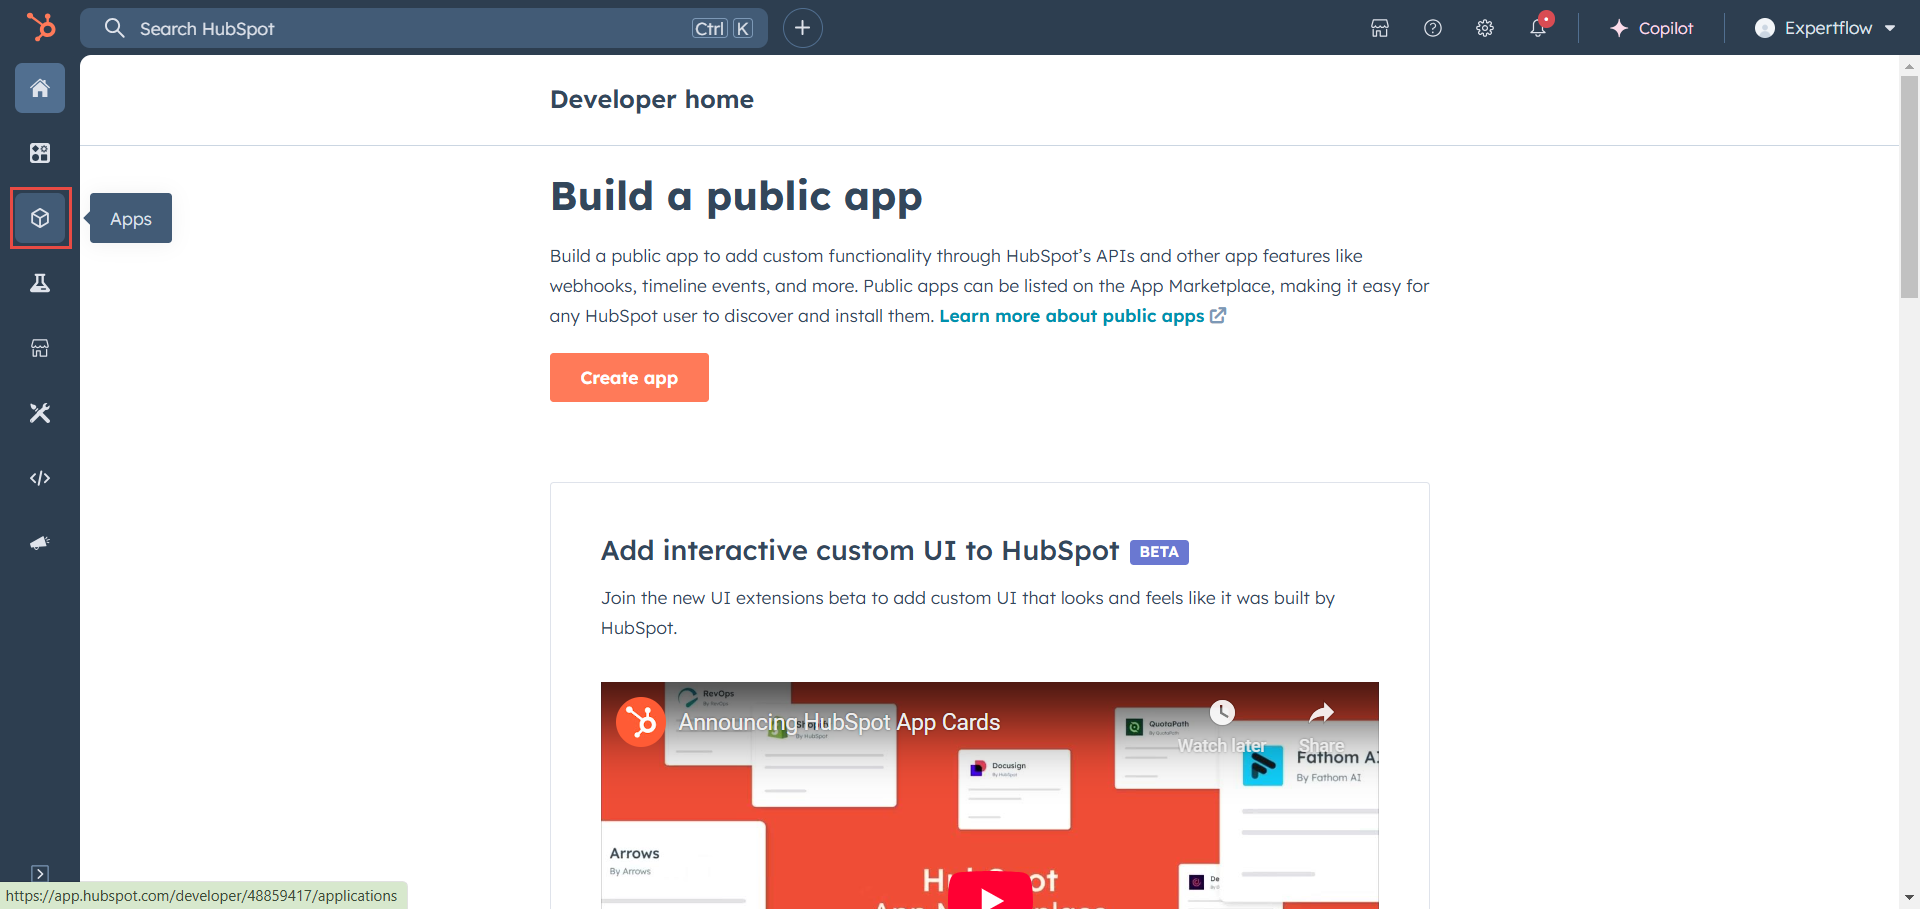
Login to your Hubspot developer account.
-
From the sidebar click on Apps and create a public app.
-
In the App Info tab, enter all the info required.
-
Add a Unique Public App name.
-
You may also add a logo for the app.
-
You may also add description of the app.
-
-
Switch to Auth tab.
-
Add one or multiple Auth-Redirect URLs
https://<FQDN>/<path>/oauth-callback, where-
<FQDN>is the domain/hostname where our app is deployed (e.g.projectsdemo.expertflow.com) -
<path>is the path to the connector as defined in the Ingress file (default:/hubspot-connector) -
/oauth-callbackis our static authentication redirect route. -
Make sure to add
HTTPSas the protocol.
-
-
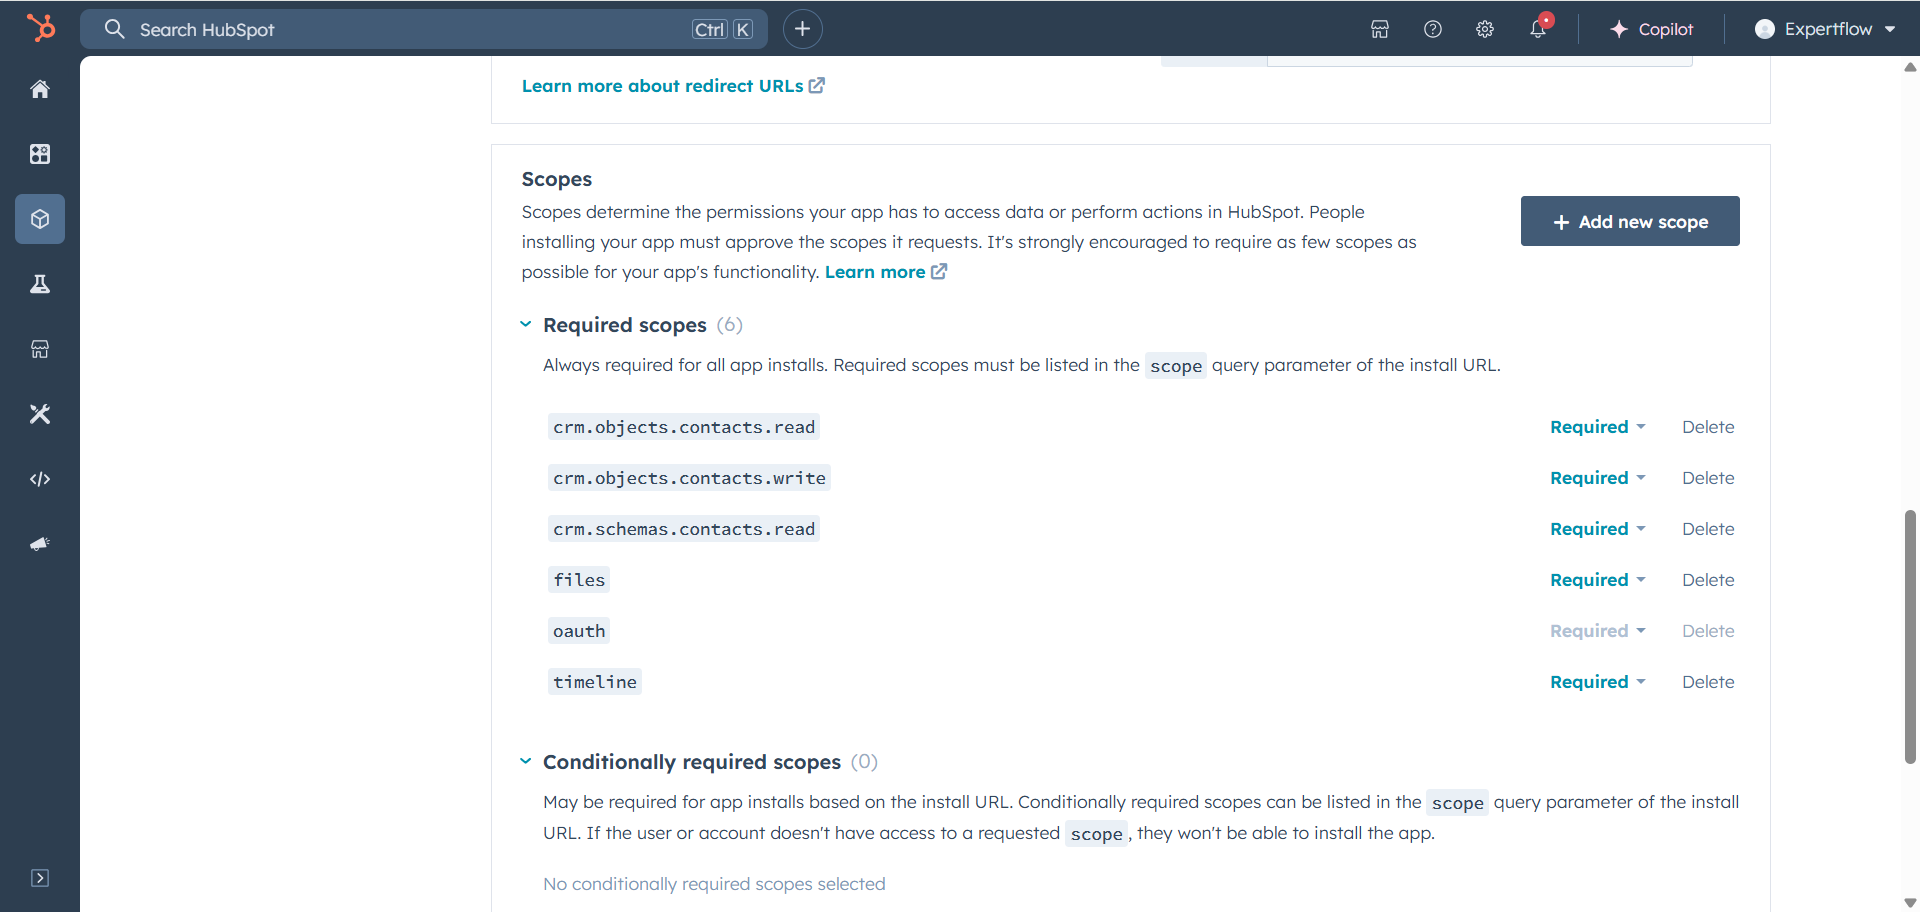
Add required scopes:
timeline,oauth,crm.schemas.contacts.read,crm.objects.contacts.write,crm.objects.contacts.read,files -
Click on Save Changes Button.
-
This page also lists our app credentials, which we’ll need later.
Configuring Calling Window
-
In your Hubspot Developer account, go to
Apps -
Click to create (or get) API key.
-
Also go to the
authpage from the above section, and copy theappId -
Make a Postman or
curlrequest to this endpoint, replacingapikeyandappIdwith the values gotten from the Hubspot developer dashboard. -
Specify all listed fields as
true. And list the chosen app’s name, and specify the URL to where the connector would be. -
Add a field
useRemote(not listed in docs), and set its value tofalse -
If you’d like to update those values later, use a
PATCHrequest instead.
{
    "name": "Webex cc",
    "url": "https://projectsdemo.expertflow.com/hubspot-connector/",
    "height": "750",
    "width": "450",
    "isReady": true,
    "supportsInboundCalling": true,
    "usesRemote": false,
    "usesCallingWindow": true
}
Application Deployment
Before you begin, verify that on the server, you have:
-
Installed Kubernetes. If not, see Deployment Planning
-
Setup storage. If not yet, see Storage Solution - Getting Started
Pulling The Hubspot Back-End Server Application from Git
The application code alongside the Kubernetes files are deployed on this repo Hubspot-Webex-Connector.
-
Create a directory with name as hubspot-webex-connector or according to your ease.
-
Navigate to newly created directory by
cd hubspot-webex-connector. -
Pull the the code from the:
git clone -b master https://gitlab.expertflow.com/cti/hubspot-webex-connector.git
If you’re testing for QA, please pull from the develop branch to include latest development changes. git clone -b develop https://gitlab.expertflow.com/cti/hubspot-webex-connector.git
-
After that, if you want to get the latest changes to code, navigate into the created directory (with
cd <dir-name>), and rungit pull origin master -
Run
cd kubernetesto change directories. This is where all the YAML files are stored.
Setting Up Environment
We use Kubernetes for our server deployment, on which the static files for the connector will be served, and where the back-end server will be running.
Namespace
Create a namespace “expertflow” if it doesn’t exist.
kubectl create namespace expertflow
Configure hubspot-configmap.yaml
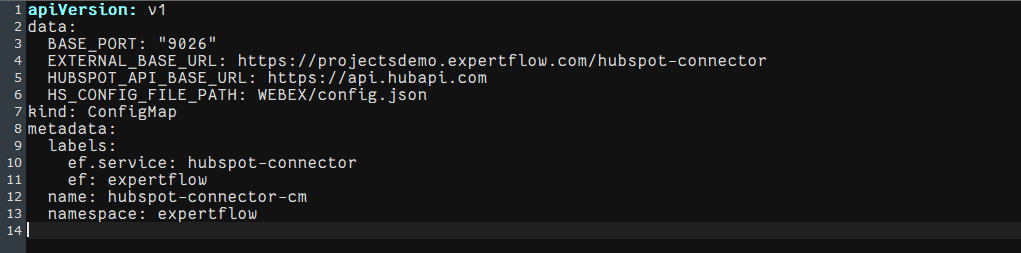
Open the hubspot-configmap.yaml file to edit configurations.
-
EXTERNAL_BASE_URLis the full URL to where our app will be running (e.g.https://<FQDN>/hubspot-connector). -
BASE_PORTthe port where the app will be running on that domain (default"9026").
Changing the BASE_PORT requires changing port value in multiple other files.
-
HUBSPOT_API_BASE_URLthe base URL for hubspot’s API. Should be left set tohttps://api.hubapi.comunless there’s a reason to change it. -
HS_CONFIG_FILE_PATHthe file path for the config file on each Hubspot portal. The connector will read its configs from that file.
Configure hubspot-secretValues.yaml
-
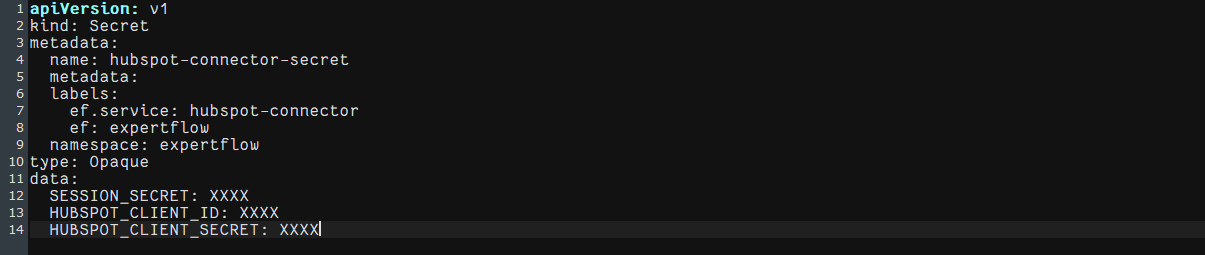
Open the
hubspot-secretValues.yamlfile. -
Update values as needed and described in the file.
-
SESSION_SECRET: a randomly generated secret, for encryption purposes -
HUBSPOT_CLIENT_ID: Can be found in the Hubspot developer dashboard for the app under the Auth tab. -
HUBSPOT_CLIENT_SECET: Can be found in the Hubspot developer dashboard for the app under the Auth tab.
-
Make sure values are base64 encoded before being added to the file. You can use any online or terminal tooling to encode the values.
Ingress.yaml
Hubspot Webex Connector should be accessible by a fully qualified domain name. Assign the FQDN.
Replace <FQDN> with your FQDN for HubSpot-Connector (e.g. projectsdemo.expertflow.com) and run this command.
sed -i 's/devops[0-9]*.ef.com/<FQDN>/g' hubspot-configmap.yaml hubspot-ingress.yaml
Create Self-Signed SSL/TLS Ingress Certificates
Please modify the <FQDN> with your current FQDN before applying the following command.
-
Create IngressCerts directory (optional)
-
mkdir ingress-certs
cd ingress-certs
-
set the Variable name to your FQDN (e.g.
projectsdemo.expertflow.com).
The${FQDN}variable in following commands will be replaced with the value you provided in this step. -
export FQDN=<enter FQDN here> -
Now generate a secret with the following commands.
-
openssl req -x509 \ -newkey rsa:4096 \ -sha256 \ -days 3650 \ -nodes \ -keyout ${FQDN}.key \ -out ${FQDN}.crt \ -subj "/CN=${FQDN}" \ -addext "subjectAltName=DNS:www.${FQDN},DNS:${FQDN}" -
Create a Kubernetes secret in your required namespace. In our case it’s
expertflowkubectl -n expertflow create secret tls hs-ef-ingress-tls-secret --key ${FQDN}.key --cert ${FQDN}.crt
Configure hubspot-deployment.yaml
-
Open the
hubspot-deployment.yamlfile. -
Replace the image with the updated build tag.
-
Updated build tag is
gitimages.expertflow.com/cti/hubspot-webex-connector/build:develop-53b7eaa93286fc08784294e274a248ac233330c5
Applying Kubernetes YAMLs
-
Apply the Configmap with
kubectl apply -f hubspot-configmap.yaml -
Apply the Secret with
kubectl apply -f hubspot-secretValues.yaml -
Apply the service with
kubectl apply -f hubspot-service.yaml -
Apply the image-pull secret with
kubectl apply -f hubspot-imagePullSecret-expertflow.yaml -
Apply the Ingress with
kubectl apply -f hubspot-ingress.yaml. (For RKE2-based Ingresses using Ingress-Nginx Controller) -
Apply the deployment with
kubectl apply -f hubspot-deployment.yaml
User-Side Installation
Joining Calling-Window Beta
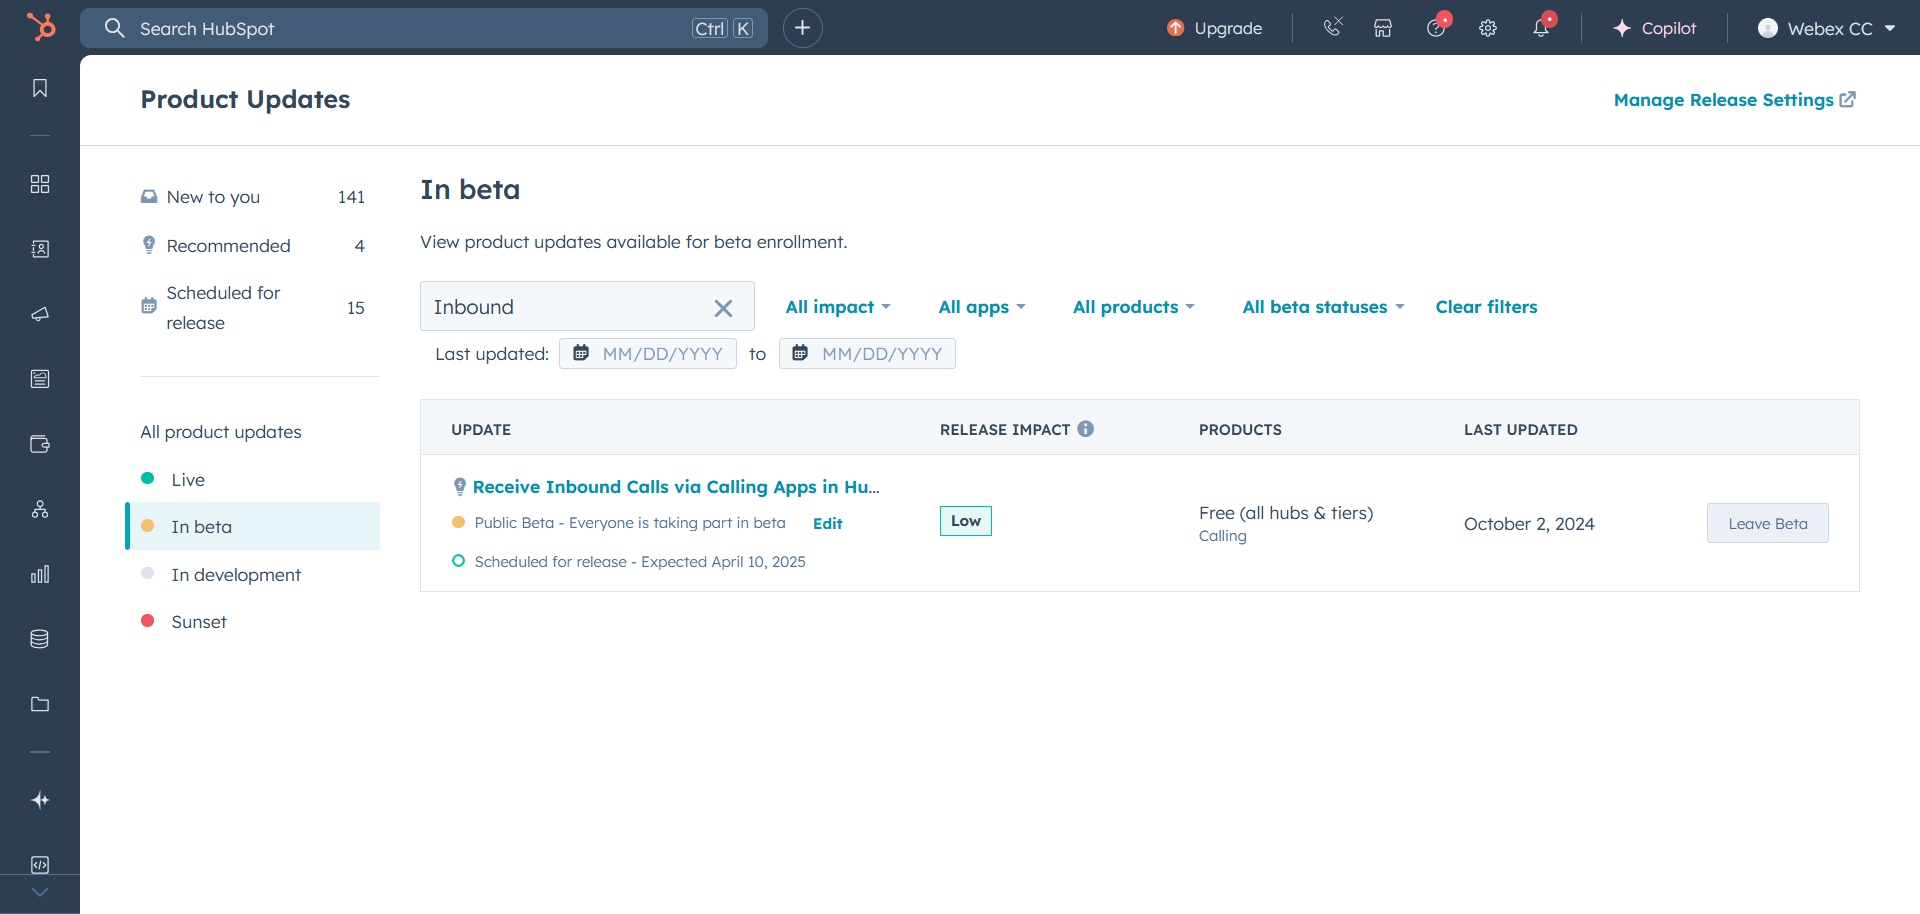
Since the calling-window & inbound calls are still in public beta as of the date of writing this document (and until March, 27th, 2025), we’ll need our user to join the beta manually.
-
Open the Hubspot user’s account.
-
Click on the user’s profile in the navbar (top-right).
-
Go to “Product Updates”.
-
Click on the “In-beta” tab to filter updates.
-
Search for “Inbound”, and join the Receive Inbound Calls via Calling Apps in Hubspot Beta for all users on your account.
Creating Configuration File
-
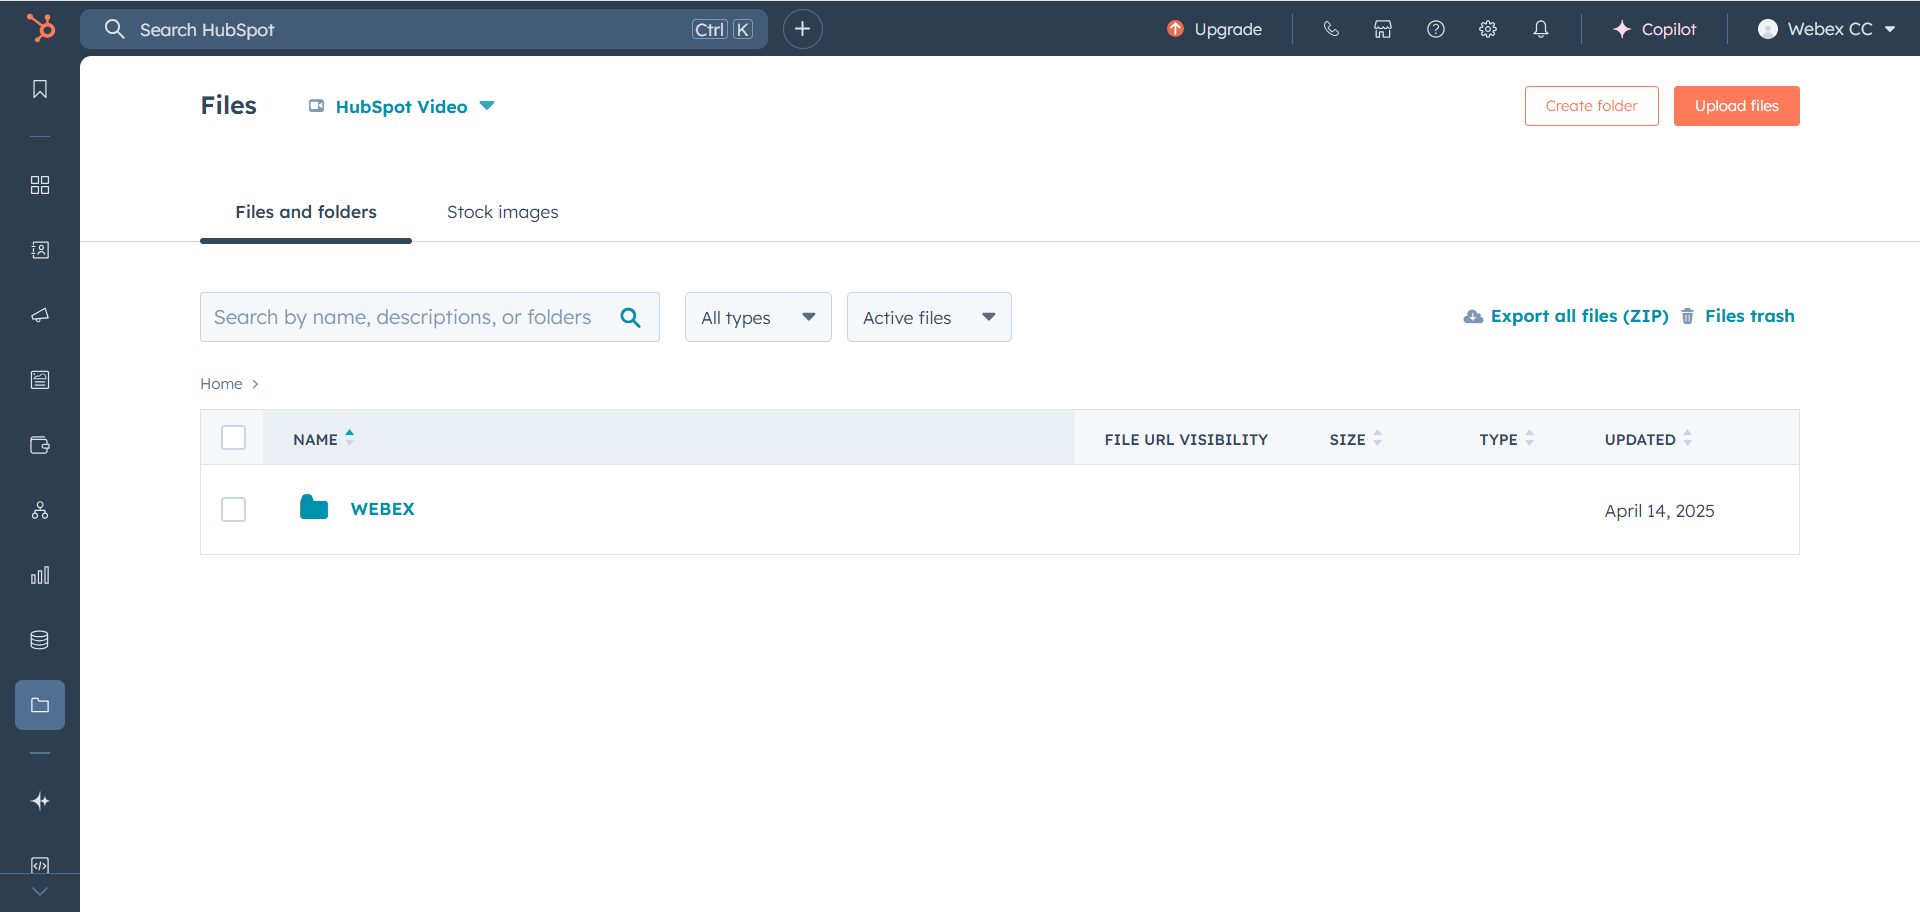
From the side navbar on the left, go to Library->Files.
-
If you can’t see the file manager in the UI. Simply navigate to
https://app.hubspot.com/files/<portal-id>/, where<portal-id>is the number that shows in your account’s URL, and can also be viewed under the account dropdown on the far right of the navbar.
-
-
From the File Manager, create a new folder called WEBEX(mind the upper-casing!).
-
On your machine, create a file called
config.json(make sure it’s in the.jsonformat). -
Copy the following content into the file:
{
    "WEBEX_URL": "https://desktop.wxcc-us1.cisco.com/",
    "DEFAULT_COUNTRY": "PK",
    "CALLING_WINDOW":{
        "HEIGHT": 700,
        "WIDTH": 450
    }
}
Installing The App
Now that the app is running, we need to install it for the required Hubspot Portal.
-
Go to
https://<FQDN>/<path>/installto start the installation flow-
Where
<FQDN>is the domain name where the app is hosted (e.g.https://projectsdemo.expertflow.com -
Where
<path>is the path to the connector as defined in the Ingress file (default:hubspot-connector
-
-
Then go to settings.
-
Click on General and select the Calling Tab.
-
Then scroll down and change your “Calling Provider” to be our app.
Configuring and Updating the Webex Contact Center Desktop Layout
To ensure a seamless integration between Webex Contact Center and SuiteCRM, follow these steps to configure and update the Webex Contact Center Desktop Layout:
Step 1: Access Admin
-
Log in to Webex Control Hub as an administrator.
-
From the left-side menu, click Launch My Organization if it appears.
-
From the left-side menu, select Contact Center.
-
From the left-side menu, select Desktop Layouts.
-
You can open Global Layout to use it, or click Create Desktop Layout to make a new one.
-
Click on Replace File to upload the JSON file
HubSpot_Webex_DesktopLayout.json, then click Save.
Step 2: Apply Changes
-
Return to Webex Control Hub.
-
From the left-side menu, select Teams and choose your team.
-
Under Desktop Layout option, ensure it is assigned to the updated one (which contains the SuiteCRM_Webex_DesktopLayout).
Step 3: Test Webex
-
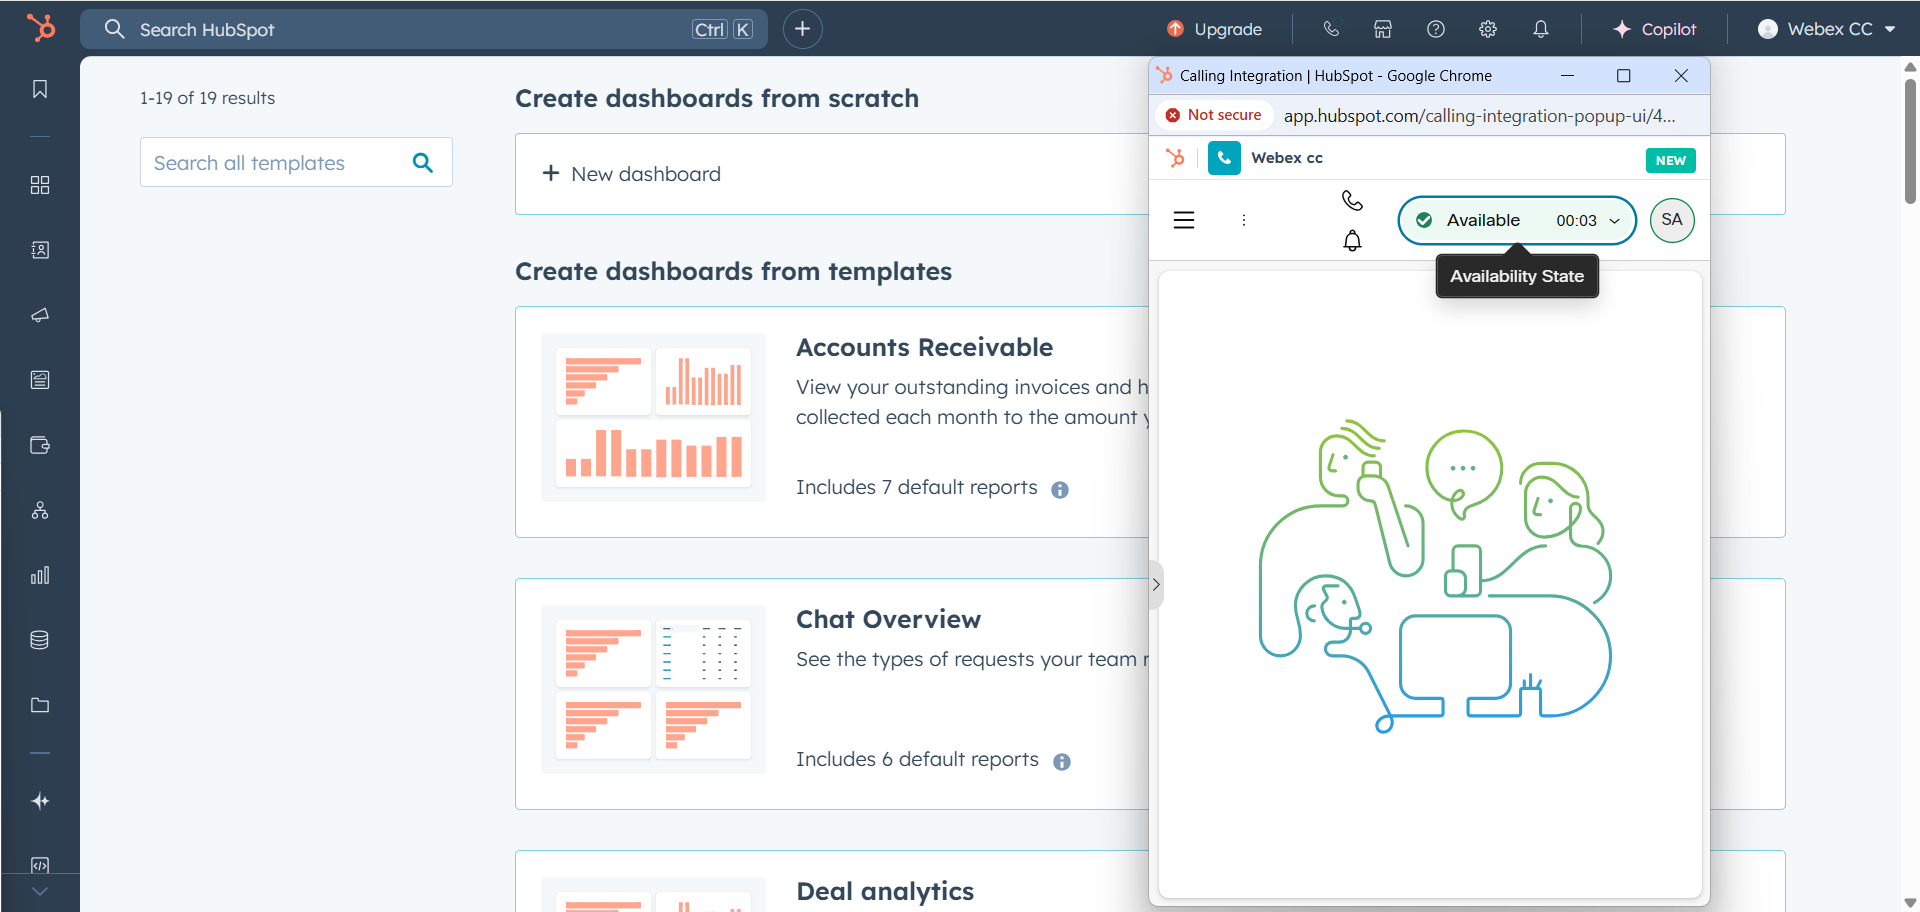
Log in to your Hubspot CRM account and show the Webex widget.
-
Log in to your Webex Agent Desktop inside the widget.
-
Perform test calls to ensure:
-
Customer information loads correctly
-
Call controls work as expected.
-
Troubleshooting Tips
-
If the layout does not update, clear the browser cache and refresh the Webex Contact Center interface.
-
Verify that Webex Contact Center credentials are correct.
After completing these steps, your Webex Contact Center Agent Desktop will be properly configured to work with CRM.
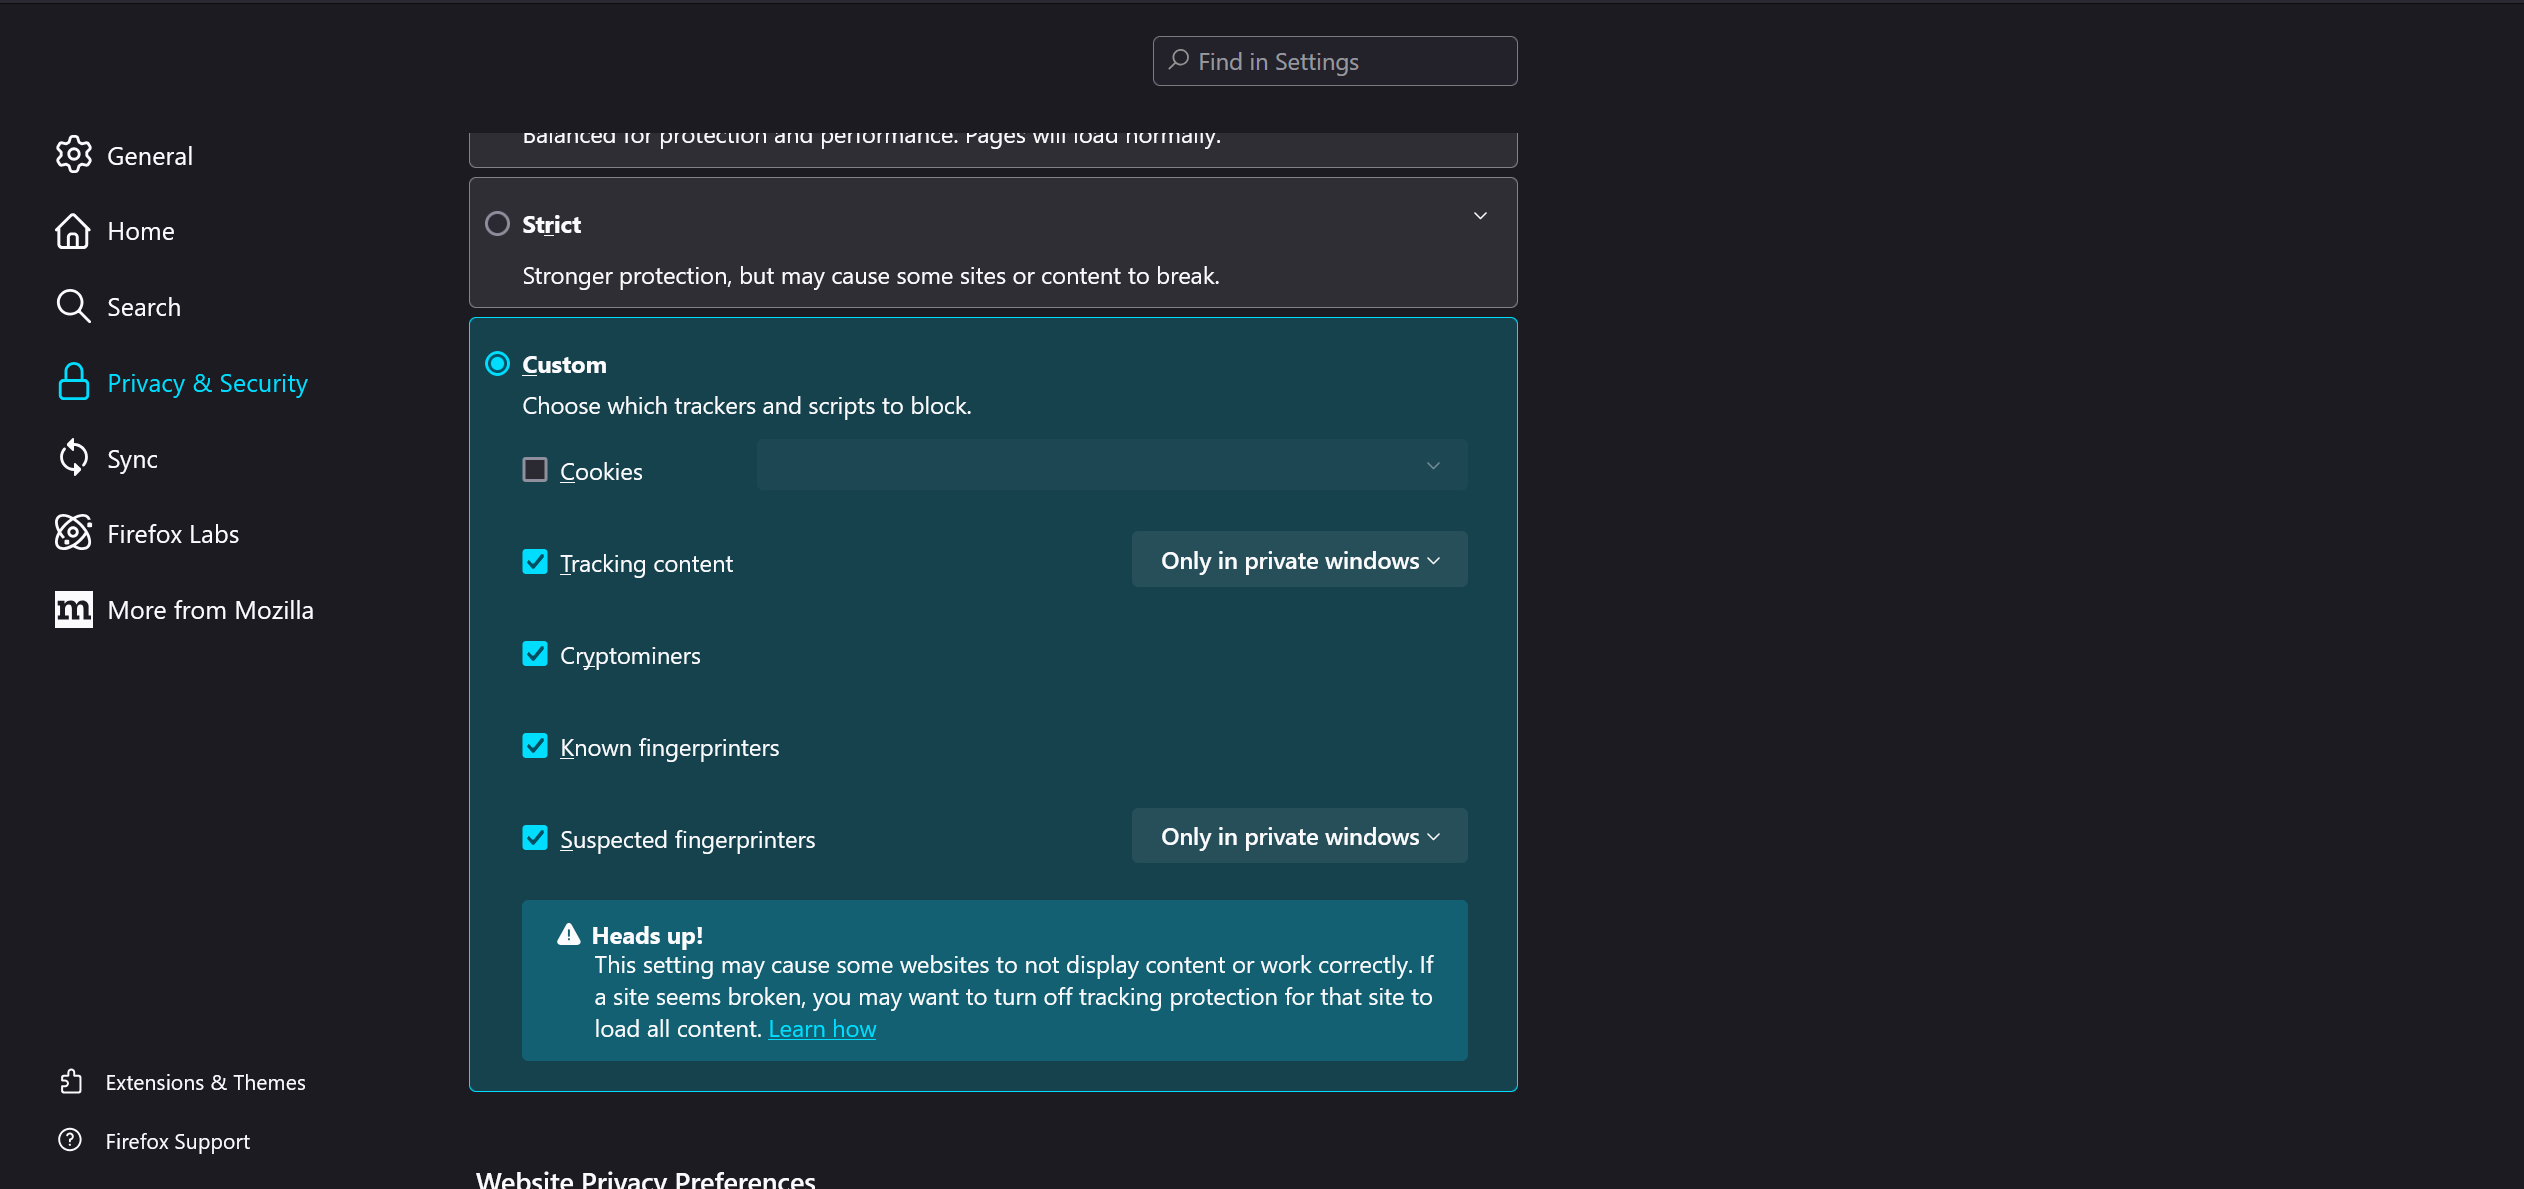
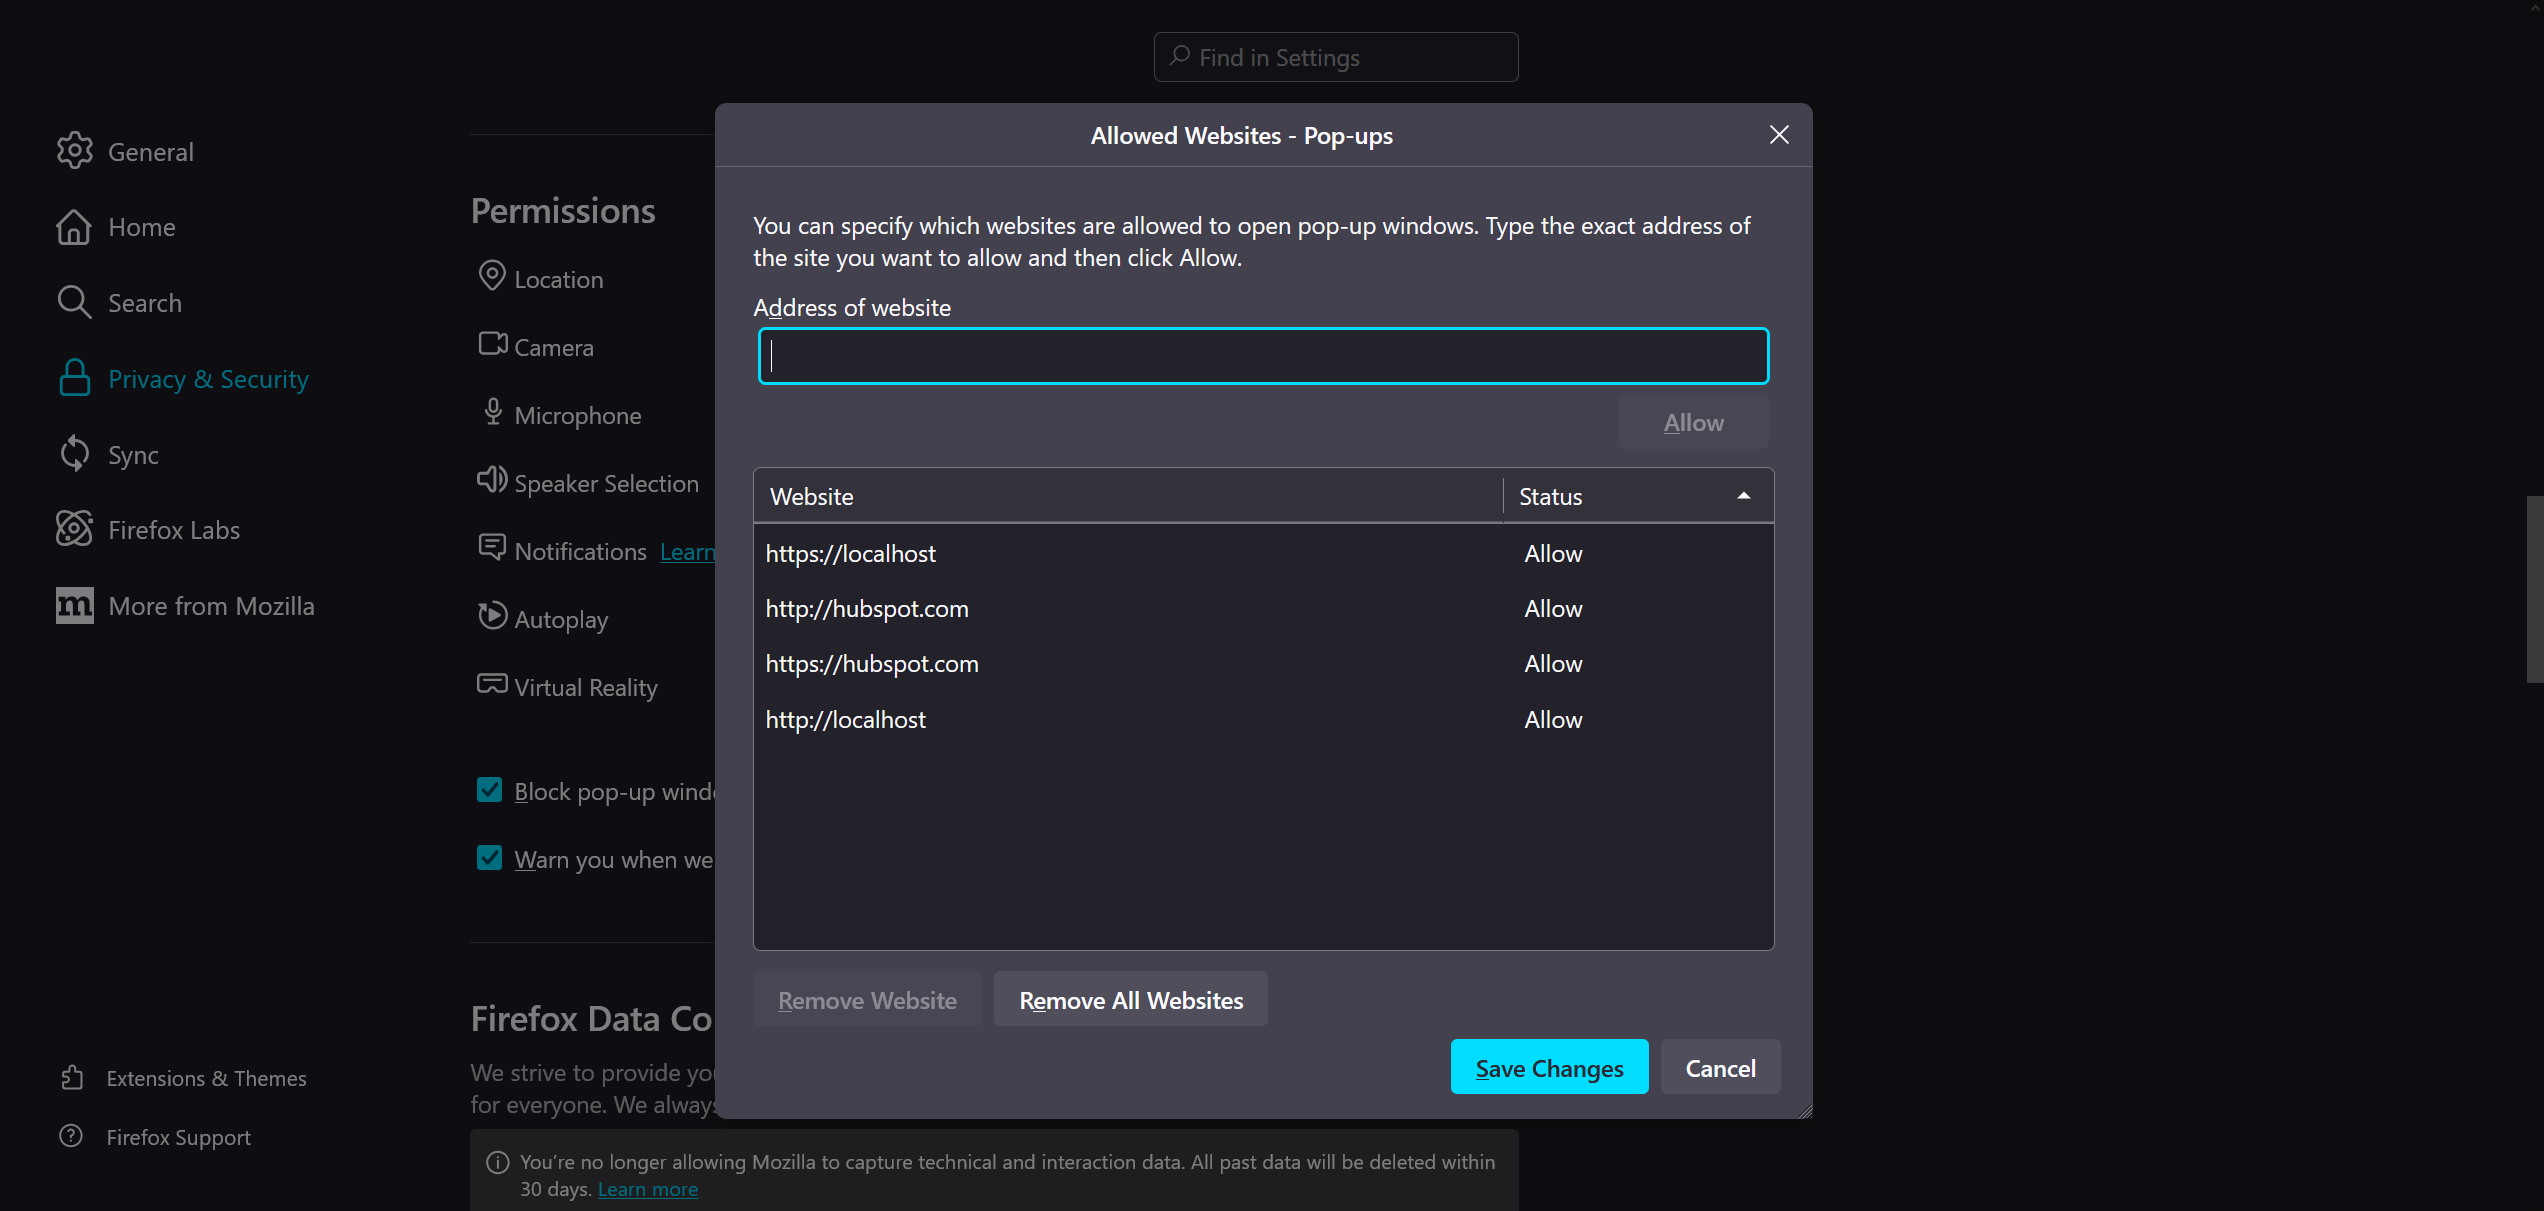
Firefox Browser Configurations
Firefox browser requires configuration settings in Privacy & Security.
List of configuration changes required in Firefox:
-
Go to the browser Privacy & Security settings and then removed cookie blocking.
-
Add exception to pop-up window blocking for the connector's domain & Hubspot.
After completing these steps, your Webex Contact Center Agent Desktop will be properly configured to work with Hubspot CRM.