Overview
EF chat gadget gives call center users the ability to communicate internally with other agents and supervisors. Agents are arranged according to their teams and an icon represents live agent status. To initiate a chat, an agent clicks another agent’s profile which opens a chat window. The gadget will work with HTTP.
Chat Gadget Deployment Planning
The chat application is a combination of 3 components.
|
Solution Components |
Description |
|
Chat Application |
This is an IIS based web application that requires a windows server machine to be deployed on. |
|
API Service |
This is a WCF based web-service that requires IIS to run |
|
Chat Gadget for Finesse |
A finesse gadget which renders Chat application frontend inside Cisco Finesse. |
Prerequisites
Following are the mandatory prerequisites for a smooth installation.
Hardware Requirements
These requirements suffice for a deployment with 300 agents or less.
|
Item |
Recommended |
Notes |
|
CPU |
2 vCPU |
Can be co-hosted |
|
Memory |
4 GB |
|
|
Disk Space |
30 GB |
Minimum disk space requirement is 5 GB. The recommendation is to account for transactional storage and logs. |
The gadget can be co-hosted with other Expertflow or third party products.
Redundancy is only supported on Cisco Finesse side, i.e., a single chat application will be deployed along with a finesse gadget on each of the two Cisco Finesse servers.
Software Requirements
|
Item |
Recommended |
Notes |
|
Operating System |
|
supported on these operating systems |
|
Database Server |
|
A separate SQL Server installation is not a requirement. A separate database can be created on already installed SQL Server. |
Port Utilization Requirements
Chat application deployed in IIS.Any available port can be assigned to the application. Default port is 80. Local & network security policy should allow communication on configured port.
System Access Requirements
-
IIS
Users with Admin rights can perform chat application installation along with Api service deployment.
-
Cisco Finesse Administration access
-
Finesse Administration credentials.
-
Cisco Finesse agent desktop/supervisor desktop access
-
Finesse agent\supervisor configured properly with team(s) assigned.
-
SQL Server DB credentials username\password
Time Synchronization Requirements
If the system dates and time are not synchronized the system can produce unpredictable results. Therefore, please make every effort to adhere to the following time synchronization guidelines:
The server machine and Cisco Finesse should have their Time Zone and time configured properly according to the geographic region and synchronized. To configure the time zone, please see the instructions from the hardware or software manufacturer of NTP server. The application servers should be synchronized to the second. This synchronization should be maintained continuously and validated on a regular basis. For security reasons, Network Time Protocol (NTP) V 4.1+ is recommended.
Compatibility
|
Item |
Recommended versions |
Notes |
|---|---|---|
|
UCCE |
11.5 |
Tested on version 11.5 |
Browser Compatibility
See how browser requirements are mentioned by some other vendors:
|
Item |
Recommended versions |
Notes |
|---|---|---|
|
Firefox |
Recent versions |
Tested on version 54.0.1 (64- bit) |
|
Chrome |
Recent versions |
Not tested |
|
Internet Explorer |
Recent versions |
Not tested |
Chat Application Browser Settings (Firefox)
Open browser.Type about:config in the address bar.
Click on the button captioned I accept the risk.
In the search bar type security.mixed_content.block_active_content Property.
Make sure it’s value set to False.
Chat Application Browser Settings (Chrome)
When a website page has insecure content, the following shield icon will appear in the address bar and click on the shield icon to open the menu options.
-
At this point, there could be 2 different messages: "Load Anyway" or "Load unsafe script". Click on either 'Load Anyway' or 'Load unsafe script' links to successfully load the video or other media content.
-
Click on the Done button to exit the menu.
NOTE: The URL in the address bar will show a line through HTTPS:// to indicate that the page is not fully secure, but the webpage will load the content.
Chat Application Browser Settings (Internet Explorer)
-
Open Internet Options and click on the Security tab
-
Click on the Custom level.button
-
In the new window, scroll down to the Miscellaneous area, and under the Display mixed content option, click on the enable option to display mixed content.
-
When finished, click on the OK button
-
You will need to restart IE to completely enable the new settings. Now, nonsecure content (http://) used inside Blackboard courses will always be displayed on your screen.
Deployment Modes
|
Component |
Cisco Finesse |
IIS |
|---|---|---|
|
Chat Application |
|
☑ |
|
API Service |
|
☑ |
|
Chat Gadget for Finesse |
☑ |
☑ |
Deployment
Download the latest copies of chat gadget, chat app and FileUploadAPI from gdrive and extract the zip folders.
Follow the steps listed below.
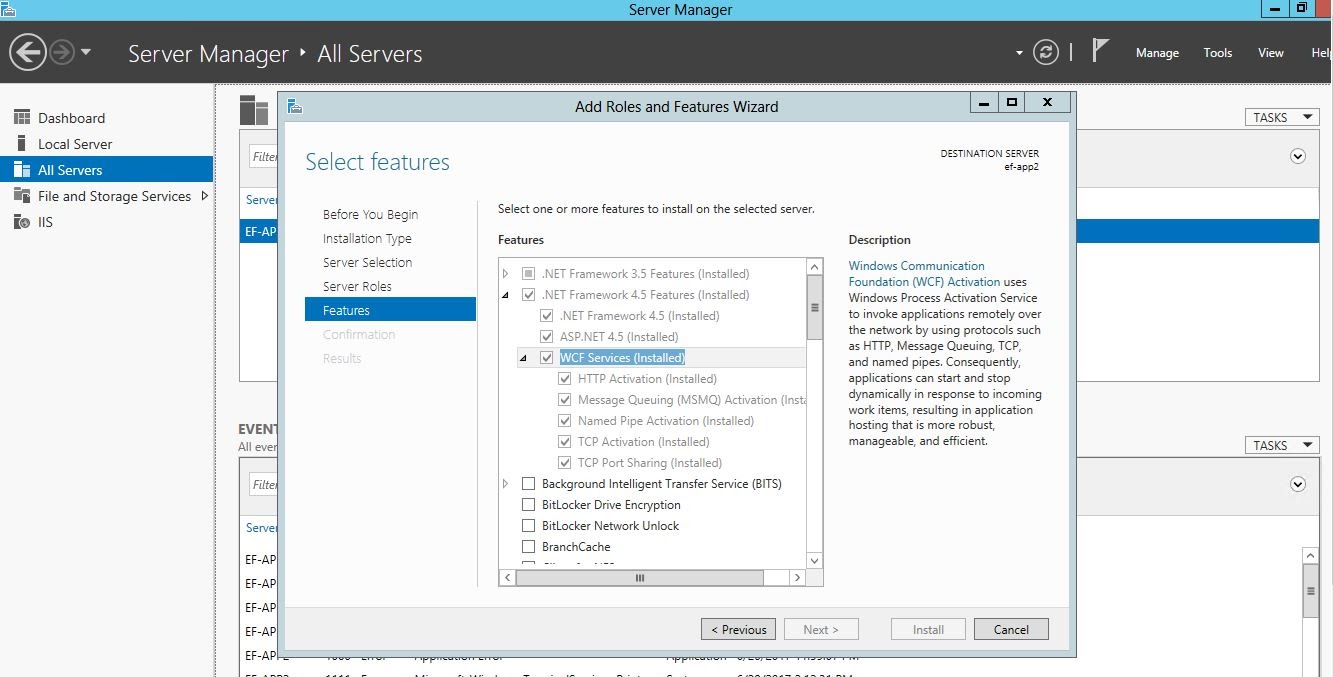
WCF Service Installation
Make sure that WCF services are properly installed. For installation follow these steps
-
Run Server Manager
-
Select All servers
-
Click on Manage and select Add Roles and Features
-
Click Next twice
-
Select Features
-
Expand .Net 4.5 features (Installed)
-
WCF Services box should be checked if not then check the box
-
Click on Install
Chat Application Deployment
For application deployment follow these steps
Create Server Certificate
-
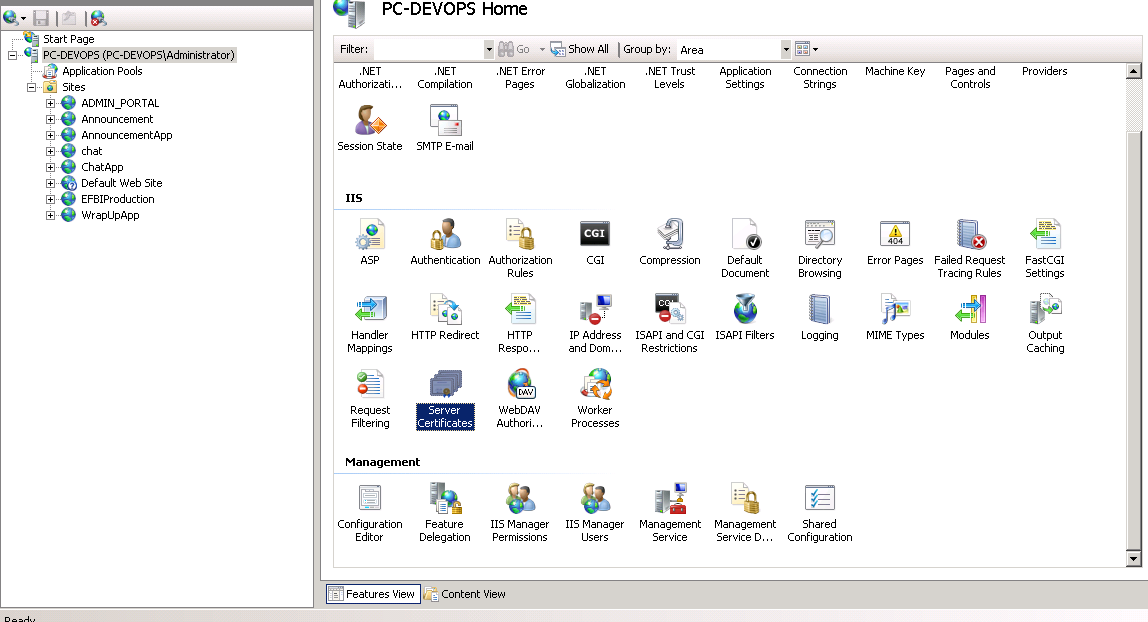
Press window+R, write inetmgr and click OK. It will run IIS Manager.
-
Click on the PC Name, double click on the server certificates from the IIS portion, as shown in the figure below
-
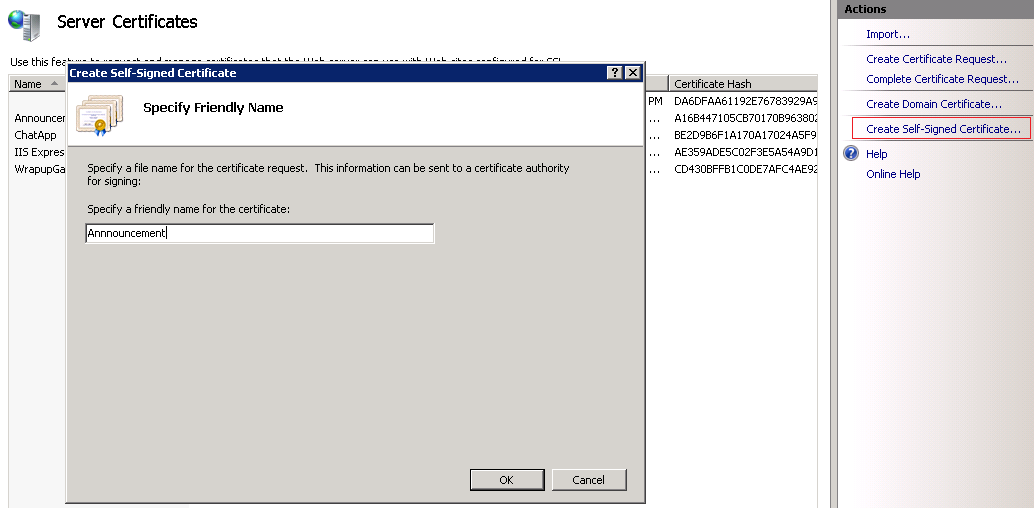
A new window will open. As shown in the figure below.
-
Select the Create Self-Signed Certificate.
-
Write any name, e.g. chat and click OK
Create a New Website
-
Create directory with name ChatApp in c:\inetpub\wwwroot folder.
-
Right-click on Sites and select Add Web Site
-
Set the following values in the following fields as shown in the picture below and click OK.
Update Bindings for https
-
In IIS Manager, Click on the newly added site
-
Select binding for the top-left corner as shown in the figure below
-
Click on Add
-
Set the values in the window
Create Database
First, create the database using the following steps.
-
Run SQL Server and create a new database named ChatDB. You can choose any other name as well.
-
Copy scripts
script.sql
into sql window
-
In scripts, update the database name in Use [ChatDB]
-
Execute the commands
File Upload API deployment
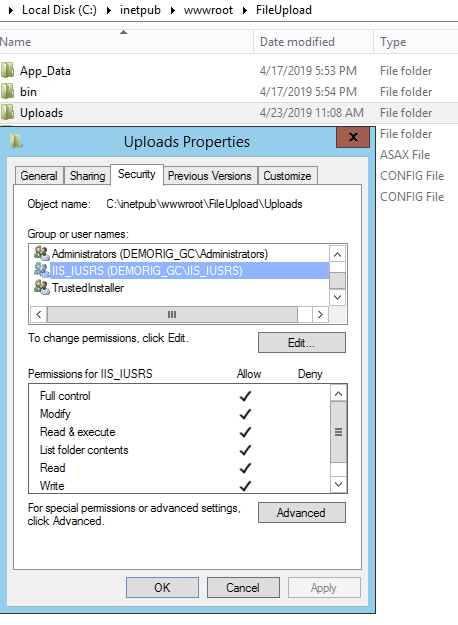
Extract the zip (downloaded under “Deployment” section above) and create a folder on C:\inetpub\wwwroot by name, Fileupload and copy the extracted content into it. Add another folder within this folder and give it a name “Uploads” and grant read/write access to local admin user and IIS as shown below
Hosting FileUpload API on IIS
-
Right click on Sites and select Add Web Site
-
Set following values in the following fields as shown in the picture below and click OK.
-
Type: https
-
IP Address: where site is deployed e.g. 192.168.1.36
-
Port: default is 443 you can set any available port number
-
SSL Certificate: select SSL certificate which was created
earlier
-
Update Bindings for https
-
In IIS Manager, Click on the newly added site
-
Select binding for the top-left corner as shown in the figure below
-
Click on Add
-
Set the values in the window
Post Deployment Updates
-
Open the config.js file in editor (notepad/notepad++) and update the web services links according to the newly deployed chat application.

-
Open the web.config file present in c:\inetpub\wwwroot\ChatApp.
-
Update following higlighted fields for; Datasource, FileUPload API (provide the link to Uploads folder), finesse credentials.


4. Go back to Chat App site, and add another http binding. This new http port will be used by below highlighted API. *Please note*, you can only do this, if you baseURL & dbBaseURL APIs are running on https

Application Logs
Application logs are made in c:\log\ChatApplication.log file. Make sure that the log folder has read and write permissions. In order to enable permissions, follow these steps for log folder.
Finesse Gadget Configuration
Go to the Gadget directory which is downloaded above and open finesse-chat-10.5.js file. Set the chat gadget application link according to the deployment as shown in the image below.
Finesse Gadget Deployment
Gadgets can be installed on your own web server or directly on the Finesse server. In order to install on the Finesse server follow these steps:
-
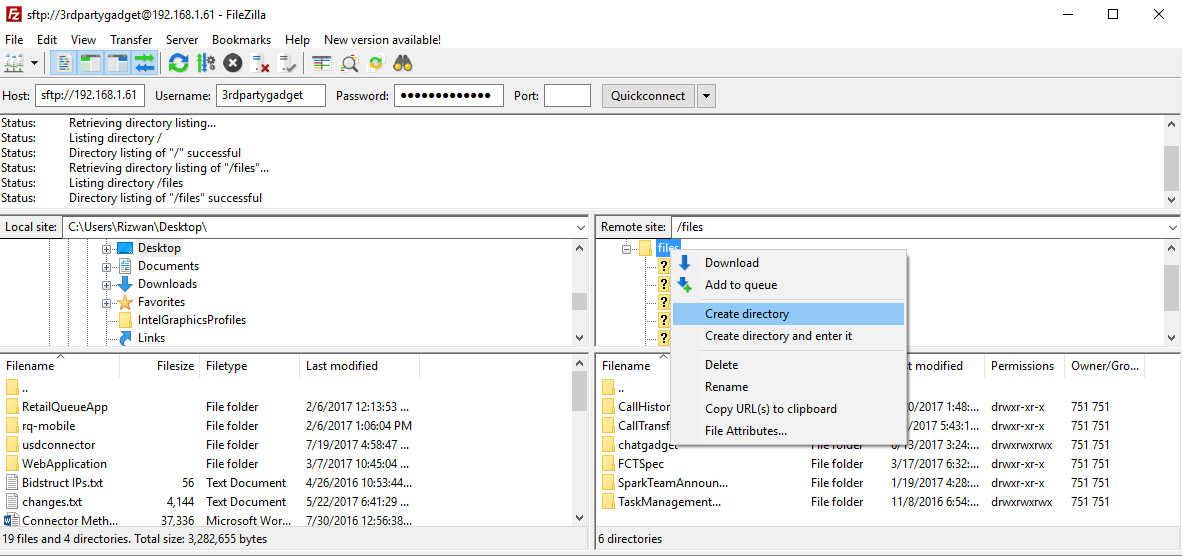
Run FileZila and login to finesse with following credentials
-
Create a folder e.g. chatgadget into the files directory on finesse server
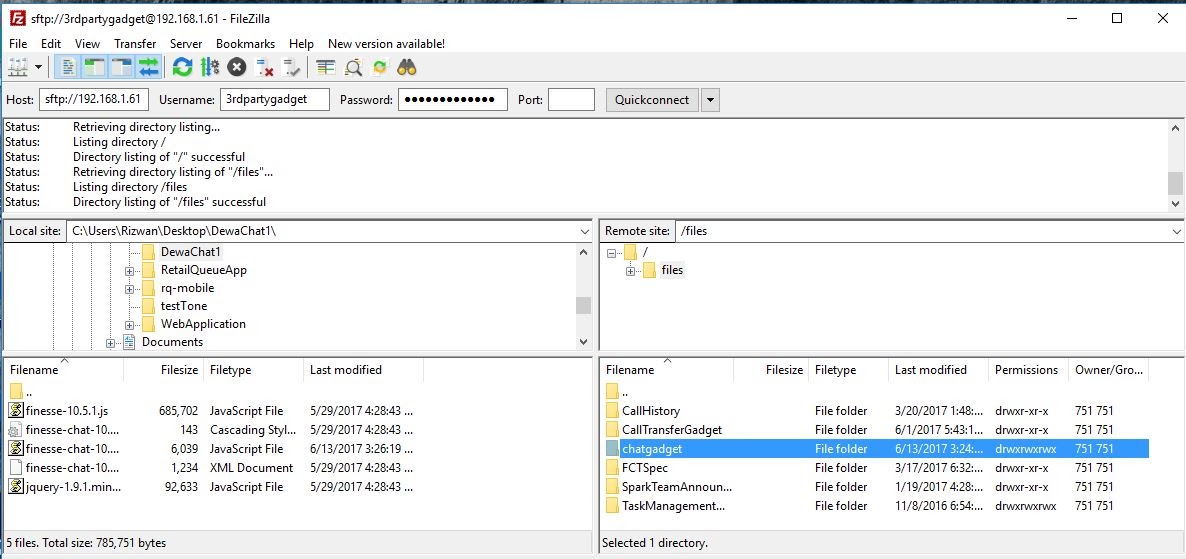
-
Upload the gadget files which was downloaded
here
-
Next we will update the Finesse layout to point to the new gadget. Load the Finesse administration by going to: https://<hostname or ip>:8445/cfadmin/
-
If your team’s are utilizing the default layout, Click on the desktop layout tab. Otherwise, click on the Team Resources tab to edit a specific team's layout.
-
Where you place the Chat Gadget is your preference. In this example I am placing the gadget under the HOME tab in a column. If you uploaded the gadget as a instructed above, you can copy the following lines:
Add SSL to Browser
This step should be done on the browser of each agent/supervisor.
Open the deployed chat application address in firefox e.g.
https://192.168.1.36:321/chat-messages.html and add the exception to the browser.
Troubleshooting
|
Issue |
Summary |
Alternative |
|---|---|---|
|
Gadget not loaded. |
Gadget not loading issue. |
IIS server stopped. Make sure servers up & running. |
|
Application .war file not deployed. |
Application not deployed on server. |
Make sure application deployed on tomcat. |
|
Application running but no data loaded in dropdown. |
Application running but no data loaded in dropdown. |
Make sure proper credentials in application config file. |
|
History not loading. |
Agent history could not be displayed. |
Make sure SQL Server is up & running. |
|
Gadget Not appearing in Finesse. |
Gadget Not loading in Finesse due to wrong web application url. |
Make sure proper url entered in gadget file. |
Unable to Download History
Follow the following steps
-
Go to gadget directory where gadget is deployed e.g. c:\inetpub\wwwroot\ChatApp
-
Right-click on Downloads folder→ properties→ security→ edit→Add
-
Write “everyone” inside Select Users and Groups window
-
Click on Check Names, Your screen should look alike following figure
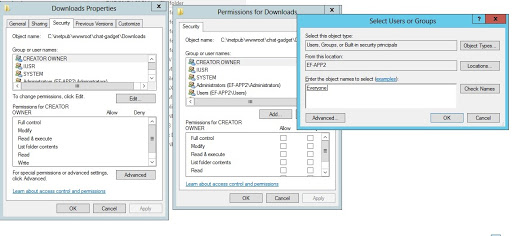
5. Select OK
6. Now in Permissions for Downloads window select the checkbox in front of Write as shown in the following figure
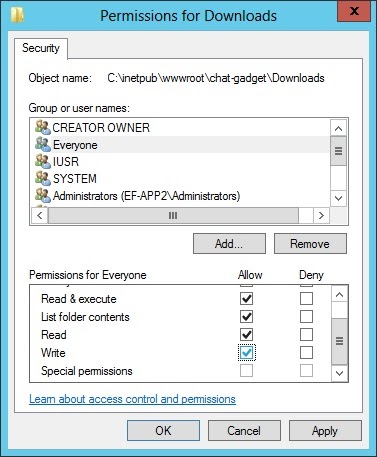
7. click→ Apply → OK→ OK