Salesforce Connector enables an agent to perform multiple actions to handle customer queries.
The details of Agent capabilities are described below:
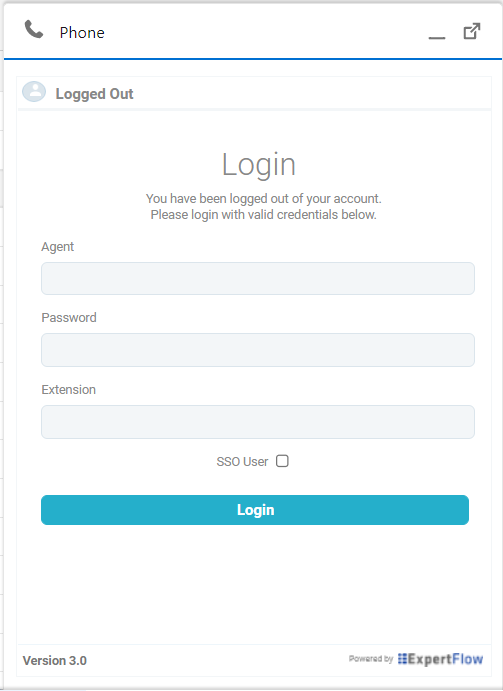
Login
An agent can be logged in by entering agent credentials and then pressing the ‘Login’ button from the login screen. There is support for an SSO user in our solution, for an SSO user, the user needs to check the checkbox for "SSO User" placed just below the extension field.
Login
Post Login Interface
After entering the credentials, and checking the box of SSO User, the agent can see the Dashboard with all the agent's details.
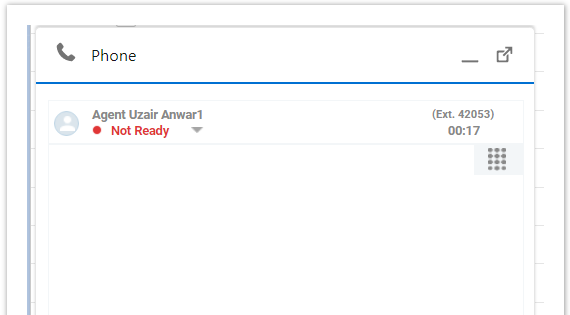
Dashboard (Post Login) Screen
State Change
Change State to Ready
After logging in. an agent may change state to Ready or Not-Ready.
During Wrap-up, an agent may change state to Ready or Not-Ready.
Available controls for agent state are displayed when the bottom-facing arrow button is pressed next to the agent’s extension.
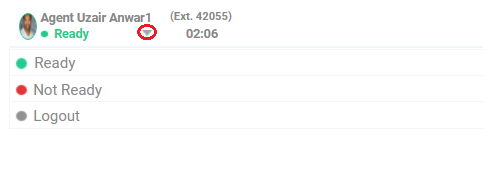
Change State to Ready
Change State to Not Ready
For changing the state to Not Ready, agent can choose one of the reason codes that are displayed in the Not-ready bar. Select desired not-ready reason and the agent state will be changed to Not-ready with respective reason.

Change State to Not Ready
Logout
To logout, agent must specify one of the logout reason codes that are displayed in the "Logout" dropdown. The agent will be loggedout with the respective reason.
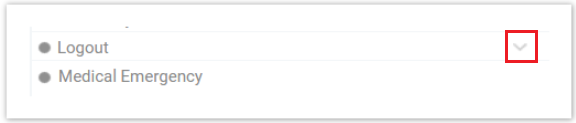
Logout
Wrap-up
Wrap-up reasons are displayed when the agent is in a wrap-up state. Select desired to wrap up reason and the agent will be logged with the respective reason. It is not mandatory to select any wrap-up reason. Wrap up window can be toggled from the button placed above the ‘Call Wrap-Up’ window.
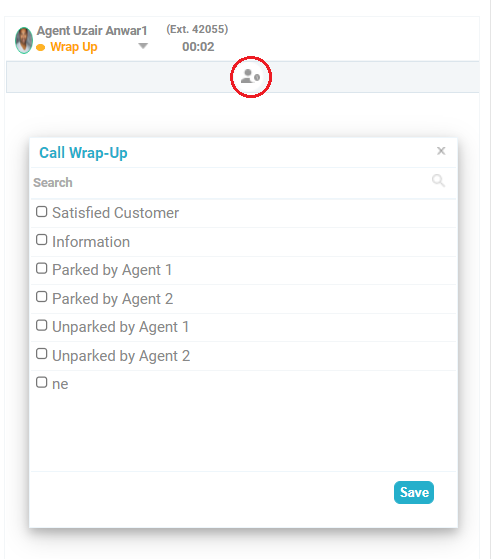
Wrap-up
Wrap-up Timer
For every state a timer exists, that shows how much time has elapsed for the particular state

Wrap-up Timer
Call State Controls
CTI toolbar provides call state controls including but not limited to:
-
Answer Call
-
End Call
-
Hold Call
-
Resume Call
-
Consult Call
-
Direct Transfer
-
Consult Transfer
-
Conference Call
The details of each one are described below
Answer a Call
The agent may answer the call by clicking on the green phone icon.

Answer a Call
Call Control Toolbar
Following call controls are available on the toolbar
-
End Call
-
Conference Call
-
Direct Transfer
-
Wrap-up Reasons
-
Consult Call
-
Dial Pad and
-
Hold/Resume Call

Call Control Toolbar
Outbound Call
-
For outbound call click the dial pad icon located on the right side, just below timer.
-
The number can be entered typing in the input field for a number or through the dial pad buttons provided in the dial pad.
-
After the number has been provided, you can click the button "Dial" to initiate the outbound call
Consult Call
-
For consulting another agent, click the click the consult icon located on the call controls as shown in the image.
-
The number can be entered typing in the input field for a number or through the dial pad buttons provided in the dial pad.
-
After the number has been provided, you can click the button "Consult" to initiate the consult call
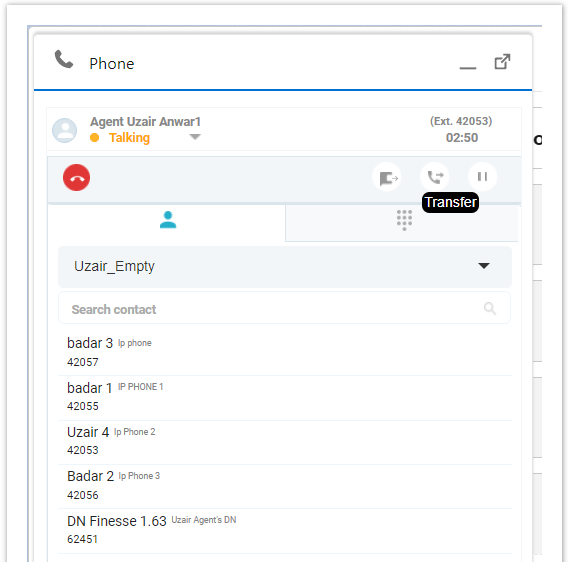
Direct Transfer
-
For direct transferring the call to another agent, click the direct transfer icon located on the call controls as shown in the image.
-
The number can be entered typing in the input field for a number or through the dial pad buttons provided in the dial pad.
-
After the number has been provided, you can click the button "Transfer" to initiate the direct transfer call.
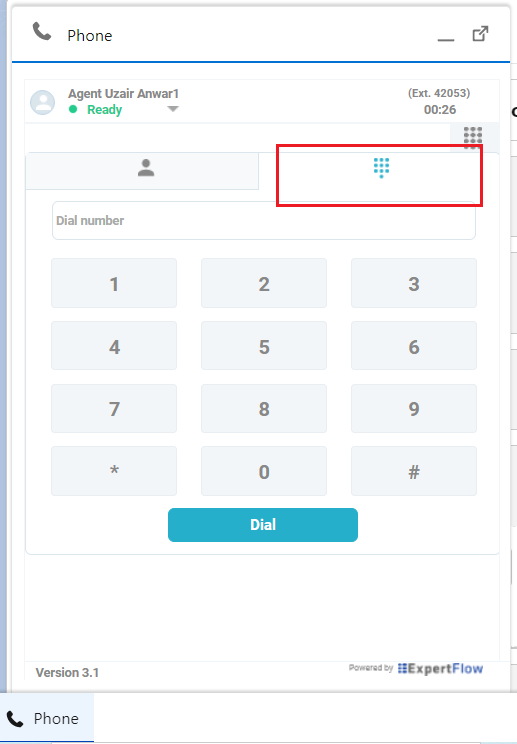
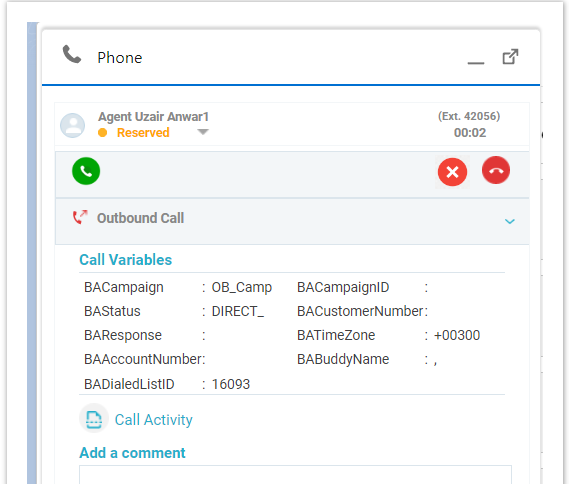
Outbound Call
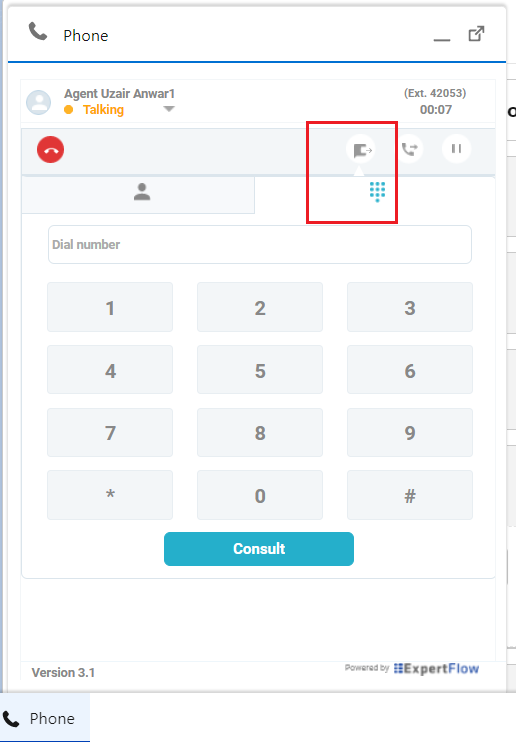
Consult Call
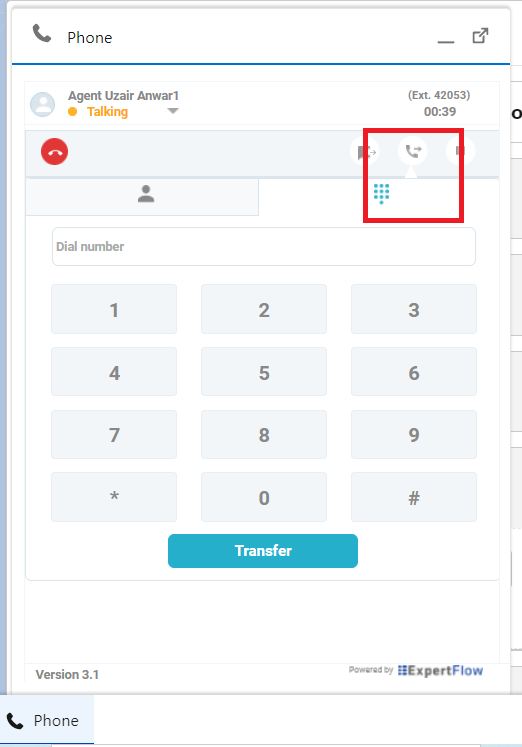
Direct Transfer
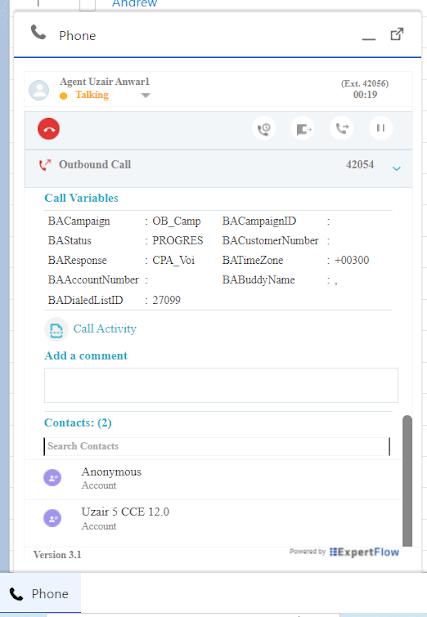
Call Notes
The user whether agent or supervisor can also provide notes during the call in the call activity section, these notes are then attached to the call activity created at the end of the call.
Call Notes
Outbound Campaign
All Cisco Campaigns are supported:
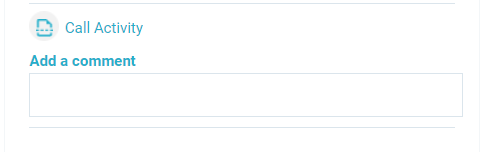
Predictive Campaign
The flow of predictive campaign calls is such that it will first ring on the customer end and the agent will be in Reserved state. If the customer accepts the call, then an agent will receive the call. On accepting, the agent and customer both are in talking state i.e. the call is Active.
Predictive Campaign
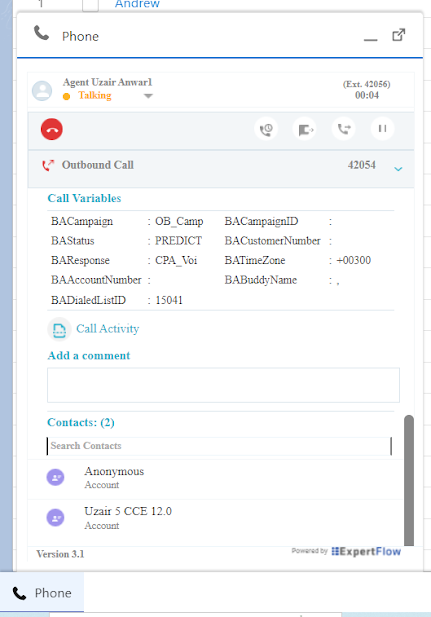
Progressive Campaign
The flow of progressive campaign calls is such that it will first ring on the customer end and the agent will be in Reserved state. If the customer accepts the call, then an agent will receive the call. On accepting, the agent and customer both are in talking state i.e. the call is Active.
Progressive Campaign
Preview Campaign
Preview campaign call flow is slightly different than other campaign calls. In the preview campaign call the call first lands on the agent, the agent has 3 choices i.e. Accept, Close and Reject the call. If the agent Accepts the call only then the campaign call proceeds. From here on, it behaves like other campaign calls. After that like other campaign calls, it will ring on the customer end. If the customer accepts the call, then an agent will receive the call again. On accepting the agent and customer both are in talking state i.e.; the call is Active.
Preview Campaign
Phonebook
The phonebook feature provides user phonebooks with integrated call controls as well as search contact and search phonebook functionality.
Make A Call
The phonebook view can be accessed by first clicking the Make Call Button and then the phonebook button as shown in the following image.
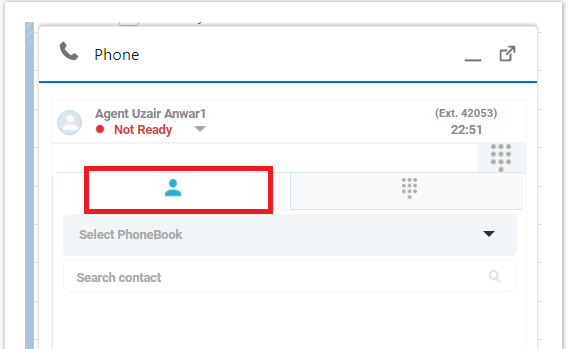
Make A Call
Select Phonebook
The desired phonebook can be selected by clicking on the Select Phonebook dropdown, you can also search for the phonebook by typing in this field.
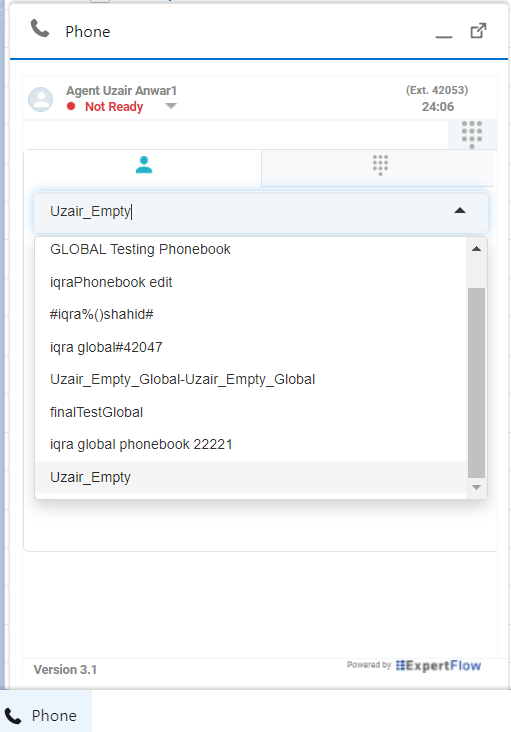
Select Phonebook
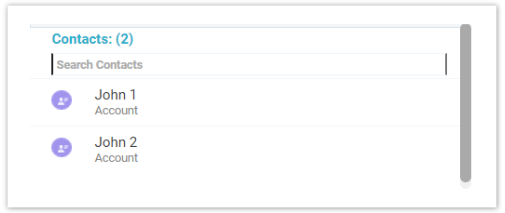
Contact List
Once you have selected the phonebook, the contact list will be populated that belongs to that particular phonebook. Upon clicking on any contact, an outbound call will be initiated for the number corresponding to that contact.
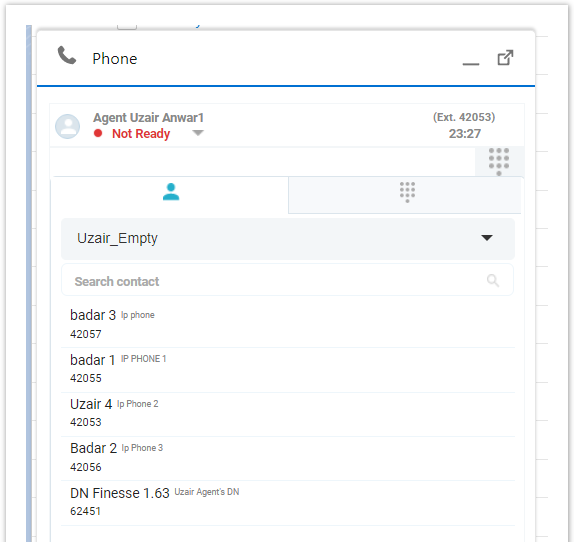
Contact List
Consult A Call
If the user has a call in progress then the user has the option of consulting an agent or transferring the call to another agent. The user can perform both operations with the phonebook feature
To consult a call via phonebook, the user has to click the consult button and then select the phonebook button. When the user selects his desired phonebook, the contact list will be populated corresponding to that phonebook. Upon clicking on any particular contact, a consult call will be initiated to that contact's number.
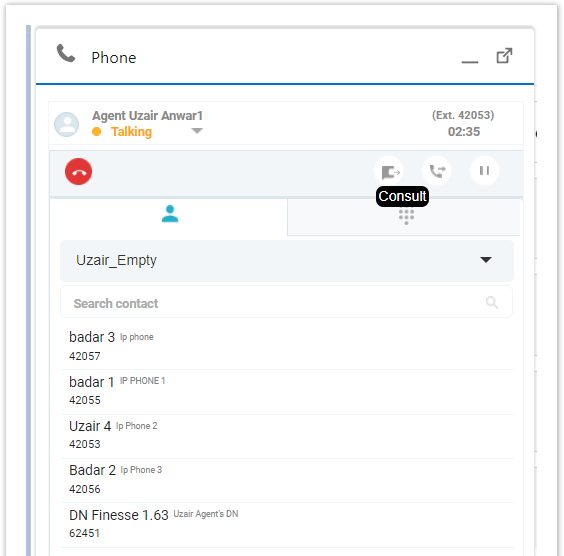
Consult A Call
Transfer A Call
To transfer a call via phonebook, the user has to click the transfer button and then select the phonebook button. When the user selects his desired phonebook, the contact list will be populated corresponding to that phonebook. On clicking any particular contact, the call will be transferred to that contact's number.
For consult transfer, the user doesn't have to select any contact. It will be automatically transferred to the consulted agent upon clicking the transfer button.
Transfer A Call
Schedule Callback
The schedule callback feature is available for campaign calls that allow the user to schedule the callback with the customer at a suitable time.
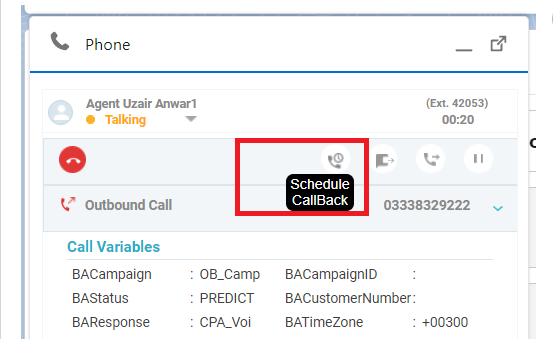
Schedule Callback Control
Schedule A Callback
To schedule a callback, the user has to click the schedule callback button and then provide the relevant details like phone number, date and time. Once all the required details are provided user need to click Schedule Callback button in the form.
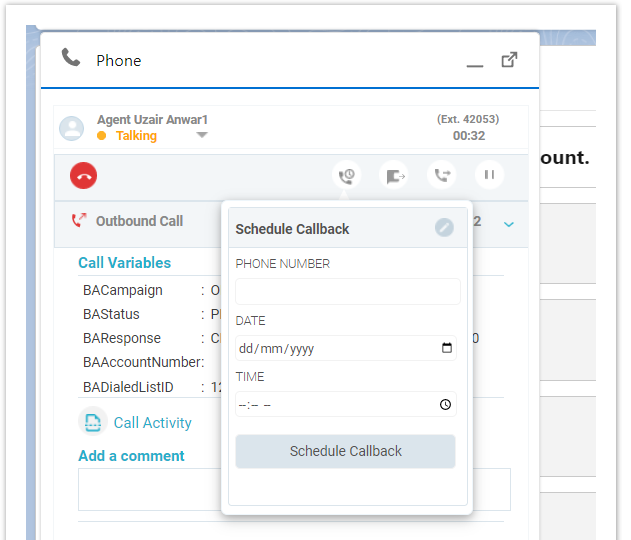
Schedule Callback
Post Call Indication
After the callback is scheduled a green tick icon will appear along with the schedule callback button.
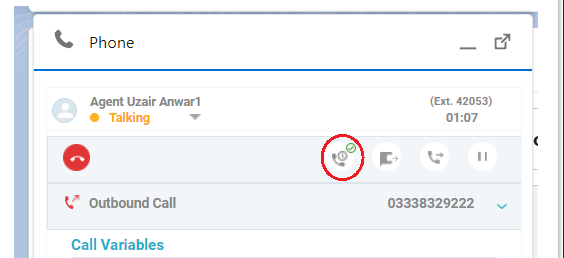
Post Call Indication
Reclassify Call
The Reclassify feature allows the user to reclassify a Campaign Call (Direct Preview Outbound call only) as Answering Machine, Fax, Invalid Number, or Voice. By default, a call is classified as Voice.
To reclassify a call, the user has to click the reclassify button and then the desired option.
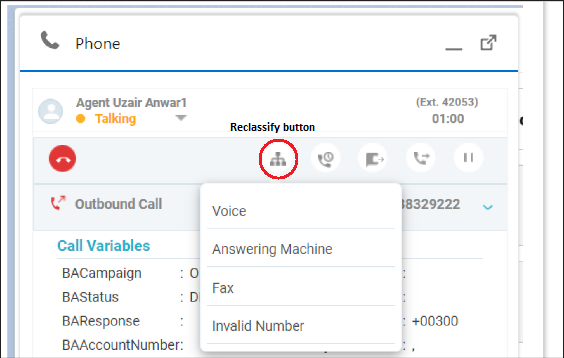
Reclassify A Call
Post Call Indication
After the call is reclassified a green tick icon will appear along with the reclassify button.
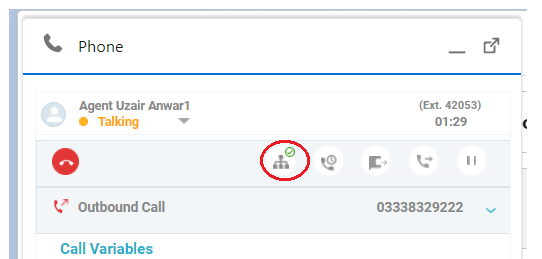
Post Call Indication
User States & CTI Controls
Below are agent states and available CTI controls against every state
|
State Name |
Controls |
|
Not Ready |
|
|
Ready |
|
|
Reserved |
|
|
Dialing Call: Alerting |
|
|
Call Active |
|
|
Call Held |
|
|
Consult Call Active |
· End Consult Call
|
|
Conference Call Active |
|
|
Wrap-up |
|
|
Logged out |
|
Screen Pop
When a call arrives on the logged-in agent, Account/Contact/Lead is popped up according to the caller number and information stored in Salesforce.
-
If one record is matched, then that record will automatically pop up.
-
If there is more than one matching record, a contact's window will be displayed, listing all matching records. If you want to open a particular record from the list, simply select that record and it will be popped up in the background window.
-
If there is no match, a Contact will be saved with the name set to ‘Anonymous’, and the number set to the caller number. (By default for the No-Match case we create the Contact, however this is a configurable option and the user can change it as per his requirement)
Screen Pop-up
Click to Dial
Click to dial feature allows the user to select any number corresponding to a record (Account/Contact/Lead) and an outbound call will be initiated to that number.
Without the click-to-dial feature, the user can’t dial a call while clicking on any number from the Salesforce record.
Click to Dial-Disabled
You can see that option is disabled in the Phone tab.

Click to Dial is disabled
Click to Dial-Enabled
Click to dial feature is enabled when an agent is successfully logged in to the Salesforce connector application. After enabling this feature, you can see the phone tab has been enabled.

Click to Dial is enabled
Call Activity
A call activity is created at the end of the call for all call type except consulting calls. It contains information such as
-
caller object,
-
wrap-up reason,
-
duration of the call,
-
call type and
-
comments.
The comments field displays the call type for the call.
The task name is created as a combination of different attributes that are agent username, call id, and the current time.
Call activities can be seen from the ‘Tasks’ tab at the top, it will show the activities in descending order i.e. latest activity will be at the top. In the case of single matching or no matching record, it will be created automatically.
Call activity will not be created if there are multiple matching records in the contact window and the user didn’t select any record.
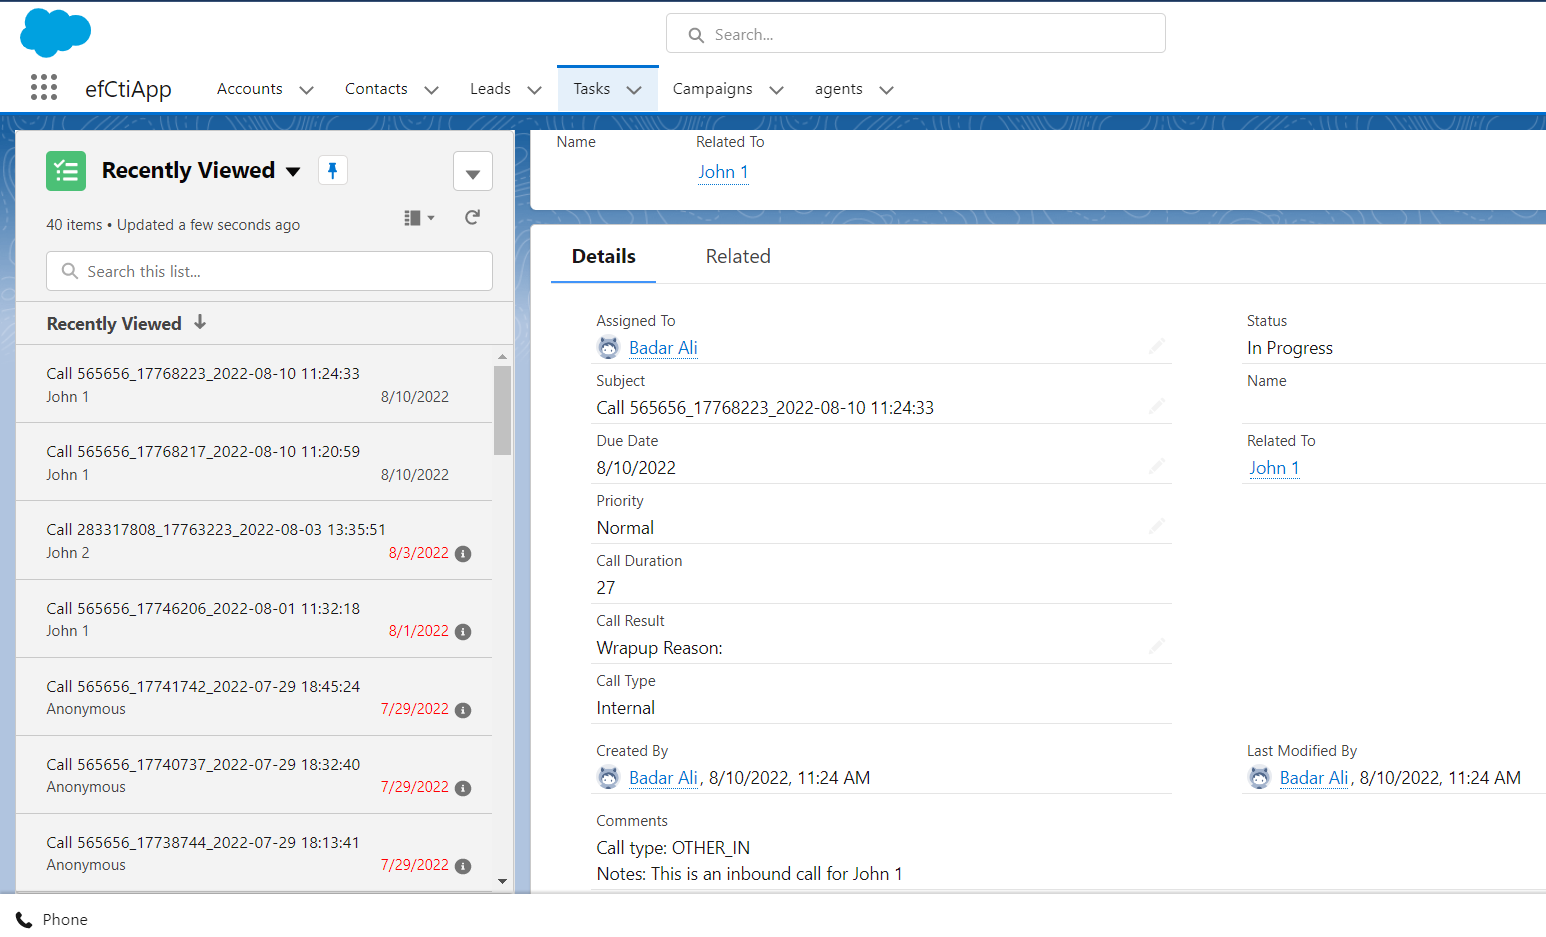
View Call Activity
Call Types
|
Call Scenario |
Agent 1 Call Type |
Agent 2 Call Type |
|---|---|---|
|
Inbound |
Inbound |
N/A |
|
Direct |
Internal |
N/A |
|
Outbound |
Outbound |
N/A |
|
Transfer |
Depends on main call source (Inbound/ Internal/ Outbound) |
Internal |
|
Conference |
Depends on main call source (Inbound/ Internal/ Outbound) |
Internal |
|
Consult Transfer |
Depends on main call source (Inbound/ Internal/ Outbound) |
Internal |
|
Campaign |
Outbound |
Internal |
These are the primitive call types that Salesforce supports such as Inbound, Internal, and Outbound.
For call types that we receive at the call end event from Finesse are described below.
Sub call types
UCCX
|
Call Scenario |
Sub Call Type |
|---|---|
|
Inbound |
ACD_IN |
|
Direct |
OTHER_IN |
|
Outbound |
OUT || AGENT_INSIDE |
|
Outbound Campaign |
OUTBOUND || OUTBOUND_DIRECT_PREVIEW |
|
Transfer |
OFFERED |
|
Conference |
CONFERENCE |
|
Consult Transfer |
TRANSFER |
UCCE/PCCE
|
Call Scenario |
Sub Call Type |
|---|---|
|
Conference |
CONFERENCE |
|
Consult Transfer |
CONSULT_OFFERED |
|
Direct |
OTHER_IN |
|
Outbound |
OUT || AGENT_INSIDE |
|
Outbound Campaign |
OUTBOUND || OUTBOUND_PREVIEW |
|
Outbound Campaign Callback |
OUTBOUND_CALLBACK || OUTBOUND_PERSONAL_CALLBACK || OUTBOUND_CALLBACK_PREVIEW || OUTBOUND_PERSONAL_CALLBACK_PREVIEW |
|
Inbound |
PREROUTE_ACD_IN |
|
Transfer |
TRANSFER |
Activity will not be created for consult call/consult call, direct transfer (direct transferring consult call leg to Agent C).
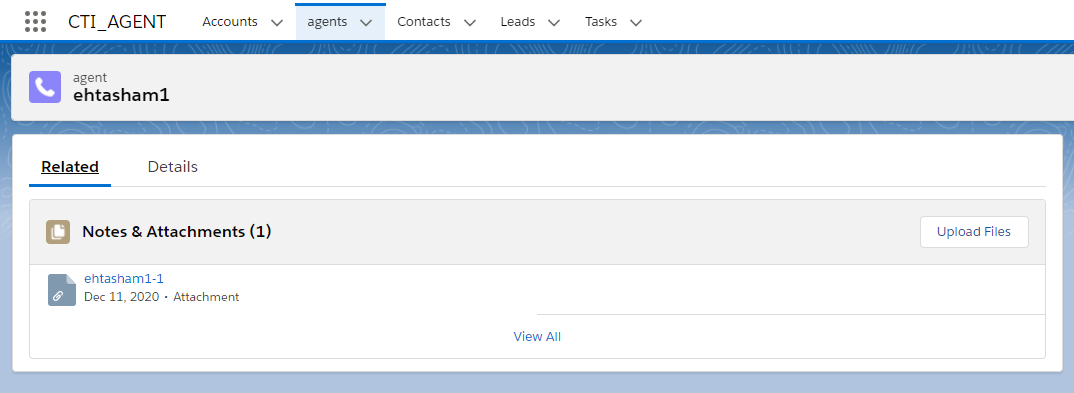
Logs
Logs are associated with agents, meaning that they will be created for specific agents that will be logged in. They contain information about the agent states, dialogues states as well as the status of connection and API requests. Logs are updated in a log file every time a call ends. For every agent there can be a maximum of 10 log files, each log file can contain logs for up to 20 calls. After every 20 calls, logs will be maintained in the next log file. Log files are named based upon the agent username and the file counter.
In case all log files are consumed up to the maximum limit, the next logs will be saved in the very first log file (oldest). New logs will actually replace previous logs. This is done so that the oldest available logs will always be discarded first if the limit has maxed out. Logs can be viewed from the ‘agents’ tab at the top, open a particular agent, and then go to the Related tab.