Purpose
The purpose of creating a deployment guide for EFCX connector in Salesforce is to provide instructions and guidance for successfully installing, configuring, and utilizing the connector within Salesforce environments.
Intended Audience
This document is intended for IT operations personnel and system administrators who want to deploy Salesforce embedded CTI connector.
Prerequisites
-
Salesforce Developer Account. Visit https://developer.salesforce.com/signup (Free-developer account) to create one if you do not have one.
-
You must have installed the EFCX on your server before integrating with Salesforce.
-
Web Server or Local Server to host the Connector.
-
Call Center Definition File which can be found in the Repository.
Installation of EFCX Connector
This EFCX connector can be deployed on any window server in any application server of the user's choice (IIS, Tomcat, etc). The following section lists the steps to deploy the application on an IIS server.
-
Download the Salesforce - EFCX Connector release and extract. In the extracted folder, Copy all the files and place them in the (c:\inetpub\wwwroot\EFCX_Connector) or any desired directory.
-
Open IIS. It can be opened by pressing window+R, writing inetmgr, and clicking OK. It will run IIS Manager.
-
Right-click on Sites to Add a new Site.
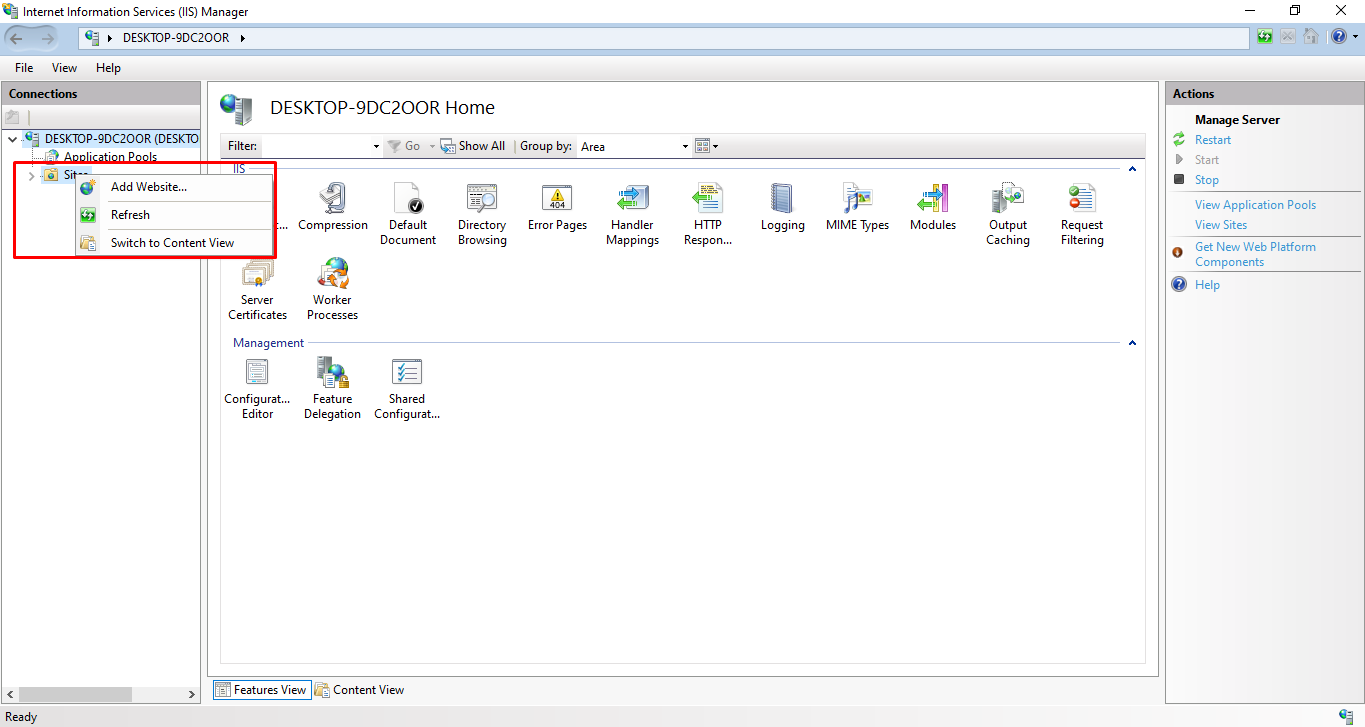
-
Add new Site, Site name (efcx_connector).
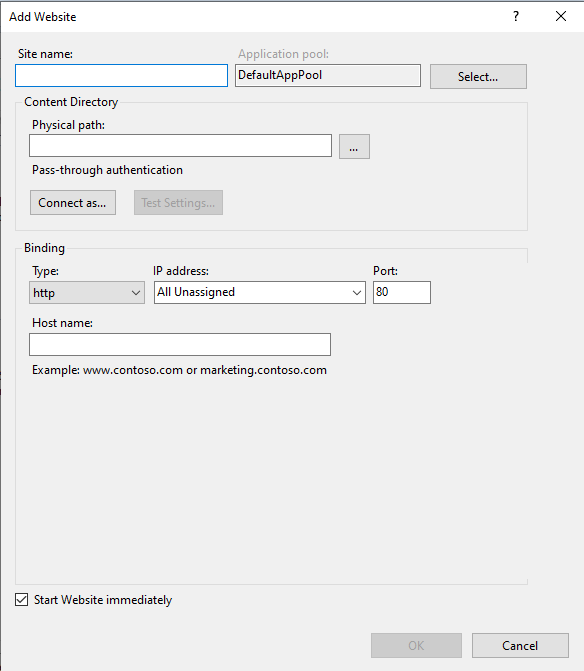
-
Physical path (c:\inetpub\wwwroot\EFCX_Connector).
-
Port, default value is 80 but any other value can be assigned.
-
Please follow this guide to install and configure the SSL certificates on IIS in order to run the EFCX connector on HTTPS.
-
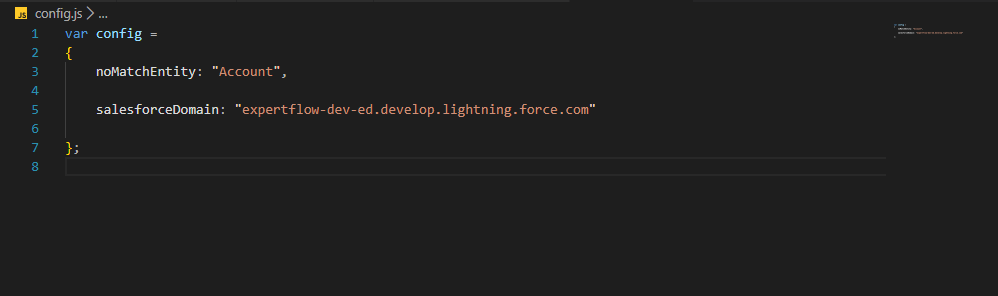
Configuration for EFCX Connector only when using with Salesforce
-
Open the new_config.js file located on
c:\\inetpub\\wwwroot\\EFCX_Connector\\config.jspath. -
Set the property of noMatchEntity to “Contact“, “Lead“ or “Account“.
-
Set the property of salesforceDomain to the domain name on which you are accessing the EFCX connector.
-
Update the configuration file and save it.
Run EFCX Connector Locally
-
After configuration, Browse the EFCX Connector from IIS.
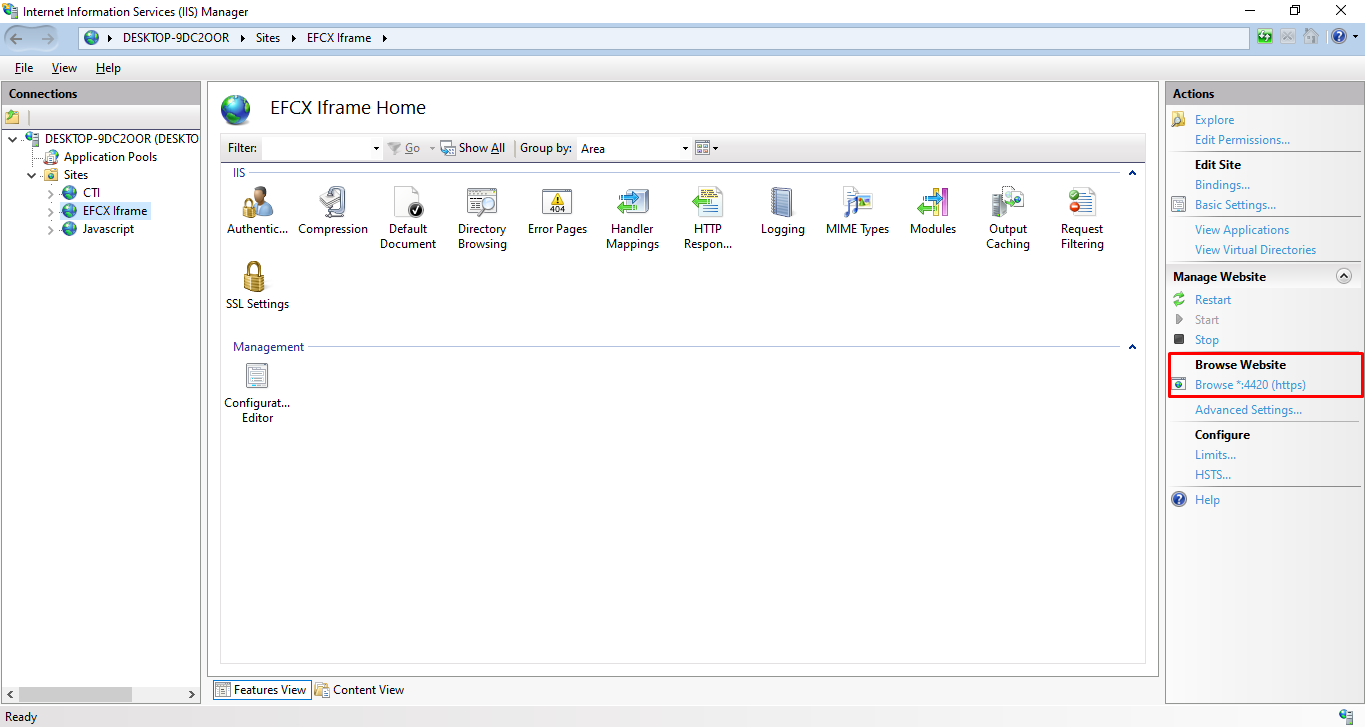
-
If you have followed all the steps correctly then you will be able to see the below interface of locally hosted EFCX Connector.

Integration of EFCX with Salesforce
Step 1: Configure CTI Adapter URL
-
From Setup, in the Quick Find box, enter Call Centers, then select Call Centers.
-
On the next page, press Continue.
-
Click on Import on the next page.
-
Upload the callCenterDefinition.xml file, present in the extracted folder and click on import.
-
On the next page, you can see the general information about the call center and you can edit it by clicking the Edit option.
-
Once you click on Edit option, on the next page all the fields will be filled with the data in callCenterDefinition file.
-
Change the Adapter URL with the URL on which EFCX Connector is running.
Step 2: Assign Users to call center
-
Open Call Center with the name “ExpertflowCTI“.
-
At the bottom you’ll find the “Manage call center users” option. If you can’t find manage “Manage call center users”, then first save the call center and then look for the same option.
-
Click this option and on the next page click “Add more users”, select desired user(s), and then click “Add to call center”.
Step 3: Create and configure a lightning app
-
From Setup, in the Quick Find box enter App Manager.
-
Open the app manager, click “New Lightning App” from the top right corner.
-
Enter the name of the app and developer, other options are not mandatory but if you want you can choose according to your preferences and select next.
-
Go with the default options and click next.
-
Click “Add Utility Items”, type “Open CTI softphone” and add the softphone to your app by clicking it. Set panel height to 500 and width to 400 and click next.
-
On the next screen, add accounts, contacts, leads and tasks from available items.
-
Last but not least select all profiles and add them. After adding them click “Save & Finish”
Connect to VPN
In order to use the application, make sure you are connected to VPN if your services access is restricted to a VPN connection. Otherwise, you do not need to connect to VPN.
SSL Certificates
Before using application, accept SSL Certificates for to avoid any issue.
Login agent
-
Open your application from the top left 9-dotted pattern icon, adjacent to “Setup”. If you can’t find it, search using the name you used while creating an application.
-
Once opened, Maximize Softphone by click on “Icon” from the bottom left corner, enter agent credentials, and press login.

Login page