Setup Keycloak for VRS
Follow below steps for setting up keycloak for VRS
- Go to https://VRS-FQDN/auth and click on Administration console
- Login to the administration console using the password set in environment variables (KEYCLOAK_USERNAME and KEYCLOAK_PASSWORD). Default username is admin and password is admin
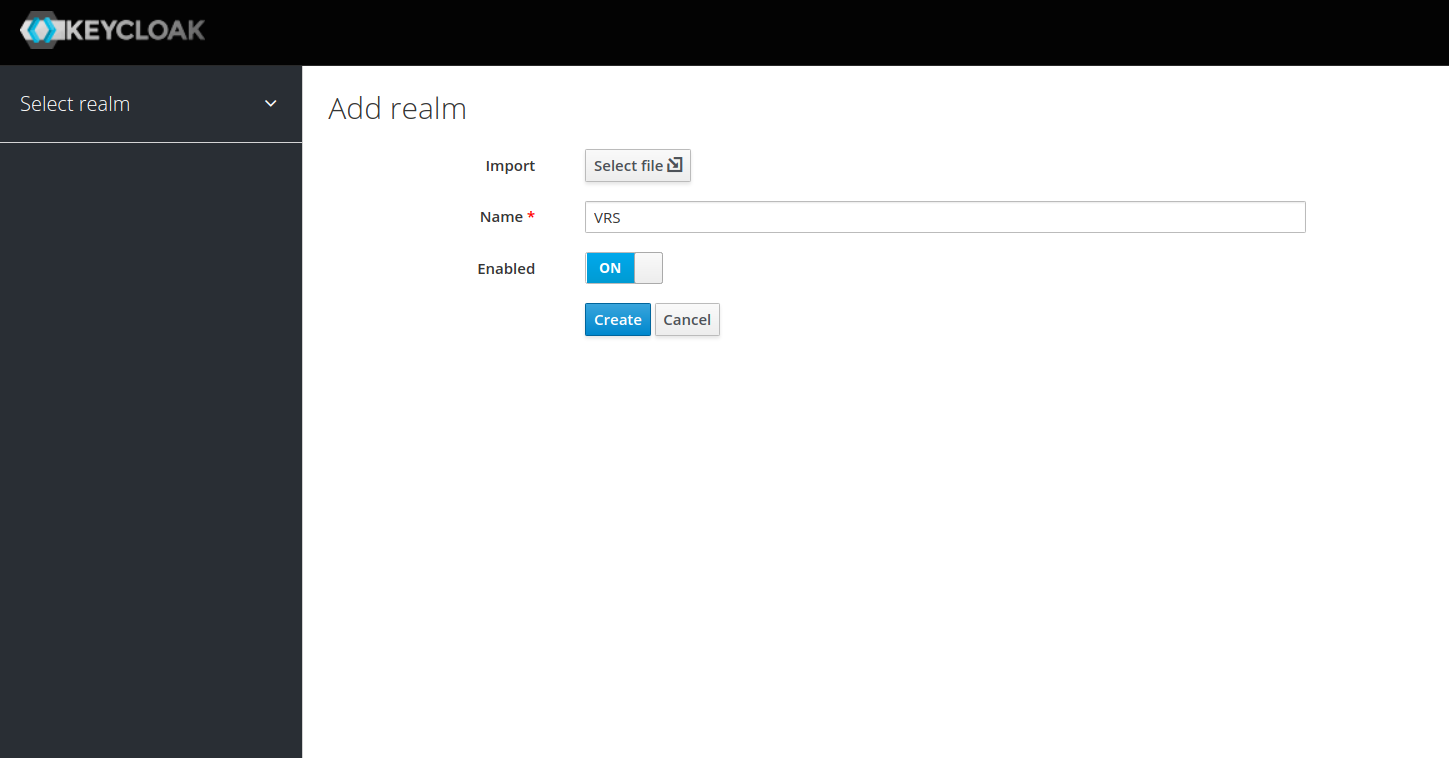
- Bring cursor to the Master (below keycloak logo) and click on Add realm button

- Enter Realm name and click on Create button
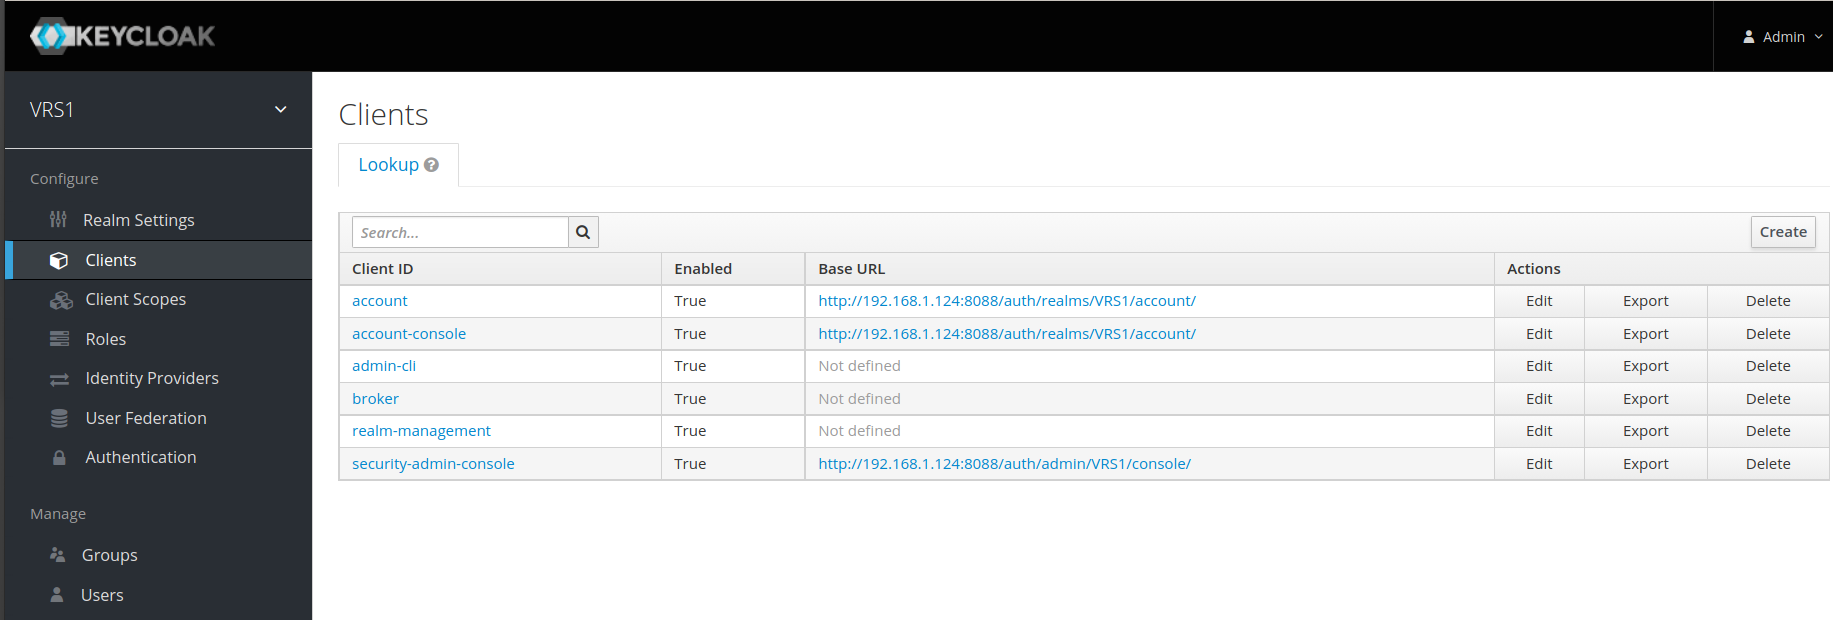
- Once Realm is created, click on clients under the created realm and then click create
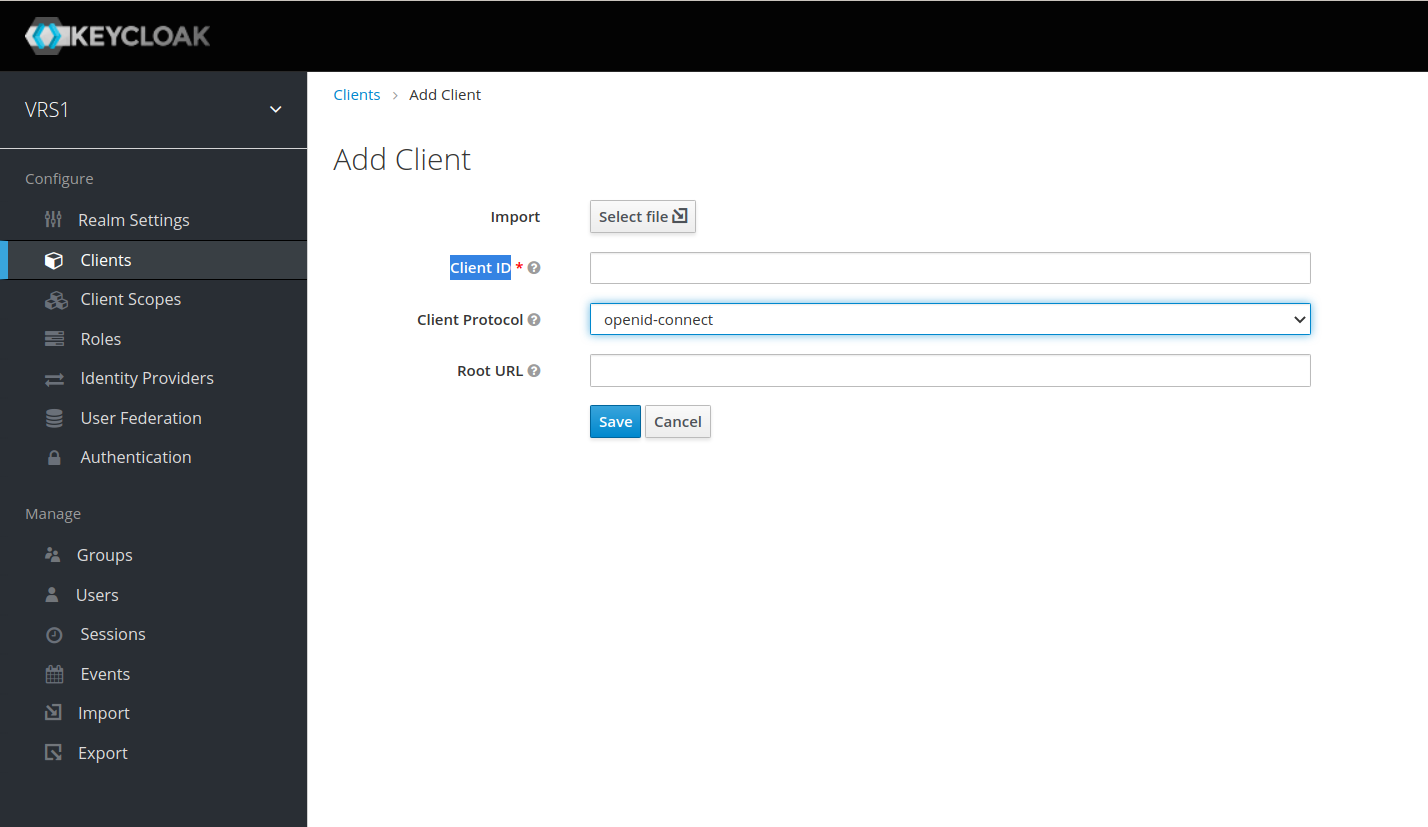
- Enter Client ID vrs, keep the rest default and click on save
- Once it is created, change the Access Type to confidential , Backchannel Logout Session Required to off, Direct Access Grants Enabled and Authorization Enabled to on, enter http://localhost:8080 in Valid Redirect URIs,Admin URL,Web Origins and click on save

- Once the client is saved, a new tab with the name Credentials will be added, click on that and copy the Secret.
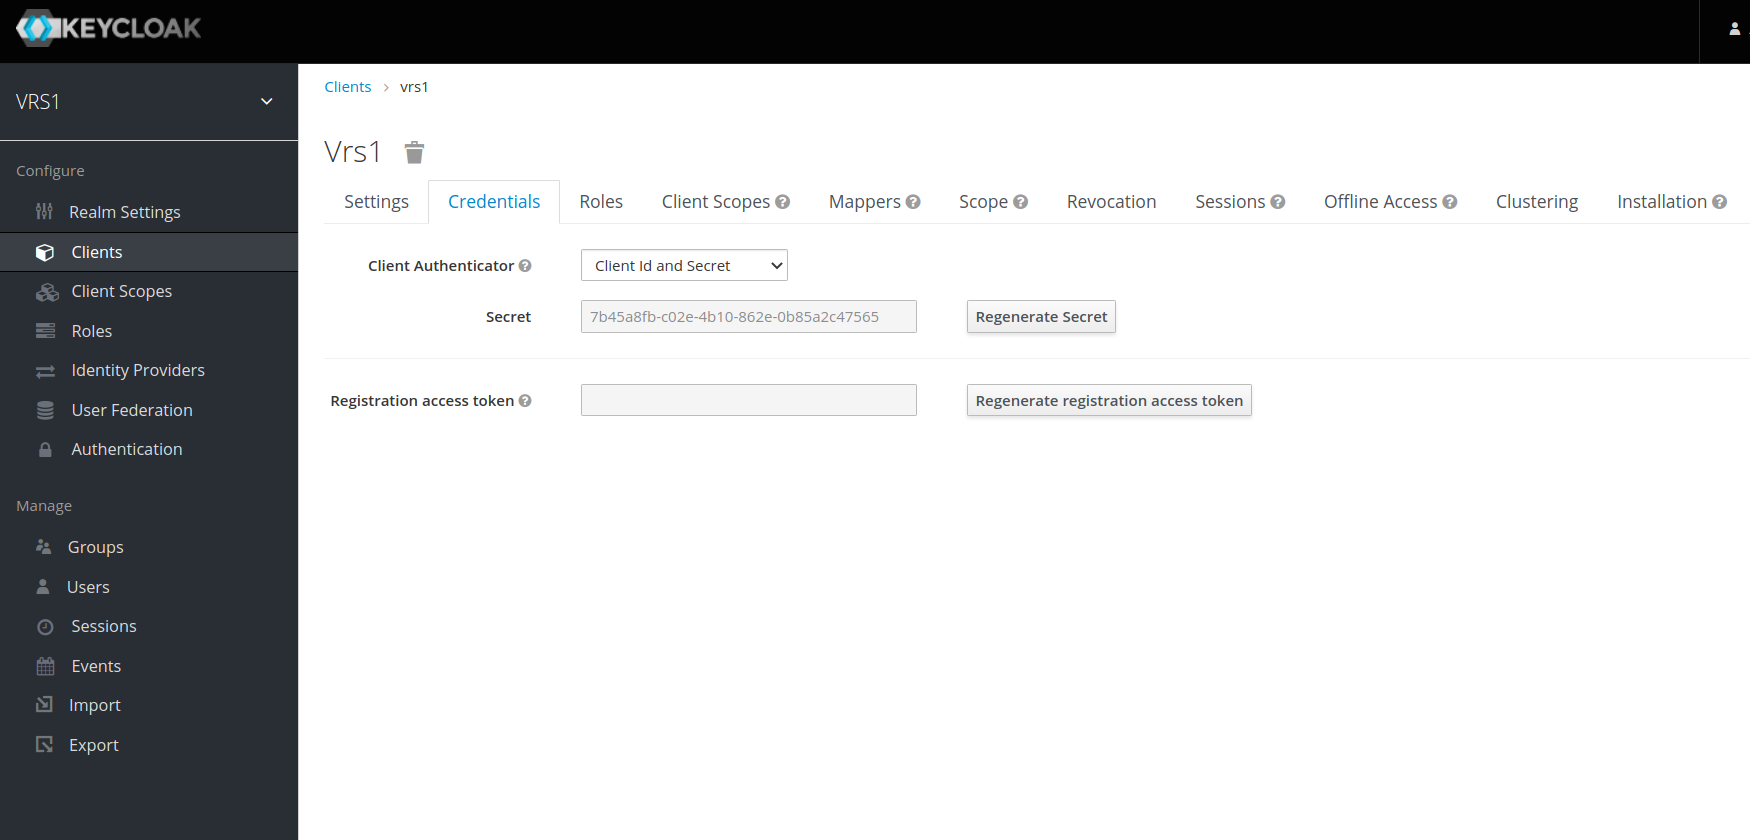
- The Client ID (client name) and Secret will be used in environment variables (KEYCLOAK_CLIENT_ID and KEYCLOAK_CLIENT_SECRET)
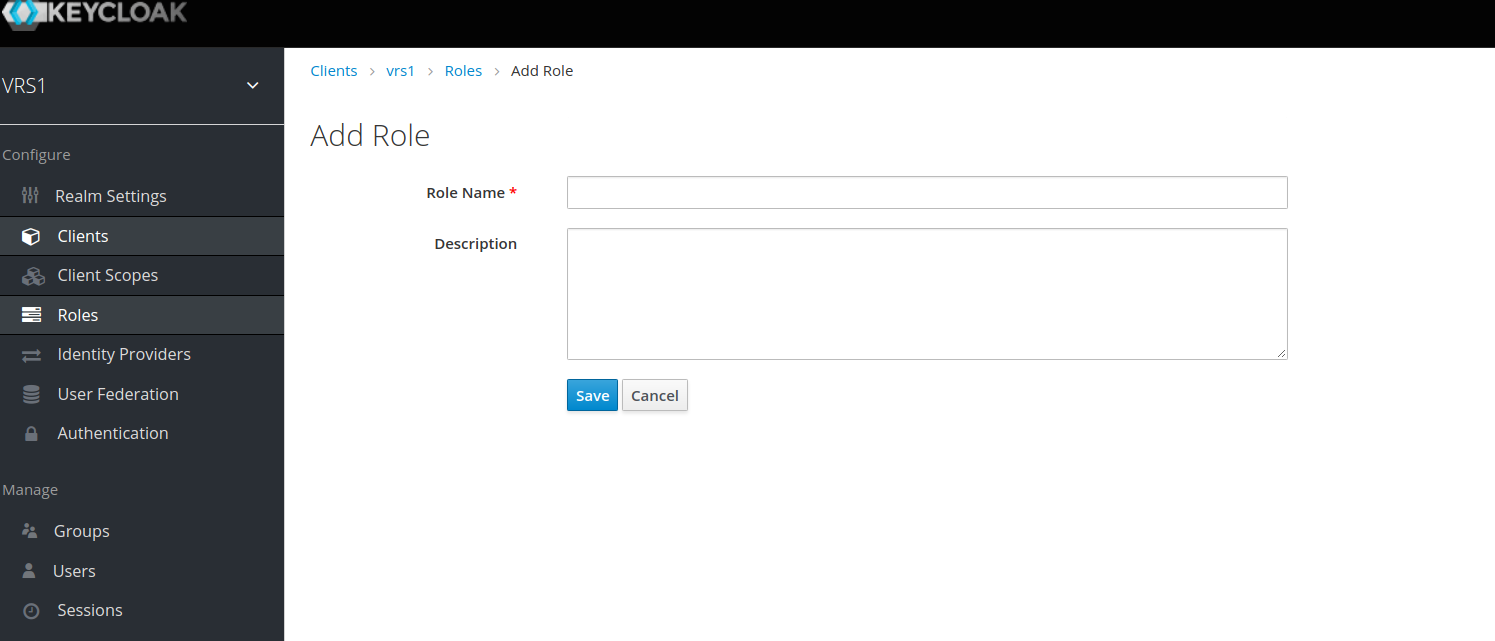
- In Roles tab, create two roles with name agent and admin (These roles will be later used to assign to the group).
- Once Agent role is created, we create a Group to assign roles to it, Group will later be used to assign multiple roles to newly created user. To create Group click on Groups in Manage section and click on "new".

- You can now enter the name of new Group that you want to create and click save.

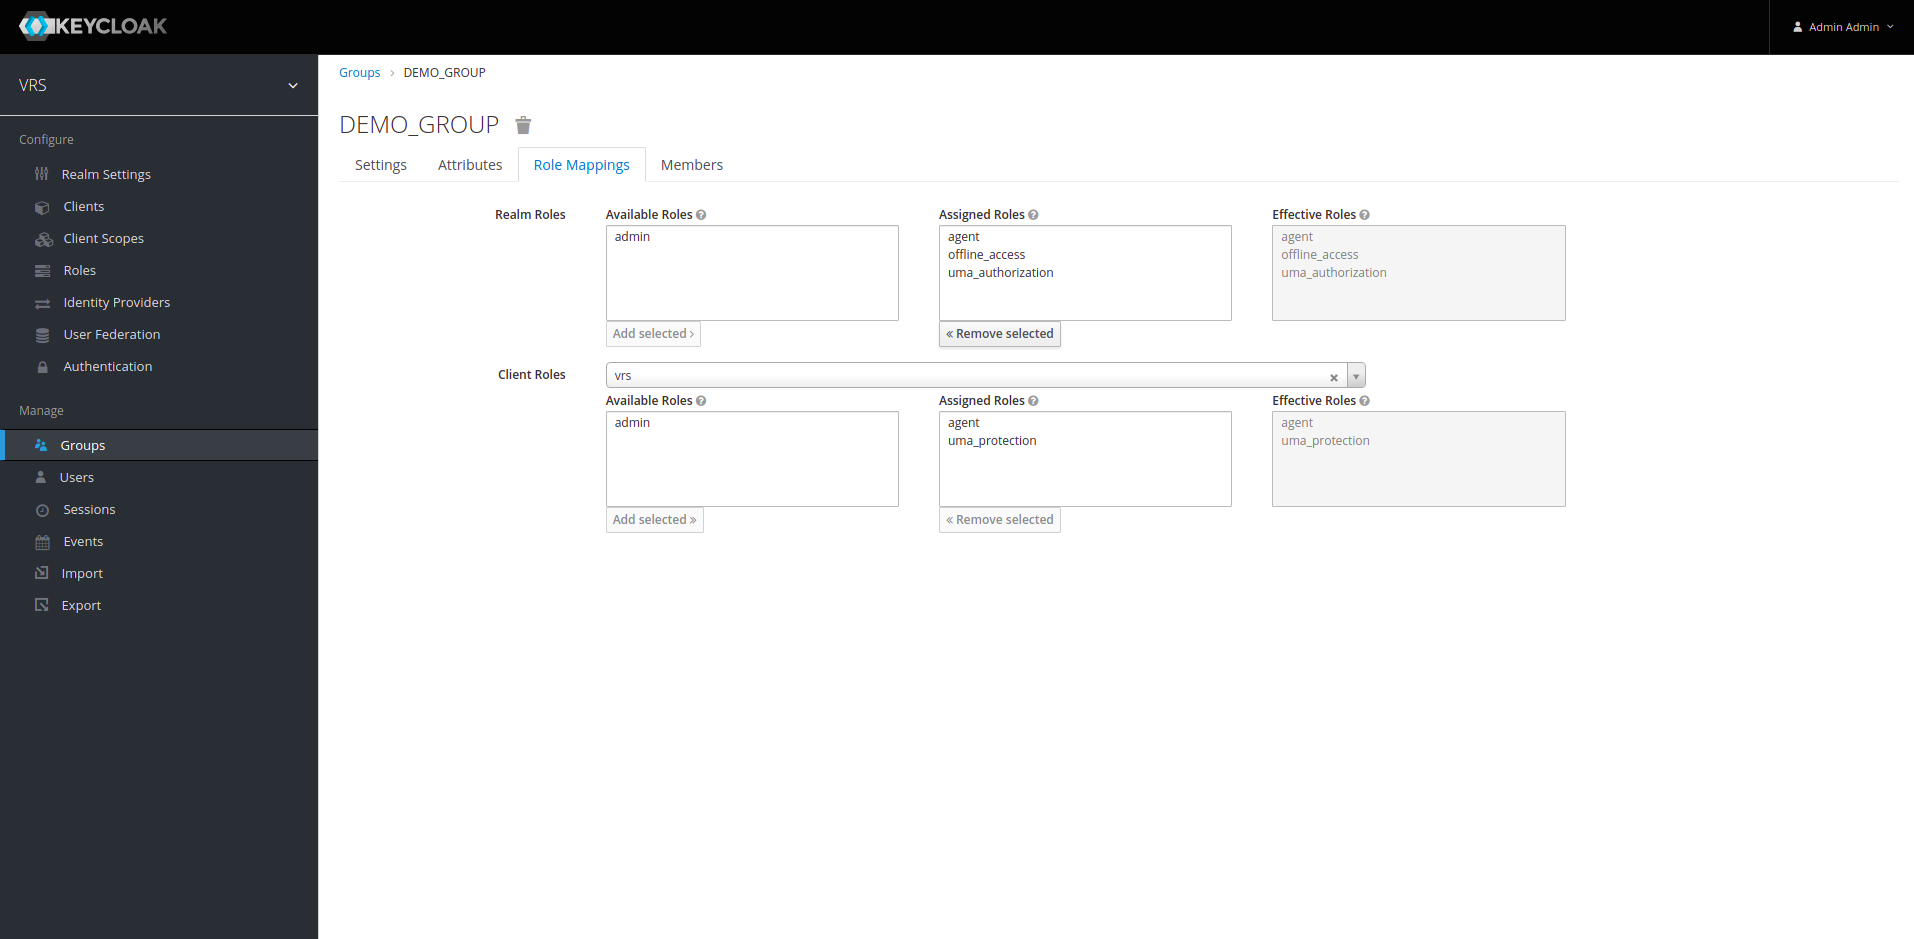
13. Once Group is created, You can see these sub-sections (Settings, Attributes, Role_Mappings, Members). Click on Role_Mappings, You'll now see Realm Roles and Client Roles and roles associated to each type.

14. In Client Roles drop-down list, select your client (in our case its "vrs"). Select all the roles from available roles that you want to assign to Group and click on "Add Selected". Now all the Realm Roles and Client Roles are assigned to Group.
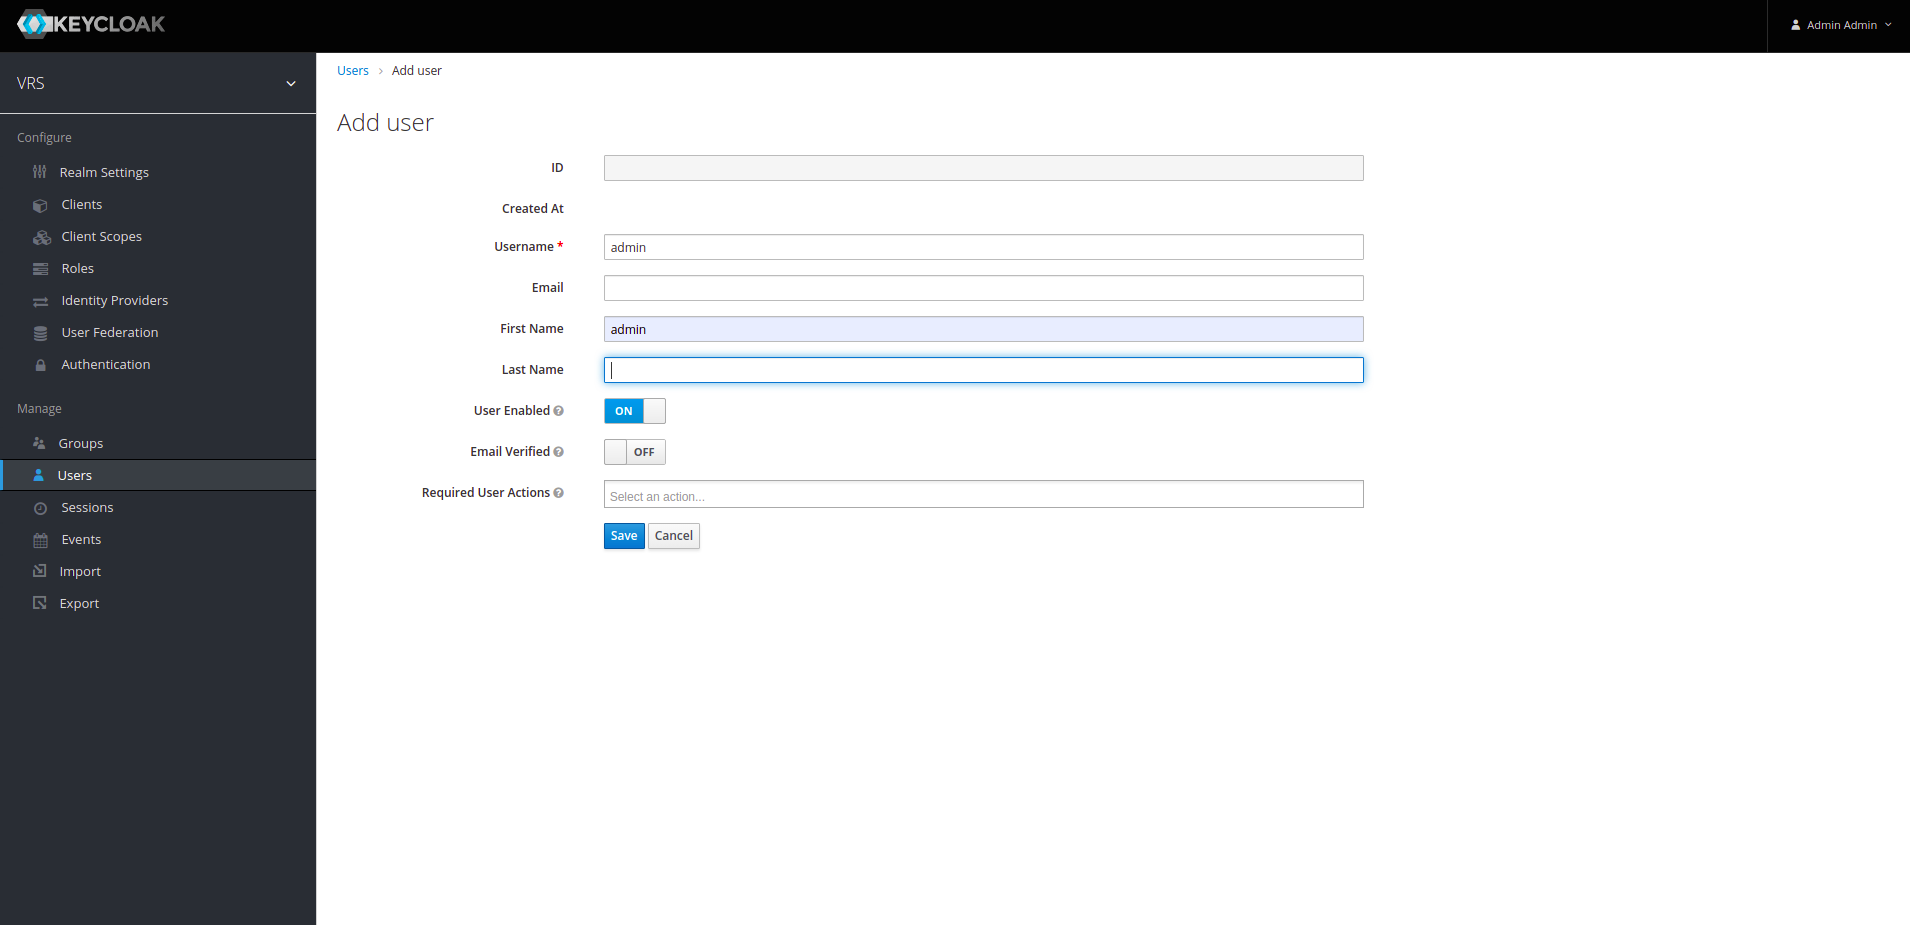
15. We also need to create an admin user and assign it "realm-management" roles (Admin User will be used to create finesse agent/supervisor in keycloak). To Create a new User click on Users option on right side and then click on Add User.

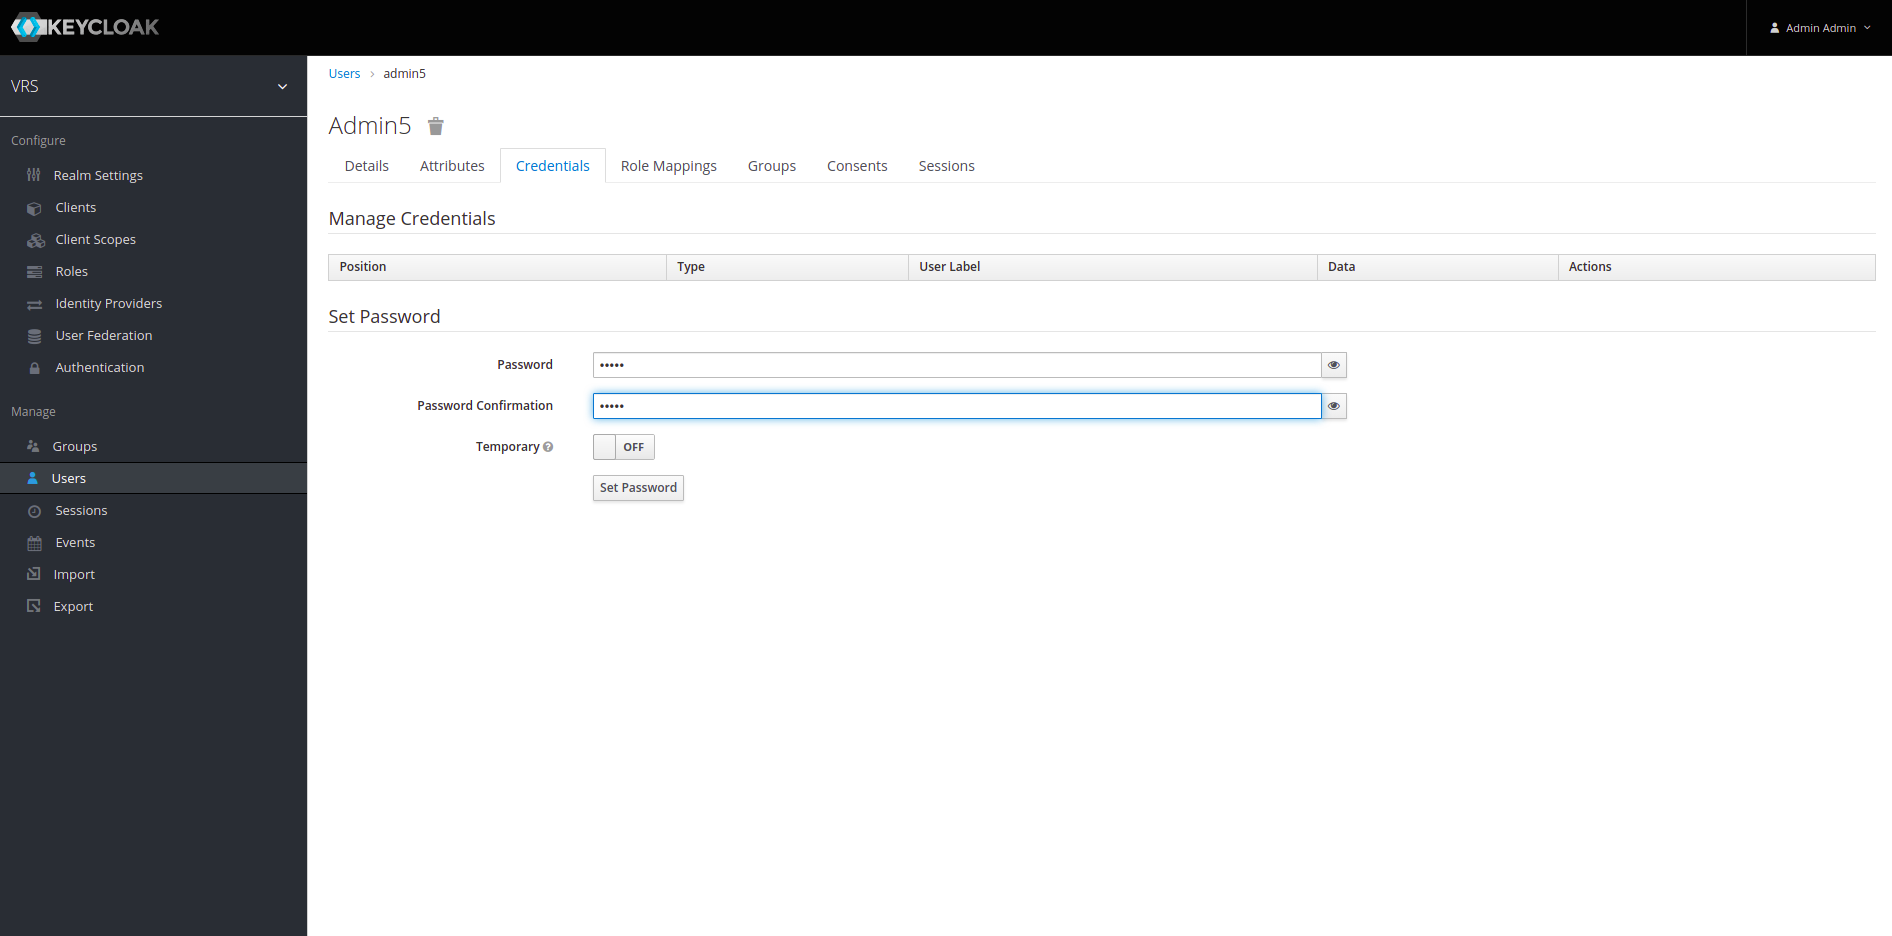
16. We will now see an Add User section. Assign Username to "admin" and firstname to "admin" and click save.
17. We now have multiple sub-options available, click on credentials tab and set password to "admin". disable the temporary option as well. Click on Set Password to save credentials
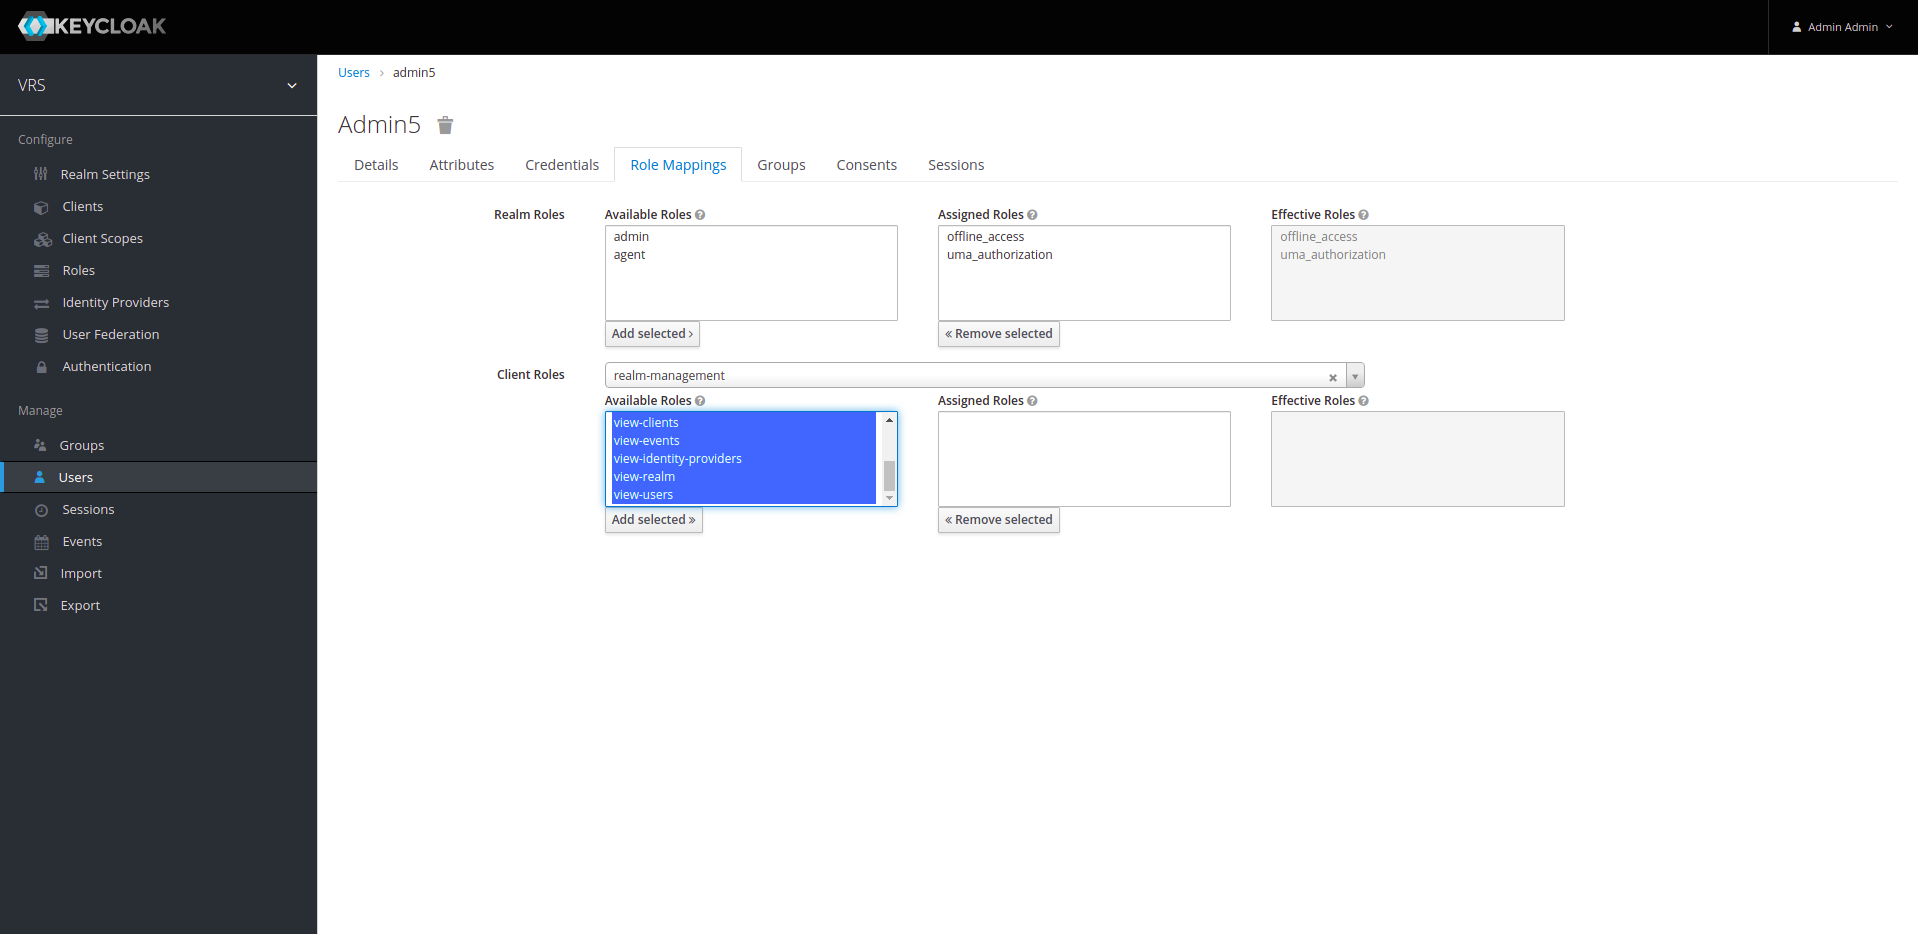
18. Now select Role-Mappings and click on Client-Roles drop down list, select "realm-management" from list. Select all the roles on the left side of realm-management and click on "Add selected".
19. Our setup of keycloak completes after assigning the realm-roles to admin. We are now good to go forward.

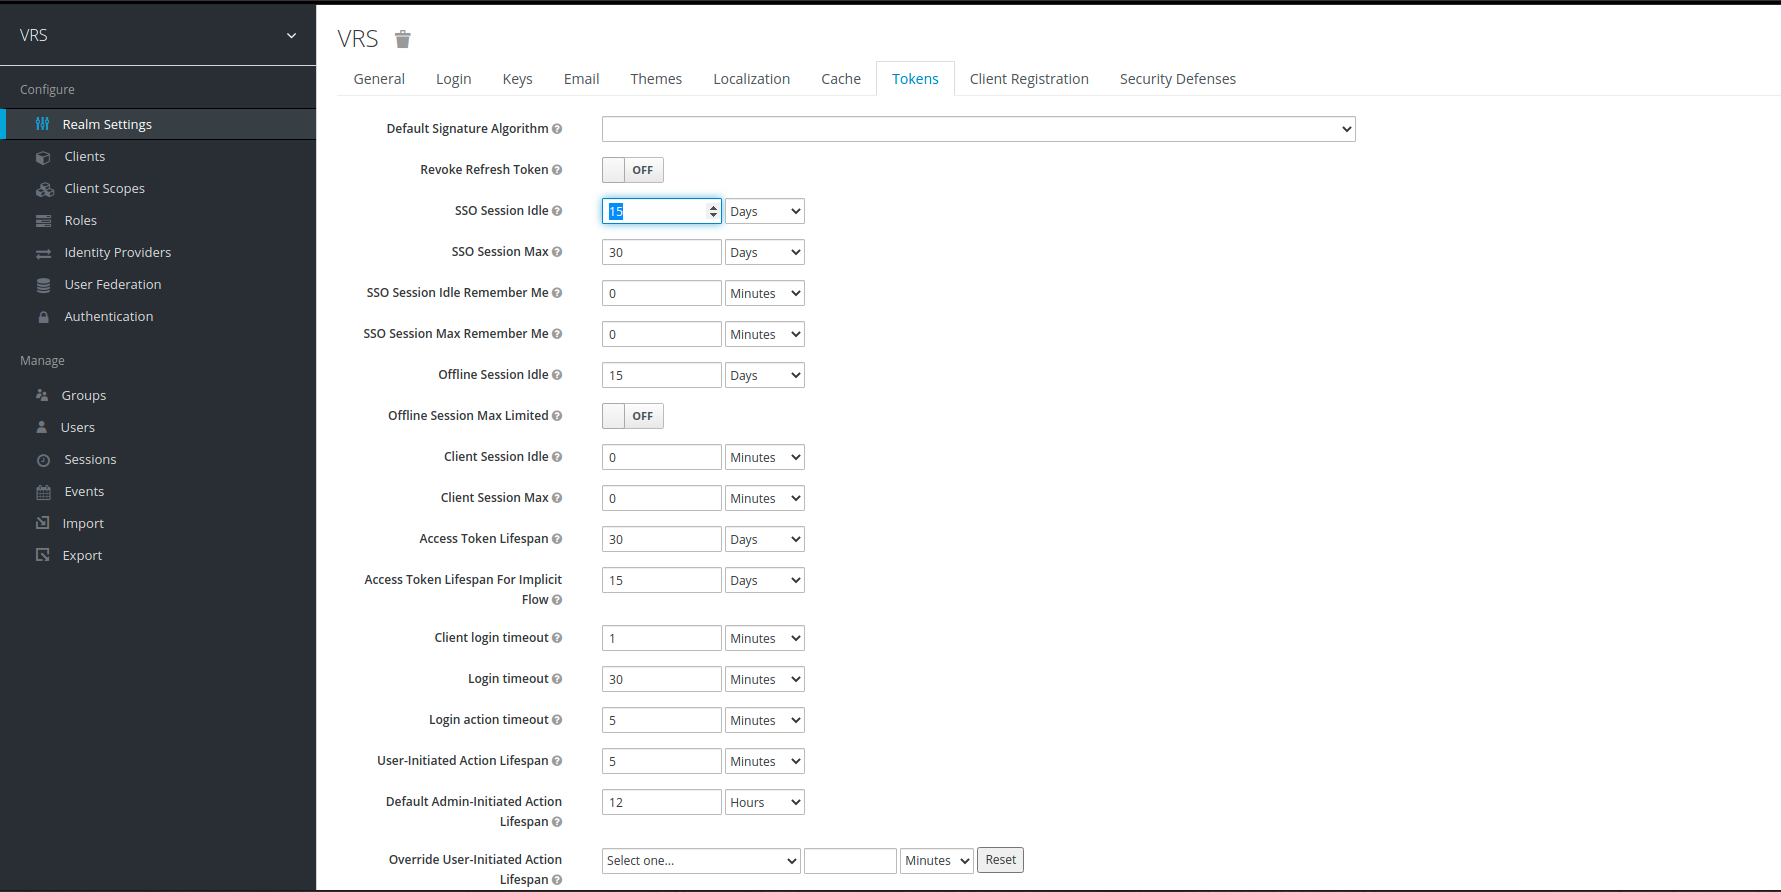
Note: Access Token Lifespan should be updated after completion of setup process. Initially it is setup as 5 mins, increase the time as per your requirement, in our case we have increased it to 1 day. To increase the access token lifespan click on the Realm Settings on left panel. then click on token, find Access Token Lifespan field and change it according to requirement.
Along with Access Token Lifespan, we also need to update SSO session idle and SSO session max fields as well. These values correspond to the Refresh token expiry.
- Increase SSO session idle to half time as that of Access Token Lifespan i.e 15 days if Access Token Lifespan is 30 days.
- Increase SSO session max to same value as of Access Token Lifespan i.e 30 days if Access Token Lifespan is 30 days.
- To Read further about Token Lifespans, you can refer to below link:
https://keycloak.discourse.group/t/tokens-expiring-too-soon/11105