Prerequisites
Follow the guides here to deploy the components for CX Voice.
Once CX Voice is deployed below are the following points to follow:
-
Cisco Jabber device (UCCX - SU3) is required to set-up WebRTC Secure link deployment.
-
A Cisco CUBE is needed for integration between Jabber extensions and EFSwitch.
Secure Link Component Deployment
Step 1: Clone the repository
git clone -b main https://efcx:RecRpsuH34yqp56YRFUb@gitlab.expertflow.com/cti/securelinkgenreation_deployment.git
cd securelinkgenreation_deployment
Step 2: Update configMap
FQDN and Widgetidentifier must be the same as the EFCX WebRTC widget.
-
Open securelinkgenreation_deployment/ConfigMaps/ef-securelinkgeneration-configmap.yaml file and add the following parameters
   SPRING_DATASOURCE_URL : jdbc:postgresql://ef-postgresql.ef-external.svc.cluster.local:5432/securelinkgeneration_db
   SPRING_DATASOURCE_USERNAME : "sa"
   SPRING_DATASOURCE_PASSWORD : "Expertflow123"
   ENCRYPTION_KEY: "1234567890123456"
   webwidgetfqdn : https://cim.expertflow.com/customer-widget/#/widget
   source : "SLG"
   linktimeout : "30"
   widgetIdentifier : "webrtc-widget"
Step 3: Update FQDN
Expertflow CX should be accessible by a fully qualified domain name. Assign the FQDN that resolves to the control plane node or KubeVIP.
Replace <FQDN> with your FQDN for Expertflow CX and run this command.
sed -i 's/devops[0-9]*.ef.com/<FQDN>/g' ConfigMaps/* Ingresses/nginx/* Ingresses/traefik/*
Step 4: Pull Image Mannualy
CONTAINERD_ADDRESS=/run/k3s/containerd/containerd.sock /var/lib/rancher/rke2/bin/ctr -n k8s.io i pull -u saifullah:saifullah96 gitimages.expertflow.com/cti/securelinkgeneration:1.6
Step 5: Update Deployment
kubectl apply -f ConfigMaps/ef-securelinkgeneration-configmap.yaml
kubectl apply -f Services/ef-securelinkgeneration-service.yaml
kubectl apply -f Deployments/ef-securelinkgeneration-deployment.yaml

#Apply Ingresses
#for RKE
kubectl apply -f Ingresses/nginx/ef-securelinkgeneration-ingress.yaml

#or
#for Traefik
kubectl apply -f Ingresses/traefik/ef-securelinkgeneration-ingress.yaml
Customer Widget Configuration
-
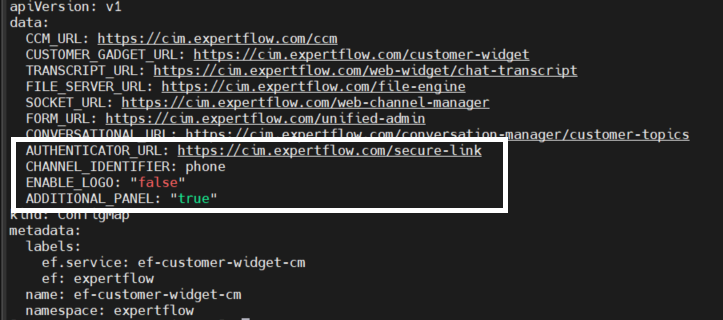
Open cim-solution/kubernetes/cim/ConfigMaps/ef-customer-widget-configmap.yaml file and add the following parameter
AUTHENTICATOR_URL : https://<FQDN>/secure-link
-
Run the following commands to update the configMaps of the customer widget
kubectl delete -f ef-customer-widget-configmaps.yaml -n expertflow
kubectl apply -f ef-customer-widget-configmaps.yaml -n expertflow
-
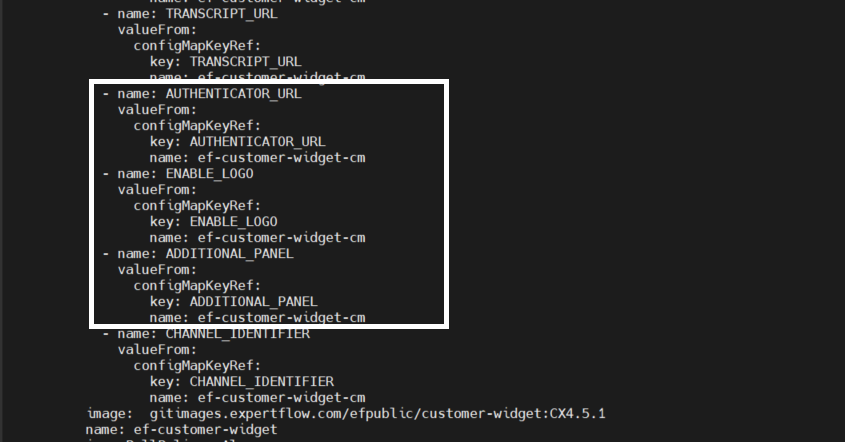
Open cim-solution/kubernetes/cim/Deployments/ef-customer-widget-deployment.yaml file and add the following parameter
- name: AUTHENTICATOR_URL
    valueFrom:
      configMapKeyRef:
        key: AUTHENTICATOR_URL
        name: ef-customer-widget-cm
-
Run the following commands to update the Deployments of the customer widget
kubectl delete -f ef-customer-widget-deployments.yaml -n expertflow
kubectl apply -f ef-customer-widget-deployments.yaml -n expertflow
Unified Agent Configuration
-
Open cim-solution/kubernetes/cim/ConfigMaps/ef-unified-agent-configmap.yaml file and add the following parameter
SECURE_LINK_URL : https://<FQDN>/secure-link ENABLE_SECURE_LINK : "true" -
Run the following commands to update the configMaps of the customer widget
kubectl delete -f ef-unified-agent-configmaps.yaml -n expertflow
kubectl apply -f ef-unified-agent-configmaps.yaml -n expertflow
-
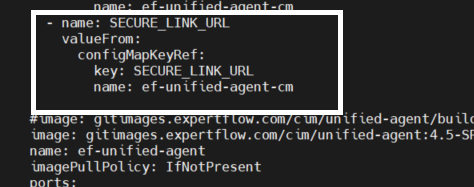
Open cim-solution/kubernetes/cim/Deployments/ef-unified-agent-deployment.yaml file and add the following parameter
- name: SECURE_LINK_URL
    valueFrom:
      configMapKeyRef:
        key: SECURE_LINK_URL
        name: ef-unified-agent-cm
- name: ENABLE_SECURE_LINK
    valueFrom:
      configMapKeyRef:
        key: ENABLE_SECURE_LINK
        name: ef-unified-agent-cm
EFSwitch Configurations
Configure SIP Trunk for outbound calls
-
Note: The SIP trunk in this case will be the Cisco CUBE gateway.
-
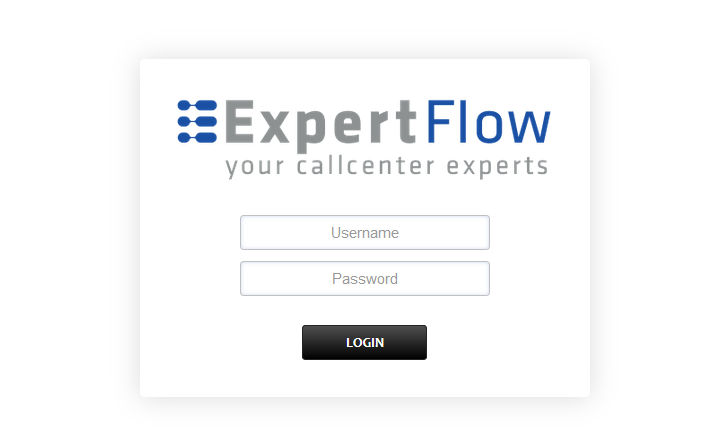
Open in browser: https://IP-addr, where IP-addr is the IP address of the server that EFSwitch is deployed on.
-
Add the username and password that was shown upon installation of EFSwitch and press LOGIN.
-
Press the IP address in the top right and select the Domain created in the Domain creation section of the EFSwitch configuration document.
-
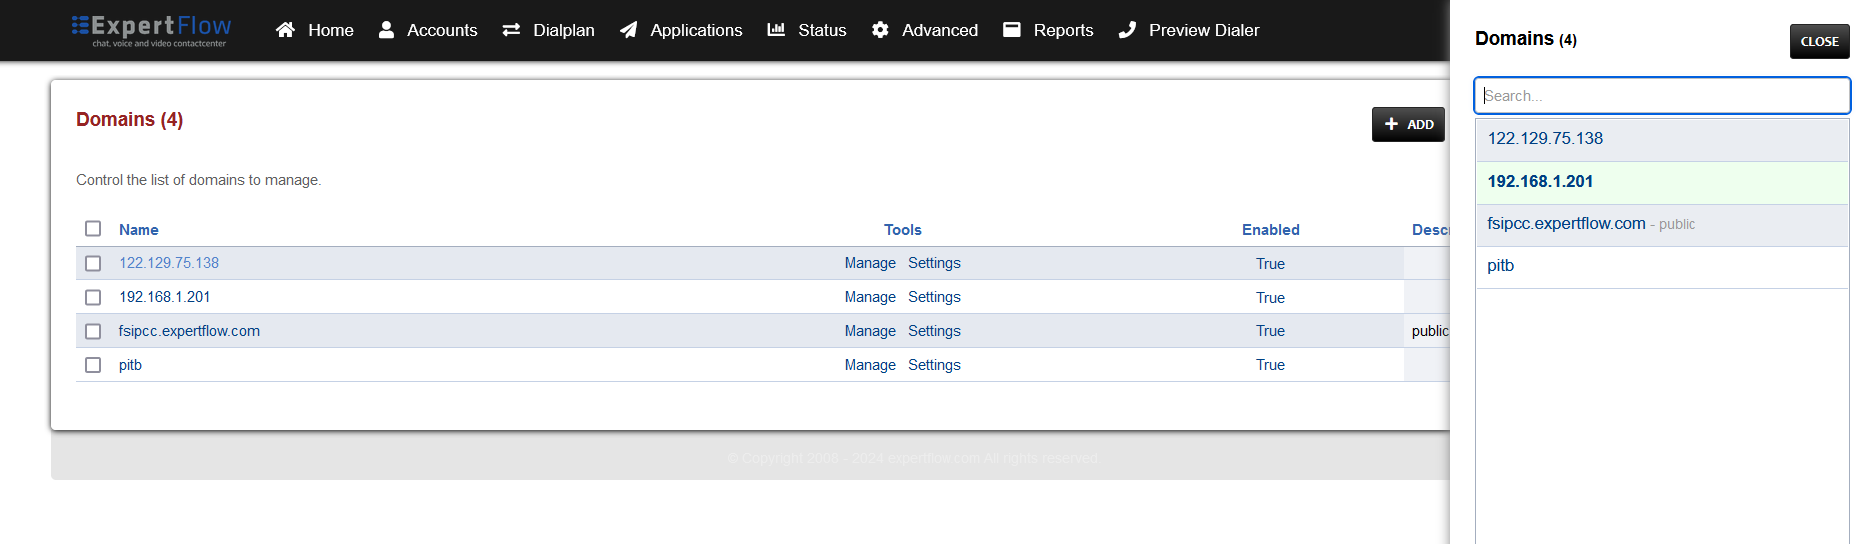
-
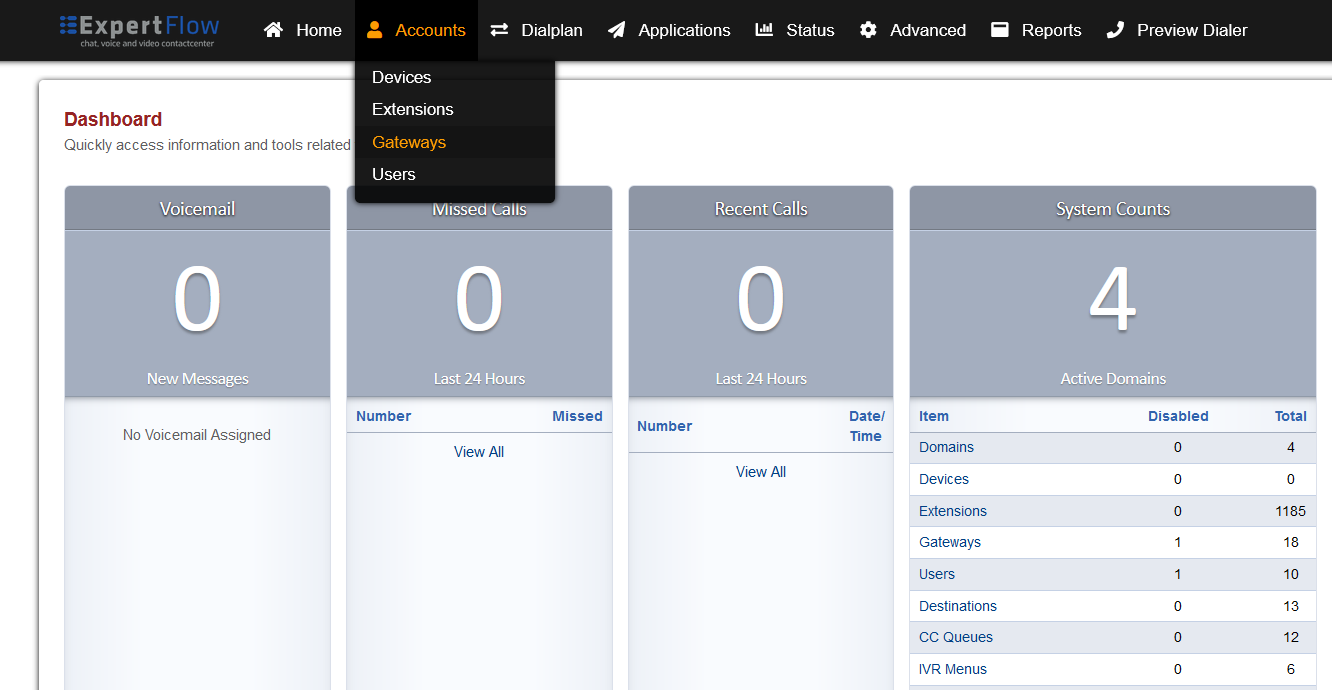
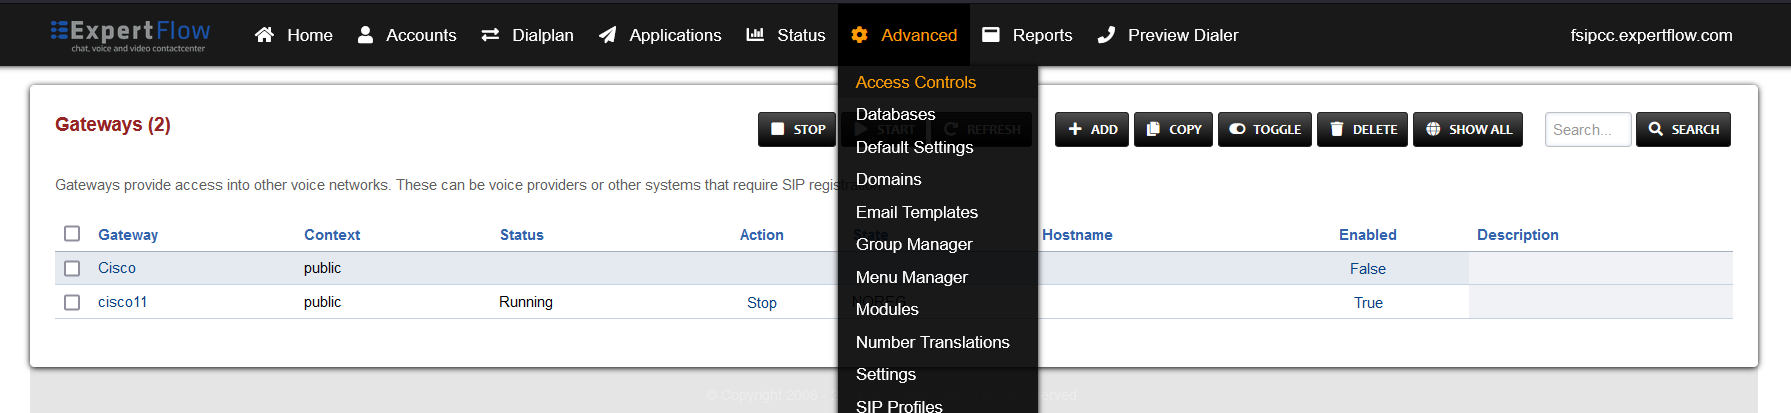
Open the Gateways section under the Accounts tab.
-
Press the ADD button in the top right.
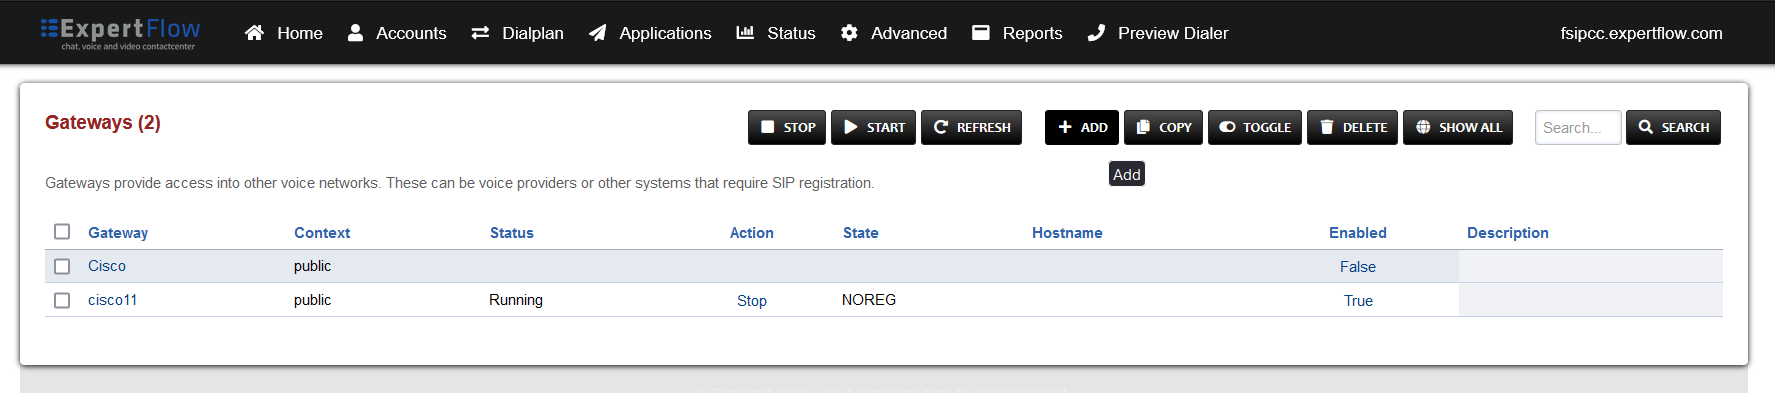
-
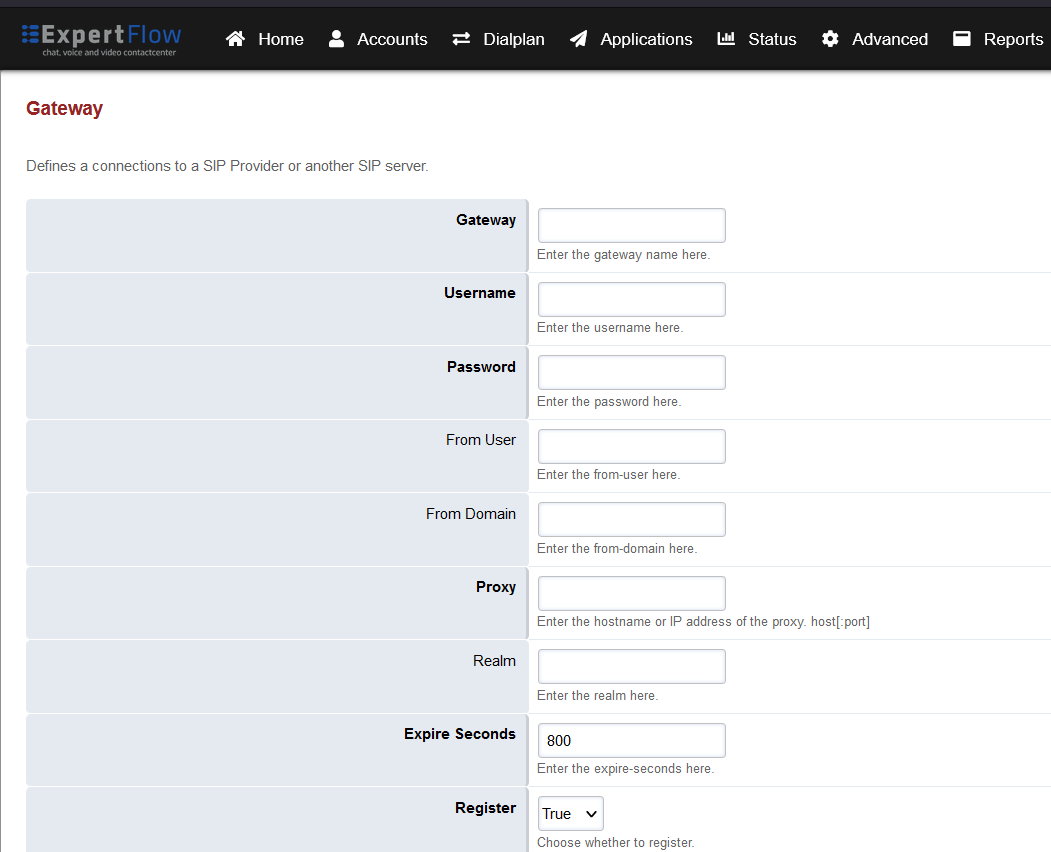
Set the following fields:
-
Gateway: A name of your choice e.g. MySipTrunk
-
Username: The username of the SIP Trunk. Not needed for IP-based SIP trunks.
-
Password: The password of the SIP Trunk. Not needed for IP-based SIP trunks.
-
Proxy: The IP address and port of the SIP trunk e.g. 192.168.25.35:5060.
-
Register: Set to True. Set to False for IP-based SIP trunks.
-
-
-
Press the SAVE button on the top right.
-
Open this newly created gateway and note the URL opened in the browser.

-
From this URL note the gateway ID , i.e. :
-
For the URL https://192.168.1.201/app/gateways/gateway_edit.php?id=becc1f43-68b9-459a-908d-bbac57d042d5
-
The gateway ID is becc1f43-68b9-459a-908d-bbac57d042d5 (everything after ?id=)
-
-
Add the IP address of the SIP trunk to the EFSwitch ACL:
-
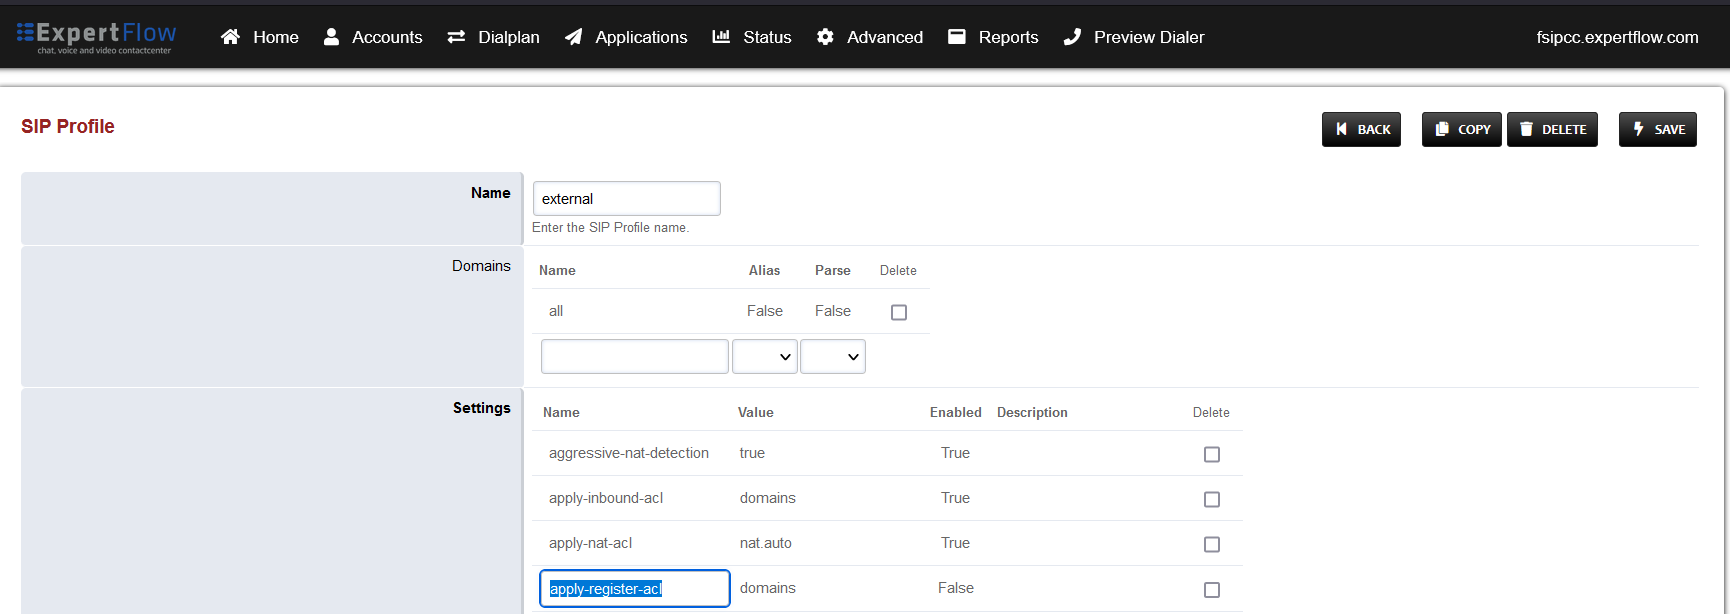
Open SIP Profiles under the Advanced tab.

-
-
Open the external profile and note the value of the apply-register-acl field.
-
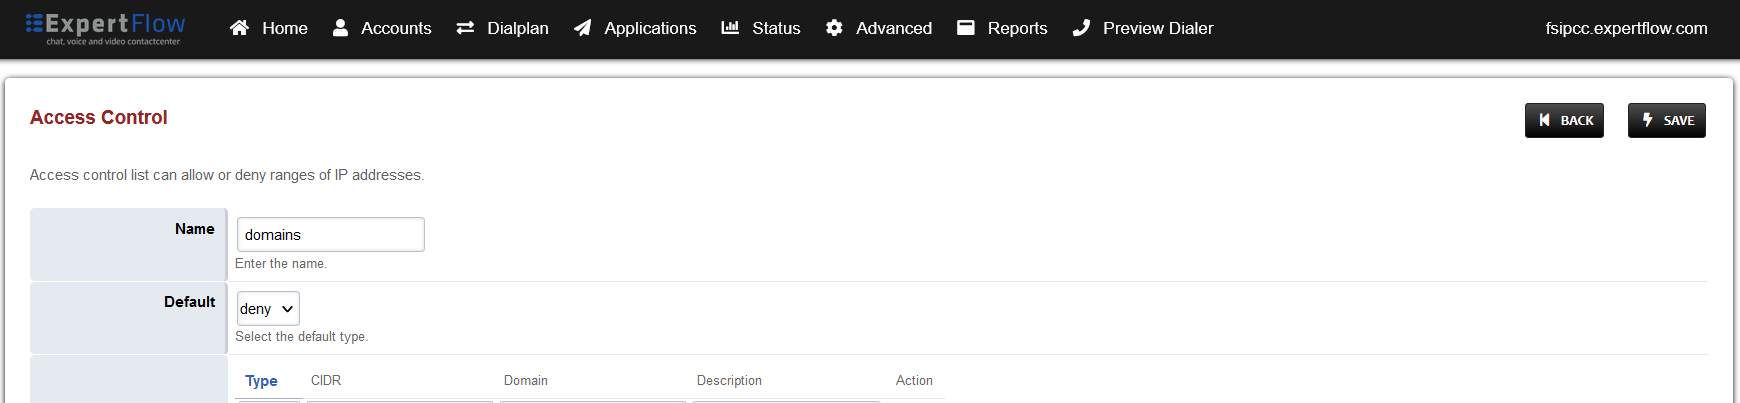
Open Access controls under the Advanced tab.
-
Open the entry that matches the aforementioned apply-register-acl field.
-
-
At the bottom add an entry where the the Type is set to ‘allow’ and the CIDR field contains the address of the SIP Trunk.
-
Press the SAVE button on the top right.
-
Open SIP Status under the Status tab.

-
-
Press the Reload ACL button at the top right.
-
-
Open SIP Profiles under the Advanced tab.
-
Open the external profile and note the value of the sip-port field.
-
Back out via the BACK button on the top right.
-
Open the internal profile and note the value of the sip-port field.
-
Open a terminal and SSH into the EFSwitch machine via the command
-
ssh EFSwitch-Server-Username@EFSwitch-Server-IP-Address -
Enter the EFSwitch server SSH password when prompted.
-
Enter and run the command
-
su -
And enter the EFSwitch server root password.
-
Run the command
-
sudo iptables -A INPUT -p tcp -m tcp --dport PORT -j ACCEPT-
Where PORT is the port noted down in the previous steps. Run the command once for each port.
-
-
Run the command
-
sudo iptables-save -
Contact the SIP Trunk provider and have all traffic from the EFSwitch machine public IP address allowed.
Configuring Call Dialplan
-
Open Unified Admin via the link https://CX-FQDN/unified-admin
-
Where CX-FQDN is the fully qualified domain name of the EF CX.
-
-
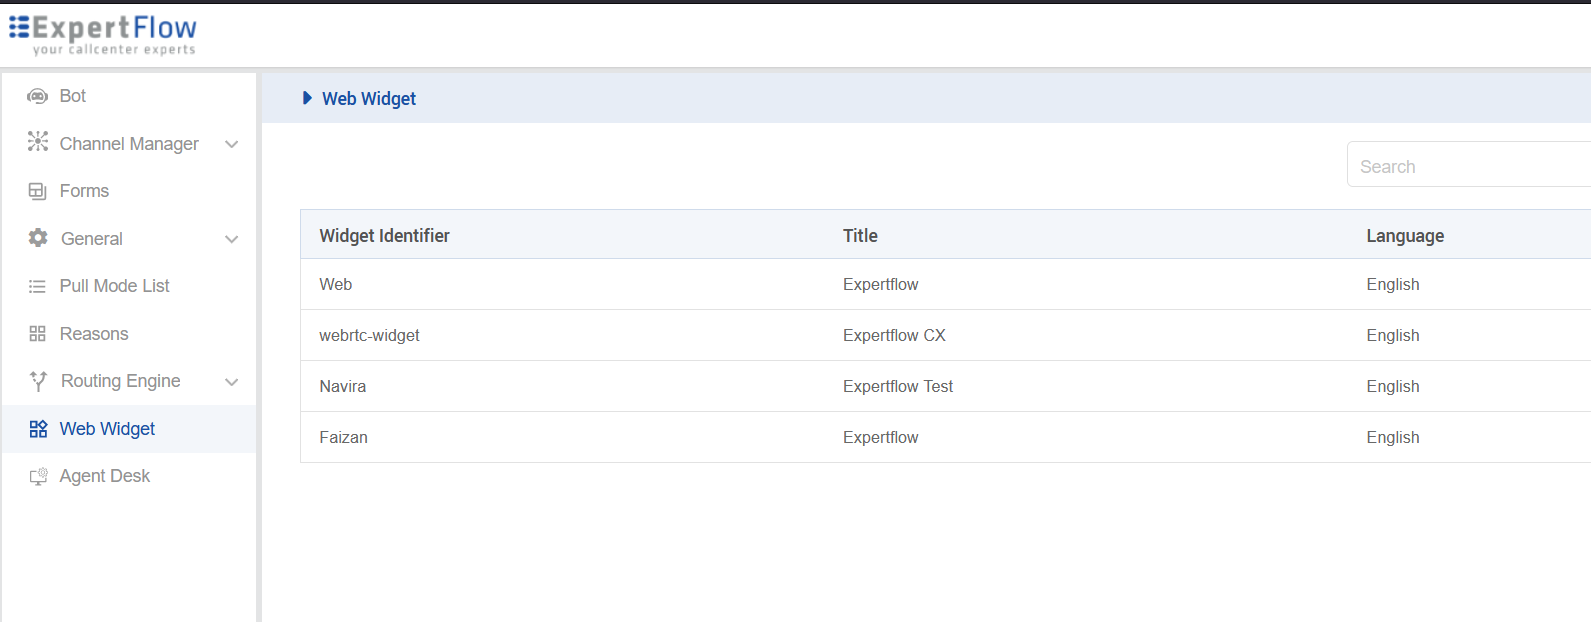
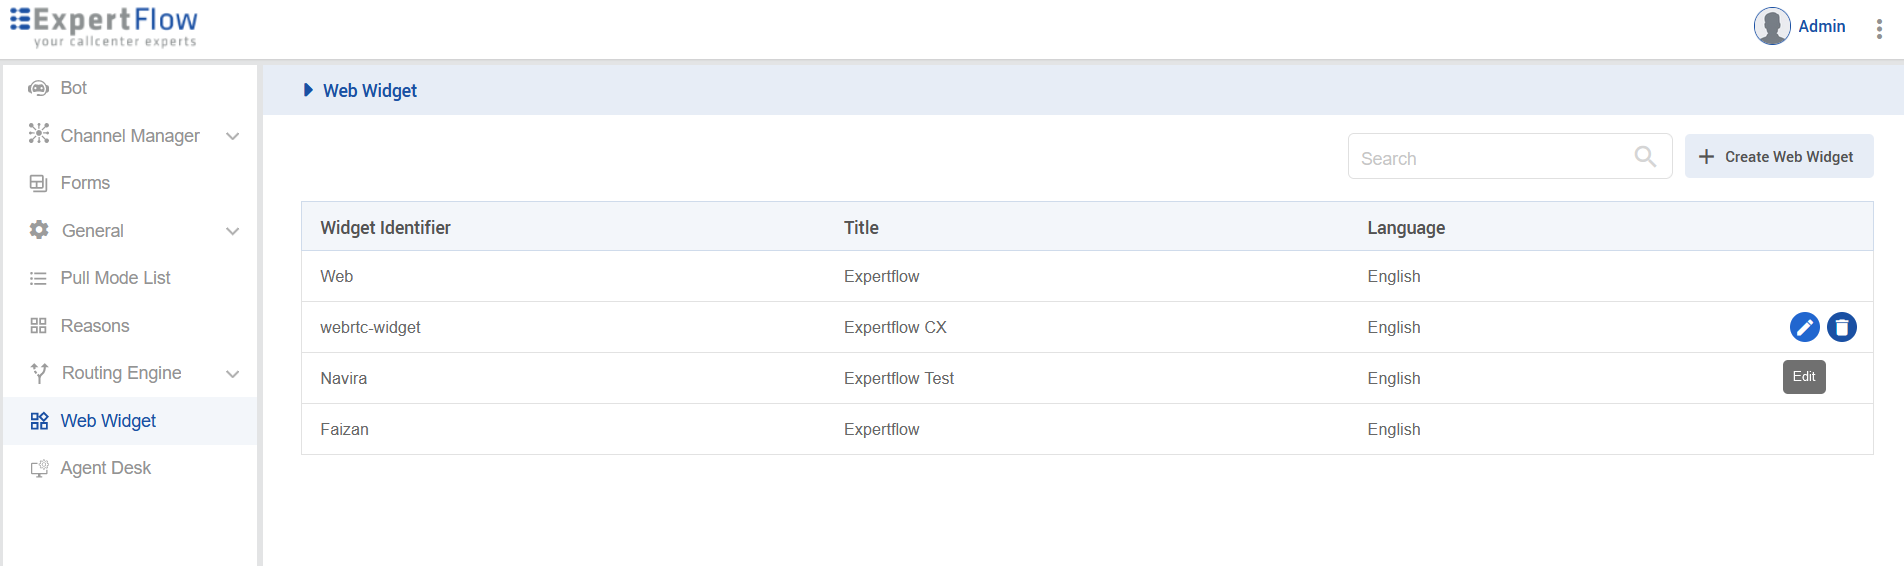
Open the Web Widget section.
-
-
Open the Widget created for video calling, via the Edit option.
-
Scroll down and note the value of the Dialing URI field.
-
Open in browser: https://IP-addr, where IP-addr is the IP address of the server that EFSwitch is deployed on.
-
Add the username and password that was shown upon installation of EFSwitch and press LOGIN.
-
Press the IP address in the top right and select the Domain created in the Domain creation section of the EFSwitch configuration document.
-
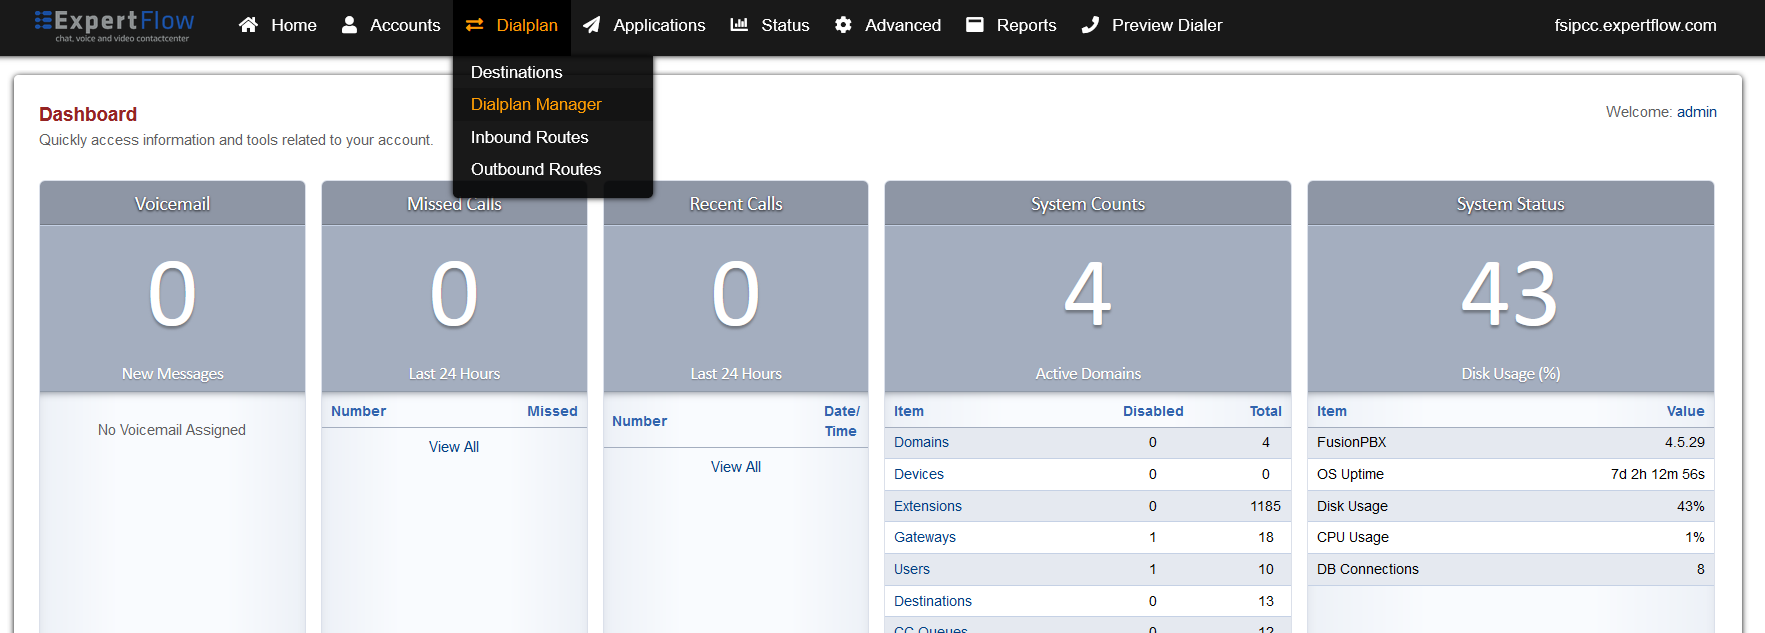
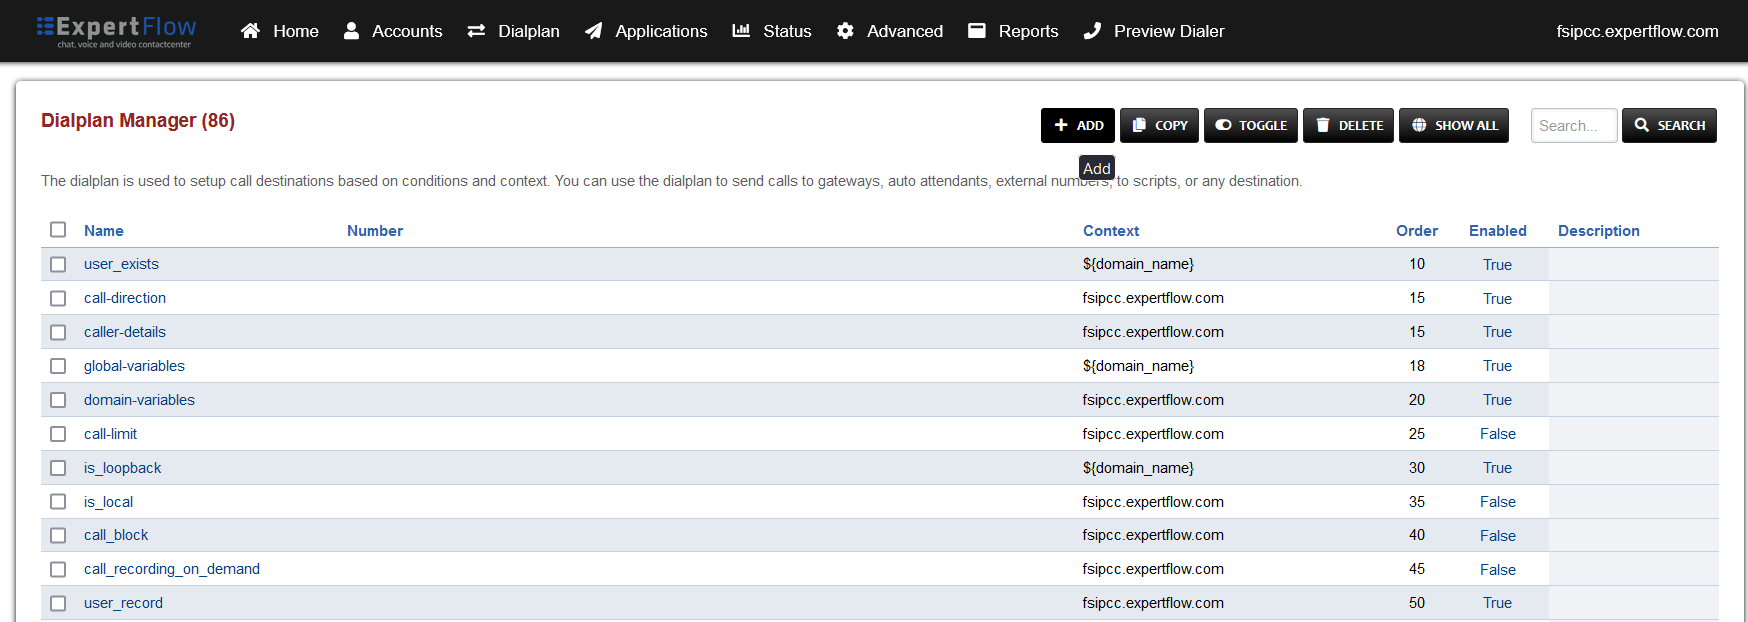
Open the Dialplan Manager section under the Dialplans tab.
-
Press the ADD button in the top right.
-
Fill the form with following details :
-
Name = WebRTC Video Call
-
Condition 1 = Select destination_number from list and set the value to the value of the Dialing URI noted in the previous steps.
-
Action 1 = Select first item from the list
-
-
Press the SAVE button on top right Corner.
-
Re-open the WebRTC Video Call dialplan.
-
Set the Context field to the value of the Domain set in the Domain creation section of the EFSwitch configuration document.
-
Set the Domain field to the value of the Domain set in the Domain creation section of the EFSwitch configuration document.
-
Change the value of the Type column in the Action row to bridge and the Data field to sofia/gateway/GATEWAY-ID/55${sip_h_X-Agent-Extension}@DOMAIN
-
Where GATEWAY-ID is the SIP Trunk gateway ID noted in the previous section.
-
And DOMAIN is the value of the Proxy set in the Gateway creation section.
-
-
Press the SAVE button on top right Corner.