Define a custom Bot in CX Unified Admin to register with Bot Framework. Add webhook URL for synchronous communication with the custom connector in the Bot Framework.
Synchronous custom Connector-Bot Communication
-
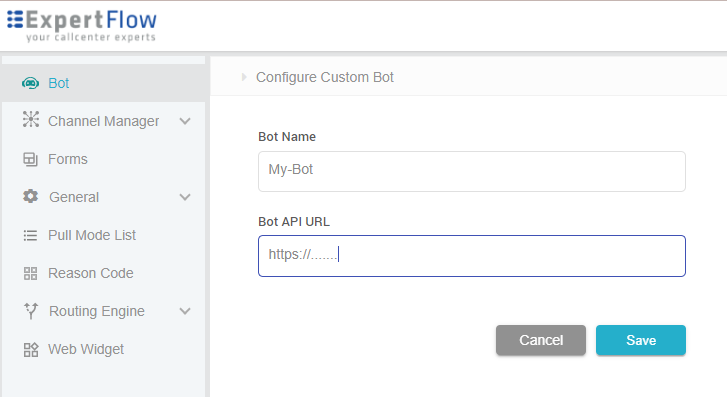
Click Bot in the left panel of Unified Admin
-
Click Custom Bot. Click on Add Bot button in the panel
-
Enter Bot Name and specify the Webhook to communicate with custom connector in the Bot Framework
API Authentication
The webhook request is a HTTP POST request. Currently, there is no specific authentication in place.
Adding Bot details
Asynchronous custom Connector-Bot Communication
If the custom bot requires asynchronous communication, then an API can be provisioned through custom connector to receive asynchronous response. The Asynchronous communication API parameters and its example is described in table on right.
Example
{
        conversationId": "261c271a-58e6-4571-9d25-77ad26d745d6",
        "botId": "1234",
        "BotMessage": {" "}
}
Asynchronous Communication API Properties
|
Name |
Type |
Description |
|---|---|---|
|
conversationId Required |
String |
ID of the conversation to which the bot message is to be sent. |
|
botId Required |
String |
ID of the bot sending the response. There can be more than one bot connected to the connector so the Bot ID is required. |
|
BotMessage Required |
List |
It can contain more than one message from the bot. It can also contain intents or actions. The details of intents and actions are given here. |