Objective:
To replace the default authentication process of Superset with Keycloak. Since we use Keycloak as IAM solution for all the products of EF, we must package the 3rd party applications with Keycloak auth as well.
Keycloak Authentication Implementation:
Following are the steps that we will follow during the implementation of Keycloak as Authentication solution for Superset.
-
Add Dependencies for Keycloak Connector in Superset code-base.
-
File Modification inside Superset for Keycloak Login Implementation.
-
Changes in environemnt variables.
1. Add Dependencies for Keycloak Connector in Superset code-base:
To add dependenceis required for our integration process, we need to make changes to "local.txt" file on this path:
<Project-Directory>/superset/requirements/local.txt
Also add file "requirements-local.txt" inside docker directory on this path:
<Project-Directory>/superset/docker/
Add these dependencies inside both "requirements-local.txt" and "local.txt" files:

2. File Modification inside Superset for Keycloak Login Implementation:
Once dependencies are added in above mentioned files, we can now do file modifications to add code for login/log-out implementation.
These files will be modified/added into our Superset code-base inside the directory "pythonpath_dev", the path to described directory is "<Project-Directory>/superset/docker/pythonpath_dev". files to be added are:
-
keycloak-security.py:
-
This file overrides the login/logout mechanism of Superset with Keycloak Implementation. We use FLASK-OIDC connector to overwrite the default implementation.
-
-
keycloak-config.py:
-
We add all the keycloak configs in this file that are required for our Flask-OIDC connector to implement Keycloak Auth. Keycloak configs will be imported from .env file placed.
-
-
client_secret.json:
-
This file contains all the keycloak configurations including its public_key, client_id, client_secret etc.
-
-
.env:
-
We will also add .env file inside this path "
<Project-Directory>/superset/docker/", .env file contains the env_variables for Flask-OIDC client that we will import to keycloak-config.py file for connector configuration.
-
Now we will see in details the modification done in each of the above mentioned file:
keycloak-security.py:
In this file, we will add the code for login and logout APIs that use OIDC client and overwrites the already present Authenctication implementation with Keycloak Auth.
Code to add:
this code will be added in keycloak-security.py file
import sys
from flask import redirect, request
from flask_appbuilder.security.manager import AUTH_OID
from superset.security import SupersetSecurityManager
from flask_oidc import OpenIDConnect
from flask_appbuilder.security.views import AuthOIDView
from flask_login import login_user
from urllib.parse import quote
from flask_appbuilder.views import ModelView, SimpleFormView, expose
import logging
class AuthOIDCView(AuthOIDView):
@expose('/login/', methods=['GET', 'POST'])
def login(self, flag=True):
sm = self.appbuilder.sm
oidc = sm.oid
@self.appbuilder.sm.oid.require_login
def handle_login():
user = sm.auth_user_oid(oidc.user_getfield('email'))
if user is None:
info = oidc.user_getinfo(['preferred_username', 'given_name', 'family_name', 'email'])
user = sm.add_user(info.get('preferred_username'), info.get('given_name'),
info.get('family_name'), info.get('email'), sm.find_role('Gamma'))
login_user(user, remember=False)
return redirect(self.appbuilder.get_url_for_index)
return handle_login()
@expose('/logout/', methods=['GET', 'POST'])
def logout(self):
oidc = self.appbuilder.sm.oid
oidc.logout()
super(AuthOIDCView, self).logout()
redirect_url = request.url_root.strip('/') + self.appbuilder.get_url_for_login
return redirect(oidc.client_secrets.get('issuer') +
'/protocol/openid-connect/logout?redirect_uri=' + quote(redirect_url))
class OIDCSecurityManager(SupersetSecurityManager):
authoidview = AuthOIDCView
def __init__(self,appbuilder):
super(OIDCSecurityManager, self).__init__(appbuilder)
if self.auth_type == AUTH_OID:
self.oid = OpenIDConnect(self.appbuilder.get_app)
keycloak-config.py:
In keycloak-config.py file, we will add these dependencies and line, the dependencies will be added at top of file and then the code to import environment-variables from .env file and finally the OIDC variables to overwrite Flask-OpenID to Flask-OIDC.
Dependencies to ADD:
from keycloak_security import OIDCSecurityManager
from flask_appbuilder.security.manager import AUTH_OID, AUTH_REMOTE_USER, AUTH_DB, AUTH_LDAP, AUTH_OAUTH
import pkg_resources
from cachelib.base import BaseCache
from celery.schedules import crontab
from dateutil import tz
from flask import Blueprint
from flask_appbuilder.security.manager import AUTH_DB
from pandas._libs.parsers import STR_NA_VALUEfrom dotenv import load_dotenv, find_dotenv
To import Env Variables:
These lines of code will be added to load the .env file
#Loading Environment Variables.
load_dotenv(find_dotenv())
logger = logging.getLogger(__name__)
Add Keycloak OIDC Config:
#Keycloak Config...
AUTH_TYPE = AUTH_OID
SECRET_KEY: os.getenv('SECRET_KEY')
OIDC_OPENID_REALM: os.getenv('OIDC_OPENID_REALM')
OIDC_CLIENT_SECRETS= os.getenv('OIDC_CLIENT_SECRETS')
OIDC_ID_TOKEN_COOKIE_SECURE = False
OIDC_REQUIRE_VERIFIED_EMAIL = False
OIDC_CLOCK_SKEW = 500
OIDC_VALID_ISSUERS = os.getenv('OIDC_VALID_ISSUERS')
AUTH_USER_REGISTRATION = True
AUTH_USER_REGISTRATION_ROLE = os.getenv('AUTH_USER_REGISTRATION_ROLE')
CUSTOM_SECURITY_MANAGER = OIDCSecurityManager
OIDC_INTROSPECTION_AUTH_METHOD = os.getenv('OIDC_INTROSPECTION_AUTH_METHOD')
OIDC_TOKEN_TYPE_HINT = os.getenv('OIDC_TOKEN_TYPE_HINT')
client_secret.json:
This file will contain the info regarding keycloak client and realm along with public key etc, all the configurations to be added are given below:
-
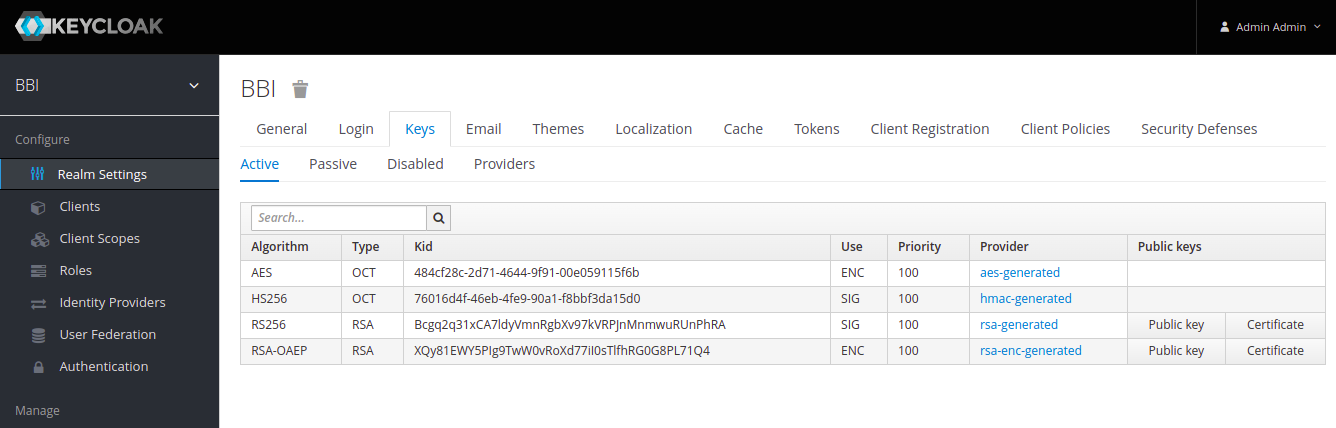
You can get the value of realm_public_key by going to Realm Settings > Keys and the clicking on Public Key button on RS256 key.
-
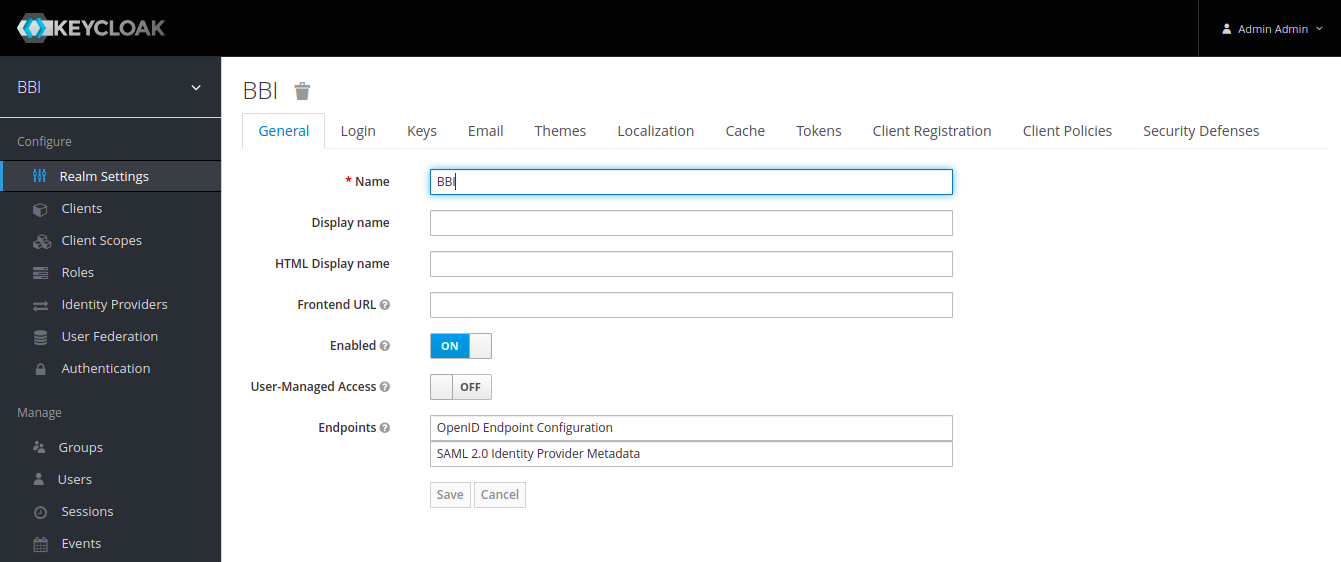
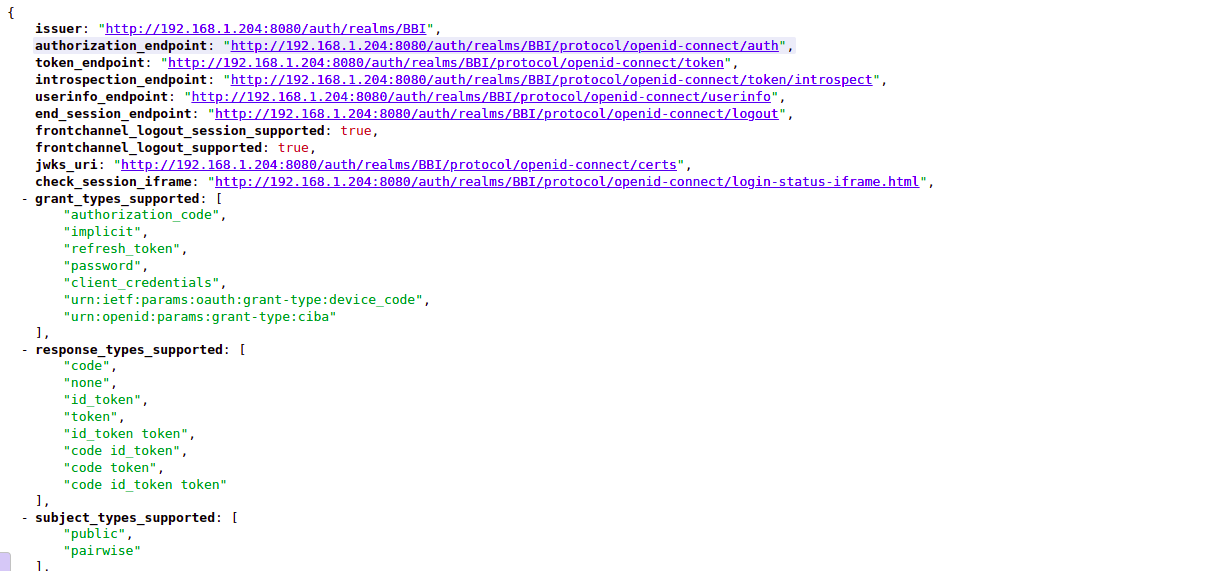
All the other information for properties given below can be gathered from Realm Setting > General then clicking on OpenId Endpoint Configuration:
Example configuration to add in file is given below:
{
"web": {
"realm_public_key": "MIIBIjANBgkqhkiG9w0BAQEFAAOCAQ8AMIIBCgKCAQEAjQTp1Yiv97rZ32rZ5FVD0a79N0JK/DWrMSg/KO8DZ0juUJE4MGX76dH/CVRbymSopNHFZautJF5B9dUyAGKSqhP3q8RTgbM5kbwp39QL+8uJ4mODjTr1a5/6BxKHKJXgq+YSYmK1r8FJY6oUIh0iOv8ifSgRugxWHA8UOKb0A2xVStcW484b85S+BHbsgut6PFJ+ja8POJDWxsIgbYJFK0wHxyOrthB7GPyN3Gn3owu5IDd3fLINDbFrK1j03o1EZphA0t6QP02YGLm15sdhBP4cODzoeKn5vqYkqHg/xF2iJS/liIkv+jEUcWaHD48RdRVYnzvDixrLxAvyNpMK7QIDAQAB",
"issuer": "http://192.168.1.204:8080/auth/realms/Superset",
"auth_uri":"http://192.168.1.204:8080/auth/realms/Superset/protocol/openid-connect/auth",
"client_id": "superset-demo",
"client_secret": "jkfWcMAmrcNGQM1bc3xXUnKe0LpQQEFP",
"verify_ssl_server": false,
"redirect_urls": [
"http://localhost:8088/oidc/callback"
],
"userinfo_uri":"http://192.168.1.204:8080/auth/realms/Superset/protocol/openid-connect/userinfo",
"token_uri":"http://192.168.1.204:8080/auth/realms/Superset/protocol/openid-connect/token",
"token_introspection_uri":"http://192.168.1.204:8080/auth/realms/Superset/protocol/openid-connect/token/introspect"
}
}
.env:
Add these configurations in .env file, the file should be placed on this path "<Project-Directory>/superset/docker/", example configurations are given below:
COMPOSE_PROJECT_NAME=superset# database configurations (do not modify)
DATABASE_DB=superset
DATABASE_HOST=db
DATABASE_PASSWORD=superset
DATABASE_USER=superset# database engine specific environment variables
# change the below if you prefers another database engine
DATABASE_PORT=5432
DATABASE_DIALECT=postgresql
POSTGRES_DB=superset
POSTGRES_USER=superset
POSTGRES_PASSWORD=superset
#MYSQL_DATABASE=superset
#MYSQL_USER=superset
#MYSQL_PASSWORD=superset
#MYSQL_RANDOM_ROOT_PASSWORD=yes# Add the mapped in /app/pythonpath_docker which allows devs to override stuff
PYTHONPATH=/app/pythonpath:/app/docker/pythonpath_dev
REDIS_HOST=redis
REDIS_PORT=6379FLASK_ENV=development
SUPERSET_ENV=development
SUPERSET_LOAD_EXAMPLES=yes
CYPRESS_CONFIG=false
SUPERSET_PORT=8088SECRET_KEY=Expertflow464
OIDC_OPENID_REALM =superset-demo
OIDC_CLIENT_SECRETS=/app/docker/pythonpath_dev/client_secret.json
OIDC_VALID_ISSUERS=http://192.168.1.204:8080/auth/realms/Superset
AUTH_USER_REGISTRATION_ROLE=agent
OIDC_INTROSPECTION_AUTH_METHOD=client_secret_post
OIDC_TOKEN_TYPE_HINT=access_token
Once we have added all these configurations, we can just run the docker build command on our Dockerfile to create a Superset image with Keycloak as Authentication tool.
Note: The changes you've done in keycloak-config.py file should also be added to config.py file, config.py file exist on this path "<Project-Directory>/superset/superset/config.py"
Process of Registration of Keycloak User in Superset:
To Create and Register a user in Keycloak for Superset login, we follow certain steps:
-
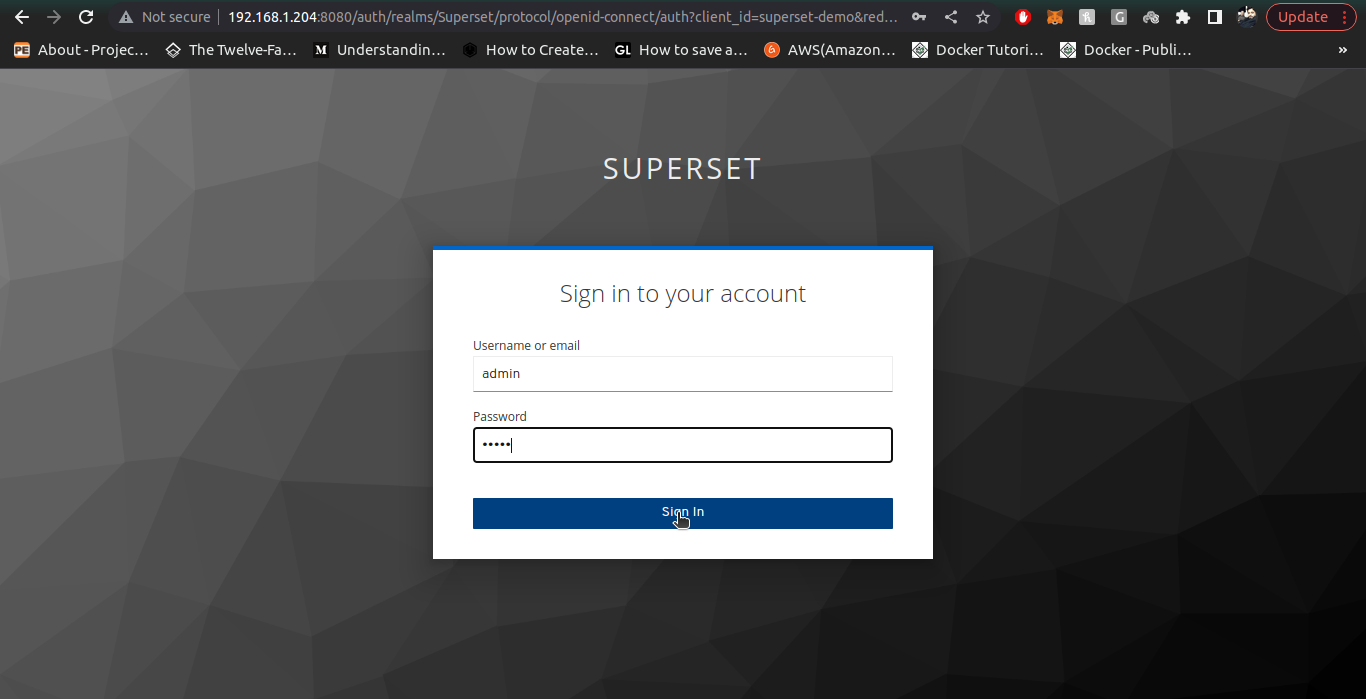
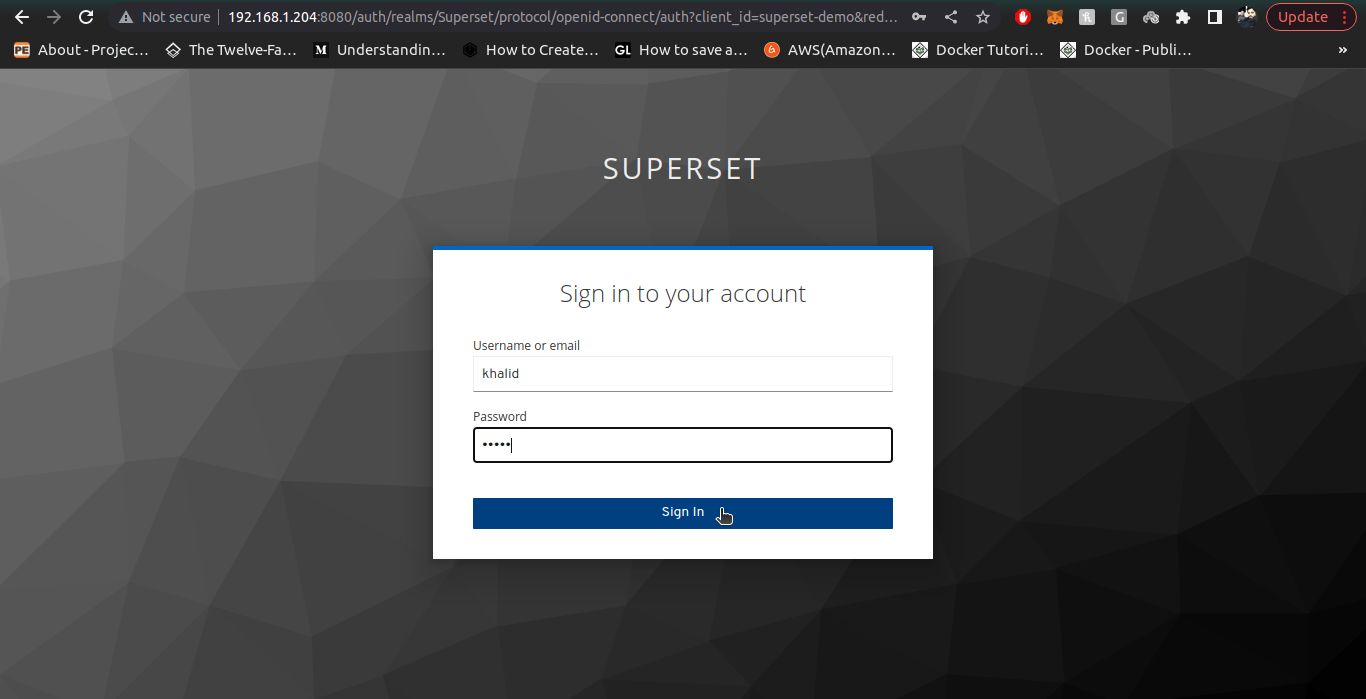
Go to the Keycloak instance you are using for Superset Auth Integration, e.g: We are using instance http://192.168.1.204:8080/auth/
-
Once inside keycloak admin console, we select our desired realm that we configured for our Superset application (we assume that both client and realm are already configured and created for our superset application)
-
For versions below 19: Keycloak API Developer Guide
-
For version 19 and above: Configure Keycloak for Client Application (Version 20 and above):
-
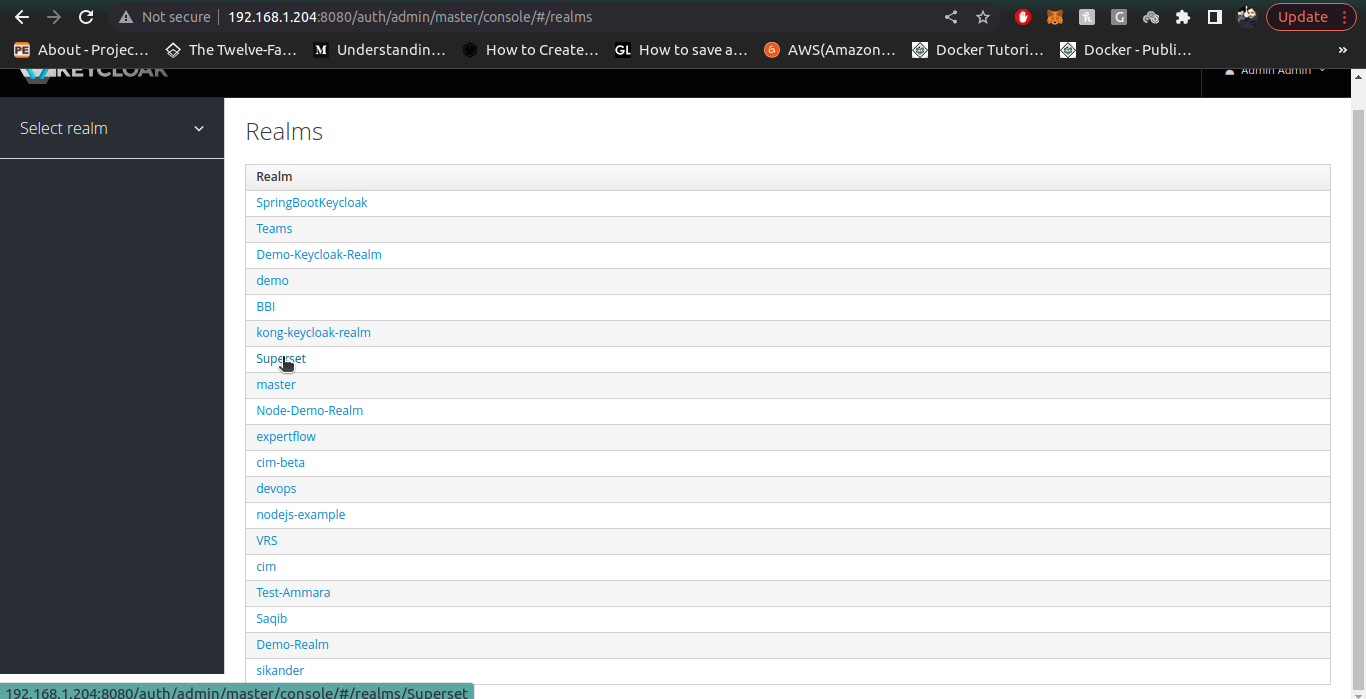
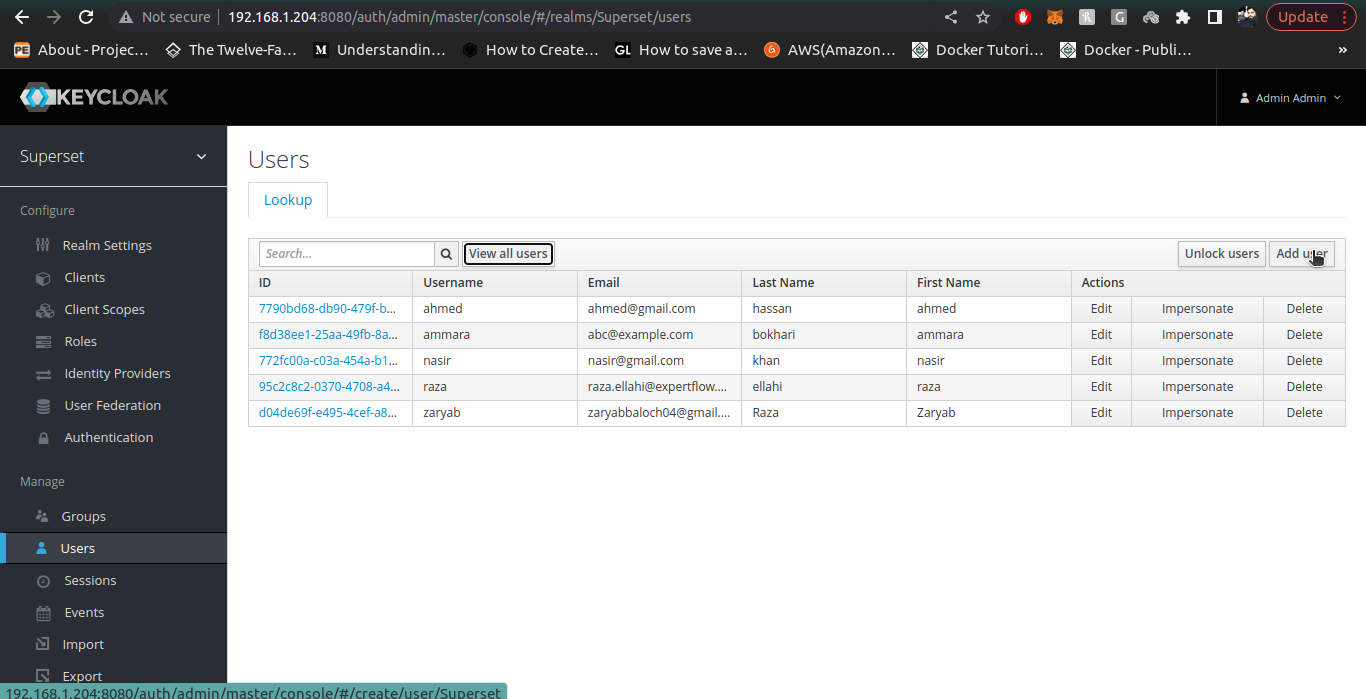
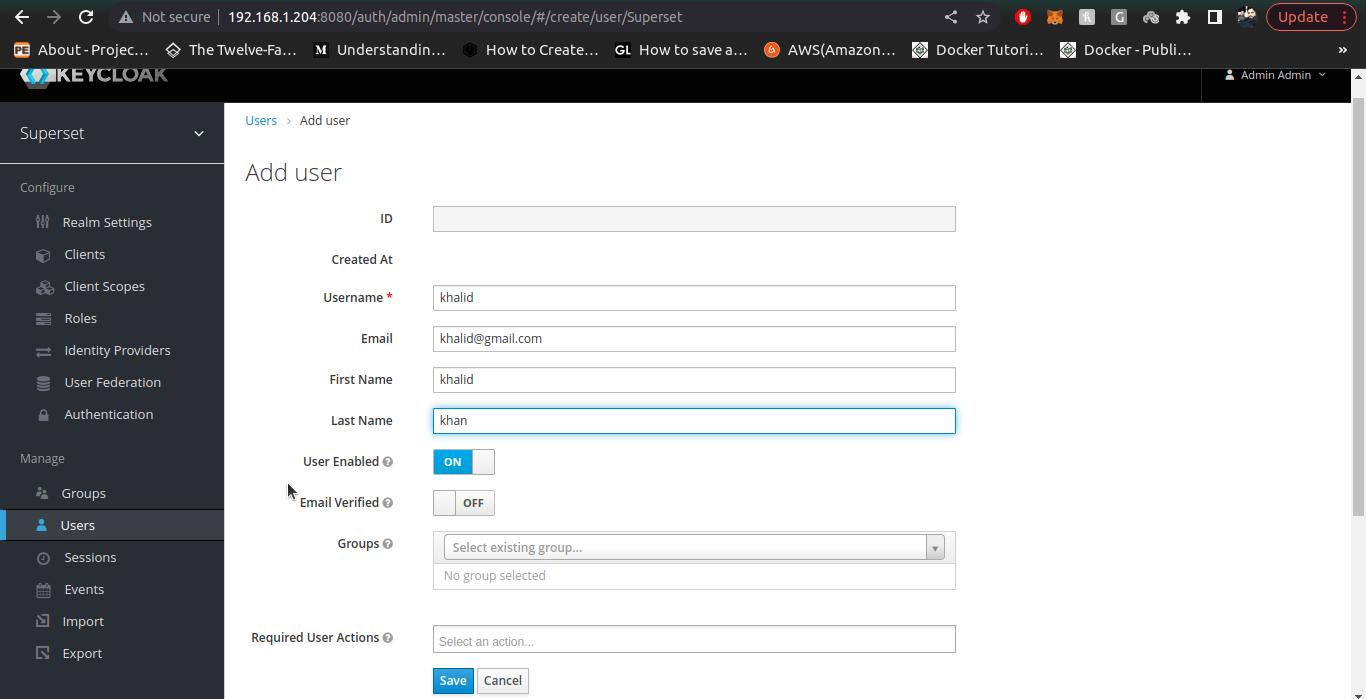
3. Once inside our desried Realm, we go to the manage section on left side panel and click on Users section to create user, then click on Create User.
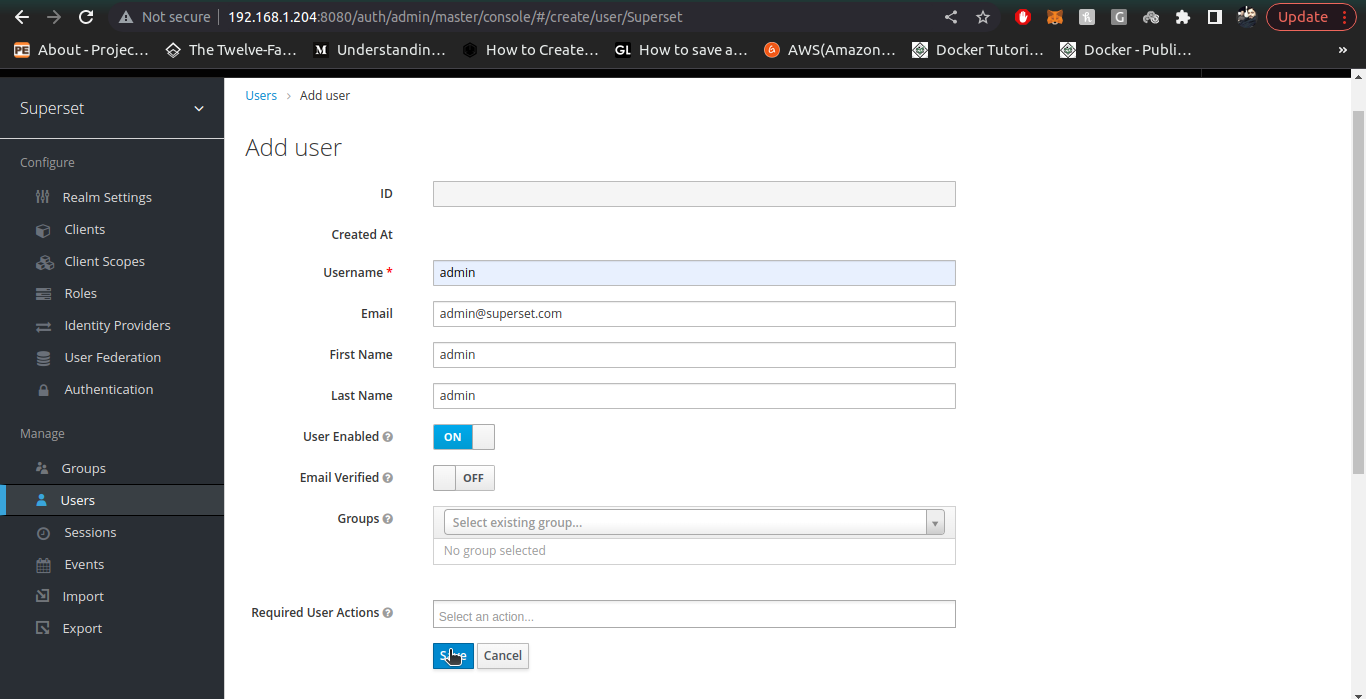
4. For admin User, the email must be admin@superset.com and first name/last name should be admin, also username should be admin.
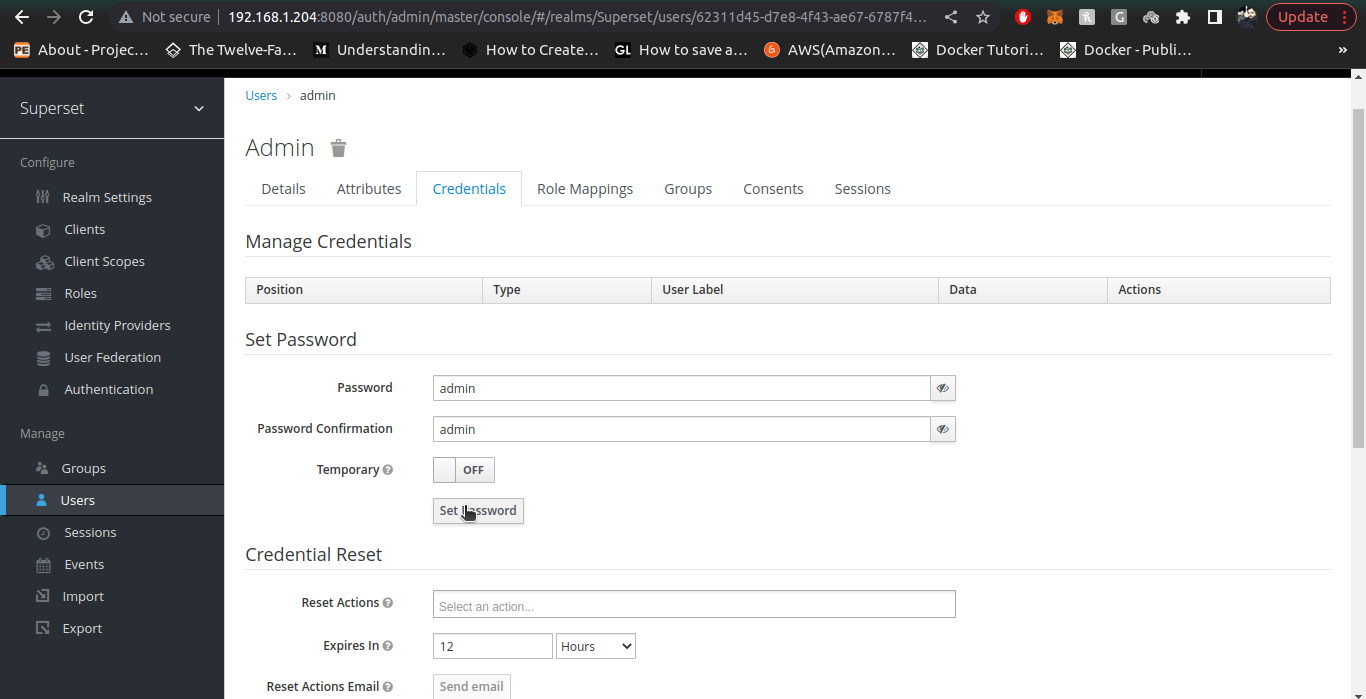
5. Once user is created, Setup the Password in Credentials tab. provide the Password and Confirm Password (both should be admin) and turn temporary to off.
6. Check the admin user now by going to your superset instance and logging-in using admin user we just created inside Keycloak realm
7. Once admin user is created, we create a normal user with pre-defined Gamma role to them. To create Gamma role users, we follow all the above steps of User creation (email, username, firstname, lastname) are mandatory attributes. Also provide credentials of User with temporary field as off.
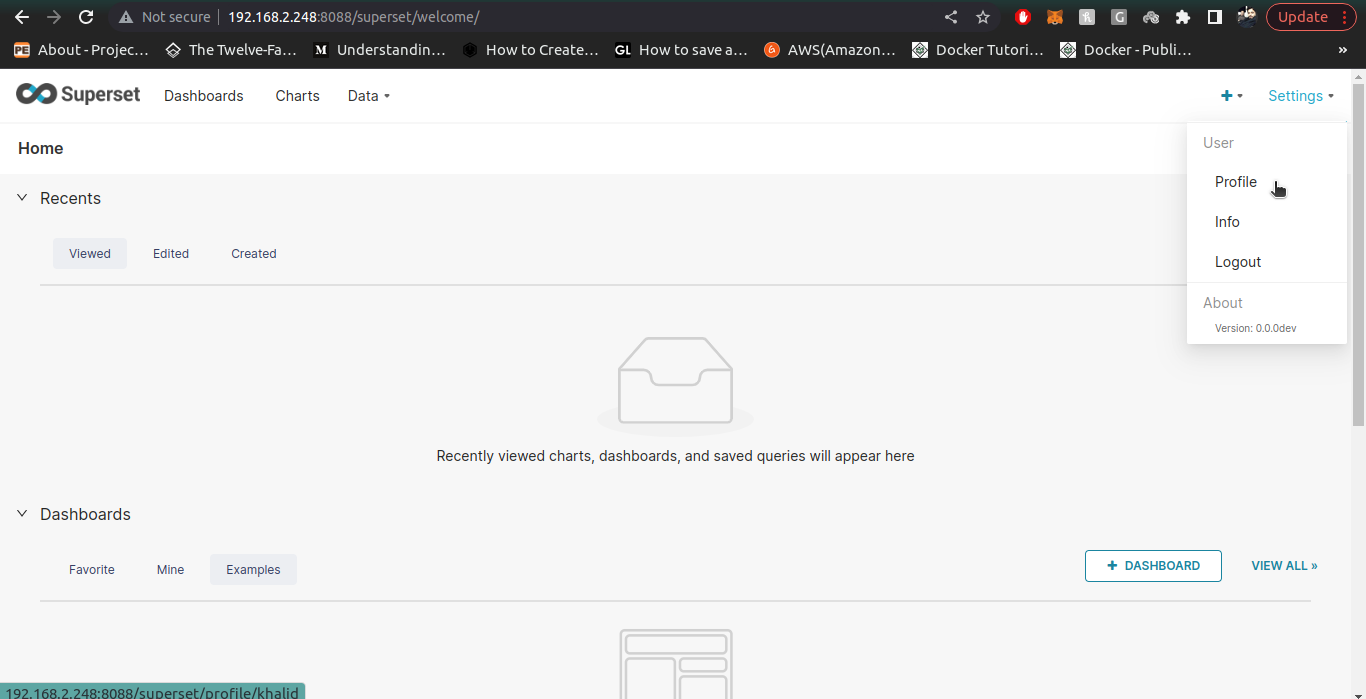
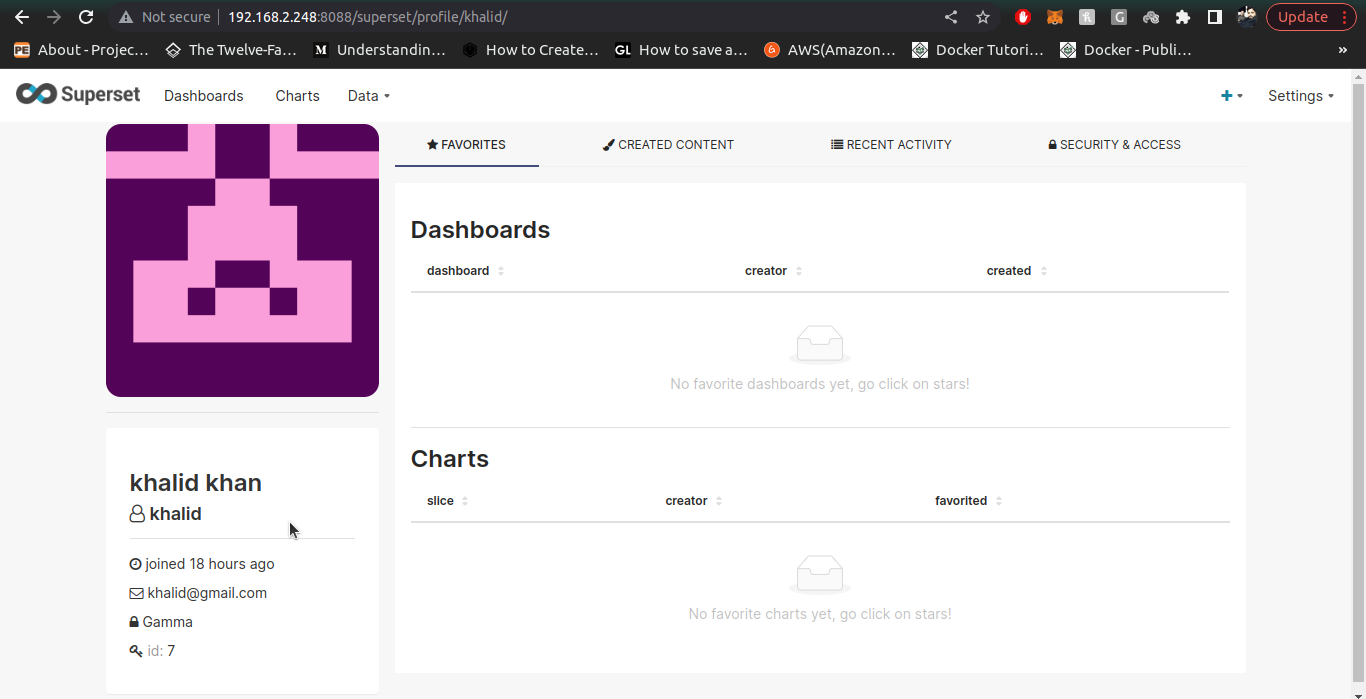
8. Check the normal user (you just created in keycloak) in your superset instance by logging-in.
Note:
If a user with certain username and email is deleted in keycloak, then creation of a user with same username but different email is not allowed in superset,Hence a clash of unique username causes Internal Server Error in Application. Please avoid creating a deleted user with different email. If you want to create a deleted user again, then make sure its email is same as well.
Build a Superset Image with Keycloak-OIDC-Connector:
To build a Superset image containing Keycloak OIDC Connector implementation. We use following steps:
-
Configure client_secret.json file by following the process given above. The path of the file is superset_repo>docker>pythonpath_dev>client_secret.json
-
Configure the env-file by providing valid data for all the Keycloak Configurations. Keycloak env variables contains variable starting from SECRET_KEY till OIDC_TOKEN_TYPE_HINT . The example of env variables is given in file .env above. Once all the valid values are provided in env-file rename it to .env . Path of env-file is superset_repo>docker>env-file
-
Once configurations are done. Create a superset custom image using file Dockerfile-Keycloak . Path to Dockerfile-Keycloak is: superset_repo>Dockerfile-Keycloak
-
Use this command to create superset docker image: sudo docker build -t <image-name: image-tag> -f Dockerfile-Keycloak .
-
-
Once build process is complete, confirm if the image is created or not by running command: sudo docker images and look for your created image.
-
Now copy the image-name and image-tag in this format <image-name: image-tag>
-
Open the docker-compose.yml file and provide the copied <image-name:image-tag> against variable x-superset-image: &superset-image
-
example: x-superset-image: &superset-image ef-superset:1.4.0
-
-
After providing the superset custom image to docker-compose file, run docker-compose command against newly updated file to run the image and confirm if it routes to Keycloak for Authentication.