-
It is assumed that you have CX and Transflux solution deployed on your respective machine. If not please refer to the the following guide for deployment Helm-based Deployment for Expertflow CX.
-
Please make sure that you pull the latest images and the latest tags while cloning from the repositories during the deployment. If not, please update the tags and redeploy the concerned components. If the latest tags are not present in your solution, you might face issues with missing data while testing the deployment.
Pre-Requisites
-
After successfully deploying the CX solution and CX Transflux, now we need to test whether the pipelines are working properly and the generated data is being stored in the target database properly or not. To do so first after the fresh deployment you need to configure the solution. Access the CX solution from the FQDN on which deployment is done:
-
<FQDN>/unified-admin
-
<FQDN>/unified-agent
-
<FQDN>//customer-widget/#/widget?widgetIdentifier=Web&serviceIdentifier=<web service identifier>
-
-
To access Apache Airflow to run the testing data pipelines, access the dedicated FQDN on which CX Transflux is deployed.
-
<FQDN>/home
-
-
Now, to set up agents and configure Admin console please refer to the following guide Unified Admin Guide
-
Once everything is configured and set up, now you can generate the testing data by having chats with the customer and agent.
How to Generate Testing Data
-
First, login to your agent desk with the username and password setup during the configuration and change the agent state to ready.
-
Now, open the customer widget and start a chat. You will be asked to enter a phone number that will be your unique identifier in the generated data. After entering the phone number you are either routed directly to the agent or routed to a bot that asks for your choice of chat selection, depending on the whether the solution is configured for PUSH mode or PULL mode.
-
Now, go to the agent desk, you would have received a chat request from the customer that you just made. Join the chat and have a testing conversation from both the ends. Once the demo conversation is done, end the chat from the agent desk.
-
Now, you will see a survey popup in the customer widget. Open and fill the survey. Go back to the agent desk and add wrap ups to finally close the chat.
-
You have successfully generated the data now you have to verify your generated data in MongoDB.
Validating Data in the MongoDB
Before accessing MongoDB, is it assumed that you have generated the certificates and setup the DB during the deployment.
Connect to your solution’s configured MongoDB and look for the generated data.
For Forms Data:
-
In order to verify the forms data open the ‘Conversation-Manager DB’ and look for CustomerTopicEvents.
-
This DB will have all your raw data that you just generated including the customer details, channel session details, survey form details, survey form responses etc. Expand the cimEvent field to see the complete generated data and any additional parameters to validate the data.
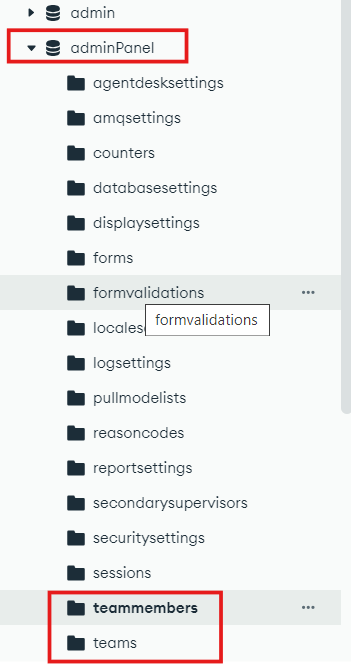
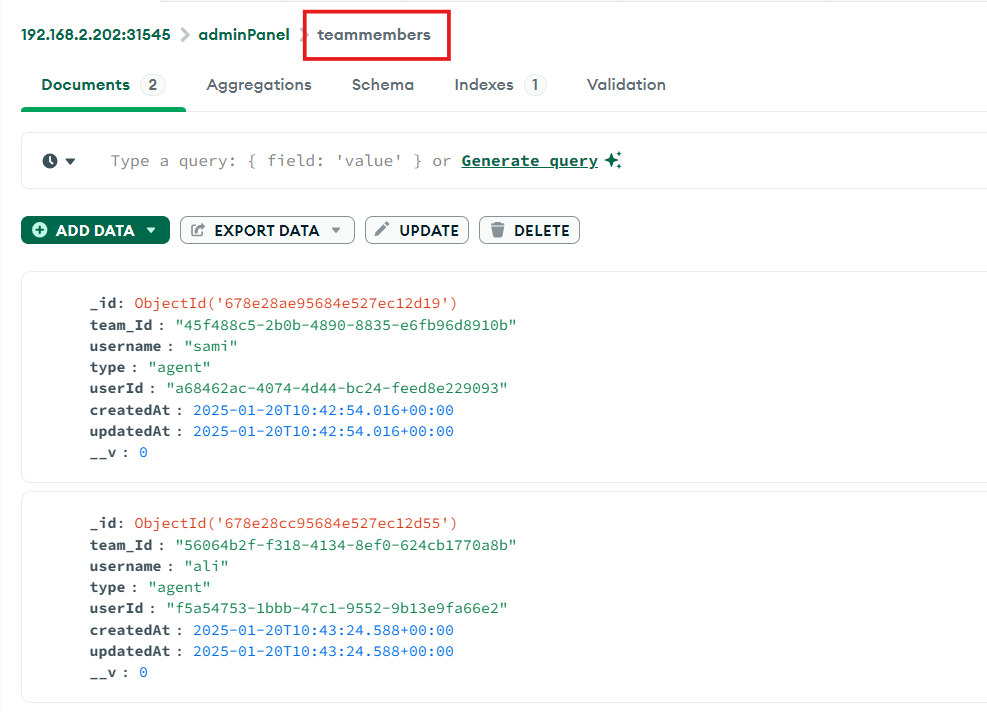
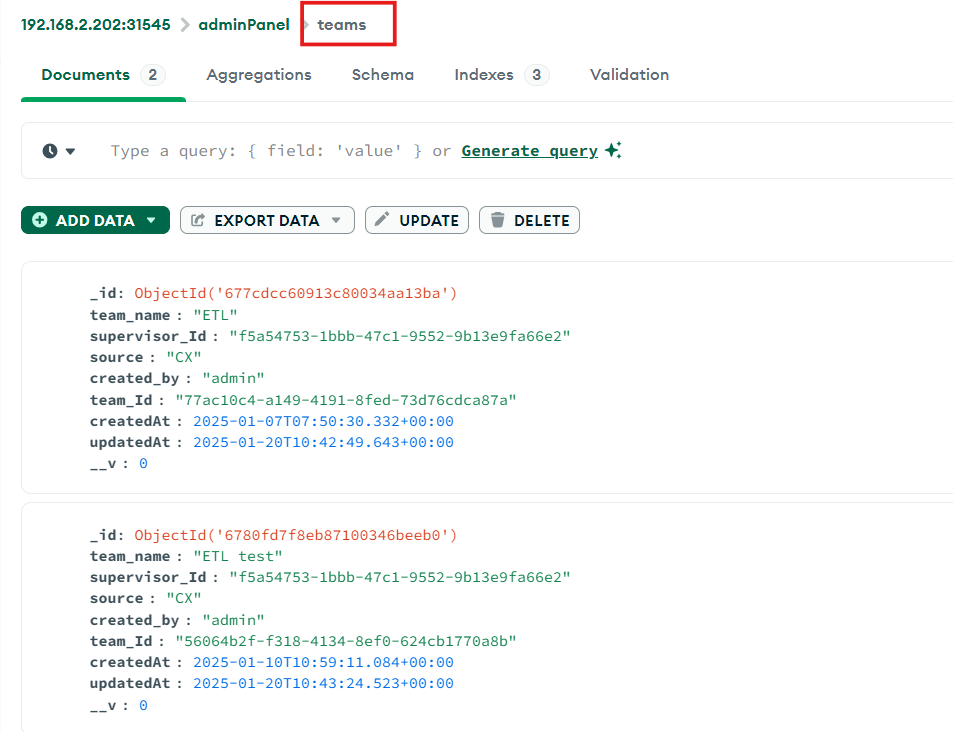
For Teams Data:
-
In order to verify the teams data open the ‘adminPanel' DB and look for ‘teammembers’ and ‘teams’.
-
In 'teammembers' and 'teams' you can see the data related to the configured agents and the teams they belong to.
Testing the Data Pipelines
-
Once you have validated all your data, now you can run the data pipeline from airflow. Use the FQDN on which transflux was deployed. (this fqdn is different from which your main solution is deployed).
-
Access the FQDN and login to airflow using username and password both as ‘admin’. Once logged in, run the respective data pipelines in order to move the raw data from MongoDB to the target database, MySQL in this case.
After generating the data, run both the pipelines i.e. ‘forms’ and ‘teams’ so data for both comes into the target database.
-
To see individual component logs, open the respective DAGs, and go to the graph. Click the component and go to logs to validate data.
-
This will validate how much data is flowing through the pipeline and in how many batches. By default the batch size is set at 30,000. So 30,000 records can go in one batch. This depends on how much data you generated. In case of forms, filling the survey form once, generates one data. For example, if you generated 10 amounts of data, the data will go in one batch and the logs should show the record count as 10. Whereas in the case of teams, this depends on the number of agents configured and the agent teams configured in the solution.
-
Now wait for the pipeline to be in the completed state. Once the pipeline is run completely, you can now validate the pipeline by checking your data in the MySQL target database.
Validating Forms and Teams Data in MySQL
-
Assuming you have already connected the target DB and set it up according to the step mentioned in the guide EF Data Platform Deployment .
-
Open MySQL and check the tables in your set target database. Run queries on different tables to check if the data is populated in the tables. You can write your own queries or use the following query that will give you the record count in each table and also give the status of the table if it is empty or not.
-
This query can validate the data for both the data pipelines i.e.; 'forms' and 'teams', assuming both pipelines were triggered while testing.
WITH ValidateData AS (
    SELECT 'state_records' AS TableName, COUNT(*) AS RecordCount FROM state_records
    UNION ALL
    SELECT 'forms_gold', COUNT(*) FROM forms_gold
    UNION ALL
    SELECT 'forms', COUNT(*) FROM forms
    UNION ALL
    SELECT 'survey_distributions', COUNT(*) FROM survey_distributions
    UNION ALL
    SELECT 'teams', COUNT(*) FROM teams
    UNION ALL
    SELECT 'team_members', COUNT(*) FROM team_members
    UNION ALL
    SELECT 'agent_team', COUNT(*) FROM agent_team
    UNION ALL
    SELECT 'agent_mrd_state', COUNT(*) FROM agent_mrd_state
    UNION ALL
    SELECT 'agent_state', COUNT(*) FROM agent_state
    UNION ALL
    SELECT 'agent_task', COUNT(*) FROM agent_task
    UNION ALL
    SELECT 'channel_session', COUNT(*) FROM channel_session
    UNION ALL
    SELECT 'wrapup_detail', COUNT(*) FROM wrapup_detail
    UNION ALL
    SELECT 'ivr', COUNT(*) FROM ivr
    UNION ALL
    SELECT 'conversation_hold_resume', COUNT(*) FROM conversation_hold_resume
    UNION ALL
    SELECT 'conversation_data', COUNT(*) FROM conversation_data
    UNION ALL
    SELECT 'conversation_participant', COUNT(*) FROM conversation_participant
    UNION ALL
    SELECT 'conversation', COUNT(*) FROM conversation
    UNION ALL
    SELECT 'agent', COUNT(*) FROM agent
    UNION ALL
    SELECT 'bot', COUNT(*) FROM bot
    UNION ALL
    SELECT 'channel', COUNT(*) FROM channel
    UNION ALL
    SELECT 'channel_type', COUNT(*) FROM channel_type
    UNION ALL
    SELECT 'queue', COUNT(*) FROM queue
    UNION ALL
    SELECT 'list', COUNT(*) FROM list
    UNION ALL
    SELECT 'media_routing_domain', COUNT(*) FROM media_routing_domain
    UNION ALL
    SELECT 'wrapup_detail', COUNT(*) FROM wrapup_detail
    UNION ALL
    SELECT 'mrd_type', COUNT(*) FROM mrd_type
)
SELECT
    TableName,
    RecordCount,
    CASE WHEN RecordCount = 0 THEN 'Table is empty' ELSE 'Table Has Data' END AS DataStatus
FROM ValidateData
ORDER BY TableName;
-
You are not limited to use the above query or checking only the above tables, however it is better to check each and every table and cross check this data with MongoDB and ensure that the complete records are loaded in the target DB. You can modify and update the query with as many tables as you want to validate to ensure the best data validation.
-
Once you are satisfied that all the data is present and validated in MySQL, your testing is complete and the CX solution and CX Transflux are working properly.
You can also view tables in the airflow database with simple Select statements to check for airflow data.