CIF Based MS CRM Web-CTI Connector Deployment Guide
Preface
This document provides deployment details of the product inside MS Dynamics CRM.
Prerequisites
Following are the prerequisites for the deployment of the Javascript CTI Toolbar.
- Dynamics 365 should be installed.
- The user must have administrative rights
- Download and install the Generic Connector.
- (required) Install Generic Connector patch Extract the RAR file and run the EXE file on the Generic Connector server.
Install Javascript CTI Toolbar for MS Dynamics CRM
This javascript_cti_toolbar can be deployed on the Generic Connector server on any application server of the user's choice (IIS, Tomcat, etc). The following section lists the steps to deploy the application in an IIS server.
- Download the javascript-cti-toolbar and place it in the (c:\inetpubt) or any desired directory.
- Press window+R, write inetmgr, and click OK. It will run IIS Manager.
- Site name (javascript_cti_toolbar).
- Physical path (c:\inetpubt\javascript-cti-toolbar).
- Port, default value is 80 but any other value can be assigned.
- Navigate to `c:\inetpub` folder and create a directory with the name javascript-cti-toolbar.
- Right-click on Sites and select Add Web Site
- Set the values in the following fields as shown in the picture below and click OK.
- Go to the physical path (c:\inetpubt\javascript-cti-toolbar)of the site which was defined above and copy files from a cloned javascript-cti-toolbar folder (which was cloned by executing the above script).
- Please follow this guide to install and configure the SSL certificates on IIS in order to run the cti_toolbar on HTTPS.
Configuration
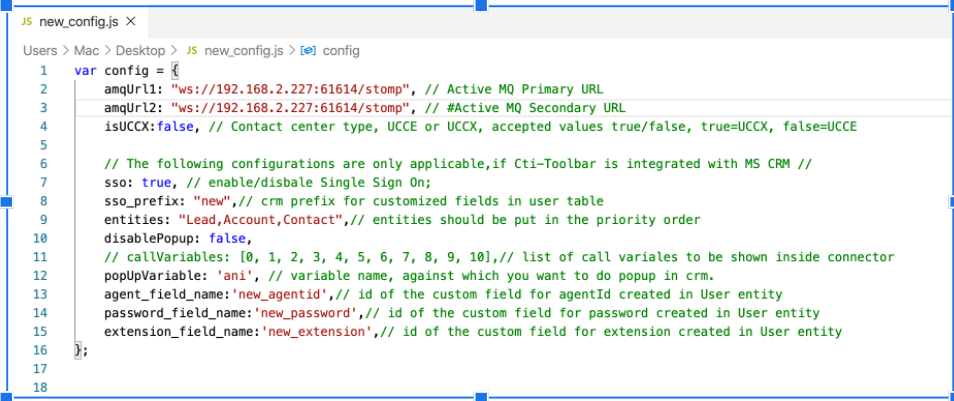
Open the new_config.js file located on `c:\inetpubt\javascript-cti-toolbar\new_config.js` path. Set the properties as per the below table.
S.No Property Name Value Description 1 amqUrl1 ws://192.168.2.227:61614/stomp This is the Primary URL of AMQ on which you have installed the Generic Connector. The protocol can be ws or wss , like if you running on a secure socket that will be wss else it will be ws. 2 amqUrl2 ws://192.168.2.227:61614/stomp This is the secondary URL of AMQ if the system is working in HA mode. for NON-HA mode you can simply put the IP of the Primary AMQ URL 3 isUCCX True/False Contact Center Type, like UCCE/PCCE or UCCX. For UCCX it will be True for UCCE/ PCCE it will be False 4 sso True/False If you wanted to enable SSO so that as soon as agents login into CRM, should also log in on CTI. You can put this value True, else False.
If Value is Set to True, property 5,6,7,8 also needed to be set.
5 sso_prefix new CRM prefix for customized fields in the CRM 6 agent_field_name new_agentid ID of the custom field for Cisco Agent ID, created in User Entity in the CRM 7 password_field_name new_password ID of the custom field of Cisco Agent Password, Created in the User Entity in the CRM 8 extension_field_name new_extension ID of the custom field of Cisco Agent Extension, Created in the user Entity in the CRM> 9 entities "Lead,Account,Contact" The searching priority user can define in the config file. For example, as per this configuration, the CTI connector first searches the record in the Lead, then in the Account, and last Contact. If you wanted to search the record first in Contact, you can simply change the order as per your requirement and the searching order will be changed. 10 disanplePopup True/False If you want to disable the screen pop, you can put the value True, else False 11 popUpVariable ANI/any custom Variable The variable on which you wanted to do the screen pop, most of the time it's an ANI, but the user can change it as per his requirement.
- The actual file looks like this. Please note that the order of the properties doesn't matter
- Update the configurations and save the file.
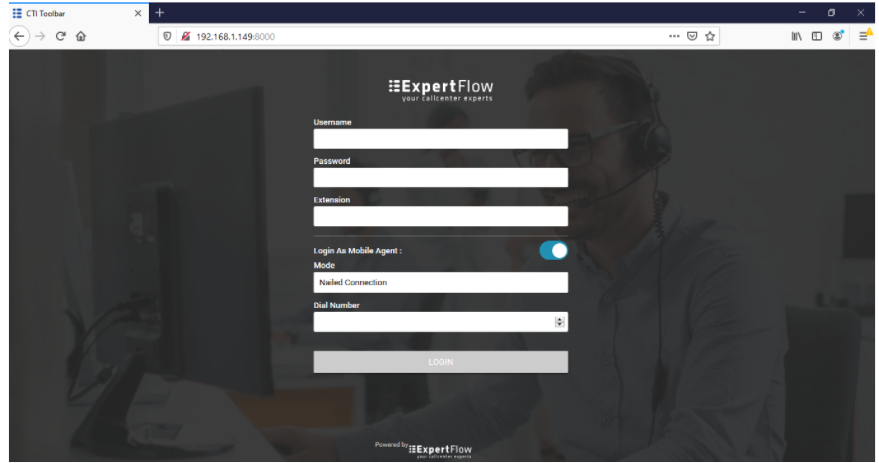
- Browse the configured FQDN and the application should be accessible as shown below.
Configure the CIF on Dynamics CRM UCI for javascript-cti-toolbar
- Login to the CRM and go to the published apps then select the ‘ channel integrated framework’.
Note
If CIF is not installed on your CRM then you can follow this guide to install on your CRM.
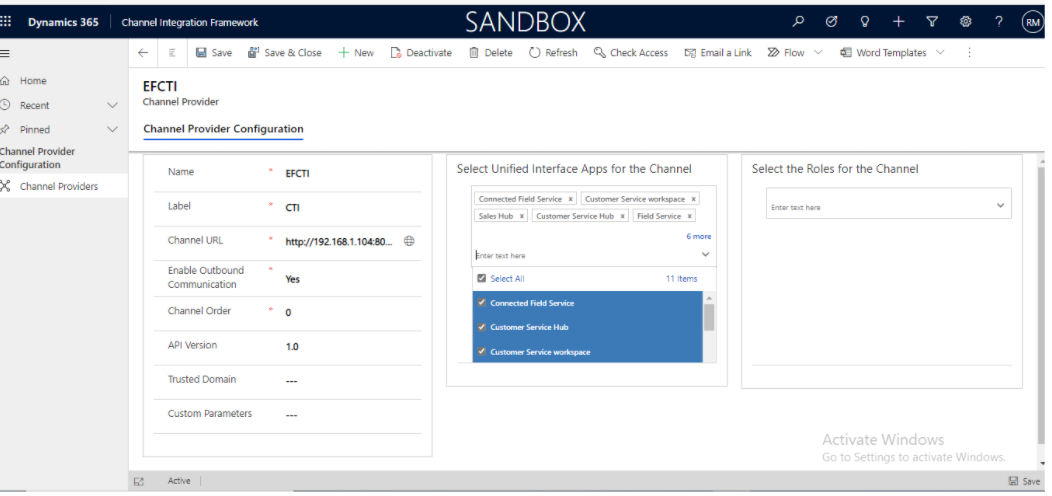
- Click on the new button to create a new active channel provider and fill in the details as given in the screenshot below.
- Name : EFCTI
- Label: CTI
- Channel Url : http://<Server-IP>:<Port>/javascript-cti-toolbar
- Enabled outbound Communication: Yes
- Channel Order : 0
- Select Unified Interface Apps for the Channel
- Select the Unified app on where you want to embed the CTI.
- Assign roles according to your requirements.
- Click on Save Button.
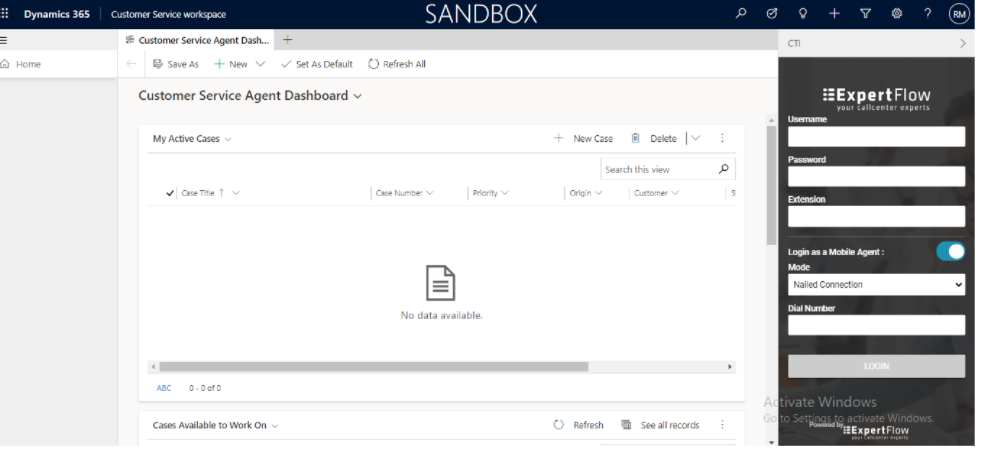
- Go to the Customer Service workspace. Will look like the following screenshot.
Configure Click-to-Call
Follow the steps to configure click to call on the Account page. You can configure it on multiple entities as per your requirement like Contact, Leads.
- Click on the setting button
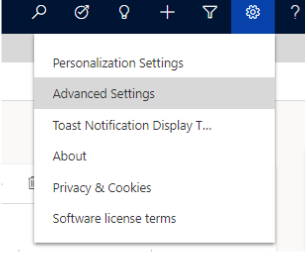
- Go to setting -> Customizations -> Customize the System
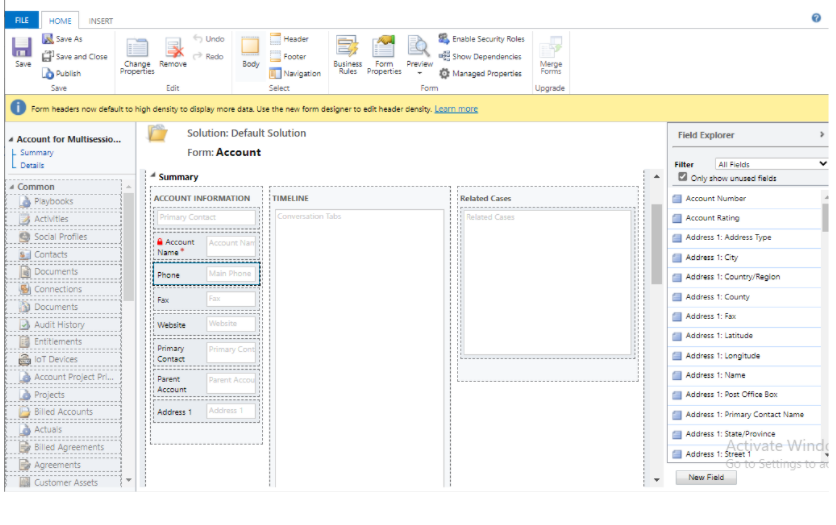
- double click phone field -> controls ->add controls -> add ‘ channel communication control ’.
- Save and publish
After following all these steps, your CTI is configured properly and now you can use EF MS CRM WEB-CTI Connector