HubSpot Public App Creation
-
On a HubSpot developer account, create a public app.
-
Set the required app info
-
Switch to
Authtab -
Add one or multiple Auth-Redirect URLs
<FQDN>/<path>/oauth-callback, where-
<FQDN>is the domain/hostname where our app is deployed (e.g.efcx44-qa.expertflow.com) -
<path>is the path to the connector as defined in the Ingress file (default:hubspot-connector) -
/oauth-callbackis our static authentication redirect route. -
Make sure to add
HTTPSas the protocol.
-
-
Add required scopes:
timeline,oauth,crm.schemas.contacts.read,crm.objects.contacts.write,crm.objects.contacts.read,files
This page also lists our app credentials, which we’ll need later.
Configuring Calling Window
-
In your HubSpot Developer account, go to
Apps -
Click to create (or get) API key
-
Also go to the
authpage from the above section, and copy theappId -
Make a Postman or
curlrequest to this endpoint, replacingapikeyandappIdwith the values gotten from the HubSpot developer dashboard -
Specify all listed fields as
true. And list the chosen app’s name, and specify the URL to where the connector would be. -
Add a field
useRemote(not listed in docs), and set its value tofalse -
If you’d like to update those values later, use a
PATCHrequest instead.
Pulling The Application from Git
The application code alongside the Kubernetes config files are deployed on this repo, on the master branch.
If you’re testing for QA, please pull from the
developbranch to include latest dev changes. Switch branches withgit checkout <branch-name>
-
Pull the the code from the repo:
git clone -b master https://gitlab.expertflow.com/cti/hubspot-connector-for-efcx.git
It will create a new directory with the app inside it.
-
After that, if you want to get the latest changes to code, navigate into the created directory (with
cd <dir-name>), and rungit pull origin master. -
Run
cd ./kubernetesto change directories. This is where all the YAML files are stored.
Server Deployment
Before you begin, verify that on the server, you have:
- Installed Kubernetes. If not, see Deployment Planning
- Setup storage. If not yet, see Storage Solution - Getting Started
Setting Up Environment
We use Kubernetes for our server deployment, on which the static files for the connector will be served, and where the backend server will be running.
Namespace
Create a namespace “expertflow” if it doesn’t exist.
kubectl create namespace expertflow
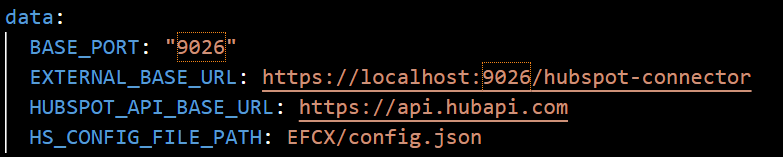
ConfigMap
Open the hubspot-connector-configmap.yaml file to edit configurations.
-
EXTERNAL_BASE_URLis the full URL to where our app will be running (e.g.https://efcx44-qa.expertflow.com/hubspot-connector/). -
BASE_PORTthe port where the app will be running on that domain (default"9026"). Changing this requires changing port value in multiple other files. -
HUBSPOT_API_BASE_URLthe base URL for HubSpot’s API. Should be left set tohttps://api.hubapi.comunless there’s a reason to change it. -
HS_CONFIG_FILE_PATHthe file path for the config file on each HubSpot portal. The connector will read its configs from that file.
Secret
-
Open the
hubspot-connector-secret.yamlfile. -
Update values as needed and described in the file.
-
SESSION_SECRET: a randomly generated secret, for encryption purposes -
HUBSPOT_CLIENT_ID: Can be found in the HubSpot developer dashboard for the app under the Auth tab. -
HUBSPOT_CLIENT_SECET: Can be found in the HubSpot developer dashboard for the app under the Auth tab.
-
Make sure values are base64 encoded before being added to the file. You can use any online or terminal tooling to encode the values.
-
Save the file.

Ingress
HubSpot-Connector should be accessible by a fully qualified domain name. Assign the FQDN.
Replace <FQDN> with your FQDN for HubSpot-Connector (e.g. efcx44-qa.expertflow.com) and run this command.
sed -i 's/devops[0-9]*.ef.com/<FQDN>/g' hubspot-connector-configmap.yaml hubspot-connector-Ingress.yaml
Create Self-Signed SSL/TLS Ingress Certificates
please modify the <FQDN> with your current FQDN before applying the following command.
-
Create IngressCerts directory (optional)
-
mkdir ingress-certs cd ingress-certs -
set the Variable name to your FQDN (e.g.
efcx44-qa.expertflow.com).
The${FQDN}variable in following commands will be replaced with the value you provided in this step. -
export FQDN=<enter FQDN here> -
Now generate a secret with the following commands.
openssl req -x509 \ -newkey rsa:4096 \ -sha256 \ -days 3650 \ -nodes \ -keyout ${FQDN}.key \ -out ${FQDN}.crt \ -subj "/CN=${FQDN}" \ -addext "subjectAltName=DNS:www.${FQDN},DNS:${FQDN}" -
Create a Kubernetes secret in your required namespace. In our case it’s
expertflowkubectl -n expertflow create secret tls hs-ef-ingress-tls-secret --key ${FQDN}.key --cert ${FQDN}.crt
Applying Kubernetes YAMLs
-
Apply the Configmap with
kubectl apply -f hubspot-connector-configmap.yaml -
Apply the Secret with
kubectl apply -f hubspot-connector-secret.yaml -
Apply the image-pull secret with
kubectl apply -f ef-imagePullSecret-expertflow.yaml -
Apply the service with
kubectl apply -f hubspot-connector-service.yaml -
Apply the deployment with
kubectl apply -f hubspot-connector-deployment.yaml -
Apply the Ingress with
kubectl apply -f hubspot-connector-Ingress.yaml. (For RKE2-based Ingresses using Ingress-Nginx Controller)
User-Side Installation
Installing The App
Now that the app is running, we need to install it for the required HubSpot Portal.
-
Go to
https://<FQDN>/<path>/installto start the installation flow-
Where
<FQDN>is the domain name where the app is hosted (e.g.https://efcx44-qa.expertflow.com) -
Where
<path>is the path to the connector as defined in the Ingress file (default:hubspot-connector)
-
-
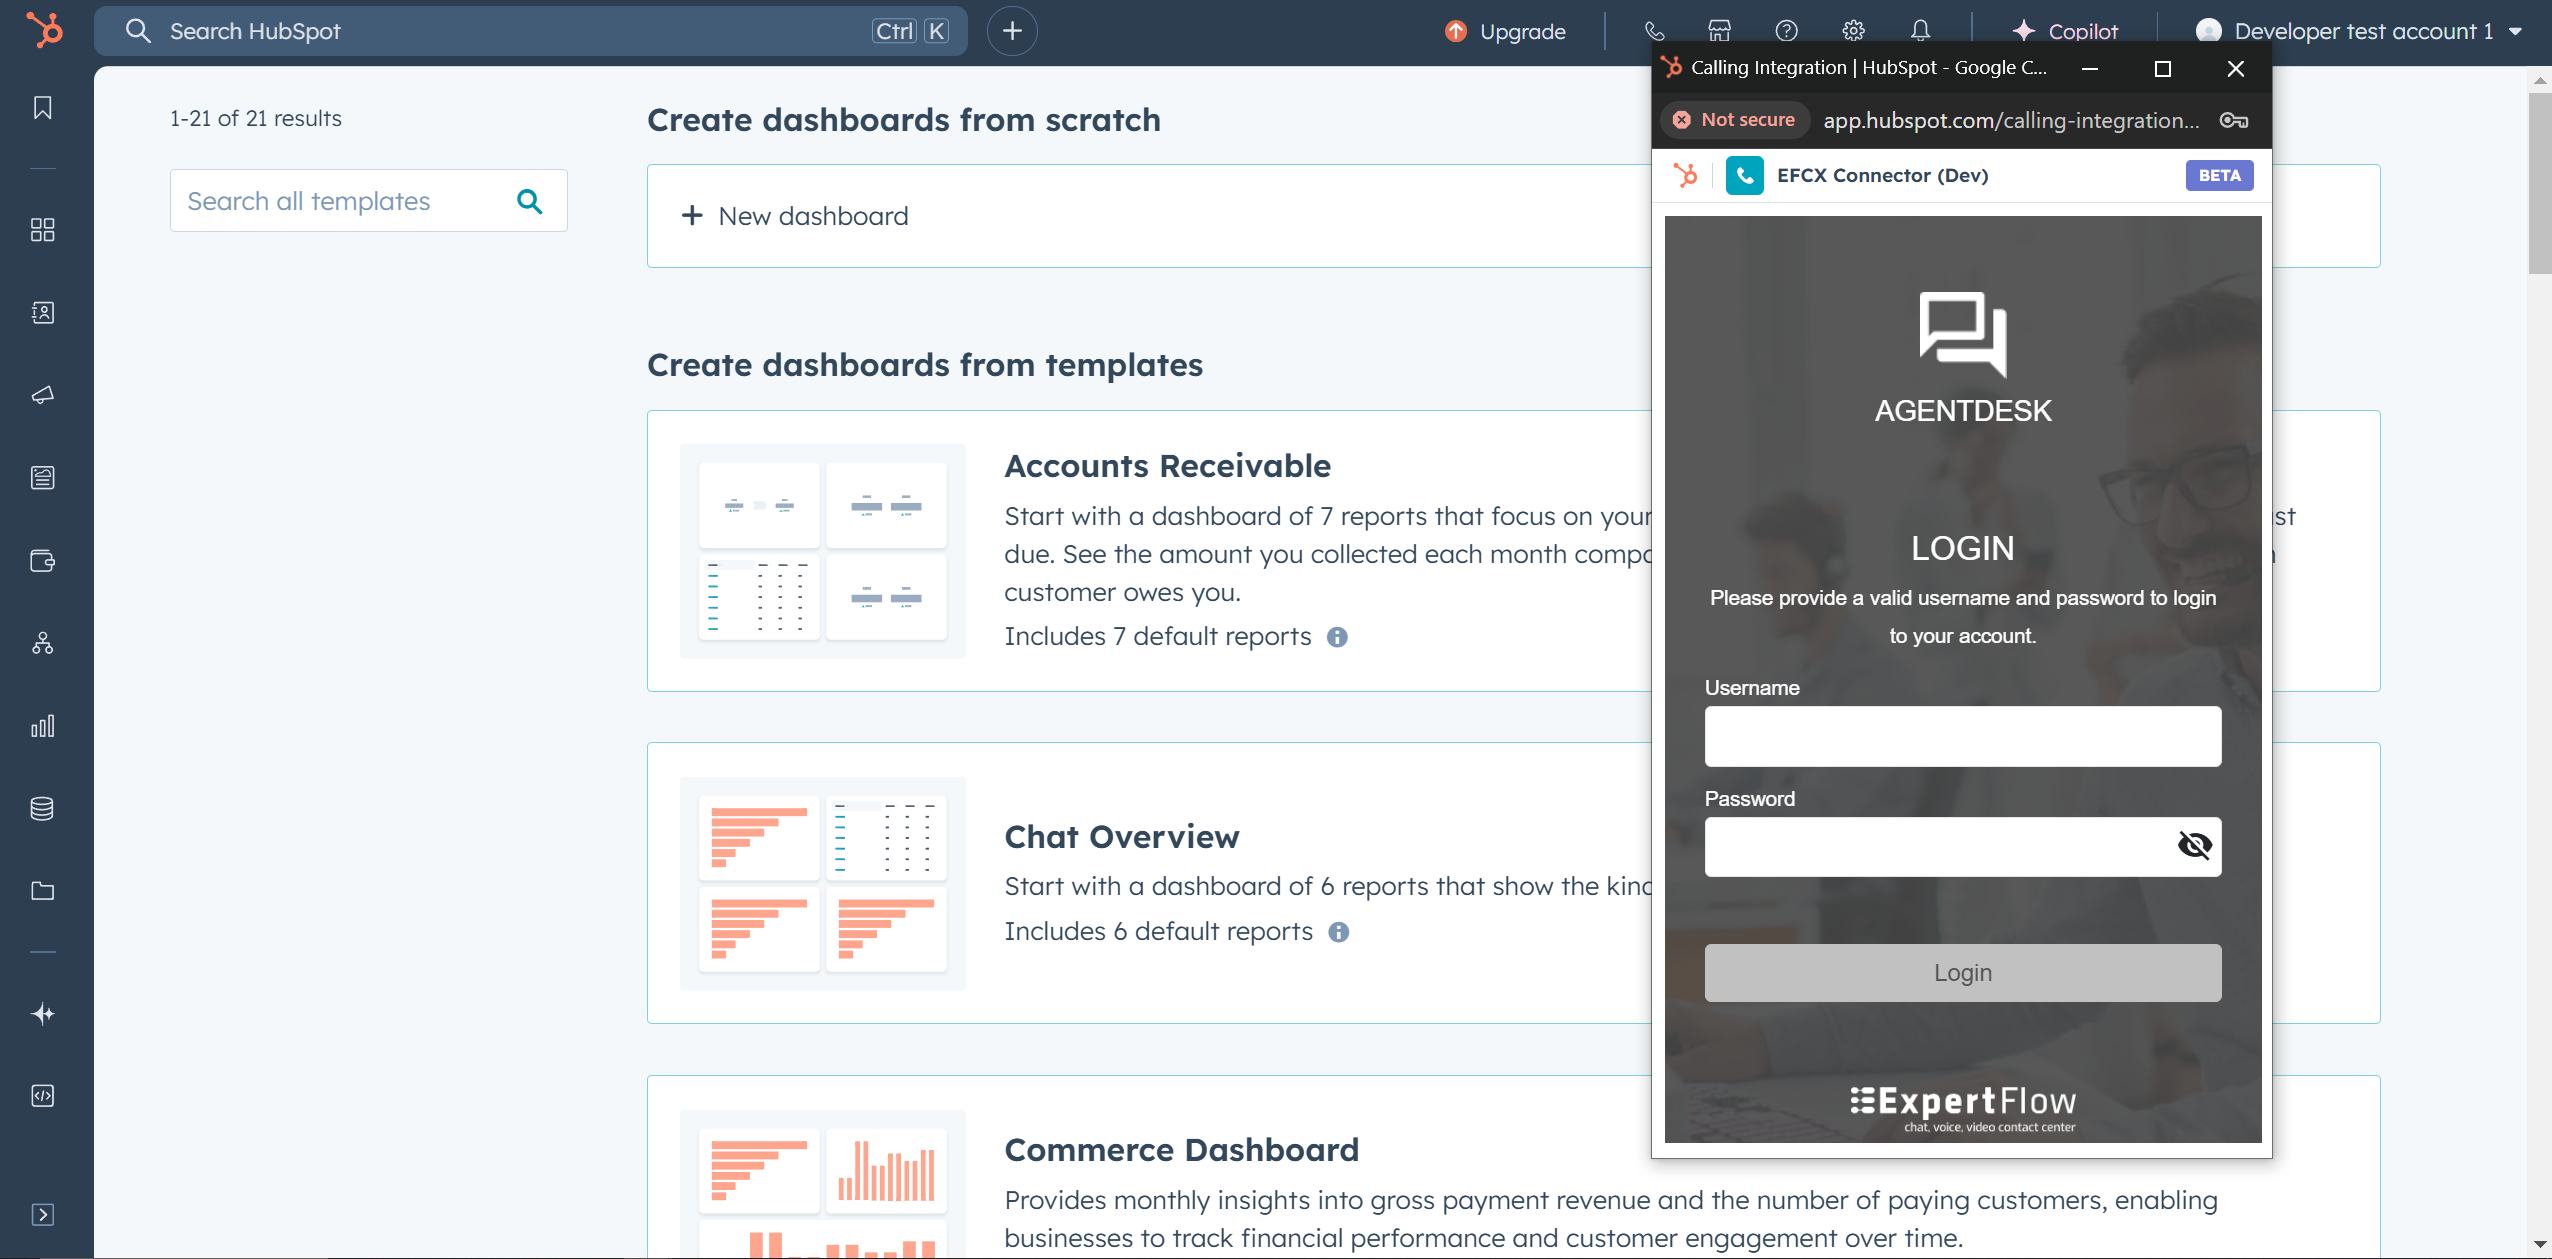
Then go to HubSpot’s settings → General → Calling
-
Then scroll down and change your “Calling Provider” to be our app
Creating Configuration File
-
From the side navbar on the left, go to Library->Files.
-
If you can’t see the file manager in the UI. Simply navigate to
https://app.hubspot.com/files/<portal-id>/, where<portal-id>is the number that shows in your account’s URL, and can also be viewed under the account dropdown on the far right of the navbar.
-
-
From the File Manager, create a new folder called EFCX (mind the upper-casing!).
-
On your machine, create a file called
config.json(make sure it’s in the.jsonformat). -
Copy the following content into the file:
{ "EFCX_URL": "https://efcx44-qa.expertflow.com/unified-agent/#/login", "DEFAULT_COUNTRY": "PK", "DESTINATION_NUMBER": "7779", "CALLING_WINDOW":{ "HEIGHT": 600, "WIDTH": 400 } } -
Modify the content as needed, where:
-
EFCX_URL: is the URL to your instance of EFCX AgentDesk -
DEFAULT_COUNTRY: is the country code whose phone code would be used for national numbers -
DESTINATION_NUMBER: is the destination number associated with your EFCX instance -
CALLING_WINDOW: (optional) an object whose propertiesHEIGHTandWIDTHrepresent the size of the calling window when opened (can be resized)
-
-
Finally, upload the file to the EFCX folder.
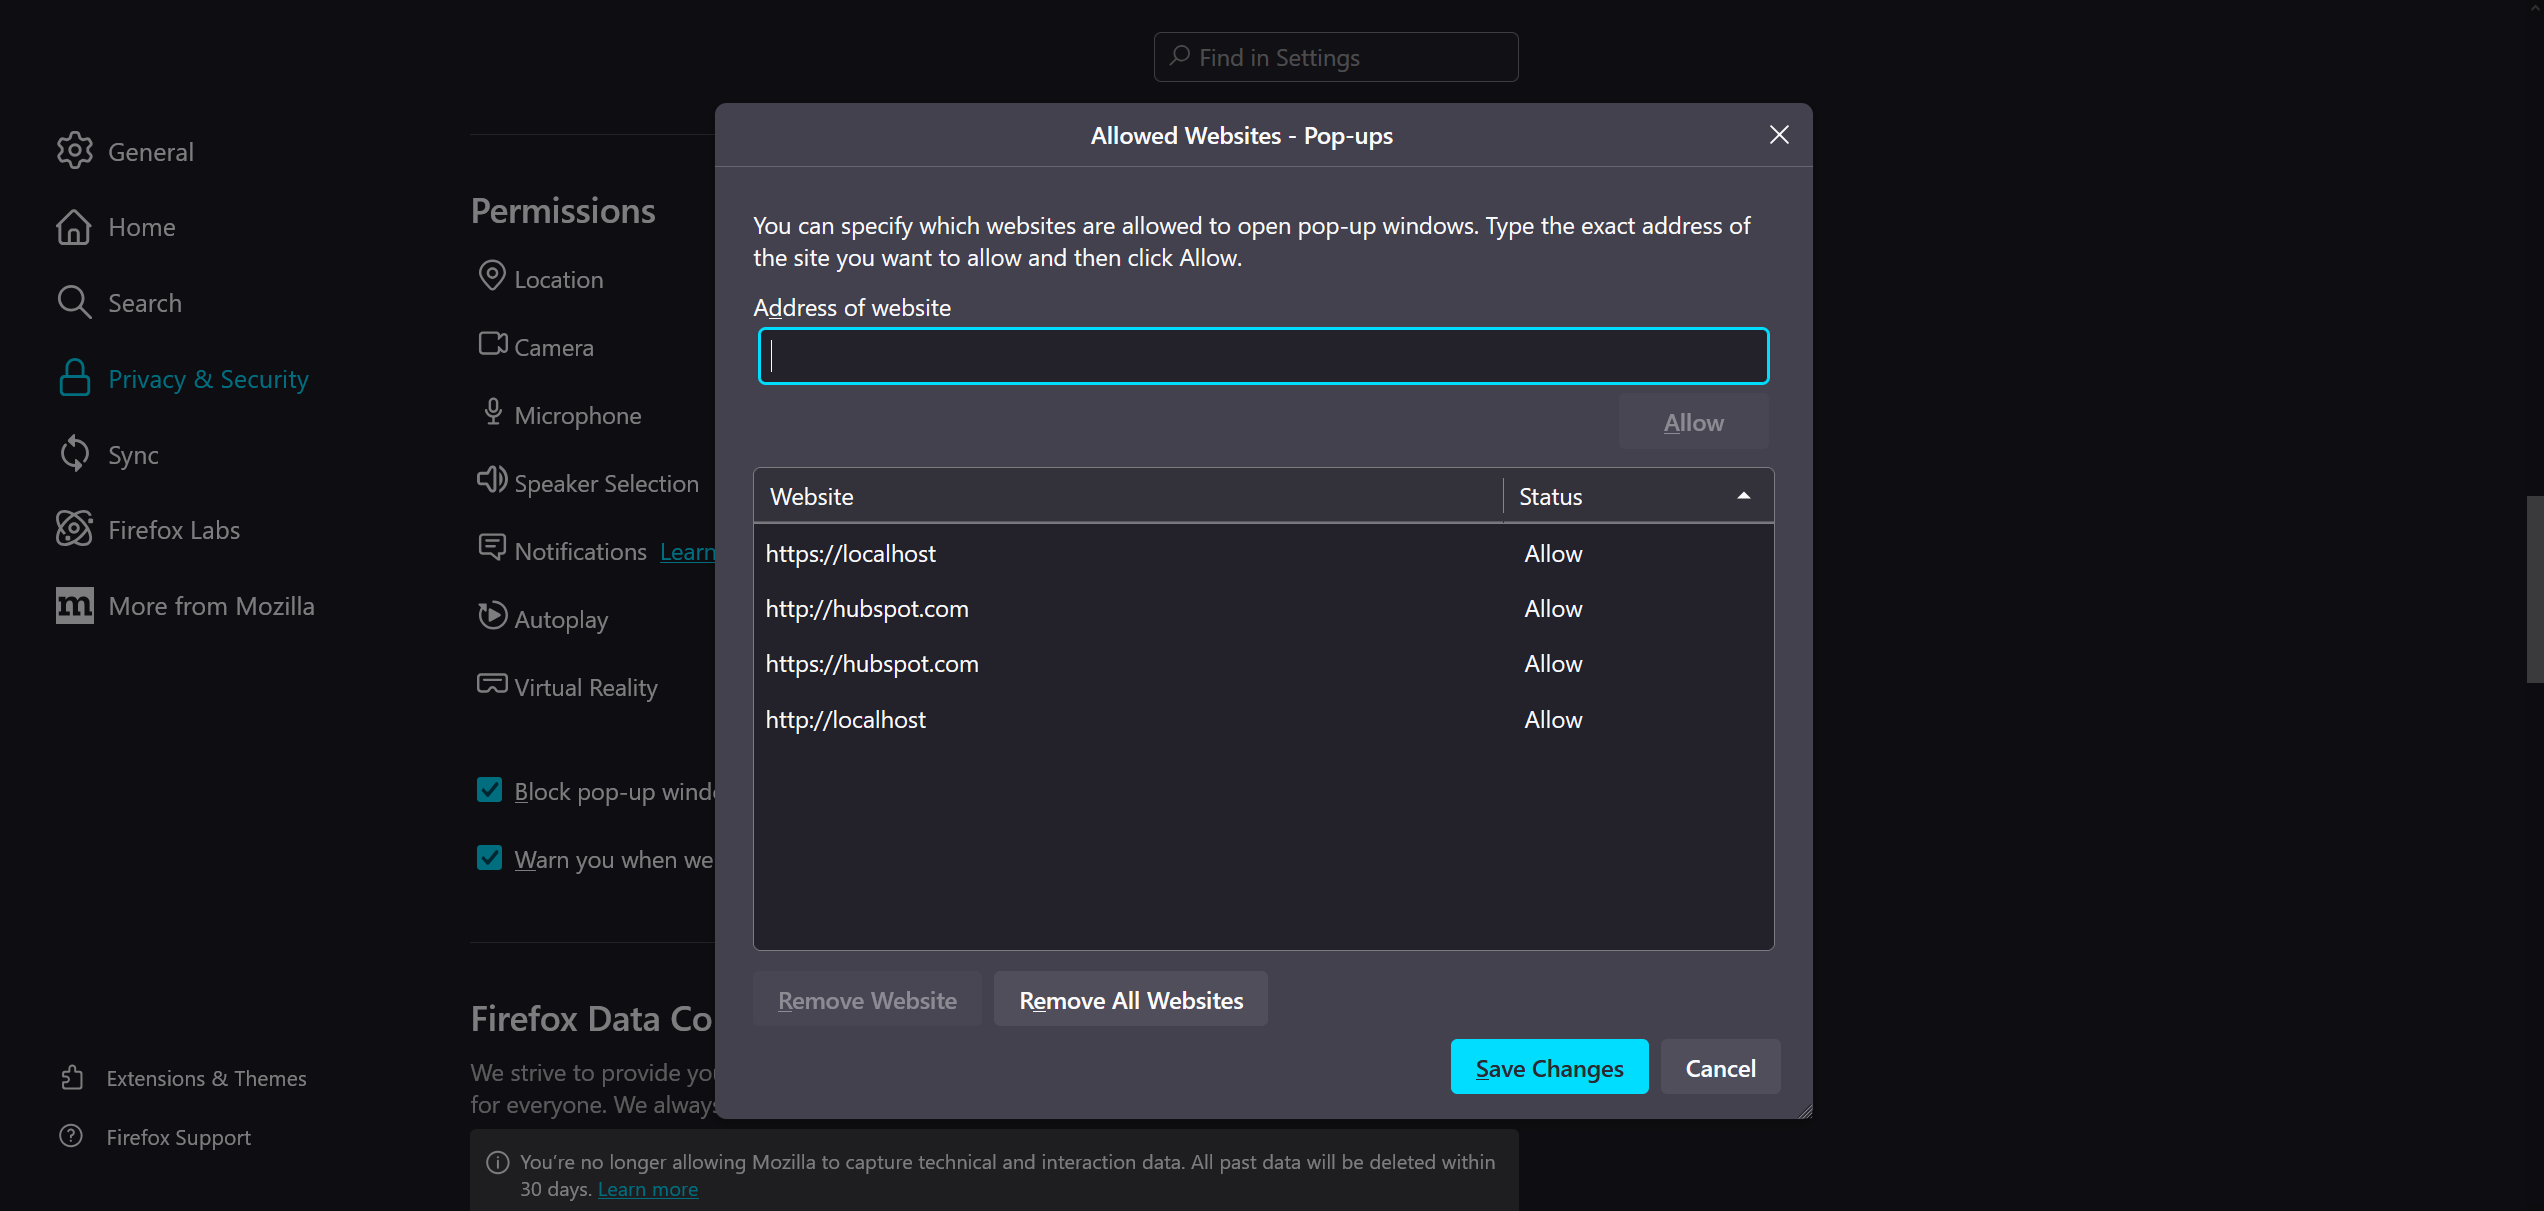
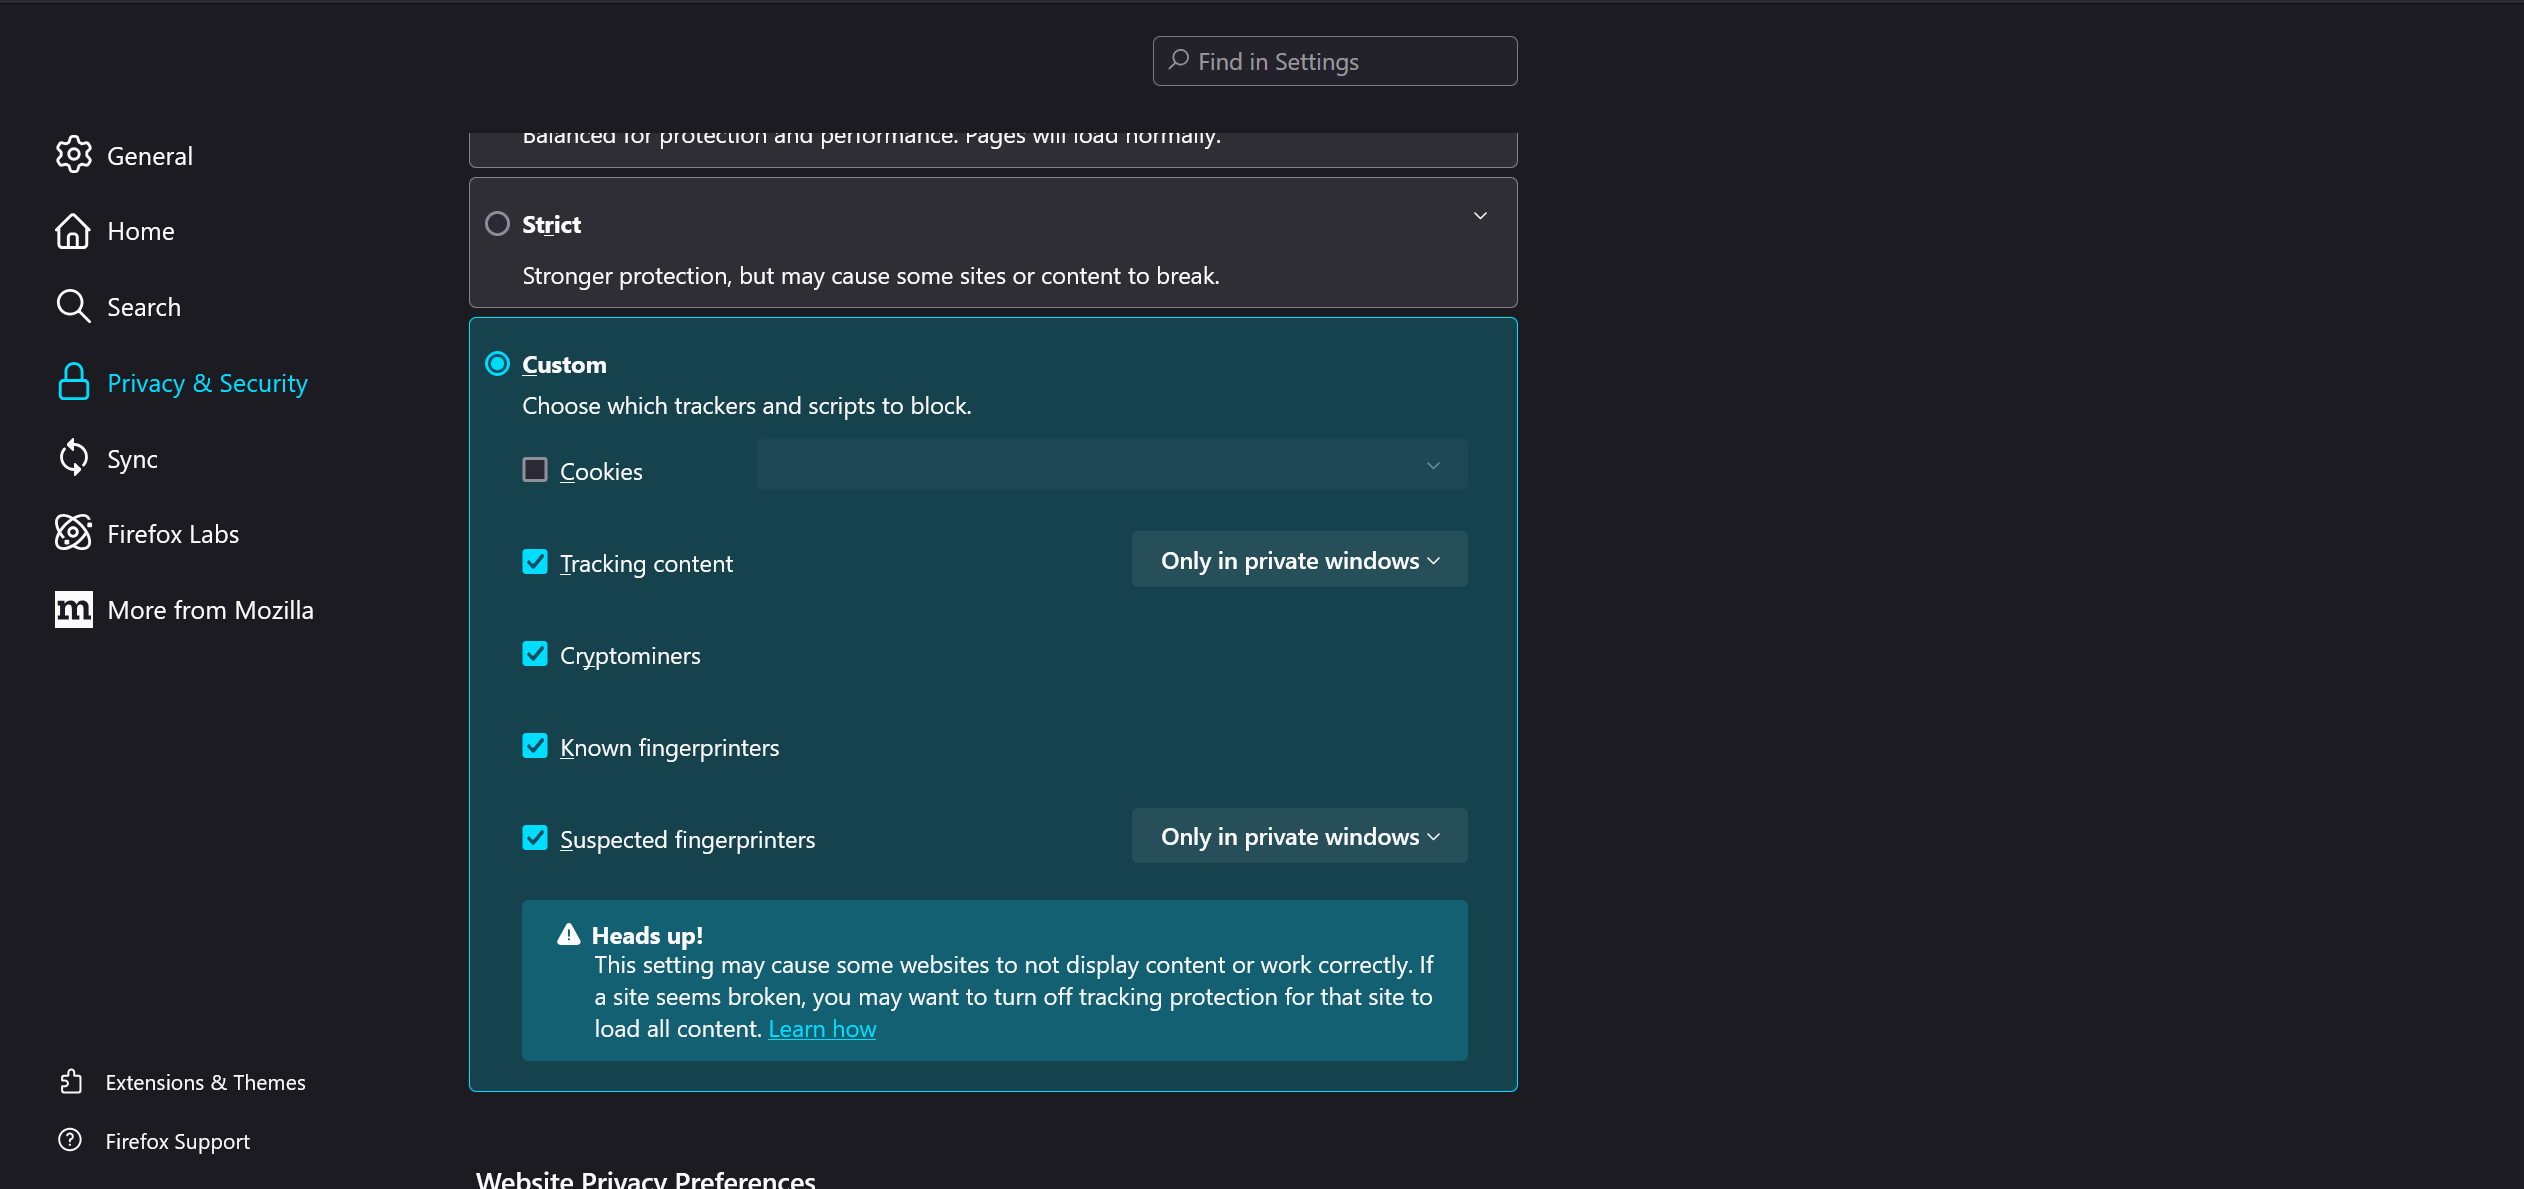
Firefox Browser Configurations
Firefox browser requires configuration settings in Privacy & Security.
List of configuration changes required in Firefox:
-
Go to the browser Privacy & Security settings and then removed cookie blocking.
-
Add exception to pop-up window blocking for the connector's domain & HubSpot.