Agent Capabilities
Integration between the EFCX Connector and ServiceNow CRM involves embedding the EFCX Connector within the ServiceNow CRM Web UI. This integration allows agents to use the same CRM agent interface for call and chat handling and transfer, enabling them to access agent/call controls within ServiceNow CRM. The EFCX Connector includes the following features:
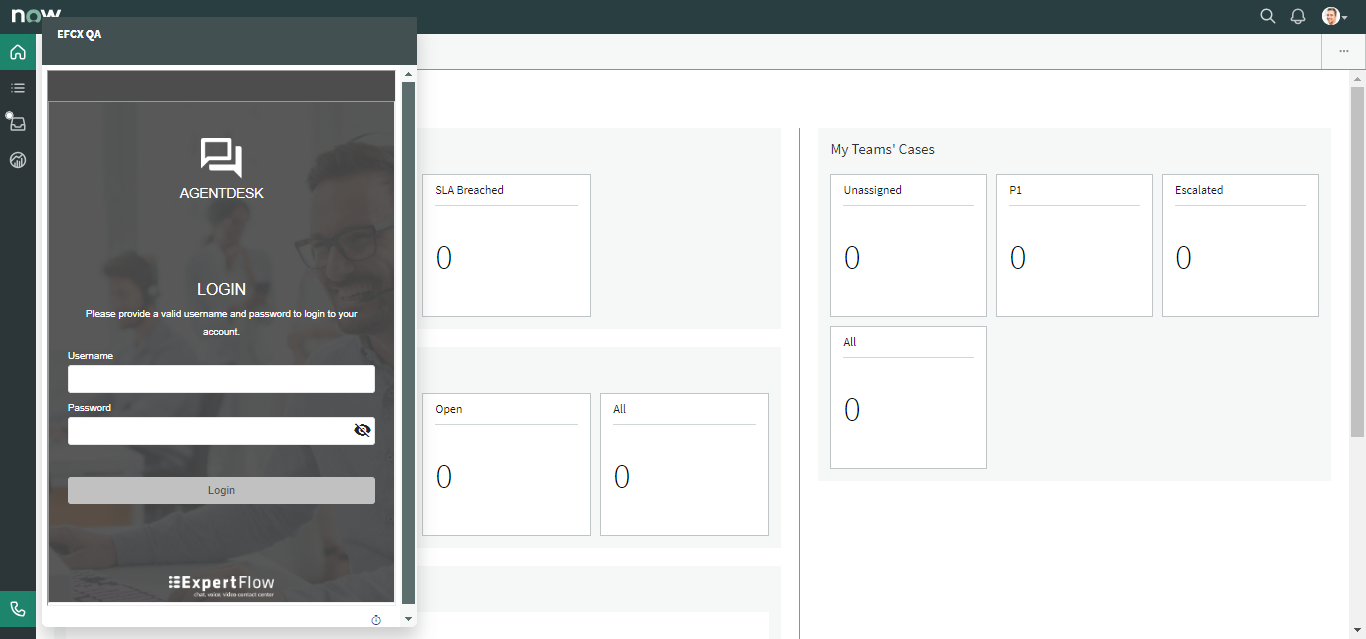
Log in to the Agent Desk
-
An agent can be logged in by entering agent credentials and then pressing the ‘Login’ button from the login screen.
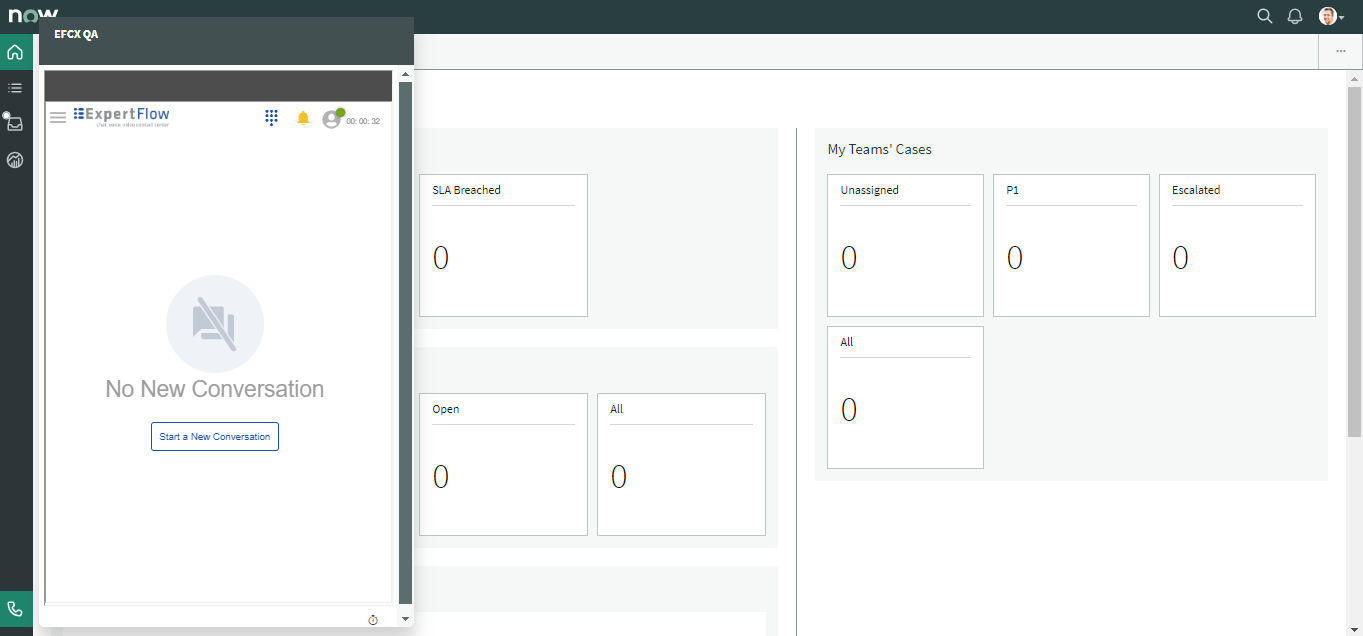
Post Log in Interface
-
After entering the credentials, the agent can see the Dashboard.
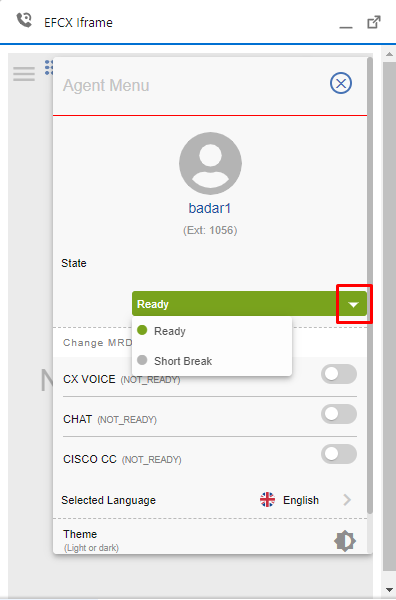
State Change
Enables agents to change their states globally and MRD-wise.
Global State
Global states are the high-level states that serve as the basis for setting MRD states. The state change on this level affects state changes on all assigned MRDs.
Change Global state to Ready or Not-Ready
-
After logging in, an agent may change global state to Ready or Not-Ready.
-
During Wrap-up, an agent may change global state to Ready or Not-Ready.
-
Available controls for agent state are displayed when the bottom-facing arrow button is pressed.
State Timer
-
Agents can also see the real-time timer going on to count how much time the agent remains in a state (Ready, Not Ready). This state timer is reset every time the global state is changed.

MRD States
MRD states are specifically for a particular MRD. Once agents set themselves as Ready, or Not Ready on a specified MRD, they make themselves available or not available to take requests from that particular MRD.
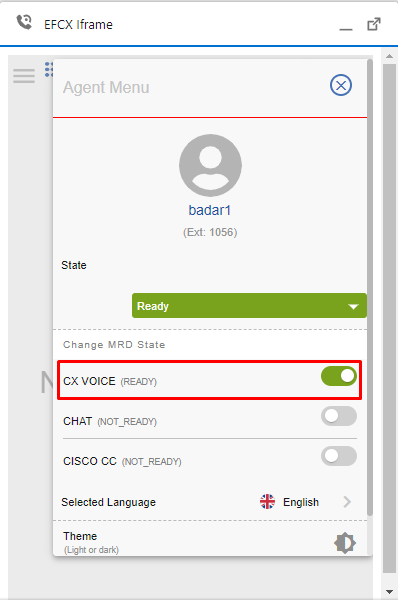
Change CX Voice State to Ready or Not-Ready
-
After logging in, an agent may change the CX Voice state to Ready or Not-Ready. On Ready state, he can be able to make inbound and outbound dialogs.
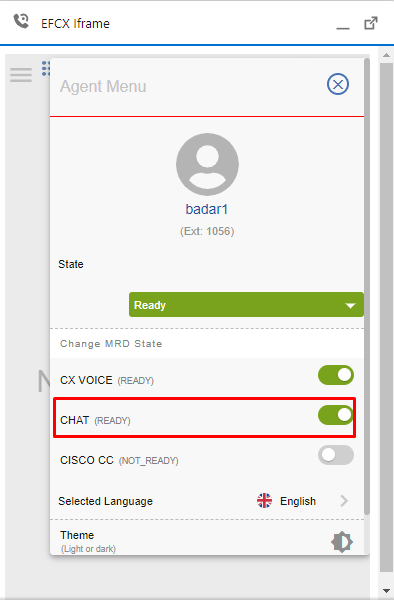
Change Chat State to Ready or Not-Ready
-
After logging in, an agent may change the Chat state to Ready or Not-Ready. On Ready state, he can be able to make inbound and outbound conversation.
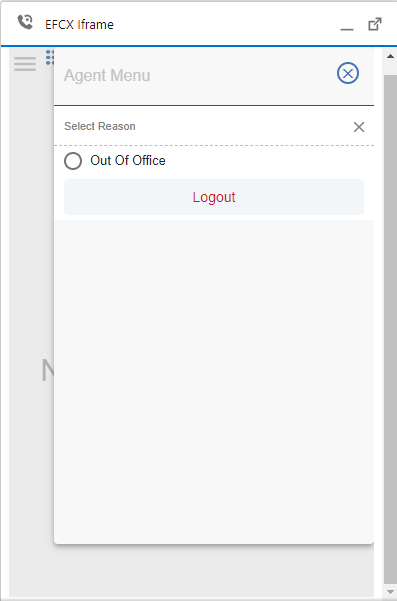
Logout
-
To logout, agent may select one of the logout reason that are displayed in the "Logout" section when he clicks on “Logout“ option. The agent will be logged-out with the respective reason.
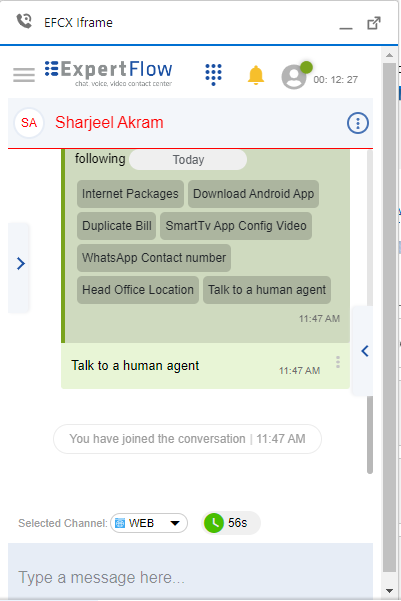
Accept a Conversation
Enables agents to receive a conversation from queues, handle an ongoing conversation, link customer profiles, view conversation history, view active channels, and view conversation data.
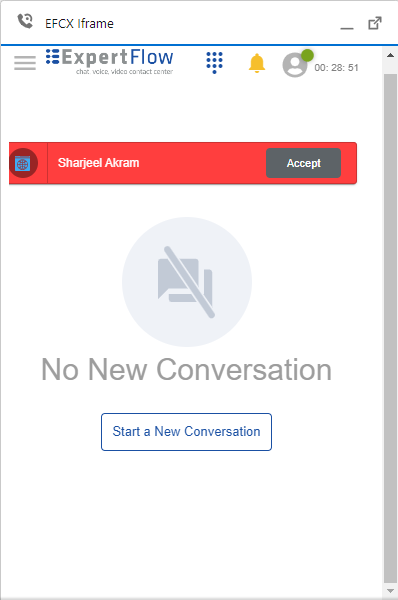
Inbound Conversation Notification
-
Once an agent receives a new request, it is assigned to an agent, and the agent is reserved. An incoming conversation notification appears on the Agent Desk, with a button to Accept the request. The notification contains the name of the customer (if identified), or "Jane Doe".
View Conversation History
The Conversation History enables the agent to provide the record of all the conversations exchanged with the active customer. Each conversation carries activities exchanged over the conversation. These activities include:
-
Voice calls received/ initiated by the agent to the customer,
-
Chat messages sent over the conversation (customer/ whisper messages),
-
Conversation notifications are logged under all conversations with this customer,
-
playable recording links are visible,
-
Wrap-up and note activities.
So when a request is routed to an agent, the agent can only see the current conversation and the activities/messages exchanged for the active conversation before it was routed to the agent.
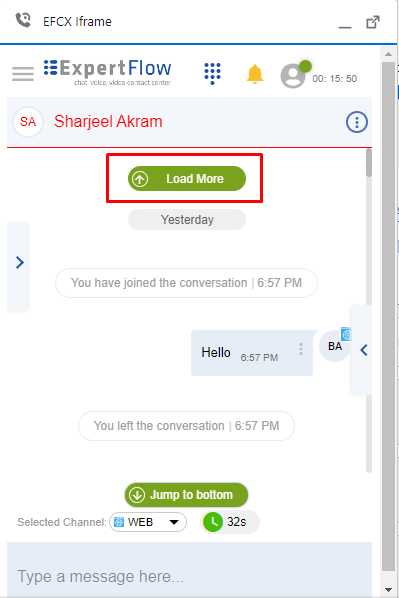
Load More
-
By default, the past conversations are hidden behind a Load More button. If the agent has permission to load the history, can click this button to load the past conversations of the customer. To know about the latest query, go to the bottom of the conversation by clicking on Jump to bottom
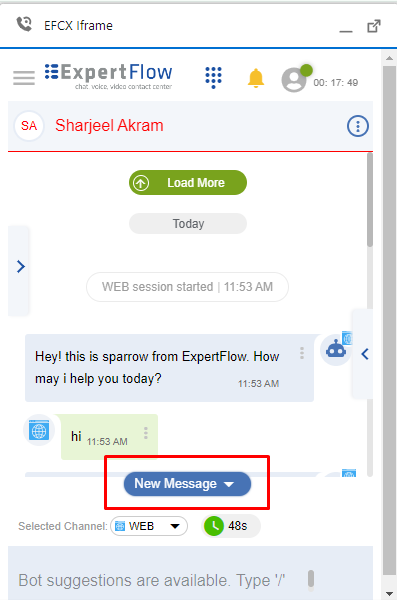
New Message
-
Upon receiving a new message while reading the previous history on the top, the agent will see the New Message button popping up. Click on that to read the newly received message.
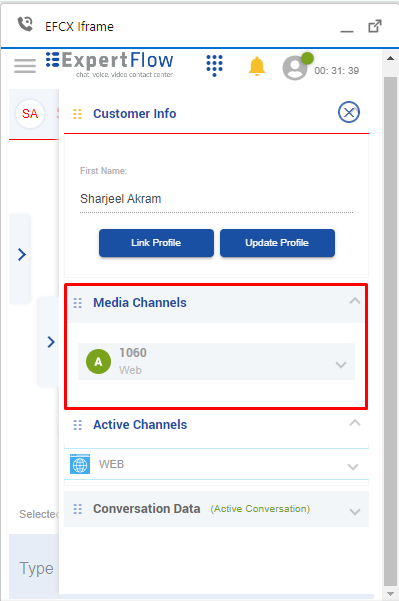
Current Channel and Customer Profile
-
Upon accepting the requests, agents see the Customer Profile data and Media Channel details of the customer on the right under the relevant panes. The CRM profile of the customer is popped up in the background (CRM) as described in the Screen pop section .
End Conversation
Based on agent permissions, an agent may leave an ongoing conversation even if a customer is present in the conversation.
-
If the agent leaves a conversation while the customer is still present on any of the customer channels, the conversation remains active but the agent task is closed.
-
If the agent leaves a conversation when the customer has left, the conversation is usually closed.
Click the 'cross' icon to leave the conversation. Upon clicking this icon.
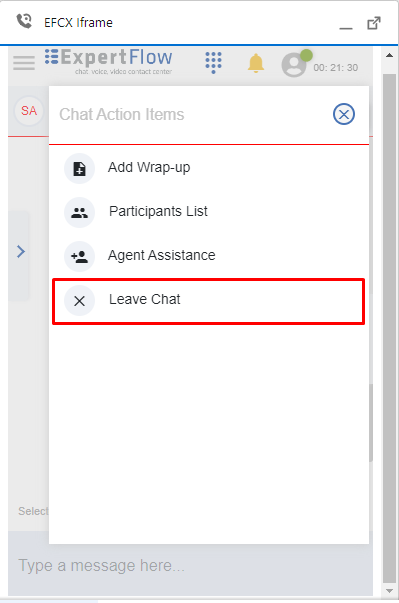
Apply Wrap-up and Add Notes
A wrap-up is a concluding note added to the conversation that helps the business to know what the conversation was about. Expertflow CX agents can provide wrap-ups to conversations that they handle, during or after the conversation.
Apply Wrap-up
-
Agents can Apply wrap-ups to a conversation by clicking the notes icon on the control toolbar. A wrap-up dialogue box will appear where wrap-up categories and reasons are listed as defined by the system administrator. The agent will choose a category and a reason that best matches the conversation with the customer.
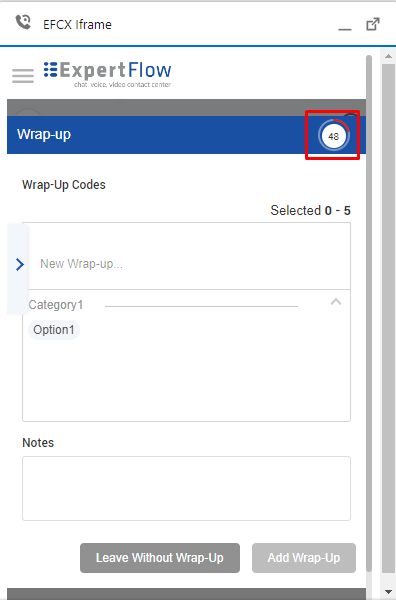
Wrap-up Timer
A wrap-up feature is already there in the application but it is not time-framed
CX now introduces a wrap-up timer as an important metric to measure the agent’s productivity. This feature limits the agent to wrap up the conversation within the configured time. The system shows a timer to the agent to wrap up the current conversation within the configured time.
-
The wrap up time is configurable. By default, it is set to 60 seconds.
-
The admins can define Wrap-up reasons as defined in the unified admin
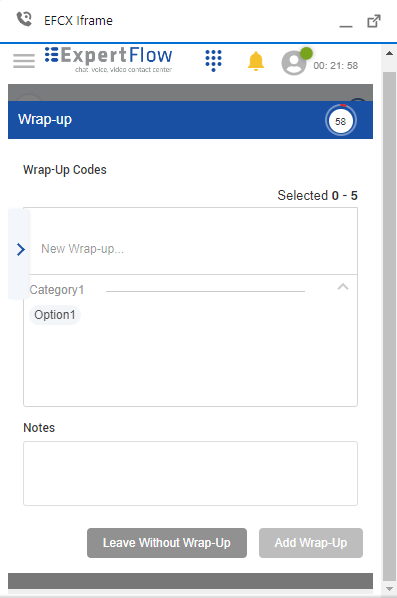
Workflow
Whenever a conversation is closed from either side, a wrap-up window pops up. The wrap-up timer can be seen on the right-hand side. Pre-defined wrap-up reasons are displayed here. The agent can choose any suitable reason fit to the conversation and add notes as adding a note is optional.
If the agent leaves without adding the wrap-up, the timer will disappear/expire, the conversation will be automatically closed without any Wrap-up reasons as it is still optional.
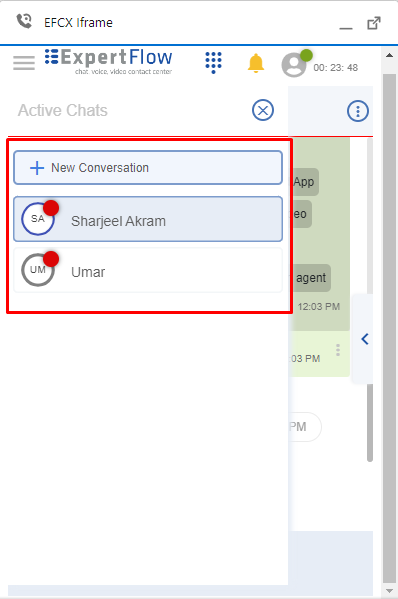
Conversation Switching
-
An agent can accept more than one conversation requests at a time. It means he can handle multiple conversation and can switch between different conversation by clicking on left under the relative panel.
-
In case of multiple conversations, when an agent switches to another conversation the customer profile in the CRM is also switched to the active conversation.
CTI Call Controls
Provides a CTI toolbar for the agent to perform multiple functions to handle the customer calls.
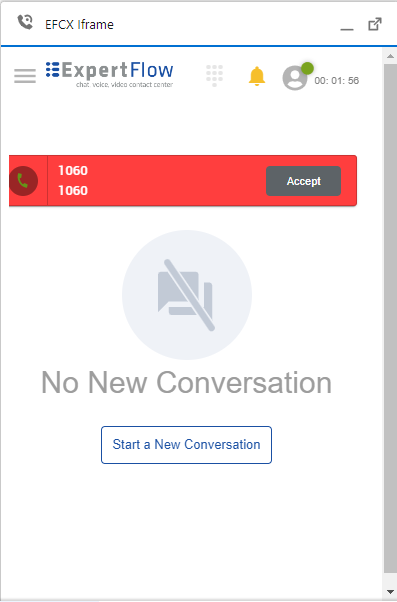
Inbound Call notification
-
Once an agent receives a new request, an incoming call notification appears on the Agent Desk, with a button to Accept the request. The notification contains the number of the customer.
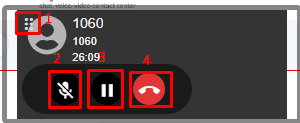
Call Controls
On accepting a call, the CTI toolbar appears with the following controls:
-
Drag
-
Mute/Unmute
-
Hold/Resume
-
End Call
Drag
As the agent accepts the call, the CTI toolbar pops up anywhere on the screen. On clicking this drag option, this toolbar can be moved any where on the screen.
Mute/Unmute
The Mute/Unmute button on the toolbar enables the agent to mute or unmute if and when required.
Call Hold/Resume
The agent can hold the call by clicking on the Hold button on being active on a call with the customer or with any other agent in case of transfer.
In the same way, the agent can resume the call by clicking on the Resume button as soon as becomes available again.
End Call
The agent can end the call using this toolbar by clicking on the End Call button. This will end the call leg between the agent and the customer.
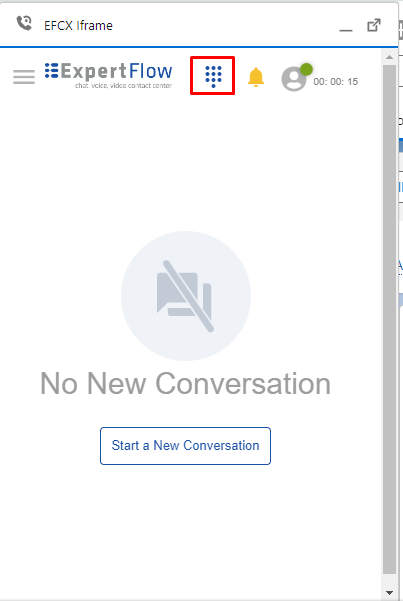
Outbound Call
-
The agent can make an inbound call by clicking on dial pad on the dashboard.
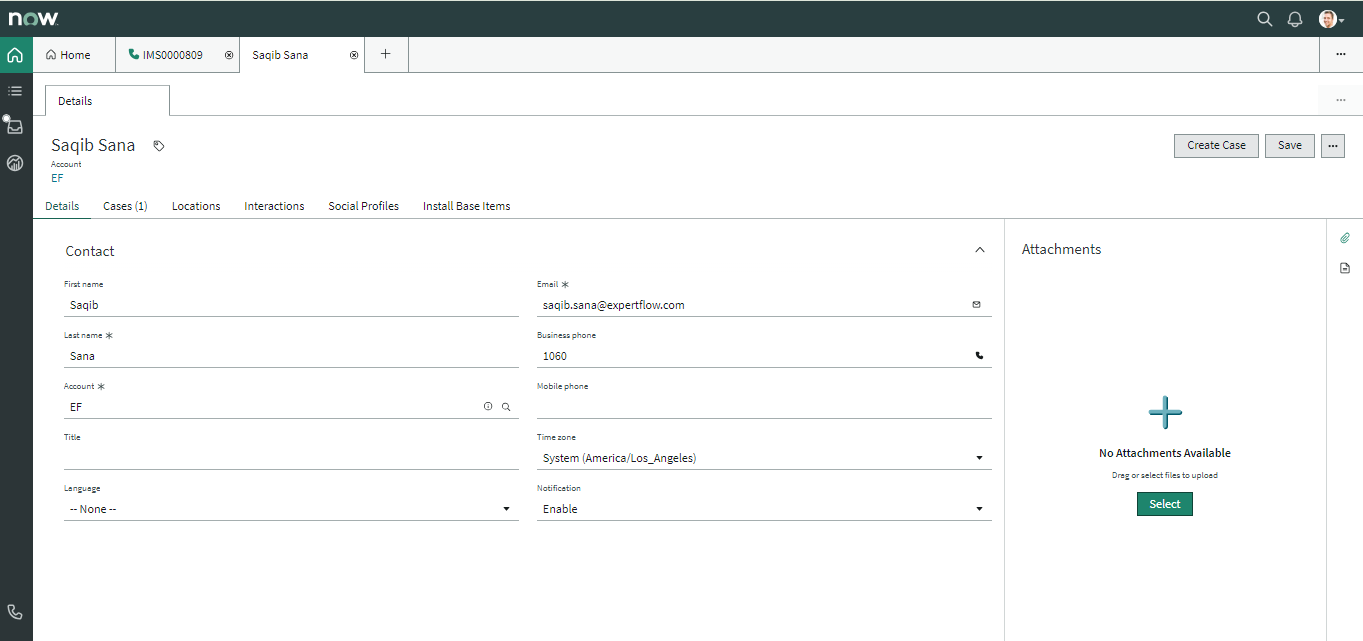
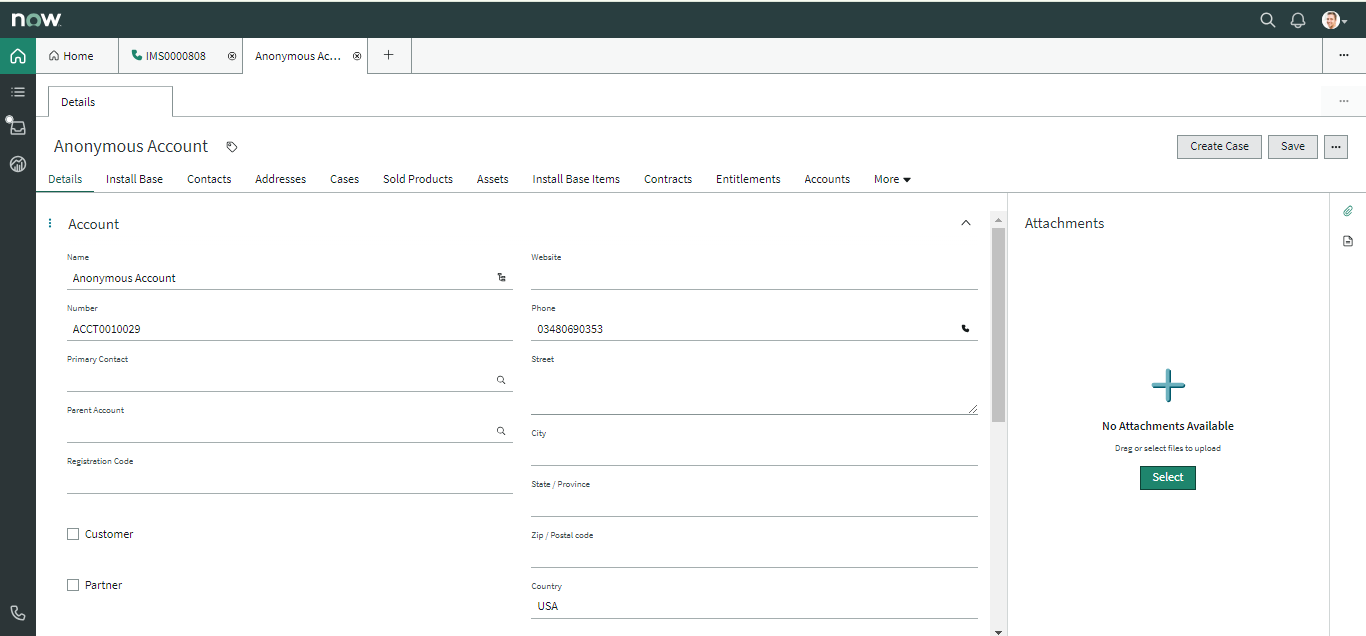
Screen Popup
When a conversation arrives on the logged-in agent, a CRM customer record is popped up according to the customer’s number and information stored in ServiceNow.
-
By default entities supported for searching are Account/Contact (we can set priority in configuration)
-
If one record is matched, then that record will automatically pop up.
No ANI Match
In the case, the customer record is not available either in the accounts, or contacts table, the "New Contact" page will be popped up in front of an agent with Anonymous Name. (configurable).
We can configure to nomatchEntity to Account or Contact.
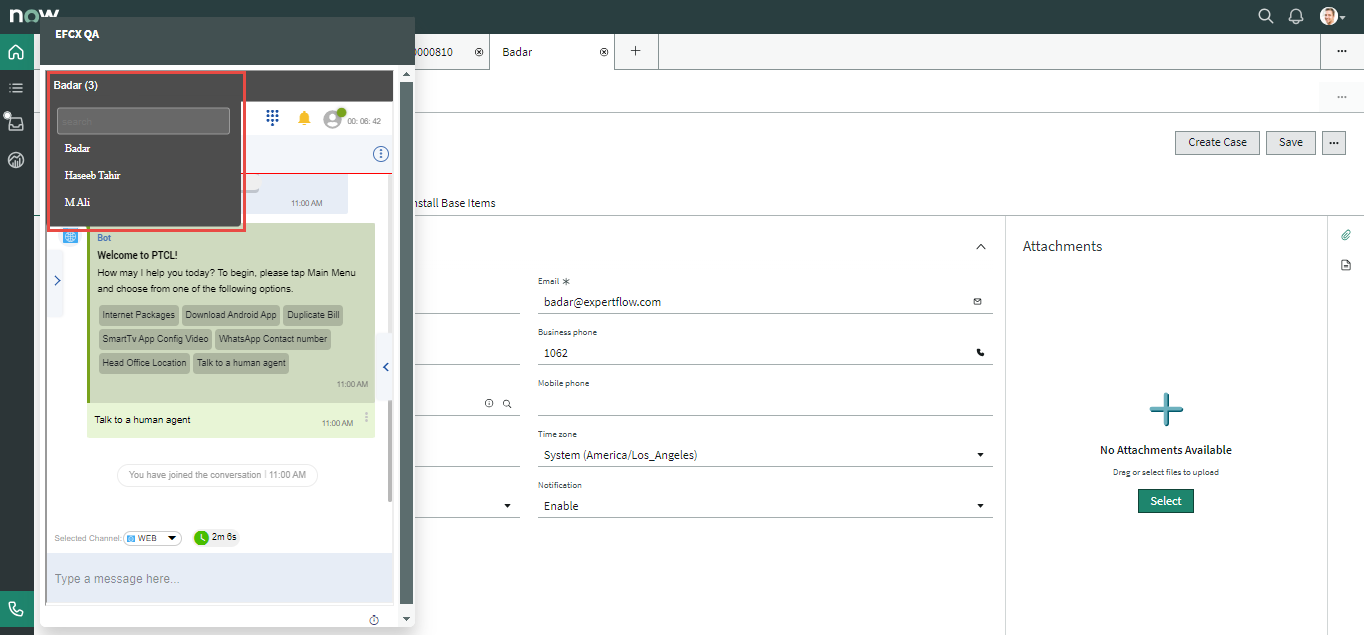
Multiple Match
In the case of multiple matches, a list of all the matched records of the respective entity will be shown in the drop-down list in alphabetical order on the top of connector. The first record in the list will automatically pop up, however, the agent can also manually select the customer record from the dropdown list and that customer profile will pop up. Search can be made as follows.
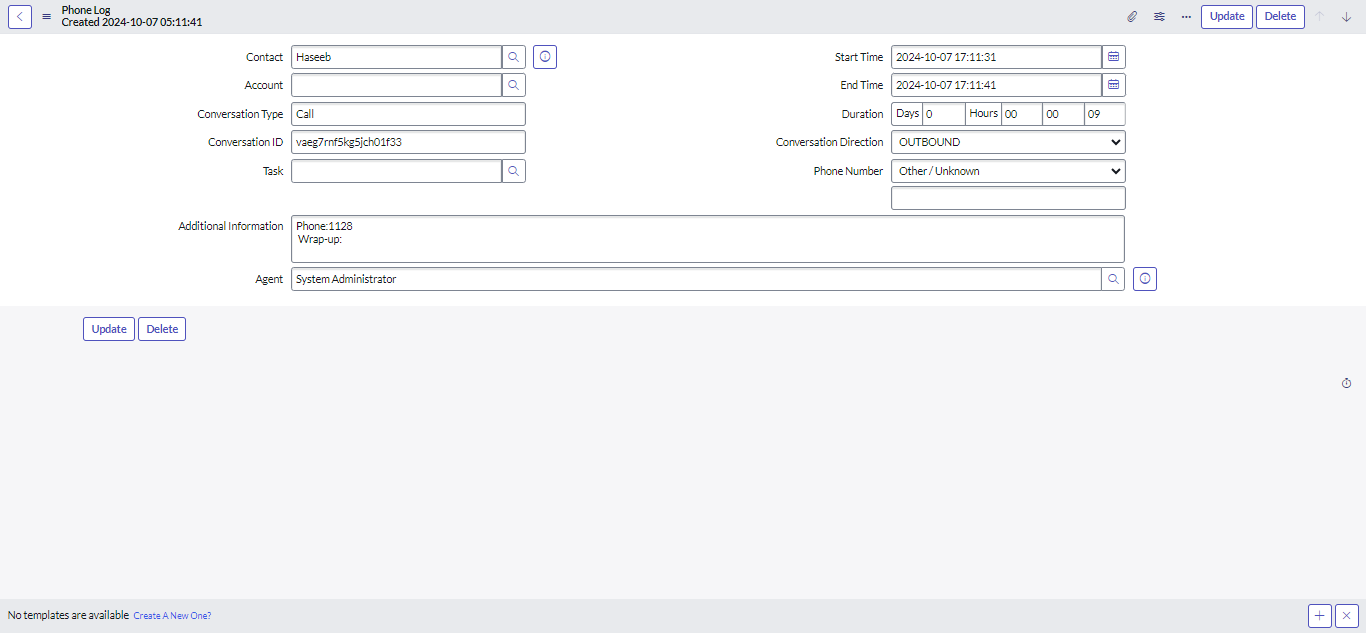
Conversation Activity
An activity is created at the end of the conversation. It contains information such as:
-
Contact
-
Account
-
Task
-
Conversation ID
-
Start Time
-
End Time
-
Duration
-
Converstation type
-
Additional Information
-
Conversation Direction
Conversation can be chat or call. The ‘Additional Information’ field displays the conversation type for the number and wrap-up notes.
Activities can be seen from the ‘phone logs’ tab, it will show the activities in descending order i.e. latest activity will be at the top. In the case of single matching or no matching record, it will be created automatically.
Wrap-up reason and notes will not be reflected in the call activity right now.
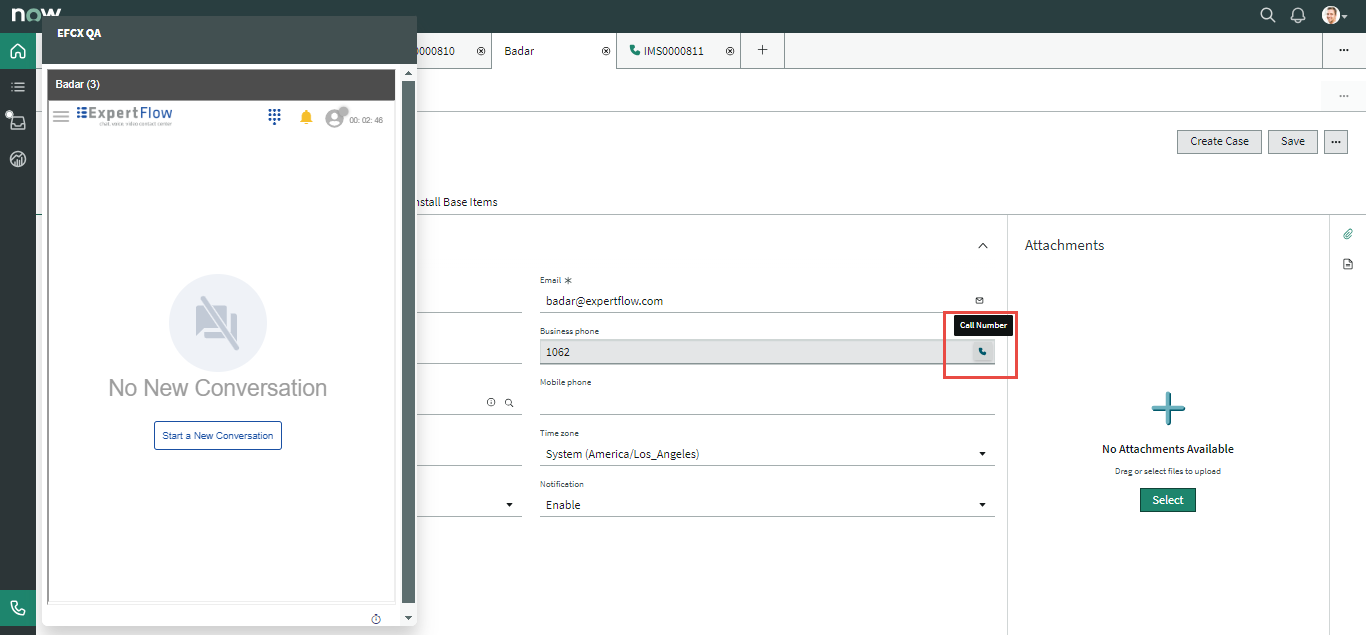
Click to Call
This feature allows the agent to select any number corresponding to a record (Account/Contact) and initiate an outbound call with that number.