Deployment Prerequisite
Before the start of this guide, please make sure that the Agent Desk Application is deployed. You can go ahead and deploy the EFCX following the steps.
CTI Installation and Configuration
Before the phone communication channel between customer service agents and external customers can be used, Customer Service Management and Openframe plugins must be activated and configured.
Before you begin, Please make sure you have a CRM administrator role.
Procedure
-
Activate the Customer Service plugin (com.sn_customerservice).
-
Activate the Openframe plugin (com.sn_openframe).
-
Create an OpenFrame Configuration or use the default CTI configuration by enabling the Default field.
*plugins are installed by default when deploying the application from the marketplace.
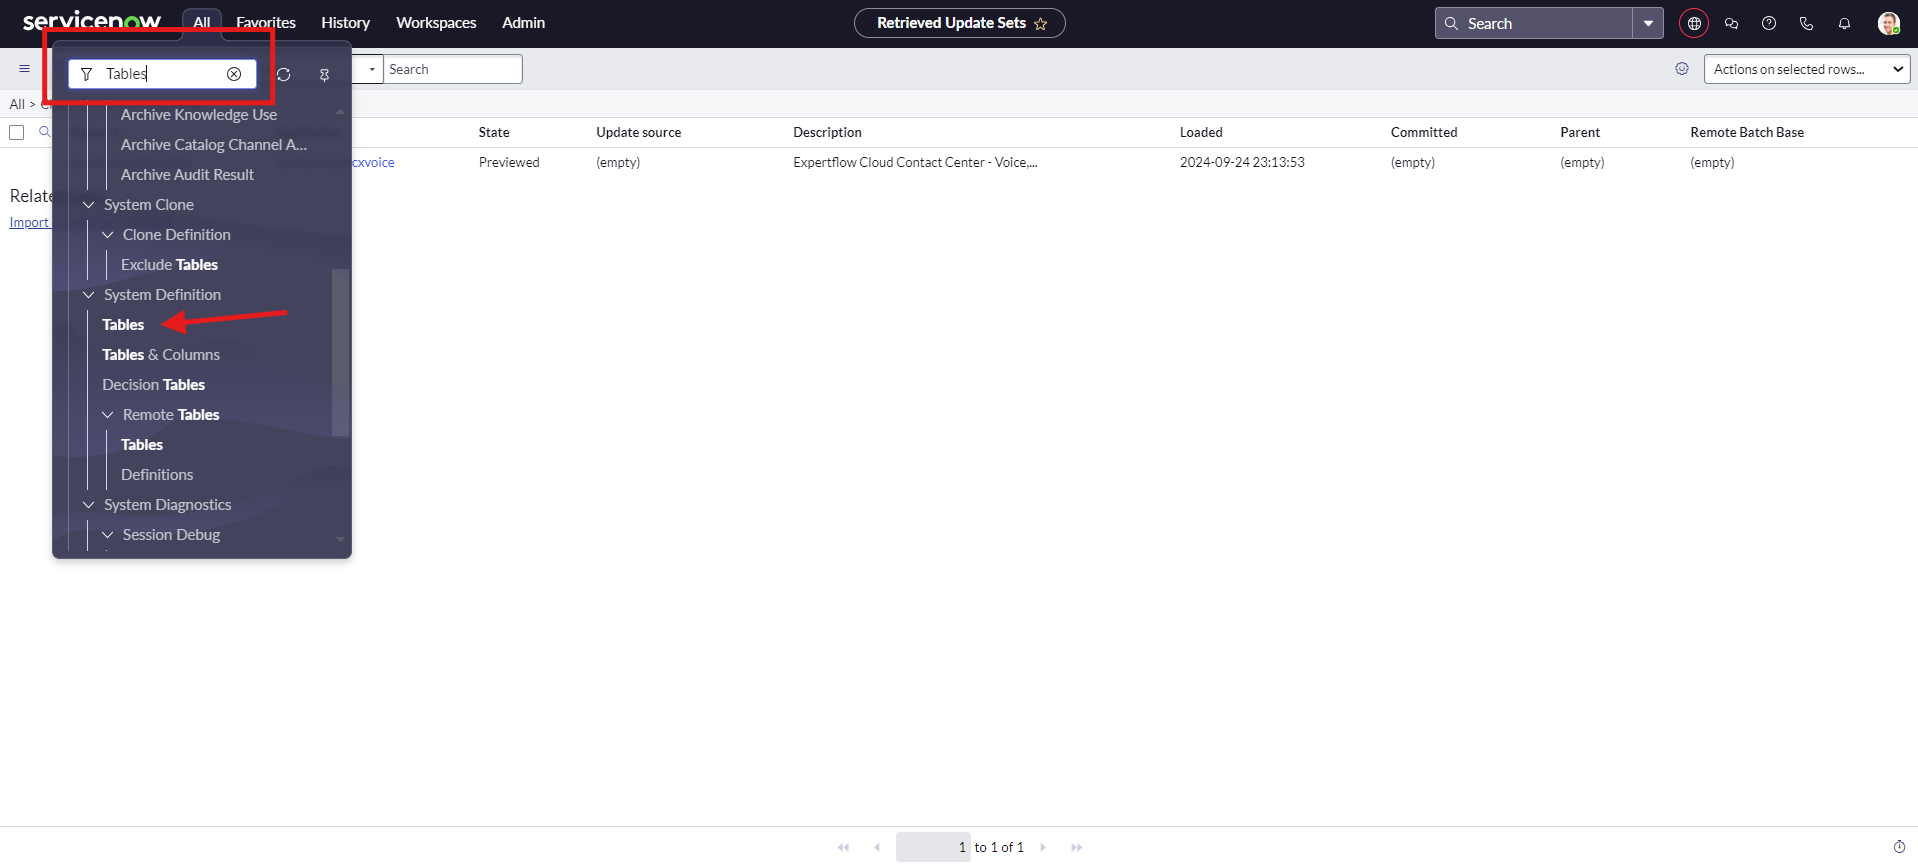
Update PhoneLog fields
-
Search Tables and click on Tables option under system definition.
-
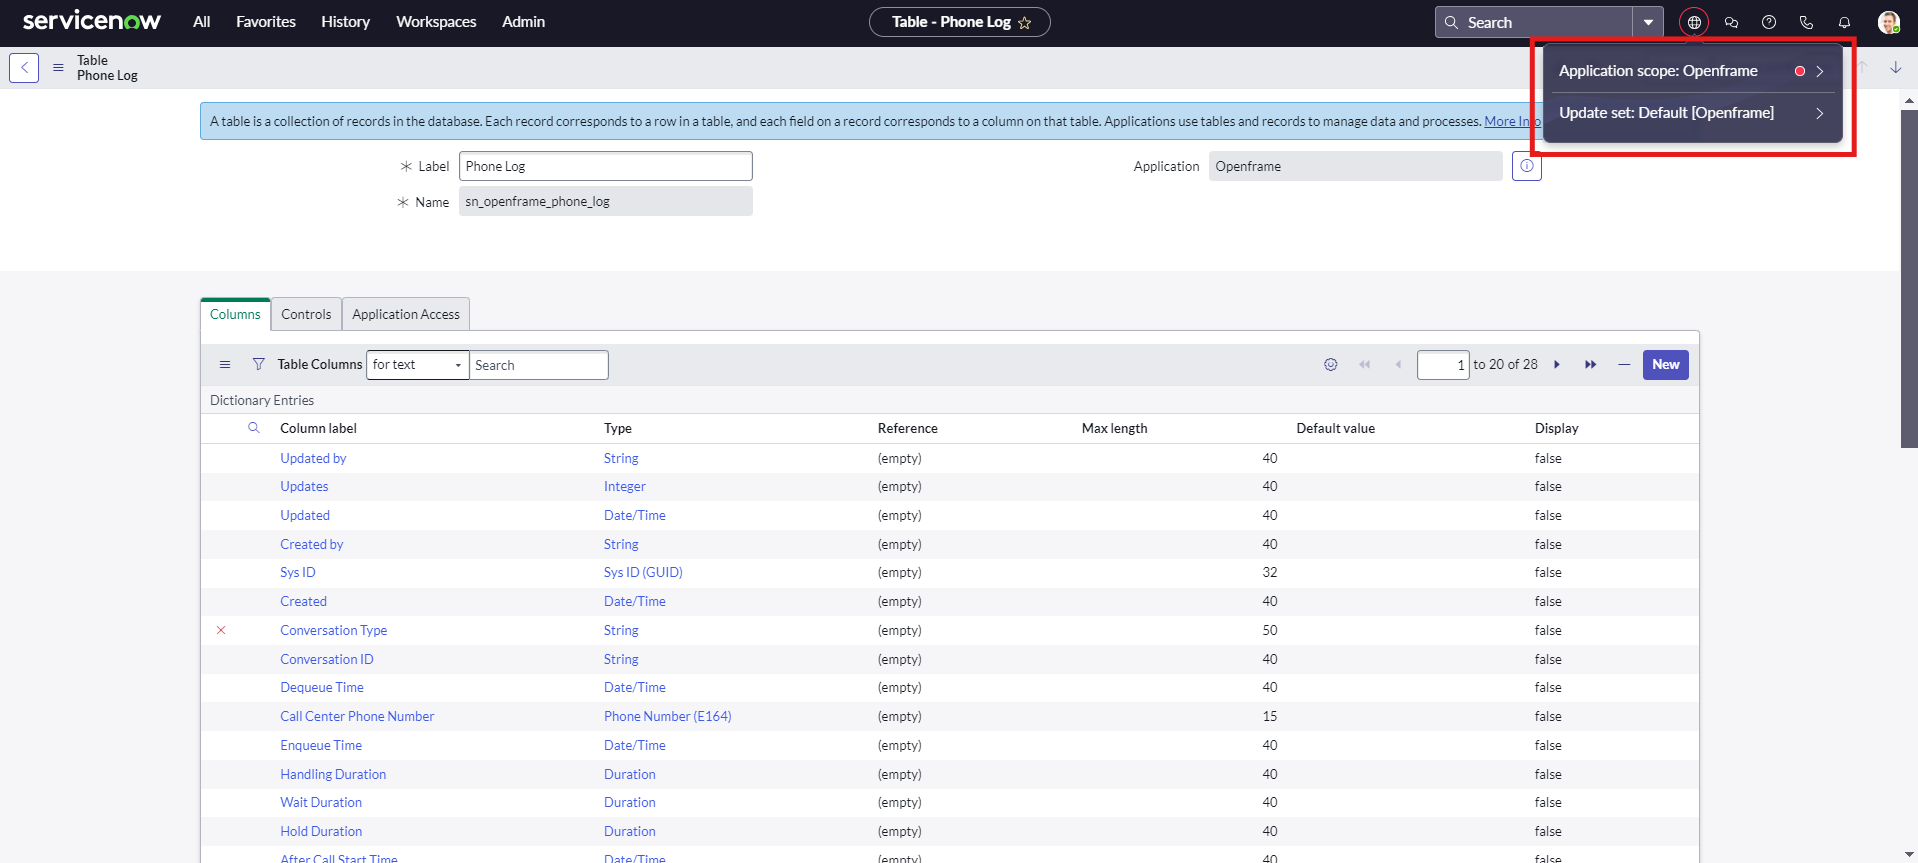
Search Phone Log table and click on Phone Log from the list.
-
Change the application scope and update to Openframe as shown in image.
-
Click on New button to add the extra fields needed to run the EFCX Servicenow connector.
-
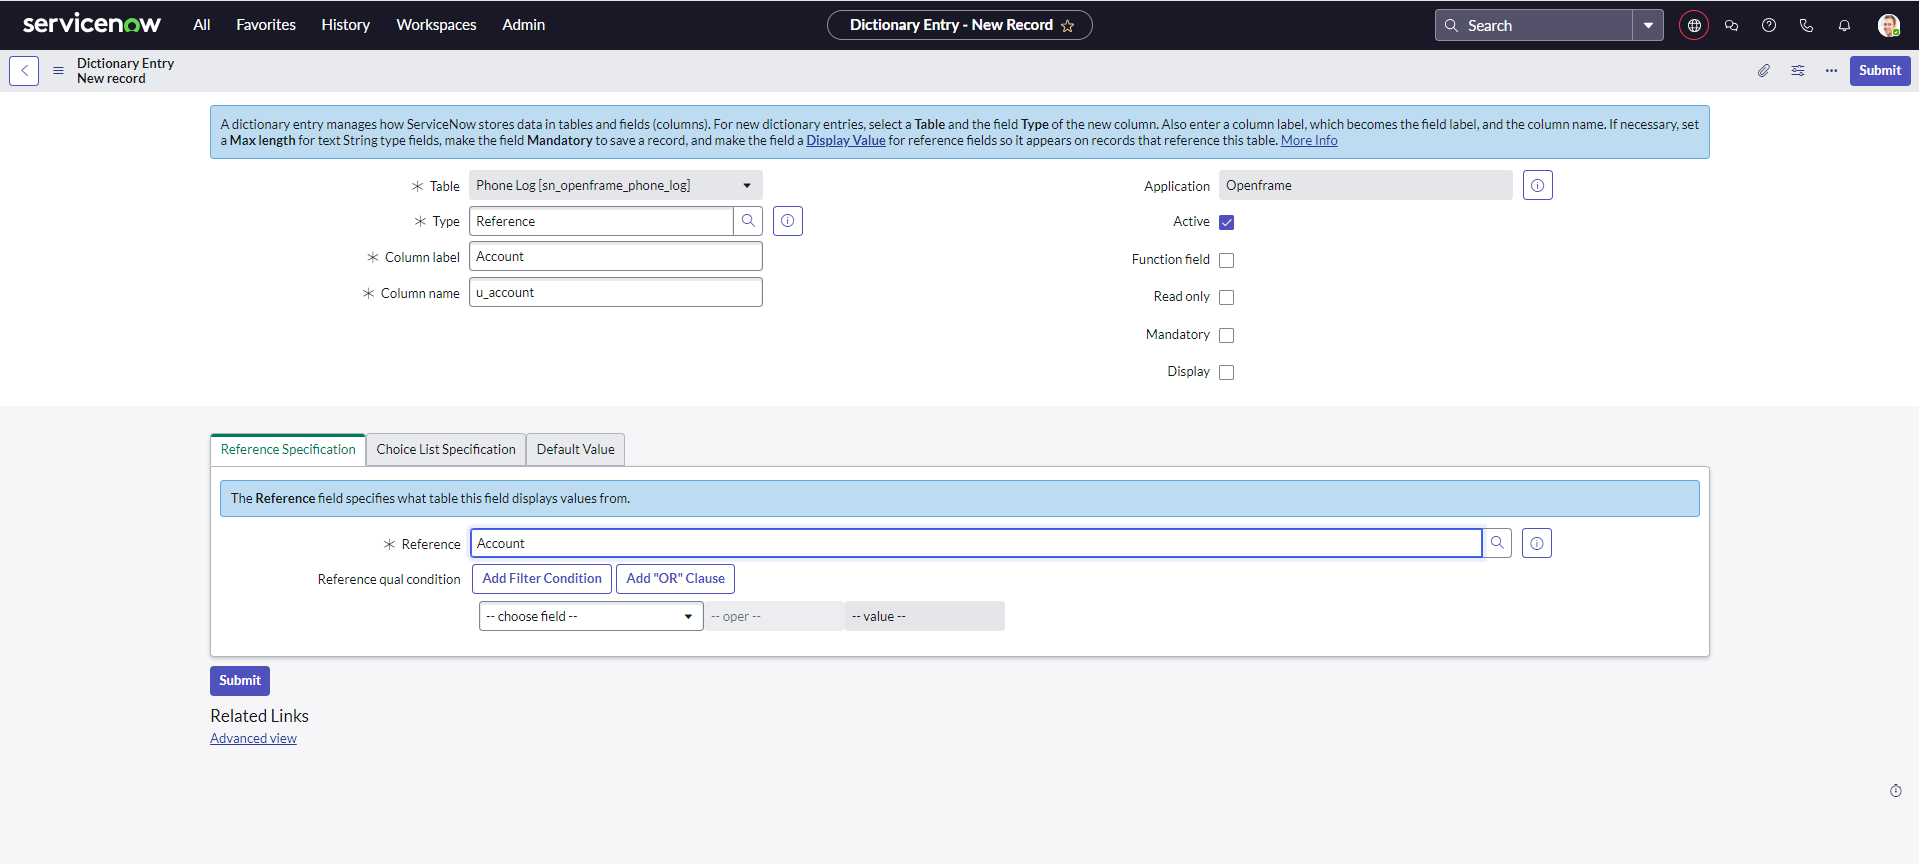
You have to add fields for Account.
|
Name of fields |
Value |
|---|---|
|
Type |
Reference |
|
Column label |
Account |
|
Column name |
u_account (will fetch automatically) |
|
Applications |
Openframe |
|
Reference Specification |
Reference = Account (customer_account) |
-
Click on Submit button on the top right.
-
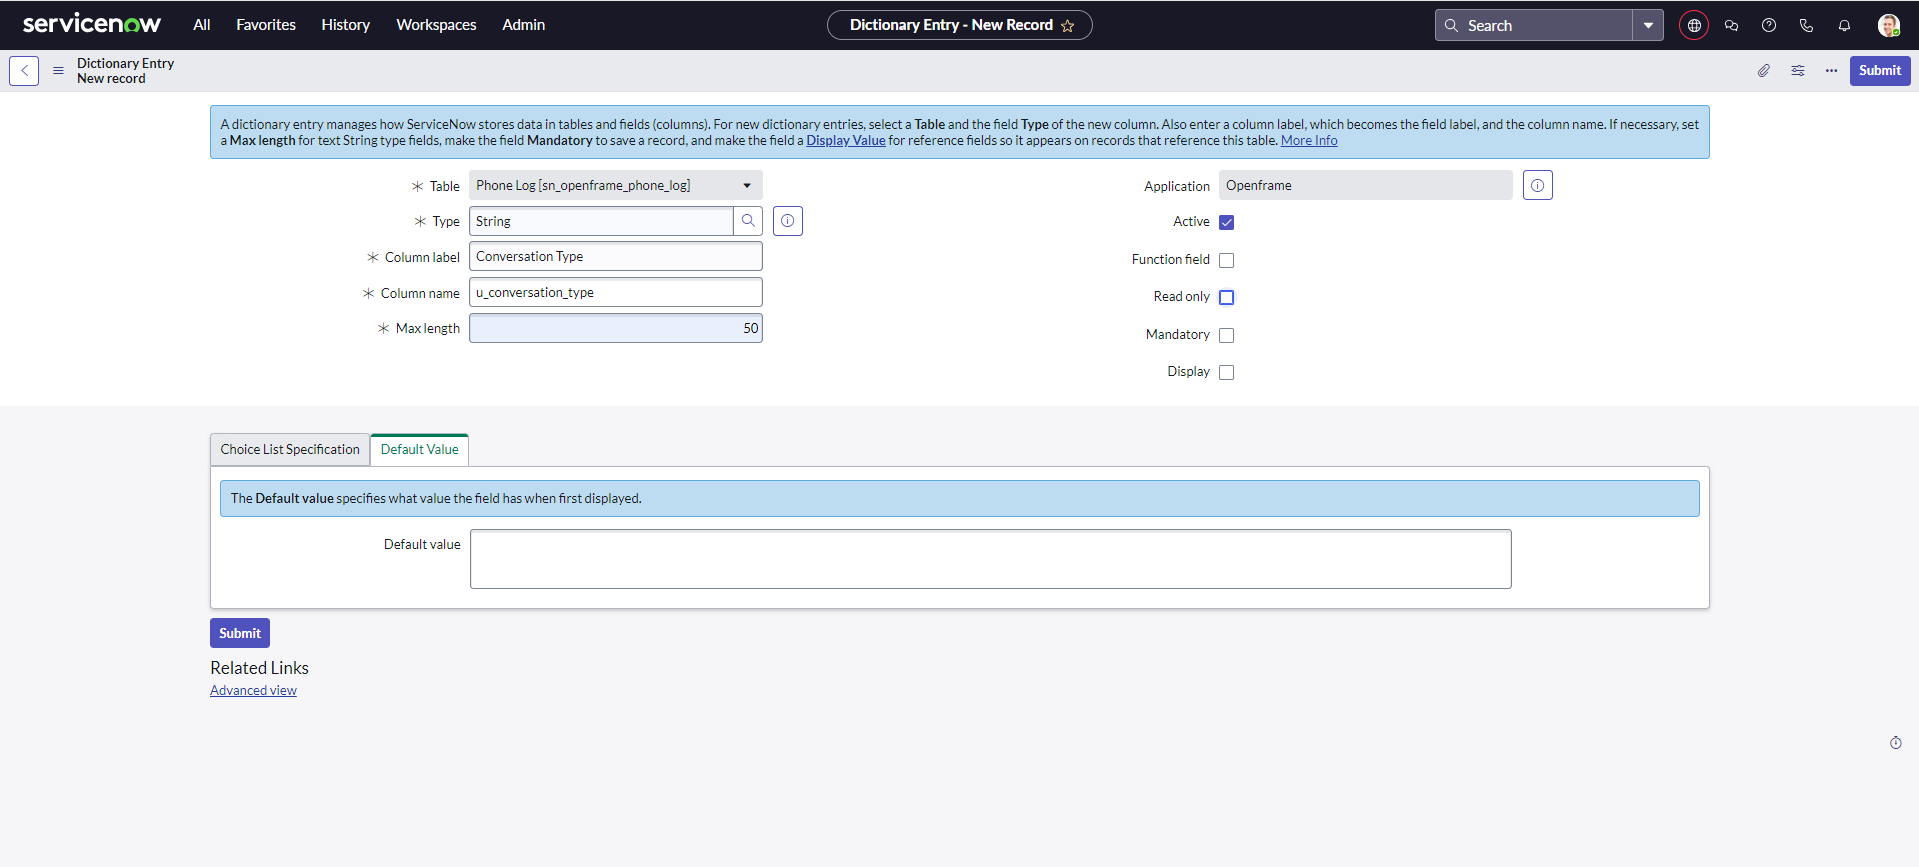
Now fields for Conversation Type
|
Name of fields |
Value |
|---|---|
|
Type |
String |
|
Column label |
Conversation Type |
|
Column name |
u_conversation_type (will fetch automatically) |
|
Applications |
Openframe |
|
Max Length |
250 |
-
Click on Submit button on the top right.
While adding fields, ensure that your application scope is Openframe and your column names start with u_account and u_conversation_type.
Change the Phone Log Fields Label
-
Search the Phone Log table and click on "Phone Log" from the list.
-
Then, select the columns Recording URL, Call ID and Call Type to change the label.
-
First, update the label of Recording URL to “Additional Information” then Call ID to “Conversation ID” and then update Call Type to “Conversation Direction”.
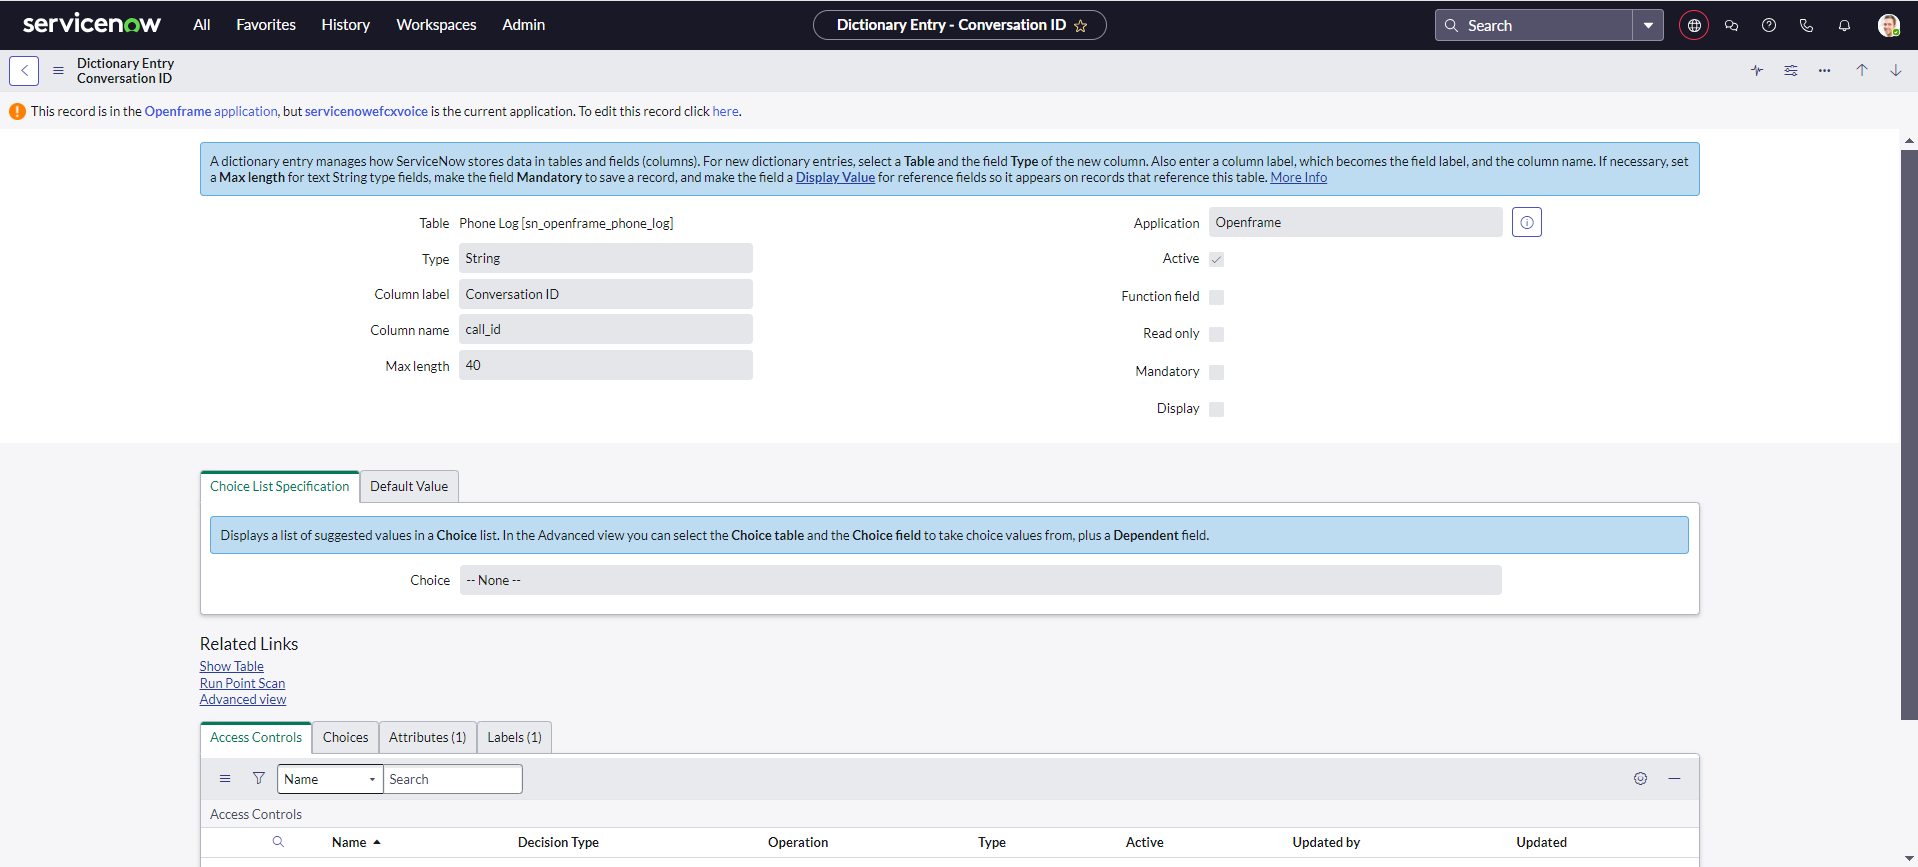
While adding or updating the fields value/label the Application scope must be Openframe
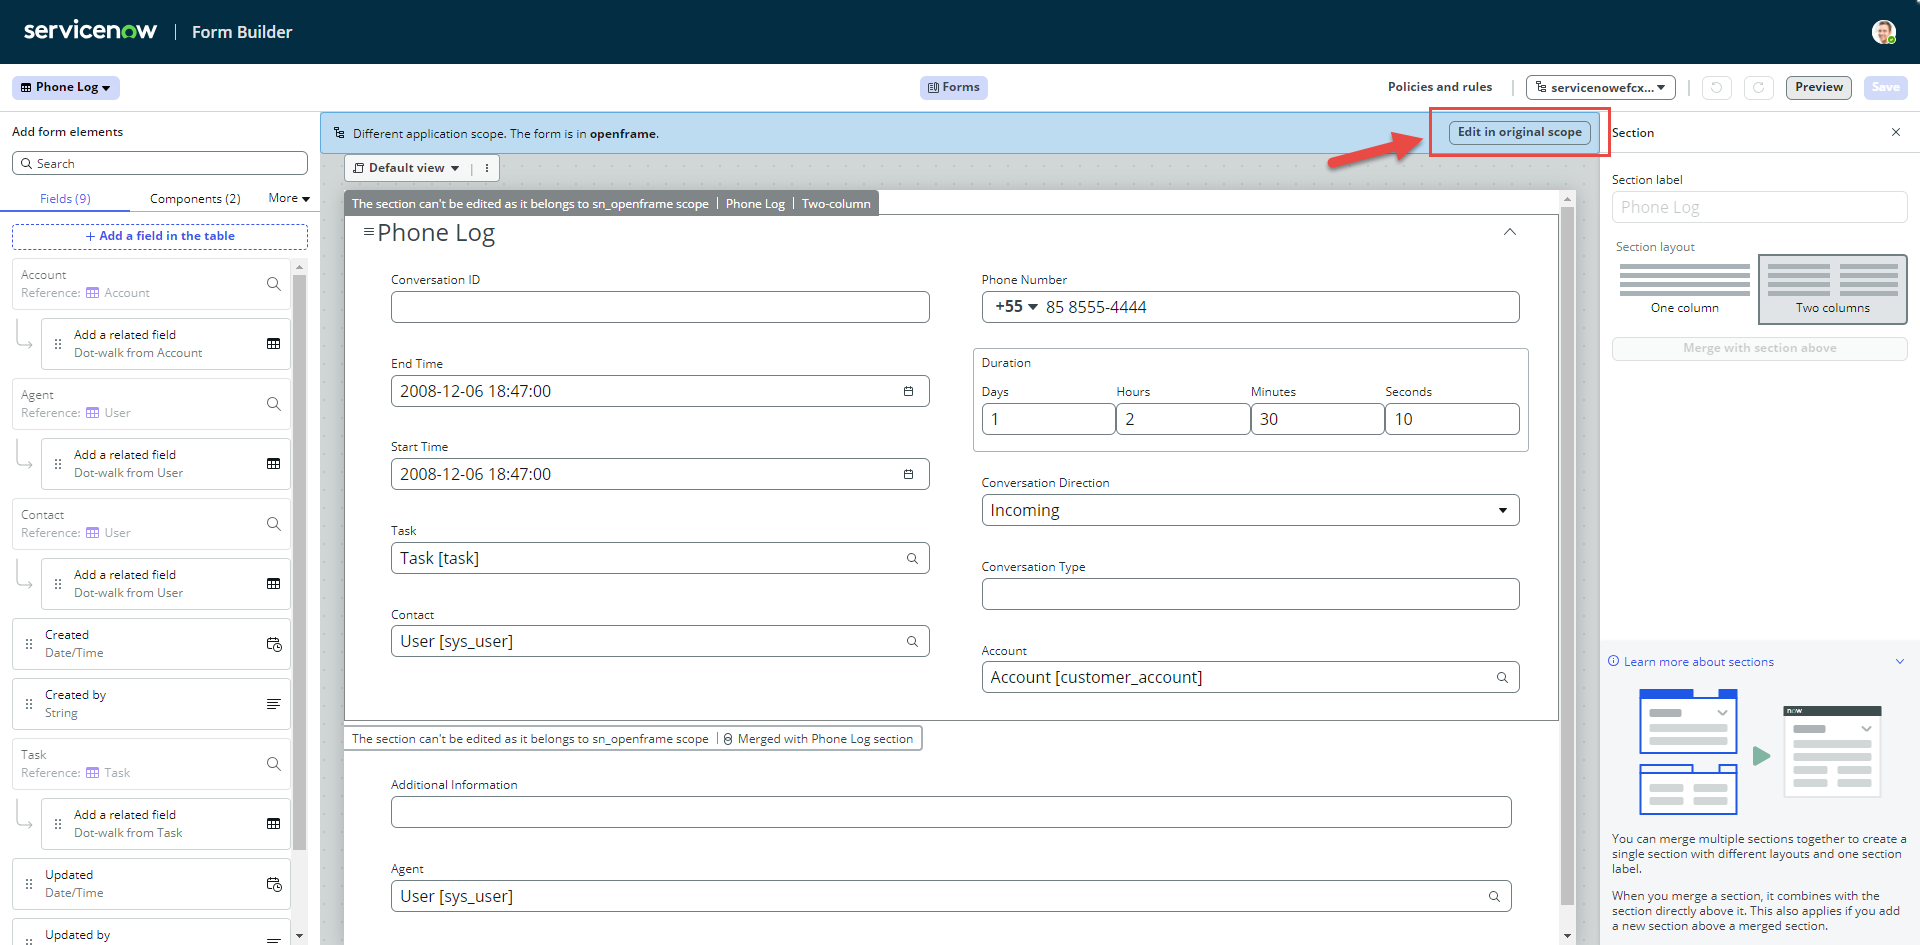
Design the Phone Log Table
-
Search Phone Log table and click on Phone Log from the list.
-
Click on Form Builder from the related links on bottom of the page.
-
Now click on Edit in orignal scope.
-
Now drag and drop the following fields:
-
Now click on Save.
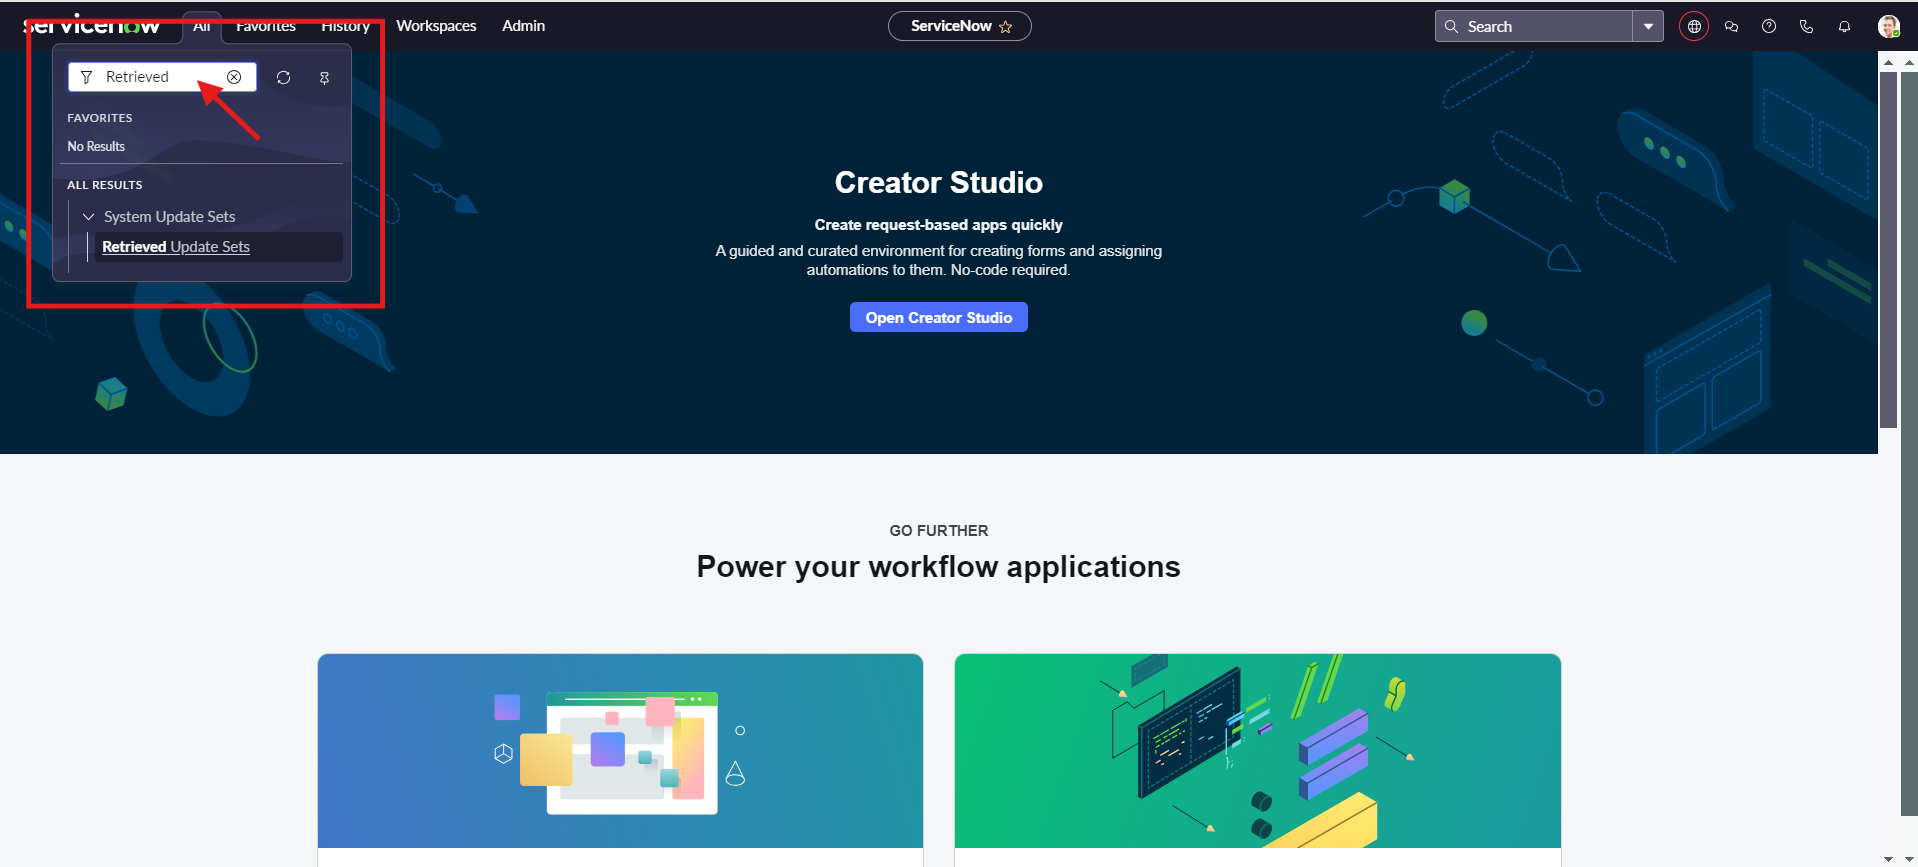
Install EFCX Servicenow Connector
-
Download the package of EFCX ServiceNow Connector.
-
Login to servicenow CRM with admin role.
-
Search and go to Retrieved updates sets options.
-
And click on Import Update Set from XML option.
-
Select the downloaded package from your device.
-
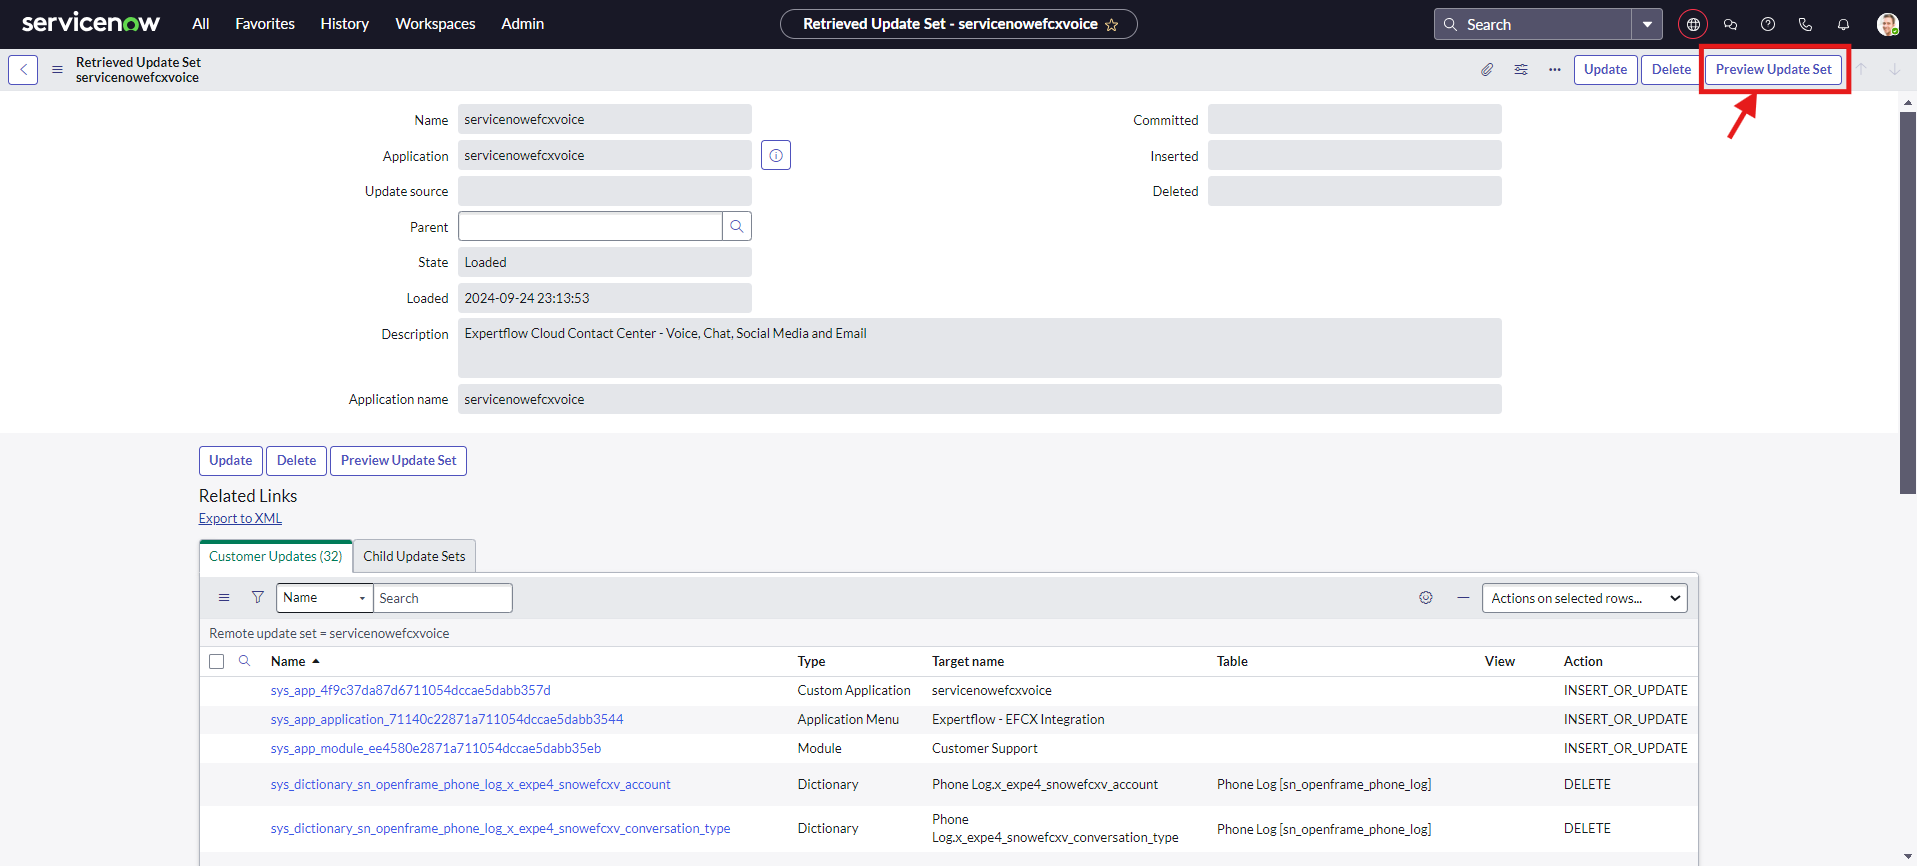
Once it is imported, click on the package and choose Preview update set button.
-
After that click on Commit Update Set button and your package will be installed in your servicenow.
Create an OpenFrame configuration
This configuration specifies the OpenFrame window settings as well as the URL to be launched within OpenFrame.
Before you begin
Role required: admin
As part of the OpenFrame configuration, users with the admin role can select one or more user groups. Access to the configuration is limited to the users who have the open-frame user role and that belong to the selected groups.
OpenFrame user roles
The OpenFrame window is available to agents who belong to one of the user groups specified in the OpenFrame configuration and with any of the following roles:
-
sn_openframe_user ( This is a minimum role that is required)
-
sn_customerservice_agent
-
sn_customerservice.consumer_agent admin (This is only required for the installation and configuration not required for the agents)
-
x_expe4_snowefcxv_cti.CTI_Role (Mandatory Role required)
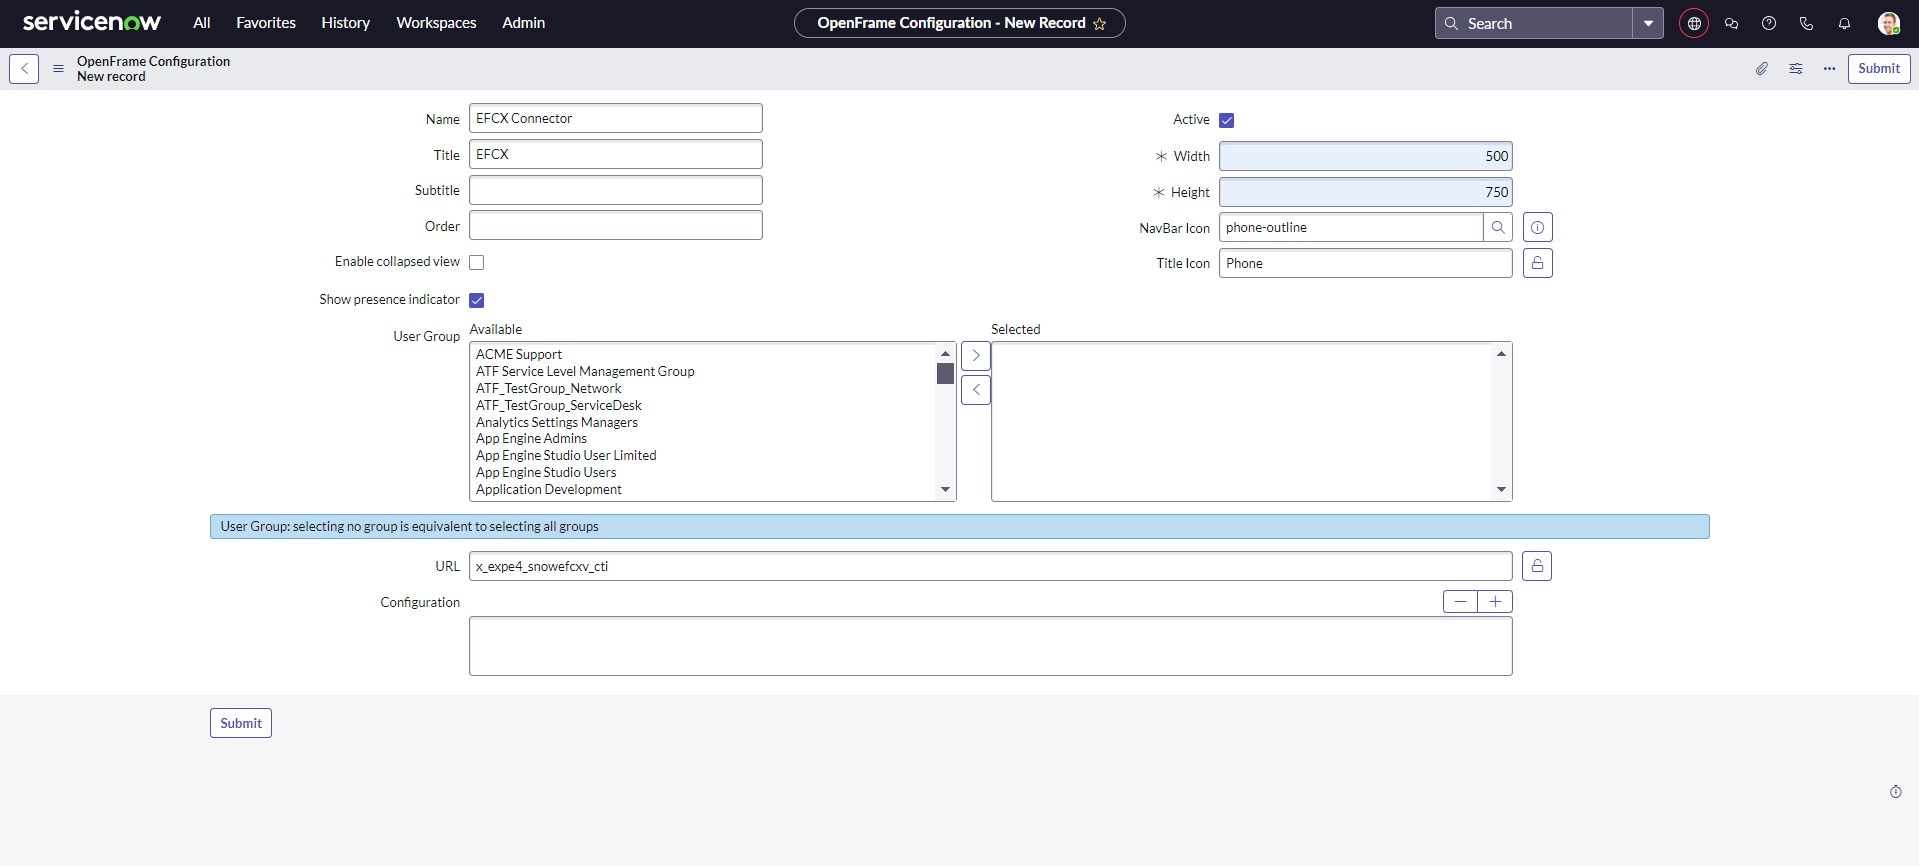
Adding the OPEN Frame Configurations
-
Click on All >>Openframe >> select configurations & then ‘New’
-
*Show presence indicator when checked Only the agent can see the phone icon.
When the above roles are provided no user group should be selected or the above-mentioned roles must be part of some user group when selected.\
-
URL = x_expe4_snowefcxv_cti and then click on Submit.
-
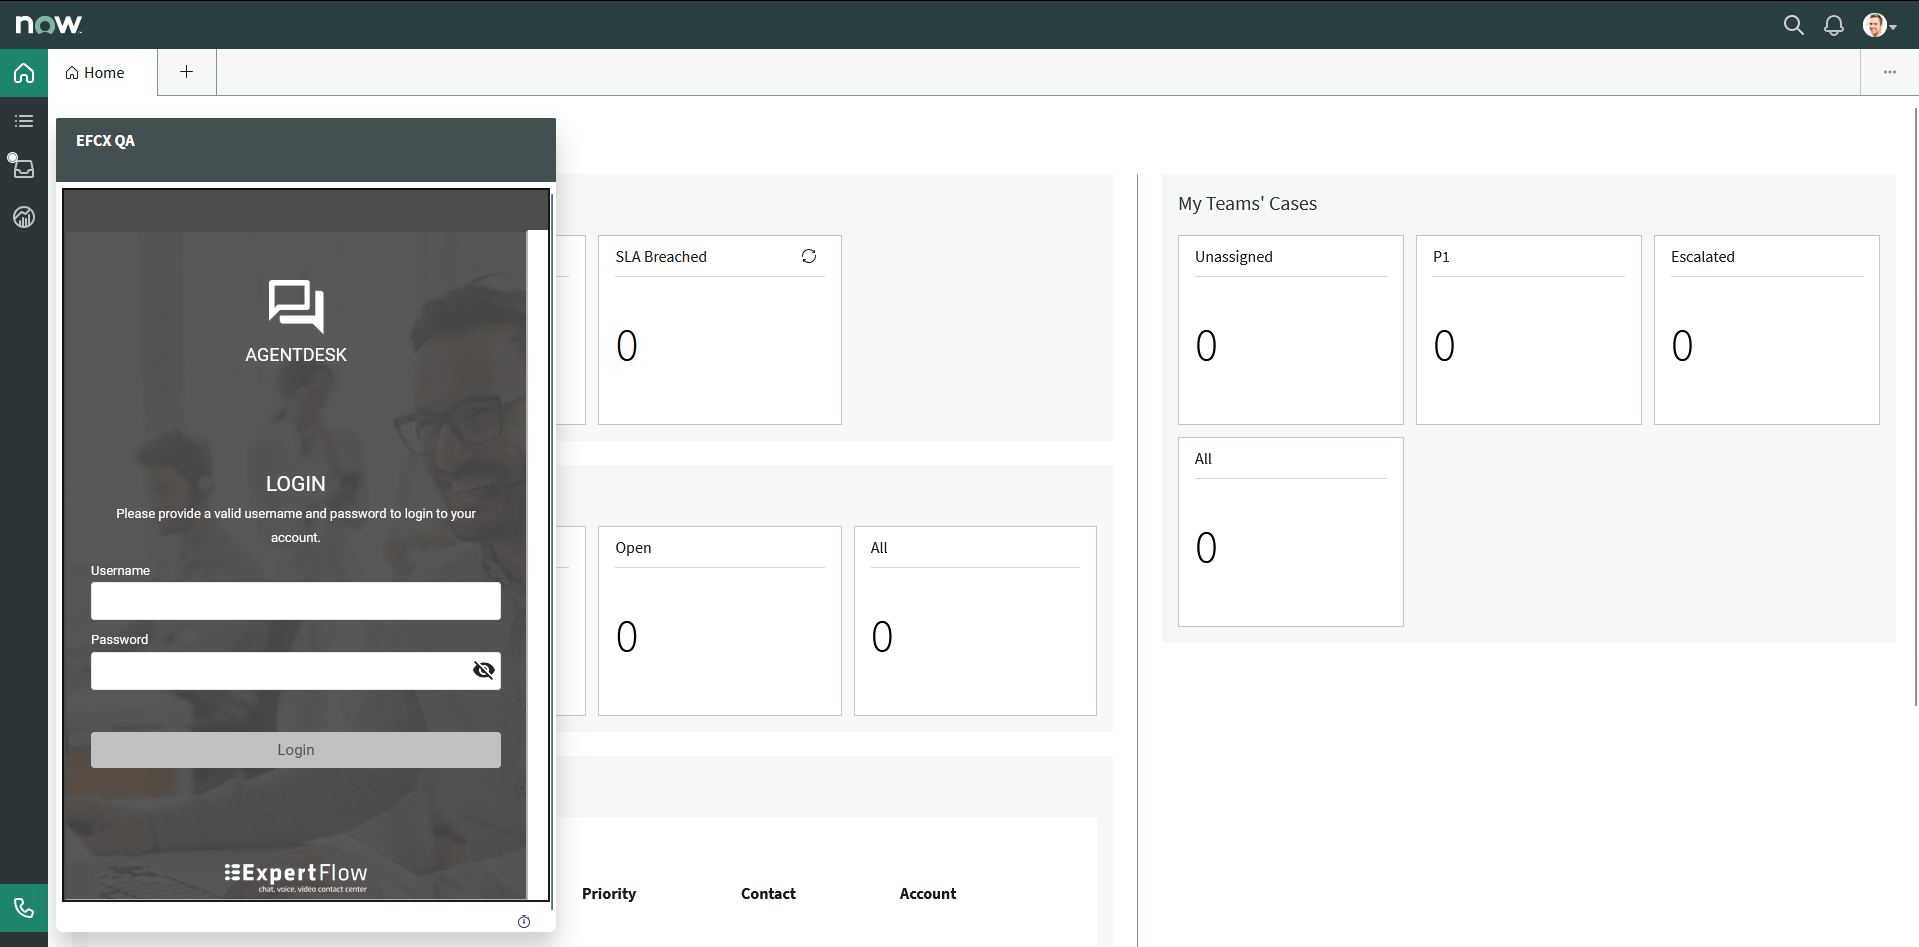
When clicked on the phone icon in the top window the integration will look like
-
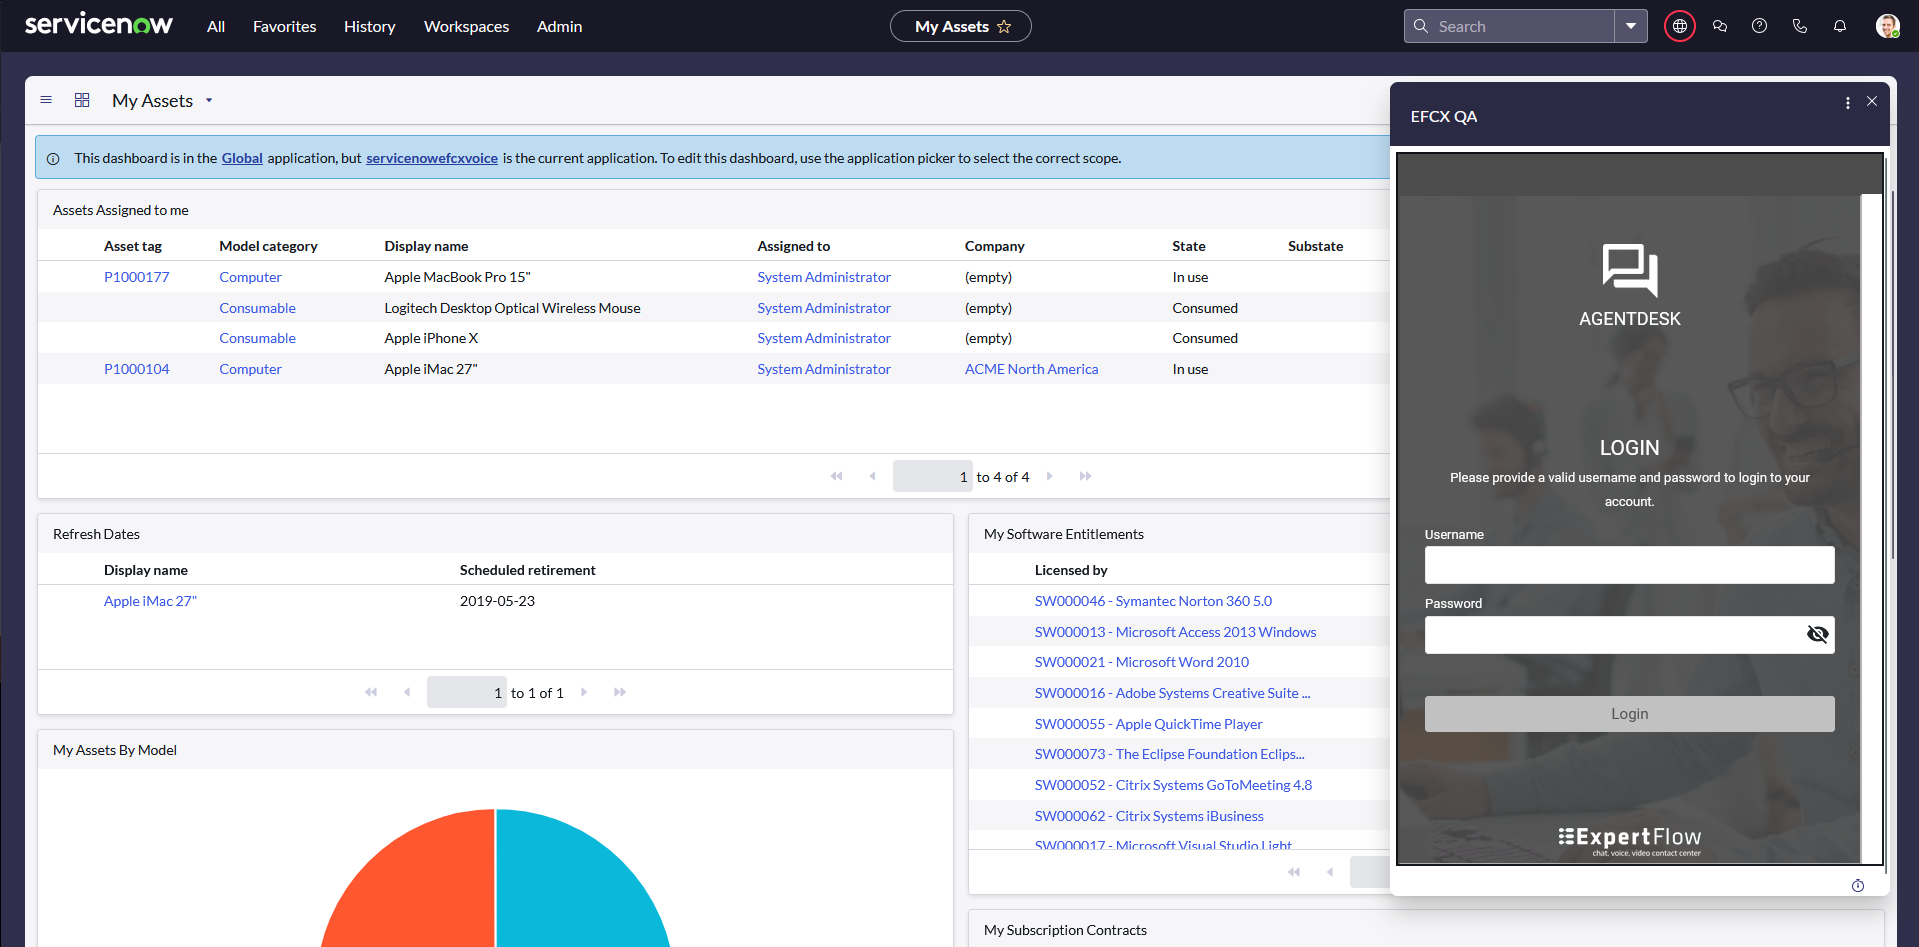
If we open the EFCX application from All >> Agent workspace then it will look like this
Add configurations
-
Search Studio and click on the Studio under the System Applications.
-
Now search your application name “servicenowefcxvoice” and select the application.
-
Go to GetConfigData file under script include.
-
In the Entities field
configData.entitiesprovide the priority for searching Contact, Account in your application like “contact,account”, all values need to be in small letters. -
In the noMatchEntity field
configData.noMatchEntityprovide new entity you want to create when there is no matching number in CRM like "Account". -
In the Destination_Number field
configData.Destination_Numberprovide the configured dialed number for queue in order to make calls like “1333“.
For the "Destination Number" field, you need to provide the "Service Identifier" that you have configured for the Voice channel in Unified Admin of EFCX. If the voice channel is not configured, you can follow this guide.
-
In the iframeUrl
configData.IframeURLfield provide the deployed EFCX URL (https://<fqdn>/unified-agent/).
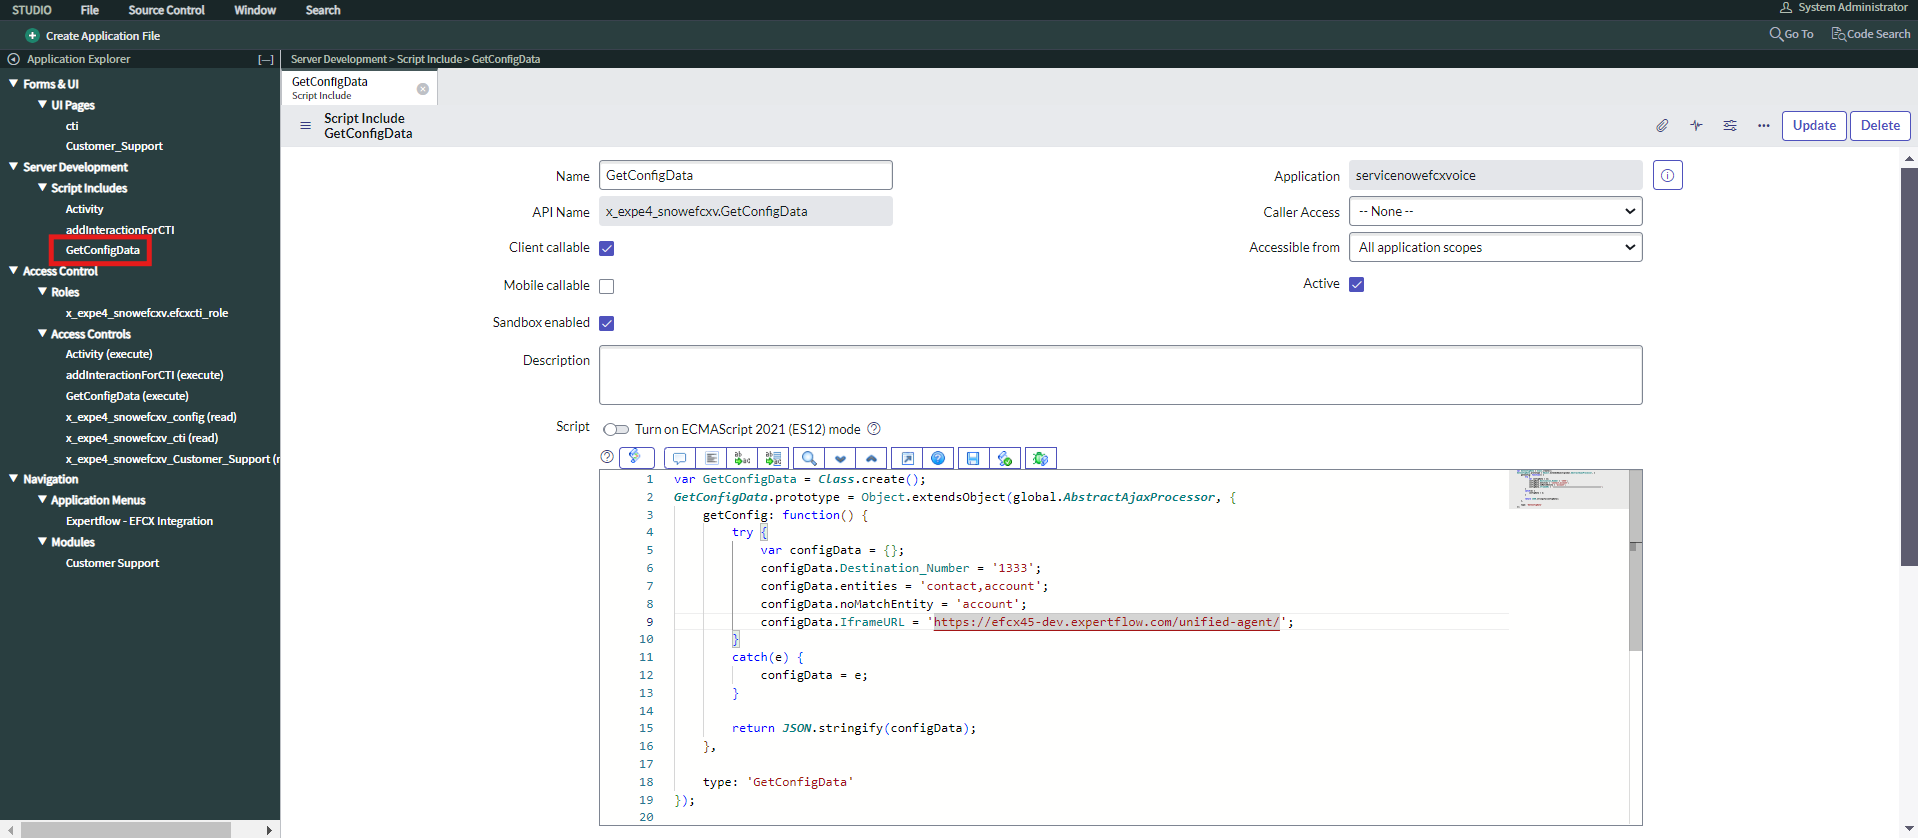
-
Now click on Update.