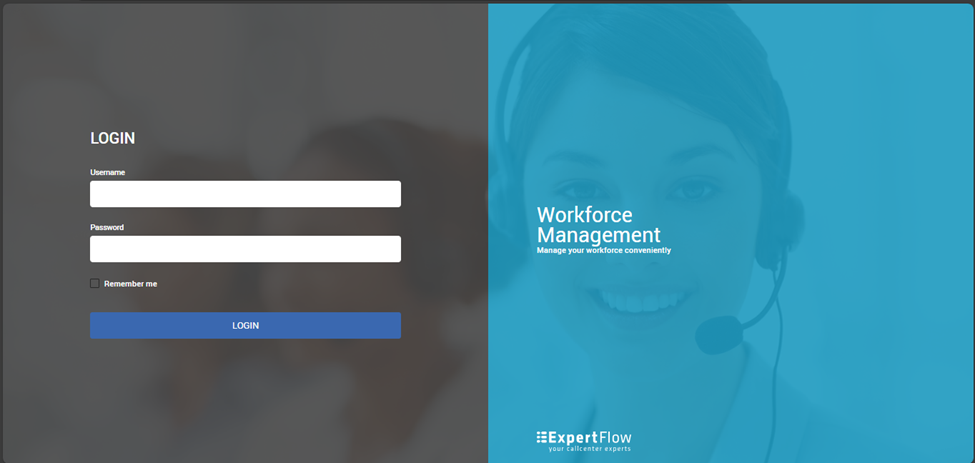
Login
Welcome to Workforce Management Solution, our solution starts with a login page and given below are the information about how to login:
-
Navigate to deployed URL or {{ URL }}/#/Login
-
Provide Username and Password to Log in to system.
-
Check Remember me if you want to save provided credentials.
-
Press LOGIN button.
-
If user is authenticated successfully user will move to welcome screen.
-
If provided credentials are incorrect error message will be displayed.
-
User Interface
-
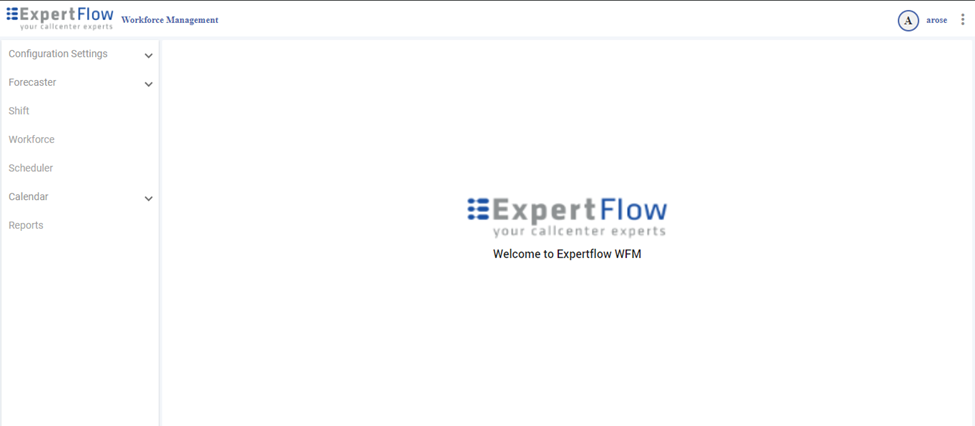
Dashboard Layout
The Dashboard Layout of the WFM application is designed to be user-friendly and efficient, providing a clear and organized workspace. The main area of the dashboard is reserved for displaying the currently selected module, ensuring that users have ample space to view and interact with the content relevant to their tasks. This layout is intended to minimize clutter and distractions, allowing users to focus on their work. The design is responsive, adapting to different screen sizes, which makes it accessible whether users are working on a desktop or tablets.
-
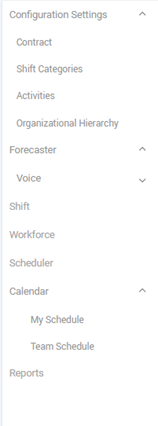
Navigation Menu
The Navigation Menu is located on the left side of the dashboard and serves as the primary means of navigating through the WFM application. This vertical menu provides quick access to all the major modules of the system, such as the Scheduler, User Management, Reporting, and Settings. Each menu item is clearly labeled and grouped logically, enabling users to find the functions they need with ease. The Navigation Menu is always visible, making it easy for users to switch between different parts of the application without losing their place. This persistent menu design ensures a smooth and intuitive user experience, facilitating efficient navigation throughout the application.
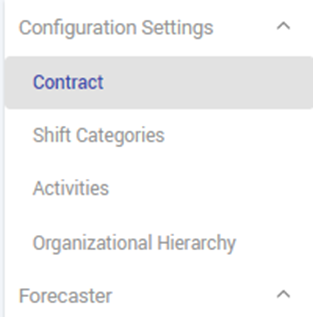
Configuration Module
Managing Contracts
The Contract Submodule is an integral part of our workforce management application, designed to streamline the creation, management, and administration of employment contracts. This submodule allows administrators to define detailed employment terms, ensuring compliance with organizational policies and legal standards.
Creating Contracts
Log in to workforce management web page .
-
Go to the Configuration heading in the sidebar menu and select the Contracts subheading.
-
Click the Create Contract button located at the top right of the main page to open the Create Contract page.
-
Enter the required information in the provided fields and select the applicable open days for the contract.
-
Employment Type: Choose the type of employment from the dropdown.
-
Name: Enter the name of the contract. This field is mandatory and has a maximum length of 25 characters.
-
Description: Provide a description for the contract (optional, max 250 characters).
-
Weekly Rest Time: Set the hours and minutes for weekly rest. The format should be HHH:MM, with a maximum of 167 hours and 59 minutes.
-
Nightly Rest Time: Set the hours and minutes for nightly rest. The format should be HH:MM, with a maximum of 23 hours and 59 minutes.
-
Minimum Time Per Week: Define the minimum hours and minutes per week. The format should be HHH:MM, with a maximum of 167 hours and 59 minutes.
-
Maximum Time Per Week: Define the maximum hours and minutes per week. The format should be HHH:MM, with a maximum of 167 hours and 59 minutes.
-
Average Work Time Per Day: Set the average daily work hours and minutes. The format should be HH:MM, with a maximum of 23 hours and 59 minutes.
-
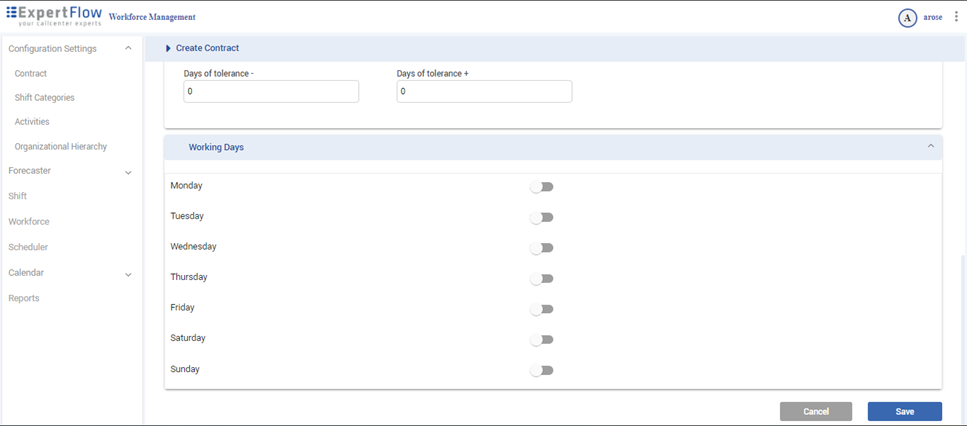
Target Tolerance: Specify the negative and positive target tolerances.
-
Days of Tolerance: Define the negative and positive days of tolerance.
-
Working Days: Toggle the days the contract will be active.
-
-
Click the Save button to create the contract.
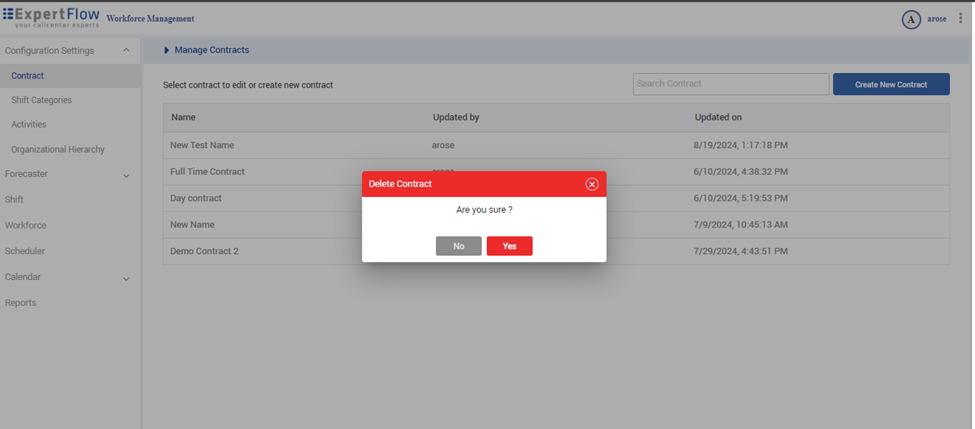
Deleting Contracts
-
Go to the Configuration heading in the sidebar menu and select the Contracts subheading.
-
On the Manage Contract page, locate the contract you want to delete in the table. Hover over the contract row to reveal the Edit and Delete icons.
-
Click the Delete icon for the specific contract. A confirmation dialog will appear; click Yes to confirm and delete the contract.
Editing Contracts
-
Go to the Configuration heading in the sidebar menu and select the Contracts subheading.
-
On the Manage Contract page, locate the contract you want to edit in the table. Hover over the contract row to reveal the Edit and Delete icons.
-
Click the Edit icon for the specific contract to open the Edit Contract page.
-
Make the necessary changes to the contract fields and open days.
-
Click the Save button to apply the changes.
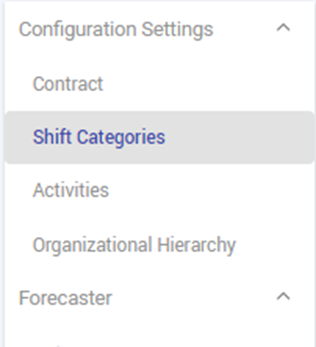
Managing Shift Categories
This section outlines the process of creating, editing, and deleting shift categories, which are essential for organizing and labeling work shifts within the system. Proper management of shift categories ensures clarity and consistency in scheduling, helping to avoid conflicts and streamline workforce operation.
Creating Shift Categories
-
Go to the Configuration heading in the sidebar menu and select the Shift Categories subheading.
-
Click the Create New Category button located at the top right of the main page to open the Create Shift Categories page.

-
Enter the required information in the provided fields for the Shift Category:
-
Name: Enter the name of the shift category. This field is mandatory and has a maximum length of 25 characters.
-
Short Name: Enter a short name for the shift category. This field is mandatory and has a maximum length of 3 characters.
-
Color: Select a color for the shift category using the color picker.
-
-
Click the Save button to create the shift category.

Deleting Shift Categories
-
Log in to workforce management web page.
-
Go to the Configuration heading in the sidebar menu and select the Shift Categories subheading.
-
On the Manage Shift Categories page, locate the Shift Category you want to delete in the table. Hover over the category row to reveal the Edit and Delete icons.

-
Click the Delete icon for the specific Shift Category. A confirmation dialog will appear; click Yes to confirm and delete the Shift Category.

Editing Shift Categories
-
Log in to workforce management web page.
-
Go to the Configuration heading in the sidebar menu and select the Shift Categories subheading.
-
On the Manage Shift Categories page, locate the Shift Category you want to edit in the table. Hover over the category row to reveal the Edit and Delete icons.

-
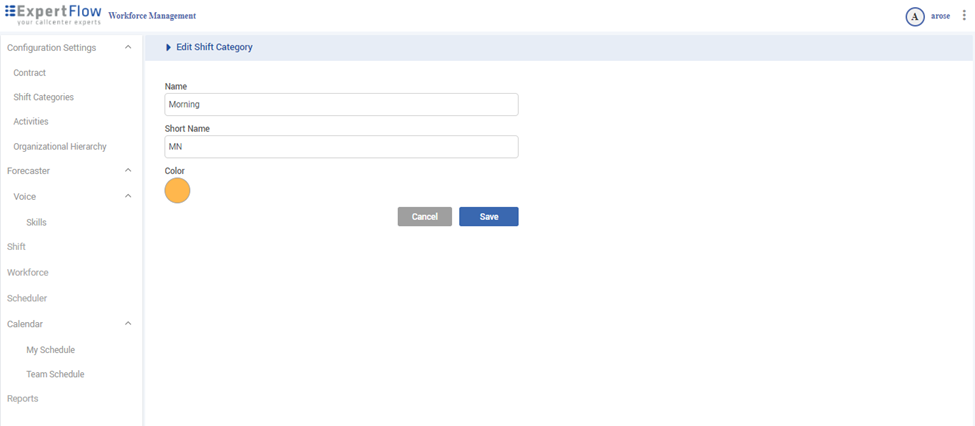
Click the Edit icon for the specific category to open the Edit Shift Categories page.
-
Make the necessary changes to the category fields:
-
Name: Modify the name of the shift category if needed.
-
Short Name: Modify the short name for the shift category if needed.
-
Color: Change the color for the shift category using the color picker.
-
-
Click the Save button to apply the changes.
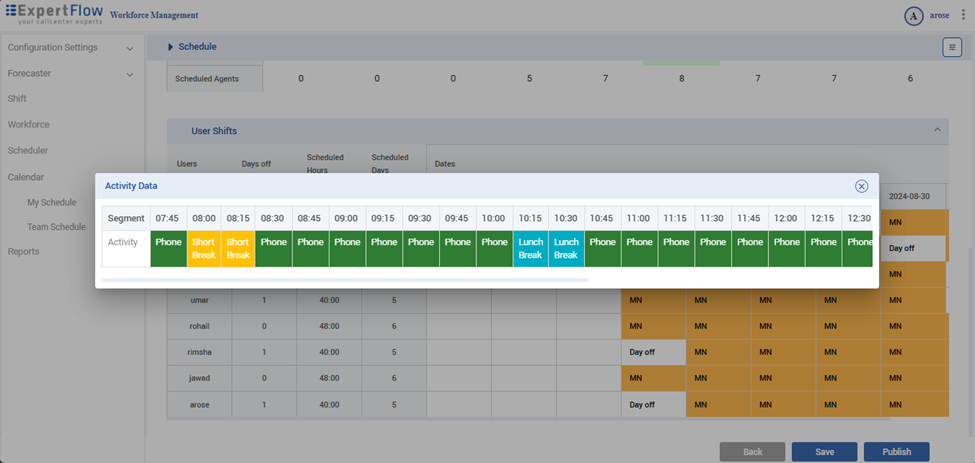
Managing Activities
This section focuses on the creation, modification, and removal of activities that are integral to workforce management. Activities represent specific tasks or periods within a shift, and their proper configuration is crucial for accurate time tracking, compliance with contracts, and effective resource allocation.
Creating Activities
-
Log in to workforce management web page.
-
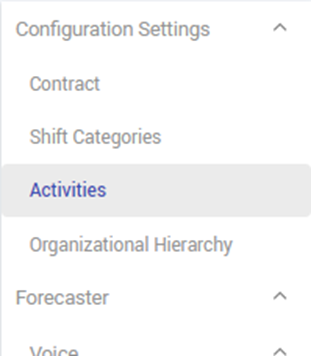
Go to the Configuration heading in the sidebar menu and select the Activities subheading.
-
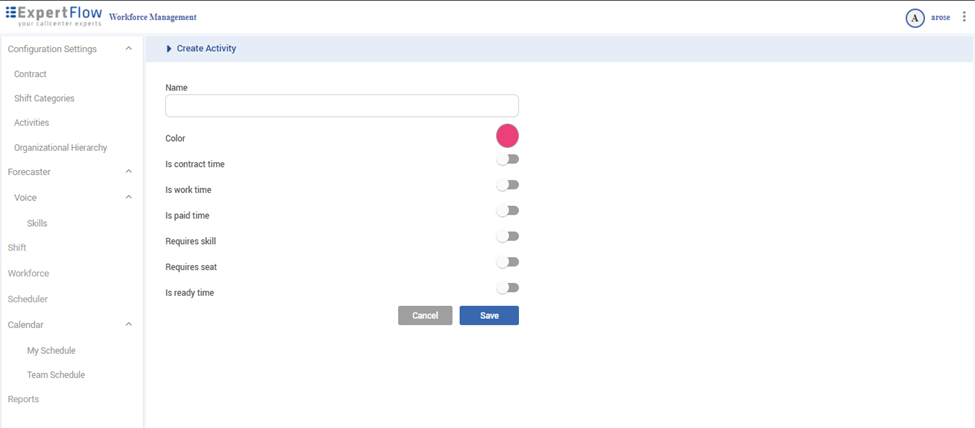
Click the Create New Activity button located at the top right of the main page to open the Create Activity page.
-
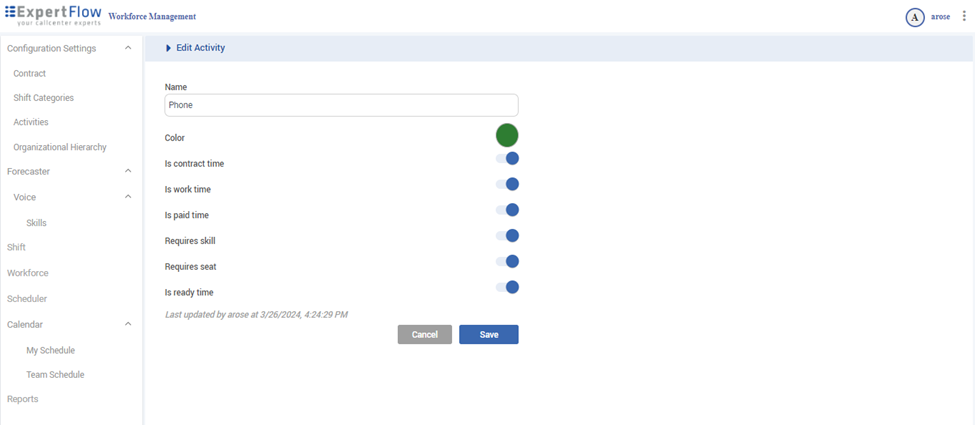
Enter the required information in the provided fields for the activity:
-
Name: Enter the name of the activity. This field is mandatory and has a maximum length of 25 characters.
-
Color: Select a color for the activity using the color picker.
-
Is Contract Time: Toggle if this activity is considered contract time.
-
Is Work Time: Toggle if this activity is considered work time.
-
Is Paid Time: Toggle if this activity is considered paid time.
-
Requires Skill: Toggle if this activity requires a specific skill.
-
Requires Seat: Toggle if this activity requires a seat.
-
Is Ready Time: Toggle if this activity is considered ready time.
-
-
Click the Save button to create the activity.
Deleting Activities
-
Log in to workforce management web page.
-
Go to the Configuration heading in the sidebar menu and select the Activities subheading.
-
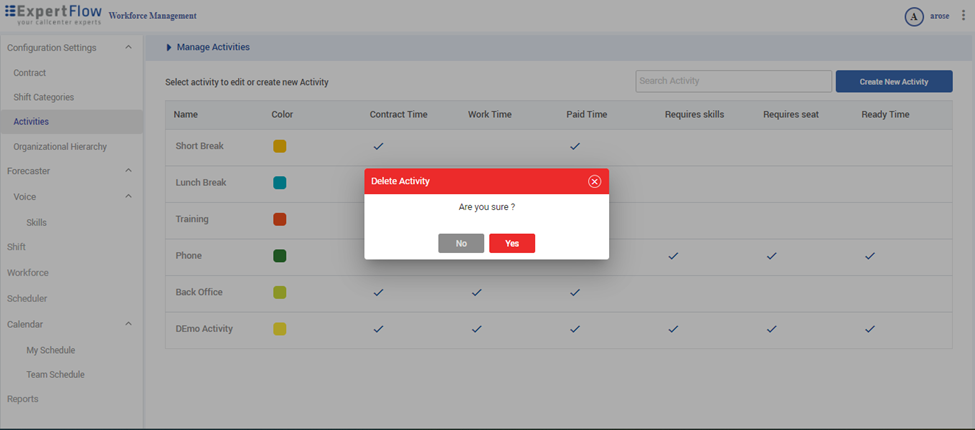
On the Manage Activities page, locate the Activity you want to delete in the table. Hover over the activity row to reveal the Edit and Delete icons.
-
Click the Delete icon for the specific activity. A confirmation dialog will appear; click Yes to confirm and delete the activity.
Editing Activities
-
Log in to workforce management web page.
-
Go to the Configuration heading in the sidebar menu and select the Activities subheading.
-
On the Manage Activities page, locate the Activity you want to edit in the table. Hover over the activity row to reveal the Edit and Delete icons.
-
Click the Edit icon for the specific activity to open the Edit Activity page.
-
Make the necessary changes to the activity fields:
-
Name: Modify the name of the activity if needed.
-
Color: Change the color for the activity using the color picker.
-
Is Contract Time: Update if this activity is considered contract time.
-
Is Work Time: Update if this activity is considered work time.
-
Is Paid Time: Update if this activity is considered paid time.
-
Requires Skill: Update if this activity requires a specific skill.
-
Requires Seat: Update if this activity requires a seat.
-
Is Ready Time: Update if this activity is considered ready time.
-
-
Click the Save button to apply the changes.
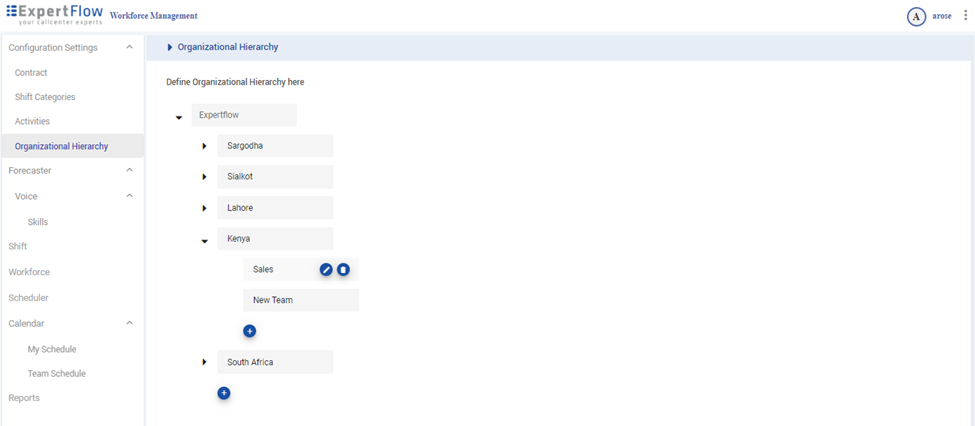
Organizational Hierarchy
The Organizational Tree View provides a hierarchical representation of the organization's structure, allowing administrators to manage locations and teams visually. This tool helps in understanding and maintaining the relationships between different parts of the organization, ensuring that all levels of the hierarchy are accurately represented. This hierarchical tree has three levels:
-
Organization (Level 1): The top-level node representing the entire organization. This node is fixed and cannot be edited or deleted by users.
-
Locations (Level 2): Branches under the organization node representing different locations within the organization. Users can create, edit, and delete locations.
-
Teams (Level 3): Branches under each location node representing teams within each location. Users can manage teams similarly to locations.
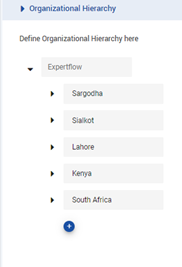
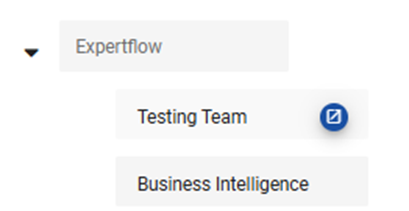
Navigating the Tree View
-
Expand/Collapse Nodes: Click on the arrow icon next to any node to expand or collapse the sub-nodes.
-
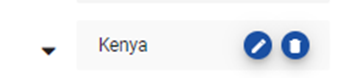
Hover Actions: Hover over any location or team node to reveal action buttons (Edit and Delete).
Managing Locations
In this section, the process of creating, editing, and deleting locations within the organization is detailed. Locations represent physical or operational sites, and their management is key to organizing teams and assigning resources effectively across different branches of the organization.
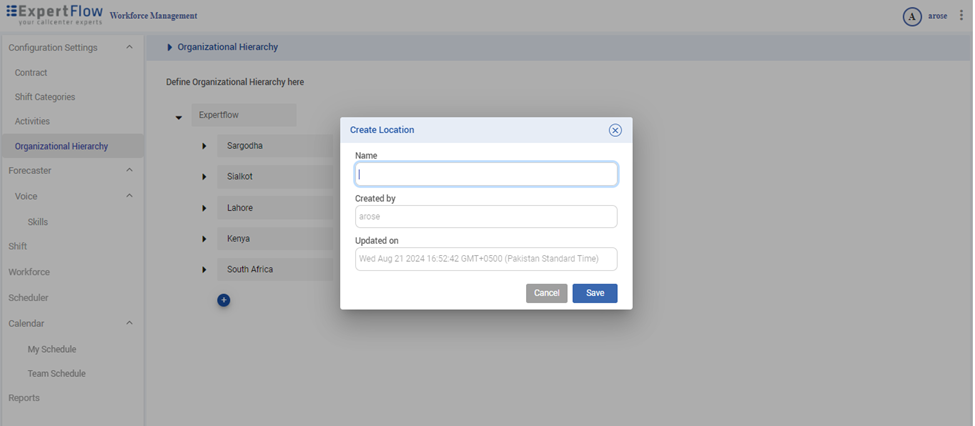
Creating Locations
-
Log in to workforce management web page.
-
Go to the Configuration heading in the sidebar menu and select the Organizational Hierarchy subheading.
-
Open the Organizational Tree View.
-
Locate the desired parent organization node.
-
Click the Plus (+) button at the bottom of the location list.
-
A pop-up will appear.
-
Input the Location Name.
-
Click Save to create the new location.
Editing Locations
-
Log in to workforce management web page.
-
Go to the Configuration heading in the sidebar menu and select the Organizational Hierarchy subheading.
-
Hover over the location node you want to edit.
-
Click the Edit icon that appears.

-
A pop-up will appear showing the current location name.
-
Modify the Location Name as needed.
-
Click Save to apply changes.
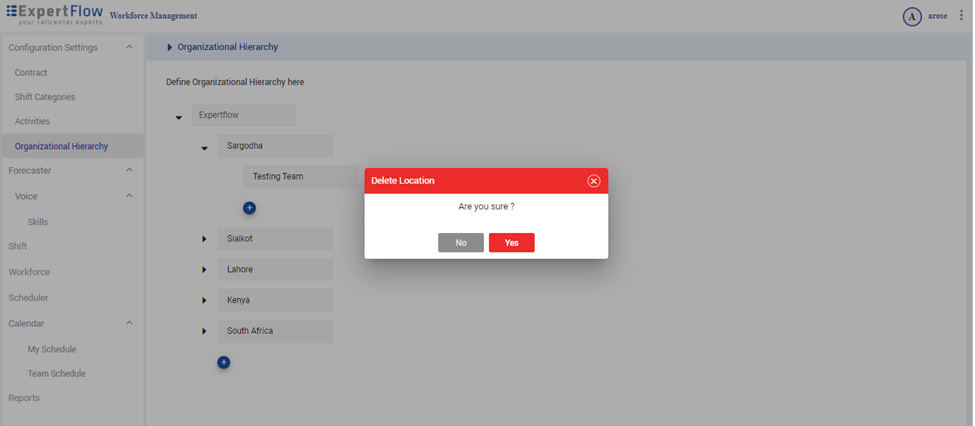
Deleting Locations
-
Log in to workforce management web page.
-
Go to the Configuration heading in the sidebar menu and select the Organizational Hierarchy subheading.
-
Hover over the location node you wish to delete.
-
Click the Delete icon that appears.
-
A confirmation dialog will appear.
-
Click Yes to confirm the deletion.
-
Note: Deleting a location will also delete all teams within that location.
-
Managing Teams
Managing teams involves creating, editing, and deleting teams under specific locations. Teams are the core units of workforce management, and their proper organization is crucial for scheduling, reporting, and overall workforce efficiency.
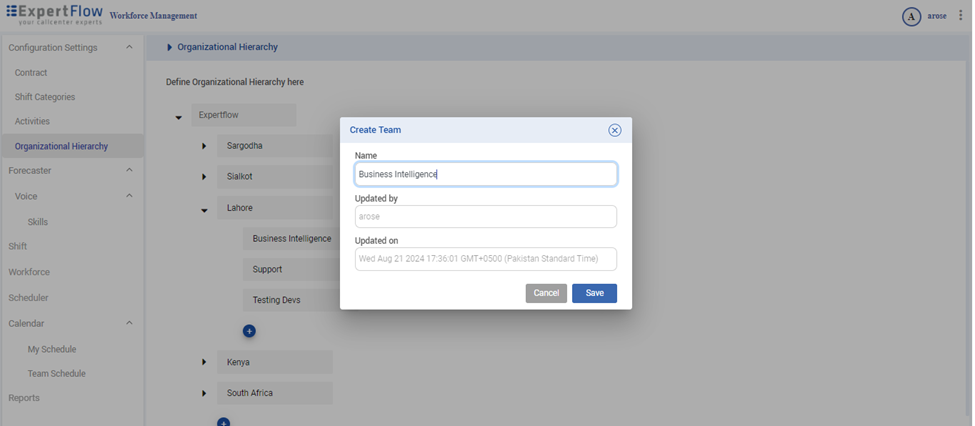
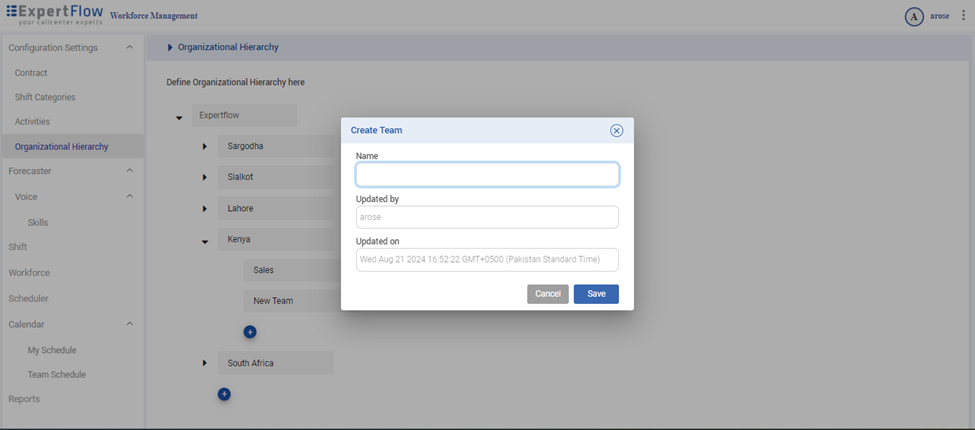
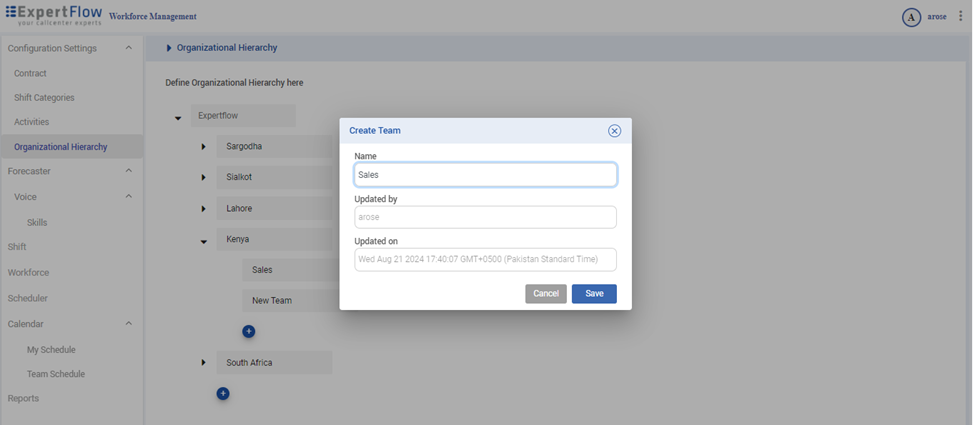
Creating Teams
-
Log in to workforce management web page.
-
Go to the Configuration heading in the sidebar menu and select the Organizational Hierarchy subheading.
-
Open the Organizational Tree View and expand the desired location node.
-
Click the Plus (+) button at the bottom of the team list under the location.

-
A pop-up will appear.
-
Input the Team Name.
-
Click Save to create the new team.
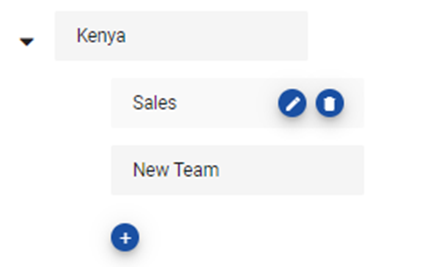
Editing Teams
-
Log in to workforce management web page.
-
Go to the Configuration heading in the sidebar menu and select the Organizational Hierarchy subheading.
-
Expand desired location node.
-
Hover over the team node you wish to edit.
-
Click the Edit icon that appears.

-
A pop-up will appear showing the current team name.
-
Modify the Team Name as needed.
-
Click Save to apply changes.
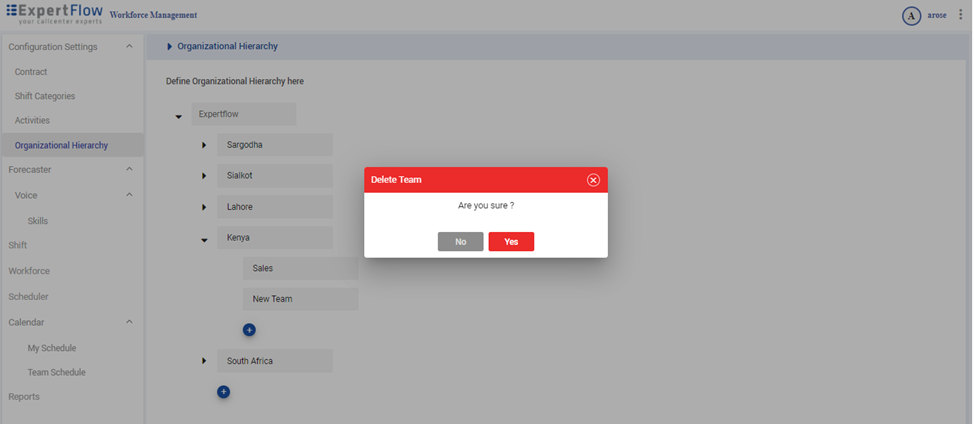
Deleting Teams
-
Log in to workforce management web page.
-
Go to the Configuration heading in the sidebar menu and select the Organizational Hierarchy subheading.
-
Expand desired location node.
-
Hover over the team node you wish to delete.
-
Click the Delete icon that appears.
-
A confirmation dialog will appear.
-
Click Yes to confirm the deletion.
Forecaster Module
The Forecaster Module is a powerful tool for predicting call volumes and managing workforce resources accordingly. It involves managing skills, queue volumes, and preparing data for accurate forecasting. This module is essential for optimizing workforce allocation and ensuring that the organization can meet demand effectively.
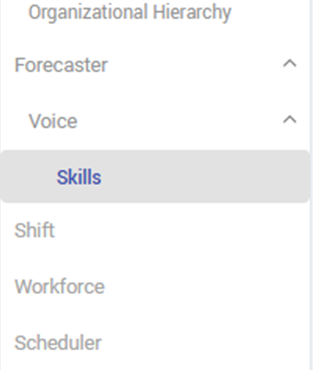
Managing Skills
-
Access Forecaster: Select "Forecaster" from the side menu, then select "Voice" to open the Manage Forecast screen displaying a table of present skills.
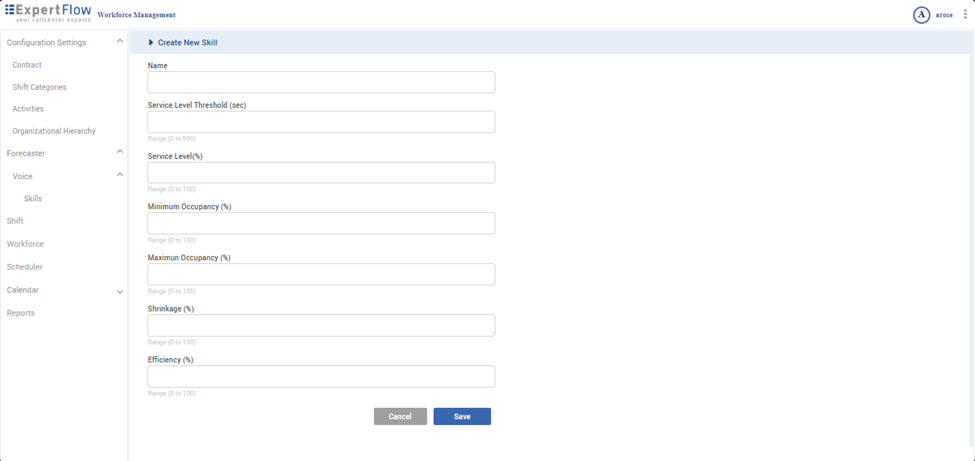
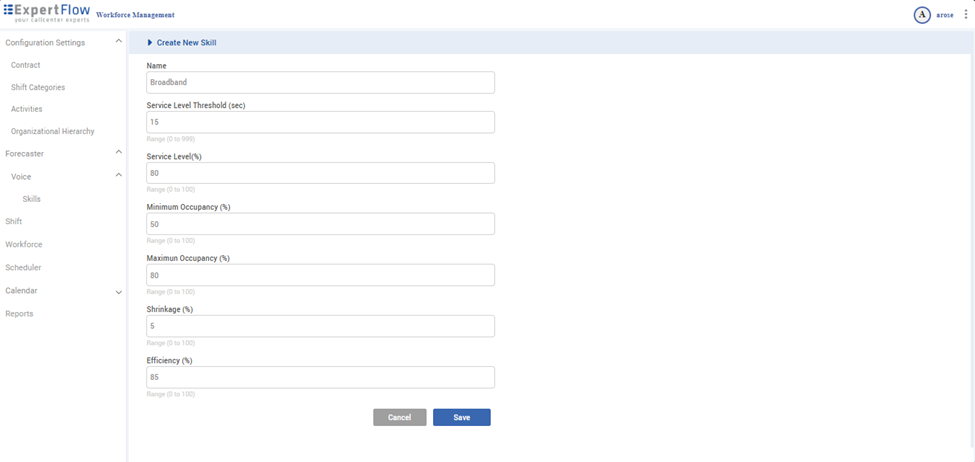
Creating Skills:
-
Access skills forecaster module.
-
Click Create Skill in the top right corner.
-
Fill out the form.
-
Press Save to create the new skill.
Editing Skills:
-
Access skills forecaster module.
-
Hover over the desired skill row.
-
Click the Edit icon.
-
Modify the fields as needed.
-
Press Save to apply changes.
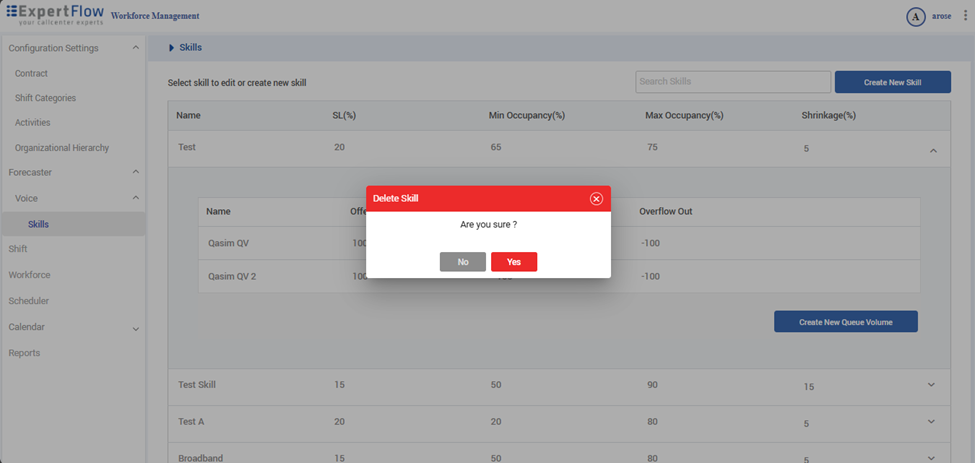
Deleting Skills:
-
Log in to workforce management web page.
-
Hover over the desired skill row.
-
Click the Delete icon.
-
Confirm deletion in the pop-up.
-
Note: Deleting a skill will also delete all related queue volumes.
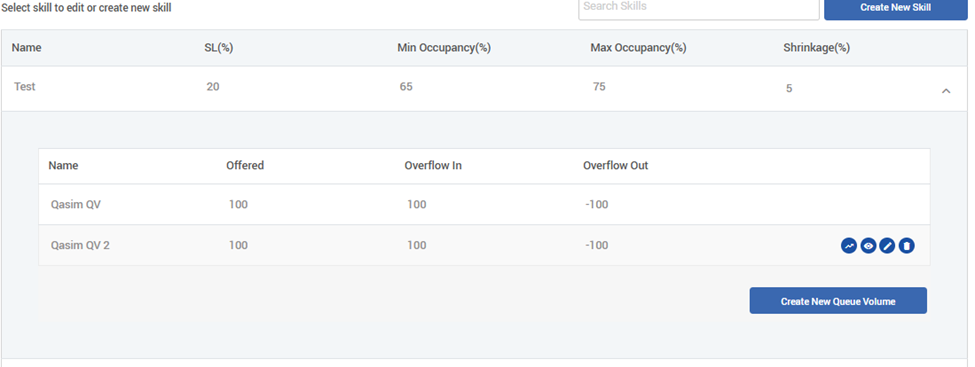
Queue Volume Management
Creating Queue Volume for Skills
-
Access skills forecaster module.
-
Click on a skill row to open a sub-table of queue volumes
-
Click the Create Queue Volume button in the bottom right corner.

-
Fill out the basic fields for queue volume and open days for forecast.
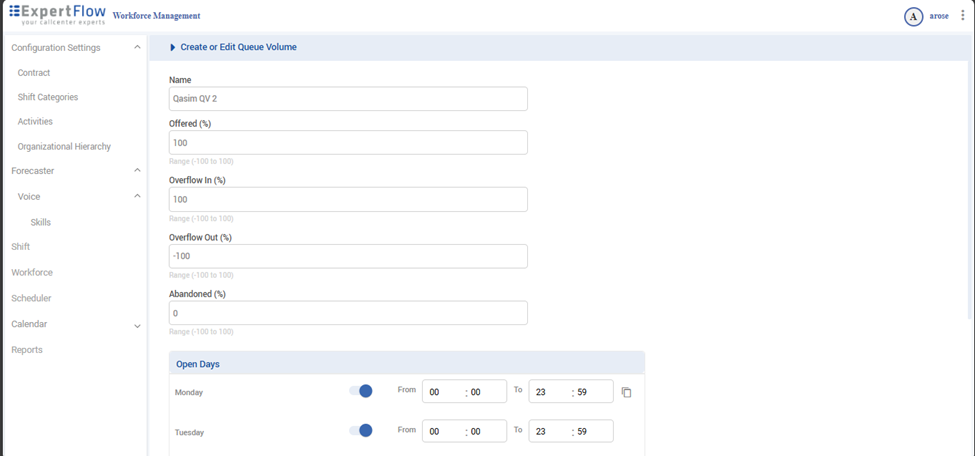
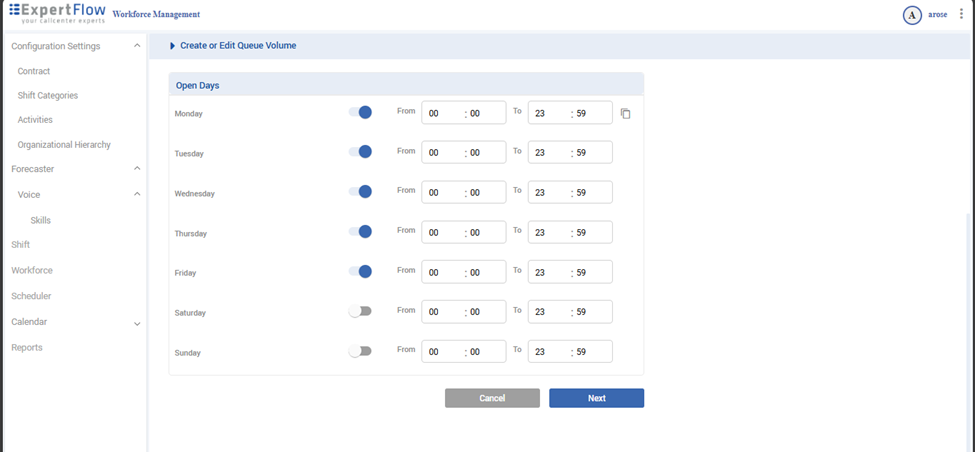
-
Click Next to proceed.
-
Select present queues or click Import Queue in the top right corner to import from an Excel file.
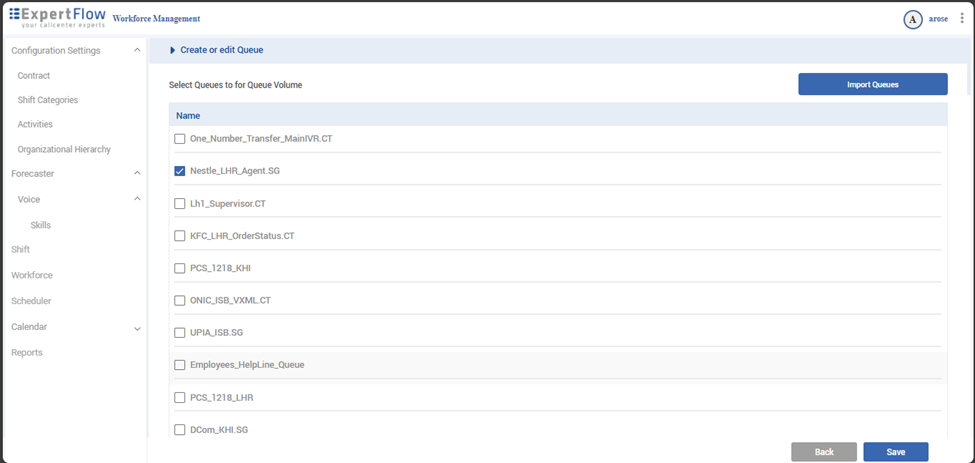
-
After selecting queues, click Next to create the queue volume.
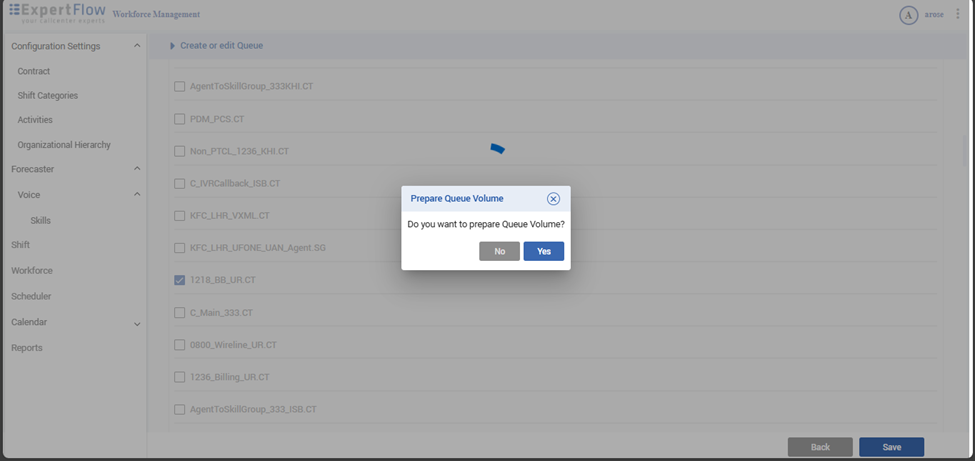
-
A pop-up will ask if you want to prepare the queue volume.
-
If No, you will return to the Manage Skill screen.
-
If Yes, proceed to the prepare queue volume screen.
-
-
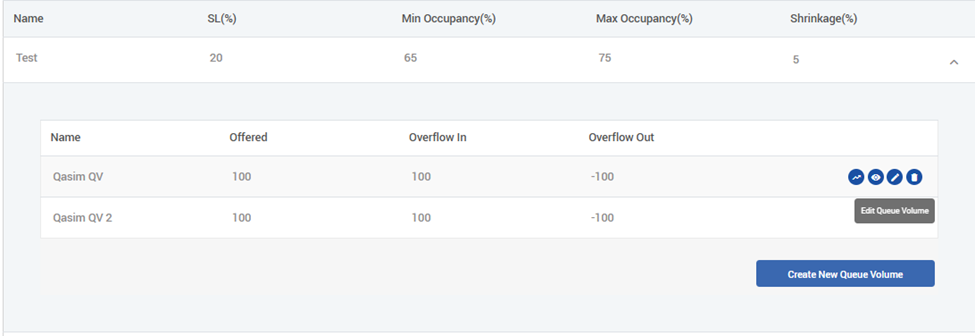
Editing Queue Volume for Skills:
-
Hover over the desired queue volume row.
-
Click the Edit icon.
-
-
Modify the fields as needed.
-
Press Save to apply changes.
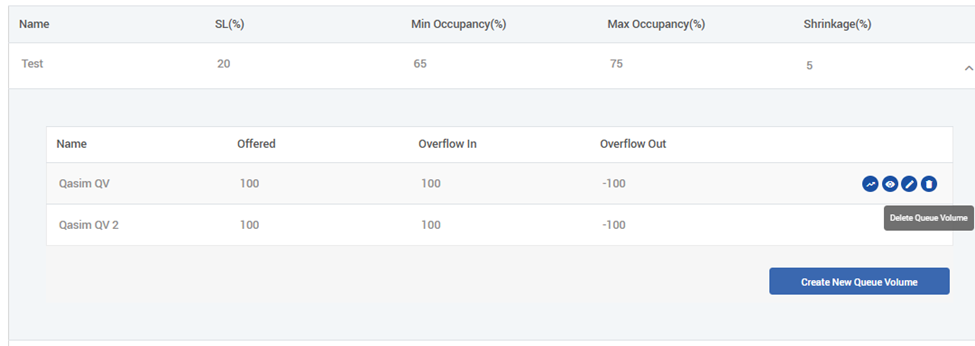
Deleting Queue Volume for Skills
-
Hover over the desired queue volume row.
-
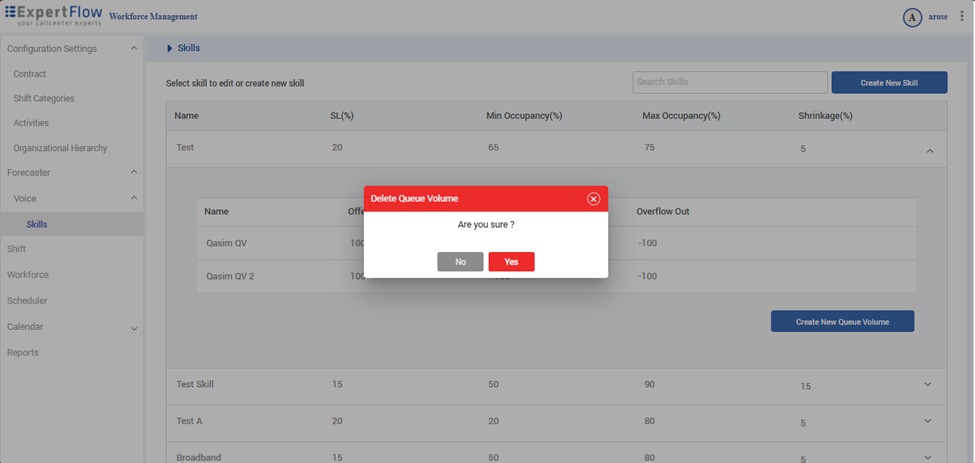
Click the Delete icon.
-
Confirm deletion in the pop-up.
Managing Queue Data for Forecast
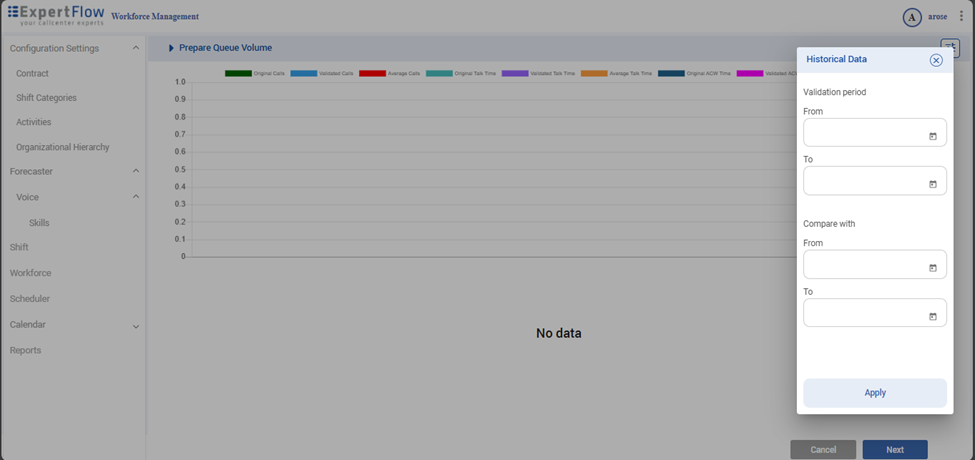
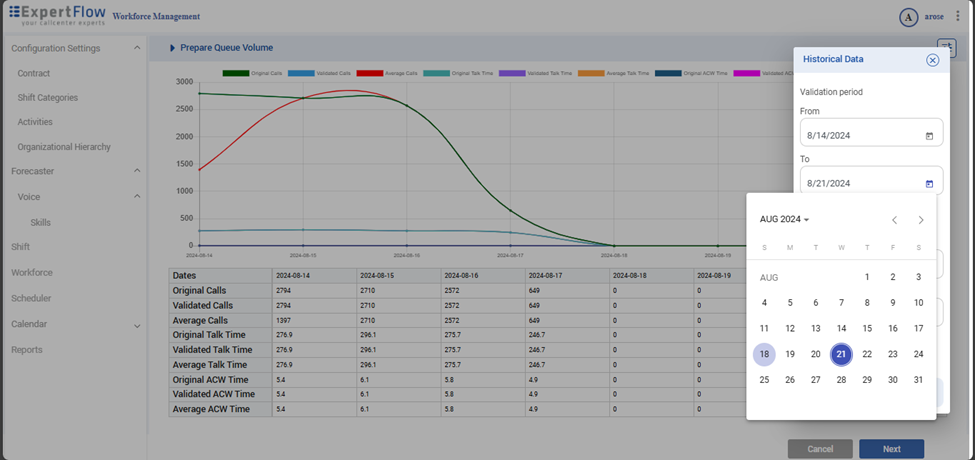
Preparing Queue Data
-
Hover over the queue volume row and click Open Queue Volume/Eye icon button to open the prepare queue volume screen.

-
Click the Filter button in the top right corner.
-
Select the time period and comparison time period in the pop-up.
-
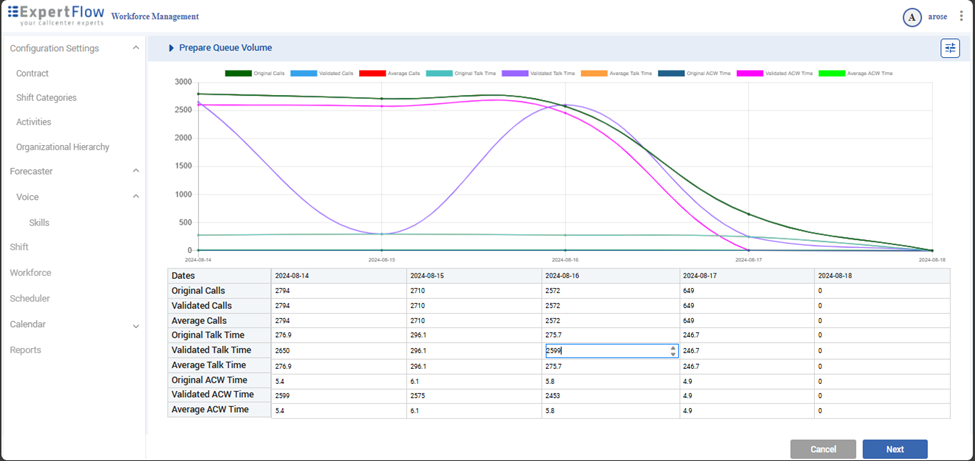
Press Apply to display detailed data with a graph and table.
-
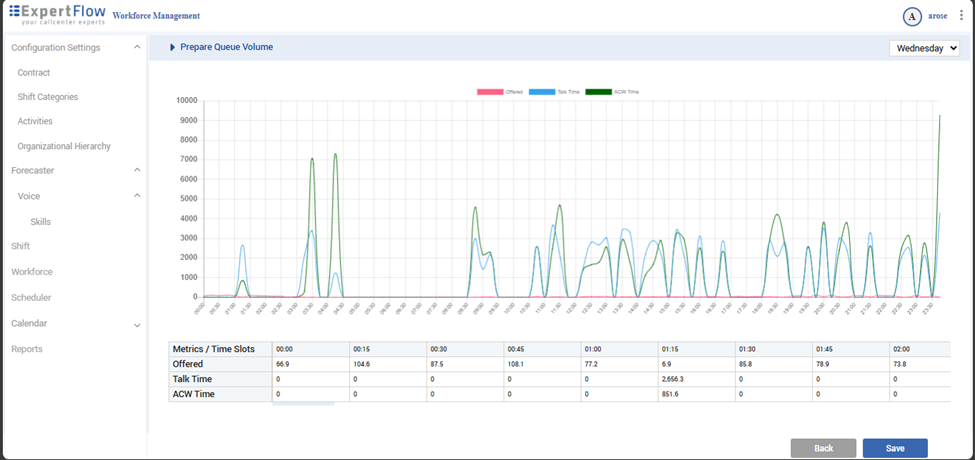
Click Next to view daily data for each day of the week.
-
Press Save to save the data.
-
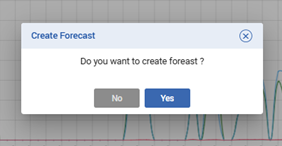
A pop-up will ask if you want to create a forecast.
-
If No, you will return to the Manage Skill screen.
-
If Yes, proceed to the forecast screen.
-
Updating Queue Data
-
Hover over a queue volume row and click the Queue Volume icon button to directly open the queue data preparation screen.

-
If saved data is present, it will be displayed and can be updated. If no data is present, new data can be created.
-
Update data and press save next.
-
View Day data
-
Press Save
Managing Forecasts
Creating Forecasts:
-
Hover over the row of the desired queue volume and click Forecast Icon Button to open the forecast screen.

-
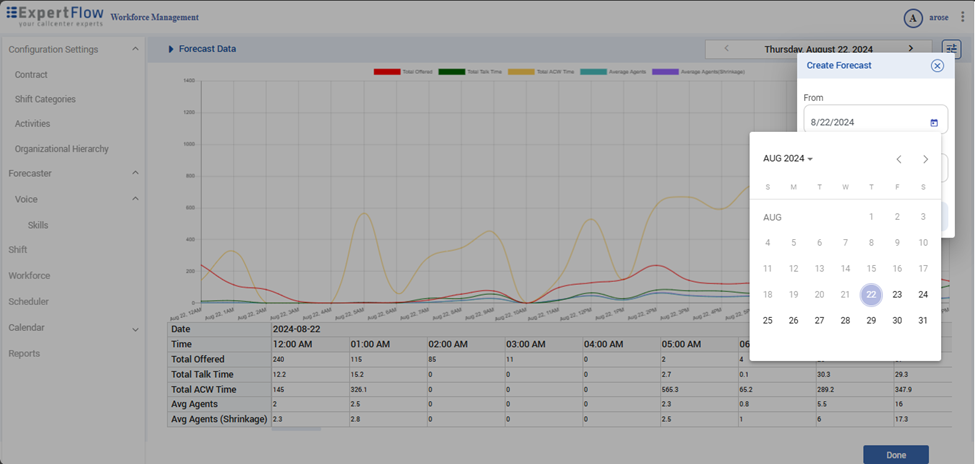
Choose the time period in the pop-up.
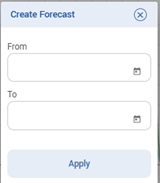
-
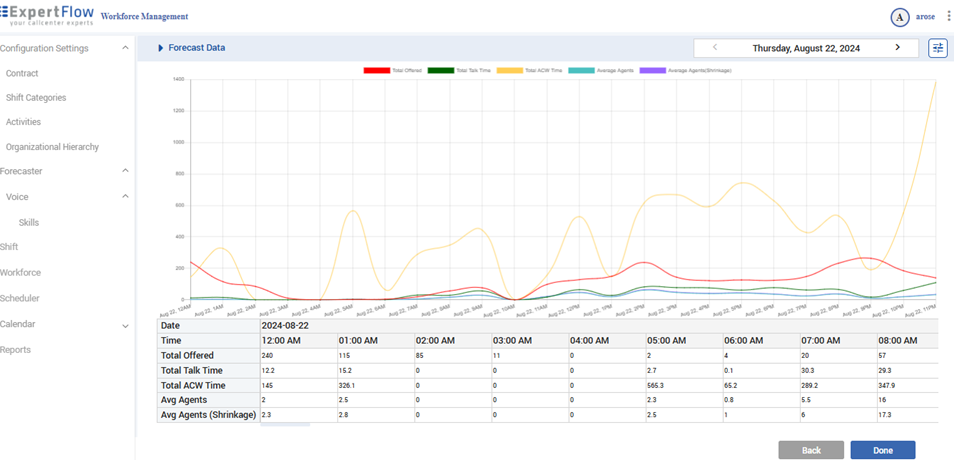
The forecast will be created based on queue data and displayed in a graph and table.
-
To change the time period, click the Filter button in the top right corner to open date selection filters.
-
Chang dates and press Apply to change time period if required.
Shift Module
The Shift Module focuses on creating and managing shift graphs, which visually represent shift schedules and combinations. This module allows for detailed planning and visualization of shift patterns, helping managers ensure that all shifts are adequately covered and that employee time is used efficiently.
Managing Shift
Creating Shift
-
Log in to workforce management web page.
-
Select "Shift" from the side navigation menu to open the shift management screen.
-
Click Create New Shift in the top right corner.

-
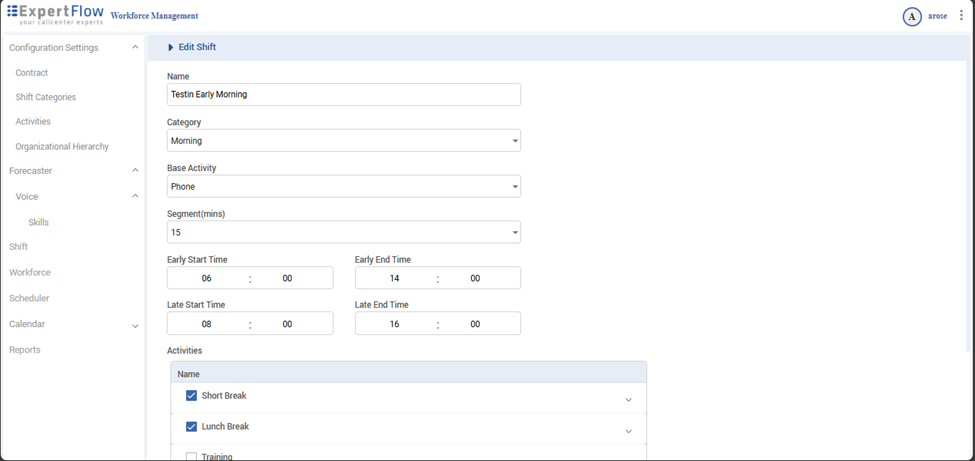
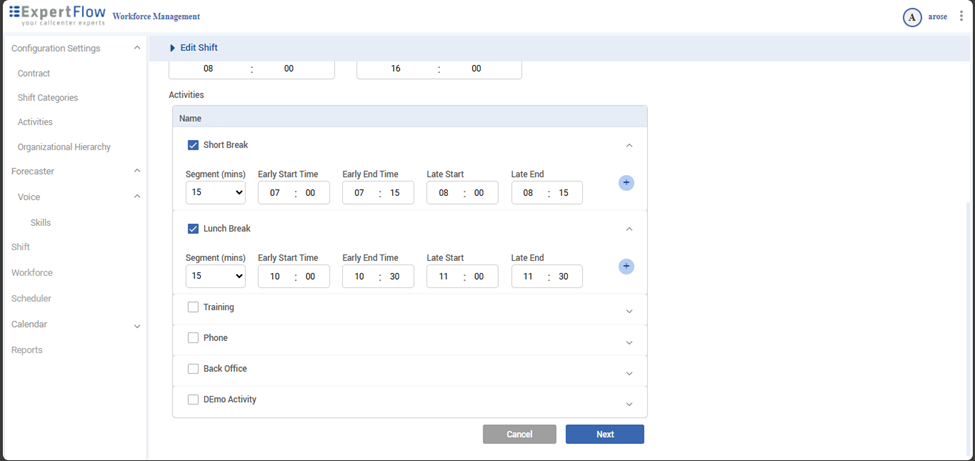
Fill out the form with the following details:
-
Shift Name
-
Base Activity: Select the base activity.
-
Segment: Choose the segment.
-
Start Time: Specify the start time.
-
End Time: Specify the end time.
-
Late Start: Specify the late start time.
-
Late End: Specify the late end time.
-
-
Repeat the process for other activities as needed.
-
Press Save to create the new shift.
-
After creating the shift, the user will automatically be redirected to the graph screen.

Editing Shift
-
Hover over the desired shift row.
-
Click the Edit icon.
-
Modify the fields as needed.
-
Press Save to apply changes.


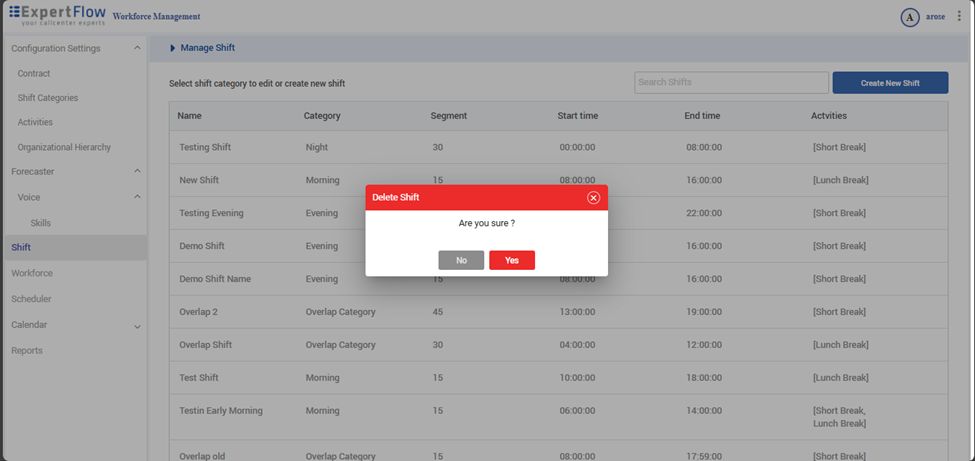
Deleting Shift
-
Hover over the desired shift row.
-
Click the Delete icon.
-
Confirm deletion in the pop-up.
Viewing Graphs of Shift Combinations
-
After Creating a Shift:
-
The user will be redirected to the graph screen where all shift combinations are displayed.
-
Press Done to return to the main table screen.
-
-
Direct Access:
-
From the shift table, the user can directly move to the shift combination graph screen.
-
Hover over shift name for which you want to check graph.
-
-
Click the View button next to the shift you wish to view the graph for.
-
There are also Edit and Delete buttons available for managing shifts.

Workforce Module
The Workforce Module provides tools for managing users within the organization, including creating, editing, and deleting user profiles. This module is central to maintaining up-to-date information on the workforce, managing access control, and ensuring that users are properly assigned to teams and roles within the organization.
Viewing Users by Teams in Tree View
-
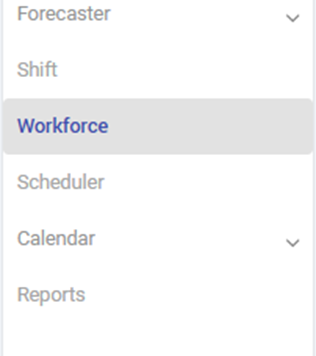
Access Workforce Module: Select "Workforce" from the side navigation menu.
-
Tree View Structure:
-
Root Node: Organization name.
-
Level 2: Teams within the organization.
-
Level 3: Agents of each team.
-
Team "Users": Contains users without a team.
-
-
Team Management: Hover over a team to reveal an icon button. Click it to manage users in that team.

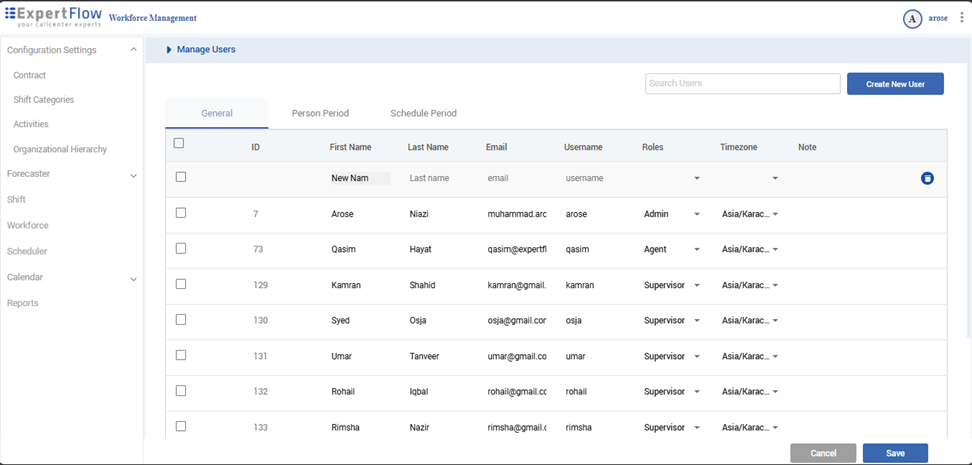
Creating New Users
-
Log in to workforce management web page.
-
Navigate to Manage User Screen by clicking Manage Users button on top right corner of Manage Workforce Screen.
-
Click Edit button in the top right corner.

-
Click Create User in the top right corner.

-
Enter User Details:
-
Required Fields: First Name, Last Name, Username, Email.
-
Optional Fields: Other fields can be left empty.
-
-
Press Save to add the new user.
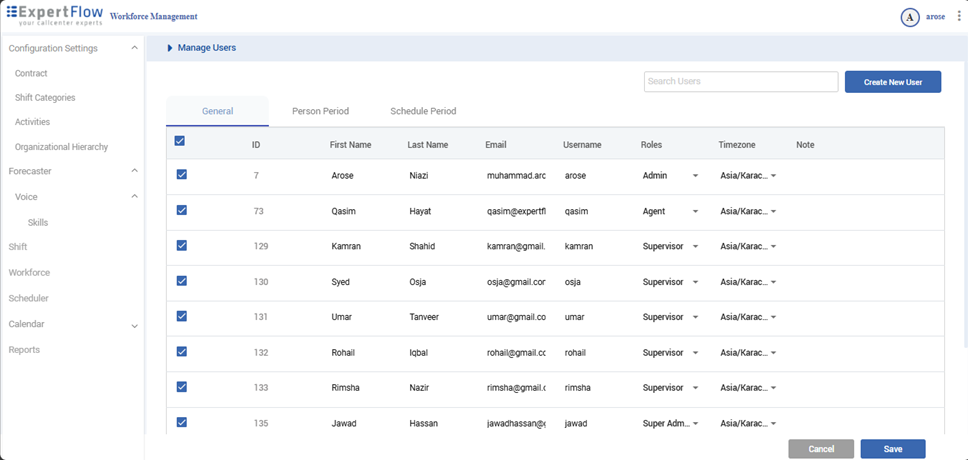
Updating User Information
Organization-Wide Updates
-
Log in to workforce management web page.
-
Click Manage Users next to the import button.

-
Click Edit in the top right to enable editing.

-
Modify User Info:
-
Update user details.
-
Check multiple users to apply changes to all selected.
-
-
Press Save to confirm updates.
Team-Specific Updates
-
Hover over a team in the tree view and click the Open icon button.
-
Click Edit in the top right to enable editing.

-
Modify User Info:
-
Update user details.
-
Check multiple users to apply changes to all selected.
-
-
Press Save to confirm updates.
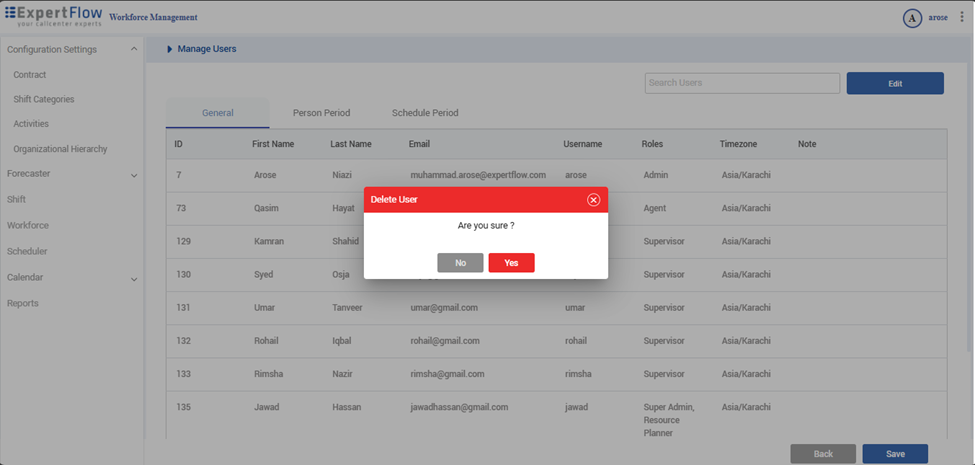
Deleting Users
-
Go to manage users Screen using.
-
Hover over the desired user.

-
Click the Delete icon and confirm the action.
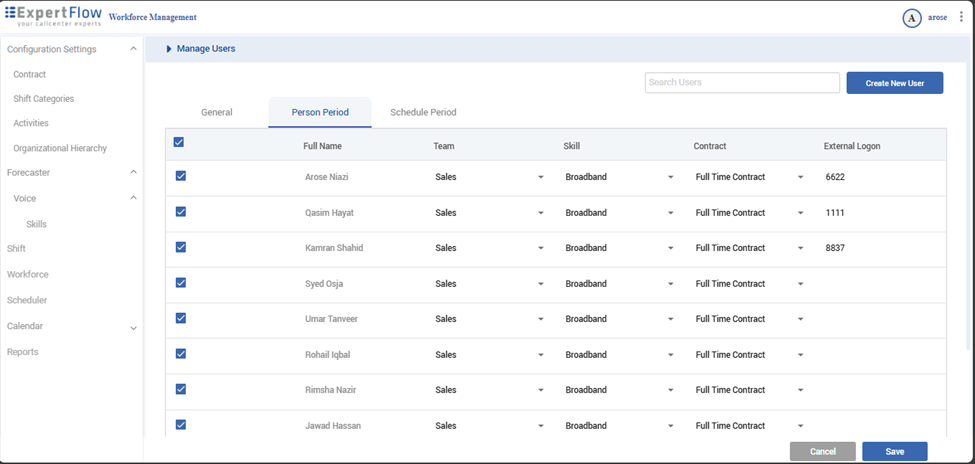
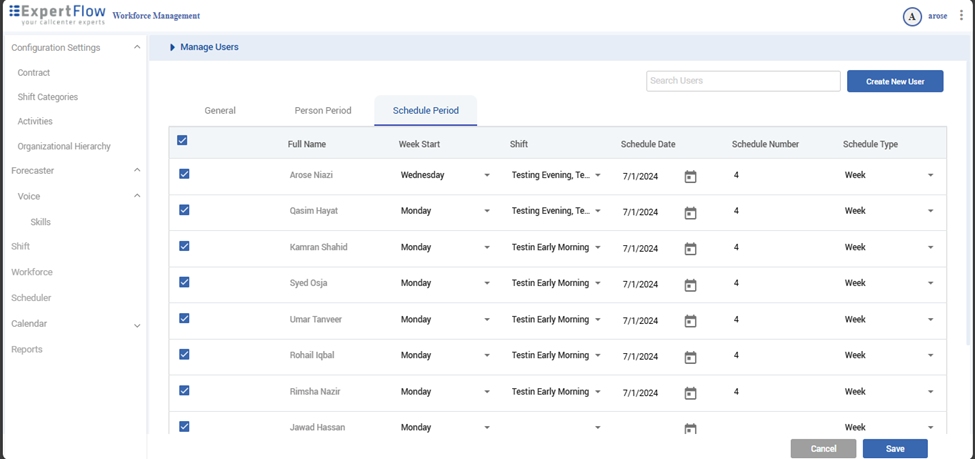
Viewing List of Users
-
User Table:
-
In the manage user screen, view all user information in a table format.
-
Importing Users
-
Click Import in the top right corner.
-
Select and upload an Excel file with user information to load users.
-
Select users to upload
-
Press Save
Scheduler Module
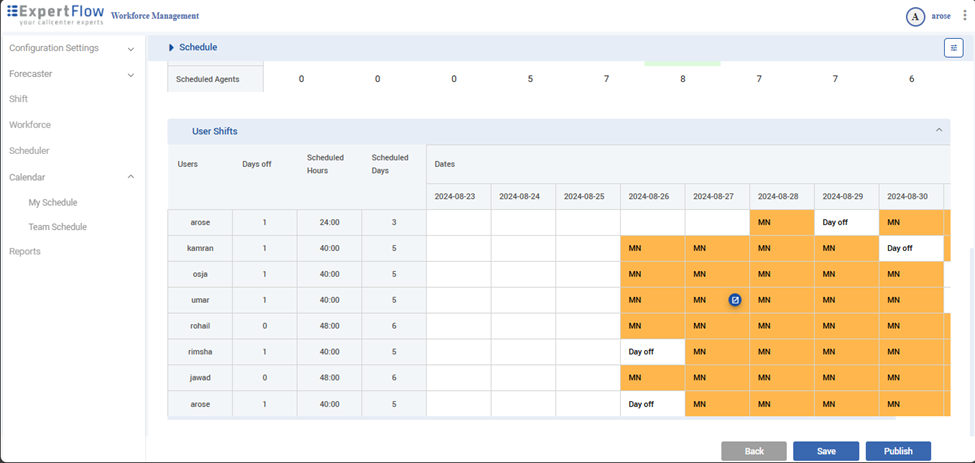
The Scheduler module is a critical component of the WFM application, enabling managers to create, view, and manage shift schedules for teams. The Scheduler is designed to handle complex scheduling needs, allowing users to define shifts based on various parameters, such as employee availability, skill sets, and forecasted call volumes. The module uses a tree view structure to organize teams and their schedules, making it easy to navigate and select the appropriate team for scheduling. Once a schedule is created, it can be saved for future adjustments or published, which updates the calendars of all affected employees. The Scheduler is a powerful tool for ensuring that the right people are in the right place at the right time, optimizing workforce efficiency and reducing scheduling conflicts.
Creating Schedules for Teams
Accessing the Scheduler Module
To access the Scheduler Module, follow these steps:
-
Log in to workforce management web page.
-
Navigate to the side navigation menu.
-
Select "Scheduler" from the list of available modules.
Tree View Structure
The Scheduler Module organizes teams and schedules using a tree view structure with the following levels:
-
Organization Level: This is the root node representing the entire organization.
-
Team Level: These are the second-level nodes, each representing a specific team within the organization.
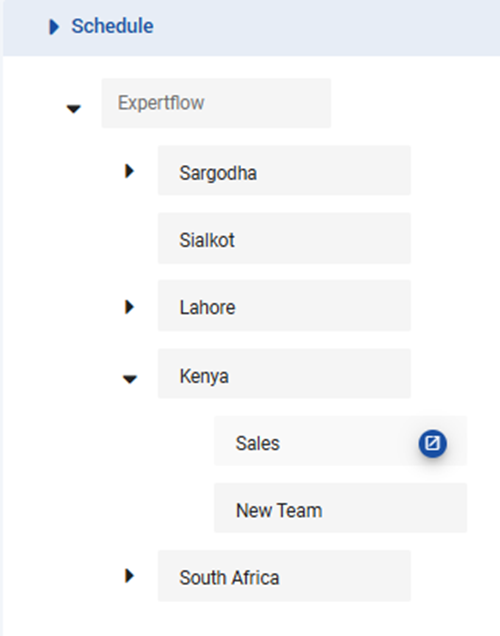
Creating a Schedule
To create a schedule, proceed with the following steps:
-
Log in to workforce management web page.
-
Access Schedule module by selecting Schedule from Side Menu.
-
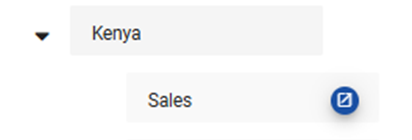
Hover over the desired team in the tree view.
-
Click on the icon button that appears next to the team name.
-
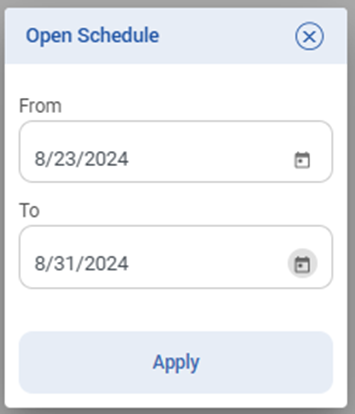
A pop-up dialog will appear, allowing you to configure the schedule.
-
Choose the start and end dates for the schedule using the provided date selectors.
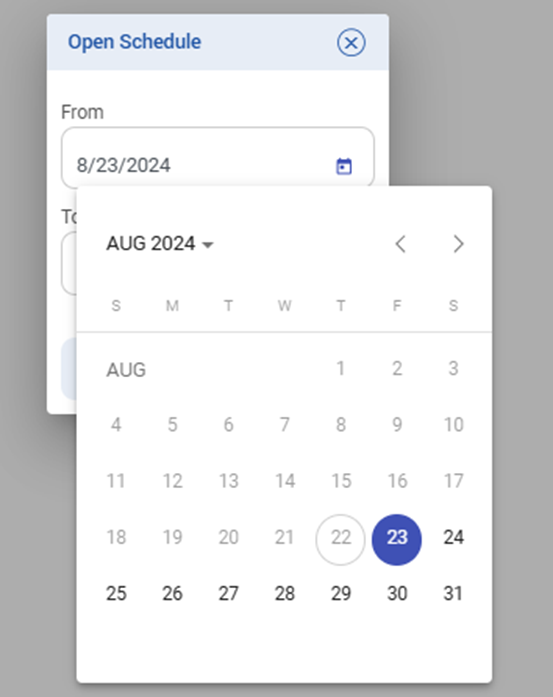
-
Once the dates are selected, click "Apply" to proceed.
-
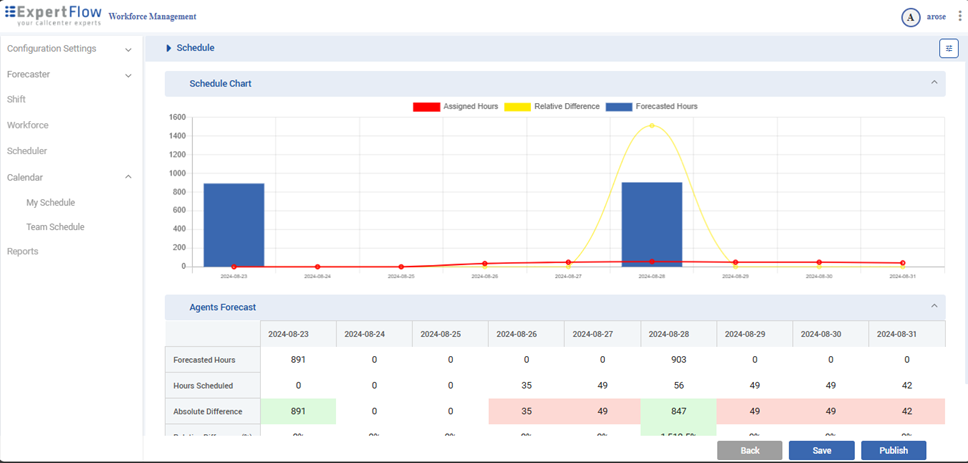
Viewing or Generating a Schedule:
-
If a schedule already exists for the selected dates, it will be displayed automatically.
-
If no schedule exists for the selected dates, you can generate a new one:
-
Click on the "Filter" button located in the top right corner.
-
This will open a date selection dialog.
-
Select the desired dates and click "Apply" to generate the new schedule.
-
-
Saving or Publishing the Schedule:
-
After generating the schedule, you have two options:
-
Save: Save the schedule for future access and modifications.
-
Publish: Publish the schedule, which will update the calendars of all affected agents.
-
-
By following these steps, you can efficiently create, view, and manage schedules for teams within the Scheduler Module.
Calendar Module
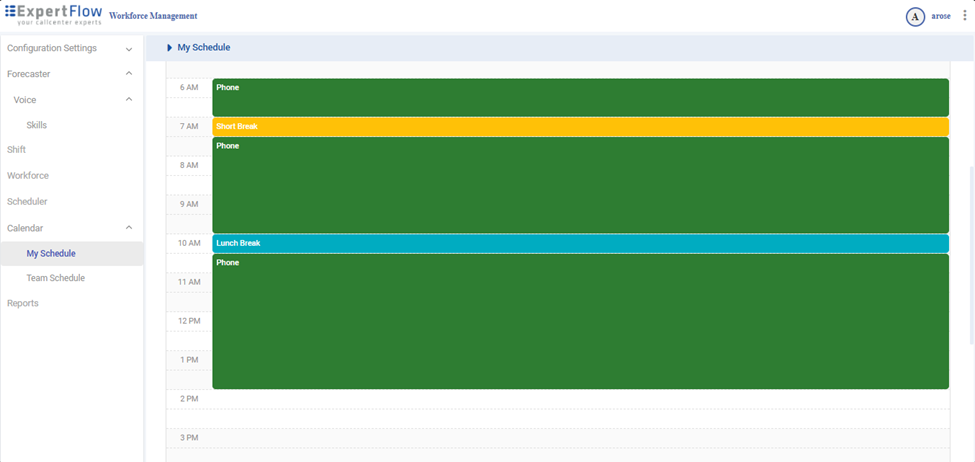
The Calendar module provides a visual representation of shift schedules, offering both agents and managers an easy way to view and manage work schedules. The Calendar is divided into two main views: My Calendar and Team Calendar.
-
My Calendar allows individual agents to see their assigned shifts, with options to view the schedule by day, week, or month. This personalized view helps agents stay informed about their work commitments and plan accordingly.
-
Team Calendar gives managers a broader view, showing the schedules of all team members. Depending on their permissions, users can also view the schedules of other teams within the organization. The Calendar module includes features such as date navigation and search functionality, making it simple to find specific schedules and users. By providing a clear and accessible overview of shift assignments, the Calendar module helps ensure that all team members are aligned with the organizational schedule, contributing to smoother operations and better time management.
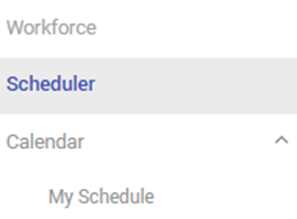
Accessing the Calendar Module
To access the Calendar Module:
-
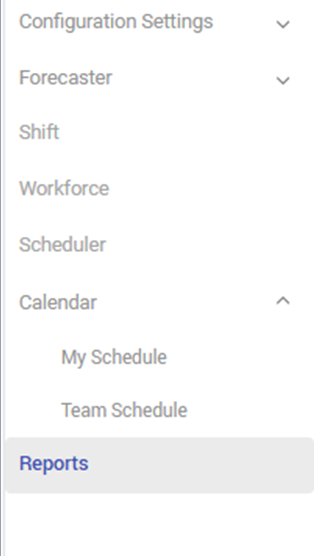
Navigate to the side navigation menu.
-
Select "Calendar" from the available options.

The Calendar Module is divided into two sub-sections:
-
My Calendar
-
Team Calendar
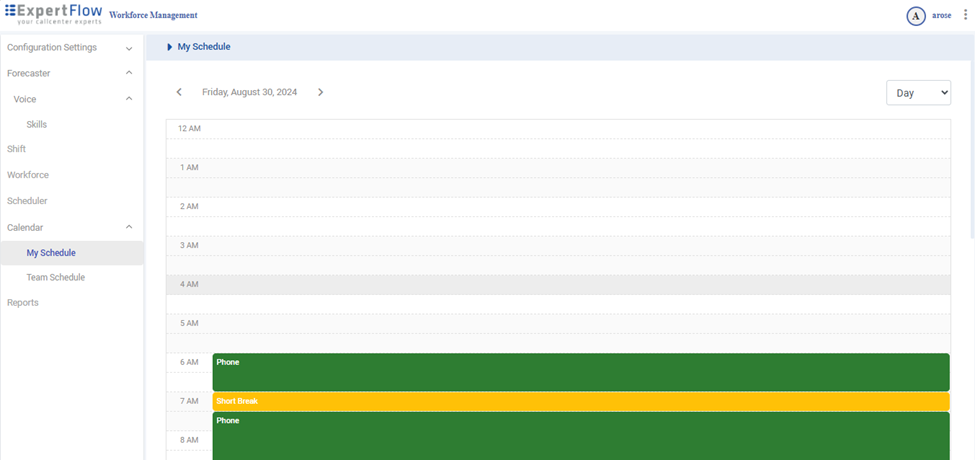
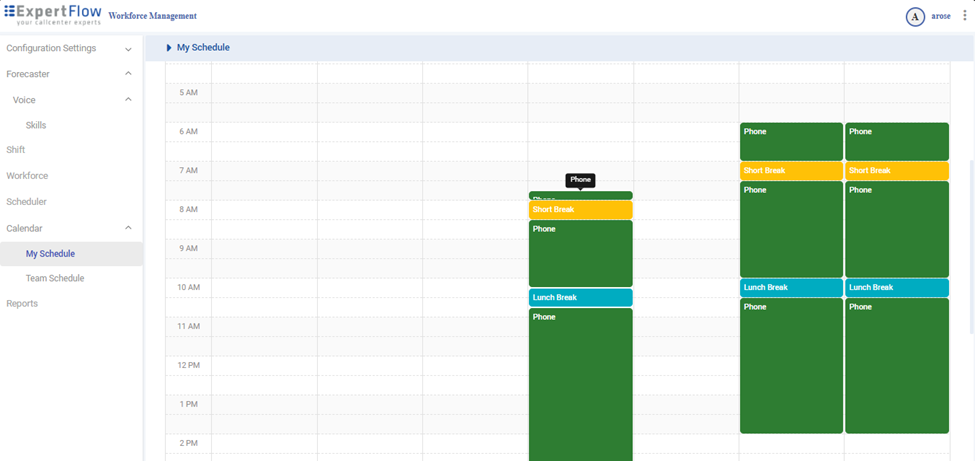
My Calendar
-
Viewing Agent Shifts:
-
The calendar displays the shifts assigned to the agent for each day.
-
-
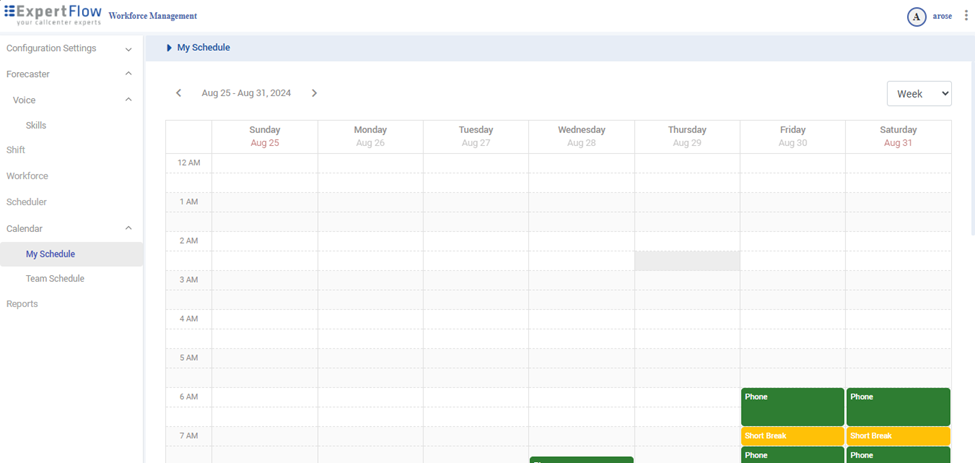
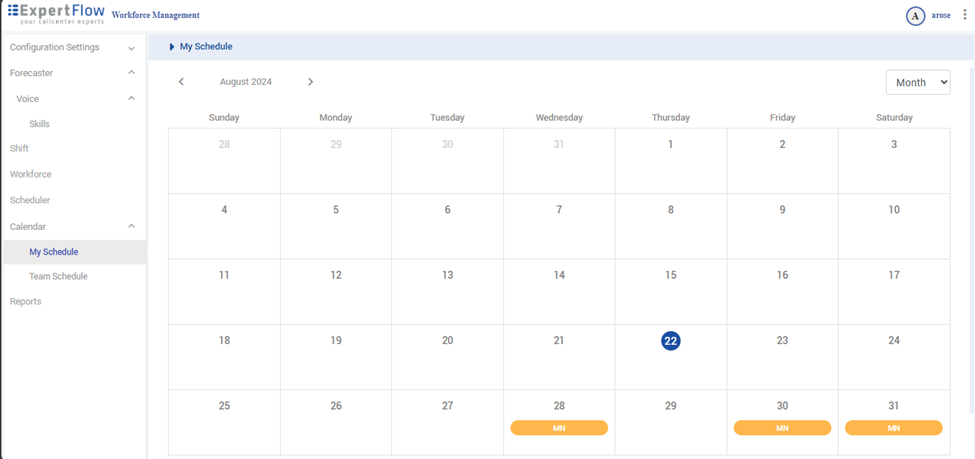
View Options:
-
Located at the top right corner:
-
Switch between Monthly, Day, and Week views.
-
-
Located at the top left corner:
-
Navigate to specific dates using the date selection controls.
-
-
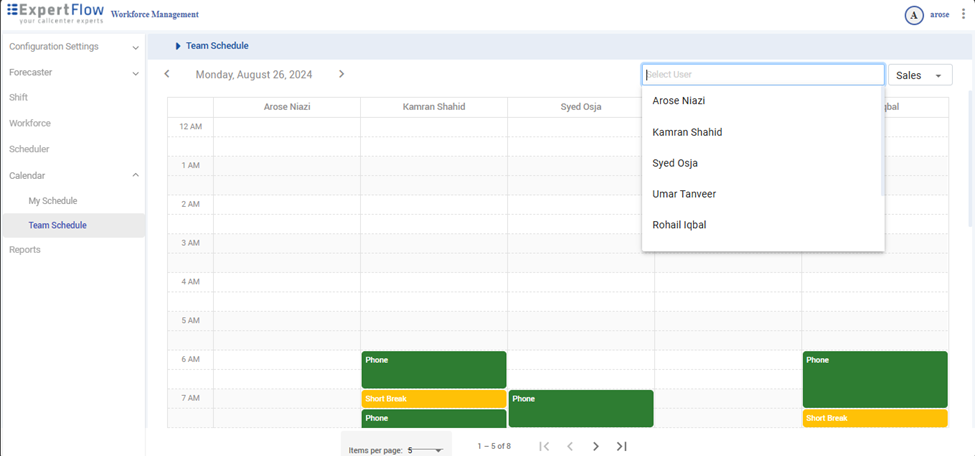
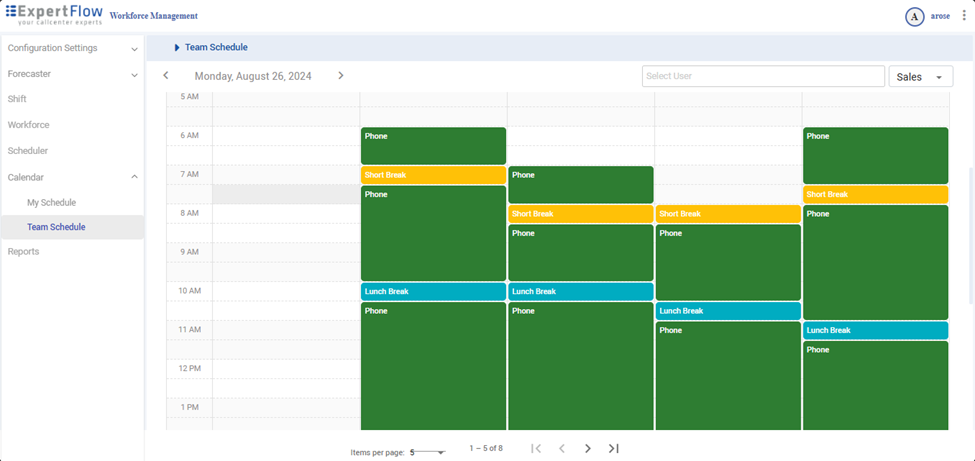
Team Calendar
-
Viewing Team Schedules:
-
The calendar displays the schedules of all team members.
-
Agents can only view the calendar of their own team.
-
Other users, depending on their permissions, can view the calendar of any user within the organization.
-
-
Selecting a Team:
-
Located at the top right corner:
-
Select the team whose calendar you wish to view from a dropdown menu.
-
-
-
Searching for a Specific User:
-
A search bar is located beside the team selection dropdown.
-
Use this search bar to find and view the calendar of any specific user within the organization.
-
-
Navigating Dates:
-
Located at the top left corner:
-
Use the navigation controls to choose the desired date for viewing schedules.
-
-
By utilizing the Calendar Module, agents and other users can efficiently view and manage their schedules, as well as navigate through different time periods to check shifts and availability.
Reporting Module
The Reports section of the application provides users with the ability to generate, view, and export various reports related to workforce management. These reports are essential for tracking performance, analyzing trends, and making data-driven decisions. Users can customize reports by applying specific filters to focus on relevant data, and once generated, reports can be exported in different formats for further analysis or distribution. The flexibility and depth of the reporting tools allow managers to gain insights into key metrics, ensuring that the organization’s workforce is optimized for efficiency and effectiveness.
-
Generating Reports
-
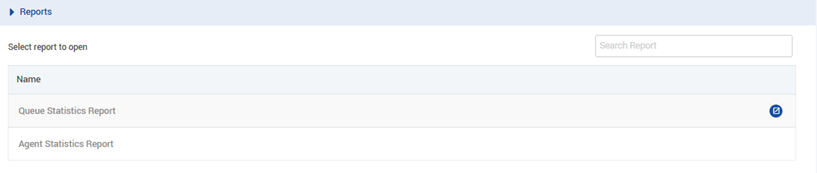
Open Reports module by selecting Reports from side navigation.
-
-
From list of Reports hover over Report you want to open.
-
Click on Open to open report.
-
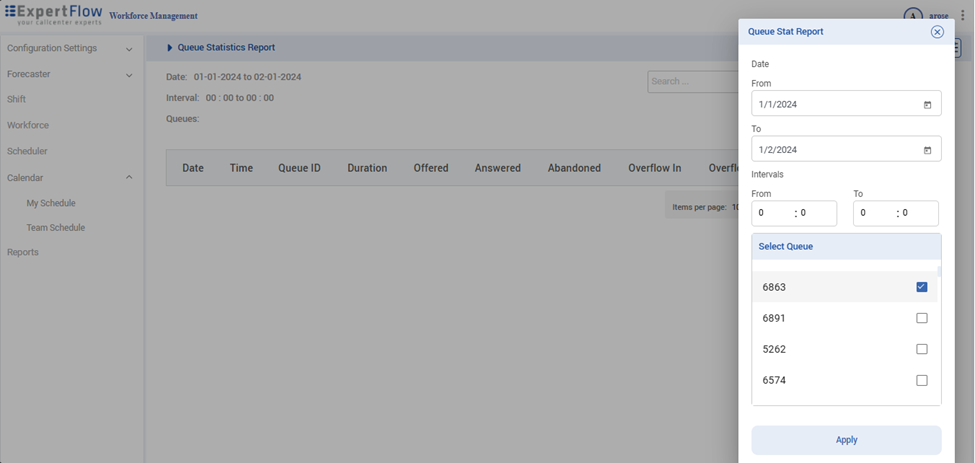
Set filters for Report.
-
Click Apply to open report.
-
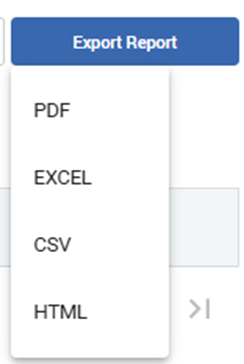
Exporting Reports
-
After Generating report click on Export button on top right corner.
-
Select format for export file from drop down list.
-
Report will be exported and saved in downloads folder.
-