Hybrid Chat agent is an HTML5 based embeddable application built using Agent API.
The app can be loaded on any compatible browser with the agent app URI and can be embedded in Cisco Finesse, Microsoft CRM, and any other HTML5 supported applications.
With CRM integration, Hybrid Chat can:
- Push chat activities to CRM
- Auto-login with CRM user login
- Automatic customer screen-pop on chat arrival, etc., assuming that CRM APIs are available.
All of this can be done for instance in the case of Dynamics Unified Service Desk and Dynamics CRM Web through CIF (Channel Integration Framework). The same can be done for SAP Hybris using the SAP Widget Integration.
On this page
Logging in
Hybrid chat agents will have different login experience based on the agent's primary interface:
Cisco Finesse
When integrated with Cisco UCC and embedded inside Cisco Finesse, the agent login to Hybrid Chat happens automatically with login to Cisco Finesse. During the login process, an agent sees a spinner showing automatic login progress.
-
When integrated with Cisco UCC, the agent should always login from within Cisco Finesse. If, for any reason, direct web login is desired, use the agent
UserIdinstead ofUserName.
-
Finesse SSO-enabled agents login is not yet supported due to a system limitation.
SSO-enabled Finesse agent can't subscribe to Finesse XMPP subscription necessary for media blending. Cisco doesn't support Finesse subscription for SSO-enabled agents yet. https://community.cisco.com/t5/contact-center/how-to-create-xmpp-connection-with-an-sso-enabled-agent/m-p/3867405#M10026
Web Browser/Dynamics CRM
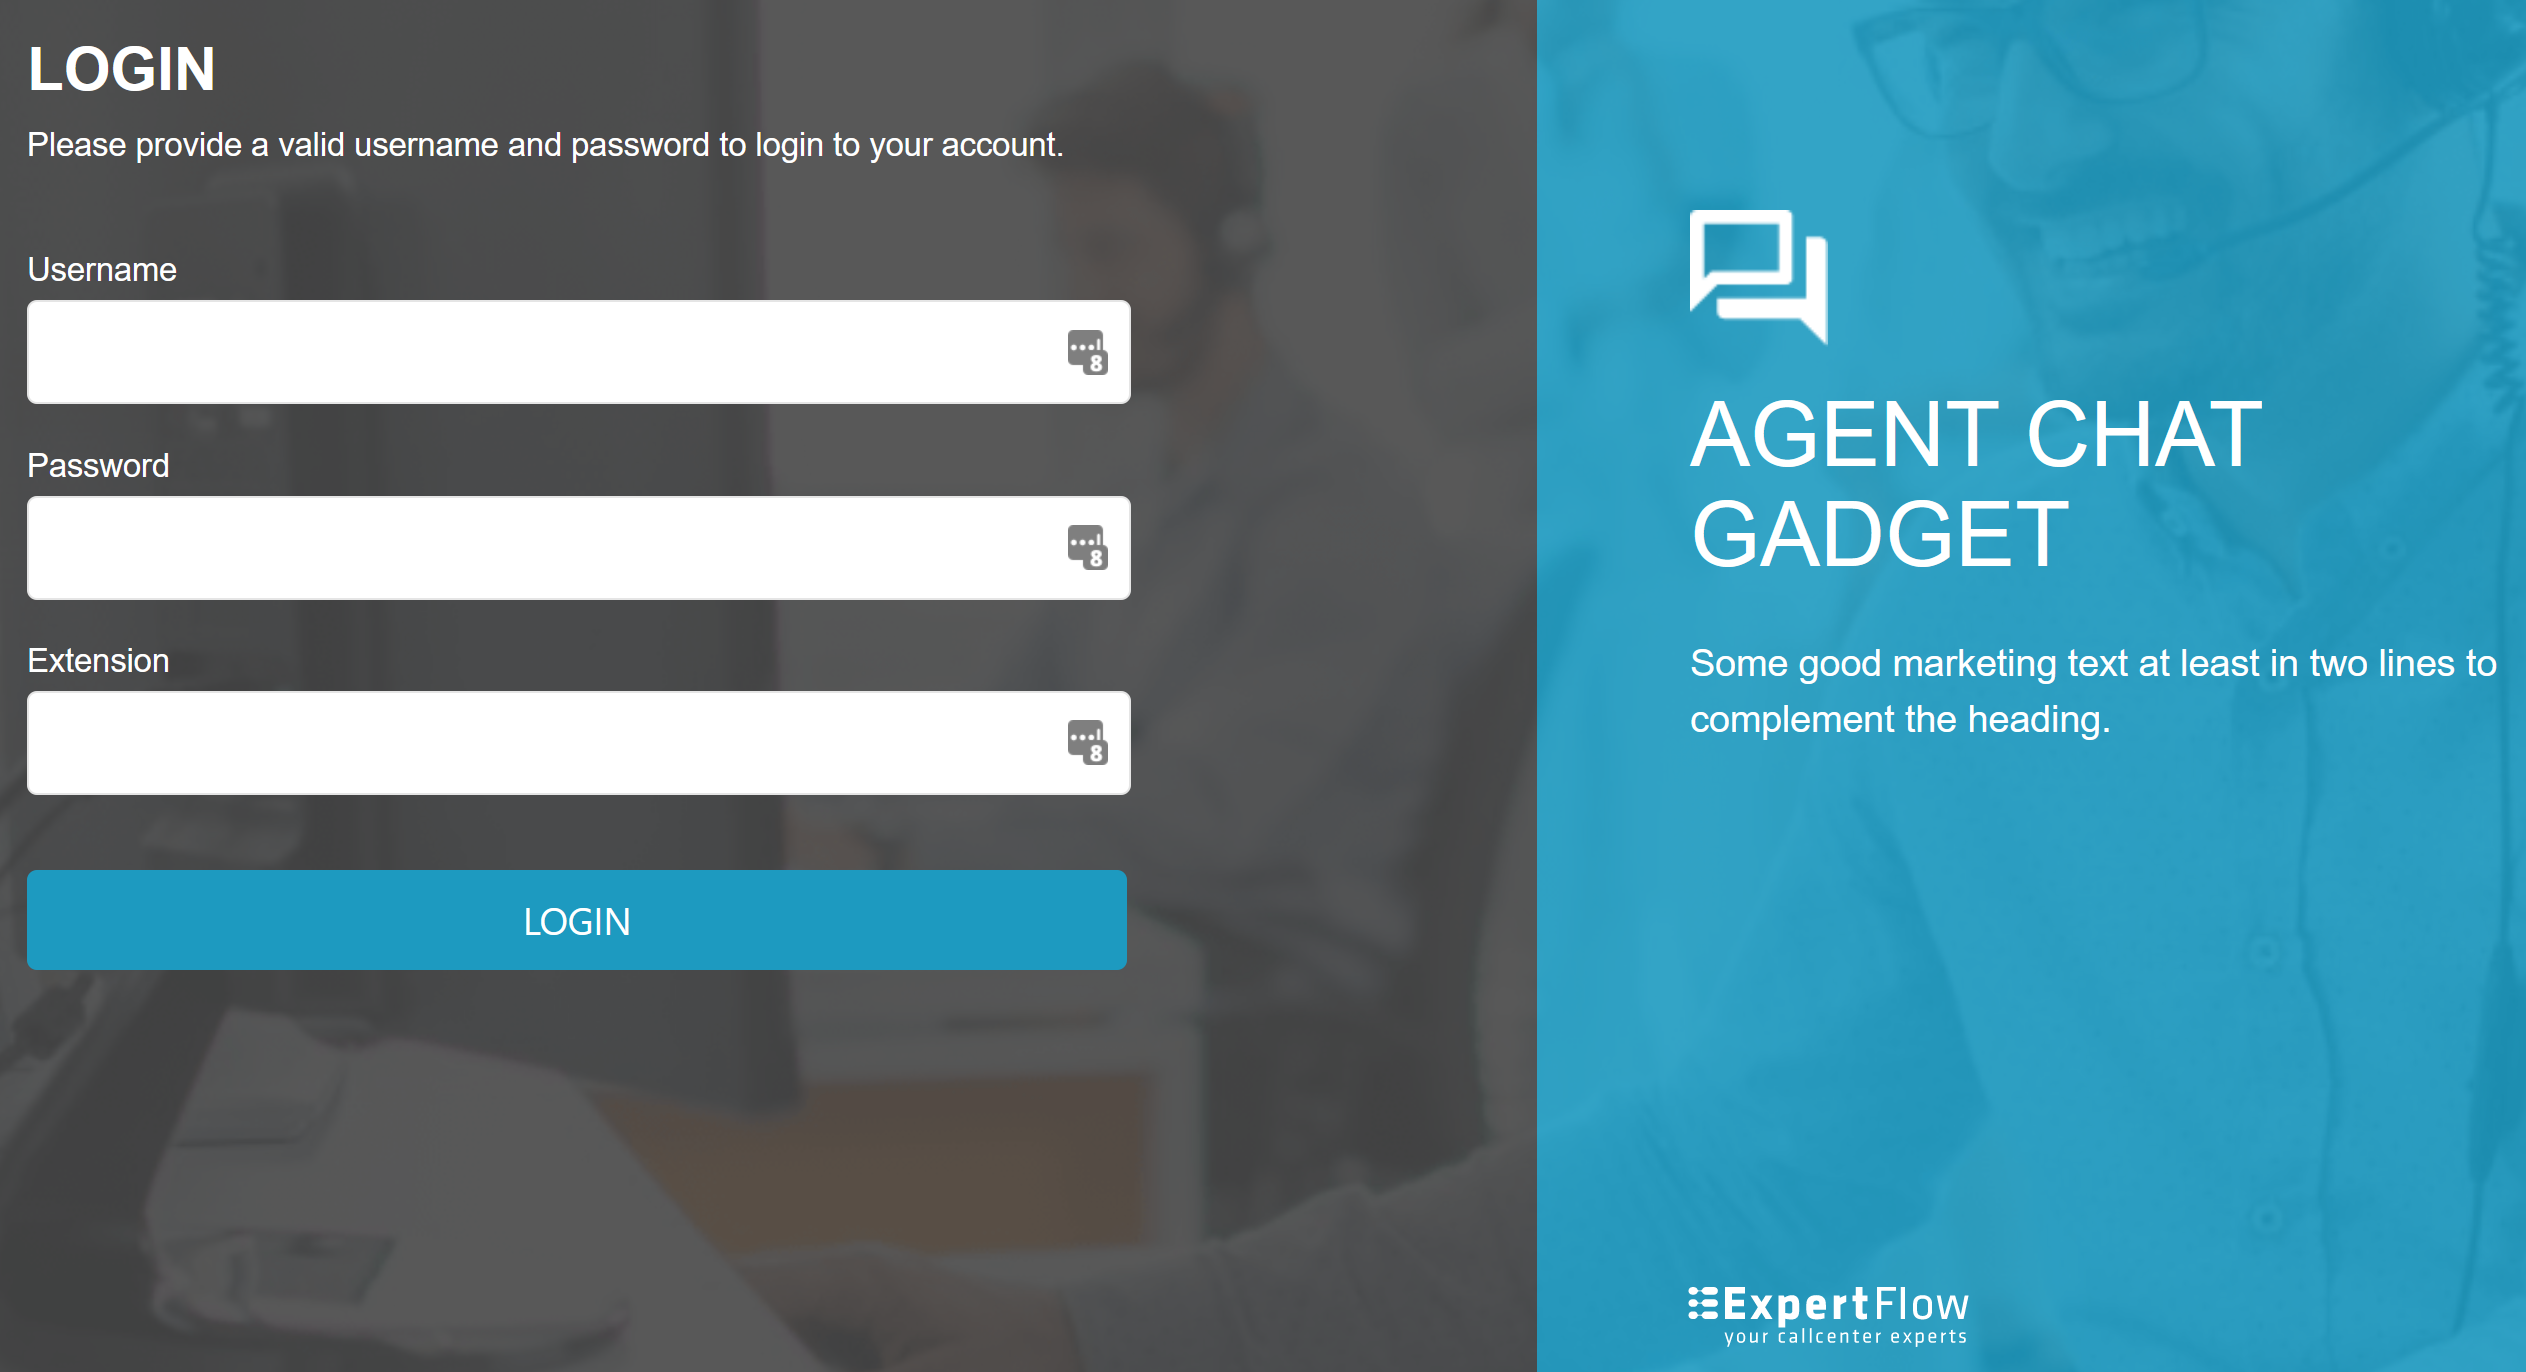
When used as a standalone application inside the Web browser, or embedded inside the Microsoft Dynamics CRM, a login screen is displayed asking agents to enter the user credentials manually to complete the login process.
The extension will only be visible when the Hybrid chat is integrated with the Cisco contact center. If used as a standalone solution, the login form will only require a username and password.
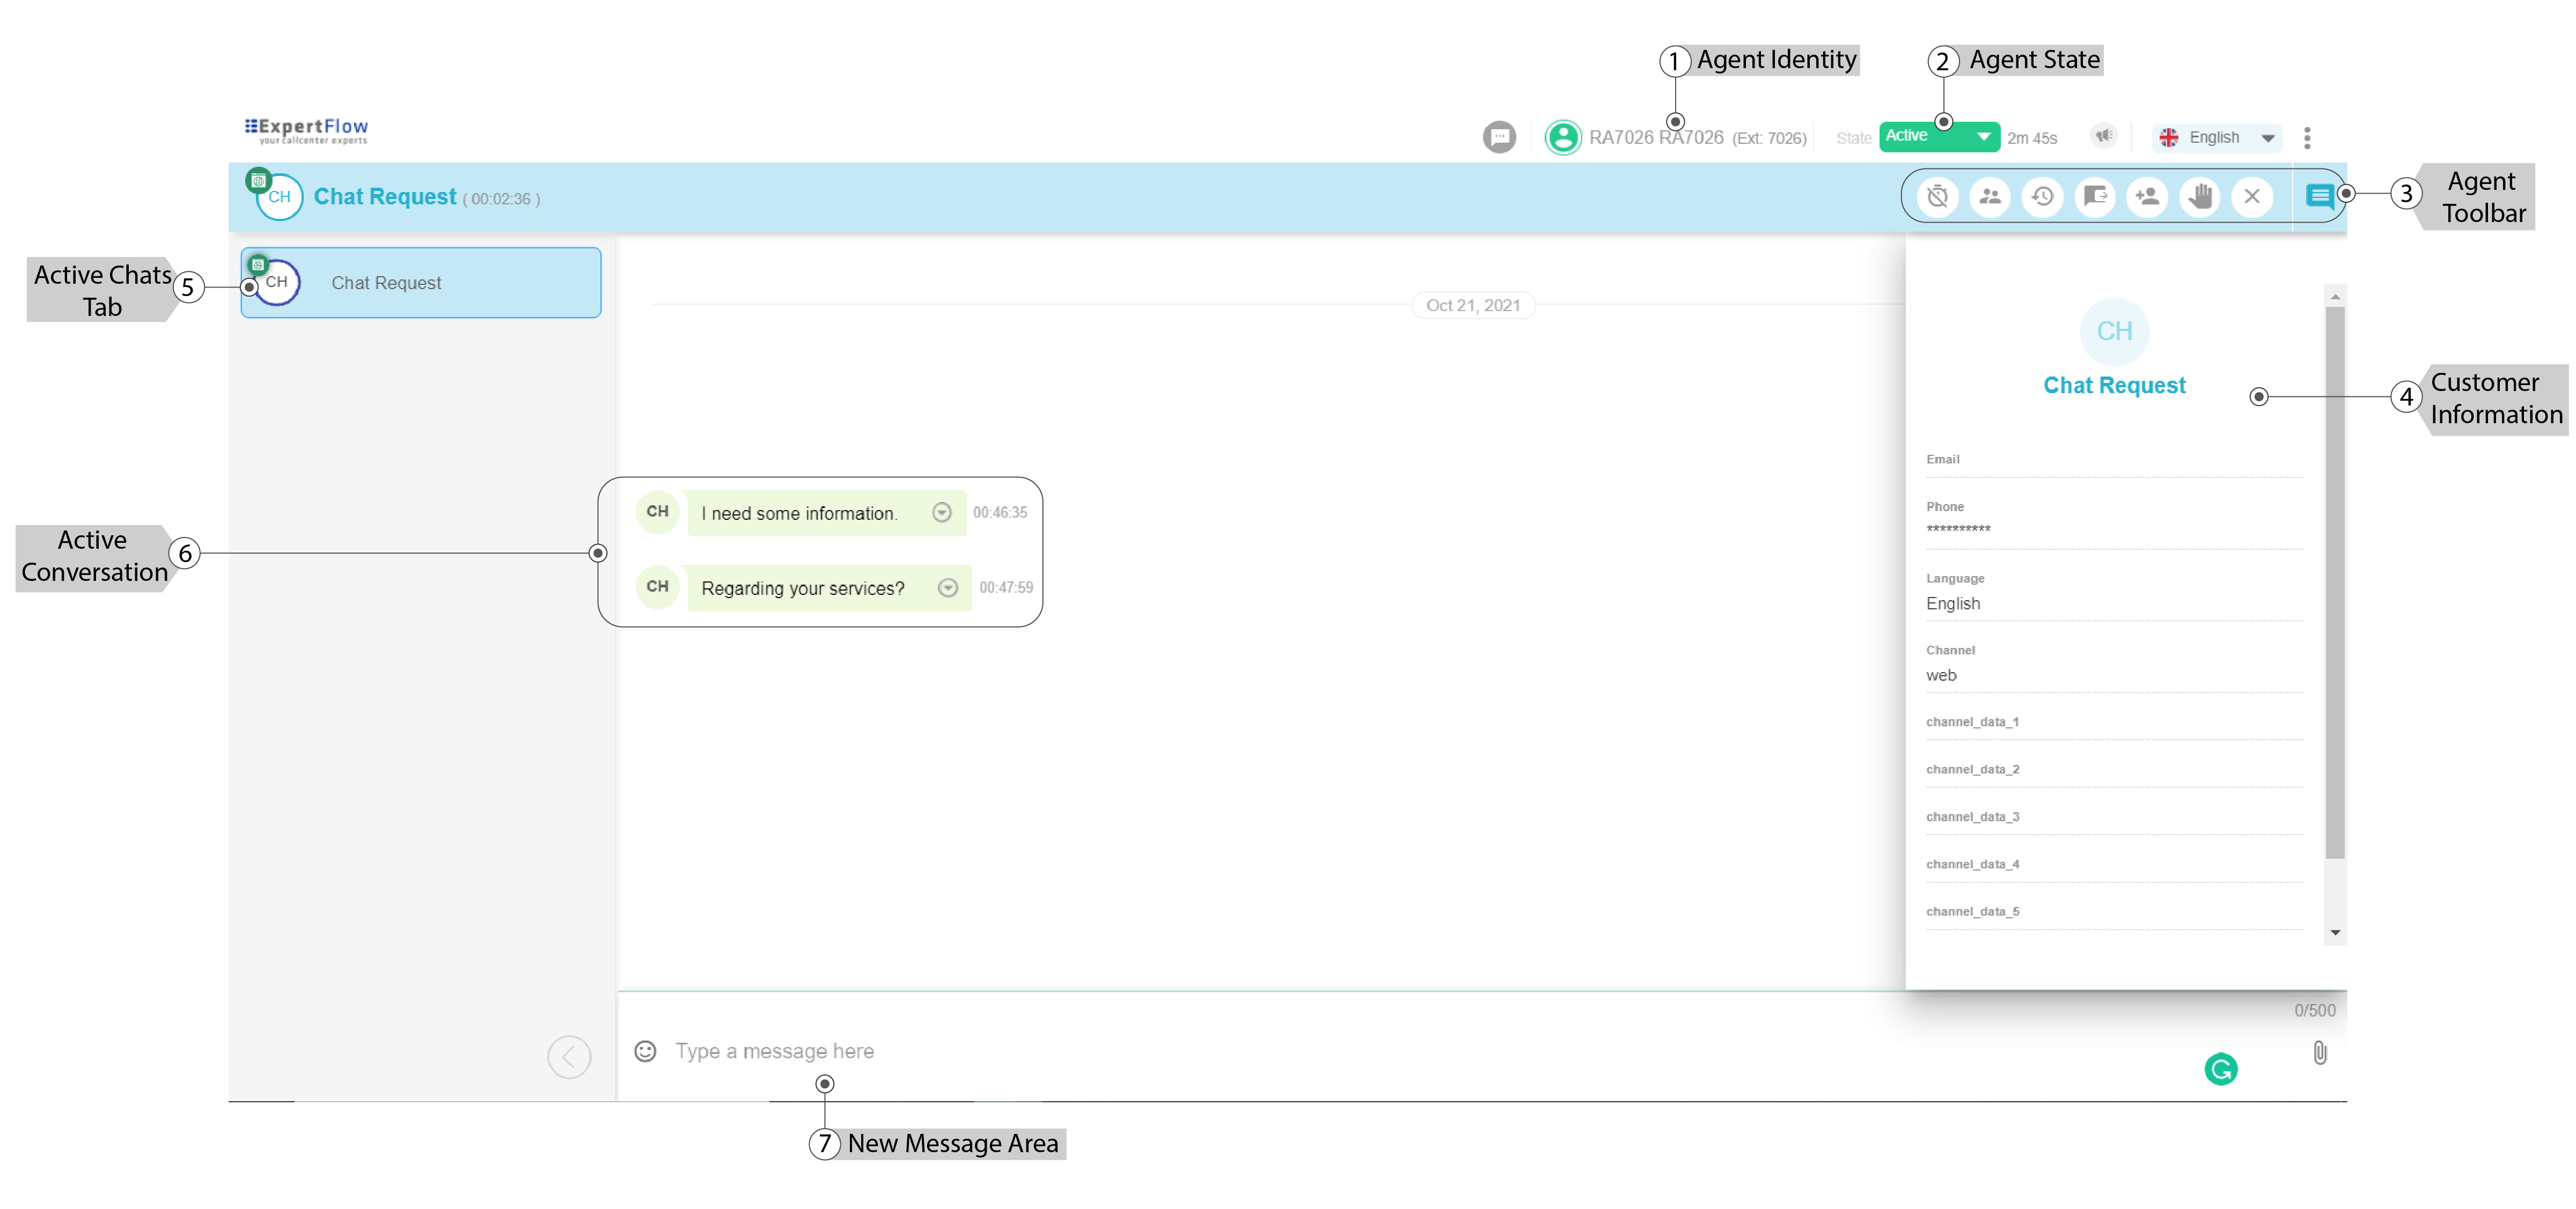
Exploring the Agent app
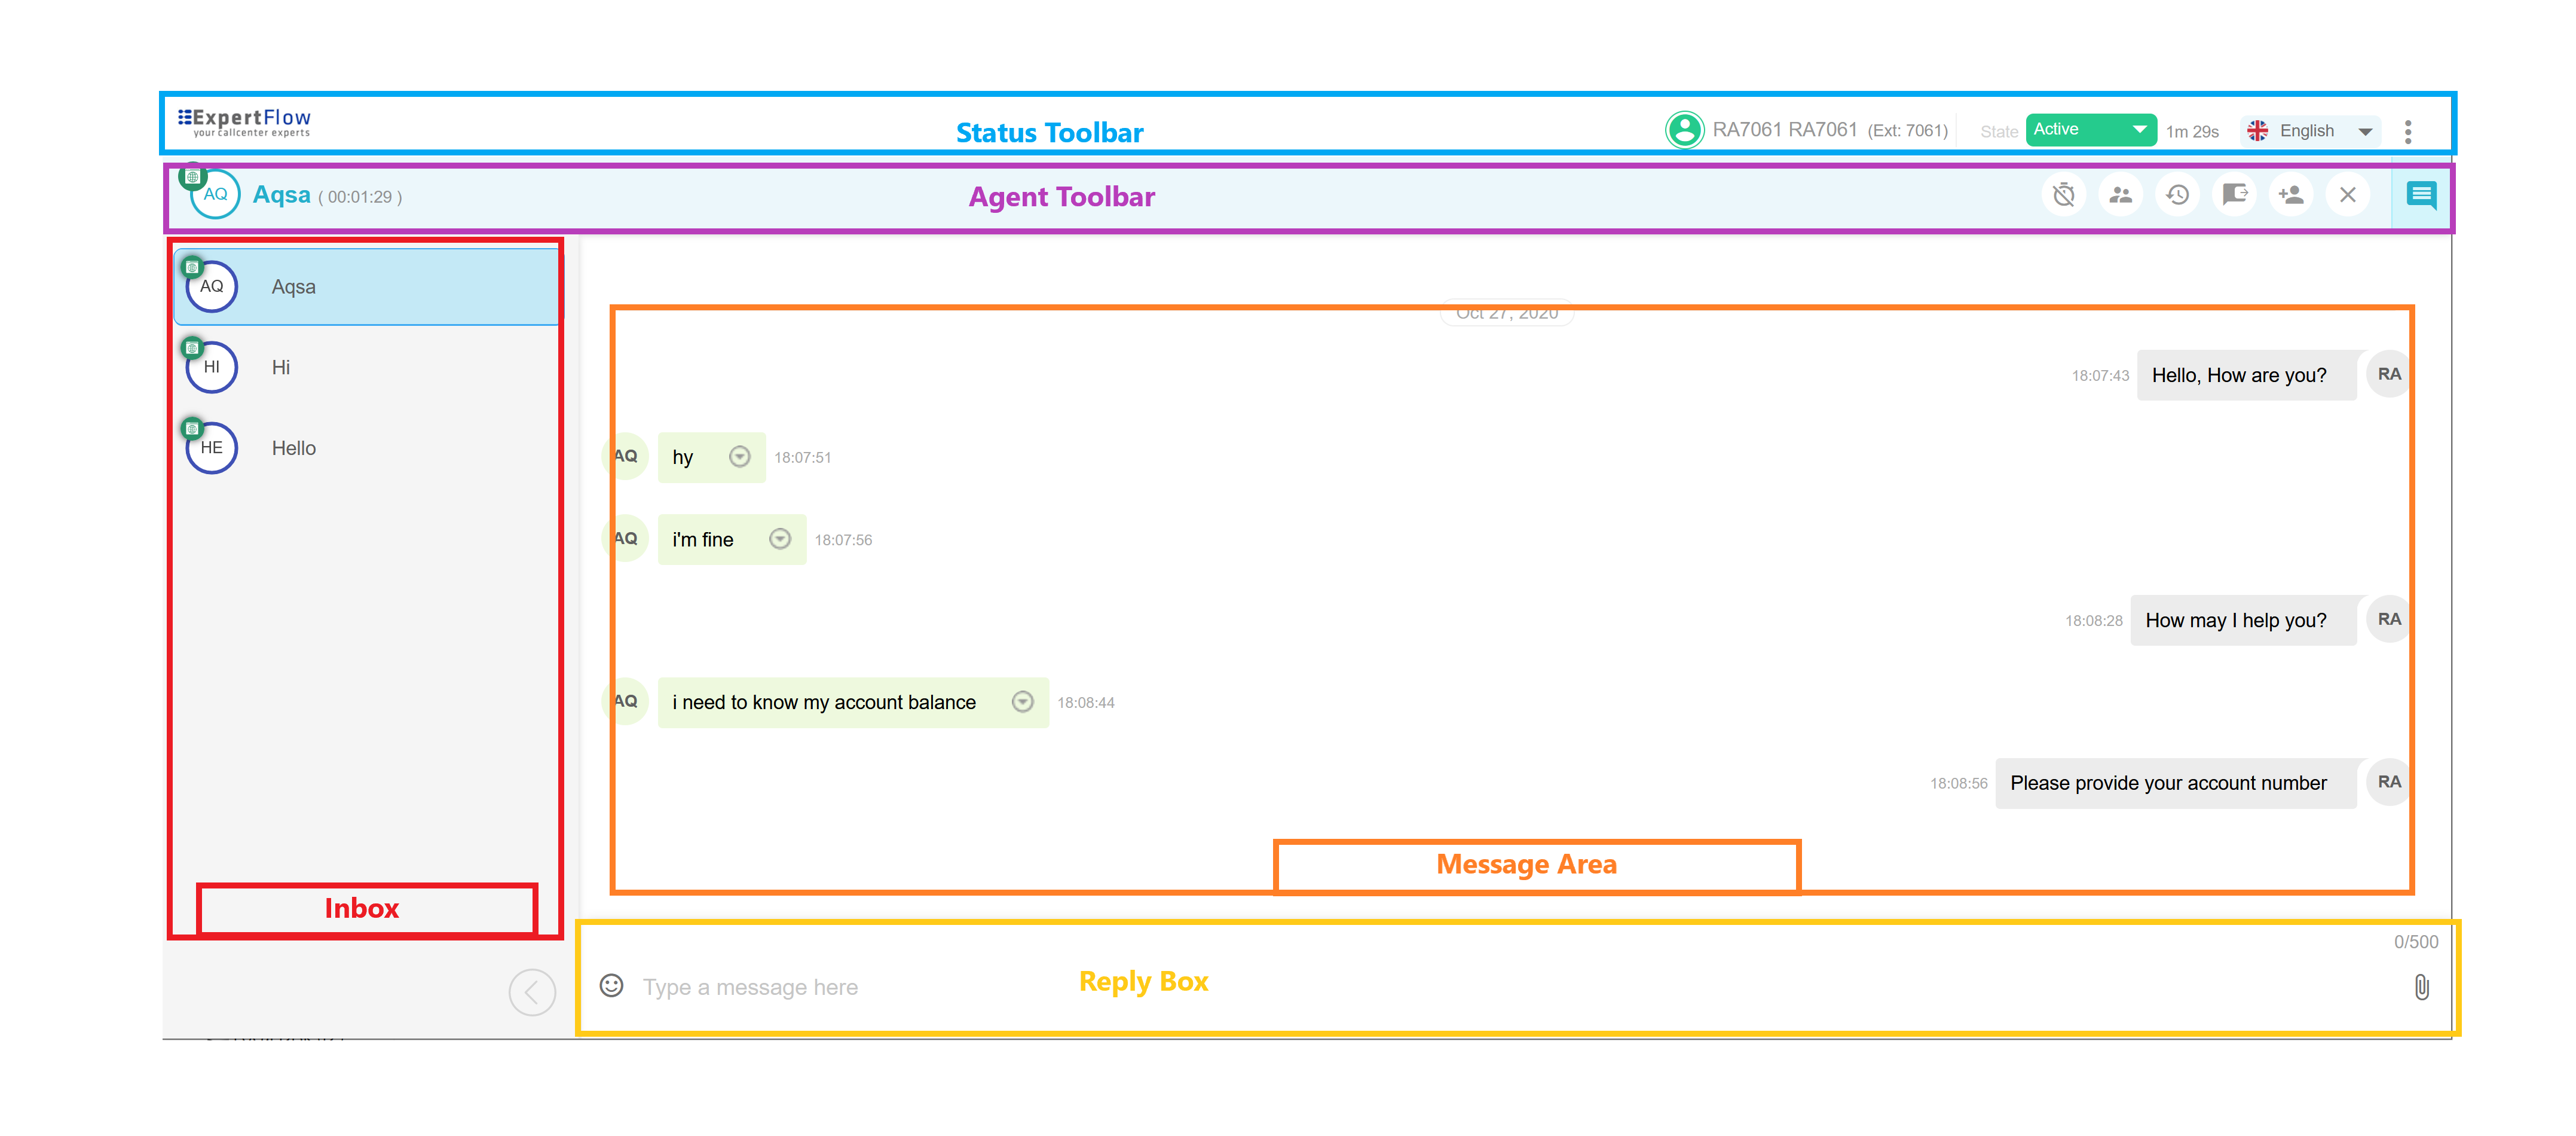
The gadget's UI has five functional areas from where the agent can perform different functions.
|
Status Toolbar |
The status toolbar shows information such as agent name, agent status, chosen interface language. |
|---|---|
|
Agent Toolbar |
This toolbar includes basic functions that the agent can perform during the chat, i.e. Hand Raise, Transfer Chat, Leave Chat, etc. |
|
Inbox |
This area shows the active chats the agent is handling. This makes it easier to switch between the chats so that no customer has to be kept waiting. |
|
Message Area |
This is where the customer's messages appear. The messages also have a drop-down option, which opens canned messages and bot suggestions. |
|
Reply Box |
The reply box is where the agent types their answer. It also provides options for file attachments and emojis. |
Status Toolbar
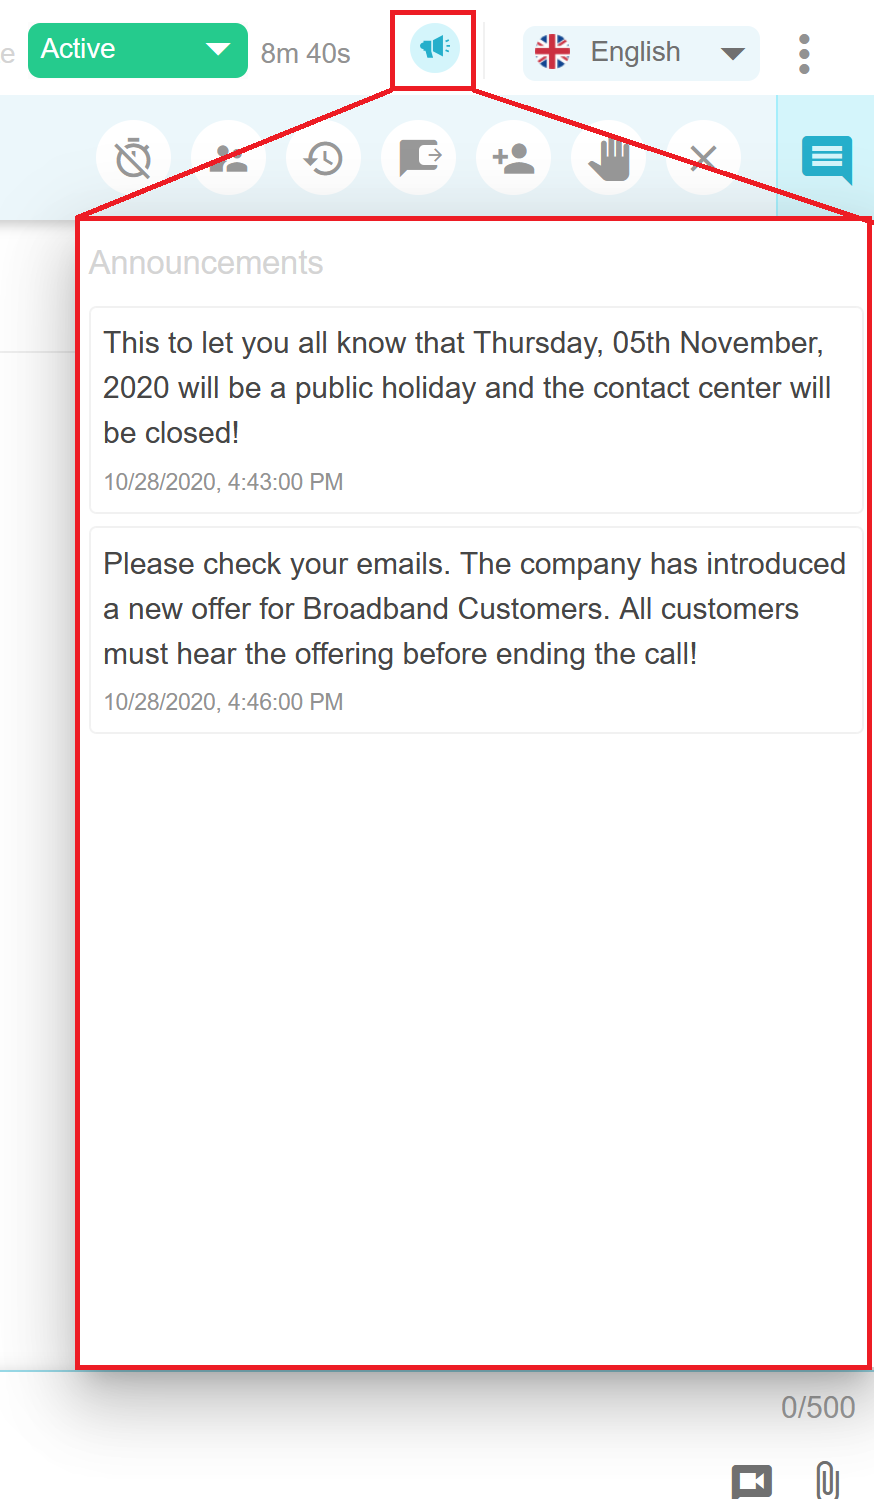
As soon as the agent logs into the Hybrid chat agent gadget, he will see the following screen, displaying the Status Toolbar:

The status toolbar has the following information/functionalities:
-
Agent Information

-
Agent State with timer

-
Announcements

-
Language
-
Logout
Agent Information
The status toolbar displays the agent's name attached to
Agent State
After logging in, the default agent state is Not Ready. To receive incoming chats, an agent has to set their state to Ready via the state-change dropdown. Agent's state is automatically switched to:
-
Active when he is handling one or multiple chats
-
Busy when he has received the maximum number of allowed chats
While being Active or Busy, the agent can select the Not Ready state from the state-change drop down, which will set his state to Pending Not Ready, where he will not receive more chats and his state will automatically be changed to Not Ready as soon as all the ongoing chats are ended.
Announcements
Announcements created and sent from the supervisor are displayed here. When an announcement is made by the supervisor, the agent gets a pop-up notification. Once the notification is dismissed, all active announcements can be seen by clicking on the announcement button.

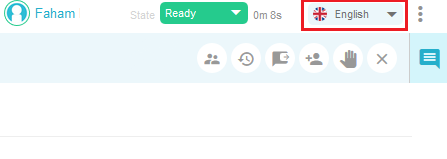
Change Language
Language drop-down allows agents to select their preferred language for the user interface. To change the language, click on the drop-down and select the desired language.
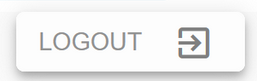
Logout
The agent can log out of the chat session by pressing the drop-down button at the top right corner. This option will be visible in NOT_READY state only.

Agent Toolbar
Agent toolbar lies just below the status toolbar and is used to perform actions during an ongoing chat. Following functionalities are available on the agent toolbar:
-
Accept Incoming chats

-
Stop Chatbot Timer

-
List of Participants in the chat.

-
Load Previous Conversation History

-
Transfer chat to to other agents

-
Conference chat

-
Hand Raise to Supervisor for help

-
End Conversation/Leave Conversation


-
Customer Info Tab

Accept Chat
Incoming new chat shows a pop-up notification on the agent interface, with an "Accept" button to accept the chat. If the agent does not accept an incoming chat within the configured time, the chat will be rerouted to another available agent.

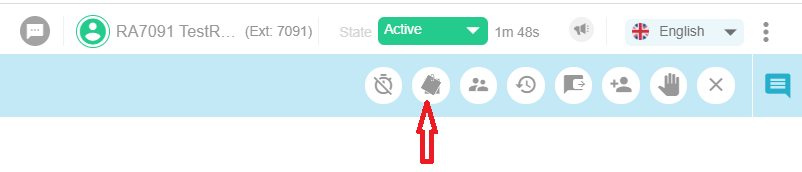
Stop Timer
If configured, a chatbot can send auto-responses on behalf of the agent if the agent doesn't respond to the customer within the configured time frame. Click on "stop timer" button to kill the chatbot's timer to auto-respond if you don't want to allow the chatbot to send a message on your behalf.

Wrap-up Notes
Agents specify wrap-up codes to indicate the purpose or outcome of an interaction. If enabled, then by clicking on the indicated icon on the agent gadget, a box is opened. The box contains a list of wrap-up codes, which the agent can click/type and can send against a customer's message, if any of them is once applied then it is not visible to be applied again within the same chat. An agent can send up to 5 wrap up messages at once. Agent can attach a note of up to 250 characters alongside the wrap up codes if required.
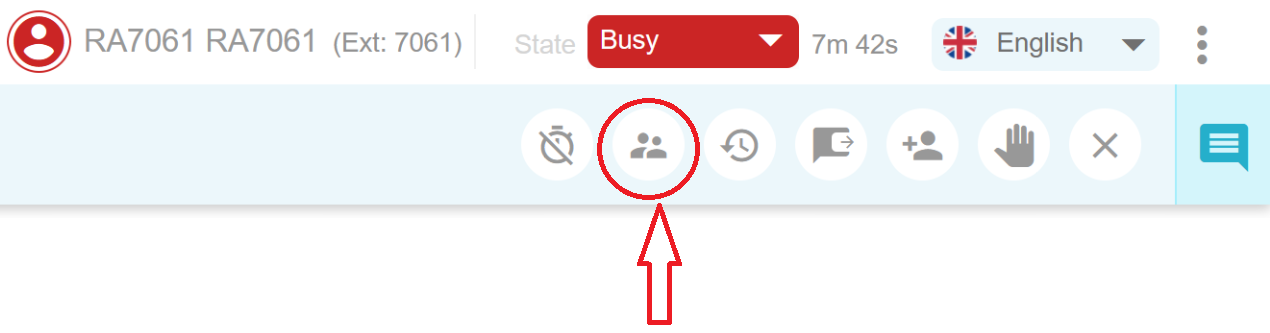
Participant List
Clicking this button shows the list of participants involved in the chat.
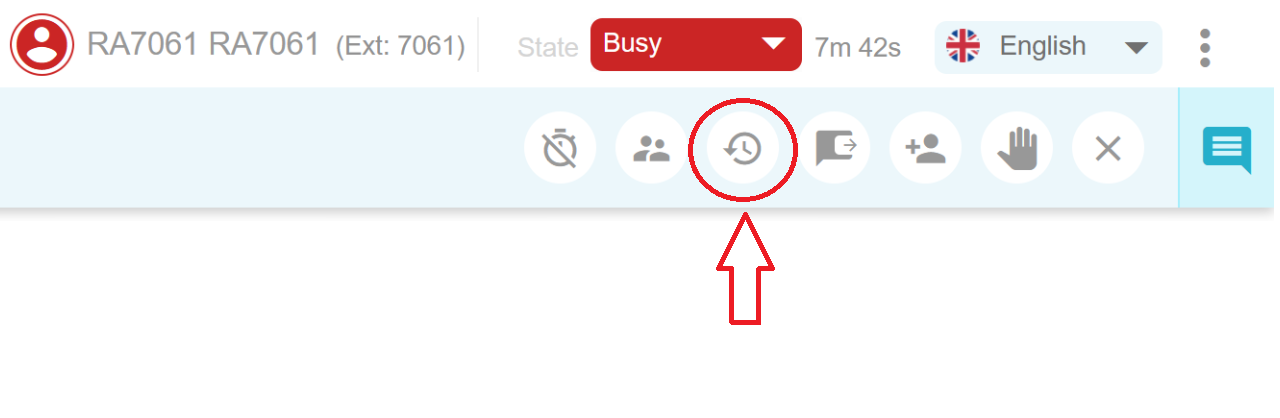
Load Conversation History
To load the agent's previous conversation messages, click on the load-history button from the toolbar. This will load customer's last x number of messages (configurable) if available. You may continue to click on this button to load more history messages.
Transfer Chat to Agent
To transfer a chat to another available agent, click on the transfer button. It will display the list of available agents. Selecting an agent will transfer the chat to that agent. As soon as the other agent accepts the chat, you'll automatically be removed from the chat.
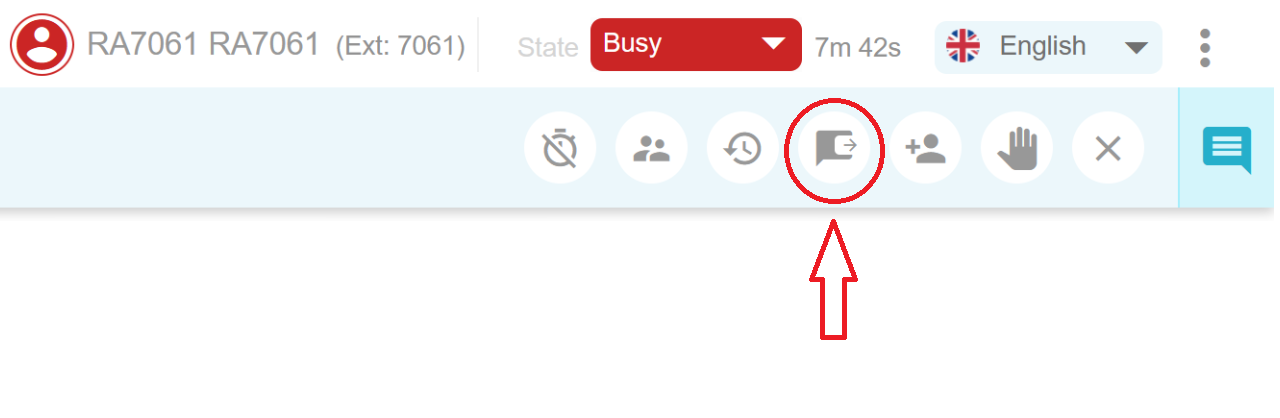
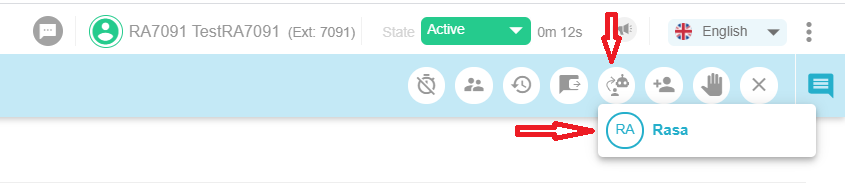
Transfer Chat to Bot
To transfer a chat to the bot, click on the icon as provided in the image. It will display the intent of the integrated bot. Select the enlisted intent, the chat is transferred to that bot with the specified intent. As soon as the chat is transferred to the bot, the chat disappears from the screen of the agent. This option can be enabled by giving any string name to the variable SURVEY_INTENT in Agent Gadget Environment Variables and can be disabled by leaving the variable empty.
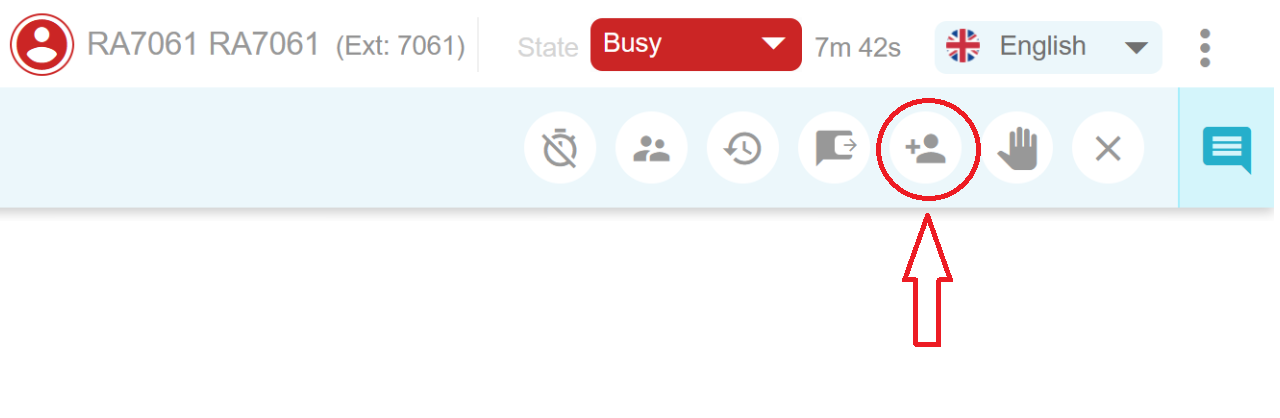
Add Participants / Conference
During an ongoing conversation, you may add more agents to convert customer-to-agent chat into a multi-party conference chat. To initiate a conference, click on the Add Participant button. A list of available agents will be displayed in the drop-down. The selected agent is added to the conference.
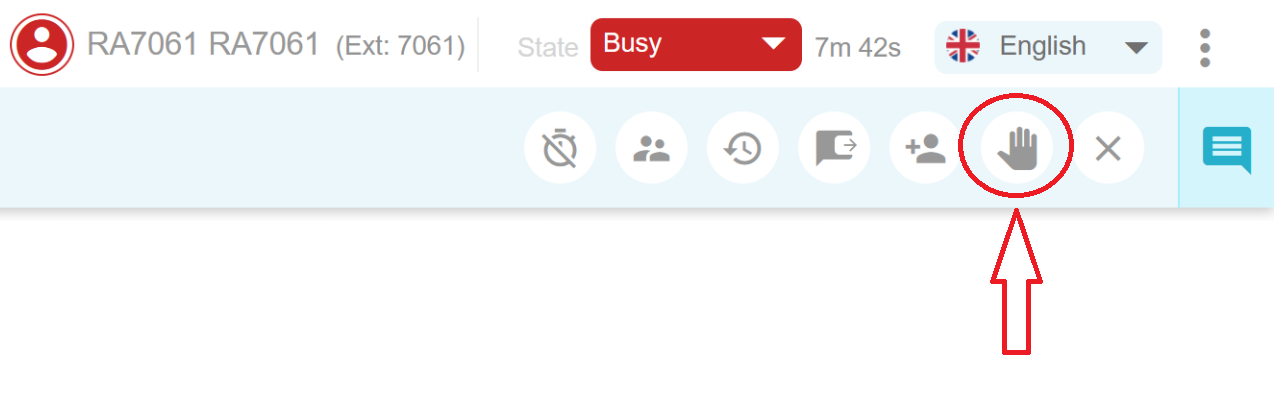
Hand-raise
Clicking on hand-raise allows you to ask the Supervisor for assistance. As soon as you click on the hand-raise option, a list of available supervisors will be displayed to choose from. When you select a supervisor, a notification will be sent to him.
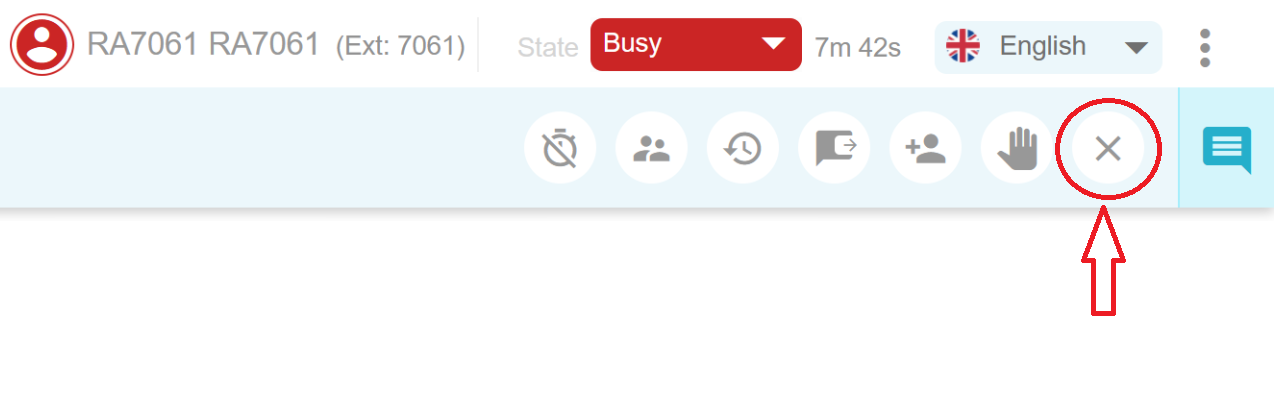
End/Leave Chat
The chat owner can end the conversation by pressing the End Chat button at any point in time.
If you have been added in a conference by another agent, you will only see a Leave Conversation button(
In case the customer ends the chat from his side, you will see a "customer left" notification and all chat controls will be disabled. You may then manually end the chat by clicking on the "End chat" button. Otherwise, the chat will automatically be closed after the time configured in the system.
Outbound SMS
Hybrid chat supports customer initiated SMS interactions known as Outbound SMS. Agents can initiate an SMS message from their toolbar by clicking the icon shown below, while they are logged in and are in any state. By clicking on the icon a dialog box is opened, where the agent enters the particular phone number, there intended message and then sends the message.

Customer Avatar
When the customer ends/leaves the chat, the customer avatar changes its color from white to grey, thus signaling the agent that the customer has left.
![]()
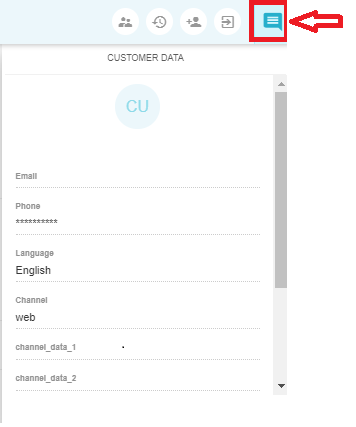
Customer Information from the Web Portal
The agent will have to click on the Customer Information tab to open it to view the customer information.
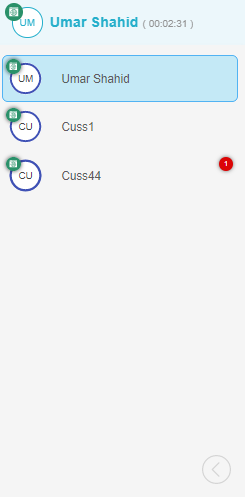
Inbox
A list of all ongoing chats is displayed here (depending upon the maximum concurrent chats configuration). You can click on any of the chat icons to select the required chat session and respond to the customer.
The selected chat session is highlighted by the blue box. You can minimize or maximize the toolbar using the arrow button at the bottom. Unread messages count is shown against each chat.

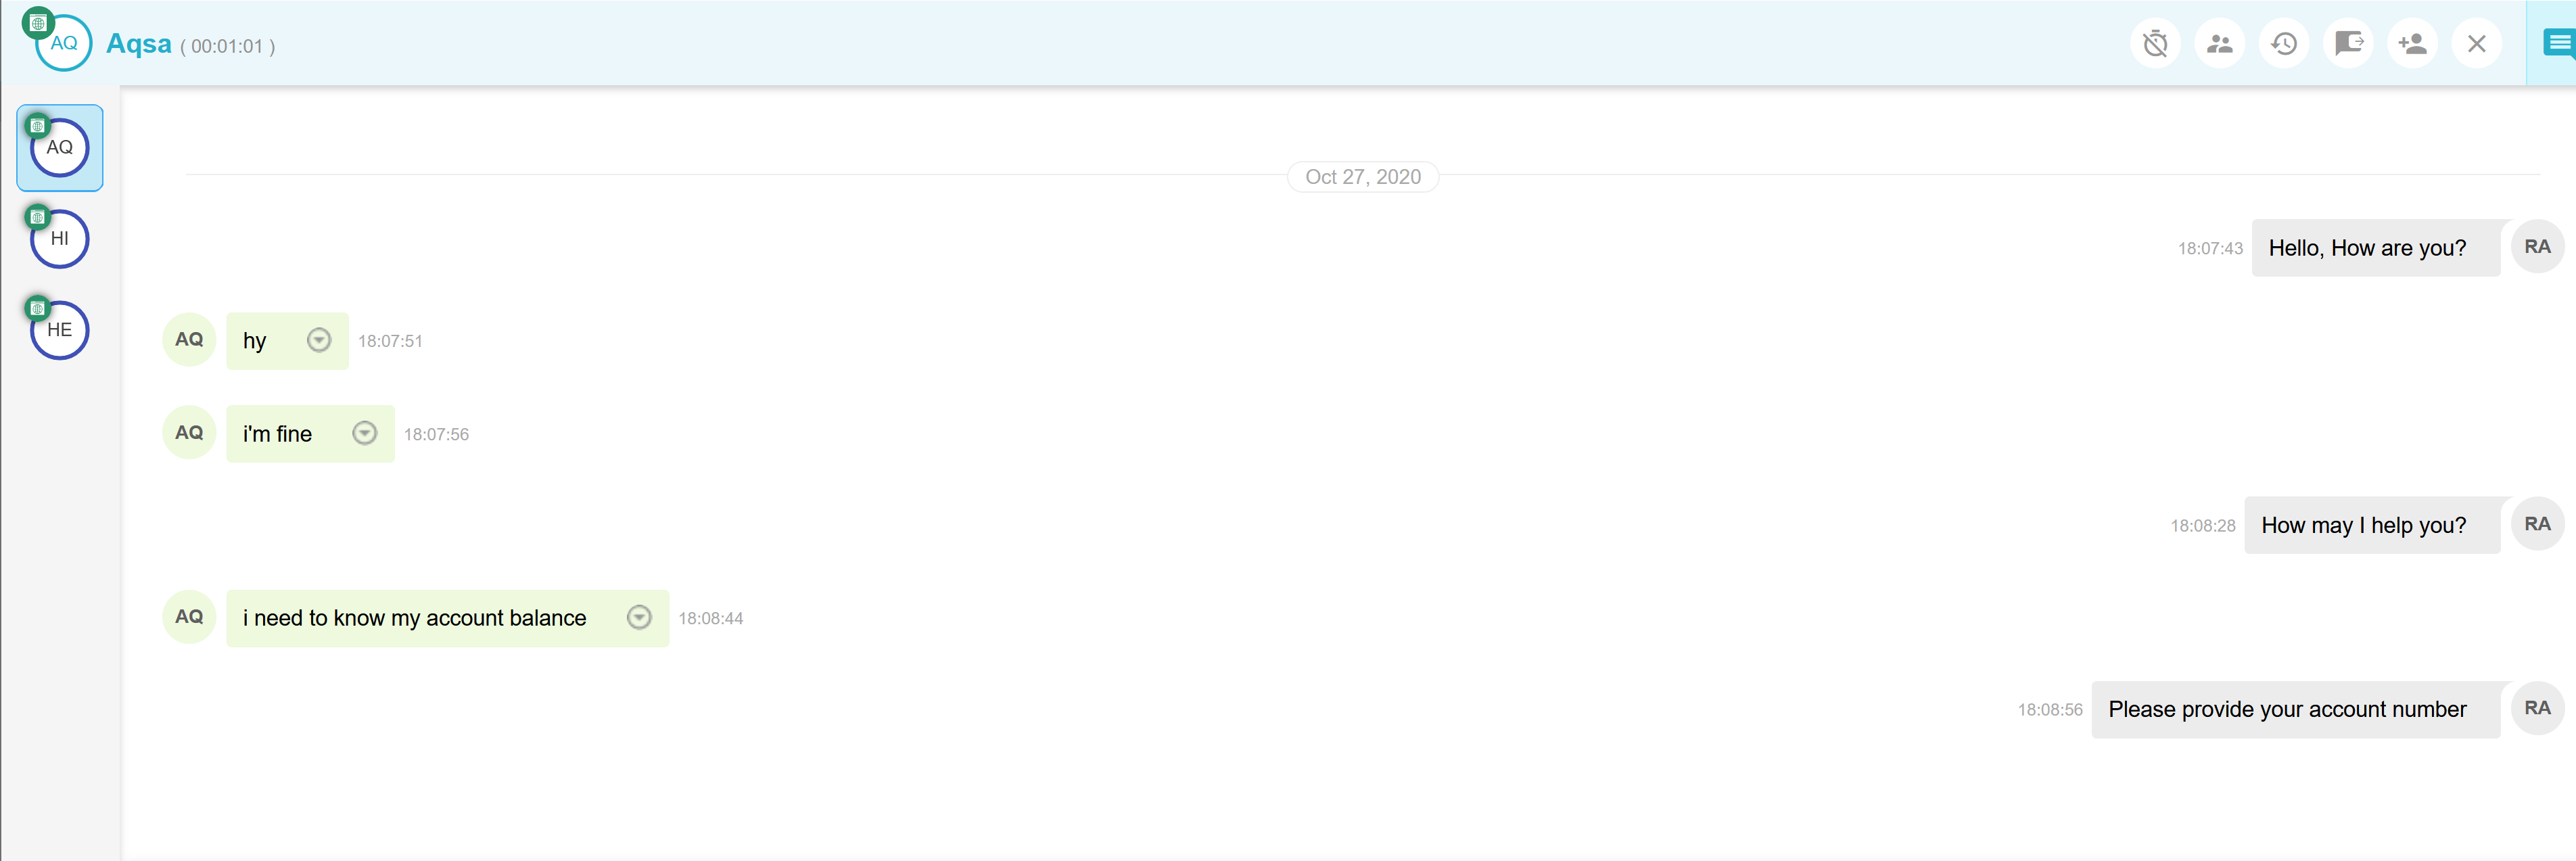
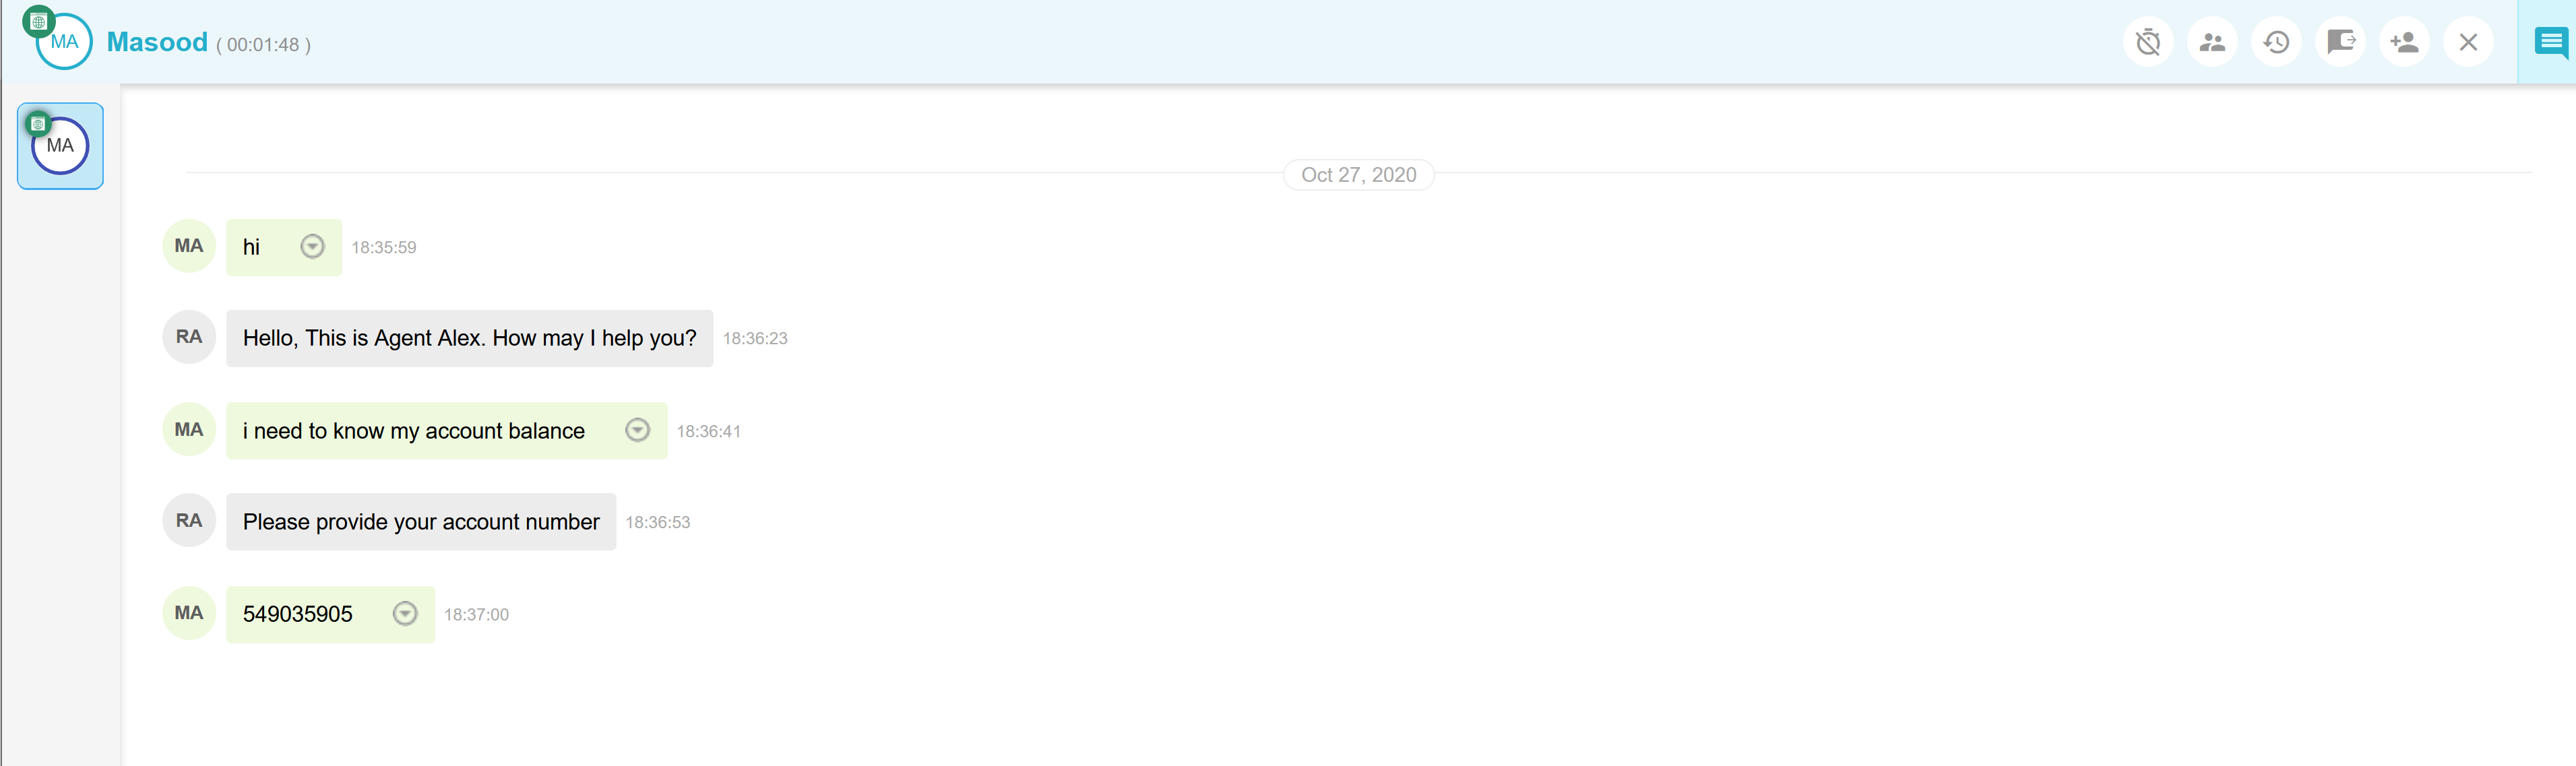
Message Area
Message Area displays the message's history of ongoing (and previous) conversations. There are two views available as per the configuration:
-
Threaded View: All personal messages (the messages that you sent) are right-aligned, while the messages from the customer are left-aligned.
-
Non-threaded View: Messages from all parties are displayed on the same side.
Reply Box
Reply box provides the following functionalities:
-
Reply Text Typing Area
-
Emojis
-
File Transfer
-
WebRTC Video
Reply Text Typing Area
Type your response in the text area here.

Emojis
You can select Emojis along with the text if required by clicking on the Emojis button.
.png?cb=d567520e3137e266d24e15524b679819)
Attachments
You can send attachments (files, images, etc.) to the customer by clicking on the attachments button and then selecting a file to be sent.
.png?cb=7e0723de296e8f28674e88f185eaebc5)
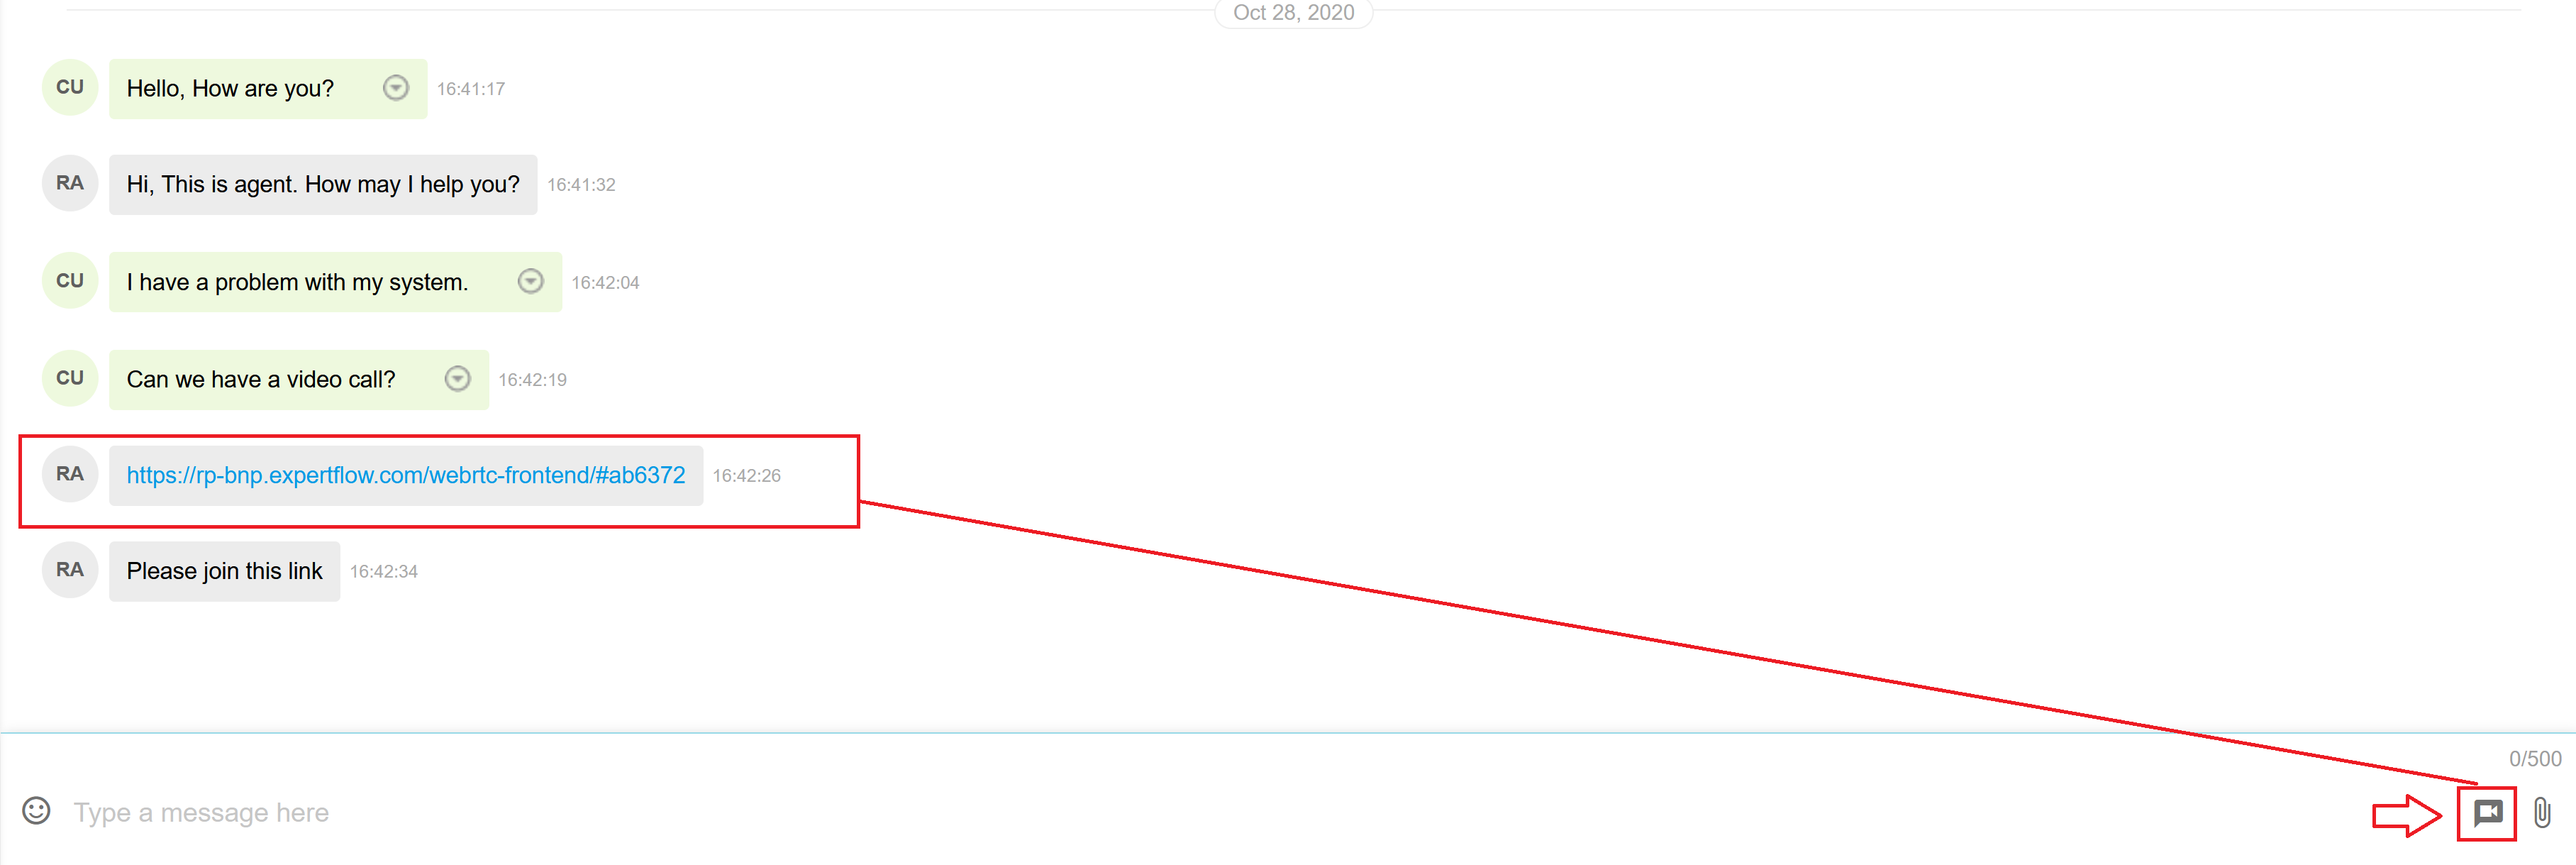
WebRTC Video
You can initiate a WebRTC video session with the customer using the video icon "Unknown Attachment" from the toolbar. Clicking on the icon will generate a WebRTC URL, automatically sent to the customer in a chat message. Both agents and customers can then click on the URL to join the WebRTC Video call.
Intermittent Connection / System rebooted / Browser refreshed
During an active chat conversation, if there is a network disconnection at your side or from the server side, your screen will freeze and you'll not be able to perform any action. If the network is restored within the configured time, your current Finesse state is restored as well i.e., you may continue to serve active chats.
If the network doesn't restore within the RECONNECT_TIME as mentioned in Chat Environment Variables, you'll be forced to log out and all agent chats are rerouted to another available agent. The RECONNECT_TIME in Agent Gadget Environment Variables is used to specify the wait-time for the agent-app to automatically reconnect if the connection is restored within this specified interval.
Route on No Answer
This essentially means that a chat request can be re-routed to a new agent in the same skill group in case the first agent could not accept the chat request within the configurable time. This seamless re-routing helps improve customer service by allowing the customer to avoid any unnecessary wait.
Text Message Auto-formatting
An agent, bot, or customer message is auto-formatted base on Auto text formatting.
Bot Suggestions
In Agent Gadget Environment Variables, the admin may enable/disable bot suggestions from ENABLE_BOT_SUGGESTION variable. If true, bot suggestions will be shown to the agent on a new customer message. Otherwise, all auto-response settings will also be disabled. The bot auto-response can be disabled by setting the timer value to -1.
With Expertflow supplied custom Rasa, the bot identifies three best intents and attaches the 3 best suggestions for each intent along with the confidence score.
With standard Rasa or other chatbots, there can be a maximum of single chat message suggestions. The agent may choose to:
-
Send it directly
-
Modify and send
-
Auto-fill - Start tying and the gadget filters and shows short-listed suggestions only.
Auto-Response
Auto-response is triggered when the agent doesn't timely respond to a customer message and there's a bot suggestion that qualifies any of threshold limits defined against BOT_T1_SCORE, BOT_T2_SCORE, and BOT_T3_SCORE. To understand the configurations of Auto-Response and how it works, please go through Bot Suggestions and Auto-response Settings section in Agent Gadget Environment Variables.
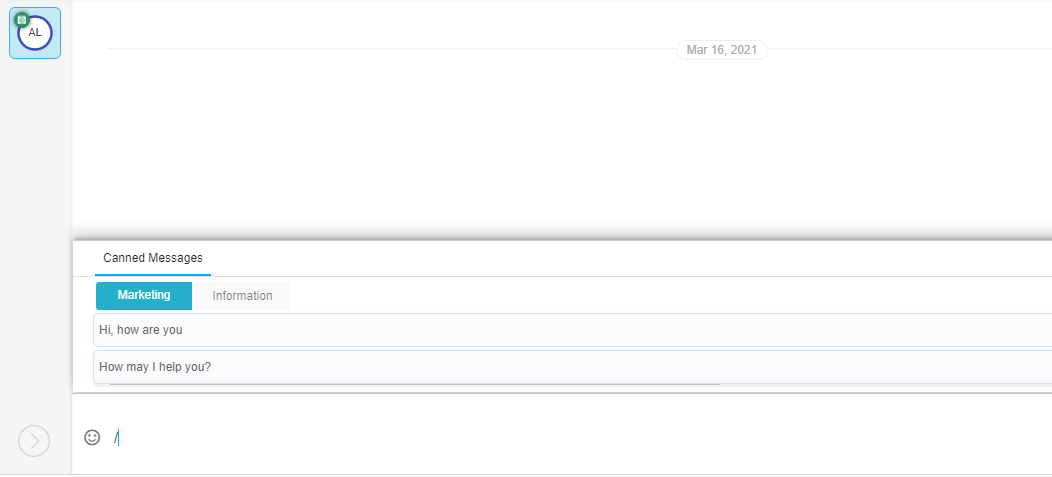
Canned Messages
The Agent has an option to send pre-configured template/canned messages from the message panel. The agent can simply type a forward slash "/" in the text box and upon doing that canned messages will appear automatically. These messages are organized under categories various categories, that can be customized as per one's preference.
For custom canned messages, mount this file /var/lib/expertflow/docker/config/canned-messages/messages.json
Canned messages for any language are supported only if that language is supported by agent-gadget.
Max Chat Sessions per Agent
The limit is configurable. Max Concurrent Tasks Limit can be configured in Communication Server properties. Default max concurrent tasks limit is 5.
Limitations
-
As a Finesse gadget, the app sometimes is in a minimized state and the agent cannot perform any action.
CSN-3505 - Getting issue details... STATUS-
Workaround: Refresh the browser
-
-
When integrated with Finesse, Hybrid Chat only supports agent login with Finesse user id. Login using the Finesse user name is not supported. As a Finesse Gadget, the app always uses a Finesse user id to log in as an agent.
-
There are no color themes for the agent chat gadget; i.e. it has one fixed color theme.
-
The agent can transfer the chat to the bot, but the bot is unable to transfer the chat back to the agent.