Hybrid Chat Configurations within Unified Service Desk
This document is intended for the deployment engineers who need to configure the Hybrid Chat agent gadget within MS Dynamics USD. This chat deployer covers the CRM (On-Prem) version 9.x with the classic UI.
Table of Contents:
Organization Chat Configurations
These are server-side organization configurations applied for the EF USD Chat to work.
- Download the Package Deployer from this link and unzip.
- Double click on “PackageDeployer” to run the application:
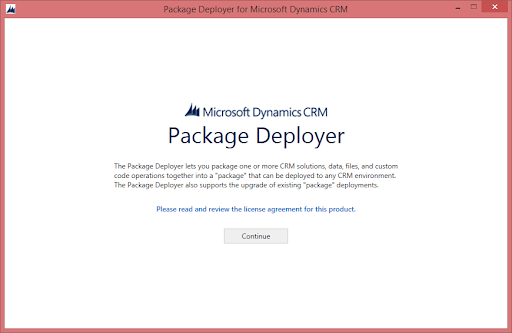
- Click Continue.
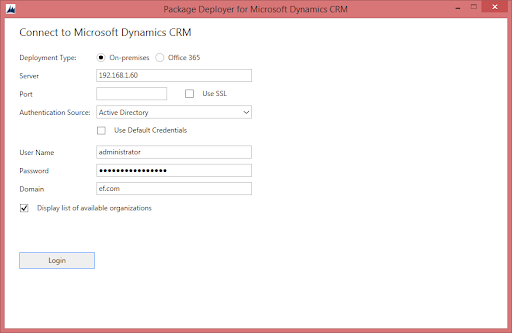
- Select the deployment type On-Premise. Port is optional as it depends how the installation is performedEnter admin account credentials and click Login.
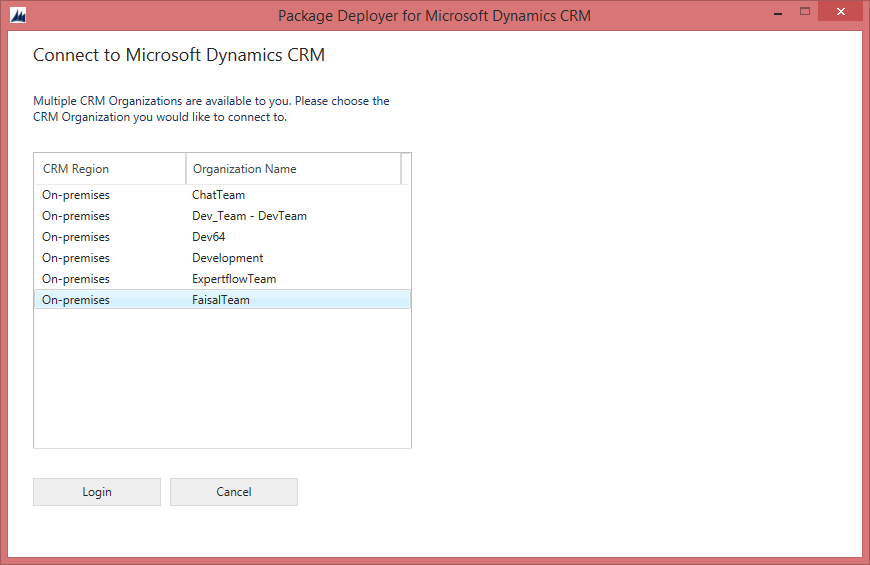
Select the organization where you want the chat configurations to be applied. If you don’t select one, the package will be installed in the user’s default organization.
- Click Next and then, click Finish.
Install USD Connector
Download & install Microsoft Dynamics Dynamics365-USD-v4.0.0.993 or higher from Microsoft’s Website.
Chat Panel Configurations
Agents may accidentally close the chat panel by clicking the [x] in the right panel. To avoid this, we can remove this option.
Login to CRM using admin credentials
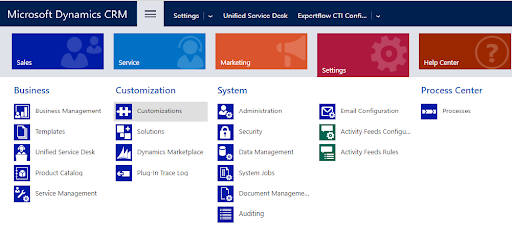
- Click on the main menu & select settings

- Under the Business, you will see the menu named Unified Service Desk
- Click on Unified Service Desk
- From the list below, click on Hosted Controls.
- Select & open the hosted control named EF Chat.
- Uncheck the option User Can Close.
- Click on Save.
Chat Entity
Create the chat entity in the CRM.
- Login to CRM using admin credentials
- Click on the main menu and select Settings.
- Click on Customizations.
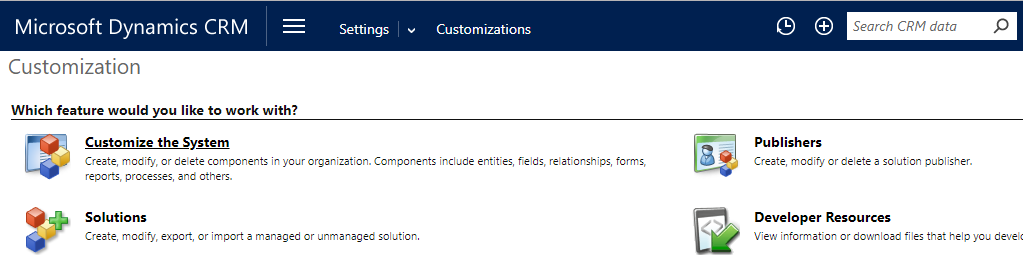
- Click on Customize the System. The Entities page will open up.
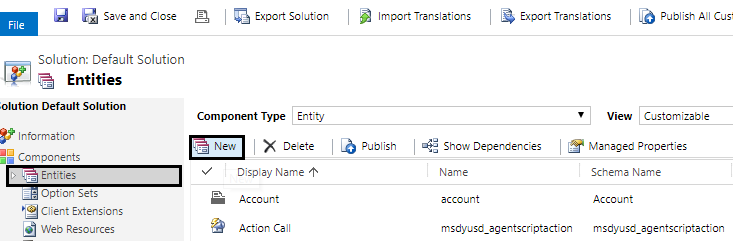
- Click on Entities & then click New. This will open the Entity-New Page.
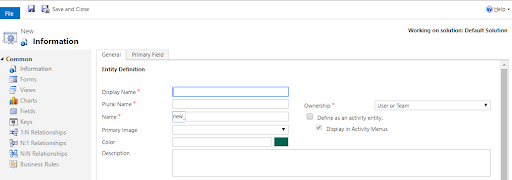
Fill in the following fields on the Entity-New Page.
Field Name
Data\Action
Display Name
chat
Plural Name
Chat
Name (Entity Name)
*new_chat (new is prefix & chat is name)
Define as an activity entity
✓
- Click on Save and close the Entity -New Page.
- Click on Publish All Customizations on the entities page.
Chat Activity Form
- Click on Entities in the left panel and expand chat entity.
Click on Forms under the chat dropdown. This will show some forms on the right side. Select the form which has the form type Main. It will open the chat activity form. The following table shows all the predefined fields present in CRM which can be dragged from the right panel to the form. All of these are required fields on the form for recording the chat activity.
Pre-defined Field(s)
Display Name
Owner Owner subject
Subject
from
From
to
To
regardingobjectid
Regarding
description
Description
The Phone number field does not exist and has to be created. Create the Phone field to record the phone number.
Field Name
Values
Display Name
Phone Number
Field Name
phonenumber (It will display like new_phonenumber where new is prefix.
Field Requirement
Optional
Data Type
Single Line of Text
Field Type
Simple
Format
Text
Maximum Length
100
IME Mode
auto
- Similarly, Create the History field to record chat history/transcript URL.

Field Name | Values |
|---|---|
Display Name | History |
Field Name | history (It will display like new_history where new is prefix) |
Field Requirement | Optional |
Data Type | Single Line of Text |
Field Type | Simple |
Format | URL |
Maximum Length | 100 |
IME Mode | auto |
From the Field Explorer. Select the Filter Custom Fields option from dropdown.
Drag the both create fields Phone Number & History on the main form. Click on 'Save'. Click on 'Publish' & then choose 'Save & Close' option from the top.
Configure Options
After adding the fields, follow the below steps to set the Options in configurations:
- Login to the CRM using admin credentials.
- Click on the main menu & select Settings.
- Under the Business, you will see the menu named Unified Service Desk
- Click on Unified Service Desk
- From the list below, click on Options
Option Name | Default Value | Description |
|---|---|---|
AgentGadgetURL | URL of agent gadget. Update the option according to the deployment. | |
HistoryURL | Chat Server URL.Update the URL according to the deployment | |
ChatEntityName | new_chat | Chat entity name. where new is prefix. |
ChatPhoneNumberFieldName | new_phonenumber | The phone number field in the chat entity to record the phone number. where new is prefix. |
ChatHistoryFieldName | new_history | History field in the chat entity to show the transcript. where new is prefix. |
Update the options according to the Chat solution deployment & created chat entity, field names in the CRM.
*If the organization prefix is different then update the Entity & field names accordingly.
Adding fields in the Quick Search View
- Click on Settings -> Customizations
- Click on Customize the System
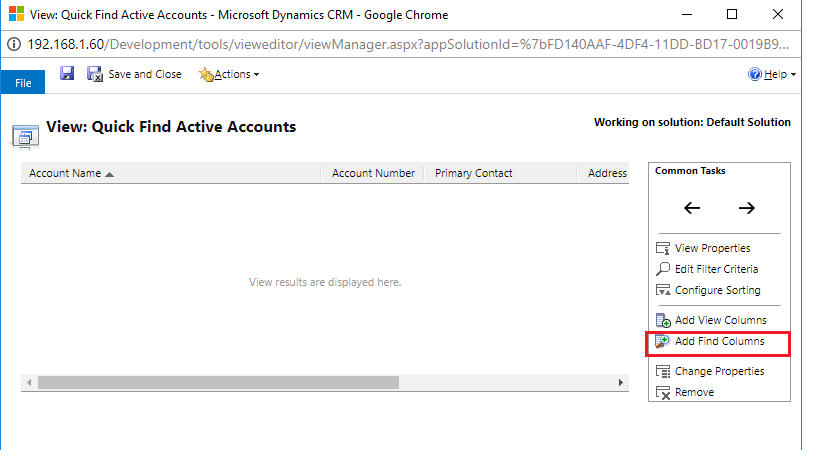
- Click on Entities -> Select an entity, e.g. Account. Click on Views. From the right pane, select Quick Find Active Accounts.
- Double click on Quick Find Active Accounts
- Click on Add Find Columns
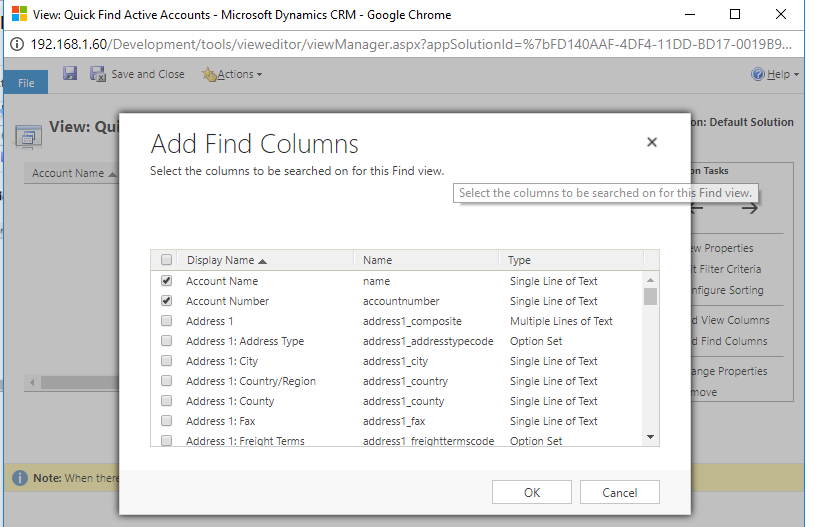
- In the Add Find Columns view, select the field names on which you want to search for match purpose & view on the screen.
- Click OK after selecting the desired columns.
- Repeat the Steps from 1-6 for Contact & Lead entities as well.
- When changes are done for required entities, click on Publish All Customizations
Following is the list of find field names for entities.
Lead | Account | Contact |
telephone1 | telephone1 | telephone1 |
mobile phone | mobile phone |
Configure Agent Access Mode
There are different access modes that can be assigned to CRM users. The agent access mode should be Read-Write. The following are the steps to configure the access mode in CRM.
- Click or tap Microsoft Dynamics CRM > Settings > Security > Users
- Double click to open the user
- In the Administration section, select the access mode to Read-Write
- Repeat the step-2 for all the users present in the configuration.

Configuring bulk deletion of temporary records
Agents handle chat sessions on the Unified Service Desk. During the handling of a chat, some temporary records are created for session management on the CRM. The size of the temporary records is directly proportional to the chats handled by the agent.
In order to delete the temporary chat records, CRM has provided the mechanism of bulk record deletion. The following are the steps to configure the bulk deletion in dynamics CRM.
- Click or tap Microsoft Dynamics CRM > Settings > Data Management > Bulk Record Deletion
- In the menu bar, click New. This opens the Bulk Deletion Wizard.
- Click Next.
- In the search criteria, add the criteria similar to the following:
- Look For – User Settings
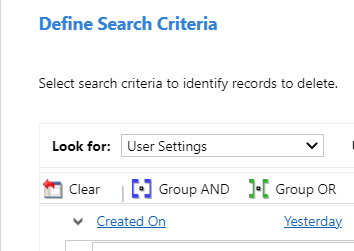
- Created On – Yesterday