Setting up Keycloak Groups as Teams:
To Setup a Keycloak Group as team, we need to understand these terminologies:
-
A single Group in Keycloak represents a single Team.
-
Every member of Group is considered an Agent of that specific Group (Team).
-
Each Group can have one or multiple supervisors. We assign supervisors to a team using Permissions/Policies. Every team has its own Permission/Policy.
-
Each User can only be part of a single Group (team). You must make sure to not add a user in more than one group. By definition of teams, one Agent can only be part of one single team and cant have multiple teams. Each Supervisor can supervise multiple teams though.
-
Supervisor can also become part of group he is supervising (team) as an agent. In such case, he is member of that Group (team) and can't be added in any other Group (team).
-
Team supervisor user must have a supervisor role assigned to it.
-
Every user must be added to a default Group (team) at time of its creation. we will name that default group as "default" in Keycloak Groups. If user is added as an Agent in any other group (team) then he must be removed from default group.
Teams Permission/Policies setup overview:
To setup Permissions and Policies for each team, we need to follow these steps:
-
Create group in keycloak admin console corresponding to its team and add members (agents) in group (team).
-
Create a resource named teams-dashboard. Resources exist in Authorization section of our client inside keycloak admin console.
-
Create a scope for the targeted group. scope name should be as follows "<team-name>-group". For example, if team name is zaryab-team then scope should be named zaryab-team-group.
-
Add scope to the resource teams-dashboard.
-
Create user-based policy and add all the users you want to make supervisor of specific team.
-
Create role-based policy for supervisor role (So, only users with role supervisor can supervise specific group. Supervisor role-based policy will be created just once).
-
Create an Aggregated policy including both the user-based group policy and role-based supervisor policy.
-
Create a scope-based Permission and link Aggregated Policy, teams-dashboard resource and team-specific scope in it.
-
Test the Permission/Policy by adding/removing users in user-based policy or by assigning user as supervisor who doesn't contain supervisor role.
Setup of Teams Permission/Policies in Keycloak Admin Console:
A user can only be assigned one team at a time. For example: If user is assigned default team then we shouldn't assign it to any other team until he is removed from default team first.
agents_permission & senior_agents_permission groups are not part of teams. We can assign these groups to any user apart from its team group.
-
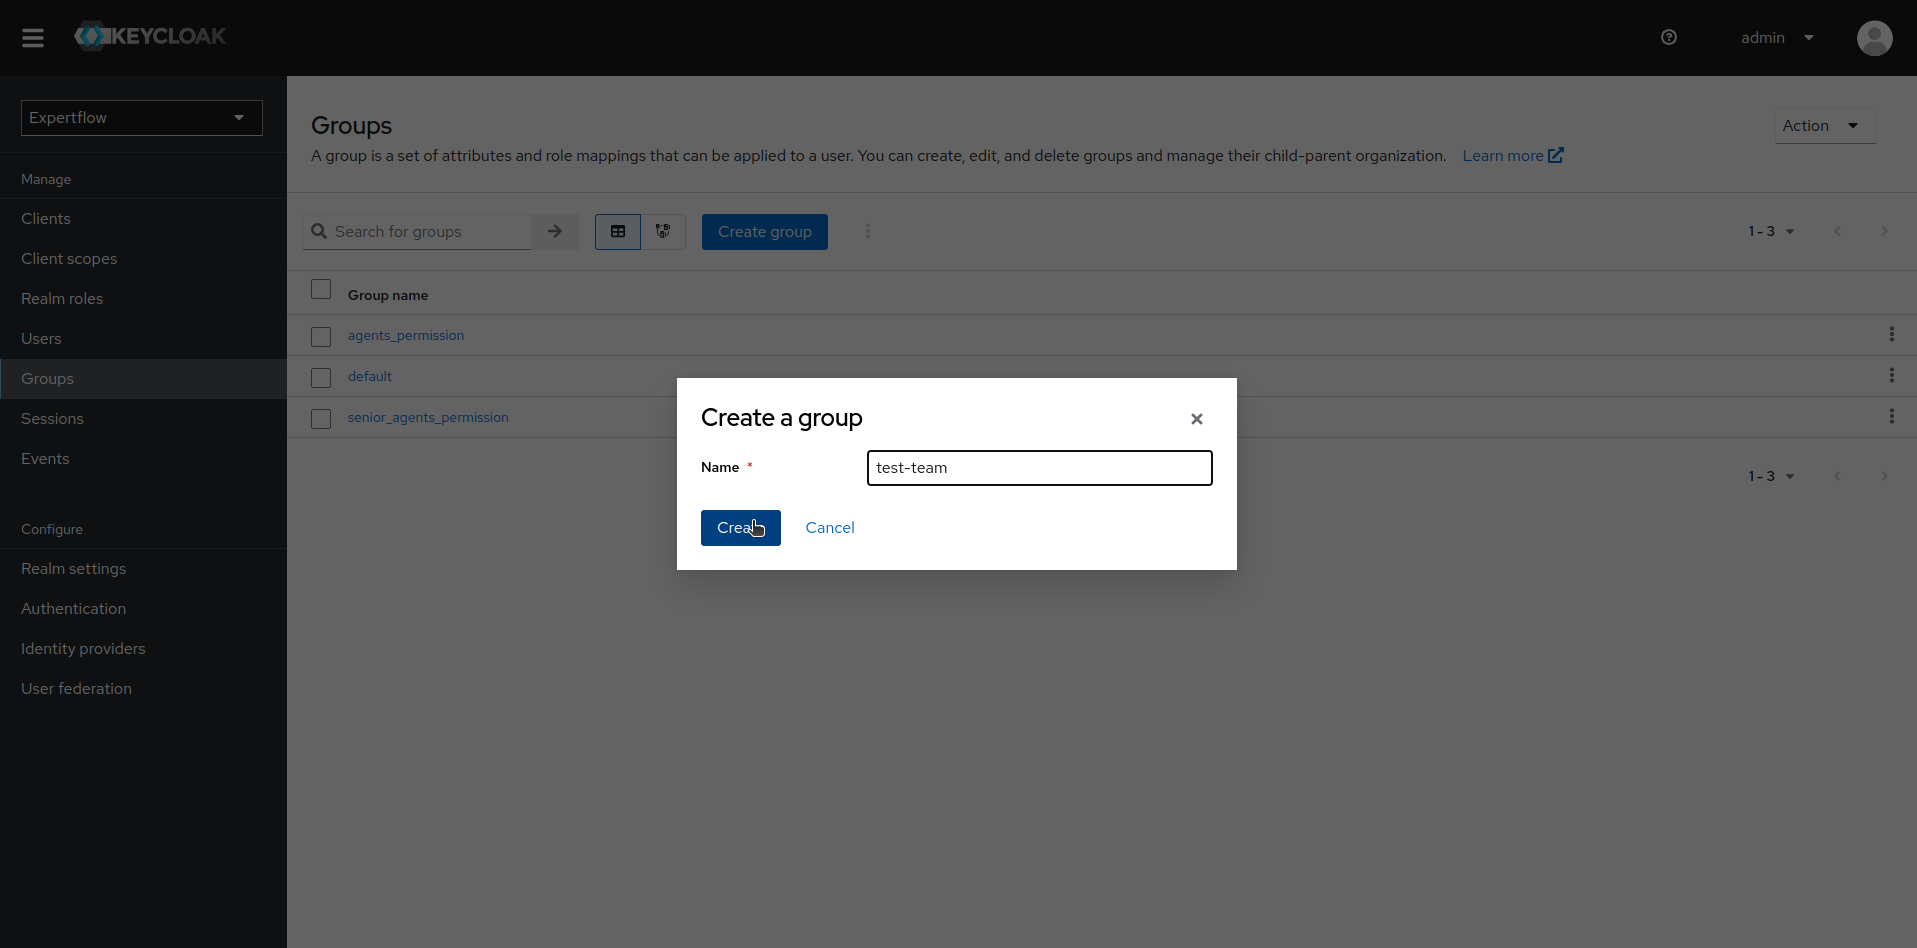
To create a team, click on the Groups tab in Manage section. We will now see a new section with heading Groups containing all the groups of current Realm. Click on Create Group button to create the team. Enter the team name and Click on Create button.
-
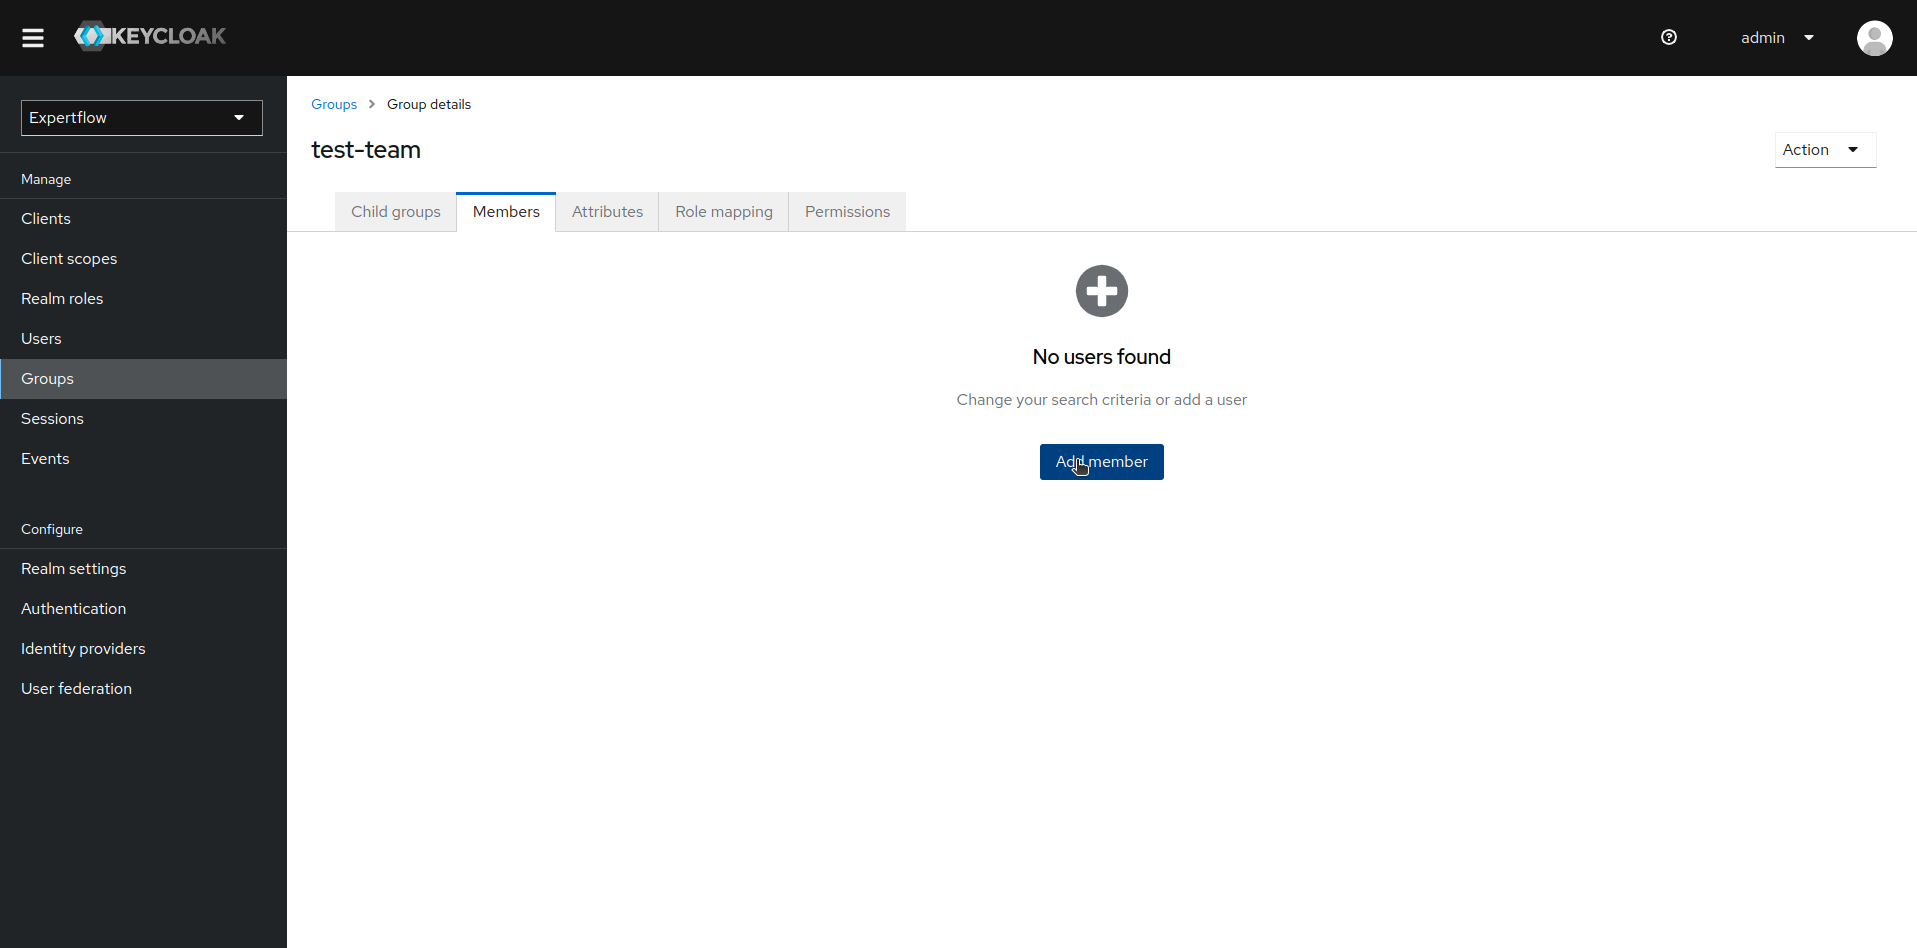
Once team is created, we add members to team. Click on the recently created team in Groups section. In team settings, click on Members tab and then click on Add member.
-
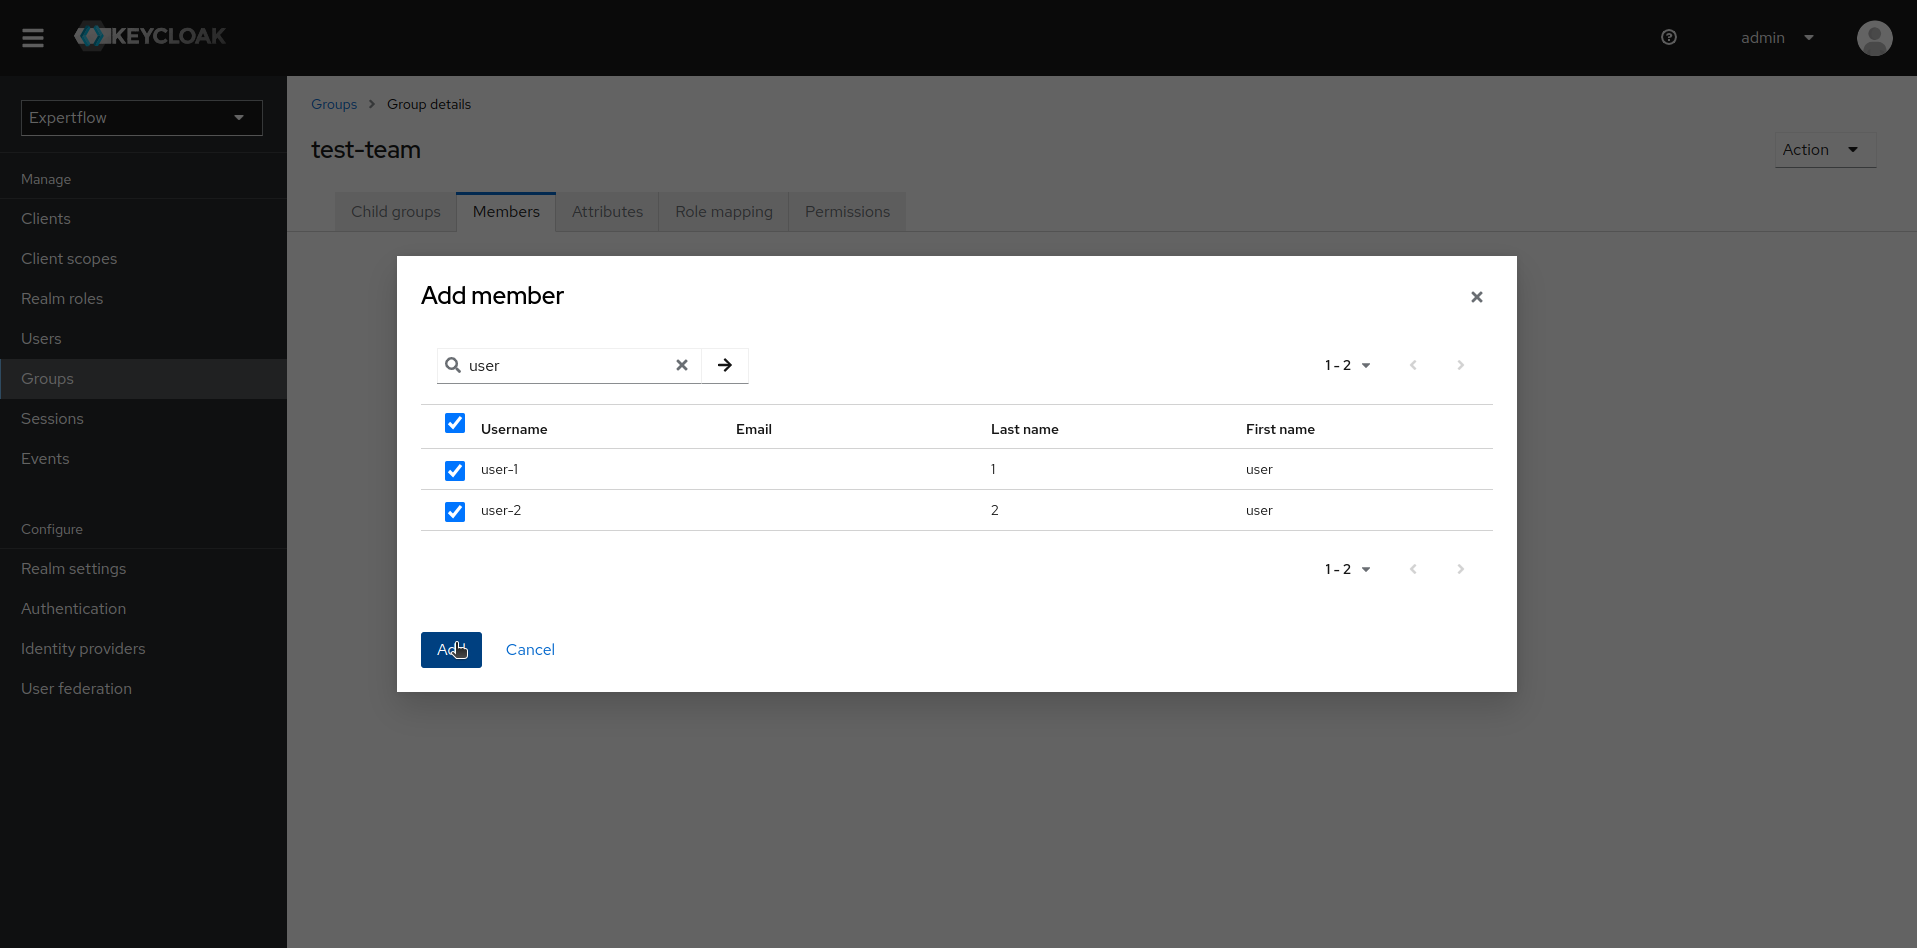
Add all the users you want to make agents as members of this team.
-
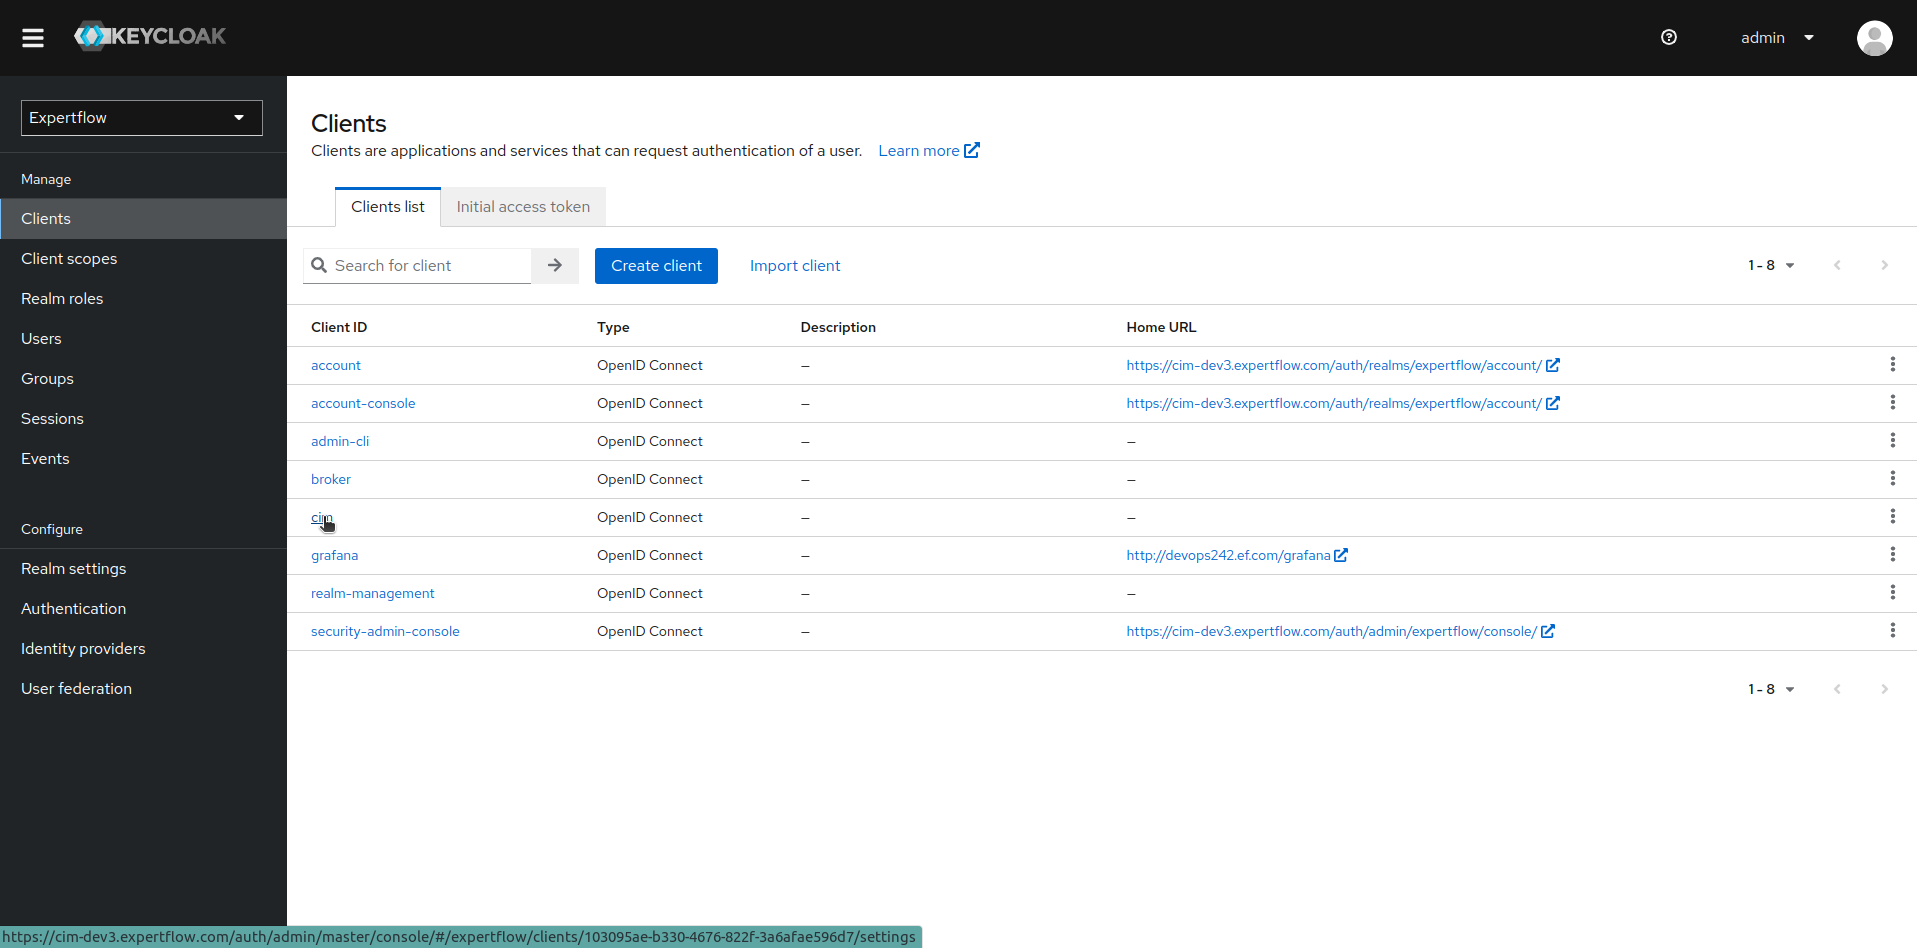
Once the team setup is done, we now create its Permissions/Policies. Go to the clients section and the select our desired client, in our case its cim
-
To setup permission/policies, we create resource first. Inside client settings, go to Authorization tab and then click on Resources sub-menu. Click on Create resource
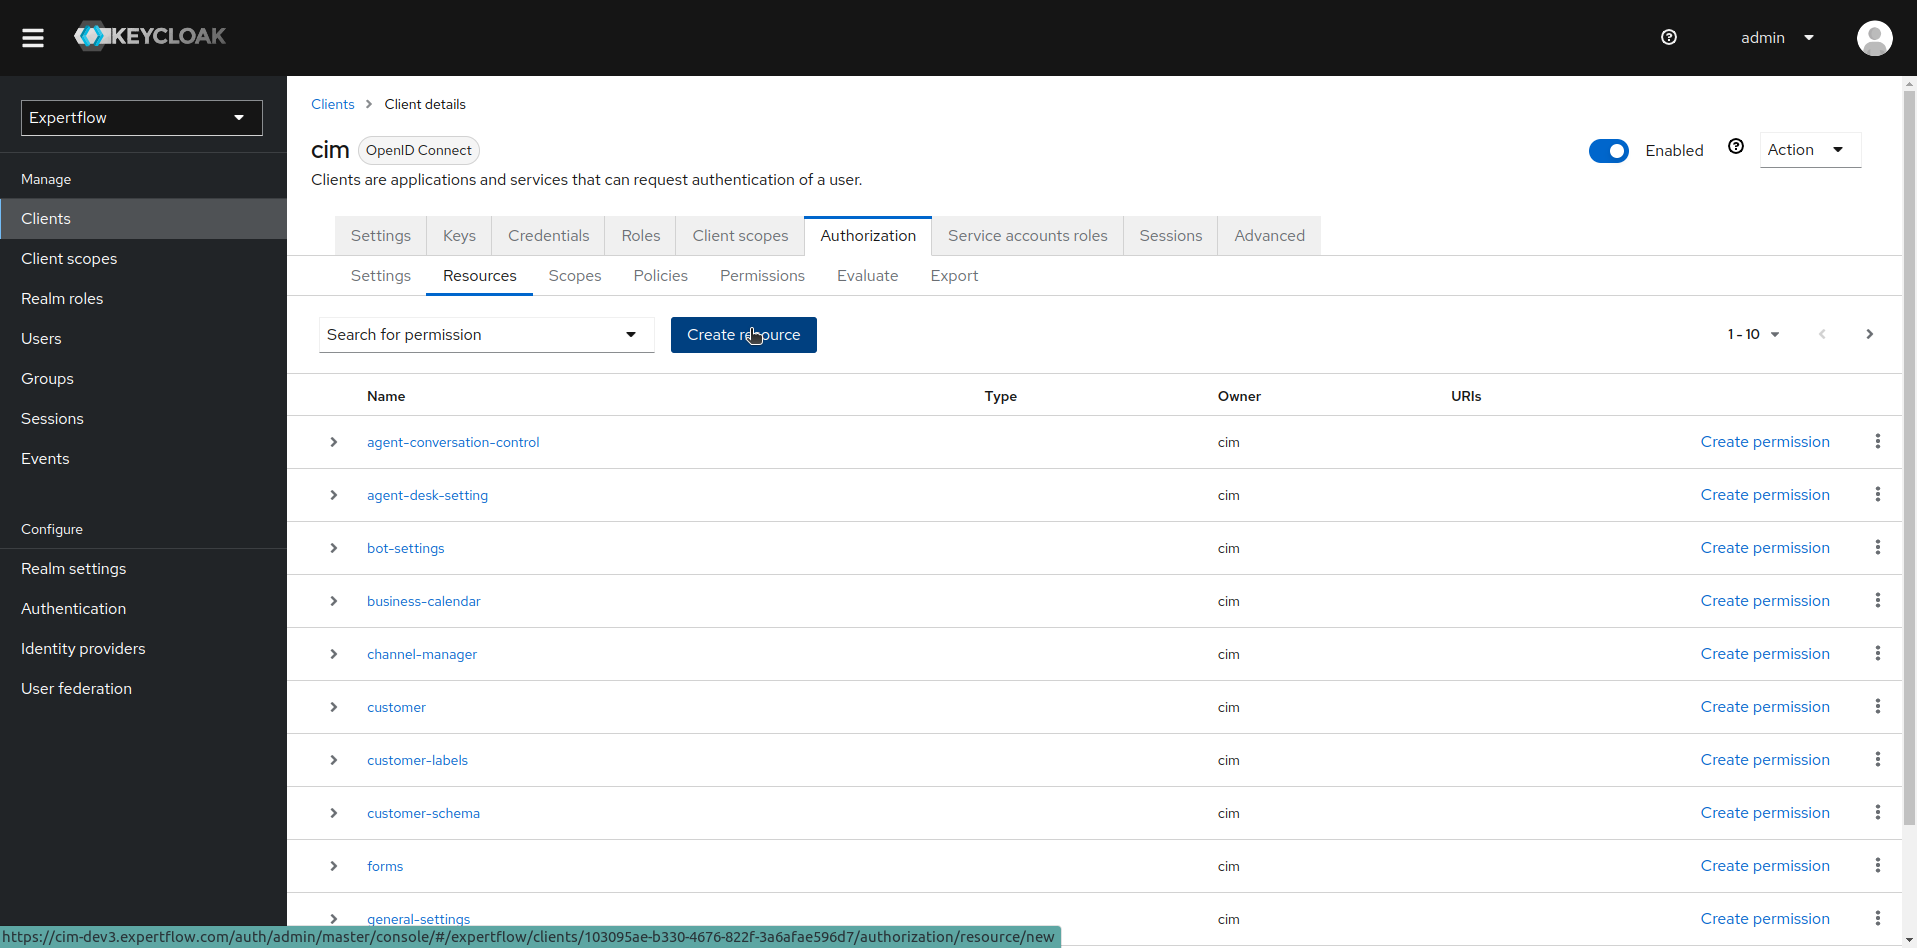
-
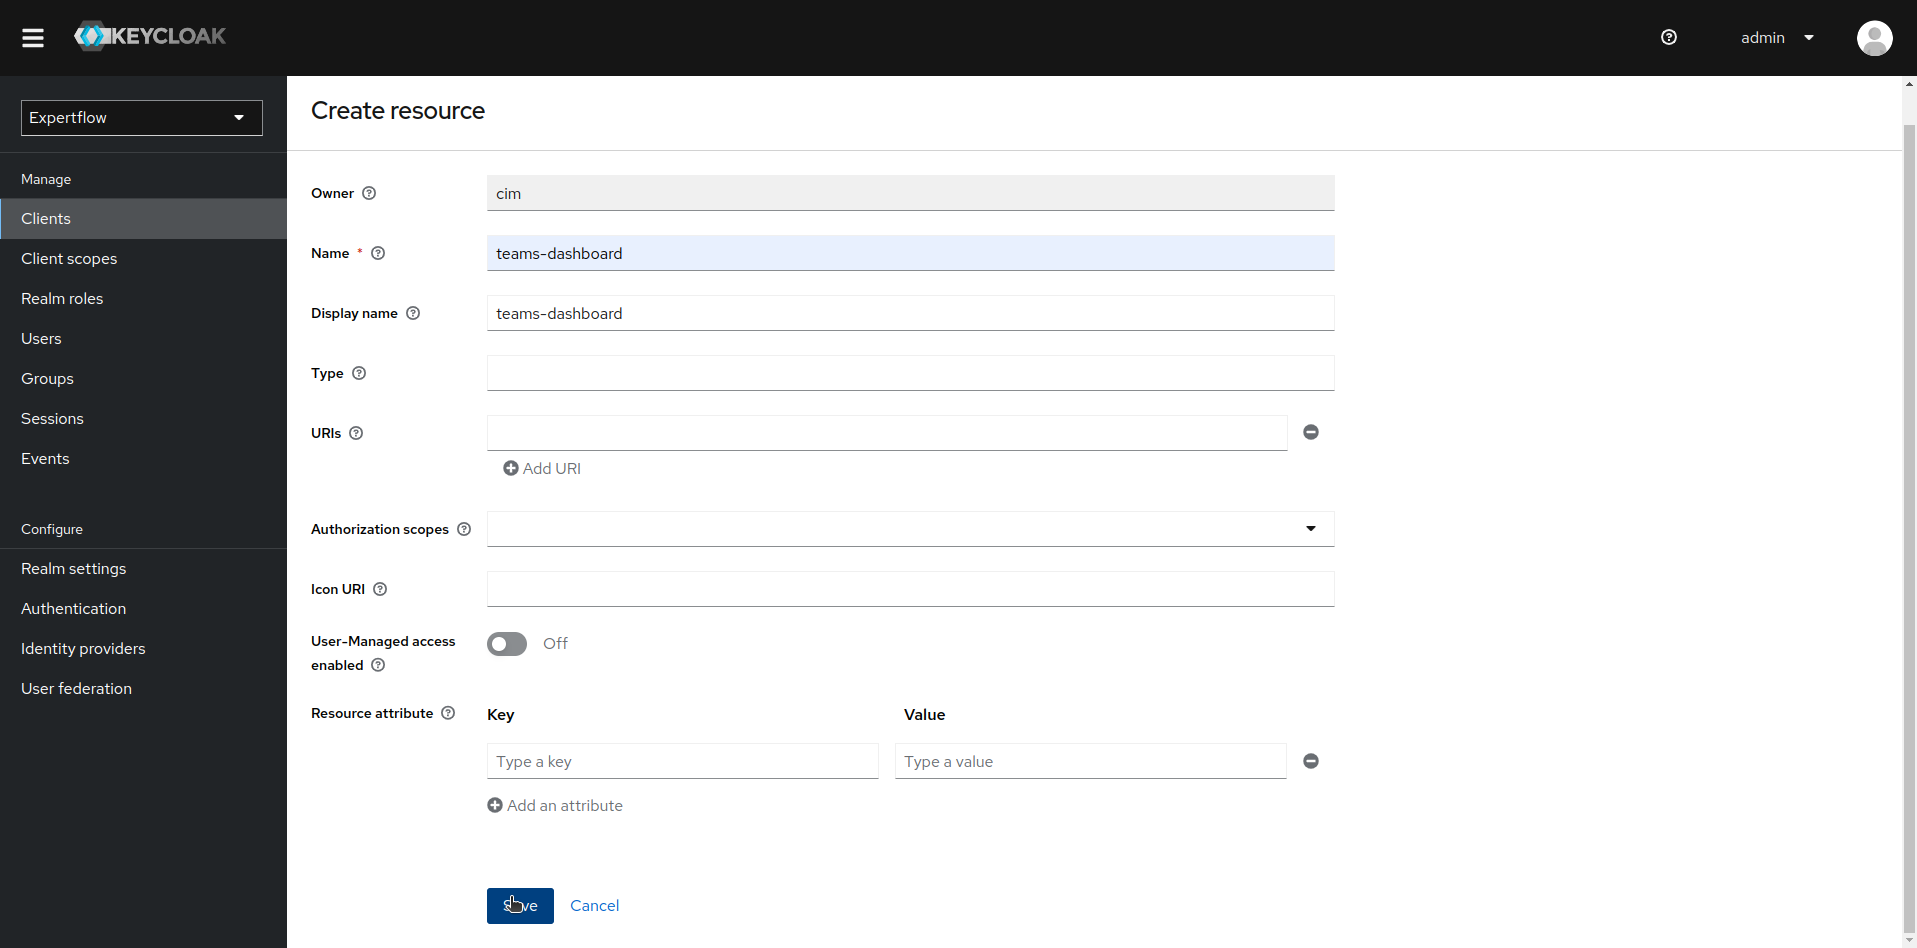
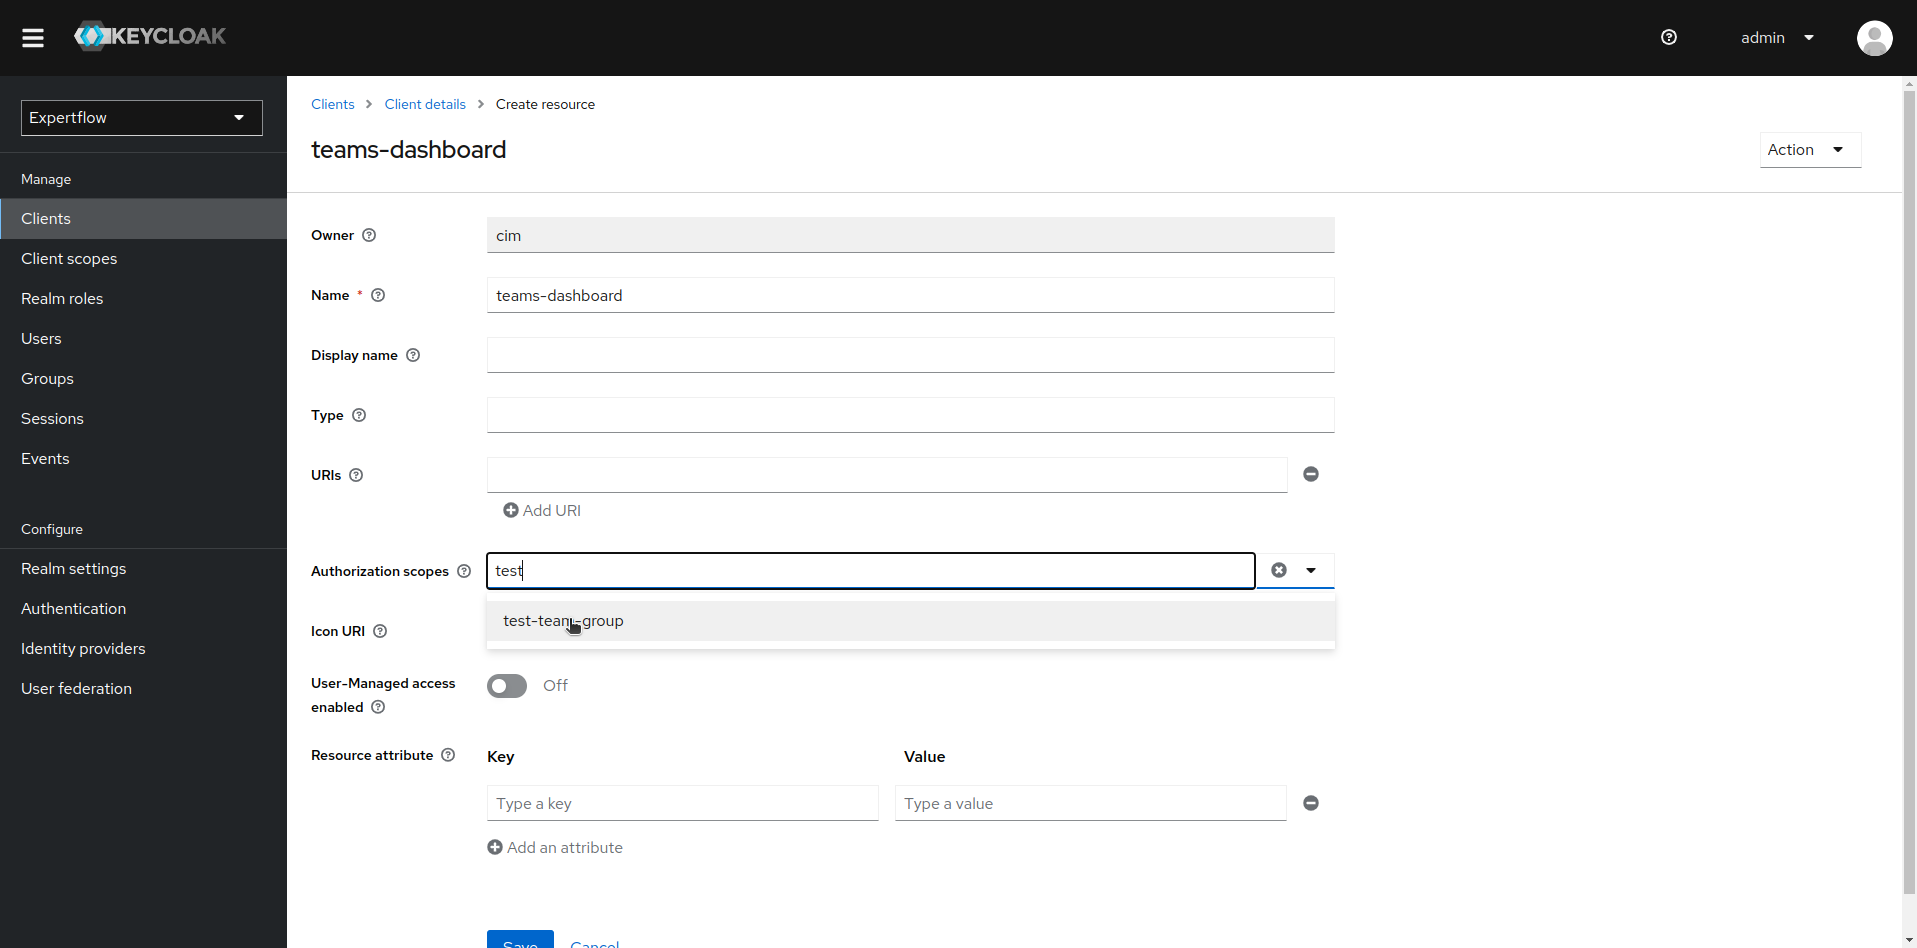
Create a resource named teams-dashboard and click save.
-
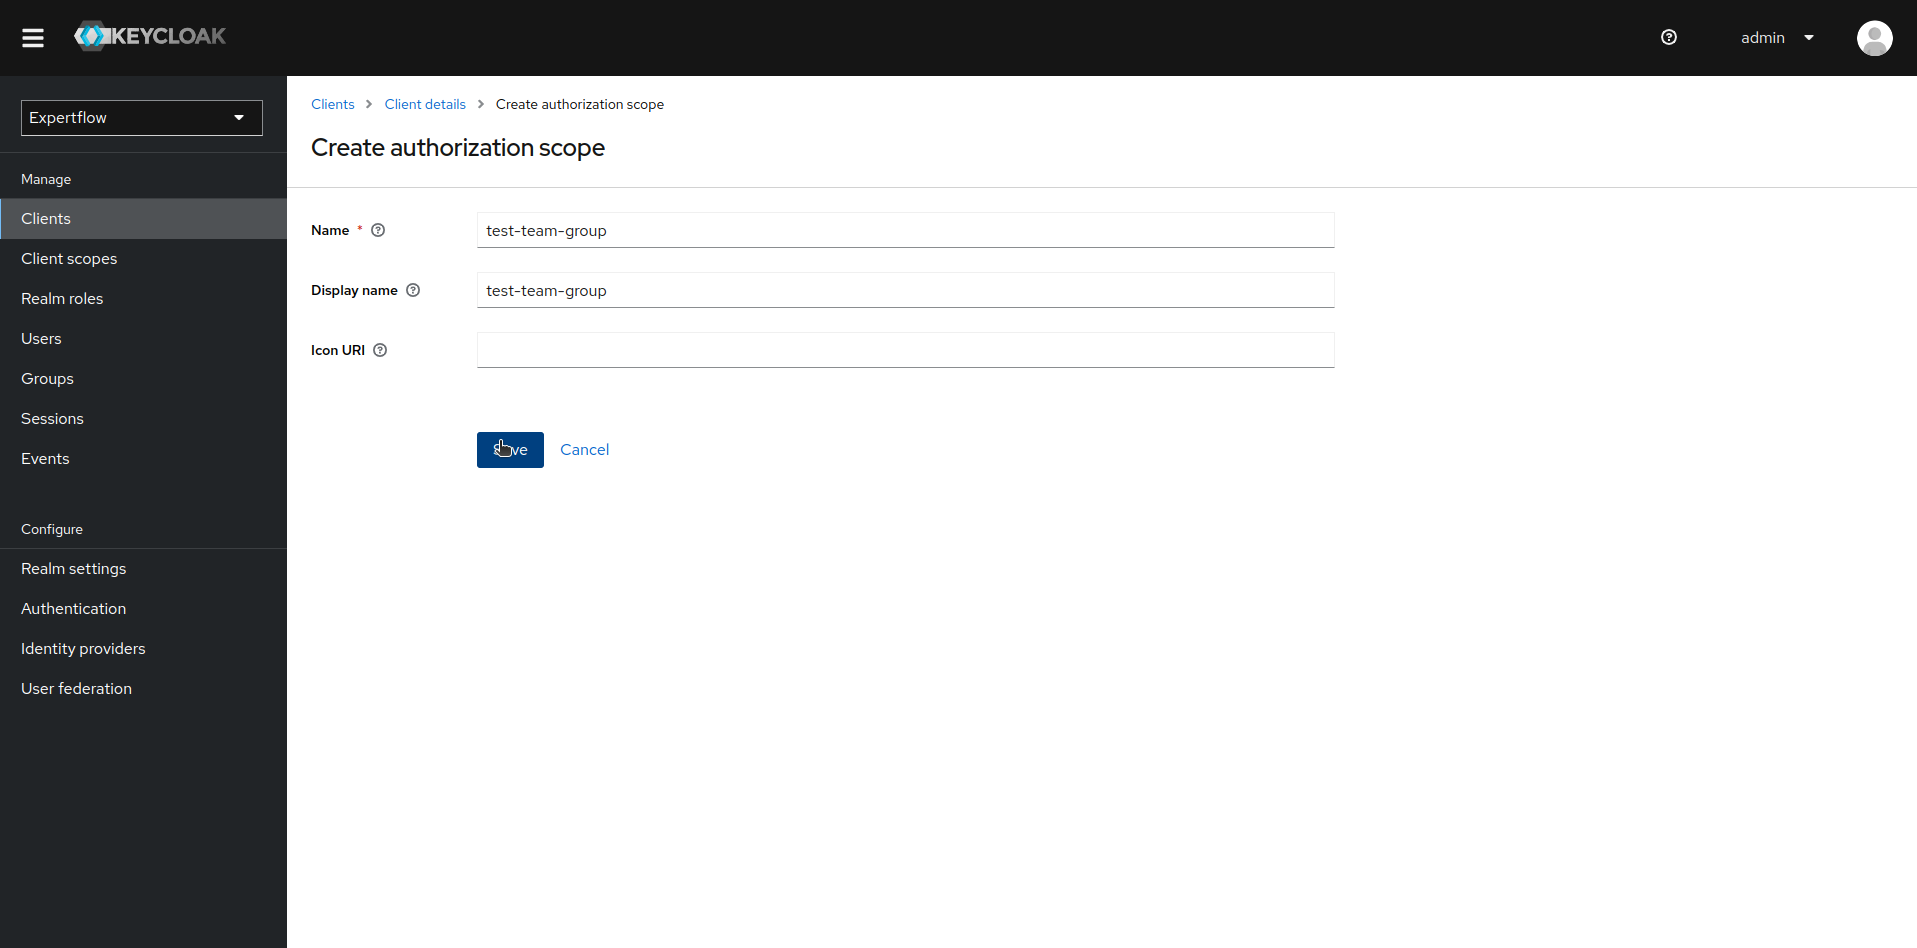
To create Scope, go to Scopes section and click on Create authorization scope
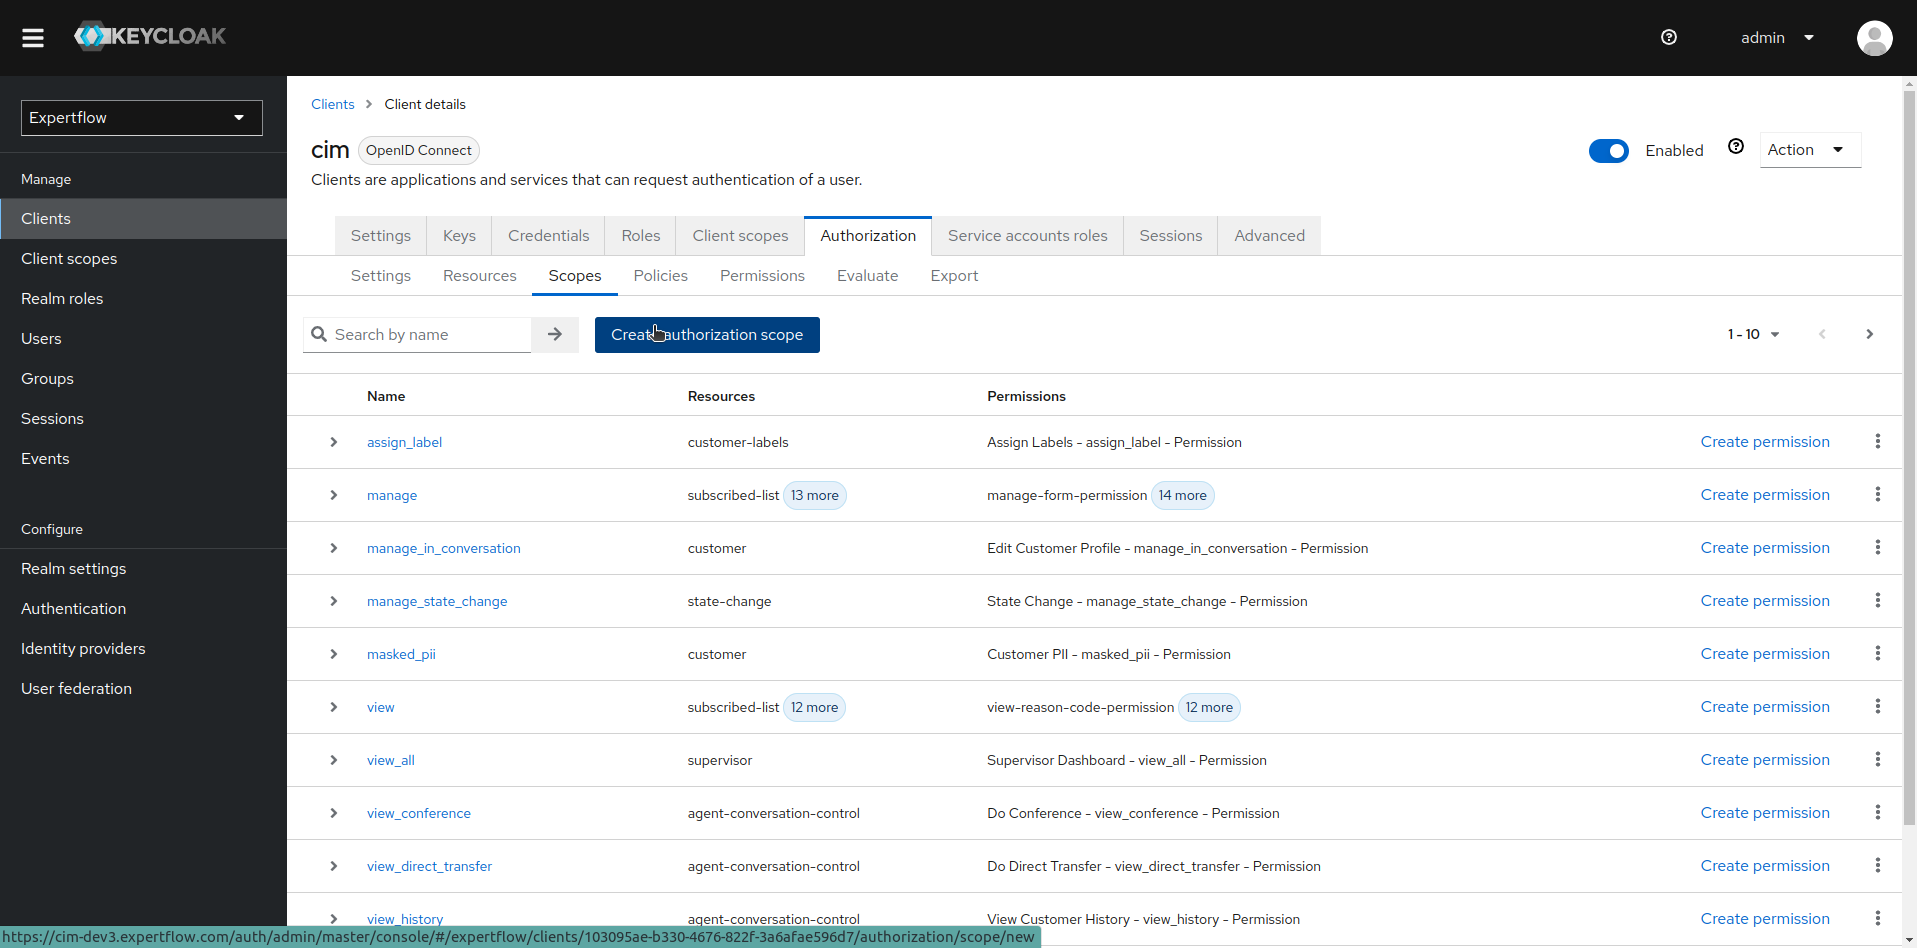
-
Create a Scope named <team-name>-group. In our case, since team name is test-team hence scope should be test-team-group.
-
Add newly created scope to teams-dashboard resource. Go back to Resources section and click on teams-dashboard resource then click on Authorization scopes drop-down and add desired scope.
-
Create user-based policy for our team. To create a user-based policy click on Policies sub menu and then click on Create policy and select User policy.
-
Name your user-based policy to match your team name. Add all the users you want to make supervisors of your team and then click on save.

-
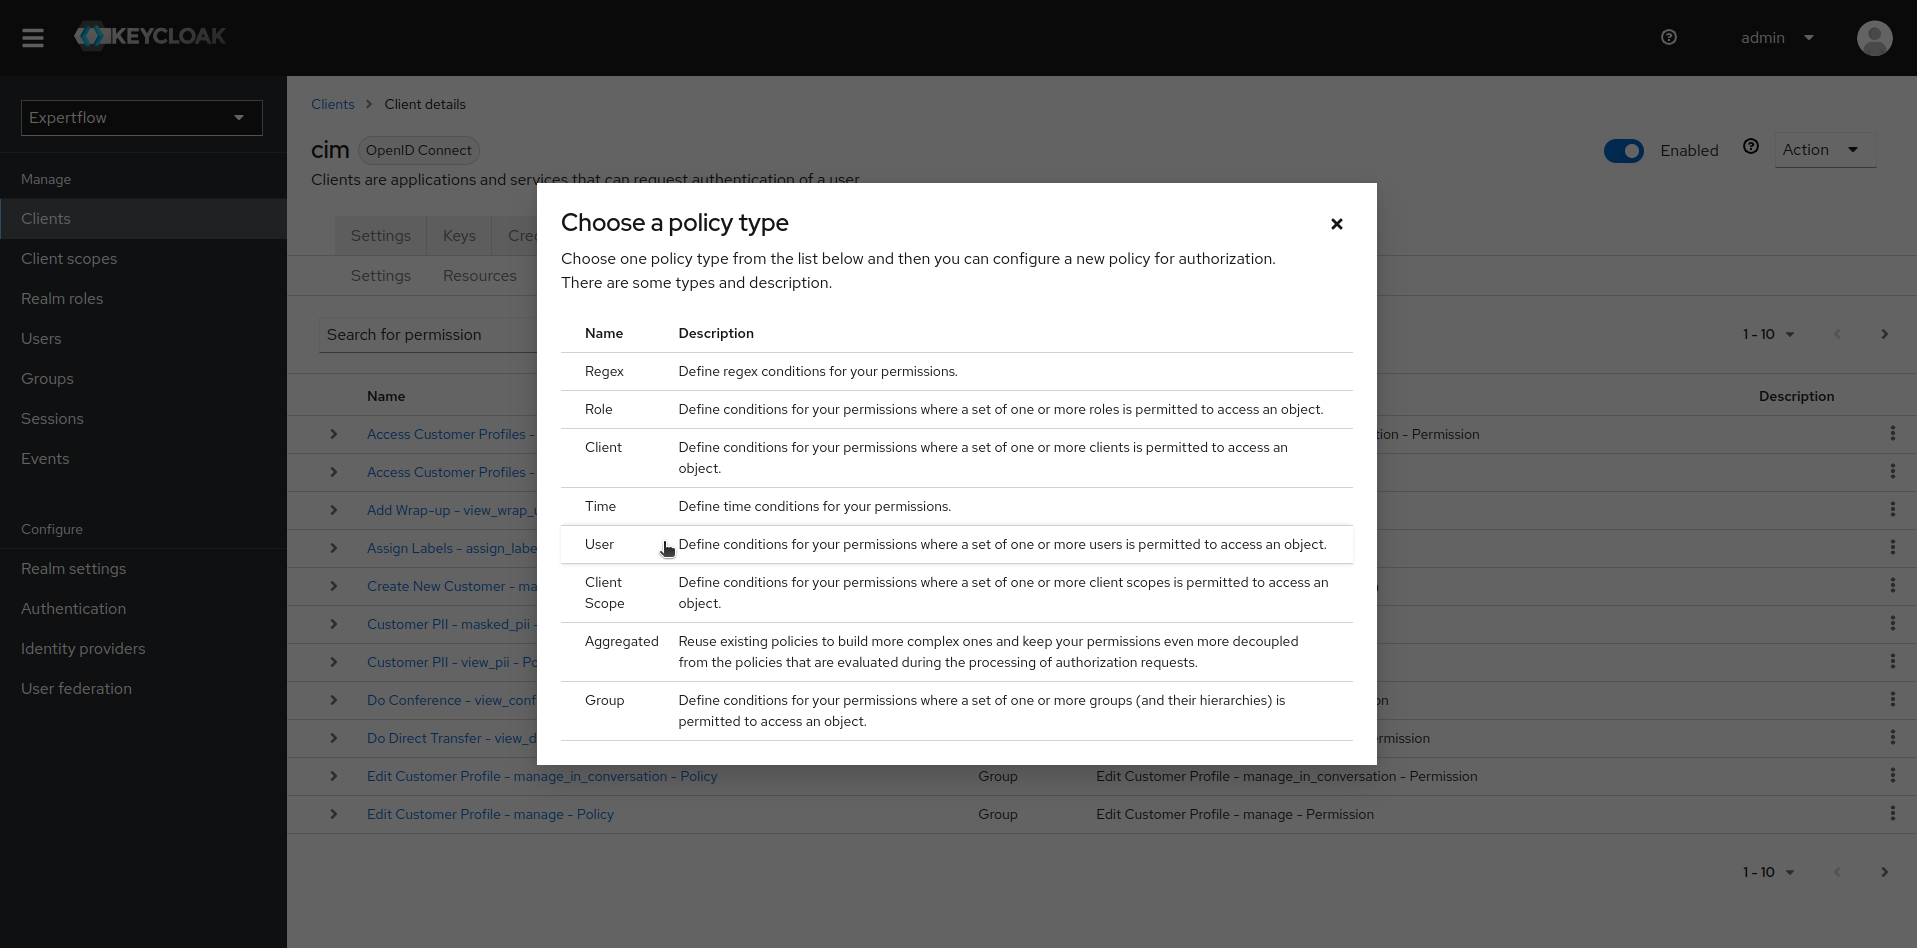
Once user policy is created, we create a role-based supervisor policy to make sure only users with role supervisor are allowed to supervise a desired team. Click on Create policy and then select Role policy.

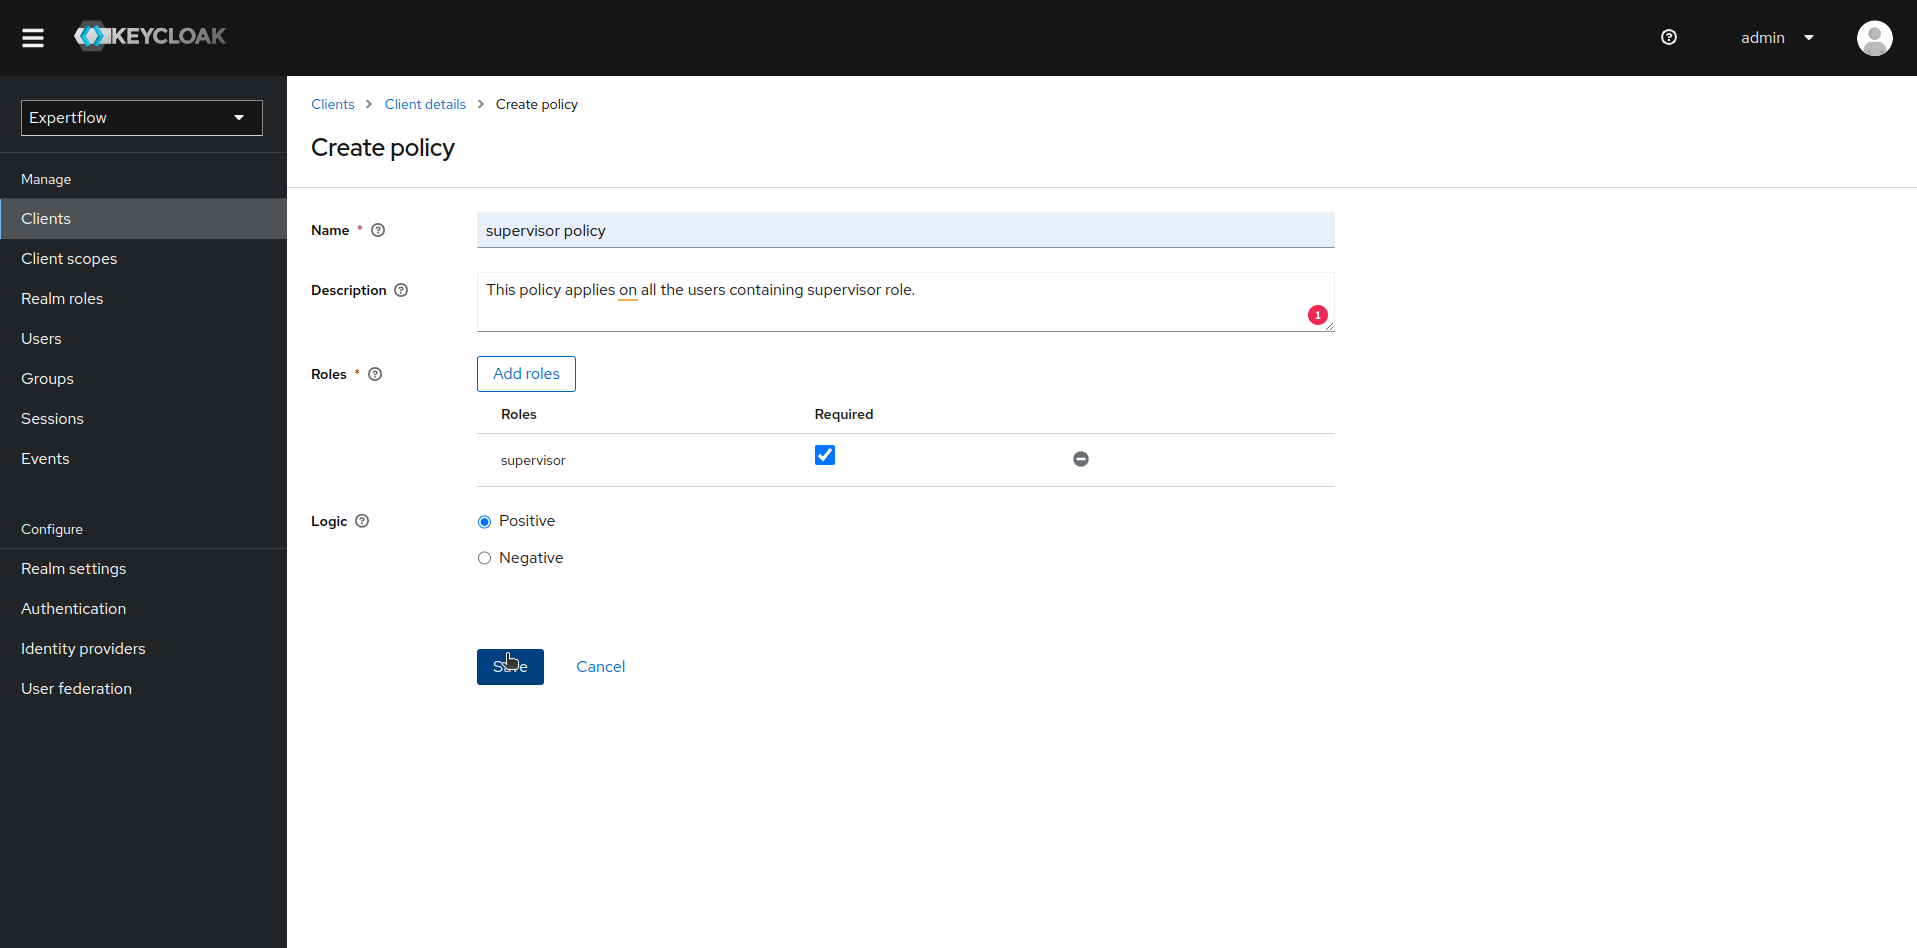
-
Name the Role based policy to match with your desired role i.e supervisor policy and add supervisor role in it, make supervisor role as required.
-
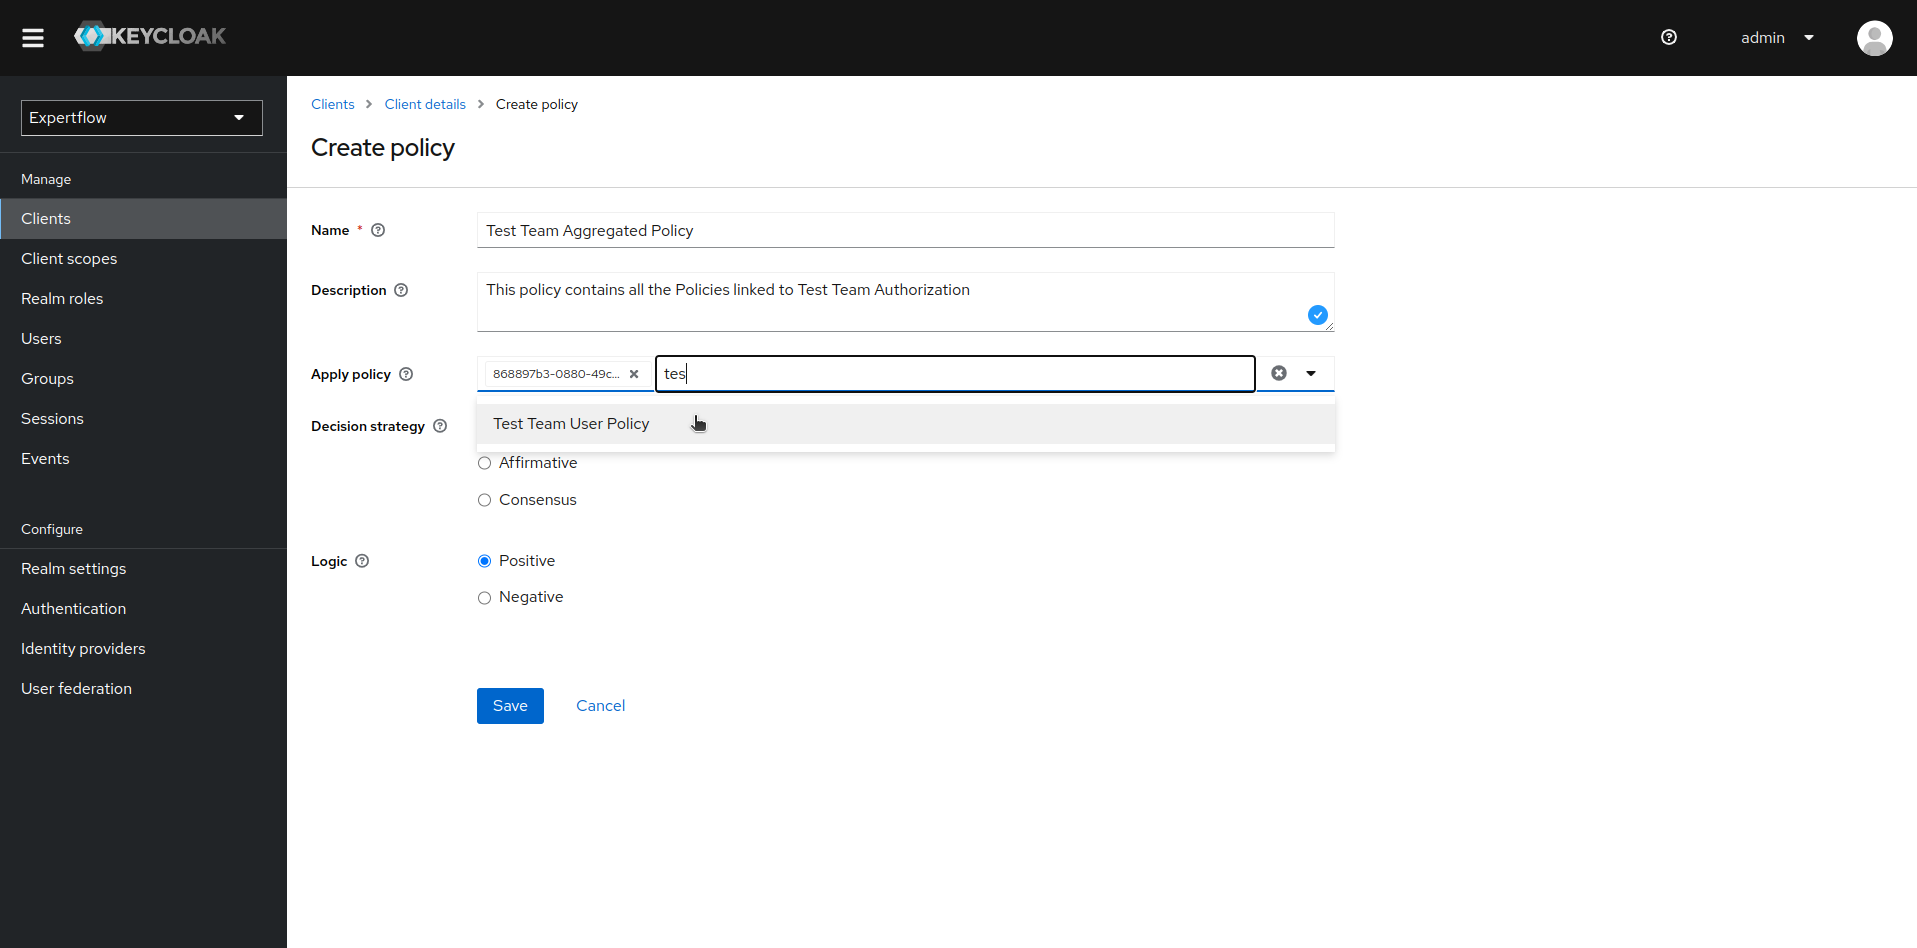
Add both User and Role based policies to Aggregated policy. Click on Create policy and then click on Aggregated. Once inside details for Aggregated policy, select both User and Role based policies we recently created in Apply policy section. Name your Aggregated policy to make it meaningful and then click on save.
-
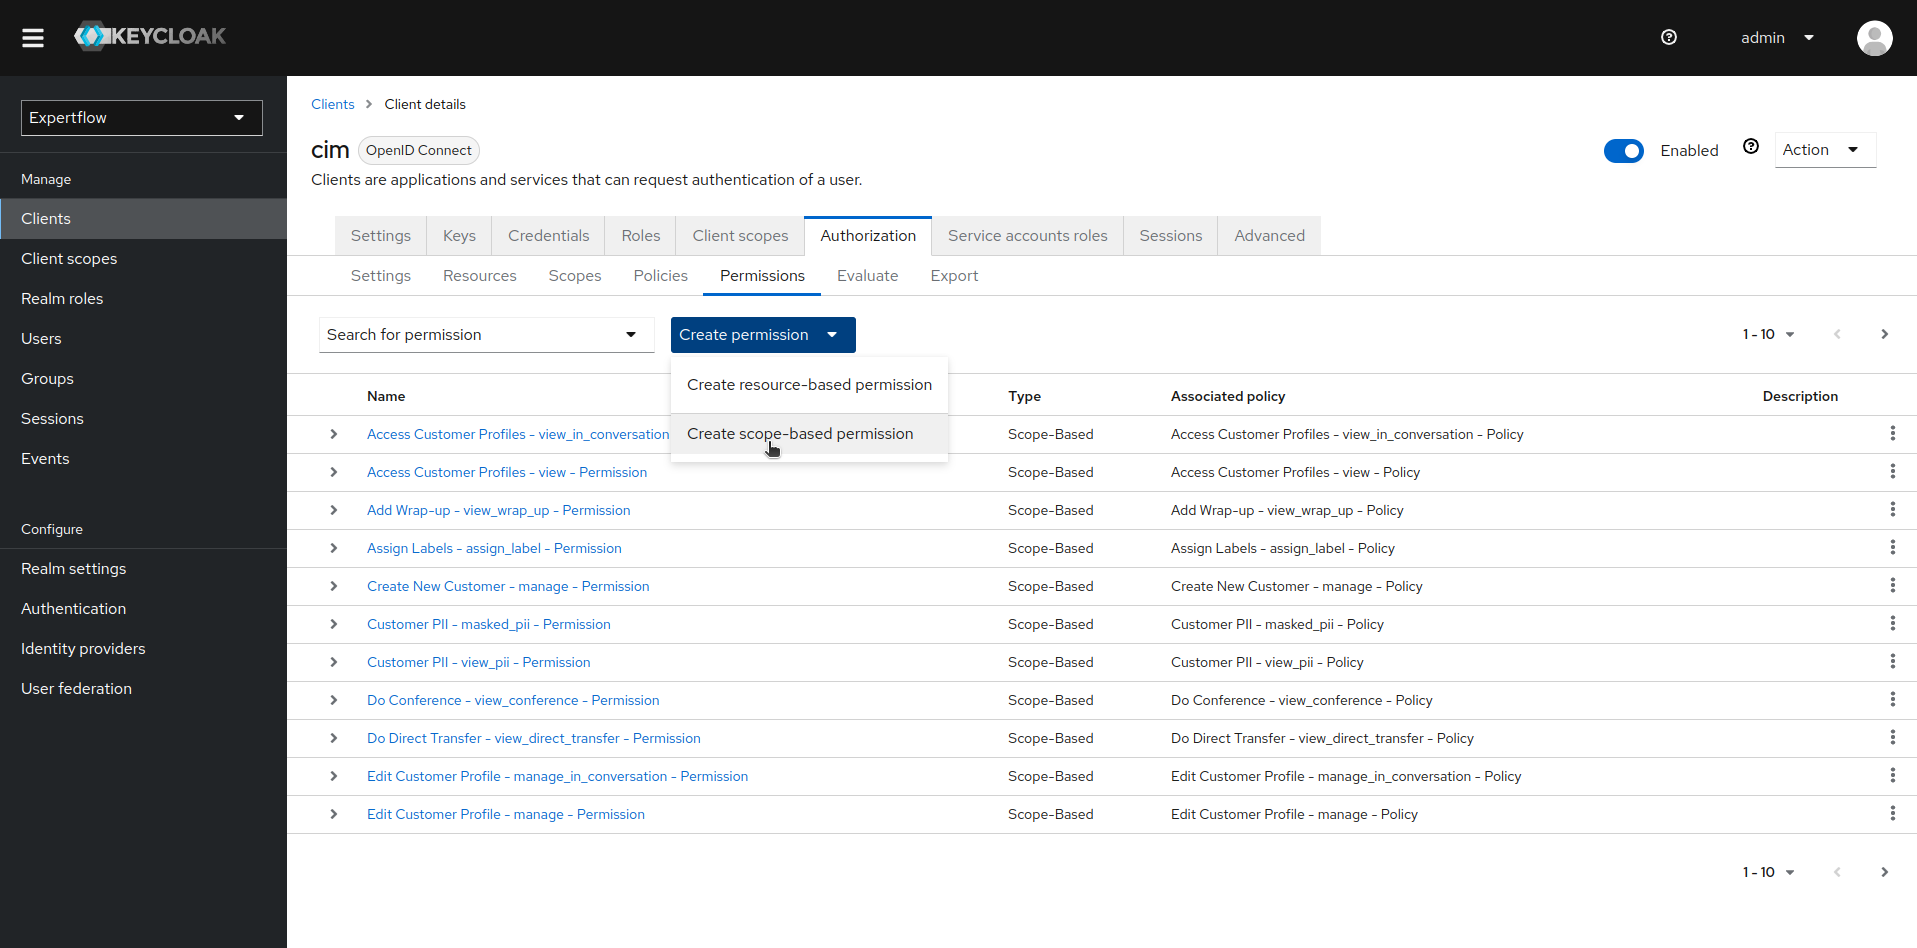
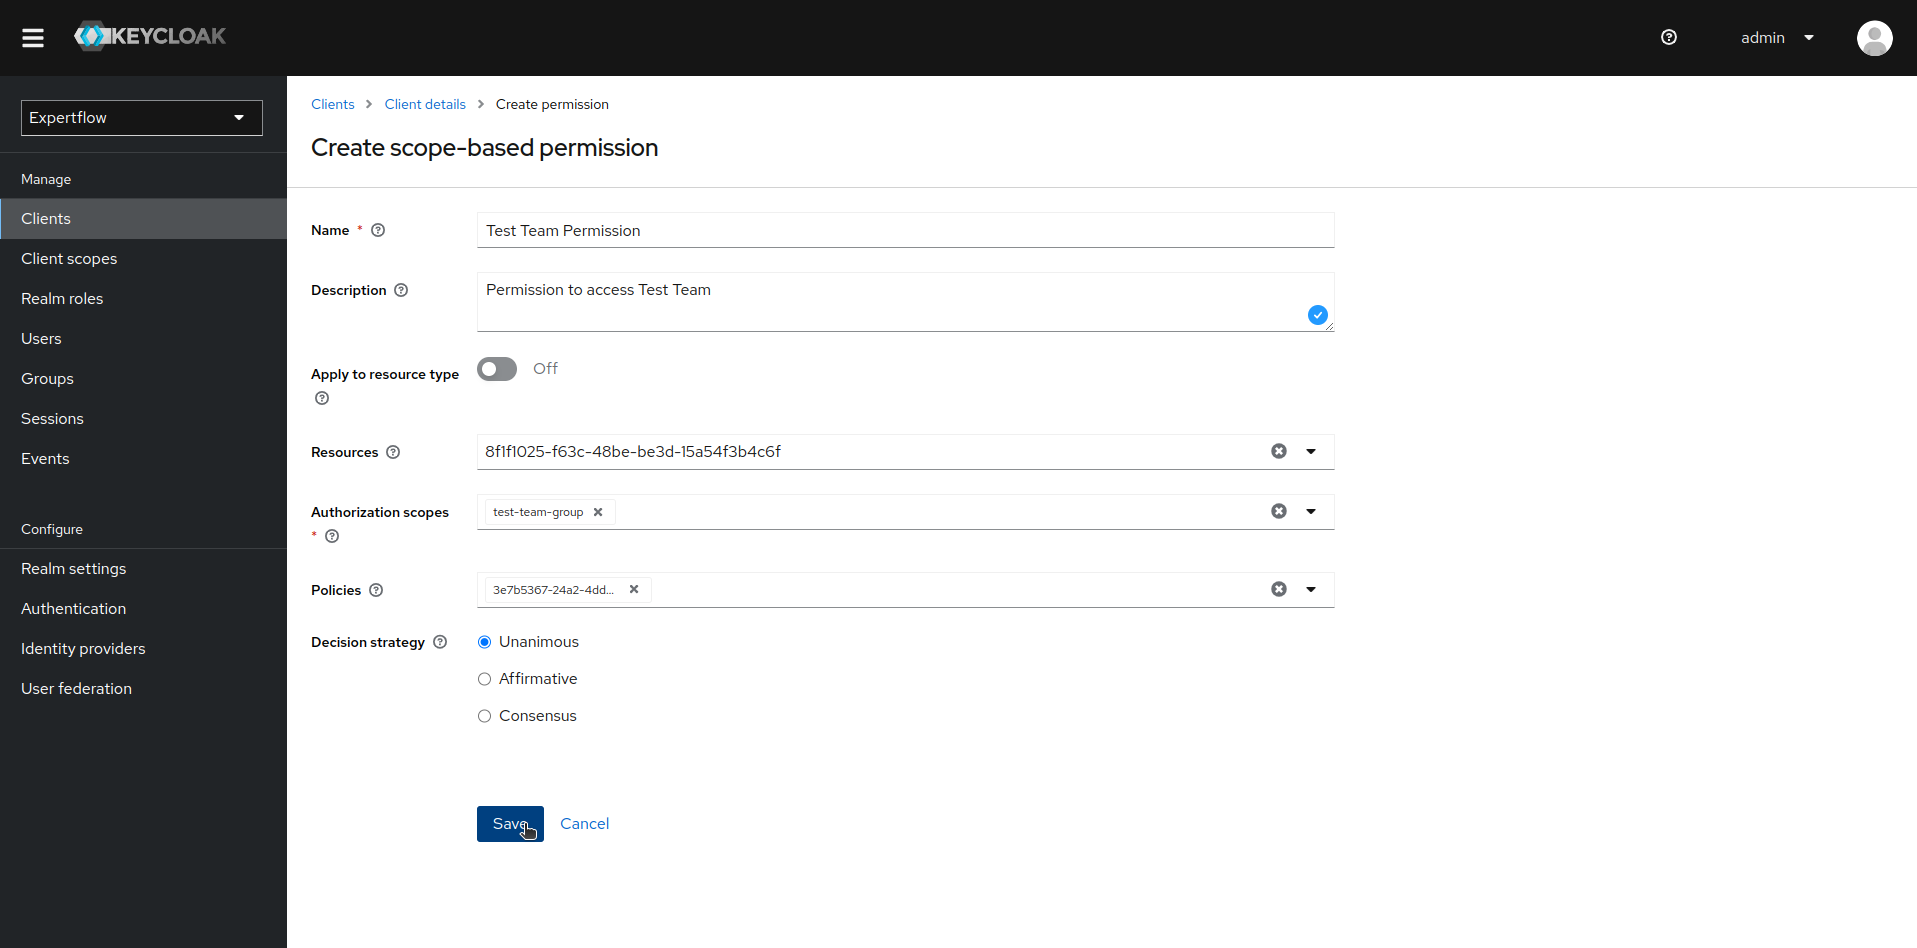
Now, we create Scope based Permission to connect the scope of our team with Aggregated Policy and teams-dashboard resource. To create scope-based Permission, click on Permissions and then Create Permission, then select Create scope-based permission.
-
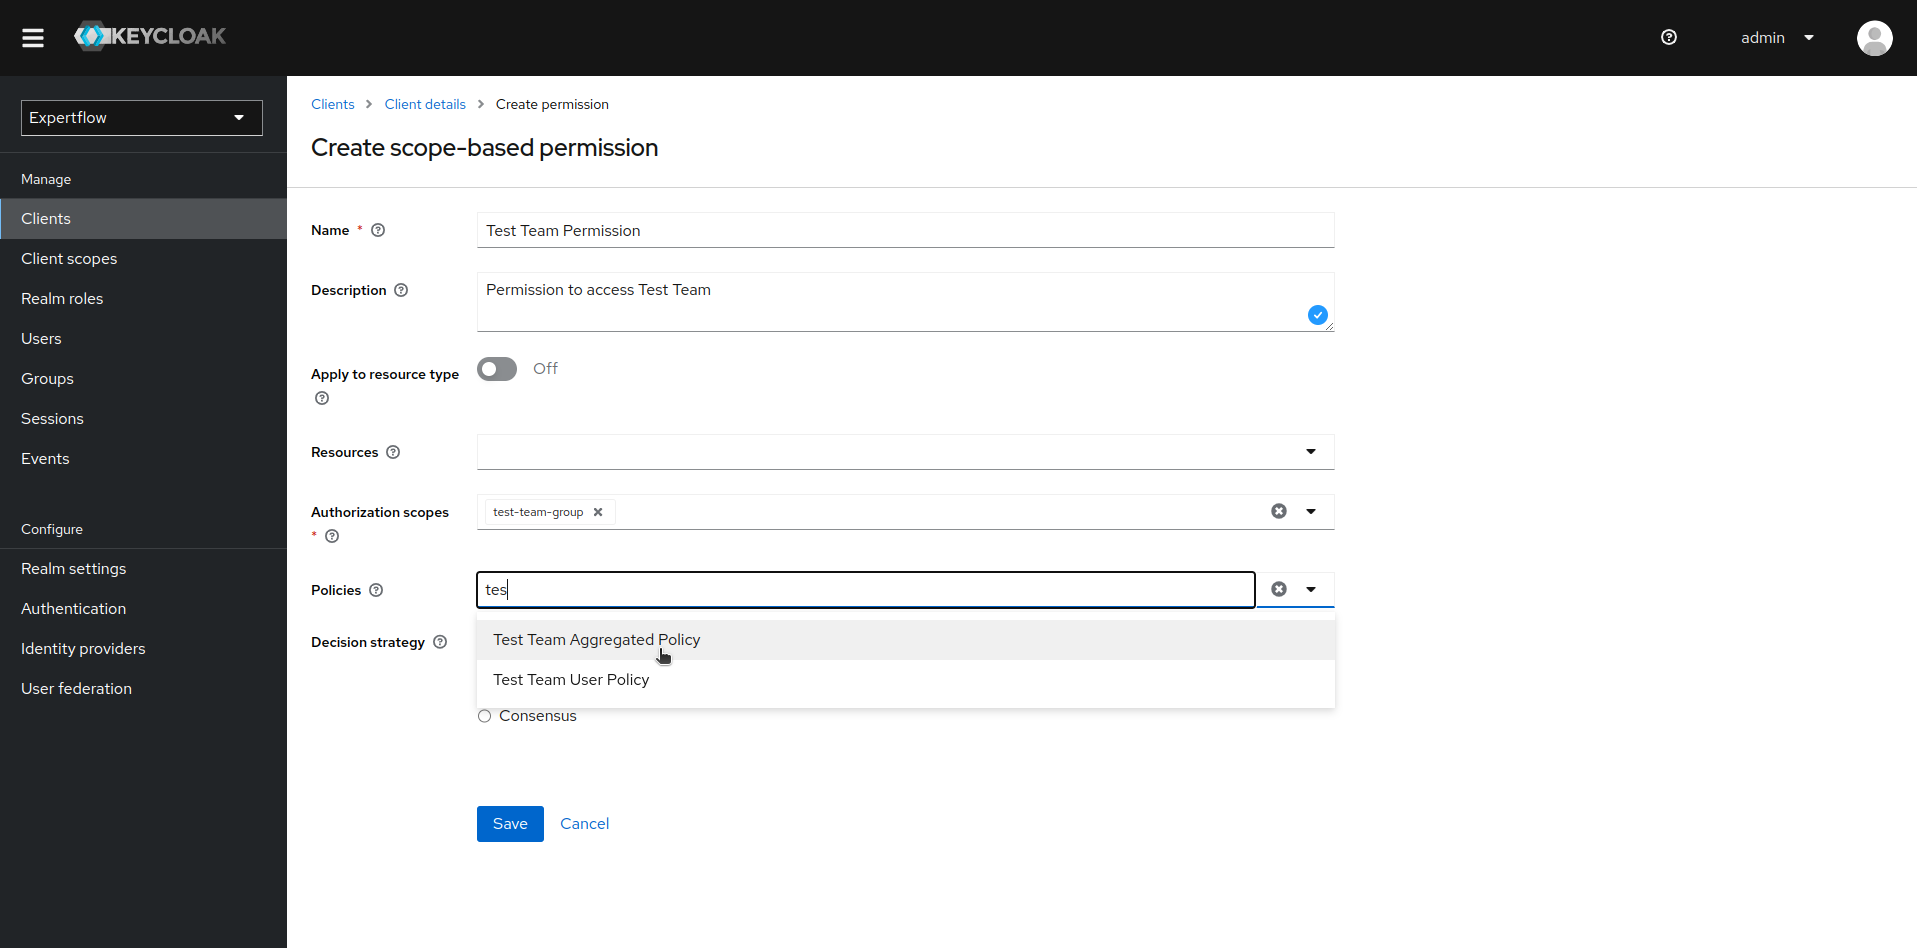
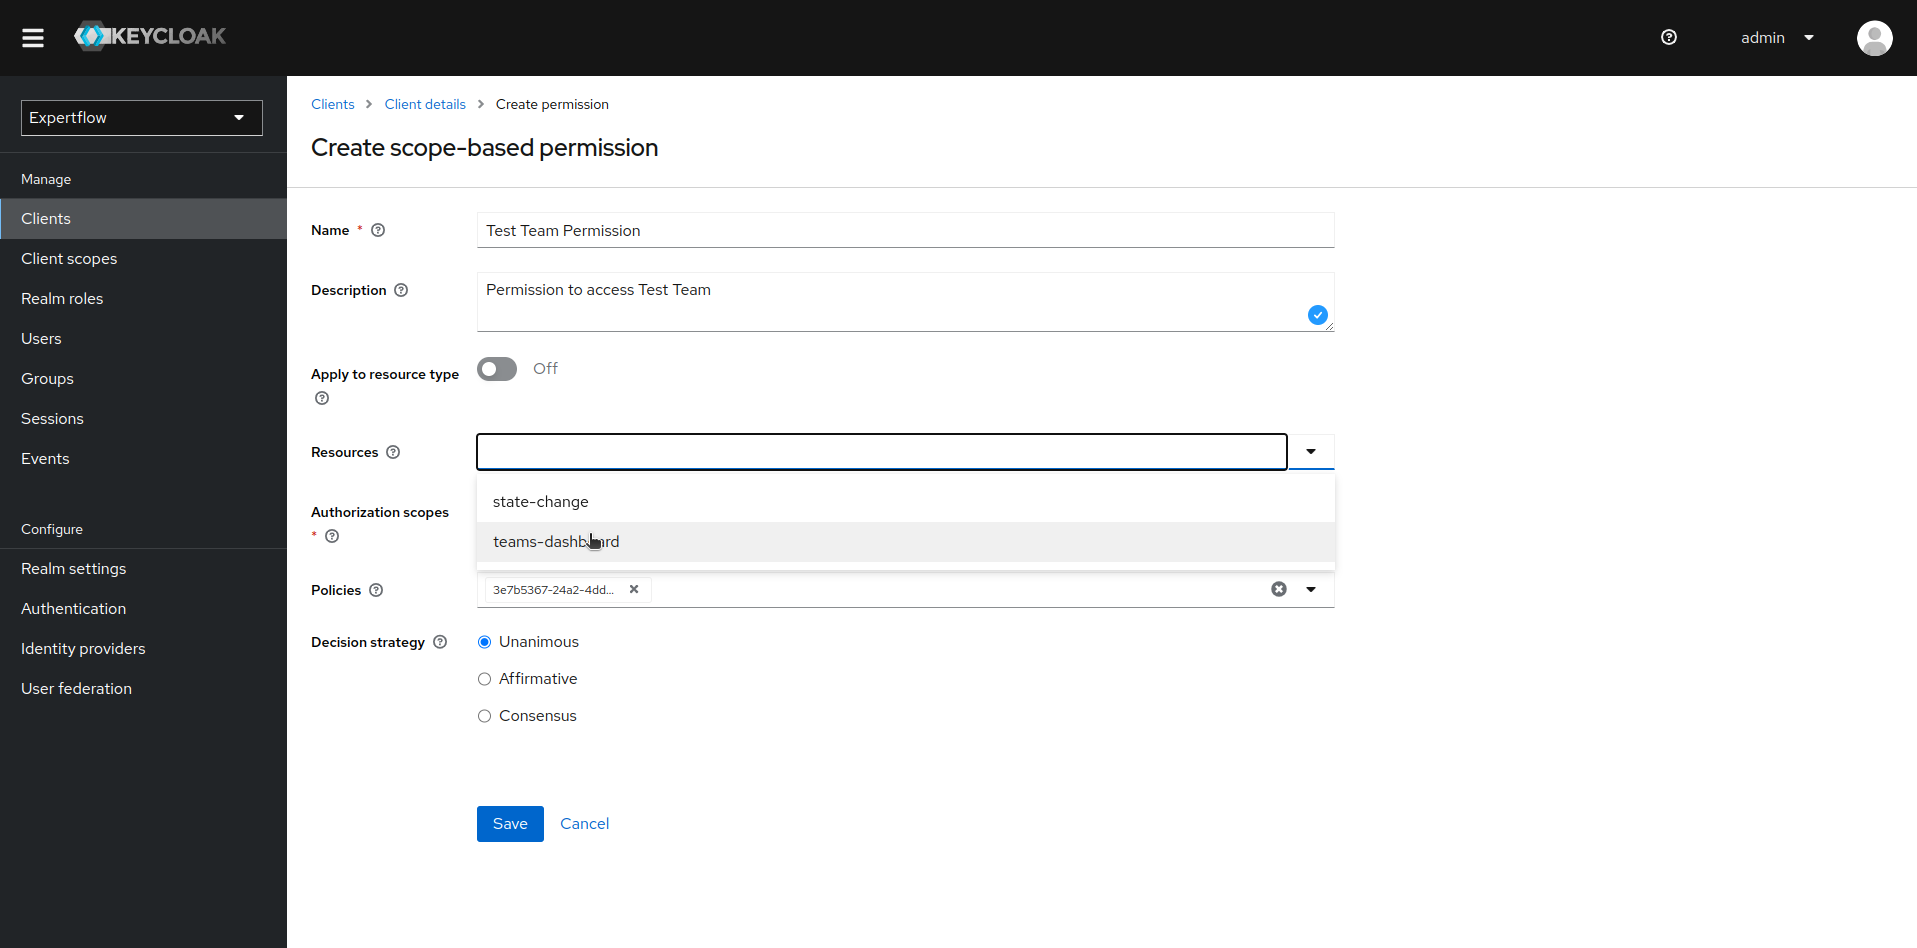
Name your Permission in accordance to your team, select teams-dashboard as resource, recently created team scope as scope and desired team Aggregated policy and then click on save.
-
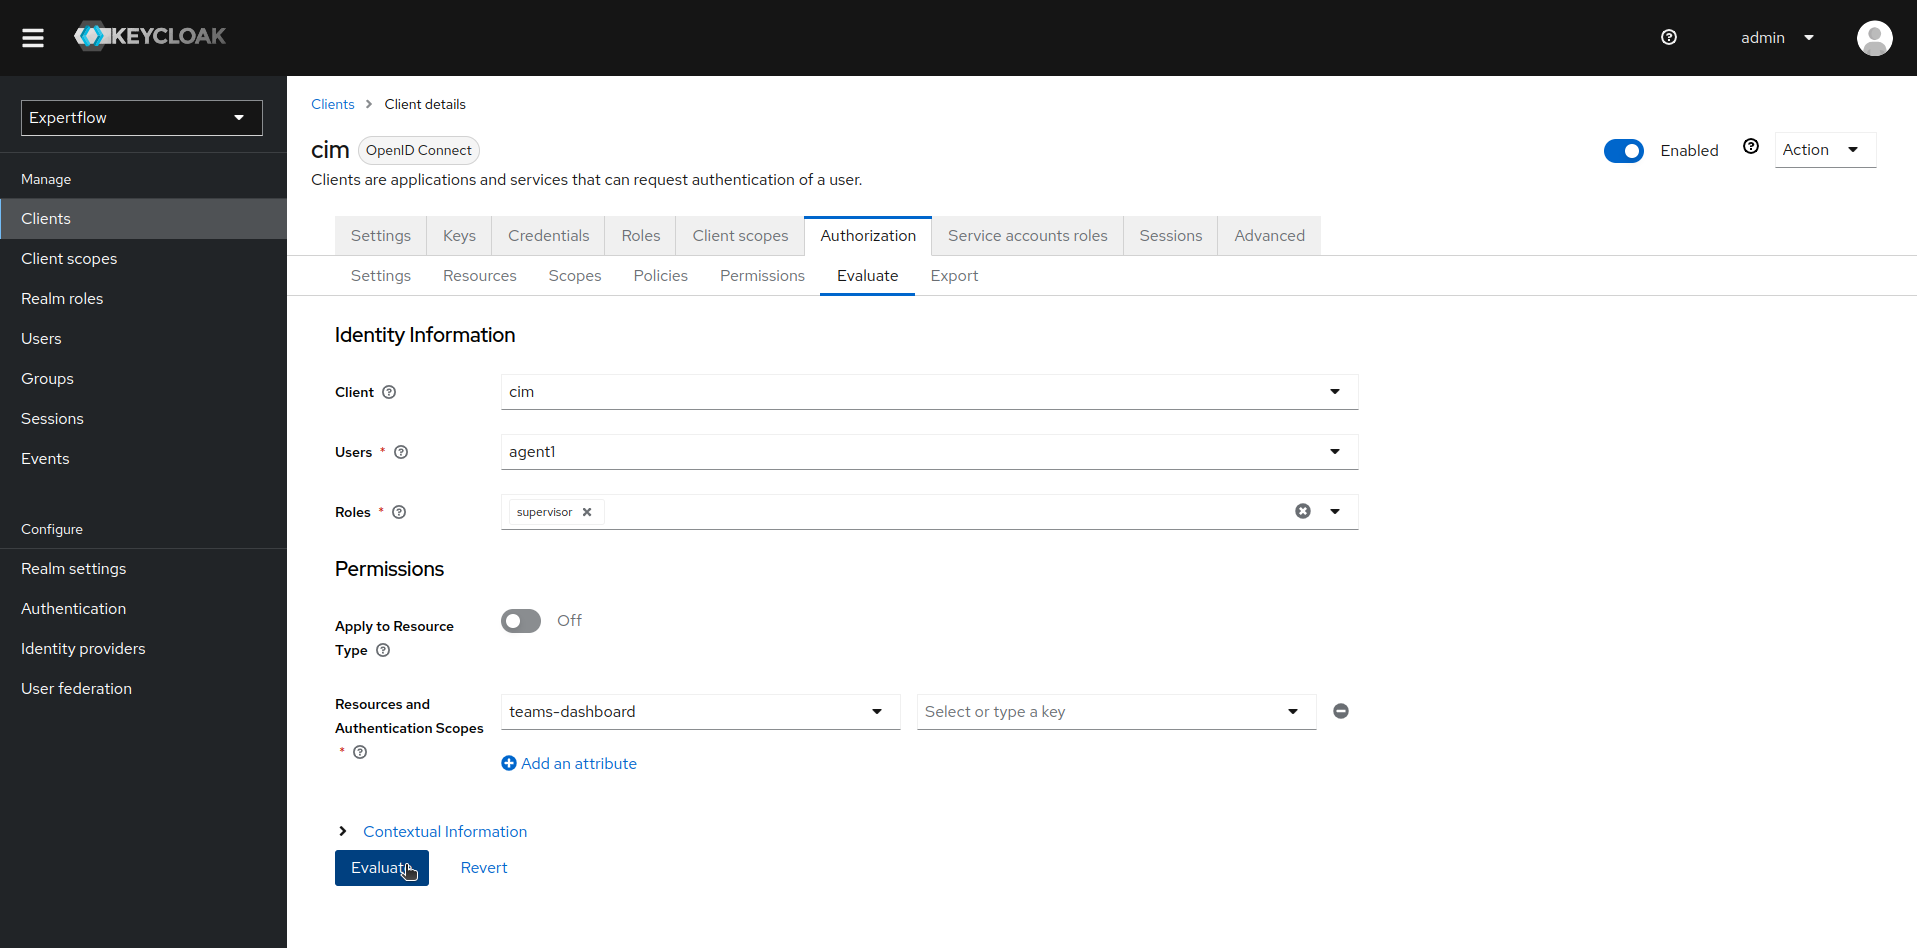
Once, the setup of Teams Permissions/Policies is complete, go to the evaluate tab and select your desired user and assign it role. Select desired resource and scope and then evaluate to see whether selected user has access on desired resource or not against given scope.