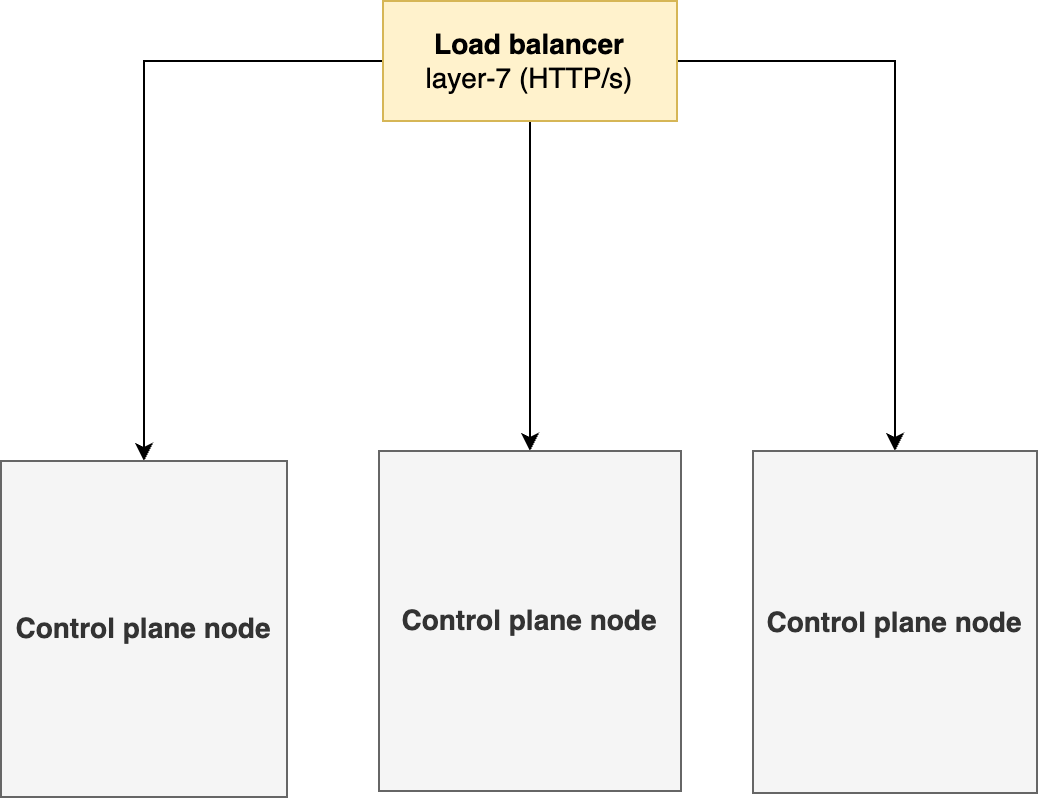
You may use any external load balancer for high availability of your Kubernetes cluster. This document covers configuration of a NGINX as an external load balancer for an RKE2 Kubernetes cluster.
Prerequisites
|
Type |
RAM (GiB) |
vCPU |
DISK (GiB) |
Scalability |
Network Ports |
Minimum Nodes |
|---|---|---|---|---|---|---|
|
Load-Balancer |
2 |
1 |
100 |
Single-Node |
6443, 9345,80,443 to all CP/Worker Nodes nodes |
1 |
Load Balancer without HA is single point of failure in the cluster setup and customers are required to setup either of above in a failover cluster.
Configuration Steps
1. DNS configurations
In your DNS, map your FQDN to an A record or a CNAME pointing pointing to the load balancer IP or hostname. Given below is a sample configuration for NGINX as an ELB.
2. Deploy an ELB
3. Deploy the cluster in HA using LoadBalancer
3.1. Deploy RKE2 on first control plane
-
Create a deployment manifest called
config.yamlfor RKE2 cluster and replace the IP address.
Assuming that the Load balancer is running on 1.1.1.1 with the FQDN cx.customer-x.com.
cat<<EOF|tee /etc/rancher/rke2/config.yaml
tls-san:
  - cx.customer-x.com
  - 1.1.1.1
write-kubeconfig-mode: "0600"
etcd-expose-metrics: true
cni:
  - canal

EOF
-
For the first control plane setup, install RKE2 RKE2 Control-plane Deployment
-
Retrieve the joining token from the control plane that you need to use for installing the remaining control plane nodes.
Bashcat /var/lib/rancher/rke2/server/node-token
3.2. Deploy RKE2 on remaining control plane nodes
-
Create a deployment manifest called
config.yaml
Assuming that the Load balancer is running on 1.1.1.1 with the FQDN cx.customer-x.com.
cat<<EOF|tee /etc/rancher/rke2/config.yaml
server: https://1.1.1.1:9345
# speicfy the token as retrieved in the first control plane deployment
token: [token-string]
tls-san:
  - cx.customer-x.com
write-kubeconfig-mode: "0644"
etcd-expose-metrics: true
cni:
  - canal

EOF
-
Install RKE2 RKE2 Control-plane Deployment on all the remaining control plane nodes.
4. Deploy Worker Nodes
On each worker node,
-
Run the following command to install RKE2 agent on the worker.
Bashcurl -sfL https://get.rke2.io | INSTALL_RKE2_TYPE="agent" sh - -
Enable the
rke2-agentservice by using the following command.Bashsystemctl enable rke2-agent.service -
Create a directory by running the following commands.
Bashmkdir -p /etc/rancher/rke2/ -
Add/edit
/etc/rancher/rke2/config.yamland update the following fields.-
<Control-Plane-IP>This is the IP for the control-plane node. -
<Control-Plane-TOKEN>This is the token which can be extracted from first control-plane by runningcat /var/lib/rancher/rke2/server/node-tokenBashserver: https://<Control-Plane-IP>:9345 token: <Control-Plane-TOKEN> tls-san: - <FQDN> write-kubeconfig-mode: \"0644\" etcd-expose-metrics: true
-
-
Start the service by using follow command.
Bashsystemctl start rke2-agent.service
At this point, you have RKE2 Kubernetes cluster ready using load balancer.
5. Verify the cluster setup
On the control-plane node run the following command to verify that the worker(s) have been added.
kubectl get nodes -o wide
Next Steps
-
Choose and install a cloud native storage. See Storage Solution - Getting Started for choosing the right storage solution for your deployment.
-
Deploy Expertflow CX following Expertflow CX Deployment on Kubernetes