Table of Contents
Introduction
Twitter supports Direct Messaging integration for user-to-user messages. Direct Messaging support includes (but not limited to) exchanging plain text messages, emojis, images, videos, gifs, quick replies, typing indicators and read receipts.
To develop any Twitter Integrations, we must have a Twitter Developer Account. In that account, we will setup a Twitter App which will then integrate our system with Twitter platform. Follow the Twitter Getting Started Guide to apply for Twitter Developer Account and setting it up.
Twitter Developer Account Guide
-
Log in to Twitter Developer Portal. If you don't have a twitter account already, please sign up first.
-
After login, you need to select the appropriate access type and provide the details of the project with which you will be using Twitter Developer Account. This process will normally take few days to review the application and approving/rejecting it. So providing as much details as possible with valid reasoning will help in approval of this application.
-
Once access is approved, Create a Project (or it might be already created when you will apply for the access) and then create an app inside project.
There are two ways to use Twitter developer platform. One is via directly creating "Standalone App" which only supports Twitter V1 APIs. Second is via creating project first and then creating an app inside the project which supports Twitter V1 as well as Twitter V2
APIs.
Currently, from our direct messaging purpose, both V1 or V2APIs can be used BUT! its better to go with V2 API by first creating a Project and then the App because sooner or later, all V1 APIs will migrate to V2.
-
Once the app is created then generate the Keys and Tokens from "Keys and tokens" tab of the application (as shown in the screenshot below). Also, make sure to set the permissions as "Read, Write and Direct Messages" from Settings Tab in case of Project based App or from App creation wizard while setting up a Standalone App.
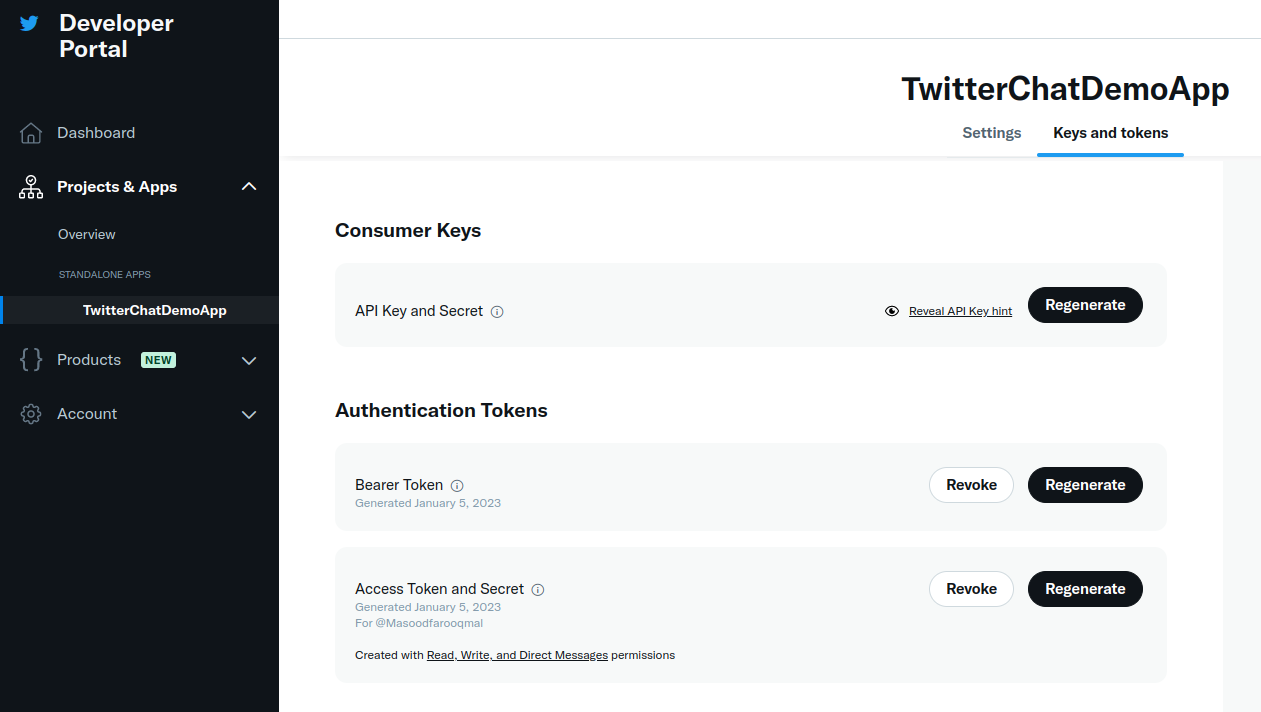
-
After you have generated the Keys and Tokens, save all these credentials (Api Key, Api Key Secret, Access Token, Access Token Secret, Bearer Token) as these will be shown only once when generated. If you misplaced or forget it, then you need to re-generate them which will invalidate the previously generated credentials. These token and keys will be used later on while setting up the application in CIM Unified-Admin.
-
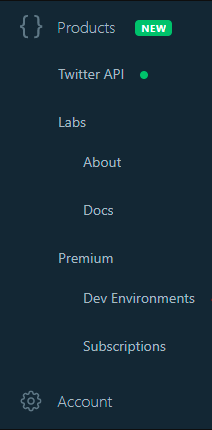
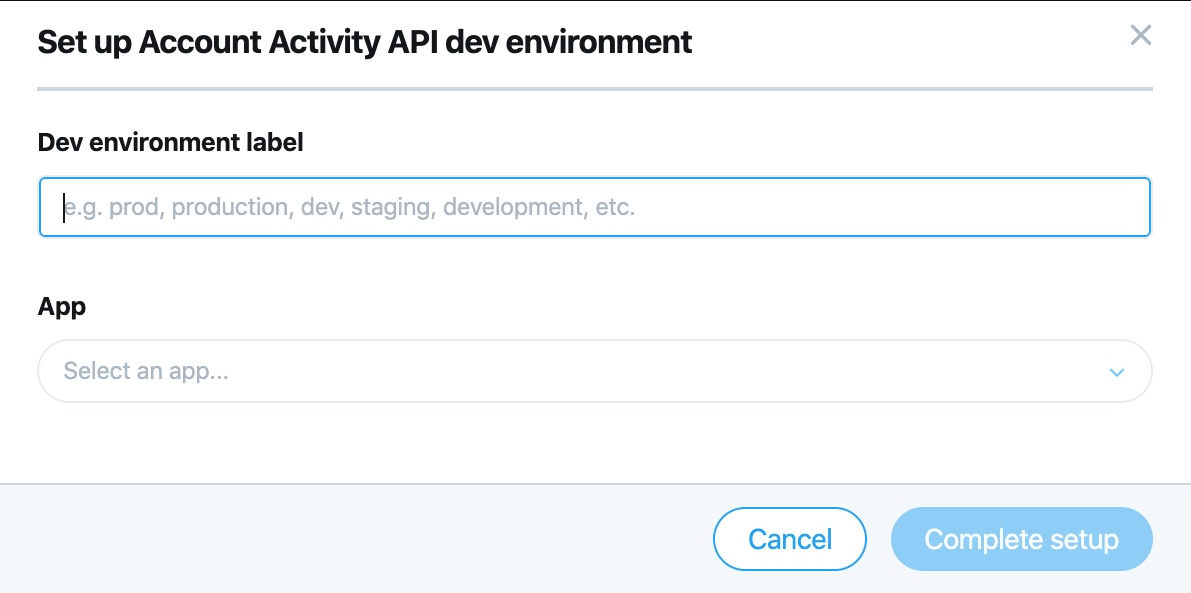
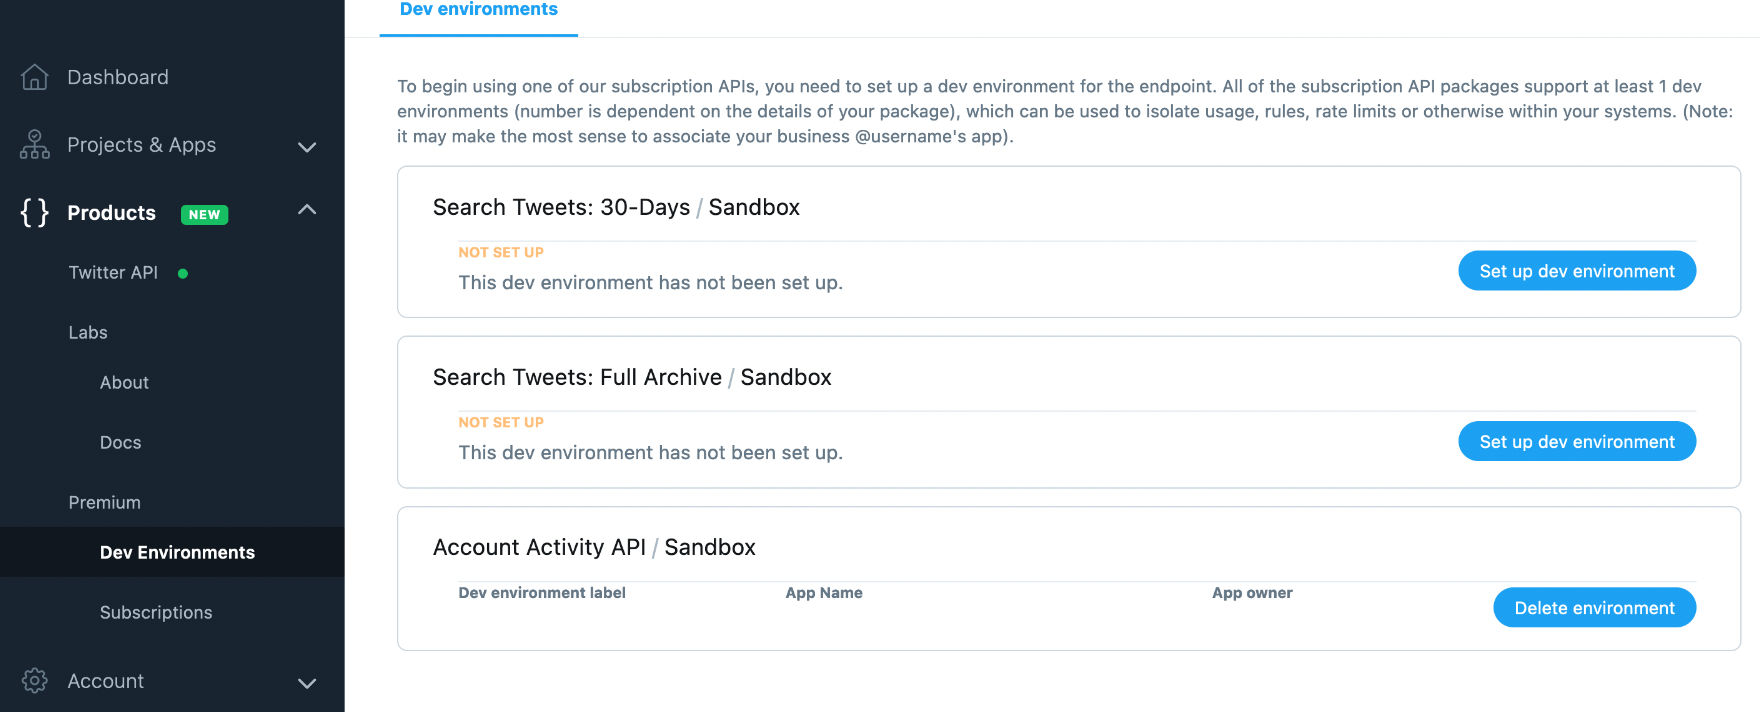
Next step would be to go to the "Products → Premium → Dev Environment" menu from the left navigation menu of Twitter Developer Portal and setup a "Lab Environment" (as shown in the screenshots below). Keep note of this environment name as well as you will be needing it while registering the CIM Twitter Webhook with Twitter. This environment is used for "Account Activity API" part, which will be sending events to the subscribed webhooks related to incoming/inbound data which could be tweets, direct messages and any other activity.
At this point, Twitter Developer Account is set up. Now, we need to perform some manual steps (one time activity) to register and subscribe for the webhook.
Twitter Account Activity API - Webhook Management
In this section, we will be sending some API calls to manage the webhook. Before proceeding with this section, we need to make sure that our Twitter Connector App is deployed and running on server.
Since Twitter is cloud-based, to integrate it with CIM, the Twitter endpoint inside the CCM MUST be accessible publicly and MUST also be hosted in a secure host with a valid SSL certificate.
1. Generate Account ID of the Twitter Account from Username
-
To fetch the account id of your account associated with twitter developer account, there are two possible ways.
-
One simple way is to login to Twitter and go to any direct message with any person. You will see the URL in the URL bar as follows: https://twitter.com/messages/732739706-210375291
Here, the highlighted id before - (hyphen) is your account id. Like in this case, 732739706 is the account id with which I am logging in.
-
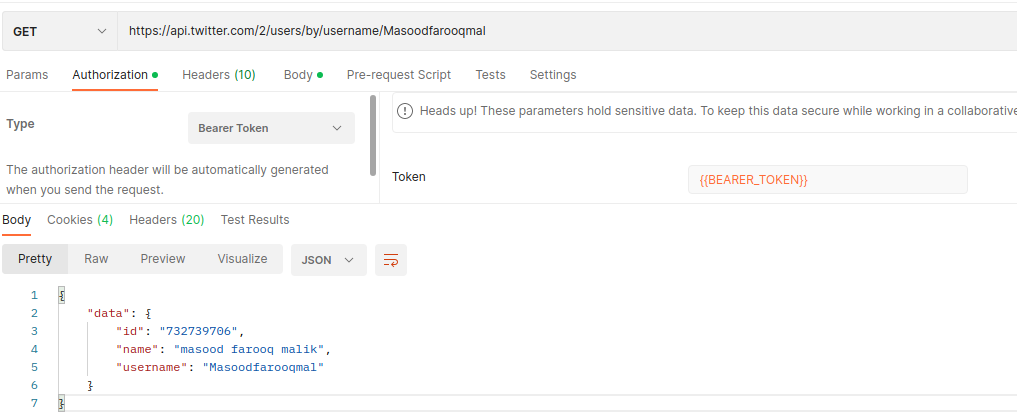
Second way can only be used if you have setup the developer account with Twitter V2 API (App inside the Project way). In this way, we can call the below mentioned API call to get the account id (as shared in the screenshot below)
URL: GET https://api.twitter.com/2/users/by/username/<username>
Header: Authorization - Type: "Bearer Token" (Provide Bearer Token extracted while generating API keys and tokens from Twitter Developer Portal)
Sample Request:
-
2. Get the existing webhook (If already registered)
-
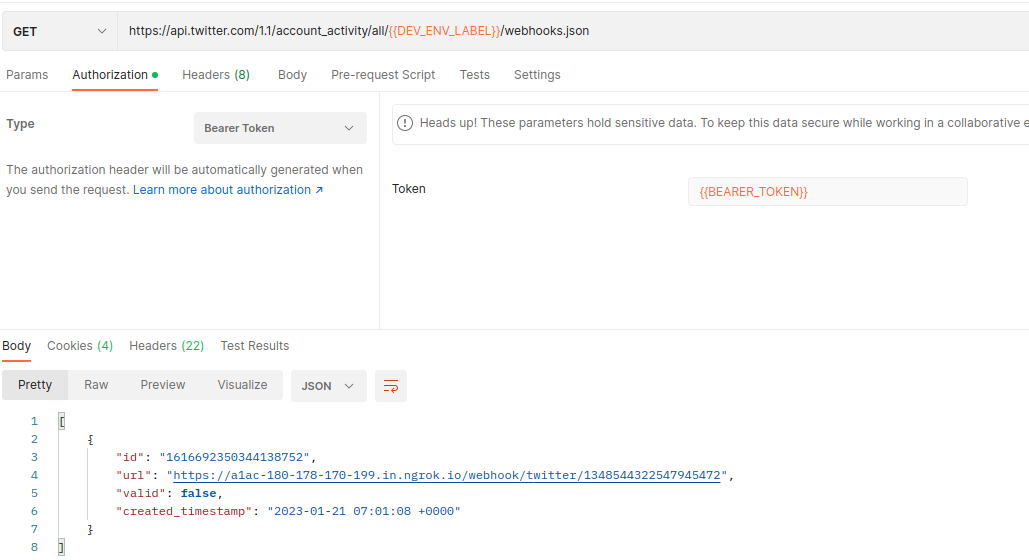
This step will be used to fetch the existing webhook registered with the Lab Environment label provided. You can review the Twitter Premium and Enterprise Account Activity API docs for the documentation and limitations regarding number of webhooks allowed and subscriptions allowed etc. Normally, for the first time, this step can be skipped because there will be no already webhook registered, so we don't need to get the existing webhook's.
-
URL: GET https://api.twitter.com/1.1/account_activity/all/{{DEV_ENV_LABEL}}/webhooks.json (replace the
DEV_ENV_LABELwith the one extracted while setting up Lab Environment from Point 6 of section 1)
Header: Authorization - Type: "Bearer Token" (Provide Bearer Token extracted while generating API keys and tokens from Twitter Developer Portal)
Sample Request:
3. Delete the existing webhook (If already registered and you want to update it)
-
This step will be used to delete the existing webhook based on its id returned from the previous section API response. Normally, for the first time, this step can be skipped because there will be no already webhook registered, so we don't need to get the existing webhook's nor need to delete any.
-
URL: DELETE https://api.twitter.com/1.1/account_activity/all/{{DEV_ENV_LABEL}}/webhooks/{{webhook_id}}.json (replace the
webhook_idwith the one that we fetched from the previous step API response as id. & replace theDEV_ENV_LABELwith the one extracted while setting up Lab Environment from Point 6 of section 1)
Header: Authorization - Type: "OAuth 1.0" (Provide 4 API keys & tokens that we extracted while generating API keys and tokens from Twitter Developer Portal. Set Signature Method as HMAC-SHA1)
Sample Request:
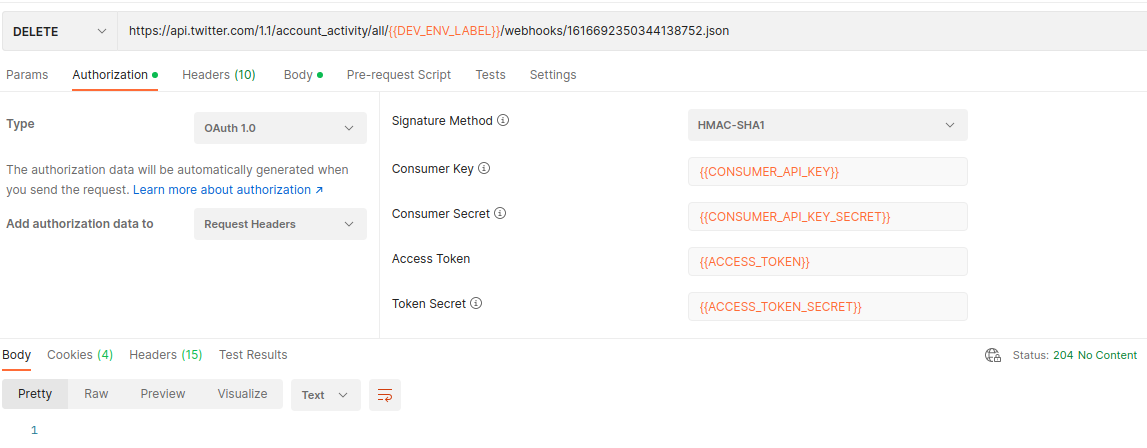
Response will be empty body with Response Code 204
4. Register & Subscribe Webhook
-
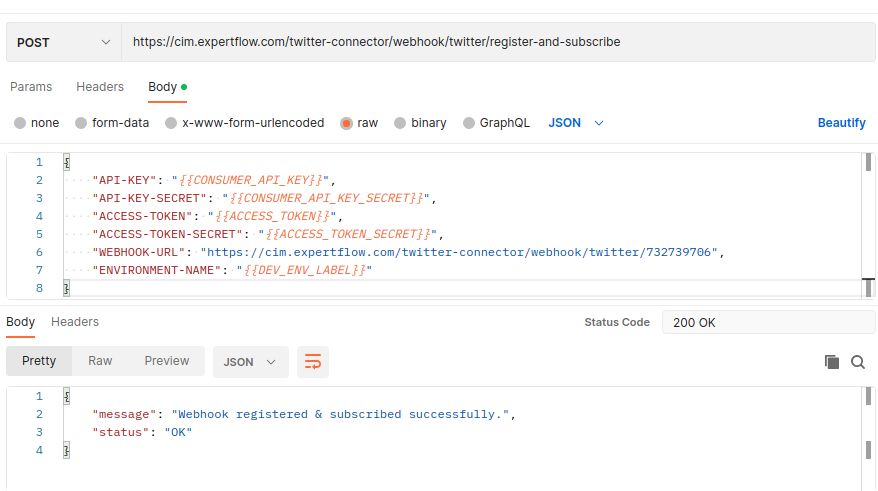
In this step, we will be registering and subscribing for the webhook. This is a two step process but it is handled inside the twitter connector application in a single API call. That's why the API call used in this step is Twitter Connector Application specific, due to which it is mandatory that Twitter Connector Application should be UP and Running before this step.
-
URL: POST
http://{{FQDN}}/twitter-connector/webhook/twitter/register-and-subscribe
(Replace the
FQDNwith the fqdn of the server on which Twitter Connector App is deployed)
Request Body:{
"API-KEY": "{{CONSUMER_API_KEY}}",
"API-KEY-SECRET": "{{CONSUMER_API_KEY_SECRET}}",
"ACCESS-TOKEN": "{{ACCESS_TOKEN}}",
"ACCESS-TOKEN-SECRET": "{{ACCESS_TOKEN_SECRET}}",
"WEBHOOK-URL": "https://{{fqdn}}/twitter-connector/webhook/twitter/{{account_id}}",
"ENVIRONMENT-NAME": "{{DEV_ENV_LABEL}}"
}
(Replace thefqdnwith the fqdn of the server on which Twitter Connector App is deployed. Andaccount_idwith account id generated in the 1st step of this section)
Sample Response - Code 200:
Twitter Channel Configuration in CIM - Unified Admin
This section will help setup Twitter Connector in CIM unified admin.
-
First of all, go to Unified Admin (https://fqdn/unified-admin) and create an MRD, Routing Attribute, Queue specifically for Twitter Channel so that we can assign these dedicated items for Twitter Channel. Then assign the MRD to selected agent and setup the agent attributes. All these steps will be performed in the same way as we normally setup for any other channel or even for basic unified-admin setup. If you have any confusion in setting up things mentioned in this step, you can review the Unified Admin Setup Guide.
-
Once done, then proceed to Channel Manager menu and perform the steps in each of the sub-menu under Channel Manager as follows:
-
Channel Type:
Channel Type should be automatically created as part of Channel Connector bootstrapping. You should see a channel named "TWITTER" here.
-
Channel Provider:
-
Create a new Channel Provider (i.e. name can be "Twitter Channel Provider").
-
Select Channel Type as "TWITTER" from the drop down menu.
-
Enter provider webhook as: https://{{FQDN}}/twitter-connector
-
Add four (4) custom attributes, each with type =
"String2000". All of them will be "Required" attributes. Their name will be:
-
API-KEY
-
API-KEY-SECRET
-
ACCESS-TOKEN
-
ACCESS-TOKEN-SECRET
-
-
-
Channel Connector:
Add a new Channel Connector.-
Name can be "Twitter Channel Connector"
-
Select Channel Provider Interface as the one we created in previous step. (I.e. Twitter Channel Provider)
-
Once you select the channel provider interface value, then the respective custom attribute fields will appear. These fields will be those 4 fields, which we added in previous step as part of custom attributes. Enter the API Keys and Token values in it from the one that we extracted while setting up Twitter Developer Account.
-
-
Channel:
Now in the Channel menu, you should see a channel named "TWITTER". Expand the collapsible menu and click on "Add new channel".-
Name can be "Twitter DM"
-
In Service Identifier field, add the Account ID that we extracted in the 1st step of Webhook Management in this document.
-
Select the default bot from the Bot ID drop down values. It could be named as "EF-Bot".
-
Select "Twitter Channel Connector" that we created in previous step in Channel Connector field.
-
Customer Activity Timeout can be set as 180 seconds.
-
Channel Mode can be used as default value. i.e. HYBRID.
-
Agent Selection Policy field value can be used as default value. i.e. LONGEST AVAILABLE.
-
Agent Request TTL can be set as 100 seconds.
-
Routing Mode can be selected as PUSH or PULL. Based on this selection, you can select the Queue or List in the next field value.
-
-
Size restrictions for uploading via Twitter API
-
Image 5 MB
-
GIF 15 MB
-
Video 512 MB (But in our application its limited to 25MB maximum)
After all these configurations, you should be able to use Twitter Channel Connector with CIM as its component. For any further details you can visit Twitter Direct Messaging Features or Twitter Media Guide.