Introduction:
CX SIP Proxy is a powerful open-source software platform designed to facilitate real-time communications over VoIP. One of CX SIP Proxy's primary functions is as a SIP proxy, efficiently routing SIP (Session Initiation Protocol) messages between users or endpoints within a network. CX SIP Proxy's Load Balancer and Dispatcher modules empower it to function as a dynamic load balancer within SIP infrastructures. It intelligently distributes traffic across multiple servers or endpoints based on customizable rules, ensuring optimal resource utilization and high availability.
This installation is tested and works perfectly on Debian 12.
Pre-requisite:
A machine with OS Debian 12 for perfect installation. The CX SIP Proxy control panel runs smoothly with PHP 7.4. If any other version of PHP is already installed replace it with version 7.4.
CX SIP Proxy installation:
Install the following utilities
sudo apt install curl
sudo apt install gnupg2
sudo apt install wget
Go to the following link to get the desired version of the CX SIP Proxy for any operation system. https://apt.opensips.org or run the following commands to download opensips 3.4 and opensips-cli for Debian 12.
curl https://apt.opensips.org/opensips-org.gpg -o /usr/share/keyrings/opensips-org.gpg
echo "deb [signed-by=/usr/share/keyrings/opensips-org.gpg] https://apt.opensips.org bookworm 3.4-releases" >/etc/apt/sources.list.d/opensips.list
echo "deb [signed-by=/usr/share/keyrings/opensips-org.gpg] https://apt.opensips.org bookworm cli-nightly" >/etc/apt/sources.list.d/opensips-cli.list
Refresh the local package index and install opensips and opensips-cli.
apt-get update
apt install opensips
apt install opensips-cli
Now install all the modules of opensips
apt install opensips-*
Start opensips and check the status
systemctl enable opensips
systemctl start opensips
systemctl status opensips
CX SIP Proxy Database Support
CX SIP Proxy uses the database to load subscribers and passwords, routes, dialplan, and others. It is compatible with every major SQL and NoSQL database. We are going to use MySQL, the most common database in use for it. To install CX SIP Proxy support for mysql we have to follow some steps.
-
Install MySQL Server
apt install mariadb-server
This will install a MySQL-compatible database server at the address 127.0.0.1 with no password, and no direct access from the internet.
-
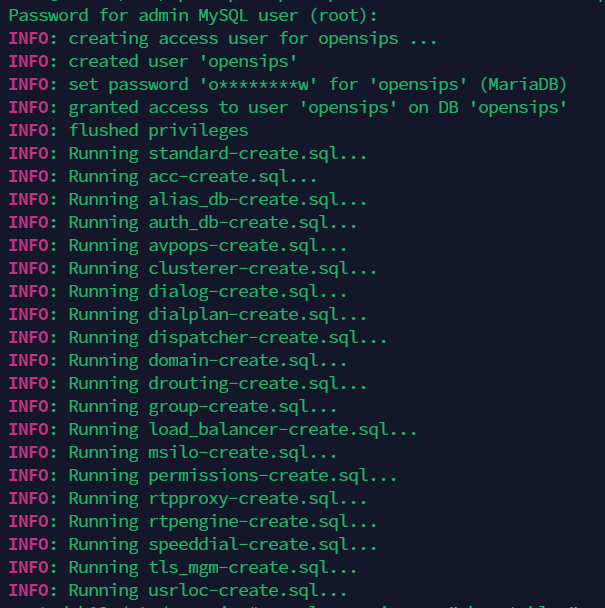
Create the database opensips using the CX SIP Proxy command line interface
opensips-cli -x database create opensips
When asked for a password, press ENTER so no password is added. It would look like

-
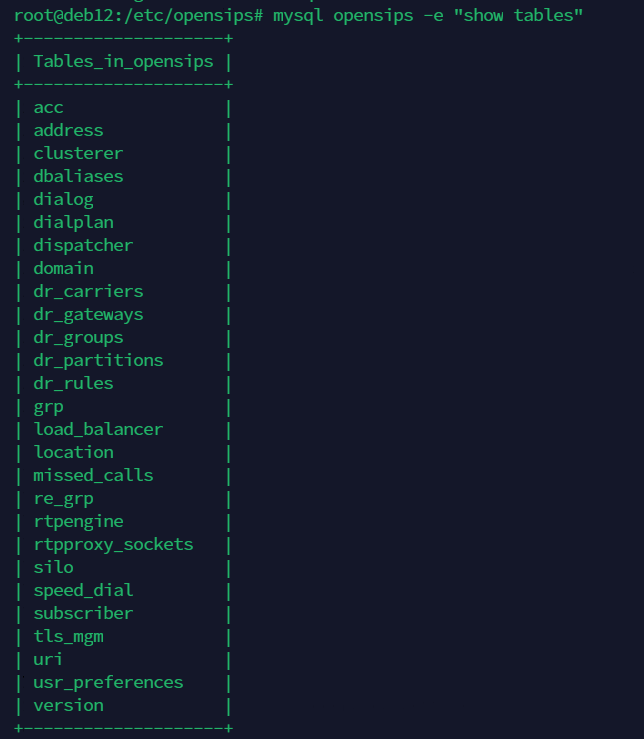
Verify if the tables were created
mysql opensips -e "show tables"It would look like

CX SIP Proxy control panel installation
Apache2 web server is used as a host for CX SIP Proxy control panel. Also, ensure that the machine is using PHP 7.4. The control panel may not function smoothly with other PHP versions.
-
To install apache2
apt-get install -y apache2 -
Run these commands to ensure the installation of other dependencies.
sudo apt-get install -y lsb-release apt-transport-https ca-certificates sudo wget -O /etc/apt/trusted.gpg.d/php.gpg https://packages.sury.org/php/apt.gpg sudo sh -c 'echo "deb https://packages.sury.org/php/ $(lsb_release -sc) main" > /etc/apt/sources.list.d/php.list' sudo apt-get update apt-get install -y php7.4 php7.4-curl php7.4-gd php-pear php7.4-cli php7.4-mysql php7.4-apcu; apt-get install libapache2-mod-php7.4 -
Now download and unzip the CX SIP Proxy control panel
cd /var/www/html
wget https://github.com/OpenSIPS/opensips-cp/archive/9.3.4.zip
unzip 9.3.4.zip
mv opensips-cp-9.3.4 opensips-cp
chown -R www-data:www-data /var/www/html/opensips-cp/
mysql -Dopensips < /var/www/html/opensips-cp/config/db_schema.mysql
cp /var/www/html/opensips-cp/config/tools/system/smonitor/opensips_stats_cron /etc/cron.d/
mysql -e "CREATE USER 'opensips'@'localhost' IDENTIFIED BY 'opensipsrw';"
mysql -e "GRANT ALL PRIVILEGES ON opensips.* TO 'opensips'@'localhost';"
mysql -e "FLUSH PRIVILEGES"
systemctl restart cron
-
Reconfigure apache2 to run CX SIP Proxy-cp
-
Replace the content of the file /etc/apache2/sites-available/000-default.conf with the content below.
nano /etc/apache2/sites-available/000-default.conf<VirtualHost *:80> #ServerName www.example.com ServerAdmin webmaster@localhost DocumentRoot /var/www/html ErrorLog ${APACHE_LOG_DIR}/error.log CustomLog ${APACHE_LOG_DIR}/access.log combined <Directory /var/www/html/opensips-cp/web> Options Indexes FollowSymLinks MultiViews AllowOverride None Require all granted </Directory> <Directory /var/www/html/opensips-cp> Options Indexes FollowSymLinks MultiViews AllowOverride None Require all denied </Directory> Alias /cp /var/www/html/opensips-cp/web <DirectoryMatch "/var/www/html/opensips-cp/web/tools/.*/.*/(template|custom_actions|lib)/"> Require all denied </DirectoryMatch> </VirtualHost> -
Restart apache2 and test the access using your browser and the address of the server.
-
systemctl restart apache2.service -
Ensure that no other application is using port 80 as apache2 runs on it.
-
Test the control panel logging in with admin, password opensips http://<server-ip>/cp
-
To generate script
/usr/sbin/osipsconfig