Overview
WhatsApp is a supported customer channel that allows businesses to start a conversation with a bot. an agent and a customer and interact with each other.
Intended Audience
This document serves as a guide to the business on how to configure WhatsApp Channel and start the chat.
Getting Started
Before You Start
You will need:
-
A Meta developer account — learn more about registering as a Meta developer.
-
A business app — learn more about creating apps. If you don't see an option to create a business app, select Other > Next > Business).
Step 1: Add The WhatsApp Product To Your App
At this point, if you created a new app, you’ll be prompted to Add products to your app. Scroll down, and under WhatsApp, select Set up. Otherwise, select your app from the My Apps screen, and you can follow the same instructions again to add WhatsApp to your app.
Step 2: Add a Recipient Number
Add a valid WhatsApp number where you can send test messages.
In the left-hand menu of the App Dashboard, navigate to WhatsApp > API Setup. Under Send and receive messages, select the To field and choose Manage phone number list.
You can add any valid WhatsApp number as a recipient. The recipient number will receive a confirmation code in WhatsApp that can be used to verify the number.
Once you verify the recipient number, it should now be selected in the To field. Repeat this process if you’d like to add another recipient, up to 5 in total.
Step 3: Send a Test Message
Send the pre-approved hello_world template message to your chosen recipient number.
In the WhatsApp > API Setup panel:
-
Ensure your test business phone number is selected in the From field.
-
Ensure you have the recipient phone number you would like to message selected in the To field. If you have multiple numbers added, you can send multiple messages at once.
-
In the Send messages with the API panel, click the Send message button.
Step 4: Configure Webhooks
With webhooks, you can receive real-time HTTP notifications of changes to specific objects. In WhatsApp, webhooks can notify you of many events in your app, like message delivery, read notifications and even account changes
-
Go to Add Product page
-
Select Webhooks
-
Then Select Webhooks from the left Navigation Menu.
-
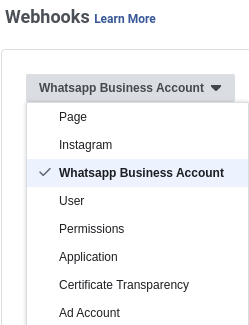
Select Whatsapp Business Account as the object you want to subscribe to and click "Subscribe to this object" button
-
Provide the whatsapp connector specific configuration for the webhook endpoint exposed on the whatsapp connector. Enter the webhook URL as follows;
-
Webhook URL: https://{{SERVER-FQDN}}/whatsapp-connector/webhook/{{Phone number ID}}
(If you don't know the page id then you can fetch it from the section "Creation of a Long-Lived(without-expiry) Page Access Token - 1g" below)-
Now, this verify token must be same as the WHATSAPP-PAGE-ACCESS-TOKEN variable in unified-admin configuration.
-
-
-
Click Verify & Save. This will be saved only if the webhook URL and the token are valid.
-
On the App dashboard, subscribe to "messages" field.
Step 5: Generate/Access the Page Access Token
Although User access tokens are supported and can be used by all app developers, you likely will only use them when you first use the App Dashboard for temporary testing.
This is because user access tokens expire quickly, so you will have to keep generating a new one every few hours.
Creation of a Short-Lived Page Access Token
Access the App Dashboard > WhatsApp > API setup panel. This panel always generates a new User access token whenever you visit it. The token is automatically scoped to your user, since you are signed into your developer account when you access the panel.
Creation of a Long-Lived Page Access Token
User access tokens come in two forms: short-lived tokens and long-lived tokens. Short-lived tokens usually have a lifetime of about an hour or two, while long-lived tokens usually have a lifetime of about 60 days.
As mentioned above, the ultimate page access token is generated using the user access token, therefore, we will start with generation of a user access token and then using the user access token, we will generate a long-lived page access token.
-
Navigate to https://developers.facebook.com/tools/explorer/ to launch the Graph API Explorer Tool which is used to generate a short-lived user access token (valid for 1hr).
-
On the Graph API Explorer window that opens on your browser, edit the from me?fields=id,name to me/accounts
-
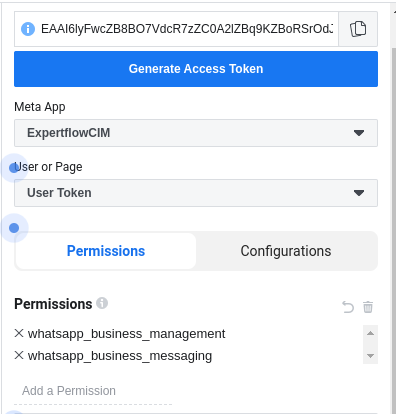
On the form to the right of your screen, select the App on the Meta App dropdown menu
-
On the User or Page select dropdown, select Get User Access Token
-
On the permissions field. Select the permissions shown in the screenshot
-
Click Generate Access Token button and then Submit
-
Copy the access token on the Access Token field and store it somewhere as you will need it in the next step.
-
Copy the Page Id(designated as id) in the API response body and store it somewhere as you will need it as well in the next step.
-
-
Navigate to Expertflow Postman documentation platform - Long-Lived User Access Token where Graph API for generating long-lived user access token is documented
-
On the page that opens, replace value on the client_id field with the actual App Id. You can find the App Id to replace in this field on your Facebook App's Settings > Basic page.
-
Replace the value on the client_secret field with the actual value on your App secret field (Note: you have to click the show button to unlock the full secret)
-
Replace the value on the fb_exchange_token field with the Short-Lived User Access Token which you generated in the step above.
-
Click Send
-
From the API response payload, copy the access token value that you receive after making the API request. This is a Long-Lived User Access Token which expires after a period of 60 days. Ensure that you store this token as we will use it in the next step.
-
-
Navigate to Expertflow Postman documentation platform - Long-Lived Page Access Token where Graph API for generating long-lived page access token is documented
-
On the page that opens, replace the {PAGE-ID} on the address bar with the actual page id which you generated in step 1, above.
-
Replace the value on the access_token field with the Long-Lived User Access Token which you generated , above.
-
Click Send
-
From the API response payload, copy the access token value that you receive after making the API request. This is a now the Long-Lived Page Access Token(never expires) which you will need to configure in the Whatsapp Connector in CIM. (Note: Ensure that you store this token in a safe place where it's not exposed to compromise).
-
Unified Admin Configuration
To set up Whatsapp Channel, the Whatsapp connector needs to be configured in the Unified Admin of the Expertflow CX's application.
Channel Type & Provider
-
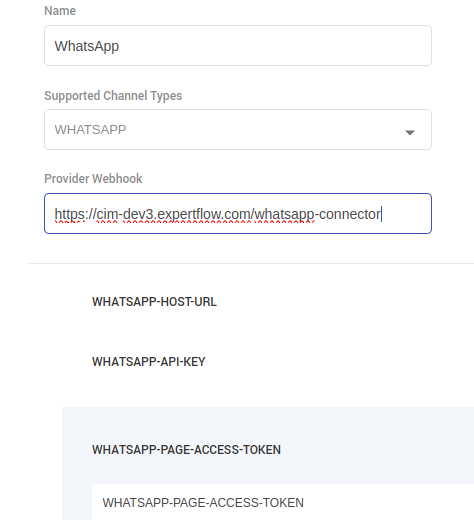
Create a new Channel Type (if doesn't exist). Give it the name "WhatsApp"
-
Provide the webhook URL for the Whatsapp Connector in the Provider Webhook field as https://{SERVER-FQDN}/whatsapp-connector. Replace the {SERVER-FQDN} in the URL with CIM FQDN.
-
Add the following attributes;
-
Click Add Custom Attribute button and on the form that opens, replace the dummy value "New attribute0.." in the attribute field with WHATSAPP-HOST-URL and select data-type as "URL" in the field to the right-most part of the form.
-
Click Add Custom Attribute button again, and replace the dummy value "New attribute1.." in the attribute field with WHATSAPP-API-KEY and select data-type as "String 2000".
-
Click Add Custom Attribute button again, and replace the dummy value "New attribute1.." in the attribute field with WHATSAPP-PAGE-ACCESS-TOKEN and select data-type as "String 100".
-
Click Save
-
Channel Connector
Adding the Whatsapp URL and Page Access Token in Channel Connector
-
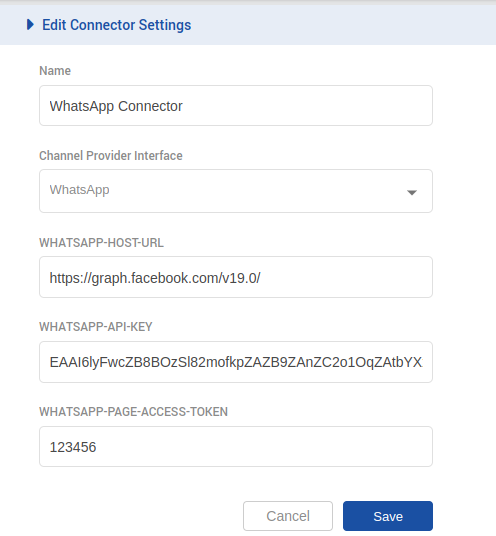
Navigate to Channel Manager > Channel Connector
-
Provide the name for the connector under the Name field
-
Select the Channel Provider Interface.
-
Enter the Facebook URL in the WHATSAPP-HOST-URL field. For example, https://graph.facebook.com/v19.0/ (Note: ensure you add the "/" after the API version)
-
Enter the Long-Lived Page Access Token in the WHATSAPP-API-KEY field.
-
Enter the "Verify Token" value which was used while registering Webhook in the WHATSAPP-PAGE-ACCESS-TOKEN field.
-
Click Save
Supported Message Types
Supported media types are mentioned Over here.
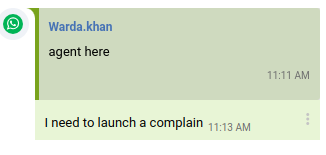
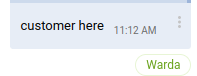
Plain Message
Whatsapp connector enables the customer and organization to send and receive plain messages instantly. To know the properties of the message body, see Text Message . The Plain message will be displayed as shown in the screenshot below.

Maximum length for Whatsapp: 4096 characters
Audio Message
Whatsapp connector enable the customer and organization to send and receive audio messages instantly. To know the properties of the message body, see CIM Media Messages -> Audio Message . The audio messages will be displayed as shown in the screenshot below and can easily be played with a single click.
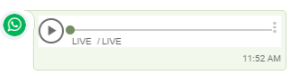
Maximum size supported by Whatsapp : 16MB
To further check which media types whatsapp support. see Media Types for Audio.
Video Message
WhatsApp connector supports enable the customer and organization to send/receive Video Files. To know the size and format, see CIM Media Messages -> Video Message Format. Video files will be visible as in the screenshot below and can be played by simply clicking on the 'Play' button.
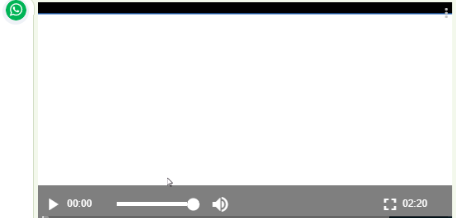
Maximum size supported by Whatsapp : 16MB
To check supported media types of video and some constraint see.
Image Message
WhatsApp connector supports enable the customer and organization to send an image/photo instantly. You can simply choose the image to send. Image Message will be visible as in the following screenshot. To zoom in and out, simply click on the image. To perceive the properties of Image Message, see CIM Media Messages -> Image Message Format.

Maximum size supported by Whatsapp : 5MB
To check supported media types of image and some constraint see.
Stickers
This feature enables the only customer to send WhatsApp supported Stickers as these are character-driven emoticons to add flavor to the conversation.
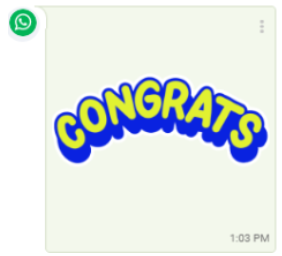
Maximum size supported by Whatsapp : Static stickers: 100KB
Animated stickers: 500KB
Limitations
Media type for sticker from whatsapp is image/webp, but our system doesn't support this type.
Emoji
Limitations
Support for Emoji is not provided as of now.
Quoted Reply
Whatsapp connector enables the customer to reply to one of the sent messages from the business by selecting that message and choosing the "reply" option which is referred to as a quoted response. This enables the customer to see his original message along with the organization's response (agent's message)
Limitations
Business provider can not send contextual message (Quoted reply) due to some WhatsApp API limitation for now.
File Message
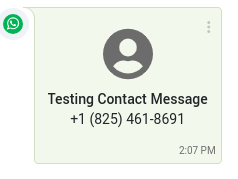
Whatsapp connector enables the customer and organization to send/receive File Messages. To see the size and properties of the file, see CIM Media Messages -> File Message Format. Administrators can enable/disable this feature by switching the toggle button on/off as this is set to off by default. To enable Unified Admin -> AgentDesk -> Enable File Sharing -> Save
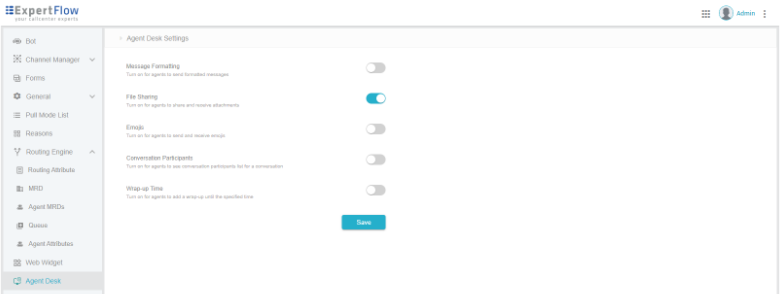
By enabling file sharing, file name and file size is visible as in the screenshot below. You can click to open, read, and download it.
Maximum size supported by Whatsapp : 100MB
To check supported media types of document see
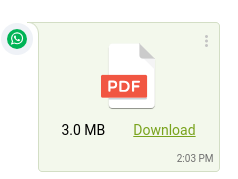
Contact Message
Whatsapp connector enables the customer and organization to send/receive Contact Messages containing the information of
-
Address
-
Email
-
Name
-
Organization
-
Phone
-
URLs
The contact message can be seen as shown in the above screenshot. The parameters and properties of sending the message are CIM Contact Message
Location Message
Whatsapp connector enables customer and organization to send/receive Location Messages containing the information of
-
Longitude
-
Latitude
-
Name
-
Address
Location messages will be rendered as a map image with a Google Maps link.
To know the properties of the message body, see CIM Location Message

Read Notification
Whatsapp connector enables customer and organization to see if the person has viewed their messages.
Interactive Messages
Interactive Messages provide a preset list of options that facilitate the customers to find and select what they want from the business quickly and easily. WhatsApp supports several types of Interactive Messages but we only support Button type.
To see all types supported by whatsapp for interactive message which can be send by any customer see.
To know the properties of the message body, see CIM Button Message
URLs
Enables the customer to send and receive URLs to/from the business. To know the method of sending URLs, see CIM URL Message
