1.0 On-Premise CRM Solution CTI Deployment Guide
Preface
This document provides deployment details of the EFCX Web CTI Connector for on-premise MS Dynamics CRM
Prerequisites
The following are the prerequisites for the deployment of the EFCX Web CTI Connector.
-
2016 CRM (8.x on-prem) should be installed.
-
The user must have administrative rights
Install EFCX CTI Toolbar for MS Dynamics CRM
EFCX Web CTI Connector is a CTI connector for any web-based CRM. Follow these steps to install the EFCX Web CTI Connector inside MS Dynamics CRM.
Note: If you have installed EFCX Web CTI Connector packages before, follow this guide to delete installed packages first.
-
Download the following zip archives from the below links:
-
EFCXonPrem_1_0_managed.zip (Download Link)
-
EFCXonPremUnmanaged_1_0.zip (Download Link)
-
-
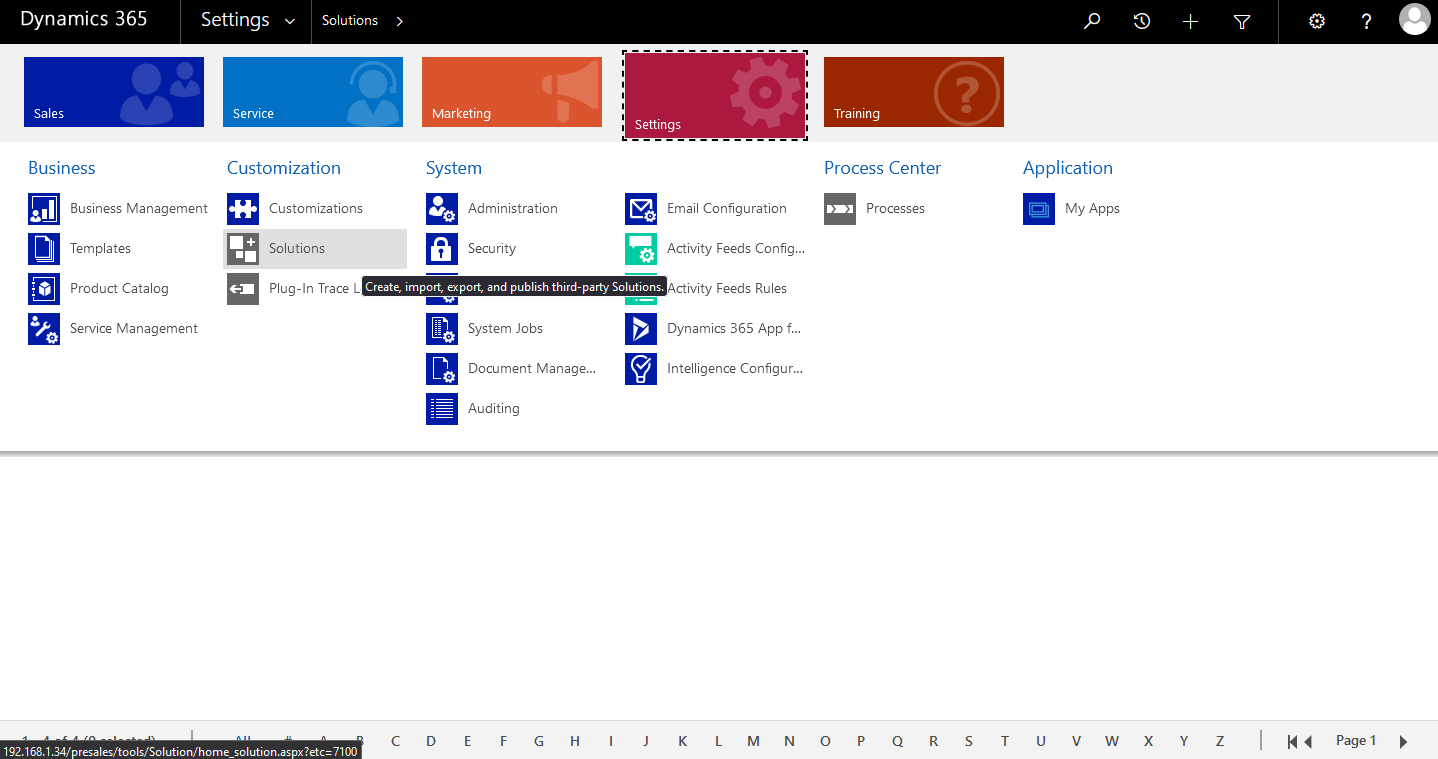
Log in to CRM using admin credentials
-
Go to Settings → Solutions
-
Opens image in full screen open
-
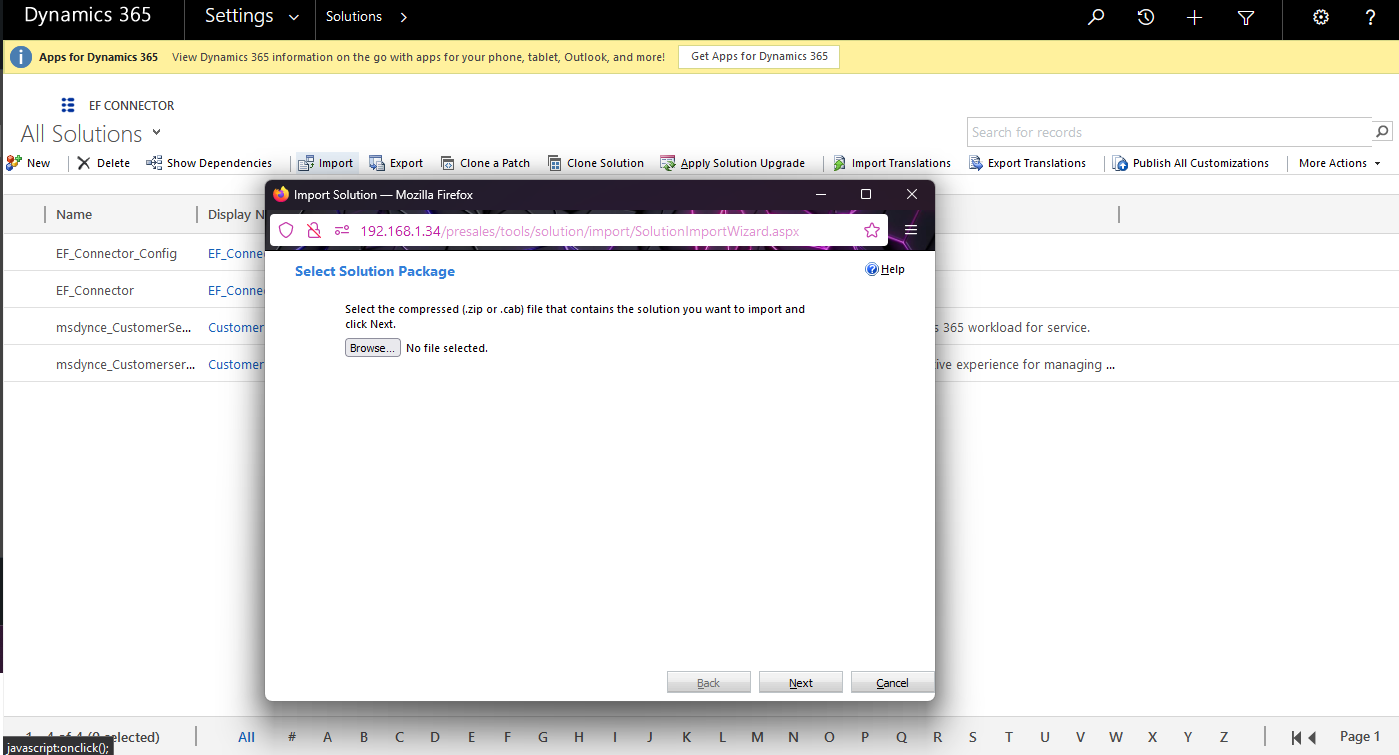
Import downloaded “EFCXonPrem_1_0_managed.zip” Solution.
-
Opens image in full screen open
-
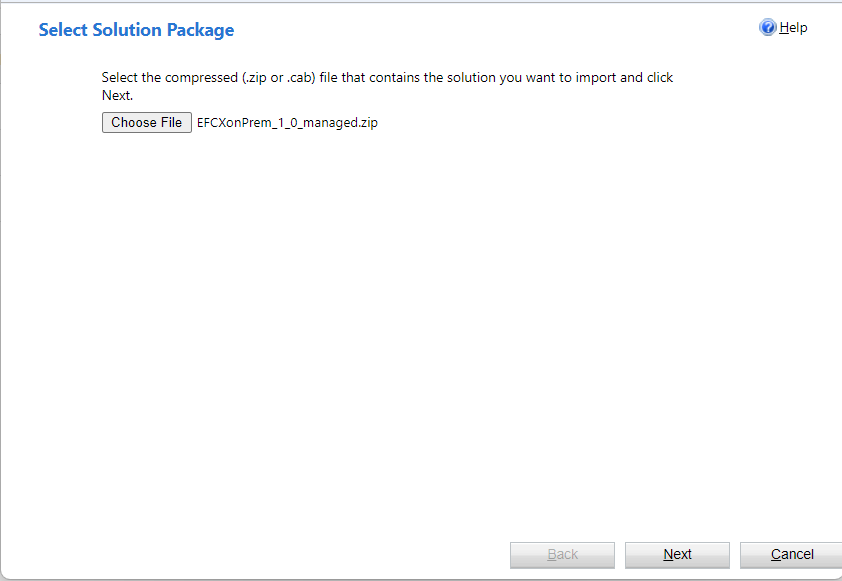
From the import solution window, Select solution package “EFCXonPrem_1_0_managed.zip” and click on the next
-
Opens image in full screen open
-
On the solution, information window click on next.
-
After successfully importing the solution, click Close to close the window.
-
Repeat the same process to install the “EFCXonPremUnmanaged_1_0.zip” solution.
-
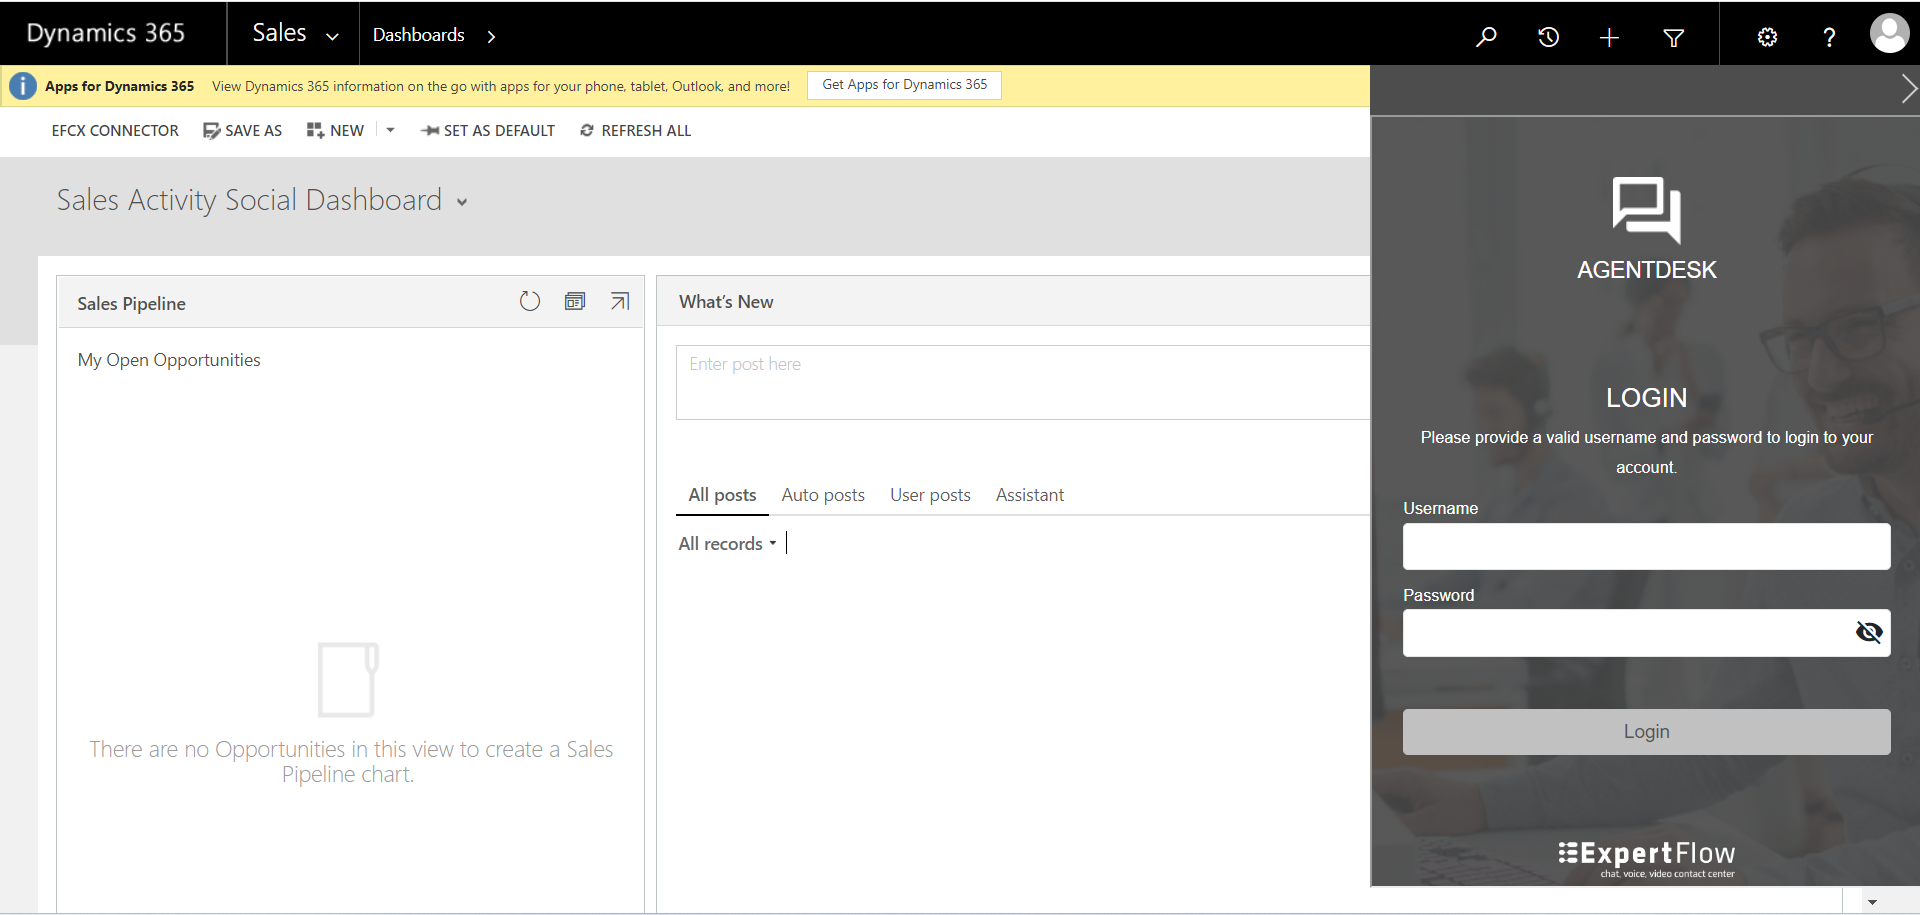
Click on “Publish All Customization”
-
Refresh CRM then EFCX Web CTI Toolbar should be visible on the top right corner
-
Opens image in full screen open
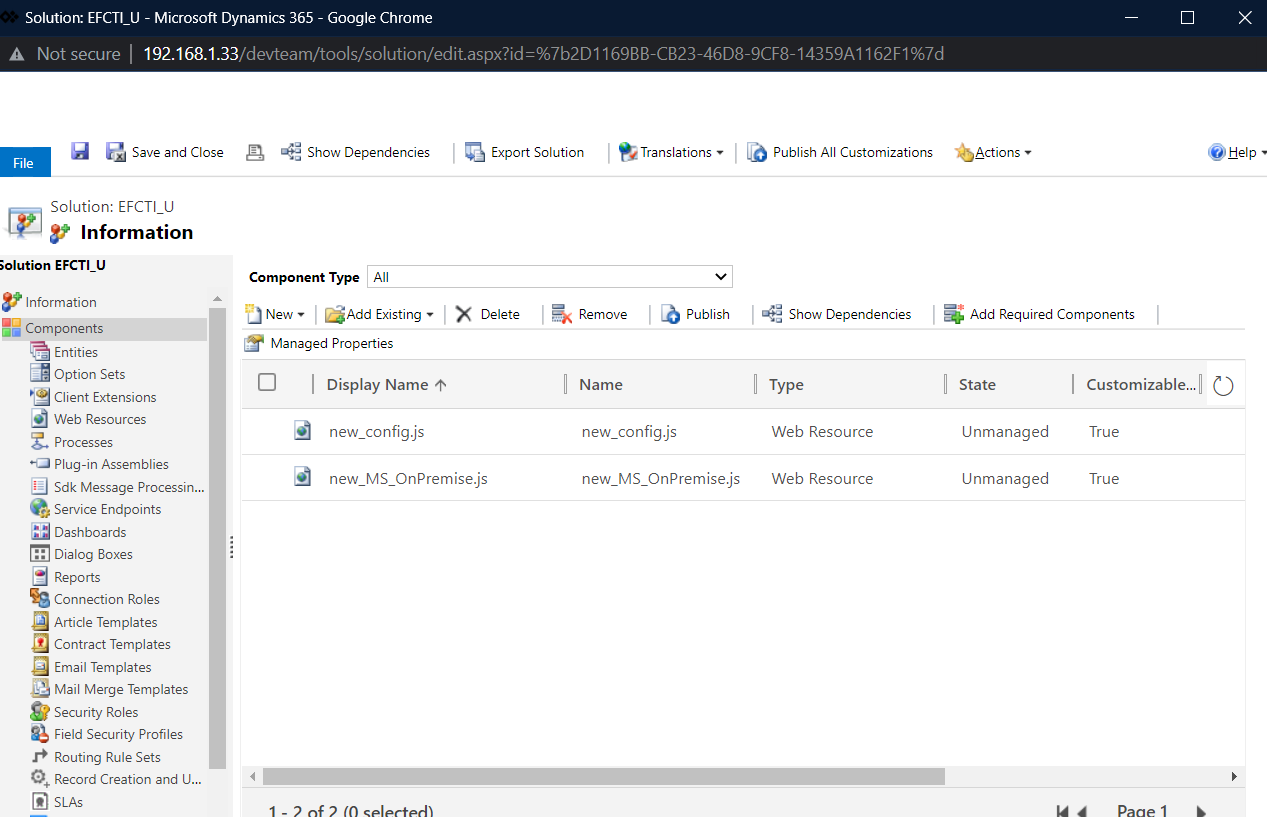
Configuration
Configurations are saved in an EFCXonPremUnmanaged solution.
-
Go to solution “EFCXonPremUnmanaged_1_0.zip”.
-
Opens image in full screen open
-
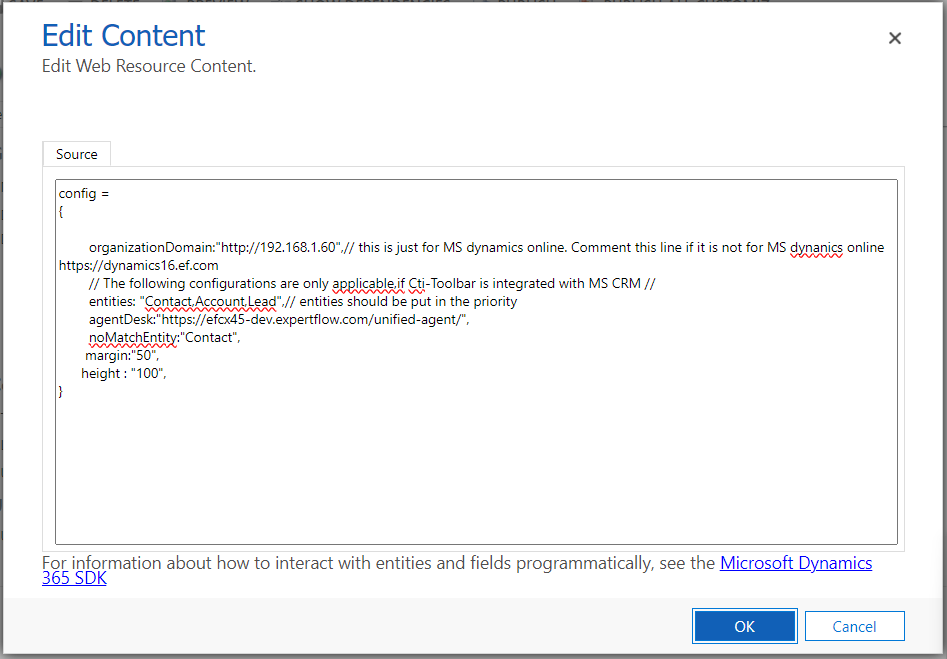
Open the new_config.js web resource. Click on the "Text Editor" Button.
-
Opens image in full screen open

-
Set the properties as per the below table.
|
S.NO |
Property Name |
Value |
Description |
|---|---|---|---|
|
1 |
entities |
“Contact,Account,Lead” |
The searching priority user can define in the config file. For example, as per this configuration, the EFCX Web CTI connector first searches the record in the contact and then accounts. If you wanted to search the record first in the account, you can simply change the order as per your requirement and the searching order will be changed. INFO In online CRM entities name should be in the small latter entities: "contact, account" |
|
2 |
agentDesk |
https://efcx45-dev.expertflow.com/unified-agent/ |
The Agent desk must be deployed before it can be accessed. Deployed URL of the Agent desk. |
|
3 |
noMatchEntity |
“Contact” |
In case there is no record found in the entities searched, then we need to tell the CRM which entity should be created. For example, as per this configuration, the EFCX web CTI connector will open the Lead entity form, then you can save it by providing necessary information like name etc. |
-
The actual file looks like this. Please note that the order of the properties doesn't matter
Opens image in full screen open
-
Update the configurations.
-
Save web resources and then publish them.
Configure Click-to-Call
Follow the steps to configure click to call on the Account page.
-
Go to Account from Customizations. Setting→ Customizations → Customize the system.
-
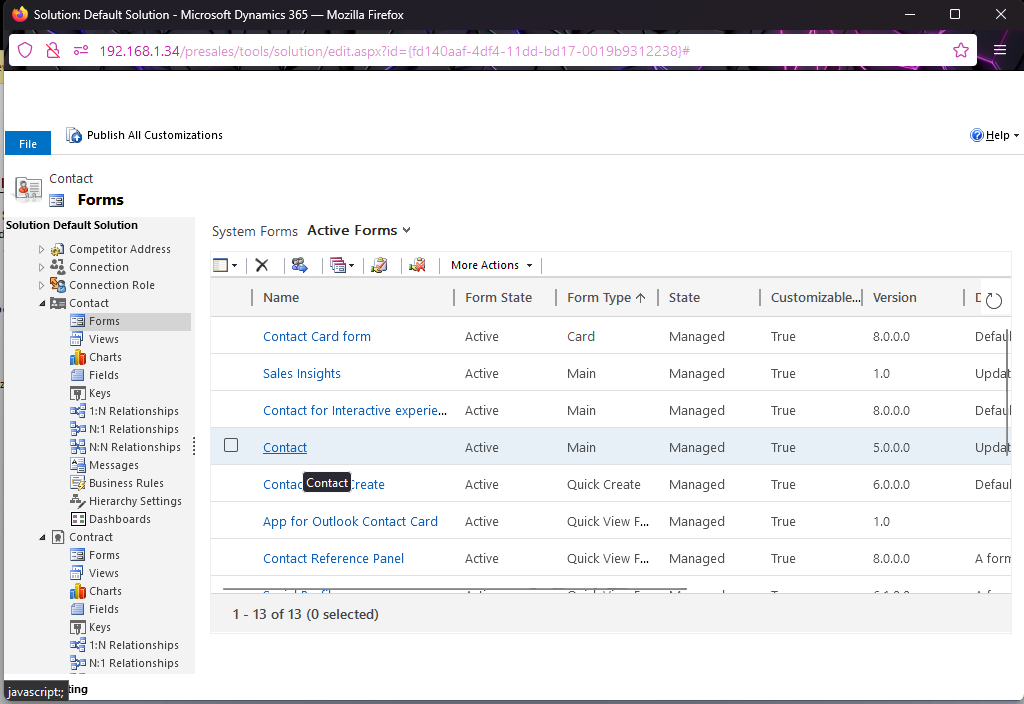
Select from the left navigation Account Entity, then select Forms.
-
Opens image in full screenOpen
-
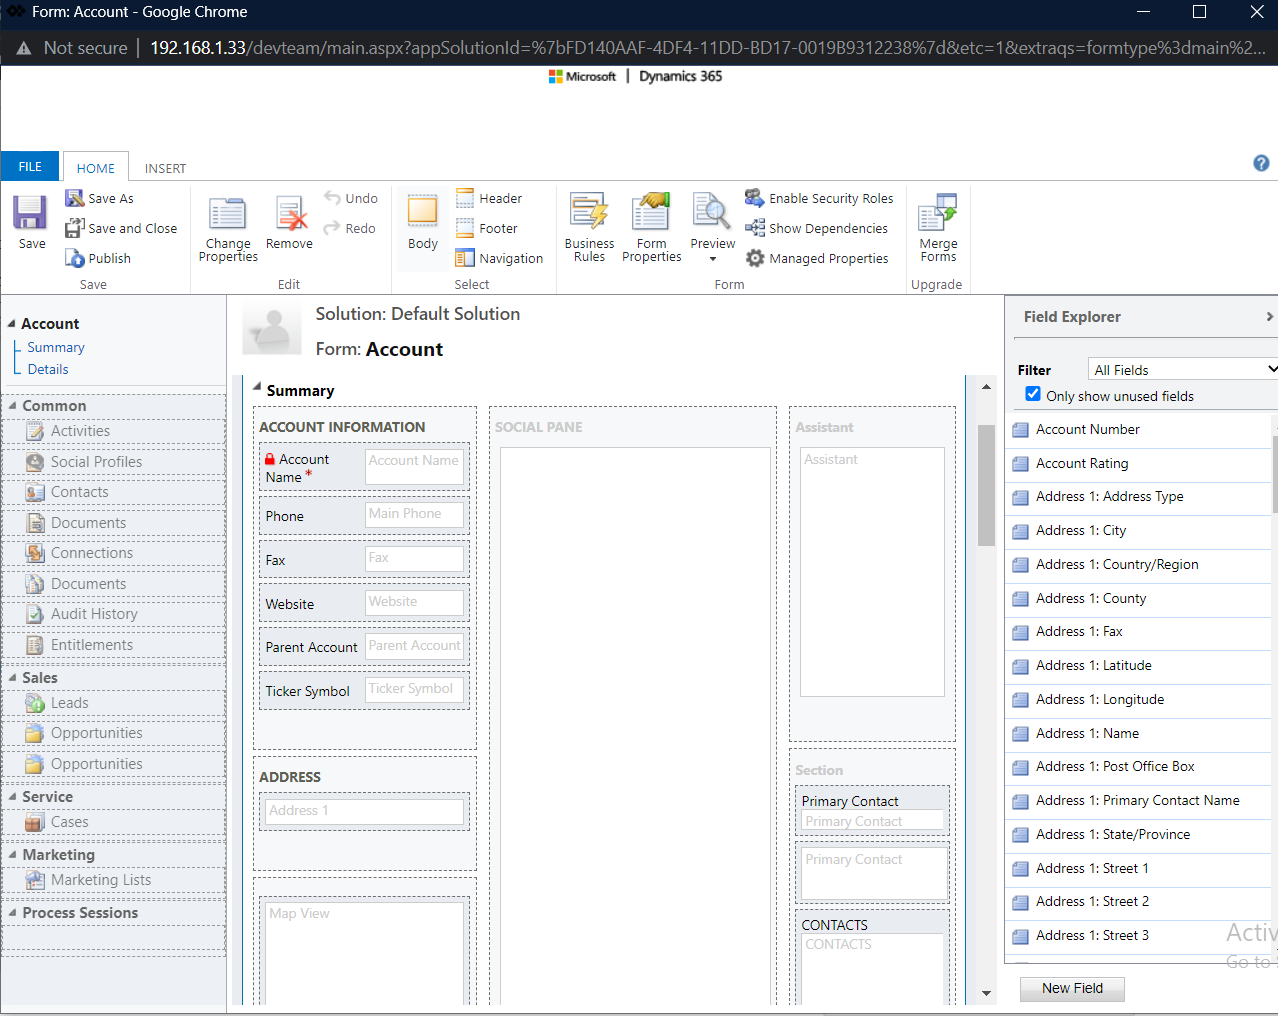
Open Account (Main) as highlighted above.
-
Opens image in full screenOpen
-
In the newly opened window, load “Form Properties”.
-
Inside the Form Properties window, Click on add and add new_click2callOnForm.js web resource.
-
Opens image in full screenOpen

-
Now inside the Form Properties window, the Event Handlers section add the file new_click2callonForm.js and add the function “hello” OnLoad event of the form
-
Opens image in full screenOpen
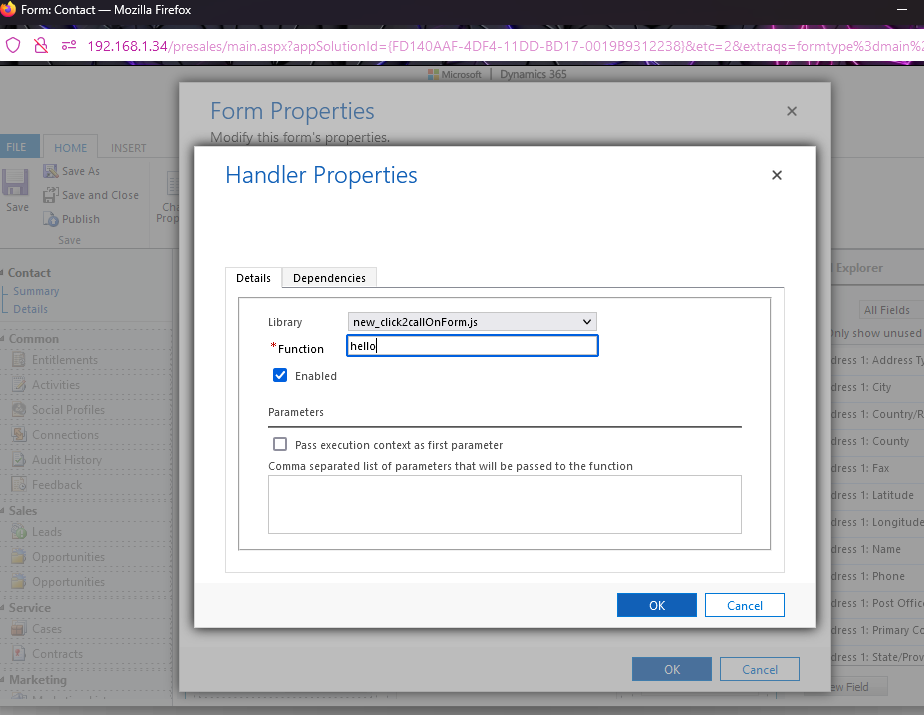
-
Click OK, this will close the Form Properties window.
-
On the Account Form window, click save and then click publish, then close all windows and reload crm dashboard page.
-
From point 3 repeat the same for all the other remaining forms like Account Quick Create form of Account entity.
-
Repeat the same process to configure click to call on Contacts Entity.
CRM Configurations for Security Roles
User should have
-
Customer Service Representatives role
-
Rights for activity creation
-
Appropriate rights for creating, modifying and appending all those entities against which activity is created i.e. (Lead, Account, Contact)