Problem Statement:
Whenever there are some changes in keycloak implementation of our application, we need to upgrade our current keycloak realm with the upgraded realm. we need to import Realm.json file that import all the information regarding the keycloak realm including clients, roles, groups etc. We can do it by simply deleting the old realm and importing the new realm using realm.json. But doing so, we delete the users of realm that we can not recover and has to create all the users manually again since realm.json file doesn't contain keycloak-users hence Users are not exported by using the exported Realm.json file.
Solution:
To avoid creation of users again manually, we have formalized a way to upgrade the realm while keeping users intact using the process, the process is explained below.
Steps for the Upgradation of Realm:
Following are the steps for the upgradation of realm to newer version (containing new permissions, groups, roles etc) without losing its users.
-
Run a script inside keycloak container in our k8s deployment to export the targeted realm and its users.
-
Use the Secure Copy command (scp command) to copy the exported realm and its users to the local machine.
-
Go to the admin console of targeted keycloak instance and delete the old realm.
-
Create the new instance of realm using import function and import realm using realm.json file.
-
Import the old realm users using the realm-user.json file that we copied using scp command, import of users can be done using the partial-import feature.
-
Run the postgreSql transaction block inside keycloak db to assign groups to keycloak users according to their roles.
Make sure that no user has any group assigned to it before running this script.
Detailed Steps:
Run a script inside keycloak container in our k8s deployment to export the targeted realm and its users:
Exec into the keycloak POD
kubectl -n ef-external exec -ti keycloak-0 -- kc.sh export --realm expertflow --dir /tmp/kc_
this command generates a lot of DEBUG output, which can be ignored safely.
After running this script for exporting realm, the following files are generated in /tmp/kc_ folder of your keycloak instance
-
-
<realm-name>-realm.json (File containing the current realm).
-
<realm-name>-users-0.json (File containing all the users of current realm).
-
Copy the exported realm and its users to the local file:
Since, we now have the targeted realm file and its users file exported to the keycloak instance machine. We can import it to our local machine for the purpose of manual import of realm using Keycloak Admin Console.
To copy the exported realm and its users to local machine, use the secure copy command on your local machine:
kubectl -n ef-external cp  keycloak-0:/tmp/kc_/expertflow-users-0.json $HOME/expertflow-users-0.json
kubectl -n ef-external cp  keycloak-0:/tmp/kc_/expertflow-realm.json   $HOME/expertflow-realm.json
In the above commands, we copied the <realm>-realm.json and <realm>-users-0.json from deployment machine to the home directory of the user.
Go to the admin console of targeted keycloak instance and delete the old realm:
After copying the realm and realm-users file to local machine, we can now keep the <realm-name>-realm.json in backup for future use and replace it with our upgraded realm file i.e <realm-name>-new-realm.json. Before importing the new realm file, we need to delete the old realm manually. To delete the old realm, follow these steps:
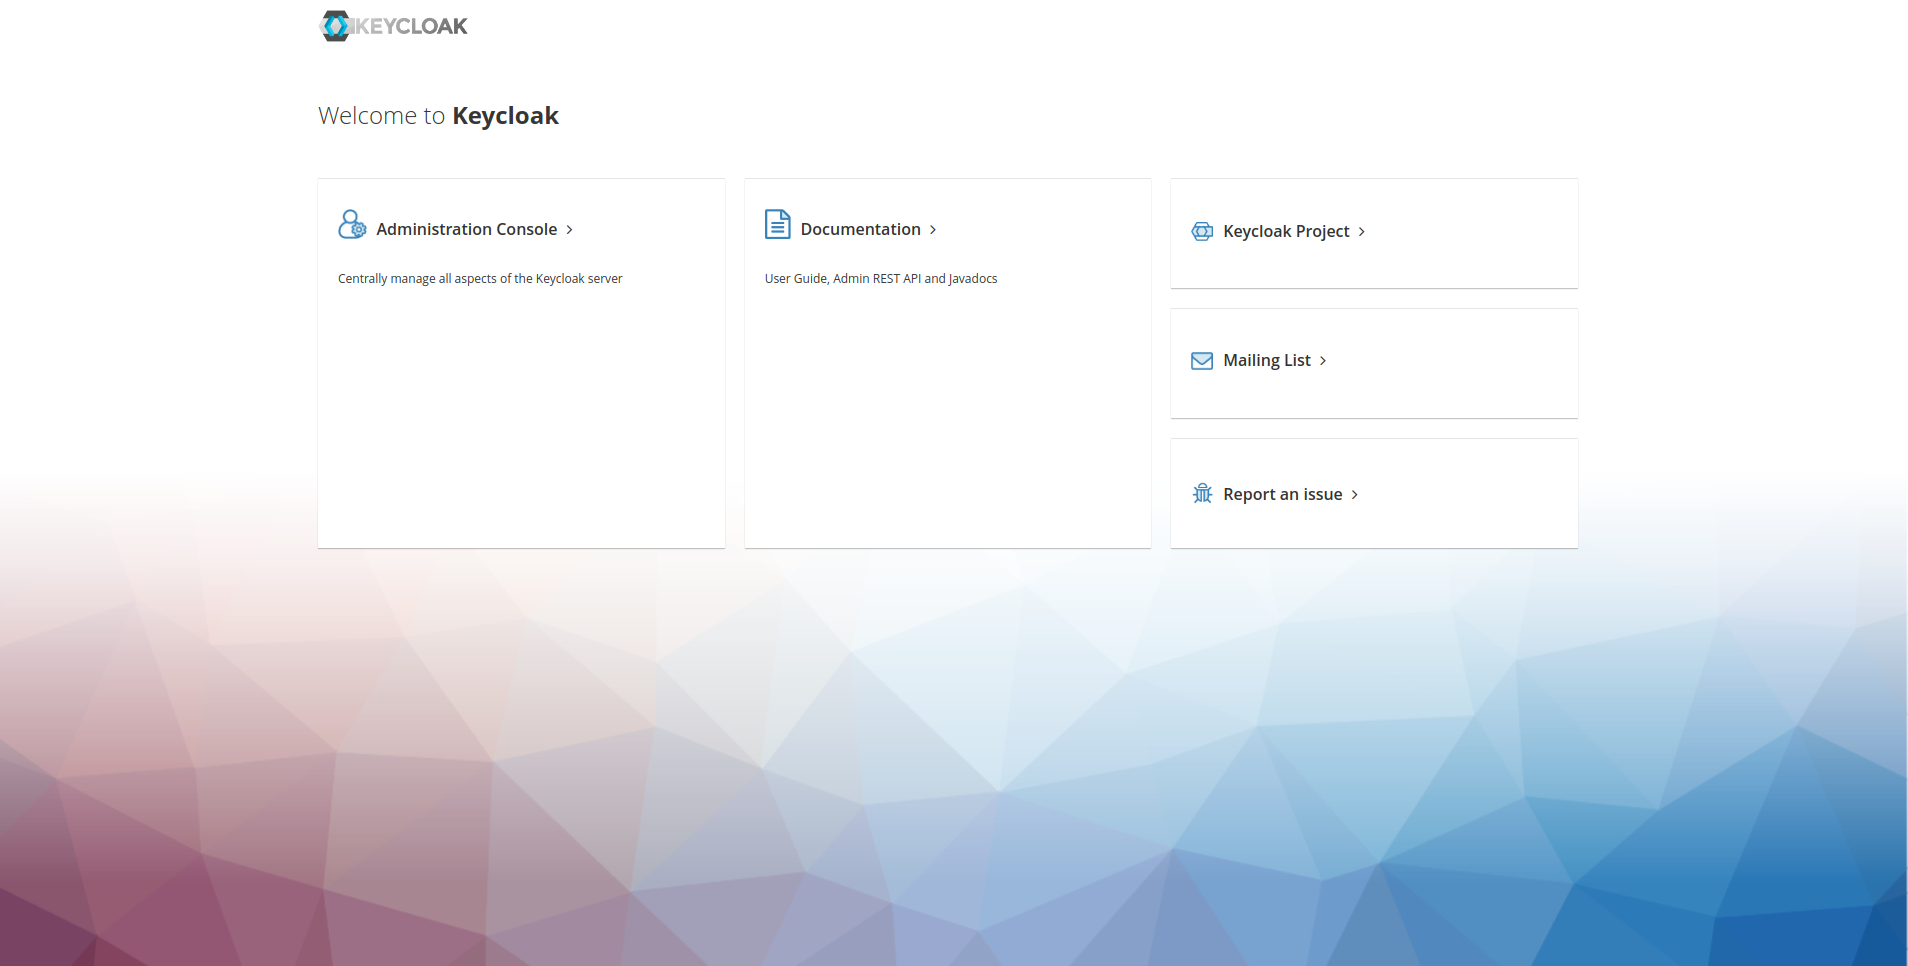
1: Login to the desired keycloak instance where your realm to upgrade exists. You can access keycloak instance by going to its url which is in this format: https://CIM-FQDN/auth/ . Once you access the URL this screen will appear:
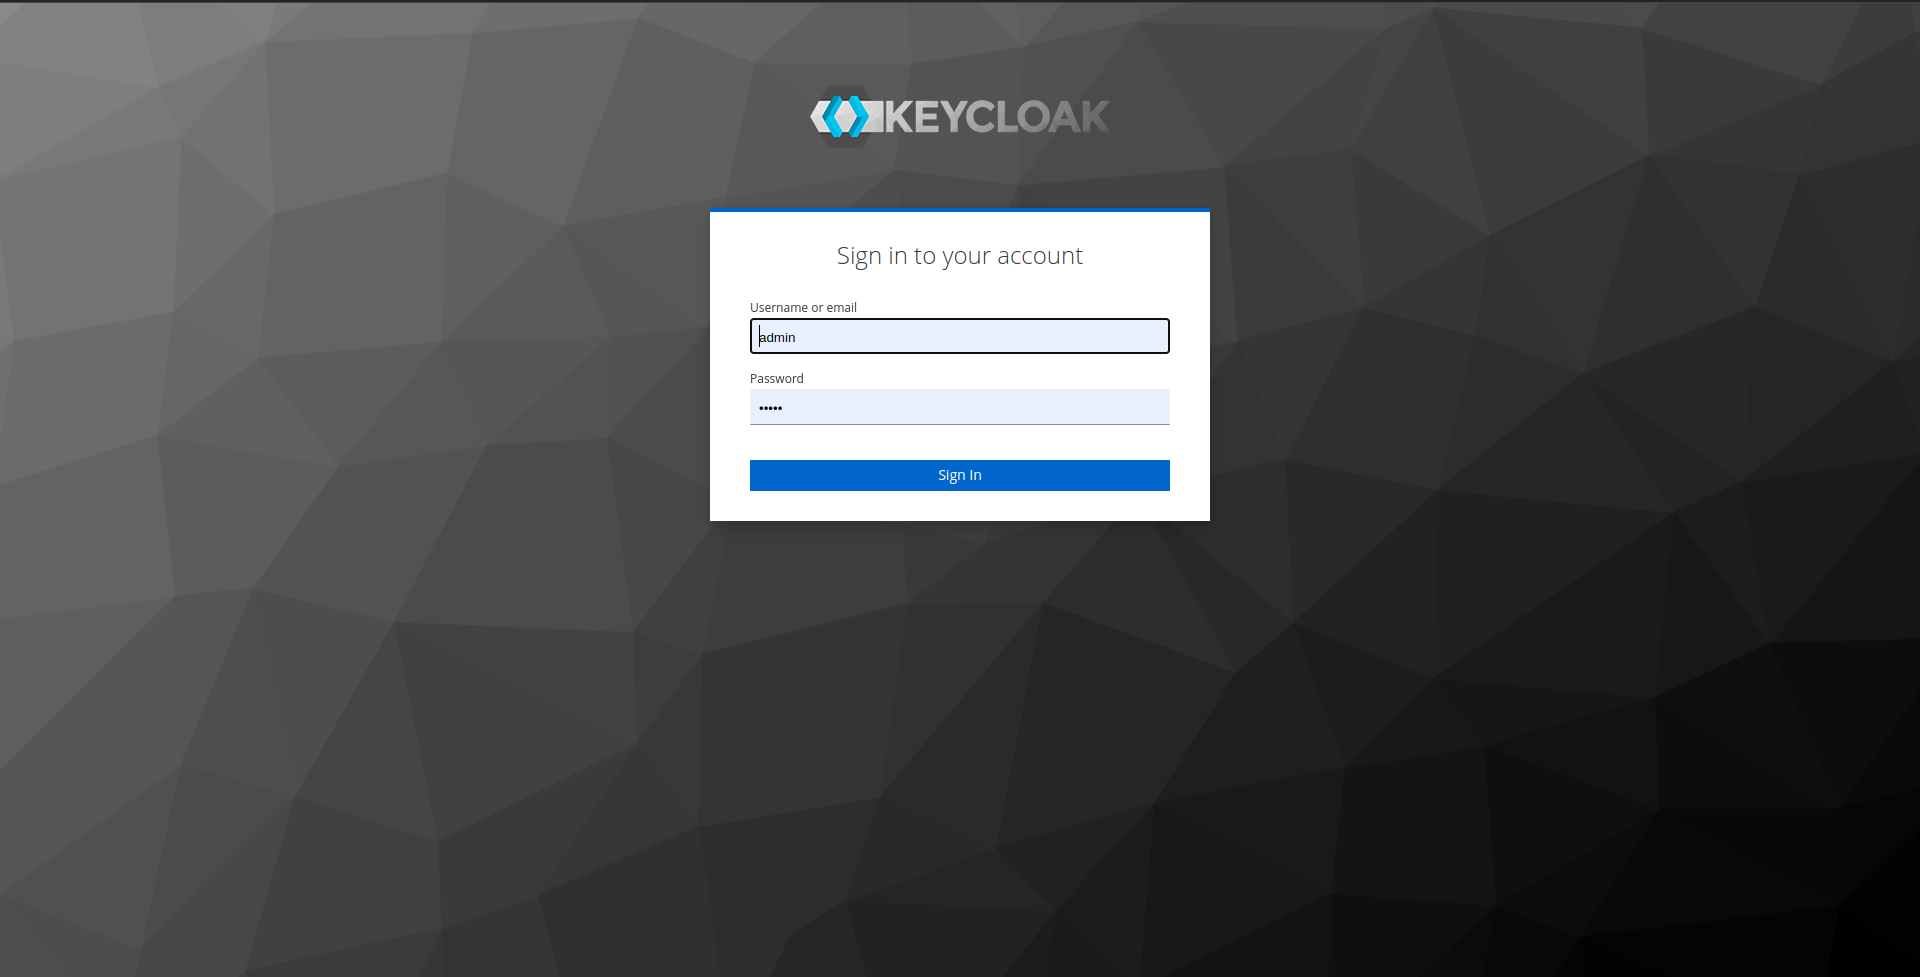
2: Click on Administration Console, you will be routed to the login page, provide the admin credentials i.e username: admin & password: admin and click on sign-in.
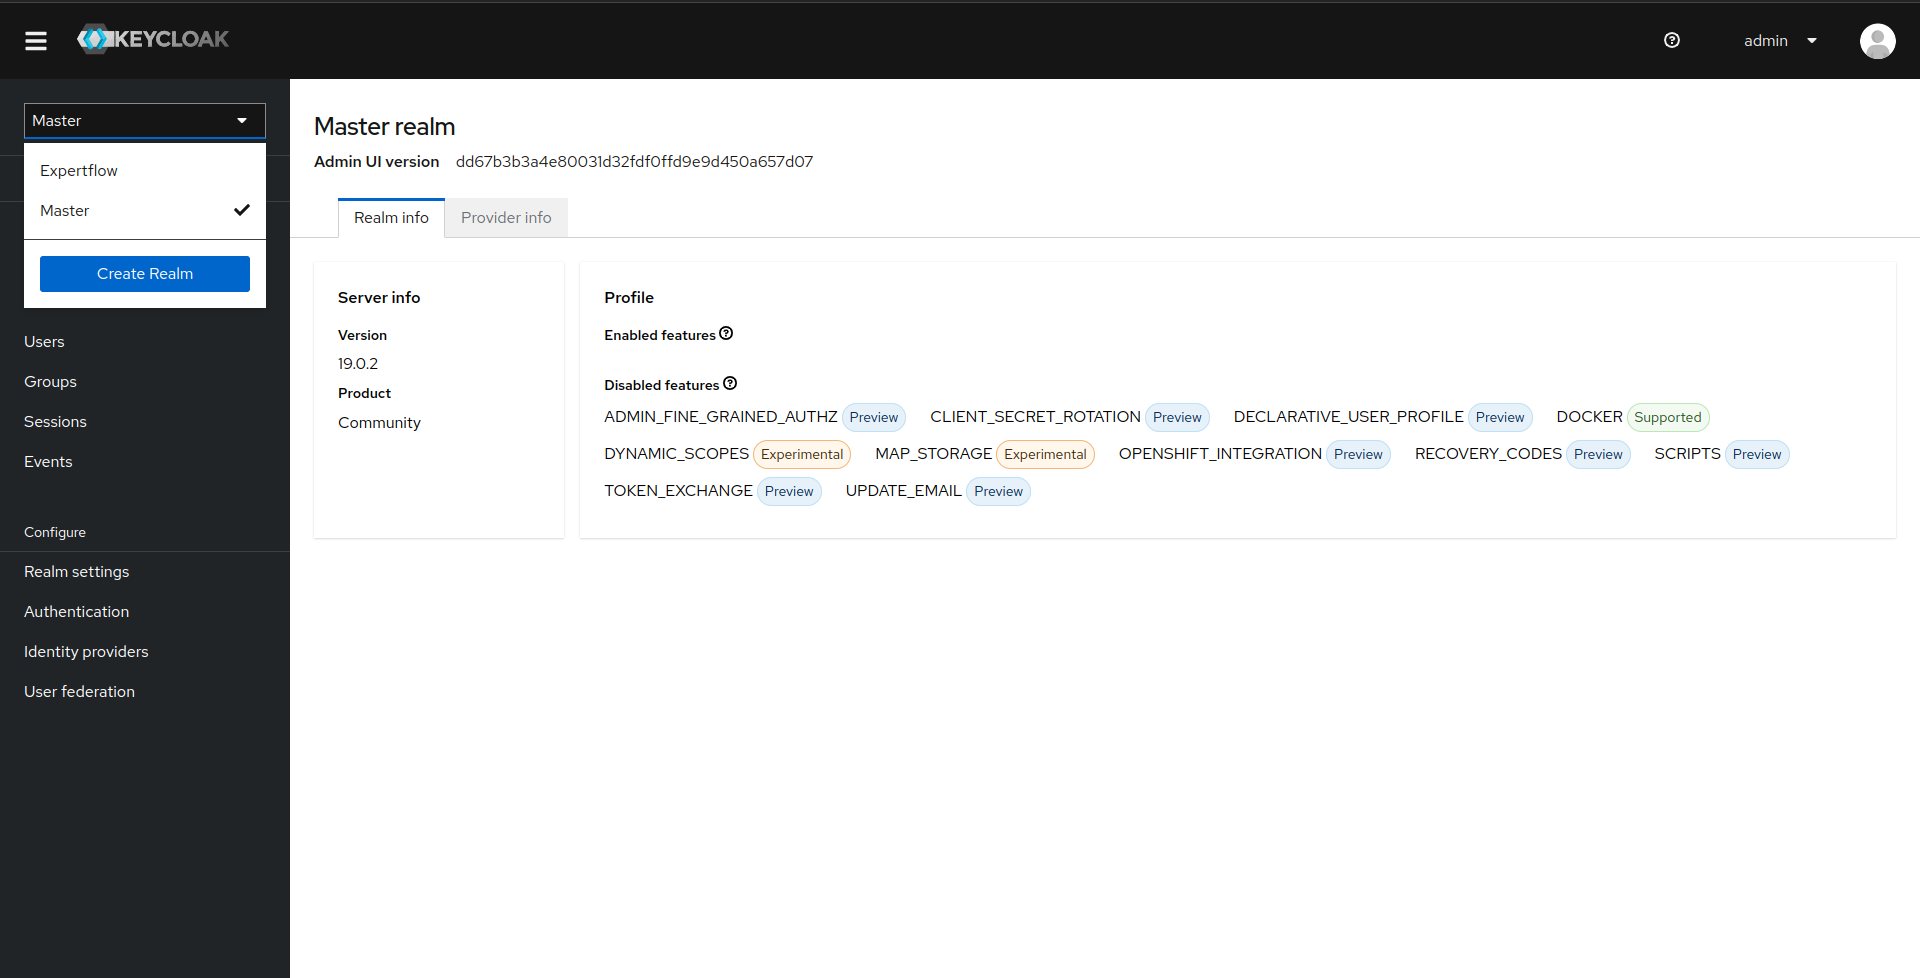
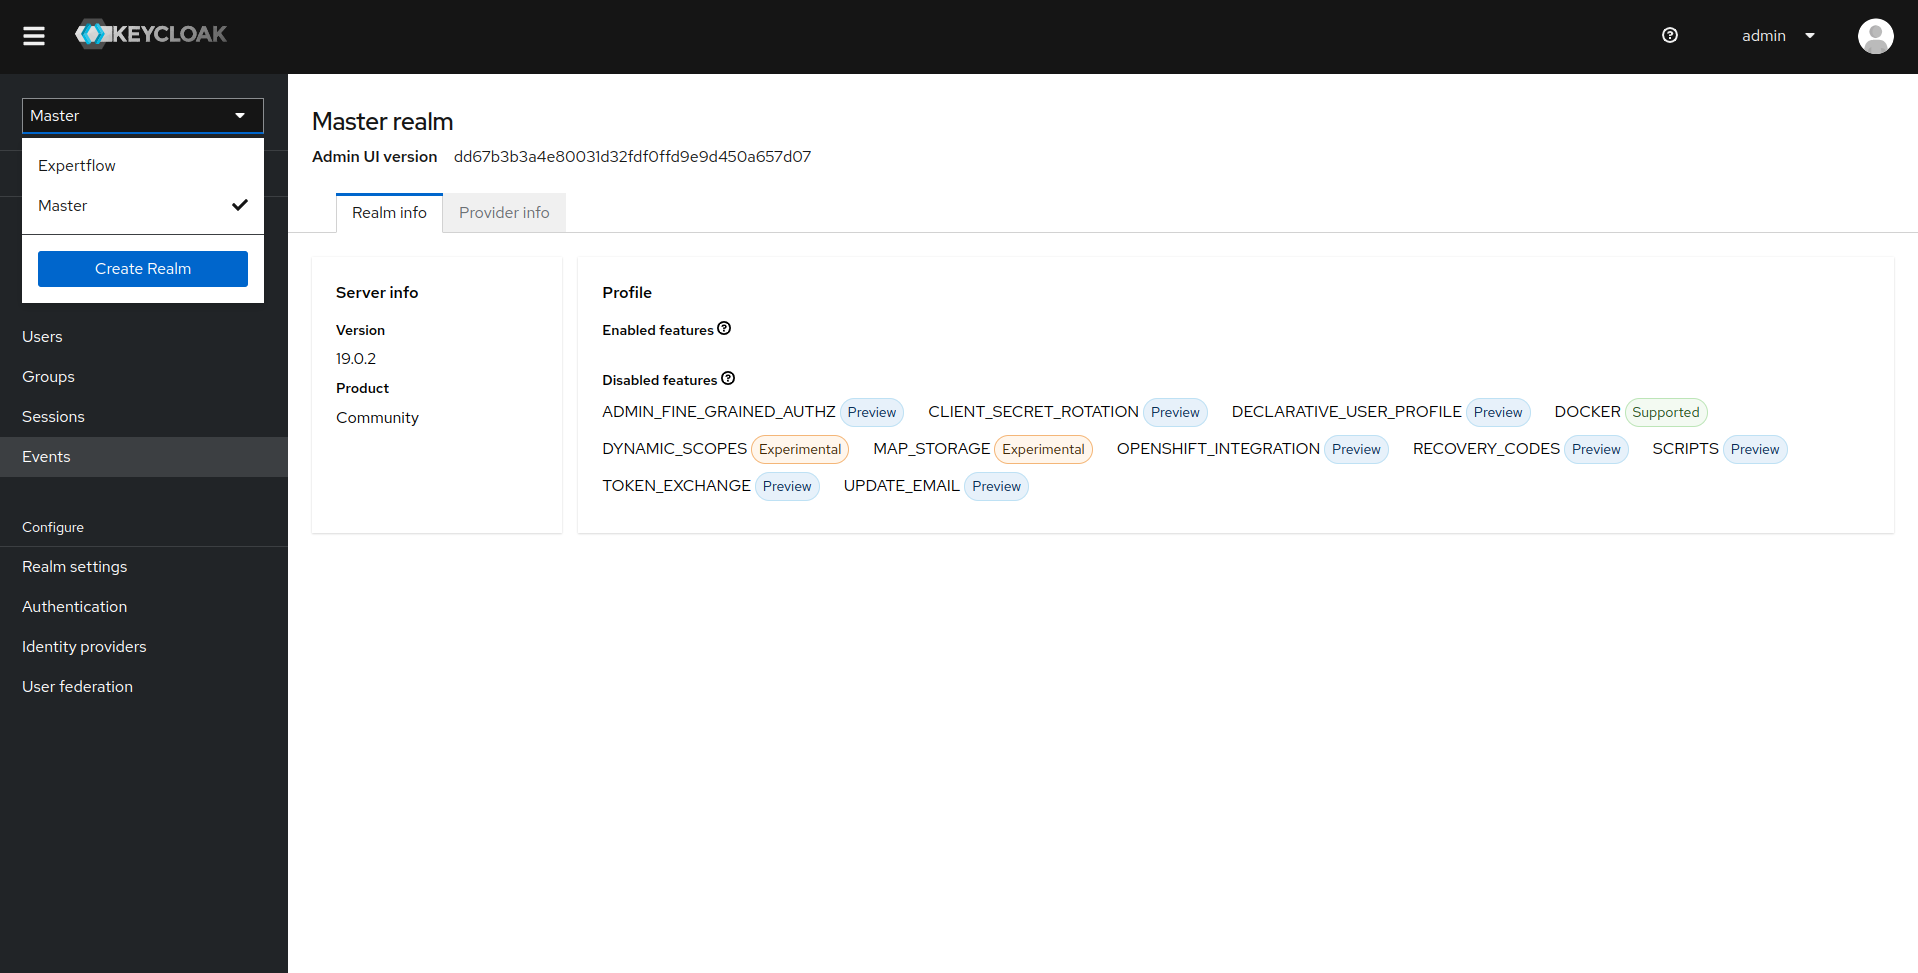
3: Once you are logged-in, you will be routed to the master realm, you can click on the top drop down to see all the realms available. In our case the realm is Expertflow so click on it.
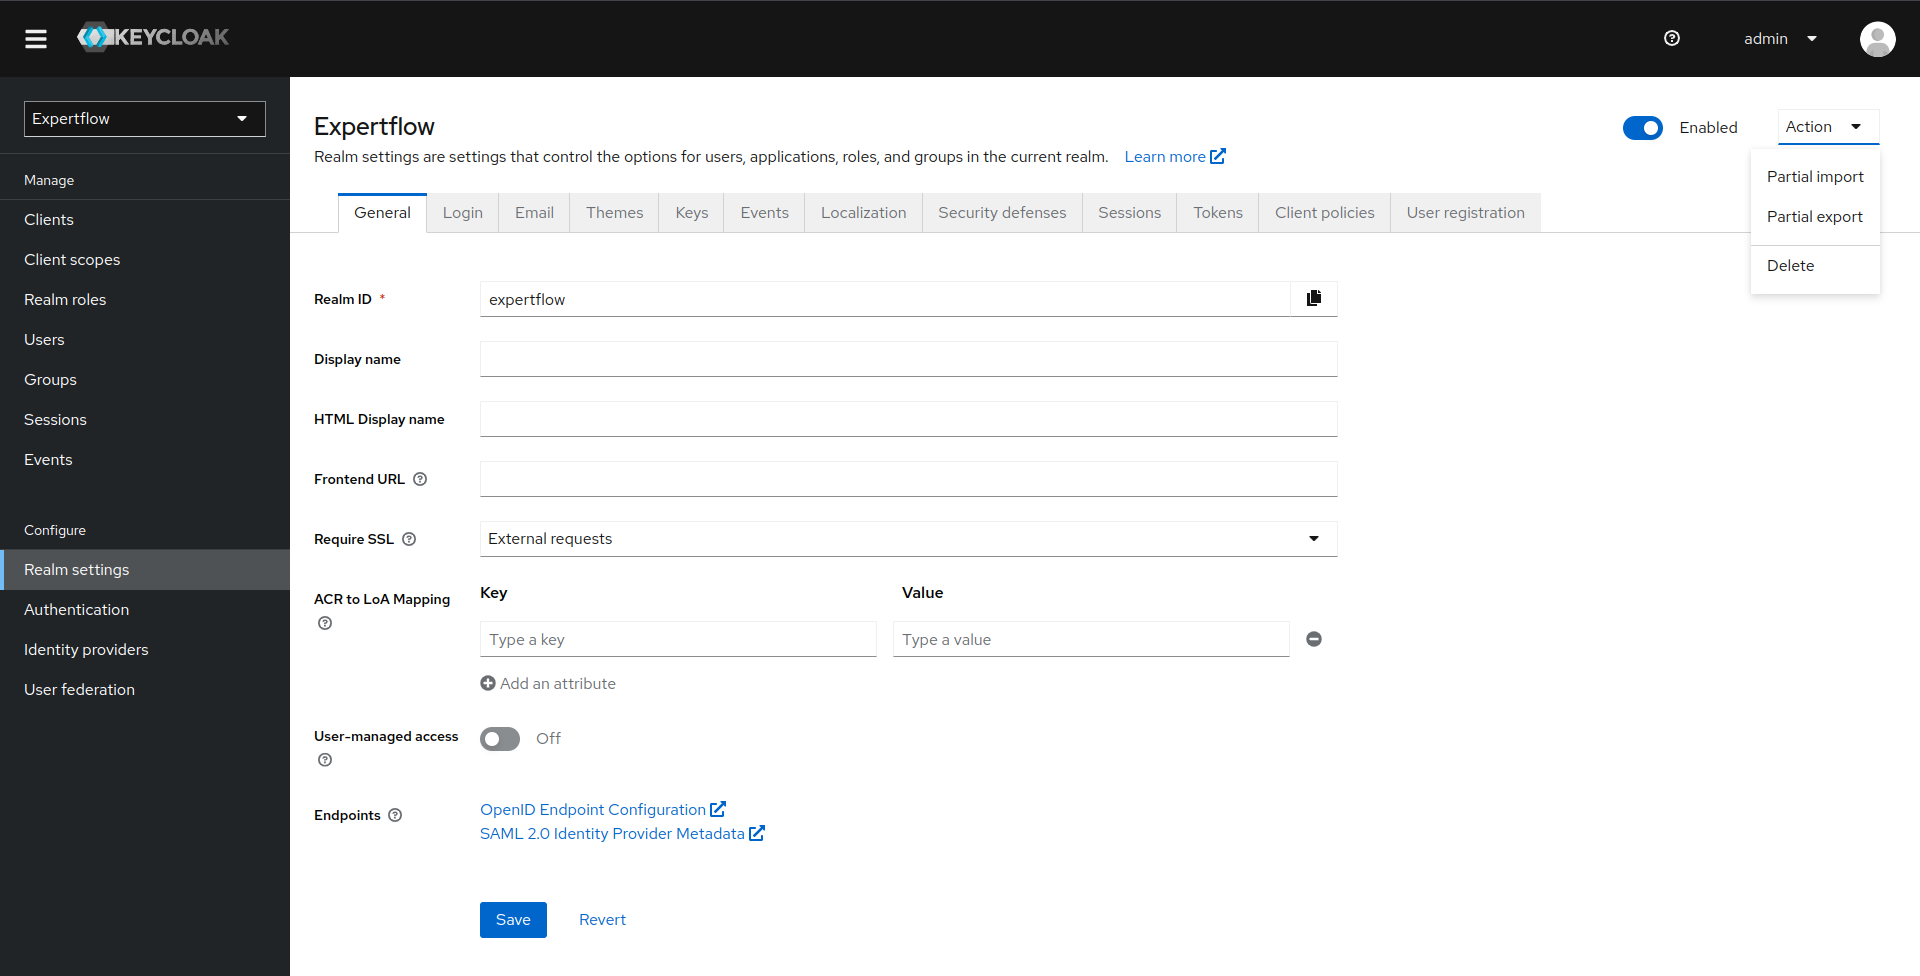
4: Once we are in Expertflow realm (In your case, select your desired realm), Click on Realm Settings in Configure menu in Left Panel, you'll be taken to the realm settings. Now, click on Action drop-down. The drop-down has several options like partial-import, partial-export and delete. Click on Delete to delete realm.
Create the new instance of realm using import function and import realm using realm.json file:
Note: Before importing the upgraded realm.json file to create new realm. Make sure that file doesn't contain any default resource, default permission and default policy. Also, all the roles/groups that previous realm had must exist in upgraded realm file too.
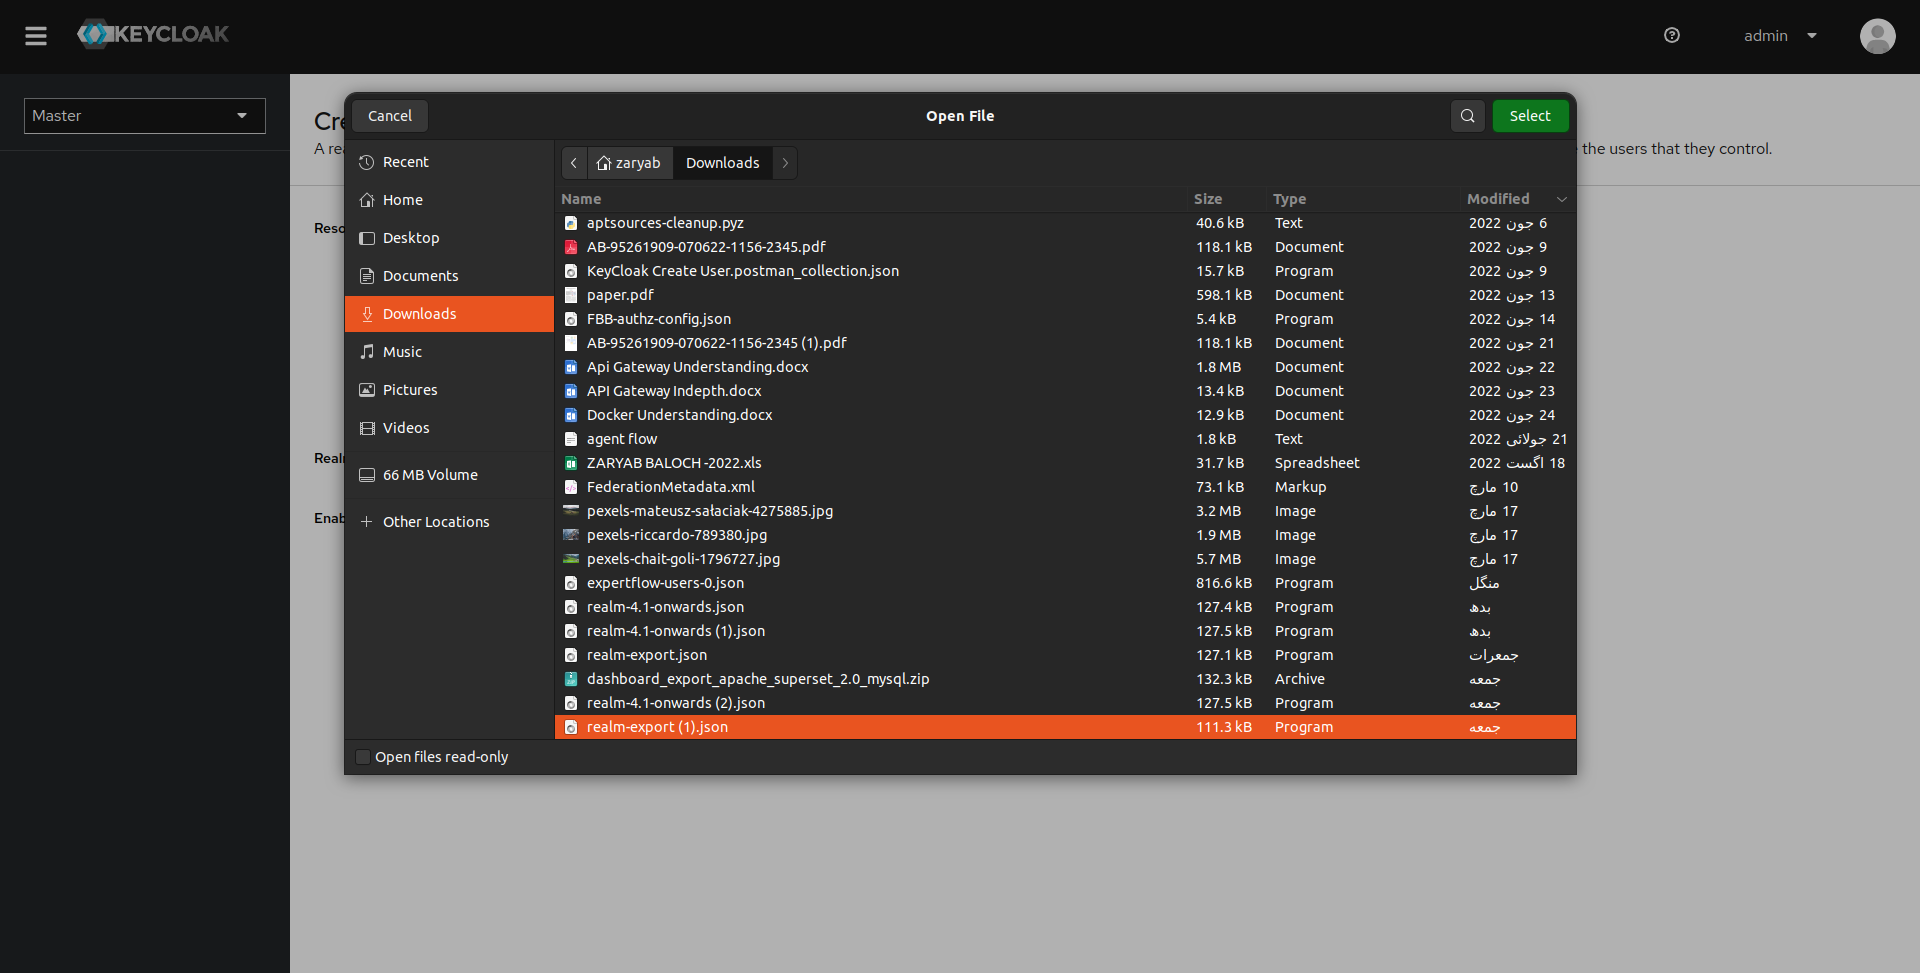
Once the old realm is deleted, we now import the upgraded realm using realm.json file. To import a new realm click on realm drop-down at top of the left-side menu and click on Create Realm:
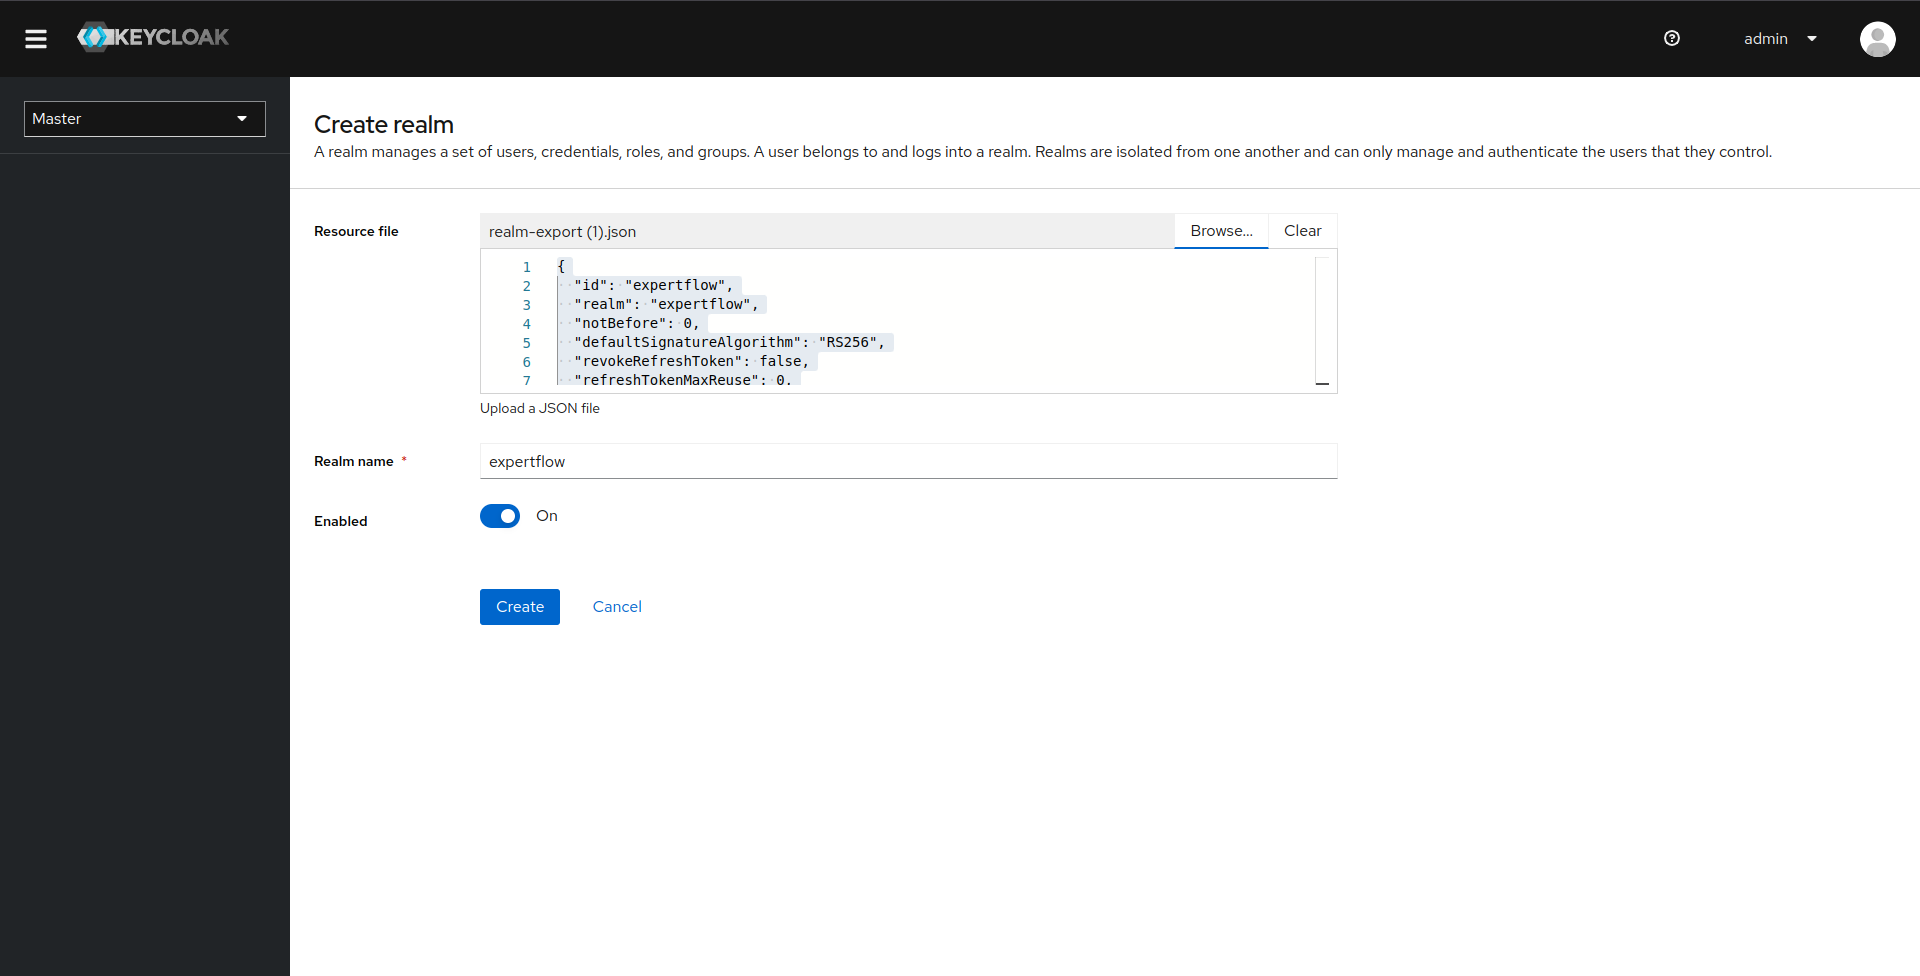
Now, we are routed to create realm menu. Since, we want to import realm, hence we click on Browse and select the upgraded-realm.json file.
Once file is selected, we can see the content of file. Click on Create button and wait until realm is created and you are routed to the menu page of new realm. Dont click on Create button again and again during time of creation of realm as realm-creation is an async process hence it might be running in background and will take some time to complete.
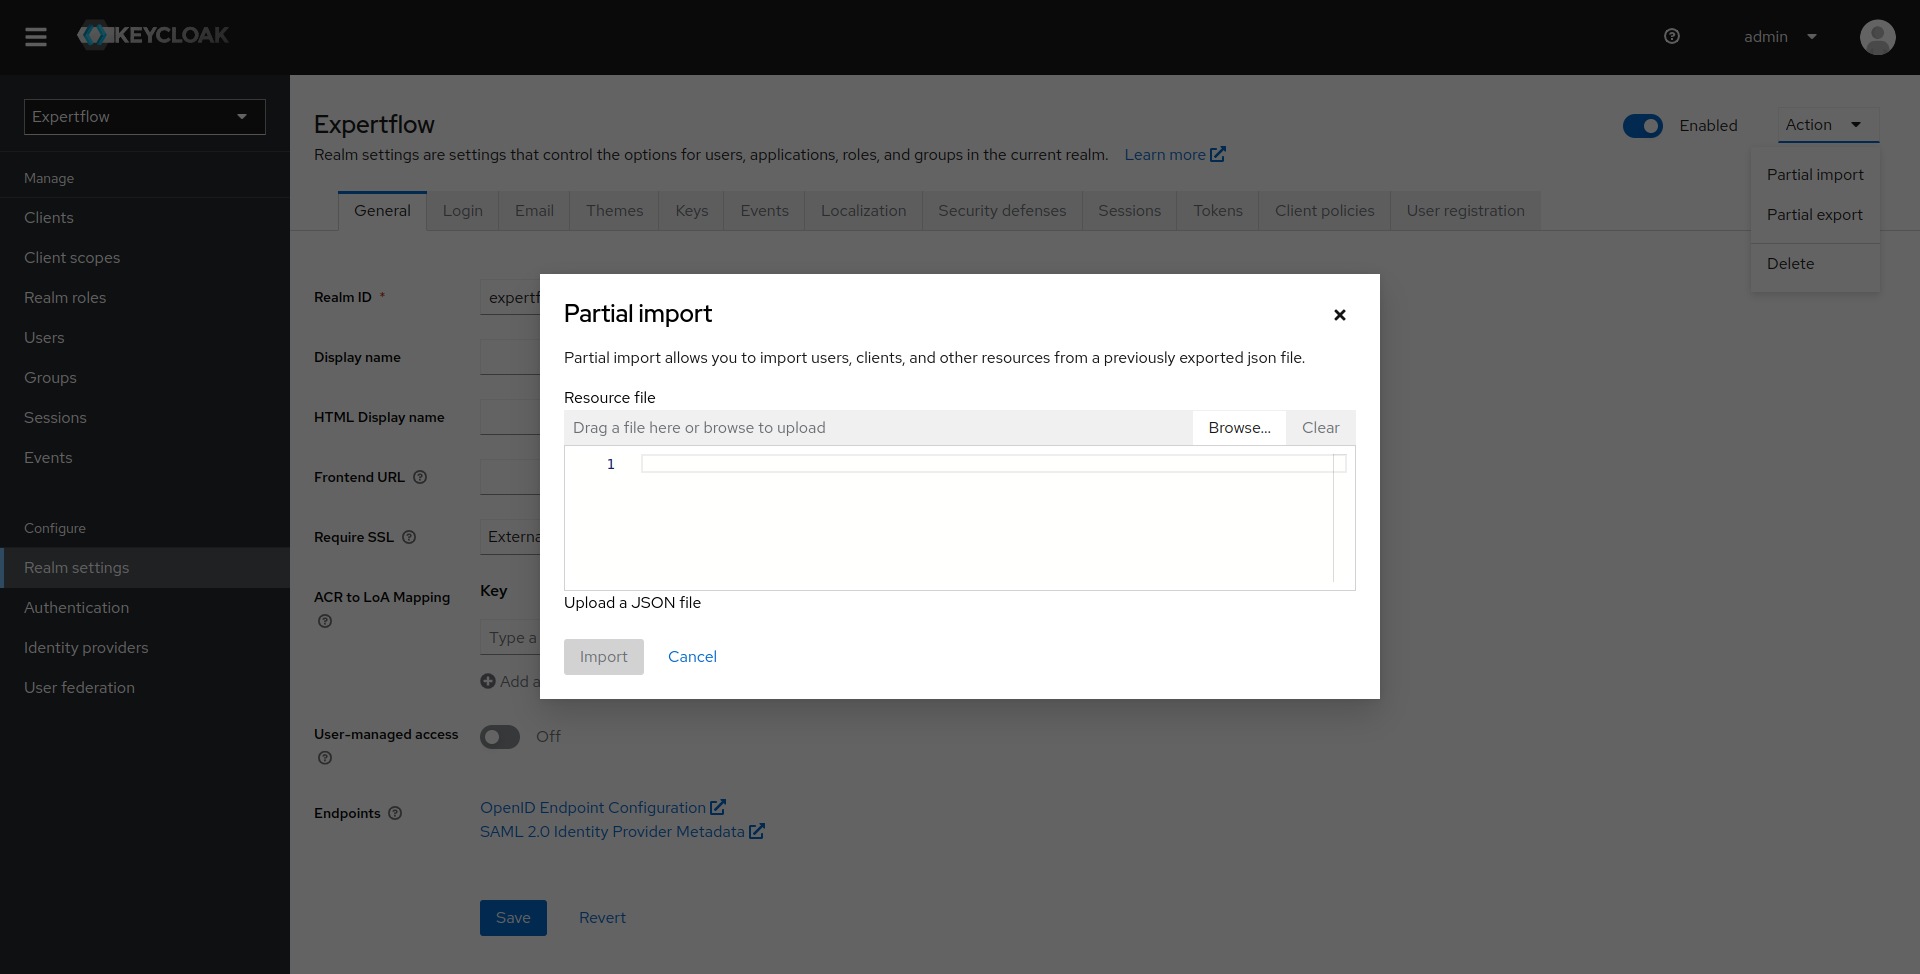
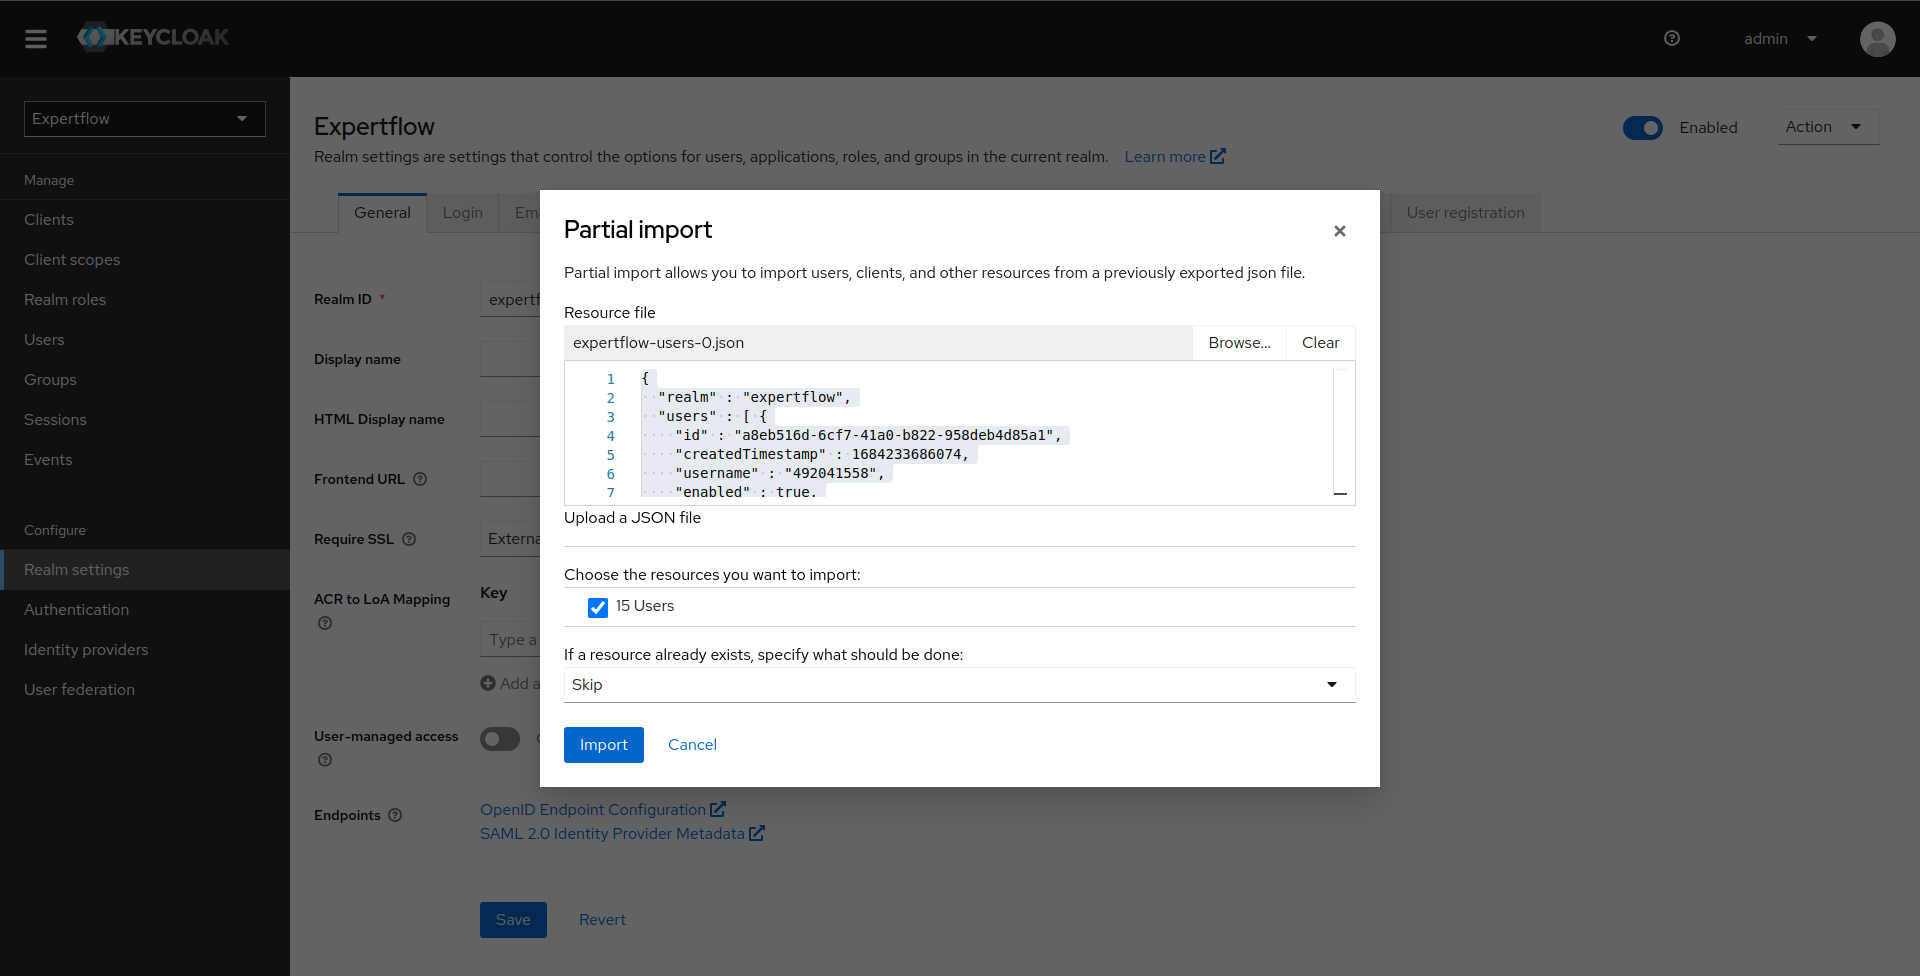
Import the users using the <realm>-realm-user.json file that we copied in step , import of users can be done using the partial-import feature:
Once upgraded realm is imported we import the user. To import users, we go to the Realm Settings in Config menu located on left-side pane. Once we click on Realm Settings we are taken to Settings menu. Click on Action drop-down and we can see multiple options. Click on Partial-Import to import users.
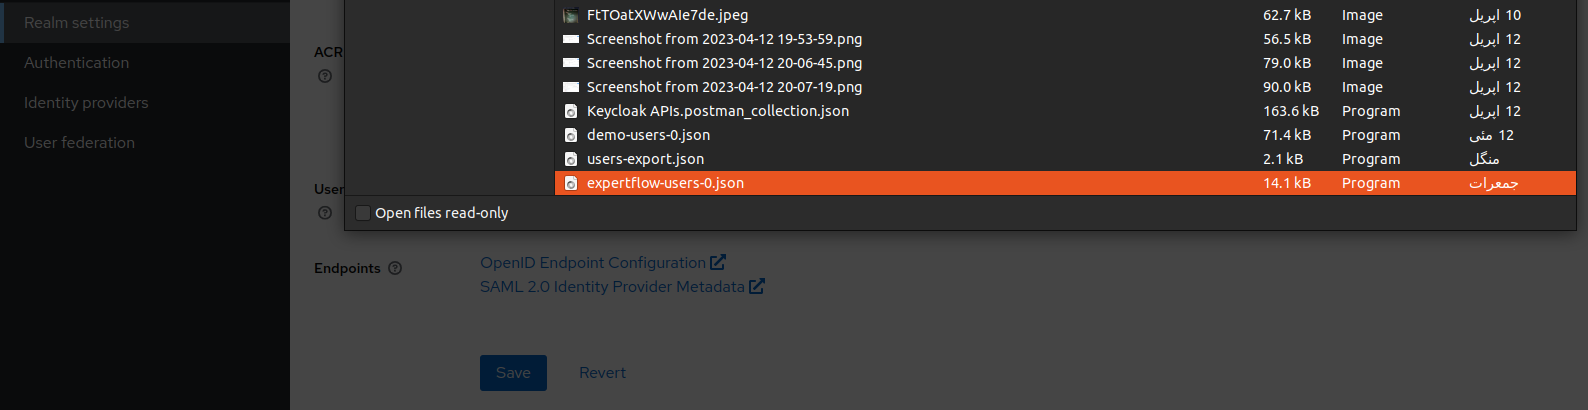
Once we click on Partial-Import. A new window opens, click on Browse and select the file containing all the users.
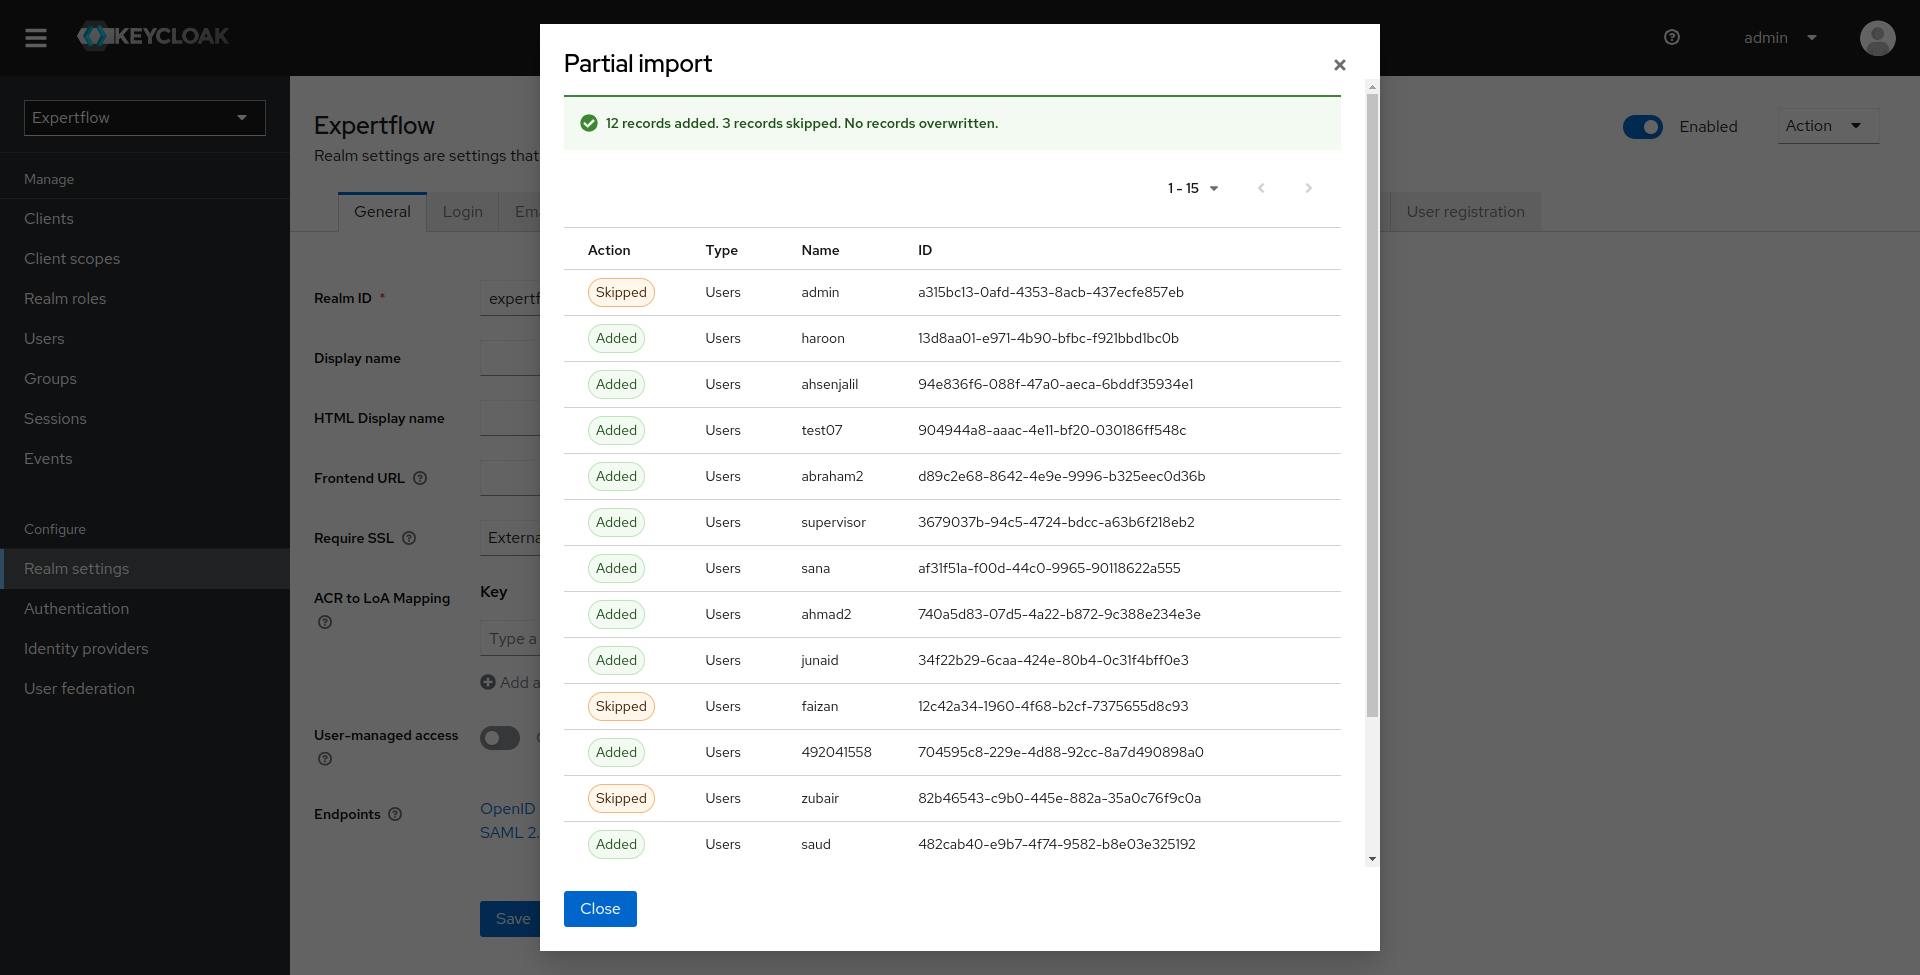
Once we select the file containing all the users, it will automatically generate the statement regarding number of users present to be exported. Check the button against number of users to be imported. Also change "If a resource already exists, specify what should be done" to Skip (This will skip any user that already exists) and then click on import.
Once users are exported, we will be shown all the users that are skipped during this process and all the users created.
Download the Keycloak DB upgrade file from this keycloak_upgrade.sql
Copy the SQL Script inside the PostgreSQL Server POD using
kubectl -n ef-external cp $HOME/keycloak_upgrade.sql ef-postgresql-0:/tmp/keycloak_upgrade.sql
Copy the current password for your postgresql server pod
kubectl get secret --namespace ef-external ef-postgresql -o jsonpath="{.data.password}" | base64 -d
you will need this password in next command as POSTGRES User's password to connect and run the SQL Script.
kubectl -n ef-external exec -ti ef-postgresql-0 -- /opt/bitnami/scripts/postgresql/entrypoint.sh /bin/bash -c "psql --host localhost -U sa -d keycloak_db -p 5432 -f /tmp/keycloak_upgrade.sql"
when prompted for the password, enter the password retrieved in previous step.
Run the postgreSql transaction block inside keycloak db: (Linking Agent-desk Permission Groups to Old Users)
After the importing of new realm and old-realm-users. We now sync the groups created for AgentDesk Permissions i.e agents_permission & senior_agents_permission to the users according to their assigned roles i.e agent, supervisor,admin. Also, we assign default group to all the users for Keycloak Teams implementation. Run this query inside keycloak db of the targeted k8s deployment. The query to run is as follow:
BEGIN;

--- admin groups assignment against roles
INSERT INTO USER_GROUP_MEMBERSHIP (Group_ID, USER_ID)
SELECT DISTINCT (SELECT ID FROM KEYCLOAK_GROUP WHERE NAME = 'default') AS Group_ID, rm.USER_ID
FROM KEYCLOAK_ROLE r
INNER JOIN USER_ROLE_MAPPING rm ON r.ID = rm.ROLE_ID
WHERE r.REALM_ID = 'expertflow' AND r.CLIENT_ROLE = 'f' AND r.NAME = 'admin'
ON CONFLICT DO NOTHING;

--- supervisor groups assignment against role
INSERT INTO USER_GROUP_MEMBERSHIP (Group_ID, USER_ID)
SELECT DISTINCT (SELECT ID FROM KEYCLOAK_GROUP WHERE NAME = 'default') AS Group_ID, rm.USER_ID
FROM KEYCLOAK_ROLE r
INNER JOIN USER_ROLE_MAPPING rm ON r.ID = rm.ROLE_ID
WHERE r.REALM_ID = 'expertflow' AND r.CLIENT_ROLE = 'f' AND r.NAME = 'supervisor'
ON CONFLICT DO NOTHING;

INSERT INTO USER_GROUP_MEMBERSHIP (Group_ID, USER_ID)
SELECT DISTINCT (SELECT ID FROM KEYCLOAK_GROUP WHERE NAME = 'agents_permission') AS Group_ID, rm.USER_ID
FROM KEYCLOAK_ROLE r
INNER JOIN USER_ROLE_MAPPING rm ON r.ID = rm.ROLE_ID
WHERE r.REALM_ID = 'expertflow' AND r.CLIENT_ROLE = 'f' AND r.NAME = 'supervisor'
ON CONFLICT DO NOTHING;

INSERT INTO USER_GROUP_MEMBERSHIP (Group_ID, USER_ID)
SELECT DISTINCT (SELECT ID FROM KEYCLOAK_GROUP WHERE NAME = 'senior_agents_permission') AS Group_ID, rm.USER_ID
FROM KEYCLOAK_ROLE r
INNER JOIN USER_ROLE_MAPPING rm ON r.ID = rm.ROLE_ID
WHERE r.REALM_ID = 'expertflow' AND r.CLIENT_ROLE = 'f' AND r.NAME = 'supervisor'
ON CONFLICT DO NOTHING;

--- agents group assignment.
INSERT INTO USER_GROUP_MEMBERSHIP (Group_ID, USER_ID)
SELECT DISTINCT (SELECT ID FROM KEYCLOAK_GROUP WHERE NAME = 'default') AS Group_ID, rm.USER_ID
FROM KEYCLOAK_ROLE r
INNER JOIN USER_ROLE_MAPPING rm ON r.ID = rm.ROLE_ID
WHERE r.REALM_ID = 'expertflow' AND r.CLIENT_ROLE = 'f' AND r.NAME = 'agent'
ON CONFLICT DO NOTHING;

INSERT INTO USER_GROUP_MEMBERSHIP (Group_ID, USER_ID)
SELECT DISTINCT (SELECT ID FROM KEYCLOAK_GROUP WHERE NAME = 'agents_permission') AS Group_ID, rm.USER_ID
FROM KEYCLOAK_ROLE r
INNER JOIN USER_ROLE_MAPPING rm ON r.ID = rm.ROLE_ID
WHERE r.REALM_ID = 'expertflow' AND r.CLIENT_ROLE = 'f' AND r.NAME = 'agent'
ON CONFLICT DO NOTHING;


COMMIT;
Once Queries are run successfully, our upgrade process is complete.