This document illustrates the procedure and steps to deploy Expertflow CX-voice on Kubernetes.
Before you begin, verify
- cx deployment on Kubernetes, see CX Voice Deployment on Kubernetes
Prepare for CX Voice Deployment
Step 1: Create Namespaces
-
Create a namespace
cx-voicefor all cx-voice components.
# Run the following command on the control-plane node.
kubectl create namespace cx-voice
Step 2: Apply Image Pull secret
-
Run the following commands for applying ImagePullSecrets of Expertflow CX images.
kubectl apply -f voice/pre-deployment/registryCredits/ef-imagePullSecret-cx-voice.yaml
Step 3: Update FQDN
Expertflow CX-voice should be accessible by a fully qualified domain name. Assign the FQDN that resolves to the control plane node or KubeVIP.
# Replace <FQDN> with your FQDN for Expertflow CX and run this command.
sed -i 's/devops[0-9]*.ef.com/<FQDN>/g'   voice/cx-voice/Ingresses/*
Step 4: Set ConfigMap fields
-
Open the Common connection ConfigMap with
Bashvi voice/cx-voice/ConfigMaps/ef-connection-env-configmap.yaml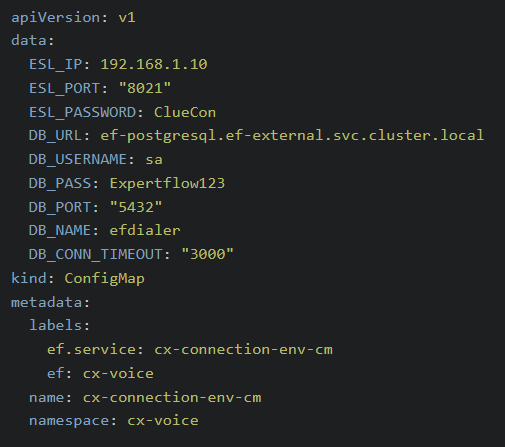
-
Change the values as follows:
-
ESL_IP: IP of the EFSwitch server.
-
ESL_PORT: ESL port of the EFSwitch server, set here.
-
ESL_PASSORD: ESL password of the EFSwitch server, set here.
-
-
Exit the editor by pressing the Esc key then entering
:wq -
Open the Dialer connector ConfigMap with:
Bashvi voice/cx-voice/ConfigMaps/ef-outbound-dialer-configmap.yaml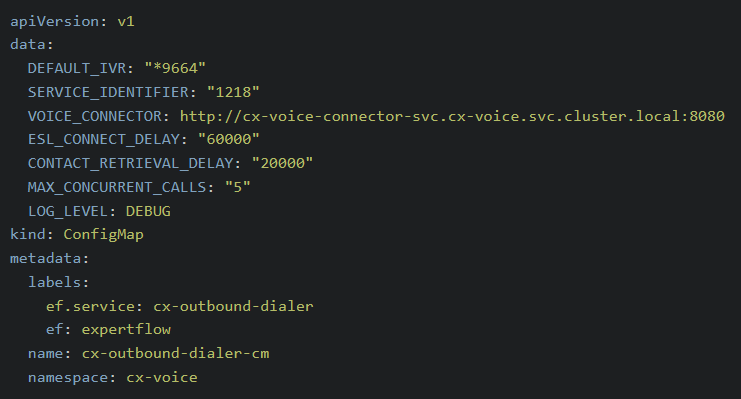
-
Change the values as follows:
-
SERVICE_IDENTIFIER: The channel service identifier of the CX Voice channel, set here.
-
ESL_CONNECT_DELAY: The delay in milliseconds between the dialer checking that its connection with EFSwitch is maintained.
-
CONTACT_RETRIEVAL_DELAY: The delay in milliseconds between the dialer reading the database for new added contacts.
-
MAX_CONCURRENT_CALLS: The maximum number of calls that can occur at a time.
-
DEFAULT_IVR: The dialing number of the default IVR created on EFSwitch, which plays when the outbound contact does not have a specified IVR.
-
LOG_LEVEL: Set to INFO for basic logging and DEBUG for in-depth logs.
-
-
Exit the editor by pressing the Esc key then entering
:wq -
Open the Voice connector ConfigMap with:
Bashvi voice/cx-voice/ConfigMaps/ef-voice-connector-configmap.yaml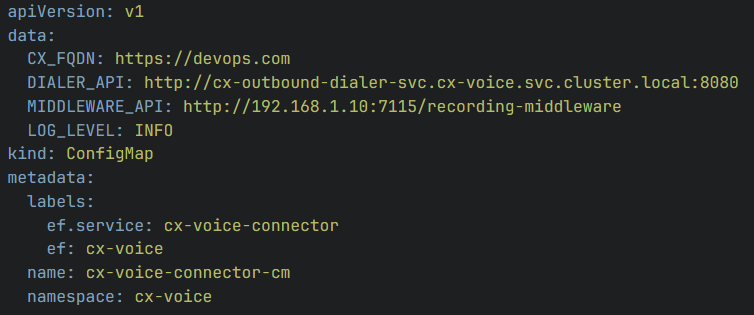
-
Change the values as follows:
-
CX_FQDN: The Fully Qualified Domain Name of the EF CX. Replace devops.com with the FQDN of the EF CX in use.
-
MIDDLEWARE_API: The API for the recording middle-ware. In the format: http://IP:PORT/recording-middleware
-
Where IP and PORT are the server IP address and container port of the recording middle-ware container respectively.
-
-
LOG_LEVEL: Set to INFO for basic logging and DEBUG for in-depth logs.
-
-
Exit the editor by pressing the Esc key then entering
:wq
Deploy CX-voice Components
-
Apply all configurations in the ConfigMaps folder using
kubectl apply -f voice/cx-voice/ConfigMaps
-
Create services for all deployment EF components
kubectl apply -f voice/cx-voice/Services
-
Apply all the Deployment manifests
kubectl apply -f voice/cx-voice/Deployments
-
Before proceeding to the the next steps, wait for all the solution components to be up and ready.
# Wait for the CX voice to be ready
kubectl -n cx-voice get pods
Step 4: Setup Ingress Routes
For RKE2-based Ingresses using Ingress-Nginx Controller
kubectl apply -f voice/cx-voice/Ingresses