Purpose
The purpose of this document is to deploy the RKE2 (Rancher Kubernetes Engine 2) Cluster in a number of ways to demonstrate the High Availability and Load Balancing. Below are the scenarios that we can use to provision an RKE2 to cluster with different requirements and dependencies.built by Rancher. RKE2 is also known as RKE Government which is a fully conformant Kubernetes distribution which is lightweight fully CNCF Certified Kubernetes Distribution.
This guide is written with RKE2 Kubernetes Distribution by Rancher in mind, however, this can be implemented with appropriate changes to any other distribution.
Intended Audience
This document is intended for IT operations personnel and system administrators who want to deploy Expertflow CX using the RKE2 distribution platform. Familiarity with computer network component networking and storage is preferable.
About RKE2 High Availability Software
The highlights of the RKE2 distribution are given as follows.
As per Wikipedia:
High availability software is software used to ensure that systems are running and available most of the time. High availability is a high percentage of time that the system is functioning. It can be formally defined as (1 – (down time/ total time))*100%. Although the minimum required availability varies by task, systems typically attempt to achieve 99.999% (5-nines) availability. This characteristic is weaker than fault tolerance, which typically seeks to provide 100% availability, albeit with significant price and performance penalties.
High availability software is measured by its performance when a subsystem fails, its ability to resume service in a state close to the state of the system at the time of the original failure, and its ability to perform other service-affecting tasks (such as software upgrade or configuration changes) in a manner that eliminates or minimizes down time. All faults that affect availability – hardware, software, and configuration need to be addressed by High Availability Software to maximize availability.
When considering the High-Availability at Expertflow CX solution, this has been converged from the conventional docker/docker-compose based deployment model to a more robust and fault tolerant model using Kubernetes. When deploying using any of the Kubernetes based distributions for example K3s, RKE2 and KubeAdm, provide us below given benefits
-
Load balanced
-
preemptively scheduled
-
Self sustained
-
Fault tolerant
-
Self-healed application components and
-
application coverage is made easier for anyone familiar with the Kubernetes manifestations.
/*<![CDATA[*/ div.rbtoc1770820563594 {padding: 0px;} div.rbtoc1770820563594 ul {list-style: disc;margin-left: 0px;} div.rbtoc1770820563594 li {margin-left: 0px;padding-left: 0px;} /*]]>*/ Purpose Intended Audience About RKE2 High Availability Software On-prem Deployment Challenges Cluster Topology Storage Topology Layered Networks Cluster Add-Ons for Kubernetes Cluster Cluster Topology Options Storage Topology Option Layered Networks Cluster Add-Ons for Kubernetes Cluster RECOMMENDED FOR HIGHER WORKLOADS IPVS Mode NodeLocal DNS Requirements RKE2: Using any RKE2 Kubernetes version Using Multus as meta CNI plugin Using Whereabout for IPAM with Multus meta CNI Choose an Installation RKE2 Deployment in High Availability with DNS RKE2 Deployment in High Availability With Kube-VIP RKE2 Deployment in High Availability With Nginx/HAProxy
On-prem Deployment Challenges
When deploying on-prem using any of the above given distributions, following are the major concerns:
-
fault-toleration
-
self-sustainability
This can create a problem in leveraging High Availability in multiple zones or data-center locations when deploying the on-prem solutions. Extended Clusters with multiple zones or data-centers are not viable option as it requires a massive scalability both at the infrastructure and cluster itself and requires commercial support for setups with higher maintenance costs. Any cluster with high-availability essentially means that the cluster is able to provide some of the above mentioned capacities.
In practice, any Kubernetes based cluster can range from a single node to multi-master nodes, providing different edges in different contexts like:
-
a Single node cluster can only provide self-healing and self-sustainability but without any sort of application availability in case of a node failure as it is a single node.
-
a Multi-node cluster with only one single master and multiple worker nodes can sustain with node failure and application. It, however, fails when the master goes down.
-
a Multi-Master cluster can work in almost all levels of availability (master (up to quorum) and worker node failures, application scaling to meet load spikes etc.) but can not failover to another cluster in another data-center in case of DR incident.
Following is the list of cluster topologies which can be deployed by keeping the above mentioned technologies in mind:
Cluster Topology
-
HA setup using HA-Proxy, Nginx or any other External Load Balancer
-
HA setup using Kube-VIP
-
HA setup using DNS based routing
Storage Topology
-
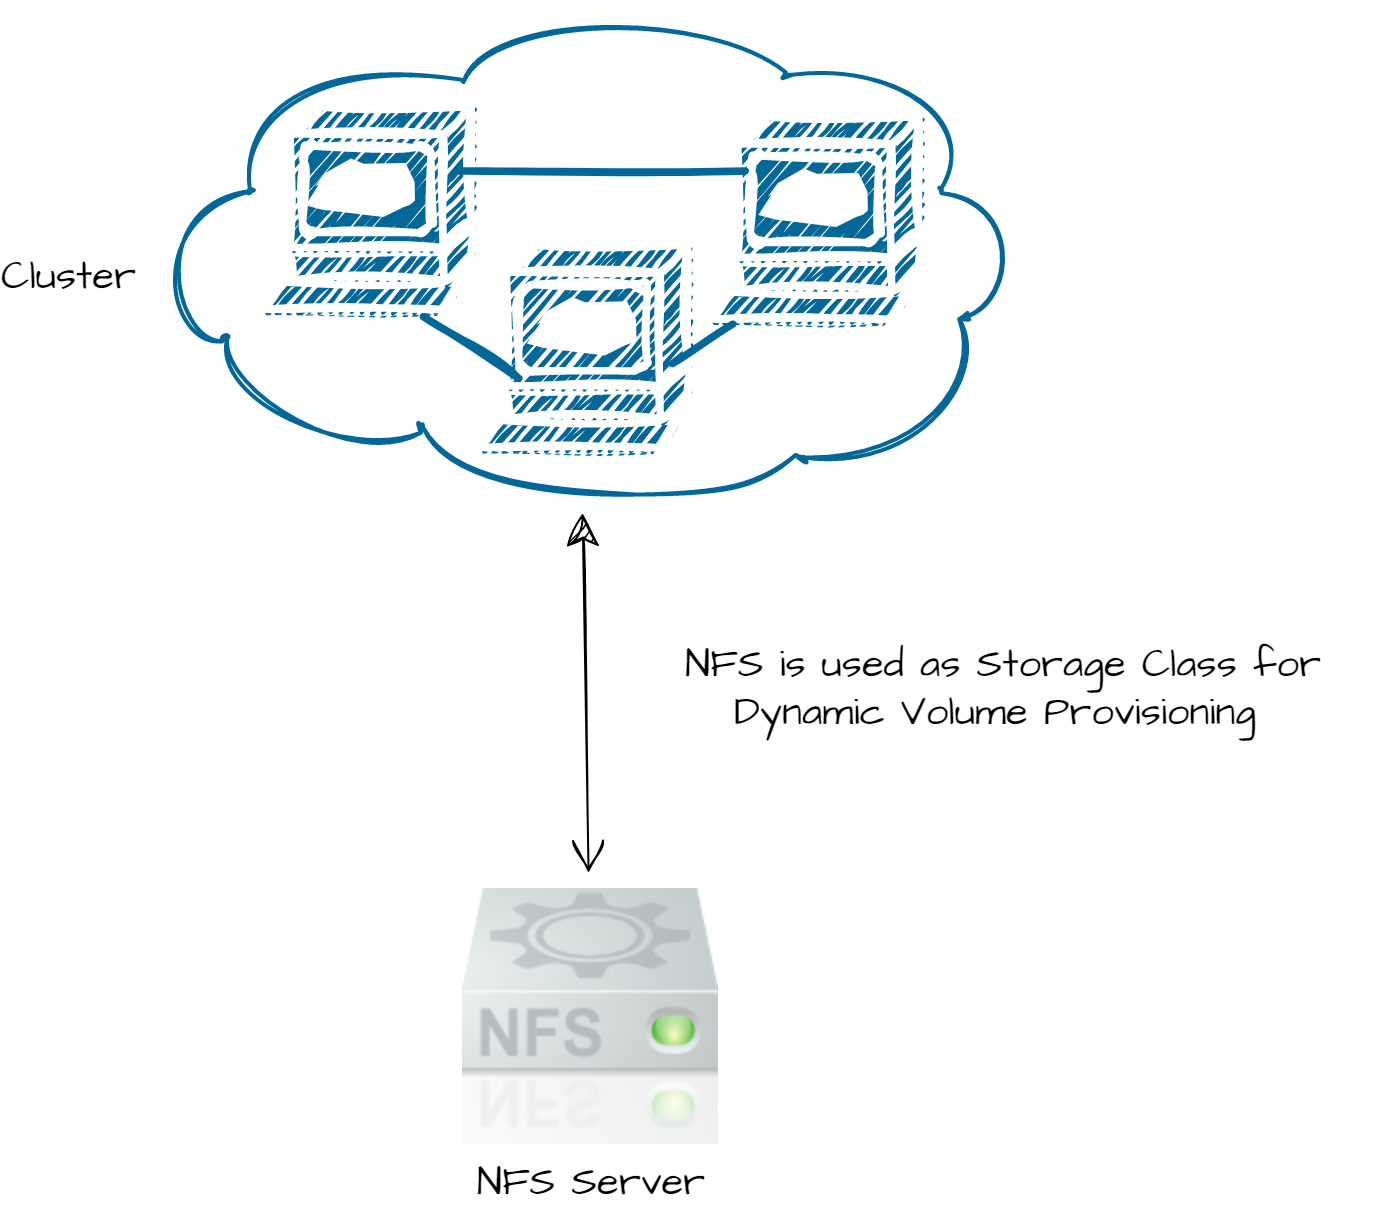
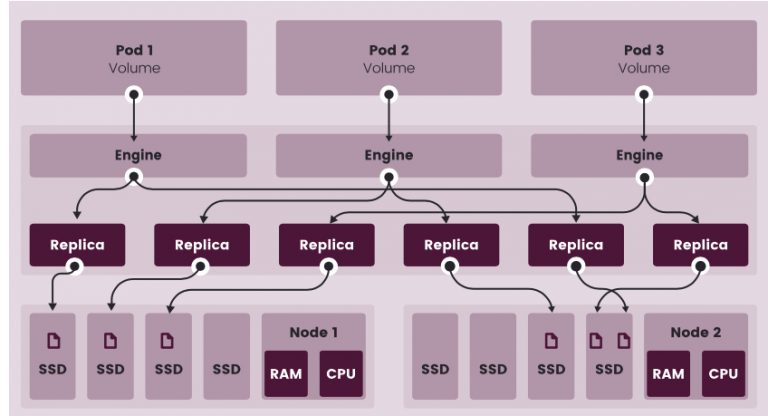
Local Storage with application level Replication
-
NFS based Storage
-
Cloud-Native Storage
Layered Networks Cluster
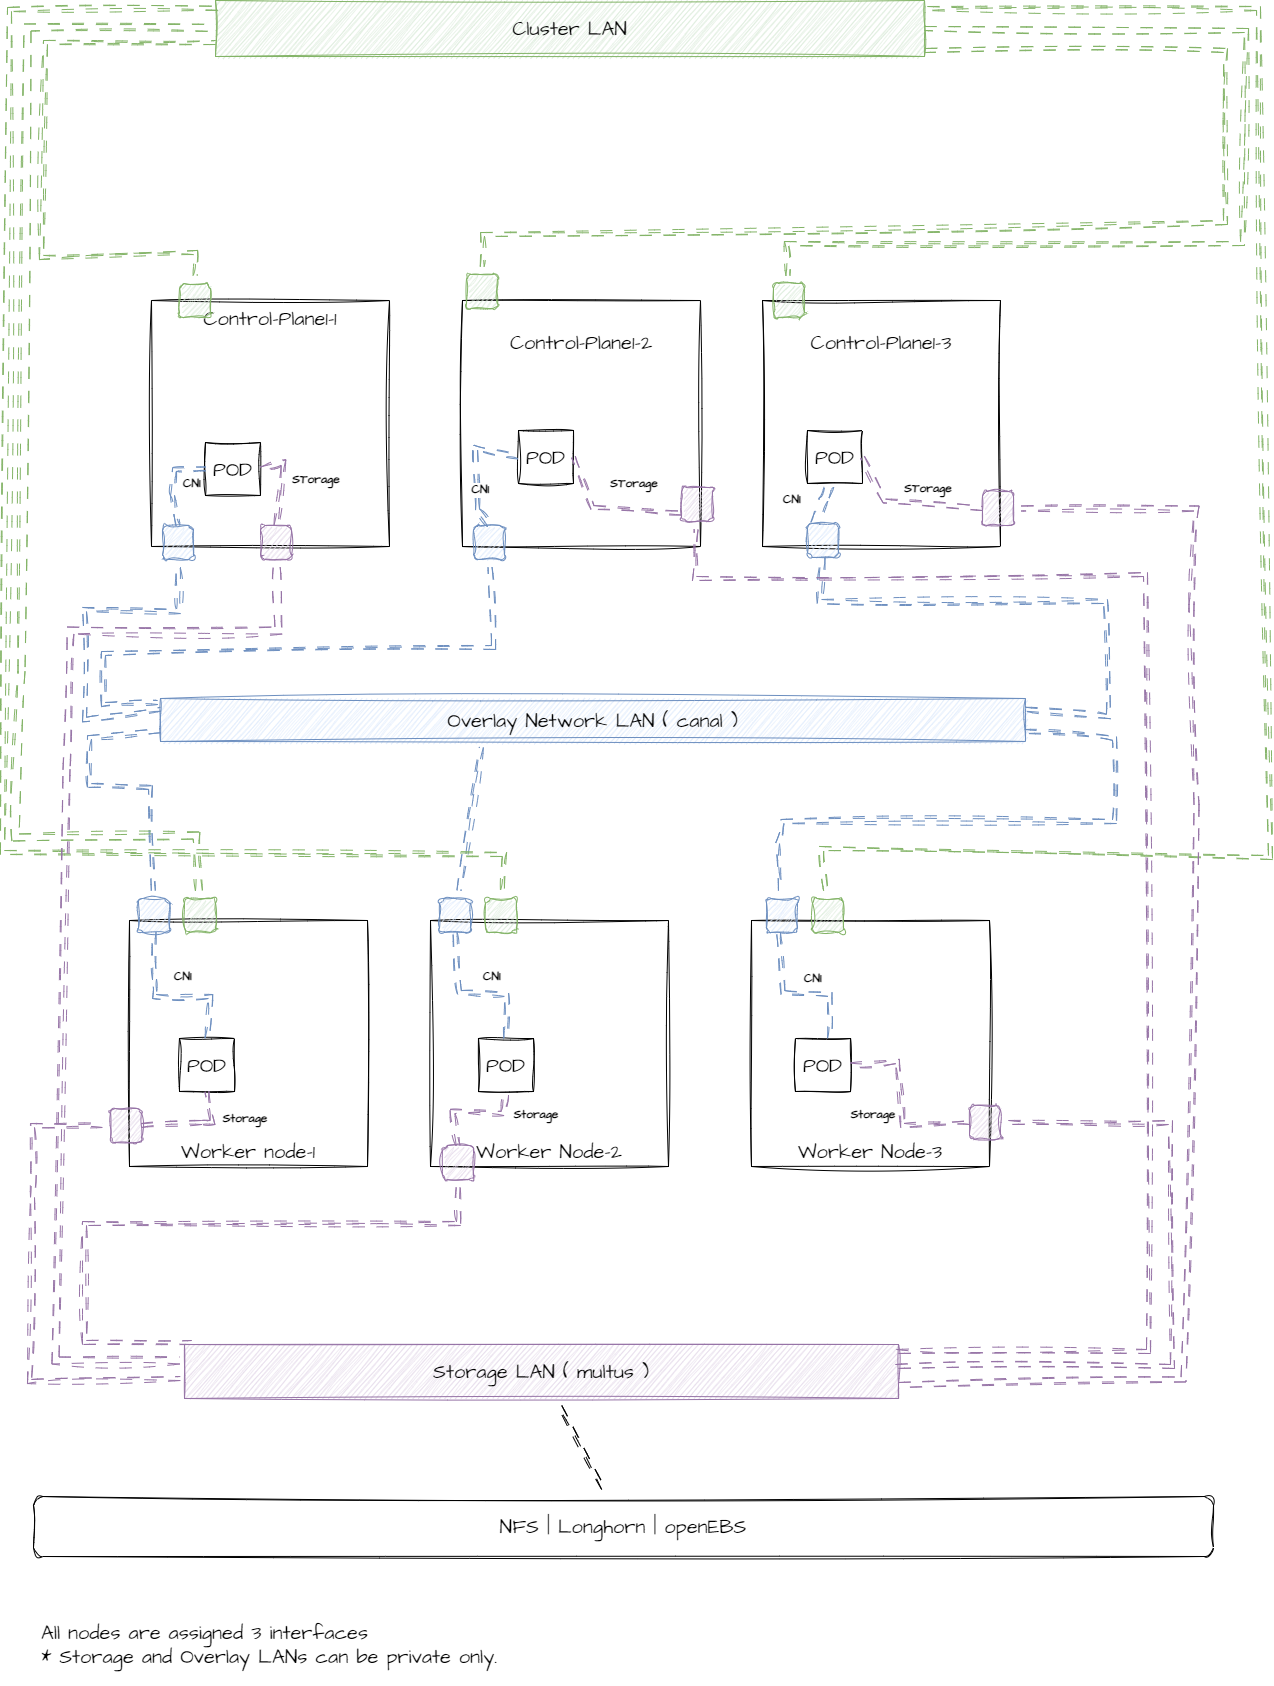
Cluster is provisioned with a separate networks for
-
Cluster traffic
-
POD Traffic
-
Storage Traffic
Add-Ons for Kubernetes Cluster
To further enhance these clusters for further stability and resilience , we can also use:
-
IPVS mode which gives a better performance in high work loads
-
Nodelocal DNS for higher work-loads and better service availability
-
Using multus as meta CNI plugin for multi-homed pods for-example for using separate path for Storage related traffic.
Cluster Topology Options
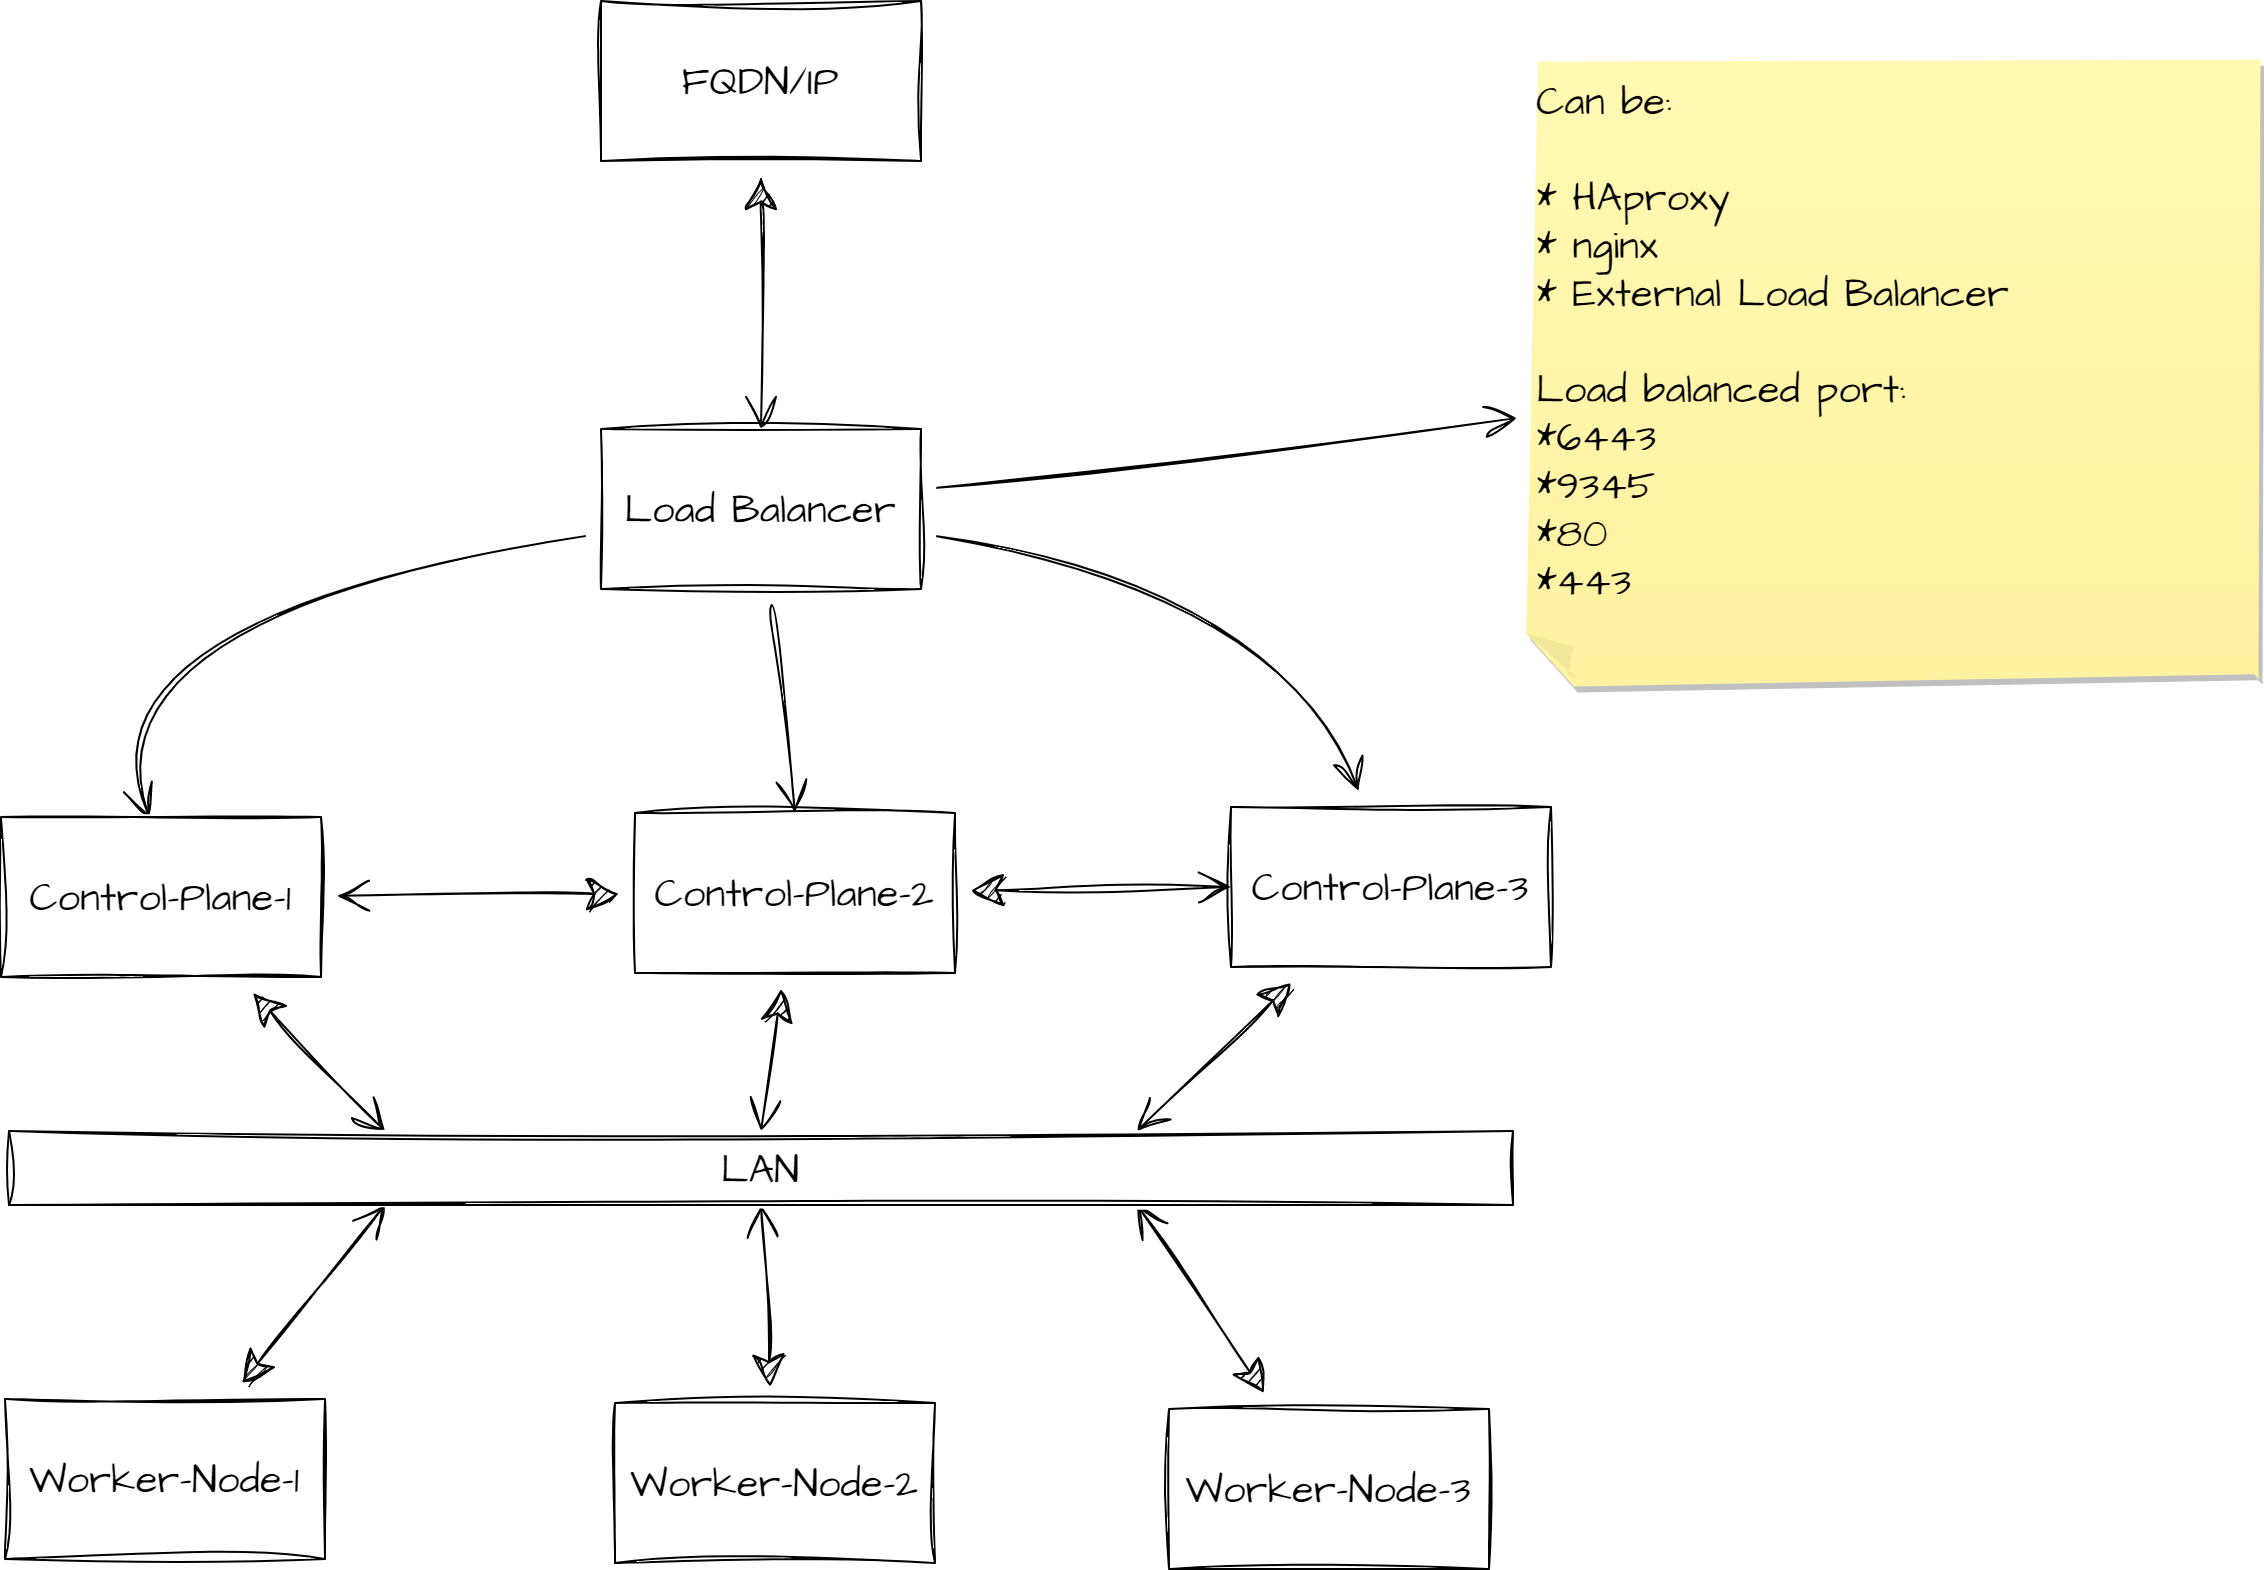
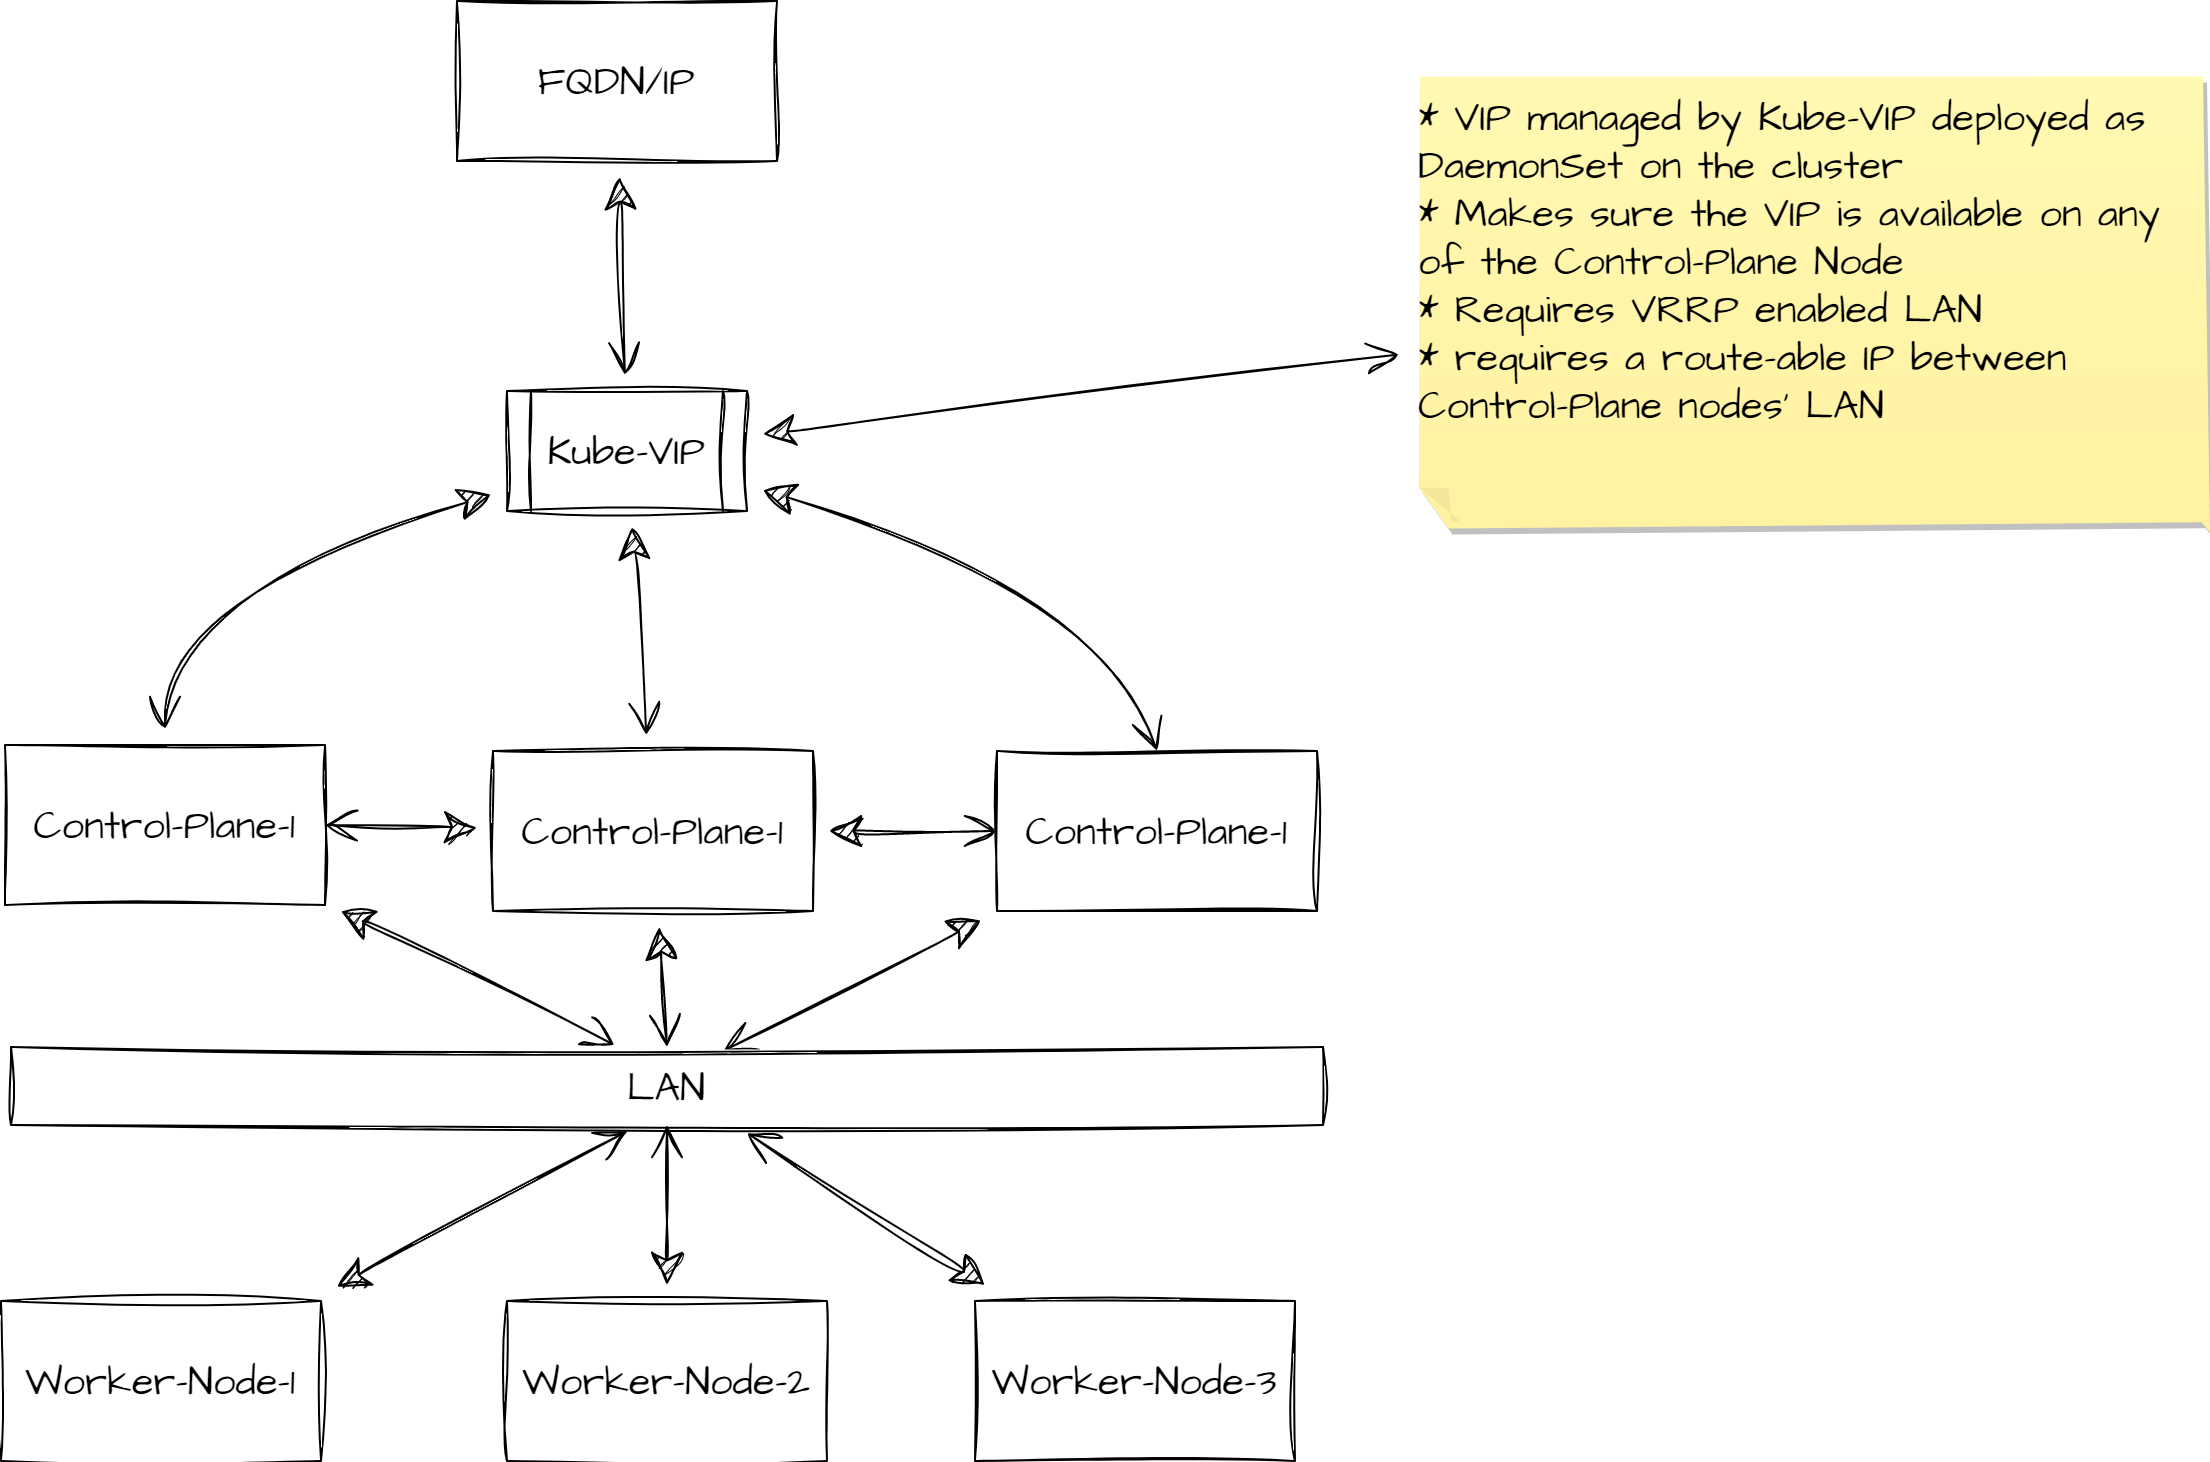
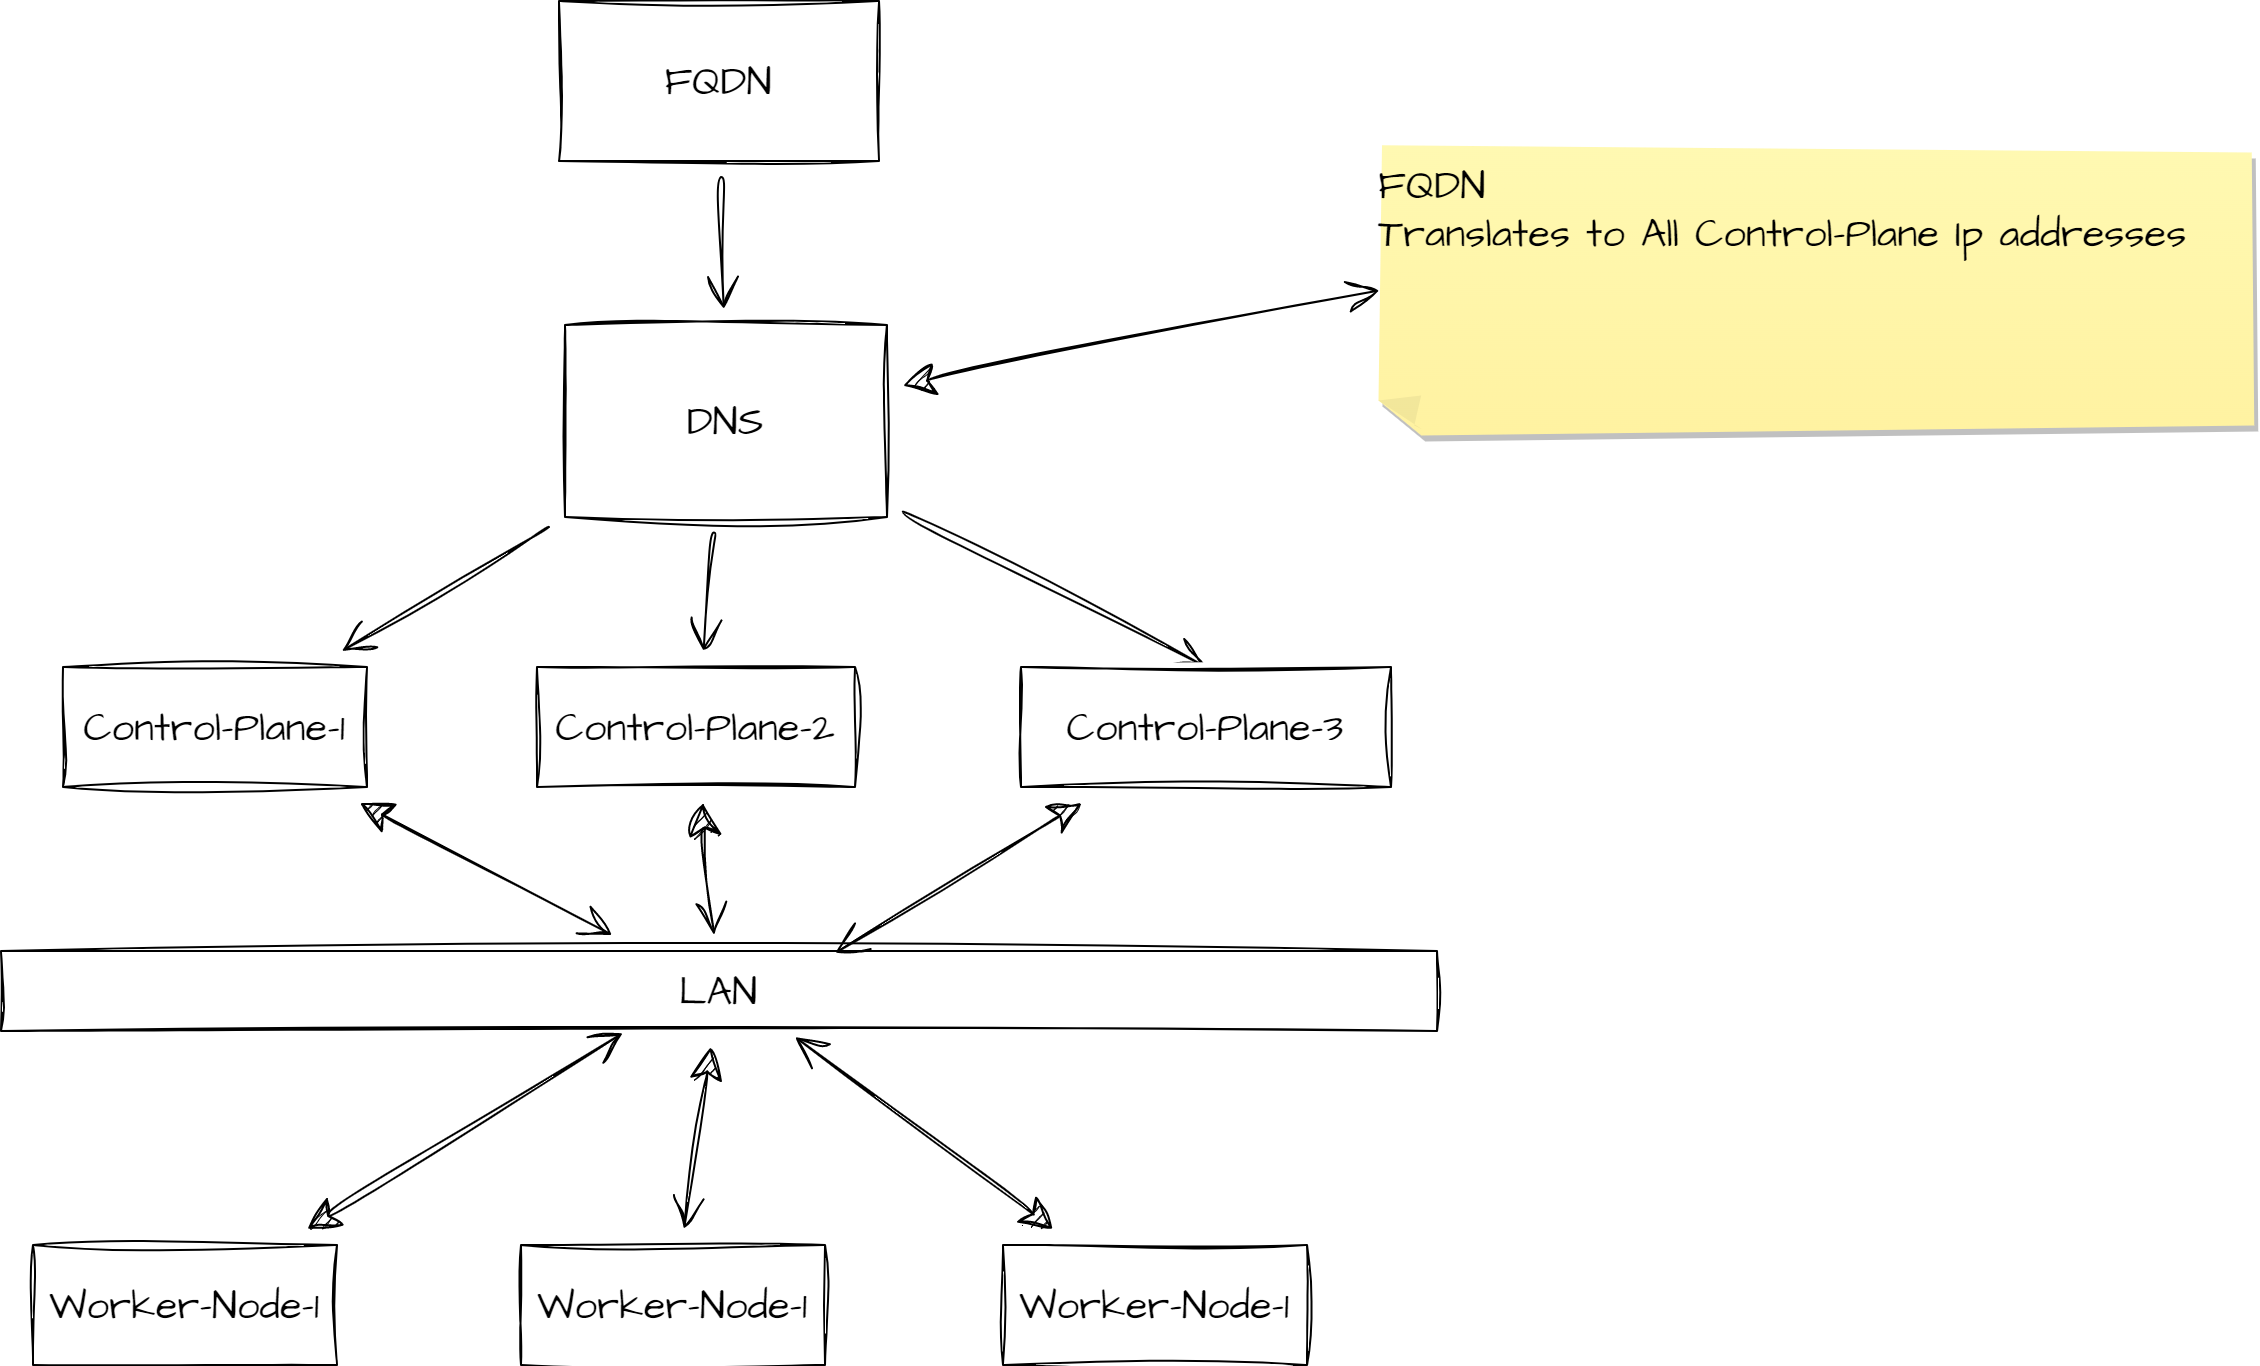
Storage Topology Option
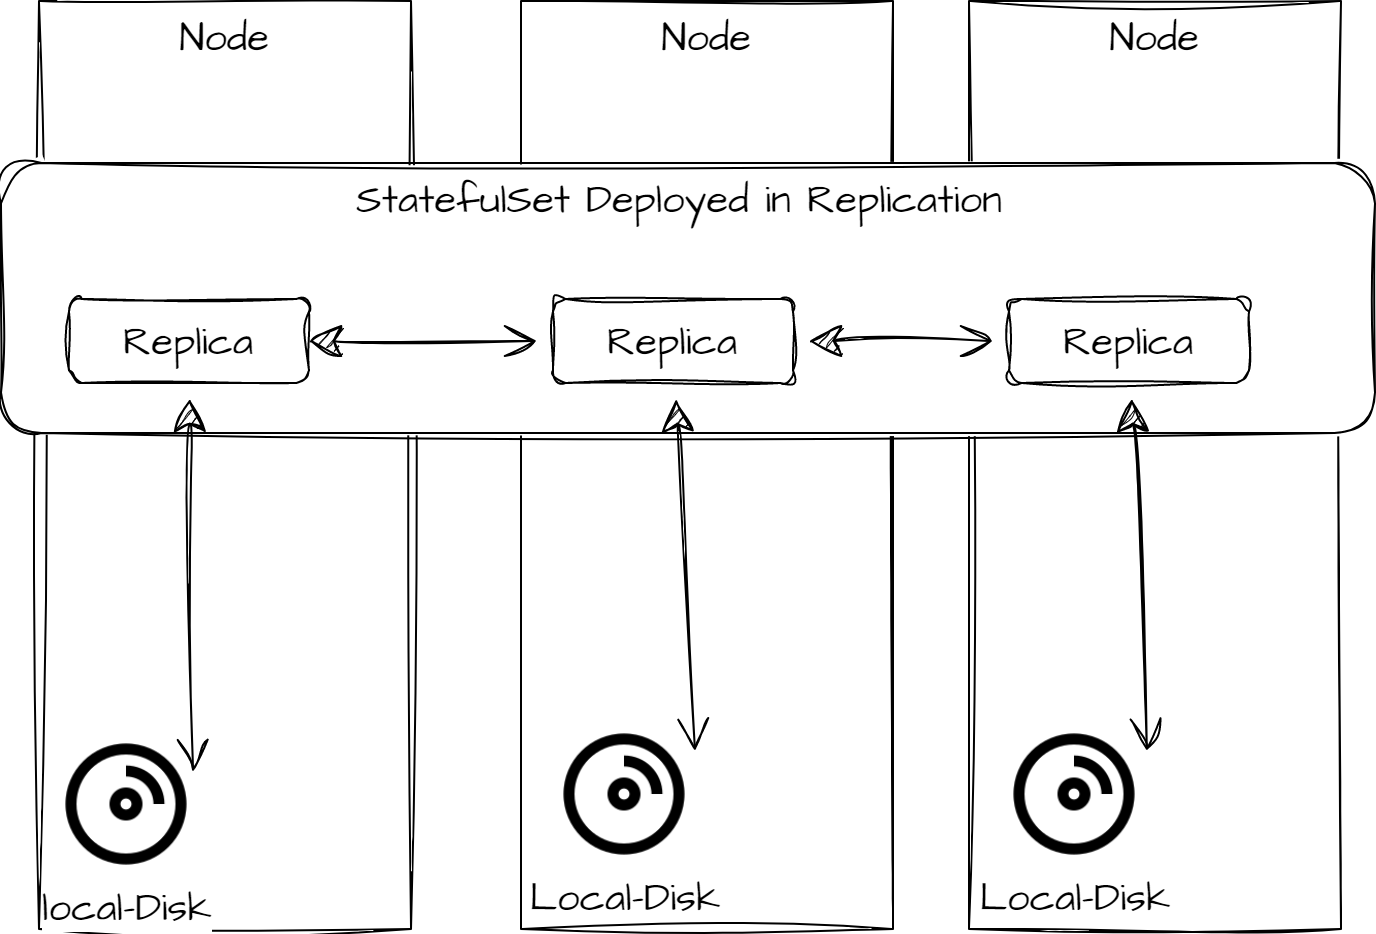
Layered Networks Cluster
Please note this topology requires expertise to manage and maintain the cluster smoothly. An inefficient setup may result in poor performance and longer outage periods if something goes wrong.
Add-Ons for Kubernetes Cluster Recommended for higher workloads
IPVS Mode
Using IPVS for Kubernetes gives edge over built-in kube-proxy's ability to use Iptables for POD's traffic. However, using IPVS requires some advanced management of the cluster and some additional tunning of the cluster may also be required. In this case, every single service is attached to the IPVS which then routes the traffic to the destination PODs.
NodeLocal DNS
Like many applications in a containerised architecture, CoreDNS or kube-dns runs in a distributed fashion. In certain circumstances, DNS reliability and latency can be impacted with this approach. The causes of this relate notably to conntrack race conditions or exhaustion, cloud provider limits, and the unreliable nature of the UDP protocol.
A number of workarounds exist, however long term mitigation of these and other issues has resulted in a redesign of the Kubernetes DNS architecture, and the result being the Nodelocal DNS cache project.
Requirements
-
A Kubernetes cluster of v1.15 or greater created by Rancher v2.x or RKE2
-
A Linux cluster, Windows is currently not supported
-
Access to the cluster
RKE2: Using any RKE2 Kubernetes version
Update the default HelmChart for CoreDNS, the `nodelocal.enabled: true ` value will install node-local-dns in the cluster. Please see the documentation here for more details.
Further reading on NodeLocal DNS is available at https://www.suse.com/support/kb/doc/?id=000020174
Using Multus as meta CNI plugin
Multus CNI is a CNI plugin that enables attaching multiple network interfaces to pods. Multus does not replace CNI plugins, instead it acts as a CNI plugin multiplexer. Multus is useful in certain use cases, especially when pods are network intensive and require extra network interfaces that support dataplane acceleration techniques such as SR-IOV or separated storage traffice for NFS and Longhorn.
Multus can not be deployed standalone. It always requires at least one conventional CNI plugin that fulfills the Kubernetes cluster network requirements. That CNI plugin becomes the default for Multus, and will be used to provide the primary interface for all pods.
For details, please check https://docs.rke2.io/install/network_options#using-multus
Using Whereabout for IPAM with Multus meta CNI
Whereabouts is an IP Address Management (IPAM) CNI plugin that assigns IP addresses cluster-wide. Starting with RKE2 1.22, RKE2 includes the option to use Whereabouts with Multus to manage the IP addresses of the additional interfaces created through Multus. In order to do this, you need to use HelmChartConfig to configure the Multus CNI to use Whereabouts.
Additional information can be found at https://docs.rke2.io/install/network_options#using-multus-with-the-whereabouts-cni
Choose an Installation
Once you have gone through the above mentioned information, you can choose to select a mode of installation as per your requirement. The steps are explained in each of these guides:
-
RKE2 Deployment in High Availability with DNS
-
RKE2 Deployment in High Availability With Kube-VIP
-
RKE2 Deployment in High Availability With Nginx/HAProxy