Odoo
Before installing our connector module, you’ll need a working Odoo installation.
There are three types of Odoo deployments:
We will only point to Odoo’s documentation for each type of installation. Please refer to them for setup information.
Note that our connector module only works with Odoo on-premise and Odoo.sh, as Odoo online has limited capabilities for custom modules. That is because Odoo Online does not allow running third-party Python code in installed modules.
Connector Module
Adding the Module Files
Odoo On-Premise (Local)
After creating an on-premise instance of Odoo:
-
Navigate to the
addonsdirectory. -
Pull the code files from the associated Git repo into a a directory with the name
efcx, so that the relative path is/addons/efcx.
Odoo.sh
After creating a running instance on Odoo.sh, you can perform the same steps mentioned above through the platform’s terminal.
User-Side Installation
-
Go to Settings → General
-
Scroll down and click on activate developer mode
-
Go to Apps
-
In the navbar, click on update app list
-
In the search bar, search for “efcx”. Make sure to remove the App filter while searching
-
Click to install
-
Go back to the Settings page, then go to the EFCX Connector Settings page and enter the appropriate values in the CRM settings fields.
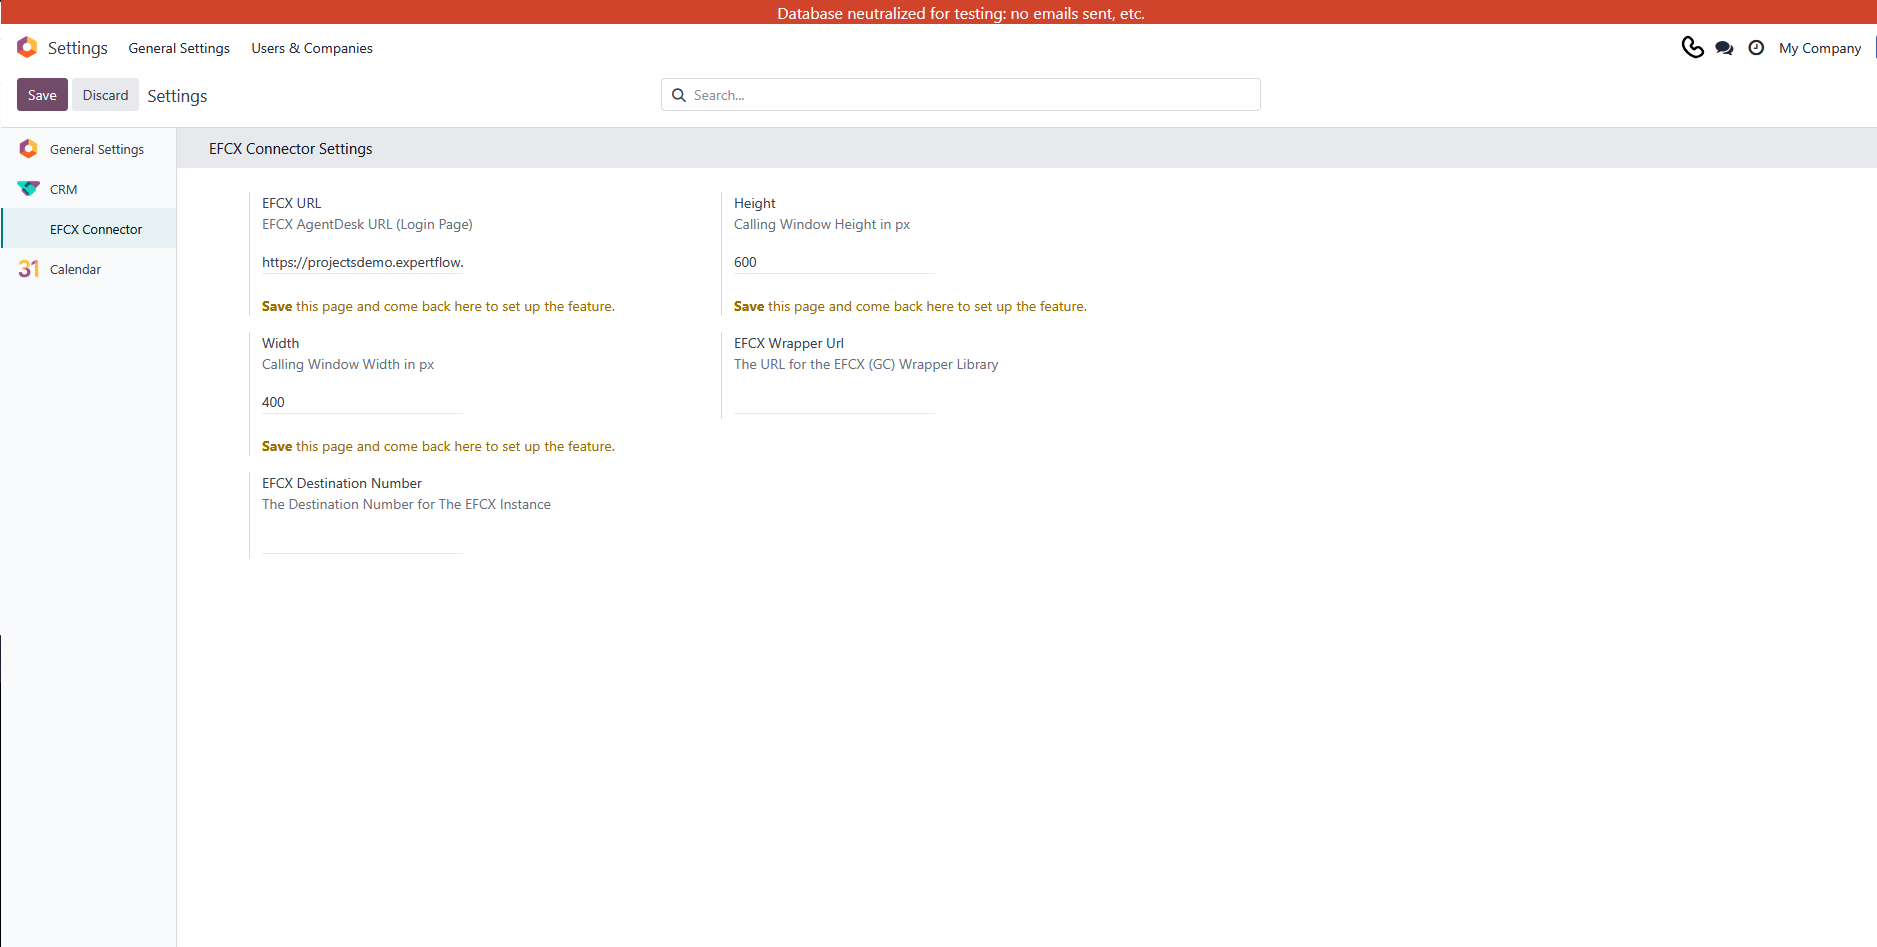
Settings
|
Field |
Values |
Description |
|---|---|---|
|
EFCX URL |
|
Add the login page URL of the Agent desk you’d like to embed. |
|
EFCX Destination Number |
e.g. |
The destination number (DN) related to CX Voice for that instance of EFCX. |
|
EFCX Wrapper URL |
(Optional field) |
Related to the EFCX wrapper library instance installed with the module, but can be changed if needed. |
|
Hight |
600 |
recommended |
|
Width |
400 |
recommended |
Connector settings revert to their default state after updating or reinstalling the module. Be sure to reconfigure them afterward.
-
Click on the Save button.
-
Navigate to the CRM dashboard and click the Phone icon ' 📞' located in the top right of the Odoo CRM to launch the EFCX in the Softphone.