This document is intended for anyone responsible for configuring or managing API authorization settings, including developers, system administrators, and operations teams. They can apply fine-grained authorization on their APIs using this document. By default, APIs of all the components mentioned in Secured Components document are secured with authorization. Secured Components document specifies the secured APIs and user roles (e.g., agent, supervisor, admin) that have access to each API, along with the allowed scopes (e.g., GET, POST) for each user role.
The document outlines all the steps for securing APIs with authorization using IAM and the authz-keycloak plugin of Application Gateway. It provides generic templates for applying authorization or customizing authorization rules for various APIs and uses an API from Customer Channel Manager as an example.
Considerables
-
Wildcard entries for APIs of all the components are already secured, as mentioned in the Secured Components (e.g.,
/ccm/*,/routing-engine/*,/conversation-manager/*, etc.). The wildcard/ccm/*covers all routes under it, such as/ccm/channel-types,/ccm/channel-provider-interfaces,/ccm/widget-configs, and so on. -
Suppose you’re working with CCM APIs and you want a specific endpoint to be treated differently and should have different access levels than wildcard endpoint (
/ccm/*), you will need to perform all the steps outlined in IAM Configurations section below. For example, if you choose/ccm/channel-types*endpoint, it will have its own set of authorization rules (including resources, scopes, policies, and permissions) associated with it.
Configurations Required in Application Gateway
By default, all the required routes are secured with authorization in Application Gateway, so no changes are required in the its configuration. To confirm that the component you’re working with is secured in Application Gateway, you can search for the following values under the plugins section of your component’s route within apisixStandalone.routes in the values.yaml file (located under /kubernetes/helm/apisix).
authz-keycloak:
  lazy_load_paths: true
  http_method_as_scope: true
  resource_registration_endpoint: "http://keycloak.ef-external.svc/auth/realms/expertflow/authz/protection/resource_set"
  discovery: "http://keycloak.ef-external.svc/auth/realms/expertflow/.well-known/uma2-configuration"
  client_id: "cim"                                             # keycloak client-id
  client_secret: "ef61df80-061c-xxxx-xxxx-387e6bf67052"        # keycloak client-secret
For example, the route for Customer Channel Manager is given below:
- id: ef-cx-ccm-main-secured
  uris: ["/ccm/*"]
  hosts: ["{{ .Values.global.ingressRouter }}"]
  priority: 0
  service_id: svc-ccm
  status: 1
  plugins:
    openid-connect: ...
    authz-keycloak: ...
In the case of an on-premises or Single Tenant deployment, for the resource_registration_endpoint and discovery settings:
-
Ensure that, instead of using the FQDN, the Keycloak service name is specified before the
/authsubpath as shown above. -
Ensure that your realm name or tenant ID is used instead of "expertflow". For example:
http://keycloak.ef-external.svc/auth/realms/tenant-id/authz/....
-
To add authorization to a specific route, you need to add
authz-keycloakplugin (mentioned above) inpluginssection of that route. -
To remove authorization from a route, simply remove or comment out the
authz-keycloakplugin from the route. In YAML files, a line is commented out by adding a#at the beginning. Removing the#enables (uncomments) the line.
Exception Routes
If /ccm/* is secured with authorization, it means that all the routes falling under /ccm/ are secured. However, if you want to leave /ccm/channel-types* unsecured by removing authorization while keeping all other routes under /ccm/ secured, you’ll need to create an Exception Route for /ccm/channel-types* without the authz-keycloak plugin. See Advance API Gateway Routing.
Configurations Required in IAM
To secure an API endpoint with authorization, you must create Resource, Scopes, Policies, and Permissions in IAM for it. These four entities must be configured for authorization to function properly. We'll cover each entity in detail.
Your realm will have the same name as your tenant ID, instead of "Expertflow".
To find the settings where you can create these entities, follow the steps below:
-
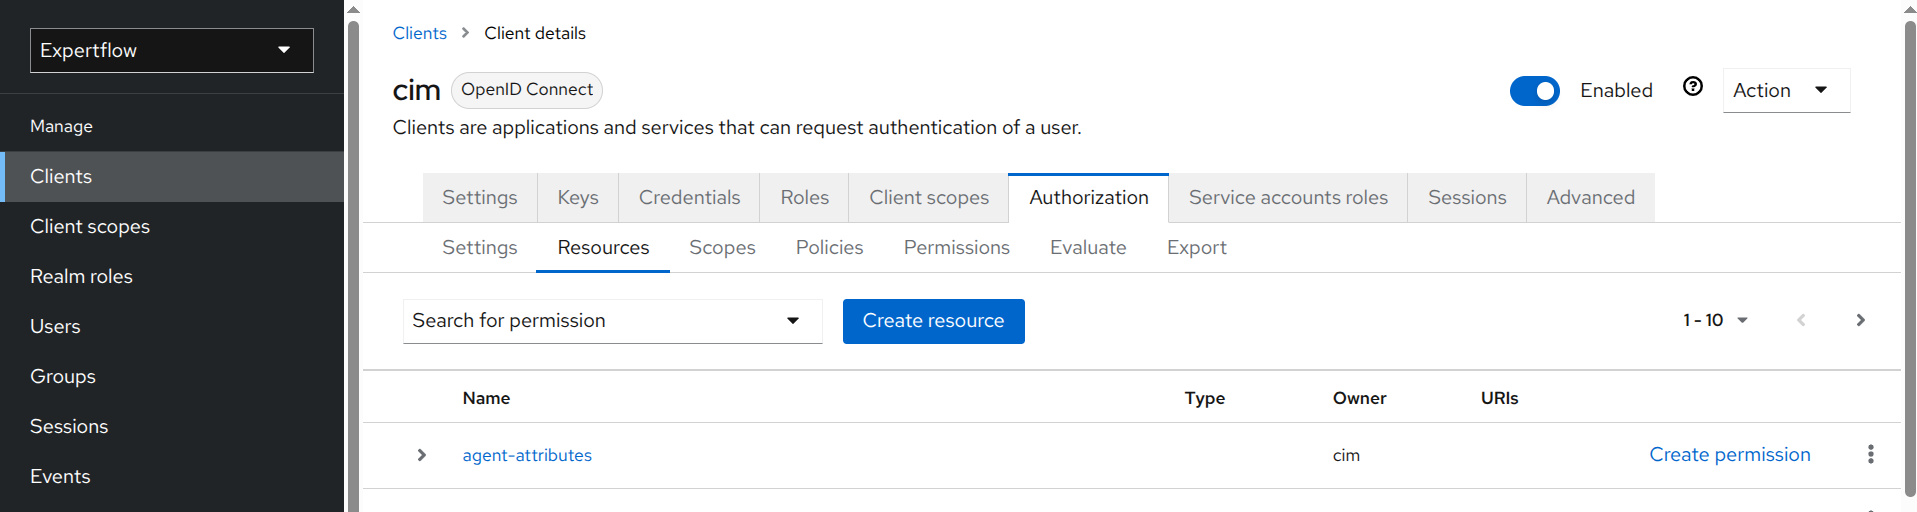
In Expertflow realm, go to Clients section and select cim.
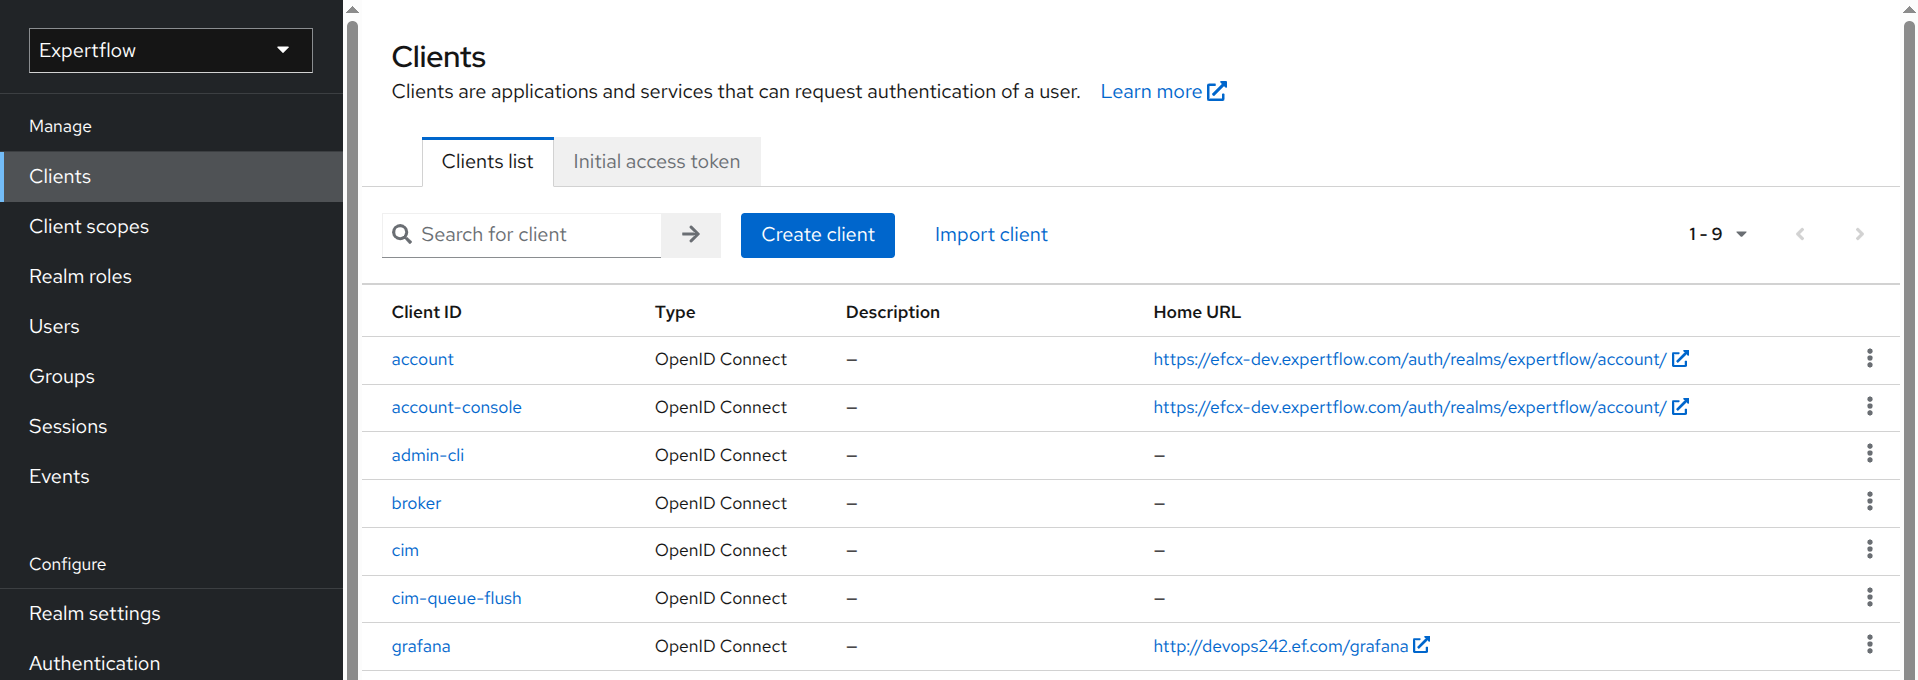
-
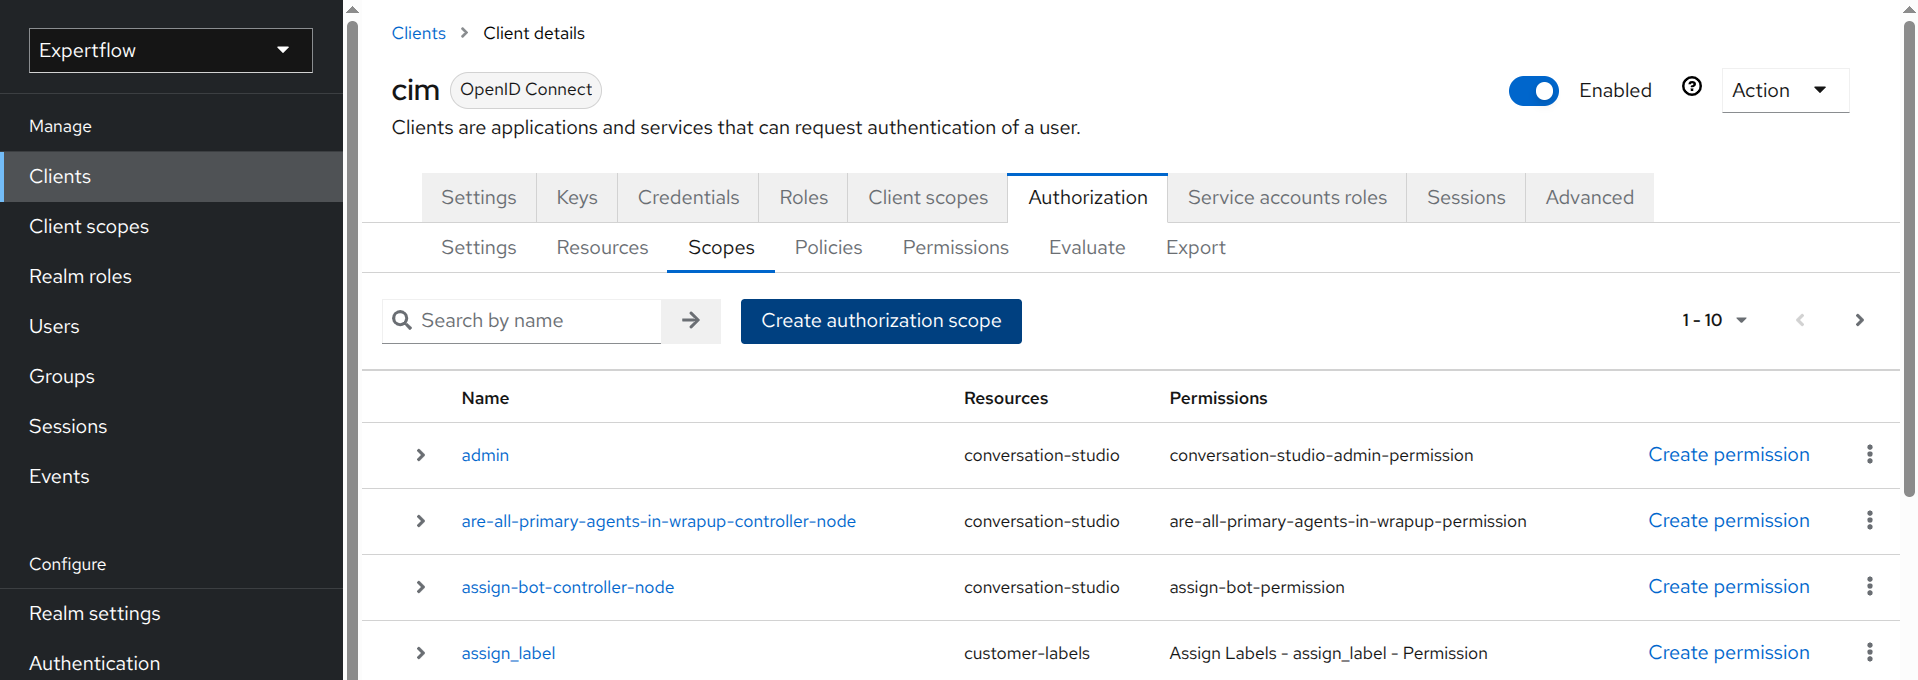
Go to Authorization tab. Here you’ll see all the four entities. We’ll cover next steps from here.
1. Create Scopes
There can be multiple scopes that need to be created for a resource. You can think of a resource as an API endpoint, and scopes as the actions (verbs/functions) that can be performed on that resource. For APIs, each HTTP method acts as a scope. Following scopes are already created in IAM:
-
GET
-
PUT
-
POST
-
DELETE
-
PATCH
If there are any other HTTP methods that your API uses or if you can’t find a scope for one of the above mentioned methods, you can create the necessary scopes by following the instructions below.
Number of scopes in a resource depends on the use-case of API you are securing. For example, if you're only securing GET and POST requests for an API, you don’t need to use/define other scopes, as those operations are not relevant in this case. Also, access is dynamic and flexible, you can give access to any user (agent, senior agent, supervisor, admin) based on use-case.
Steps to create Scopes:
-
Select Scopes under Authorization tab.
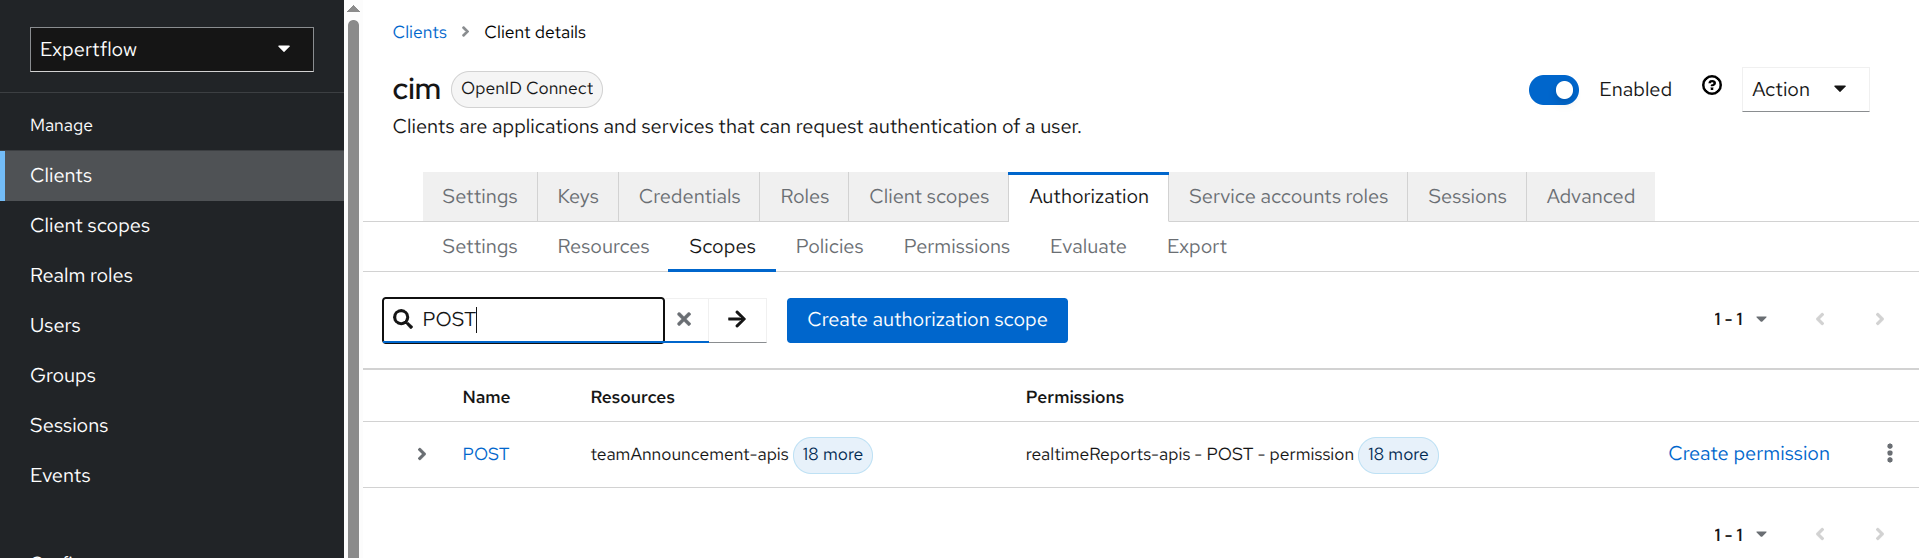
-
In the search box, enter the name of the scope you want to use for your API (e.g., POST). If you find the scope, you’re good to go. Otherwise, you'll need to create the scope by following the next steps.
-
Click Create authorization scope.
-
Enter the name of the scope for your API. The scope name should be in capital letters and match the HTTP method (e.g., DELETE).
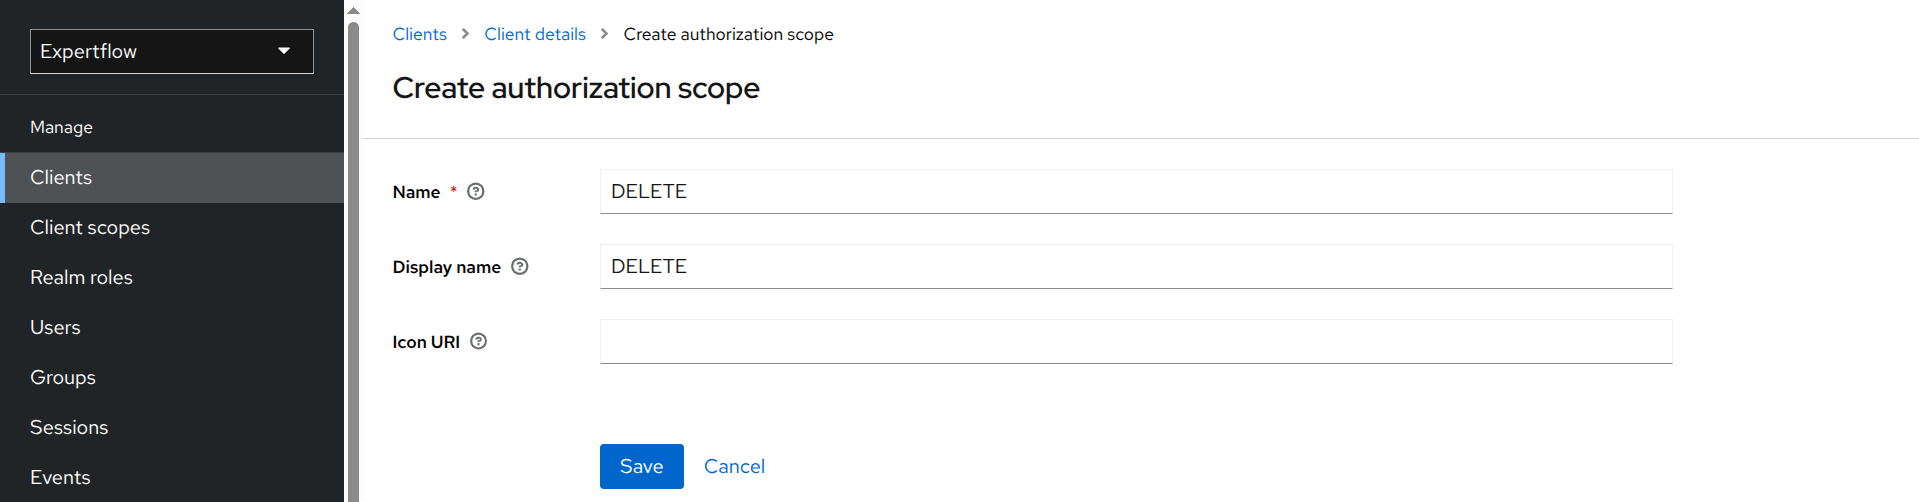
-
Click Save. Your DELETE scope has been created.
-
You can create other scopes in the same way.
-
We’ll use GET, PUT, POST & DELETE scopes with
/ccm/channel-types*.
2. Create a Resource
An API endpoint is considered a resource because it serves data or allows you to perform CRUD operations. For each targeted endpoint, a separate resource will be created in IAM. If you target N number of APIs, you will need to create N number of resources. We’ll create a resource for /ccm/channel-types* API below.
Steps to create a Resource:
-
Select Resources under Authorization tab and click Create resource.
-
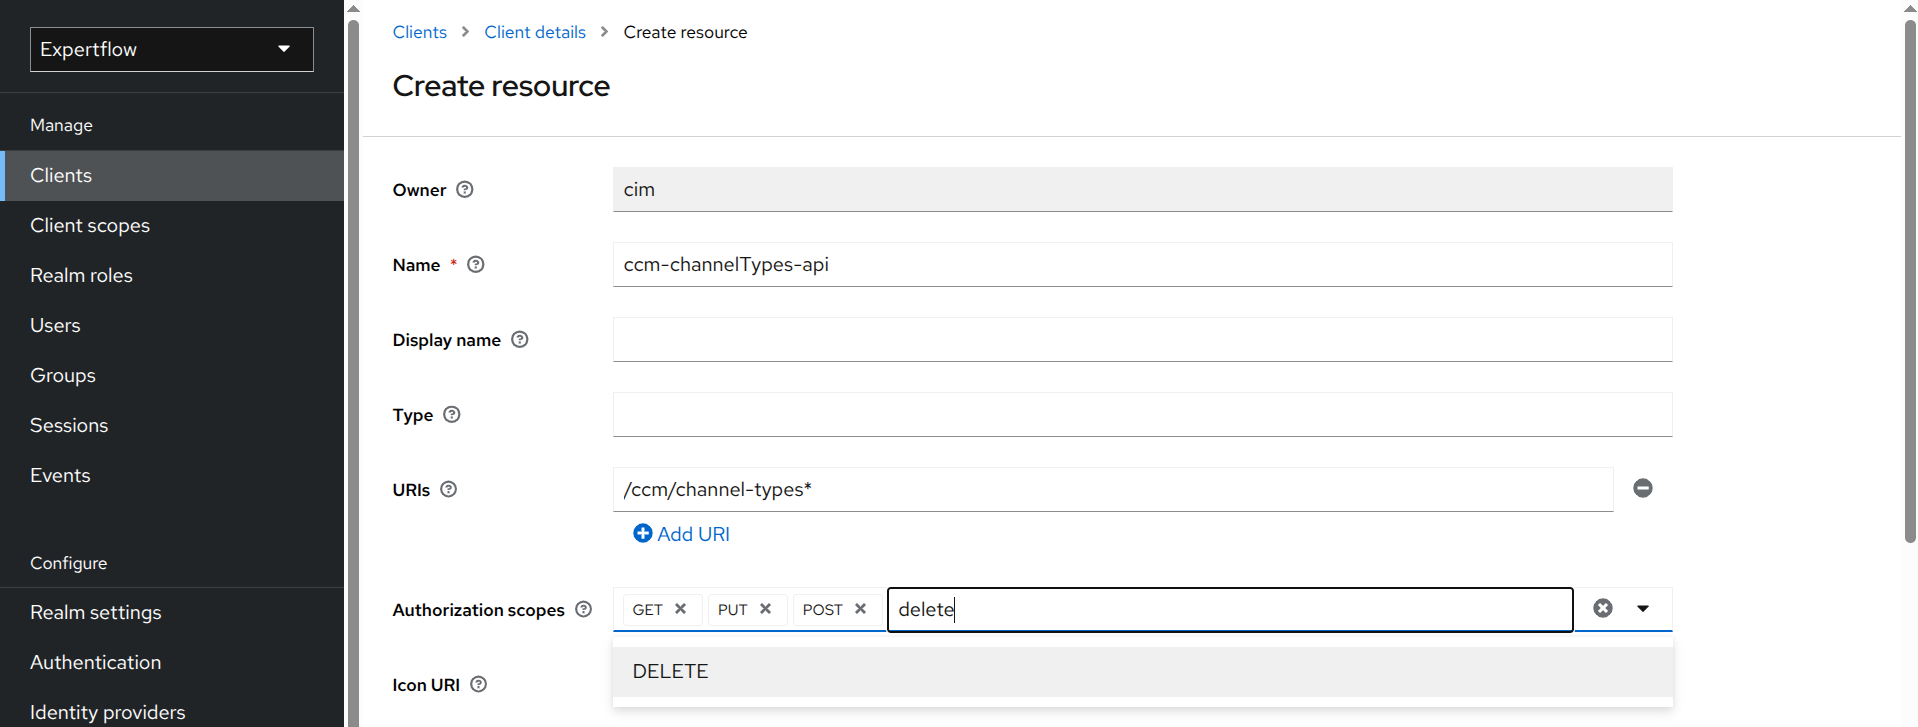
Enter the name of the resource for your endpoint. The resource name should follow the camelCase convention, structured as:
<componentName>-<endPoint>-api. -
Enter your endpoint in the URIs field. The endpoint is the last part of the URL except the FQDN. For example, to secure
https://demo.expertflow.com/ccm/channelTypes, you will enter/ccm/channelTypesin the URIs field. This should also match the exception route you added above. -
Select all the allowed HTTP methods for your API in Authorization scopes field. For example, you can enter GET or POST, and then select them from the drop-down menu.
-
Click Save and you have created a resource for an endpoint.
3. Create Policies
Policies in IAM define the conditions under which a specific action or permission is granted to a user, a role, or group of users. You need to create a policy for each scope of a resource. In the example above, since we used four scopes, we will need to create four policies, one for each scope.
Steps to create Policies:
-
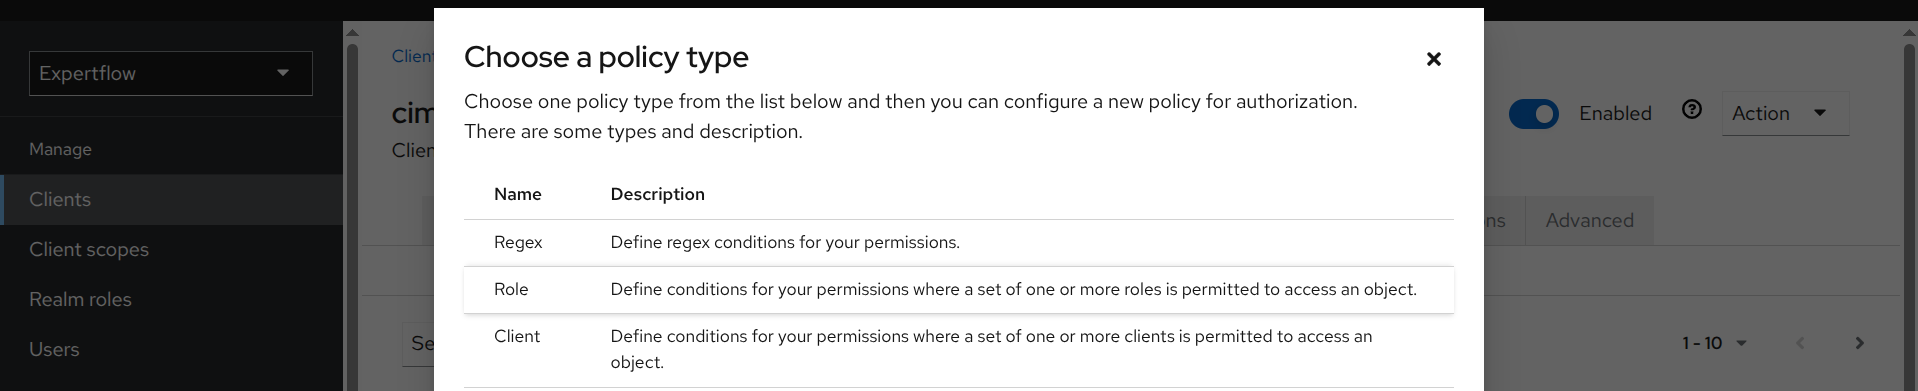
Select Policies under Authorization tab and click Create policy.

-
Select Role as policy type.
-
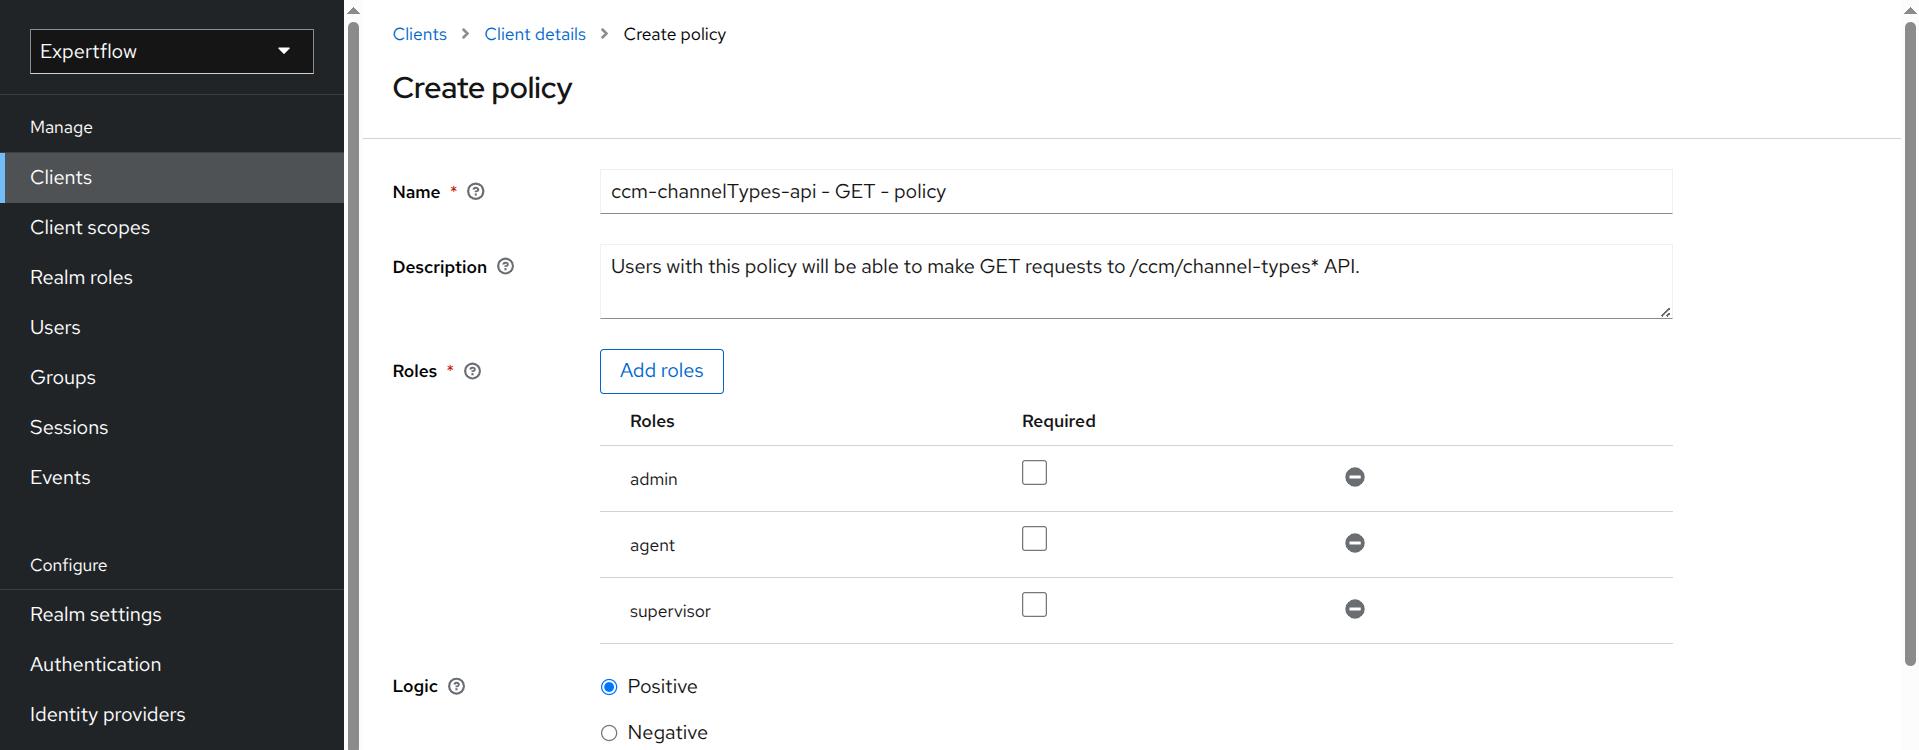
Enter the name of the policy for GET scope. Policy name should follow this convention:
<Resource Name> - <Scope Name> - policy. Note the spaces around dashes/hyphens. -
Add a description for the policy.
-
Click Add roles and assign all the roles (e.g., agent, supervisor, and admin) that should be able to make GET request to
/ccm/customer-topics*. -
Click Save. You may not see roles listed, but if IAM notifies you about successful policy creation, you’re all set.
-
Create a policy for PUT, POST and DELETE scopes in the same way. The differences are as follows:
-
Scope names are different for the policies.
-
Only select the roles that are allowed to perform specific actions on the resource. For example, supervisor for POST and admin for DELETE, etc.
-
If you want to allow an agent to perform CRUD operations on the resource, make sure to select that role as well for other scopes.
-
-
You have now created policies for the endpoint/resource.
4. Create Permissions - The Final Step
Permissions in IAM define what actions users are allowed to perform on a specific resource. You need to create a permission for each policy related to a resource. In the example above, since we have created four policies for ccm-channelTypes-api resource, we will need to create four permissions, one for each policy.
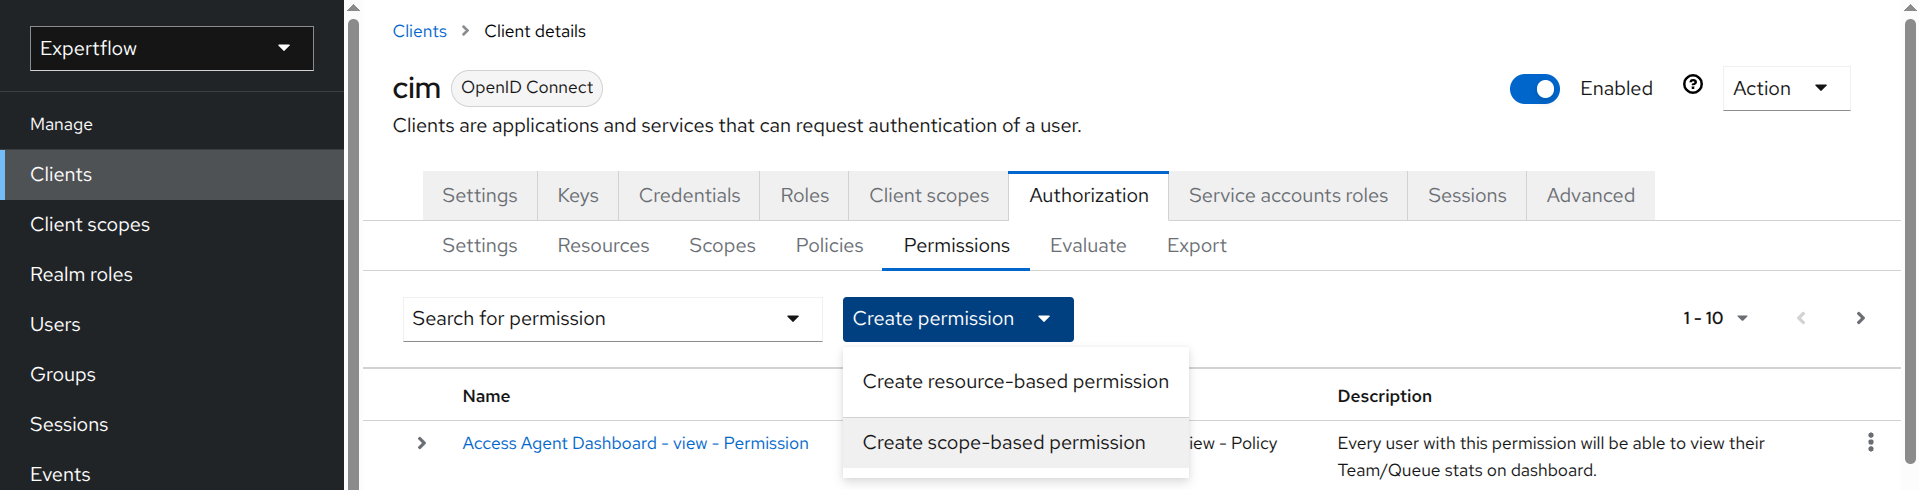
Step to create Permissions:
-
Select Permission under Authorization tab, click Create permission and select Create scope-based permission.
-
Enter the name of the permission for the GET scope/policy. The permission name follows the same convention as the policy, but with the keyword
policyreplaced bypermission. -
Add a description for the permission.
-
Select the resource you created (e.g.,
ccm-channelTypes-api). -
Select the GET scope to allow HTTP GET method for respective resource.
-
Select the GET policy you created for the resource (e.g.,
ccm-channelTypes-api - GET - policy).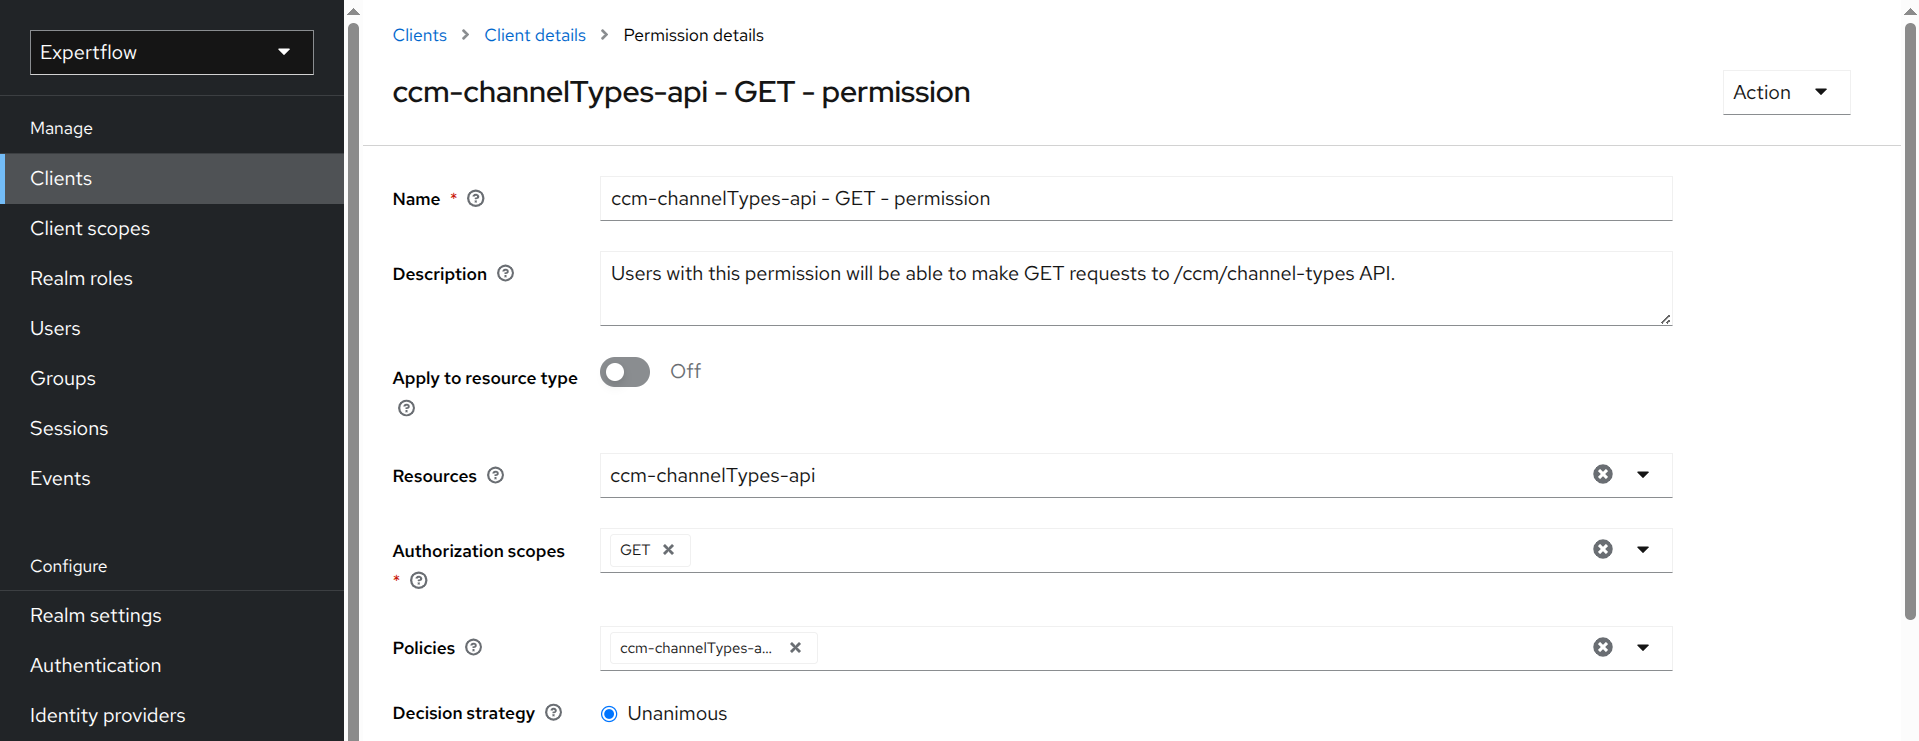
-
Click Save.
-
You’ve now created a permission that allows users with the “agent”, “supervisor”, or “admin” role to access the
/ccm/channel-types*API using theGETmethod. -
You can create permissions for other scopes/policies of the same resource in a similar manner, with the following differences:
-
Select the appropriate scope (POST, PUT, or DELETE) based on your specific requirements.
-
Choose the corresponding POST, PUT, or DELETE policy you created for the resource.
-
For example, for
ccm-channelTypes-api - POST - permission, the scope would be andPOST. The policy would beccm-channelTypes-api - POST - policy.
-
-
This permission will allow users with the “supervisor” or “admin” role to access the
/ccm/channel-types*API using thePOSTmethod.
Configured Authorization
In the above examples, we have configured authorization for the /ccm/channel-types* endpoint of Customer Channel Manager APIs, such that:
-
A user with agent, supervisor, or admin role can make a GET request to the
/ccm/channel-types*endpoint. -
A user with supervisor or admin role can make a POST and PUT requests to the
/ccm/channel-types*endpoint. -
A user with admin role can make a DELETE request to the
/ccm/channel-types*endpoint. -
Any other HTTP methods are not allowed.