Purpose
This deployment guide details installing, configuring, and using the Webex Contact Center connector in Odoo. It ensures a smooth integration, enabling effective use within the Odoo environment.
Intended Audience
This document is intended for customers who want to deploy a Webex Contact Center connector within Odoo.
Prerequisites
-
You must have Webex Contact Center set up and configured.
-
A Odoo account is required.
Uninstall current Expertflow Webex Module
Uninstall the Webex Contact Center Connector from Odoo if an older version is installed.
Follow these steps to uninstall the Webex Contact Center Connector from Odoo:
-
From your Odoo instance, open Apps, and search for expertflow.
-
On the module card, click the three dots and choose Uninstall.
-
Wait for the uninstallation process to finish.
Install Expertflow Webex Module
Follow these steps to install the Webex Contact Center Connector in Odoo:
-
Make sure to have an active Odoo installation, whether it's Odoo On-Premise, Odoo.sh, or Odoo Online.
-
Pull the module files from the associated Git repository.
-
From your Odoo instance, open Apps and select Import Module from the top bar.
-
In the pop-up window, click Upload your file, select the zip file, and then click Install.
-
Wait for the installation process to finish. It will take some time, depending on your instance.
-
After installation, Odoo will open the Expertflow-Configuration page, or you can select Expertflow from the menu dashboard.
-
Set the configurations as needed, click on the cloud icon to save, and then refresh the page.
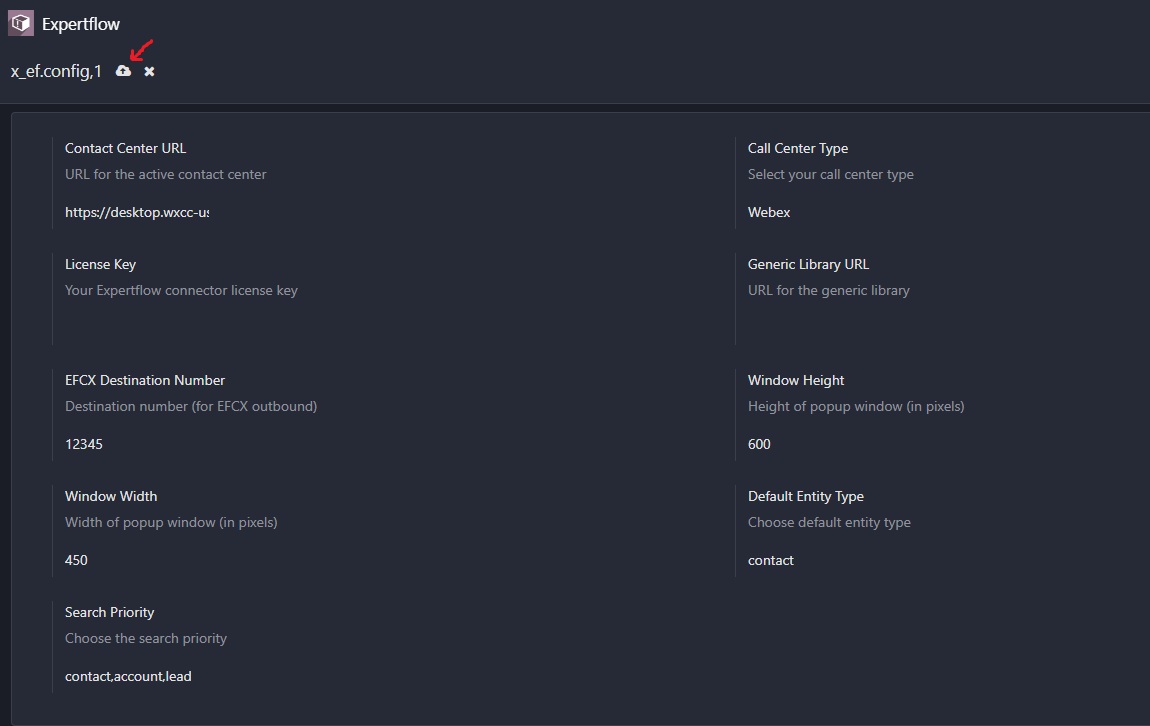
|
Field |
Values |
Description |
|---|---|---|
|
Contact Center URL |
|
Webex Desktop Contact Center URL according to your region. |
|
Call Center Type |
Webex |
Must be exactly "Webex" |
|
License Key |
|
Contact the Expertflow team to get your license key. |
|
Generic Library URL |
|
Contact the Expertflow team to get your library URL. |
|
Window Height |
600 recommended |
CTI Soft-phone window height in pixels. |
|
Window Width |
450 recommended |
CTI Soft-phone window width in pixels. |
|
Default Entity Type |
contact |
Entity for no-match case to save non-registered customers, can be contact or account or lead. |
|
Search Priority |
contact,account,lead |
The search priority entities must be three values separated by commas, like "contact,account,lead". |
Connector settings revert to their default state after updating or reinstalling the module. Be sure to reconfigure them afterward.
Configuring and Updating the Webex Contact Center Desktop Layout
To ensure a seamless integration between Webex Contact Center and Odoo, follow these steps to configure and update the Webex Contact Center Desktop Layout:
Step 1: Access Admin
-
Log in to Webex Control Hub as an administrator.
-
From the left-side menu, click Launch My Organization if it appears.
-
From the left-side menu, select Contact Center.
-
From the left-side menu, select Desktop Layouts.
-
You can open Global Layout to use it, or click Create Desktop Layout to make a new one.
-
Click on Replace File to upload the JSON file
Odoo_Webex_DesktopLayout.json, then click Save.
Step 2: Apply Changes
-
Return to Webex Control Hub.
-
From the left-side menu, select Teams and choose your team.
-
Under Desktop Layout option, ensure it is assigned to the updated one (which contains the Odoo_Webex_DesktopLayout).
Step 3: Test Webex
-
Log in to your Odoo account and show the Webex widget.
-
Log in to your Webex Agent Desktop inside the widget.
-
Perform test calls to ensure:
-
Customer information loads correctly
-
Call controls work as expected.
-
Troubleshooting Tips
-
If the layout does not update, clear the browser cache and refresh the Webex Contact Center interface.
-
Verify that Webex Contact Center credentials are correct.
After completing these steps, your Webex Contact Center Agent Desktop will be properly configured to work with Odoo.