Generic Connector Configuration
Connector Configuration Parameters
The following are the CUCM configurations that can be set in the env file.
|
Parameter |
Default Value |
Description |
|
|---|---|---|---|
|
1 |
KEY |
ASDFGHJKLZXCVBNM234RFGHUIOKJMNBFEWSDFGHNJMNBV |
License key. Must be obtained from EF Team |
|
2 |
CUCM_IP1 |
CUCM_Server_IP1 |
Primary CUCM |
|
3 |
CUCM_IP2 |
CUCM_Server_IP2 |
Secondary CUCM |
|
4 |
HEARTBEAT_SLEEP |
5 |
Delay in ping to check ping service (seconds) |
|
5 |
ACTIVEMQ1 |
localhost:61616 |
ActiveMQ Primary URL |
|
6 |
ACTIVEMQ2 |
localhost:61616 |
ActiveMQ Secondary URL |
|
7 |
CUCM_USER |
Jtapi_USer |
Jtapi users are required to login into CUCM |
|
8 |
CUCM_PASSWORD |
Jtapi_Password |
Password for the jtapi user to login |
|
9 |
ACTIVEMQ_TIMEOUT |
30000 |
ActiveMQ connection timeout (in milliseconds) |
|
10 |
PREFECT_SIZE |
20000 |
Prefect Size of the messages |
|
11 |
GRC_CONSUMER_PRIORITY |
127 |
0-127 priority to read the message first in case of multiple consumers. Details are mentioned in HA section. |
|
12 |
PRIORITY_BACKUP |
true |
Property to enable amq failover support. Details are mentioned in HA section. |
|
13 |
|
false |
Property to randomize traffic on amqs! This will be required for HA. Details are mentioned in HA section. |
|
14 |
AGENT_STATES_PUBLISHER_DURATION |
5000 |
Time after which states of all agents will be published on the topic |
|
15 |
MESSAGE_FORMAT |
JSON |
Type of Events returned to the client (Only JSON supported currently) |
|
16 |
LOG LEVEL |
TRACE |
Log Level |
|
17 |
AGENT_LOGS_PATH |
/app/logs/agents/ |
Agent Logs Storage path |
|
18 |
AGENT_LOGS_LEVEL |
TRACE |
Agent Logs Level |
|
19 |
AGENT_LOGS_MAX_FILES |
10 |
Max No of Files per agent for logs |
|
20 |
AGENT_LOGS_FILE_SIZE |
10MB |
Max file size for agent logs |
|
21 |
|
|
Expiry time for a message to read in a queue |
Deployment Steps
-
Run the following command to create a network
// For docker based deplyment docker network create appnet // For podman based deployment podman network create appnet-
In case of if podman network creation fails and user sees following error

-
In that case user needs to configure a subnet pool, run following command to do so or you can refer to the official podman documentation .
podman network create \
  --subnet 10.88.0.0/16 \
  --gateway 10.88.0.1 \
  appnet
-
-
Download the deploy.sh file from here.
-
Place deploy.sh file inside some folder eg. Jtapi_Connector.
-
Run the following commands to start the procedure.
Commands to execute deploy.sh file
cd /root/Jtapi_Connector
bash deploy.sh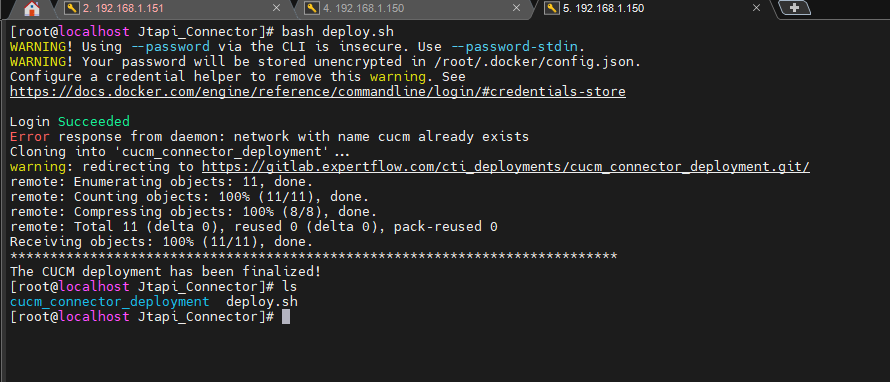
-
A cloned folder 'cucm_connector_deployment' can be seen on the command ls.
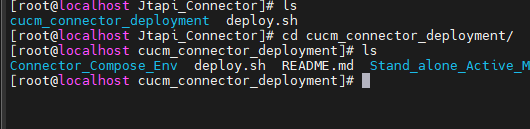
-
Go into the cloned folder, where two folders can be seen.
-
Run the following set of commands to install ActiveMQ.
cd Stand_alone_Active_MQ -
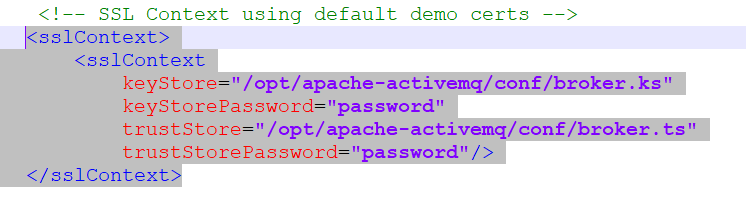
Create ssl self sigined certs (broker.ts and broker.ks) if not provided by the customer. Run the following command
// Genrate Keystore keytool -genkeypair \ -alias broker \ -keyalg RSA \ -keysize 2048 \ -validity 365 \ -keystore broker.ks \ -storepass password \ -dname "CN=10.192.9.35" // Export Certificate keytool -exportcert \ -alias broker \ -keystore broker.ks \ -storepass password \ -file broker.crt // Create Trust Store keytool -importcert \ -alias broker \ -file broker.crt \ -keystore broker.ts \ -storepass password \ -noprompt -
Now edit activemq.xml file available on the same path and update the passwords
-
If you are using podman deployment, then do this step else skip
-
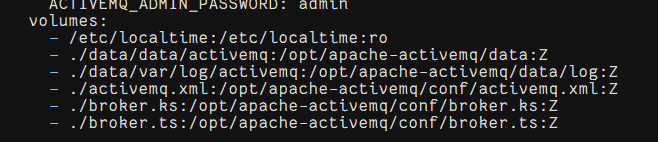
Edit docker-compose file and update the volumes as follow (add :Z at the end)
-
-
Now run following command to install activemq
// Docker docker-compose up -d // Podman podman-compose up -d -
After above command user can access admin console on a browser to confirm its availability.
http://machine_ip:8161/admin/queues.jsp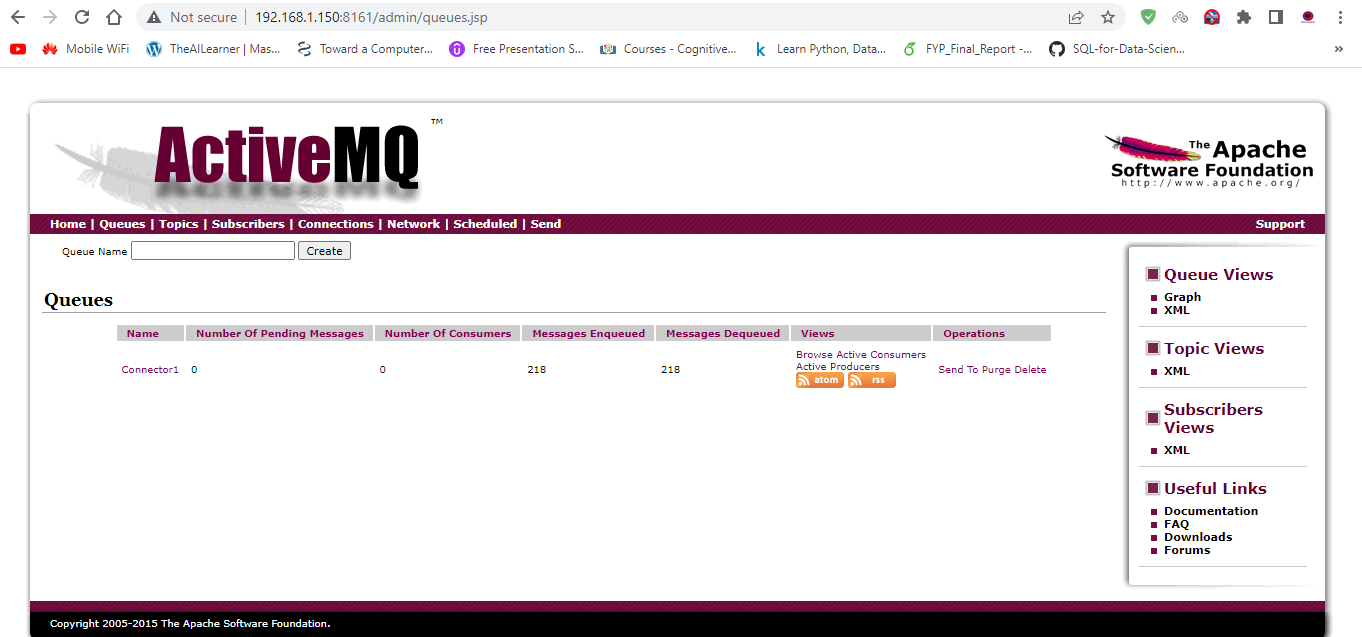
-
After amq installation, go back to the main repo directory 'cucm_connector_deployment'. And go into the connector folder 'Connector_Compose_Env'.

-
You can see the files like this.

-
Edit the env file and add the required configurations as explained here!
-
After adding configurations, run the following commands to install connector application:
docker-compose up -d -
After successful execution of step 13, run the following command to check if the container is up and running!
docker container ps -a
ActiveMQ Configuration (Redundant Deployment Only)
ActiveMQ “Config” button opens the ActiveMQ configuration file %ACTIVEMQ%/conf/activemq.xml in your default text editor (e.g. notepad).
Configuring Network of Brokers
Settings for a network of brokers are mandatory for redundant deployment only. These configurations should however be done on one side only.
ActiveMQ brokers should be configured to run as a network of brokers to communicate with each other both for Active-Active and Active-Passive deployment models.
-
Edit the ActiveMQ Network brokers in activemq.xml file
In activemq.xml, the “Network of Broker” configuration please add the following configuration mentioned in the screenshot below. There are 2 instances of <networkConnector> (i) for Queues, (ii) for topics, where you need to set the value of the URI parameter specifying other broker’s (site-B) address.
Make sure that the configurations are active on only one side. On the other side, it should remain commented out.
If the above-commented configurations are not available in activemq.xml file then copy following and add it inside <broker> tag.
Here the URI IP should be IP of the remote amq.
Configurations
<networkConnectors>
	<networkConnector
    	name="T:broker1->broker2"
        uri="static:(tcp://192.168.2.162:61616)"
        duplex="true"
        decreaseNetworkConsumerPriority="true"
        networkTTL="2"
        dynamicOnly="true">
        <excludedDestinations>
        	<queue physicalName=">" />
        </excludedDestinations>

    </networkConnector>

    <networkConnector
    	name="Q:broker1->broker2"
        uri="static:(tcp://192.168.2.162:61616)"
        duplex="true"
        decreaseNetworkConsumerPriority="true"
        networkTTL="2"
        dynamicOnly="true">
        <excludedDestinations>
        	<topic physicalName=">" />
        </excludedDestinations>
    </networkConnector>
</networkConnectors>
After adding the above configuration, the user needs to restart the same service.
Run the following commands to restart the Service
docker-compose down
docker-compose up -d
The URI on site-A should point to site-B URI “static:(tcp://SITE-B:PORT)” to configure it in network bridge mode.
For more information about configuring a network of brokers, see this article.
Frontend CUCM Docker/Podman Based Deployment Guide
CUCM Frontend Docker/Podman Based Deployment Guide
This document provides instructions for the automated deployment of the CUCM Frontend application using Podman and Nginx on RHEL 9.
1. Prepare the Environment
First, create a dedicated directory to house the deployment script and any certificate files.
mkdir -p ~/cucm-frontend-docker
cd ~/cucm-fro0ntend-docker
2. Download the Deployment Script
Download the deploy_frontend.sh file and place it inside cucm-frontend-docker folder.
3. Provide Authentic SSL Certificates (Optional)
If you have CA-signed certificates, place them in the same directory . The script will automatically detect and use them if they follow this naming convention:
|
File Type |
Required Name |
Description |
|
Certificate |
|
Your public certificate (and intermediate chain) |
|
Private Key |
|
Your private key file |
4. Execute Deployment
Run the following commands to ensure the file format is correct and to begin the installation.
# Remove hidden Windows characters and set permissions
sed -i 's/\r$//' deploy_frontend.sh
chmod +x deploy_frontend.sh

# Run the deployment
sudo ./deploy_frontend.sh
5. Verification
Once the script completes, you should see the message: "BOOM! Deployment Successful".
-
Access URL:
https://<YOUR_SERVER_IP>:8443 -
Security Note: If using self-signed certificates (default), you must click "Advanced -> Proceed" in your browser to bypass the privacy warning.

6. Updating Frontend Configuration
-
open deploy_frontend.sh file and locate Section 5 (CREATE APP CONFIG) inside the script, update the values and save it.
|
Property Name |
Value |
Description |
|
|---|---|---|---|
|
1 |
amqUrl1 |
ws://<server-ip/FQDN>:61615/stomp or wss://<activemq-server-ip>:61615/stomp |
For communicating with CUCM Connector. For Http use ws and for Https use wss. |
|
2 |
amqUrl2 |
ws://<activemq-server-ip>:61615/stomp or wss://<activemq-server-ip>:61615/stomp |
For communicating with CUCM Connector. For Http use ws and for Https use wss. |
|
3 |
powered_by |
true/false |
System variable should always remain True |
|
4 |
crm |
0/1 |
A possible value for this key would be 0 or 1 0= When web CTI is deployed as a standalone project without any CRM Integration 1= When Web CTI is deployed with some CRM, The CRM can be any. If the value for this property is 1, then the crmFilePath variable must be set |
|
5 |
crmFilepath |
The predefined path of the CRM file |
To make this property work, the above property CRM must be set 1 . Value for this property depends on the CRM you are using. Possible values are Value = |
|
6 |
outboundPrefix |
+92 or 00966 or empty string |
Digits that you want to add as a prefix before dialing the outbound call
|
-
Run this command
sudo ./deploy_frontend.sh
Integration with Salesforce
Step 1: Configure CTI Adapter URL
The user must have administrator rights in Salesforce.
-
Download callCenterDefinition.xml .
-
From Setup on Salesforce, in the Quick Find box, enter Call Centers, then select Call Centers.
-
On the next page, press Continue.
-
Click on Import on the next page.
-
Upload the callCenterDefinition.xml file and click on import.
-
On the next page, you can see the general information about the call center and you can edit it by clicking the Edit option.
-
Once you click on Edit option, on the next page all the fields will be filled with the data in callCenterDefinition file.
-
Change the Adapter URL with the URL on which CUCM Connector is running.
Step 2: Assign Users to call center
-
Open Call Center with the name “ExpertflowCTI“.
-
At the bottom you’ll find the “Manage call center users” option. If you can’t find manage “Manage call center users”, then first save the call center and then look for the same option.
-
Click this option and on the next page click “Add more users”, select desired user(s), and then click “Add to call center”.
Step 3: Create and configure a lightning app
-
From Setup, in the Quick Find box enter App Manager.
-
Open the app manager, click “New Lightning App” from the top right corner.
-
Enter the name of the app and developer, other options are not mandatory but if you want you can choose according to your preferences and select next.
-
Go with the default options and click next.
-
Click “Add Utility Items”, type “Open CTI softphone” and add the softphone to your app by clicking it. Set panel height to 500 and width to 400 and click next.
-
On the next screen, add accounts, contacts, leads and tasks from available items.
-
Last but not least select all profiles and add them. After adding them click “Save & Finish”
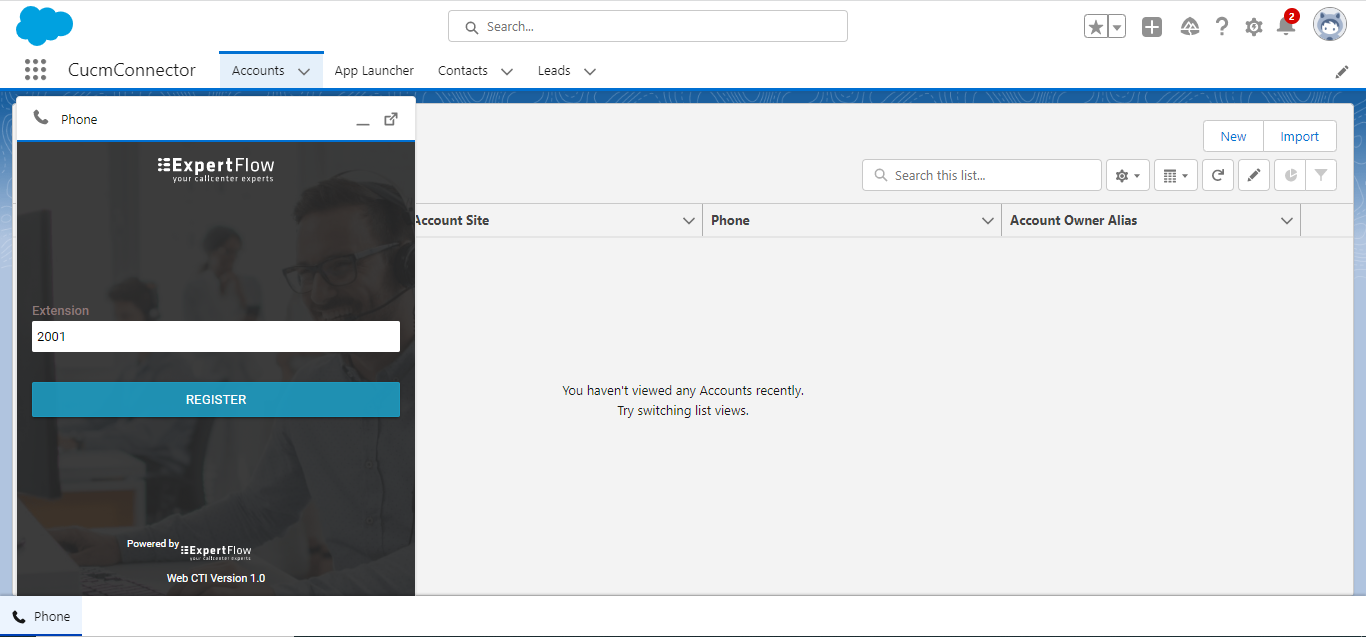
Login agent
-
Open your application from the top left 9-dotted pattern icon, adjacent to “Setup”. If you can’t find it, search using the name you used while creating an application.
-
Once opened, Maximize Softphone by click on “Icon” from the bottom left corner, enter extension, and press register button.