
Audience: CC Admins
Use this guide to configure which languages AgentDesk supports and to customize the text agents see — menu names, button labels, and system messages.
The translations applied from here apply only to the AgentDesk application and are available from CX 5.6.0 onwards only.
What is this feature?
AgentDesk can be used in multiple languages. Unified Admin provides two related pages under AgentDesk:
|
Page |
What it does |
|---|---|
|
Languages |
Choose which languages are available, set the default language, and configure the platform timezone. |
|
Translations |
Edit the actual text AgentDesk displays for each supported language. |
These pages work together:
-
Languages — turn languages on for your organization.
-
Translations — provide or customize the text for those languages.
Who can use it?
You need access to the AgentDesk section in Unified Admin.
|
Access level |
What you can do |
|---|---|
|
View |
Open both pages and browse settings and translations. Fields are read-only. |
|
Manage |
Change language settings, edit translations, import/export files, compare languages, restore defaults, and save changes. |
If you do not see Save, Import, or editable fields, your account has view-only access. Contact your administrator to request manage permission for AgentDesk settings.
How to open the feature
-
Log in to Unified Admin.
-
In the left sidebar, expand AgentDesk.
-
Select Languages or Translations.
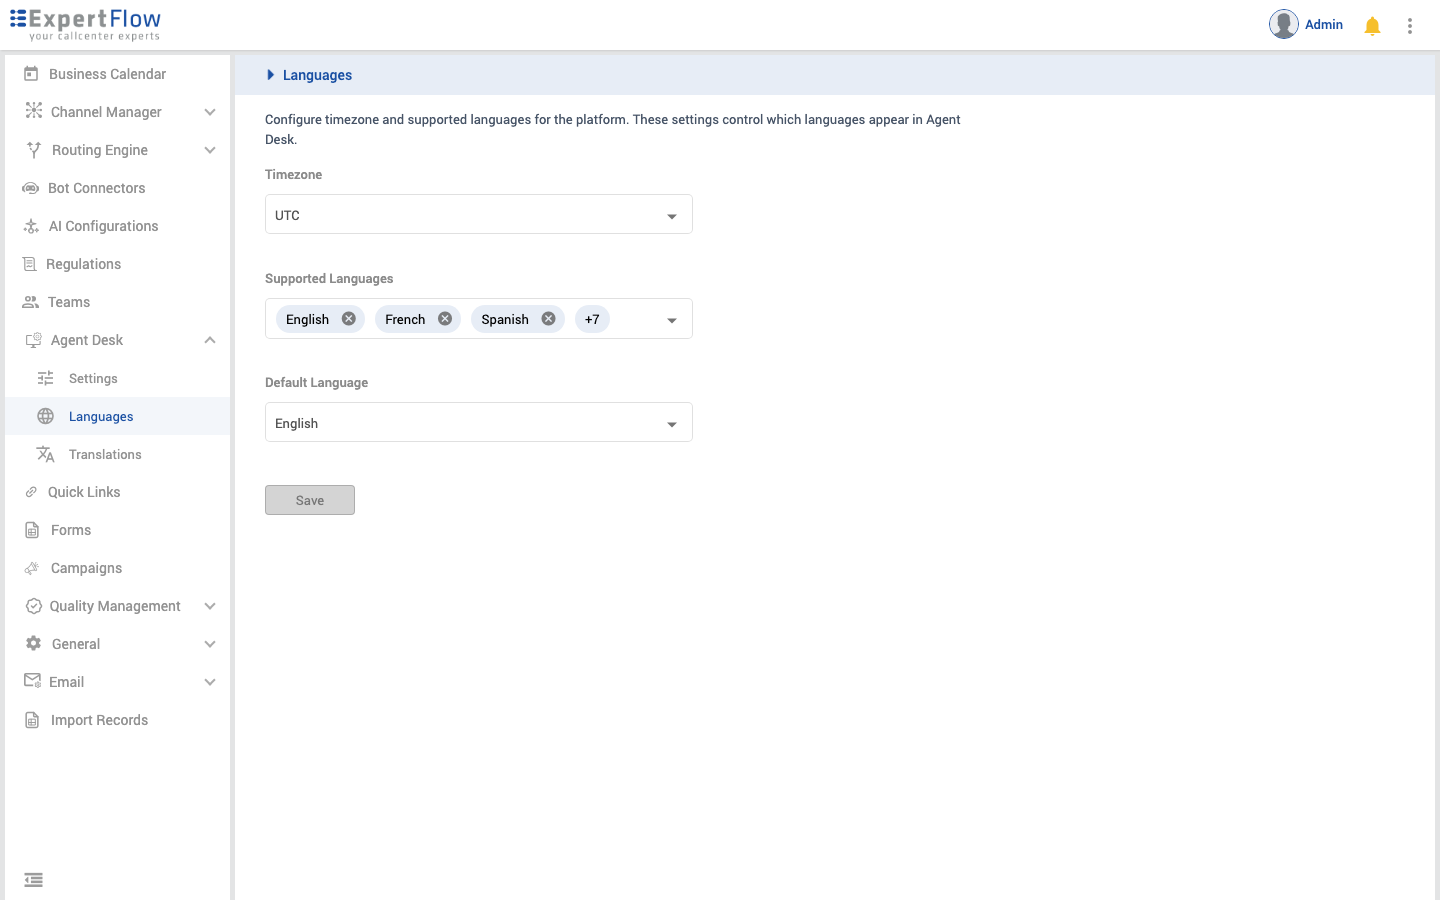
Figure 1 — AgentDesk menu with Languages and Translations
Languages page
The Languages page controls which languages appear in AgentDesk and which language is used by default.
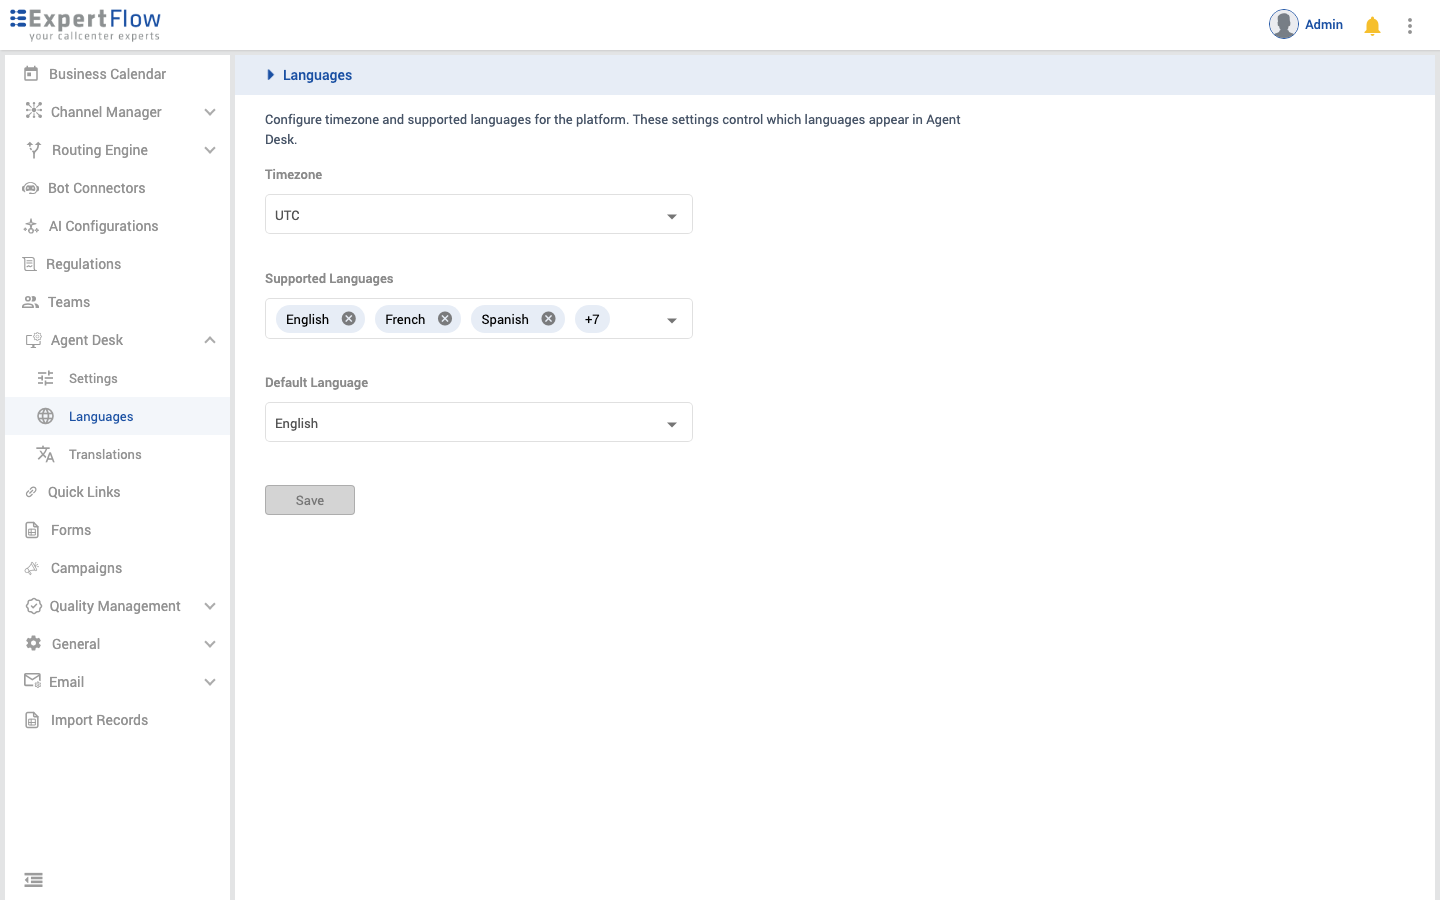
Figure 2 — Languages settings page
Fields explained
|
Field |
Description |
|---|---|
|
Timezone |
Sets the platform timezone. This controls how time-based messages in AgentDesk are displayed to agents. Use the search box inside the dropdown to find a zone quickly. |
|
Supported Languages |
Select one or more languages. At least one language must remain selected. These languages appear in AgentDesk and on the Translations page. |
|
Default Language |
The language AgentDesk uses by default. Must be one of the supported languages. |
Add a supported language
-
Open AgentDesk → Languages.
-
Click Supported Languages and check the language(s) you want to add.
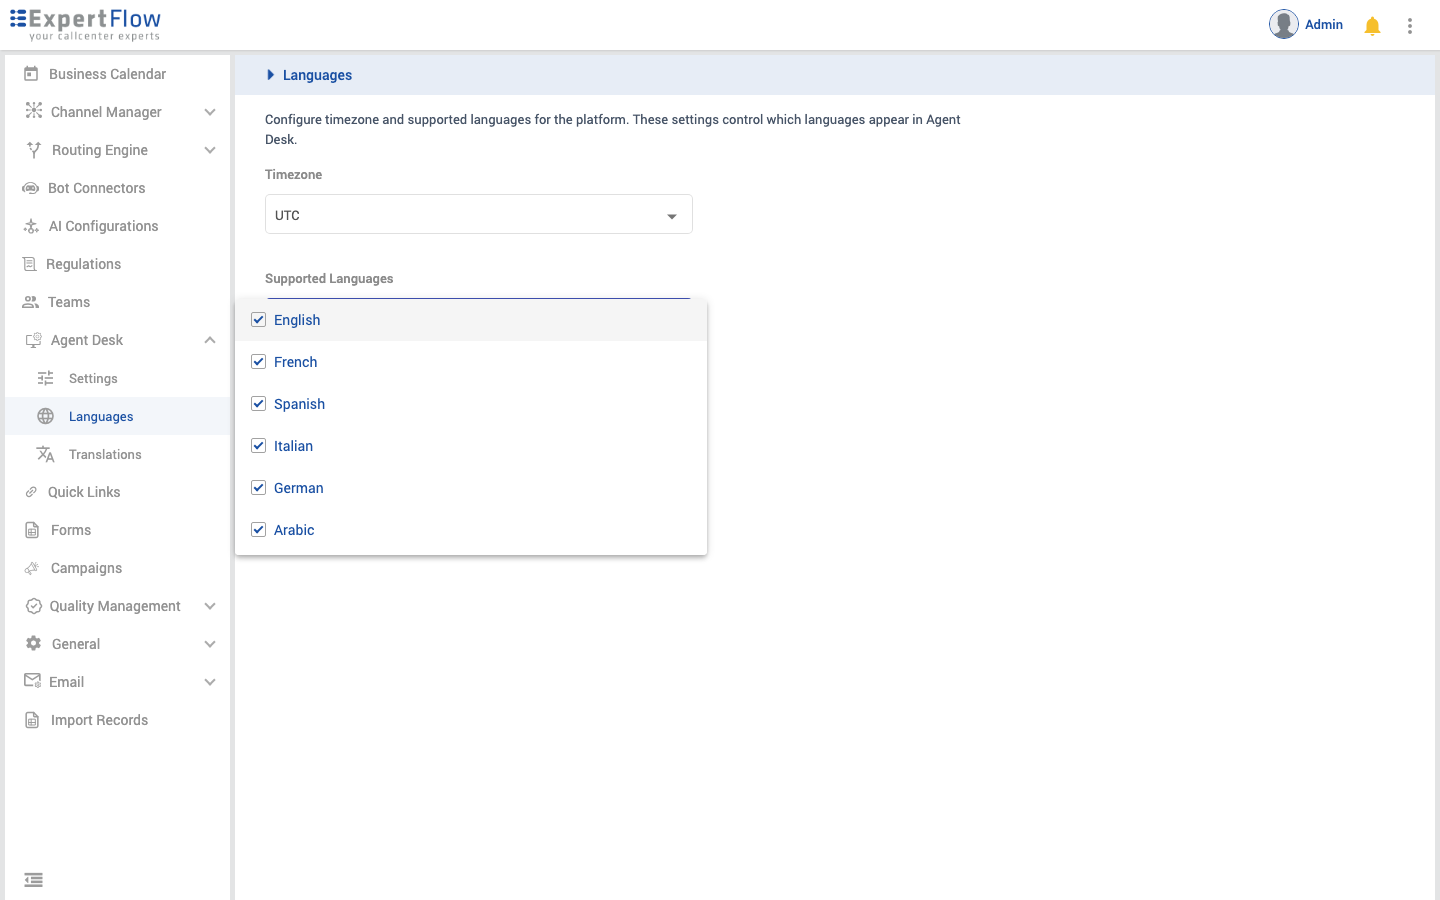
Figure 3 — Selecting supported languages
-
If needed, change Default Language.
-
Click Save.
-
Go to AgentDesk → Translations to provide or review translated text for the new language if you want to customize labels.
Tips
-
You cannot deselect all languages. At least one must stay enabled.
-
If you remove the current default language, the system automatically picks another supported language as the new default.
-
If you leave the page with unsaved changes, you are asked to confirm before discarding them.
Fallback behavior: AgentDesk uses English as the fallback language. If a translation key is missing or unavailable in the selected language, AgentDesk displays the English text for that key.
Available languages
English, French, Spanish, Italian, German, Arabic, Bulgarian, Urdu, Swahili, and Norwegian can be enabled from the Supported Languages list.
Translations page
The Translations page lists every text label used in AgentDesk. You can edit values per language, search for specific labels, and use bulk import/export for larger updates.
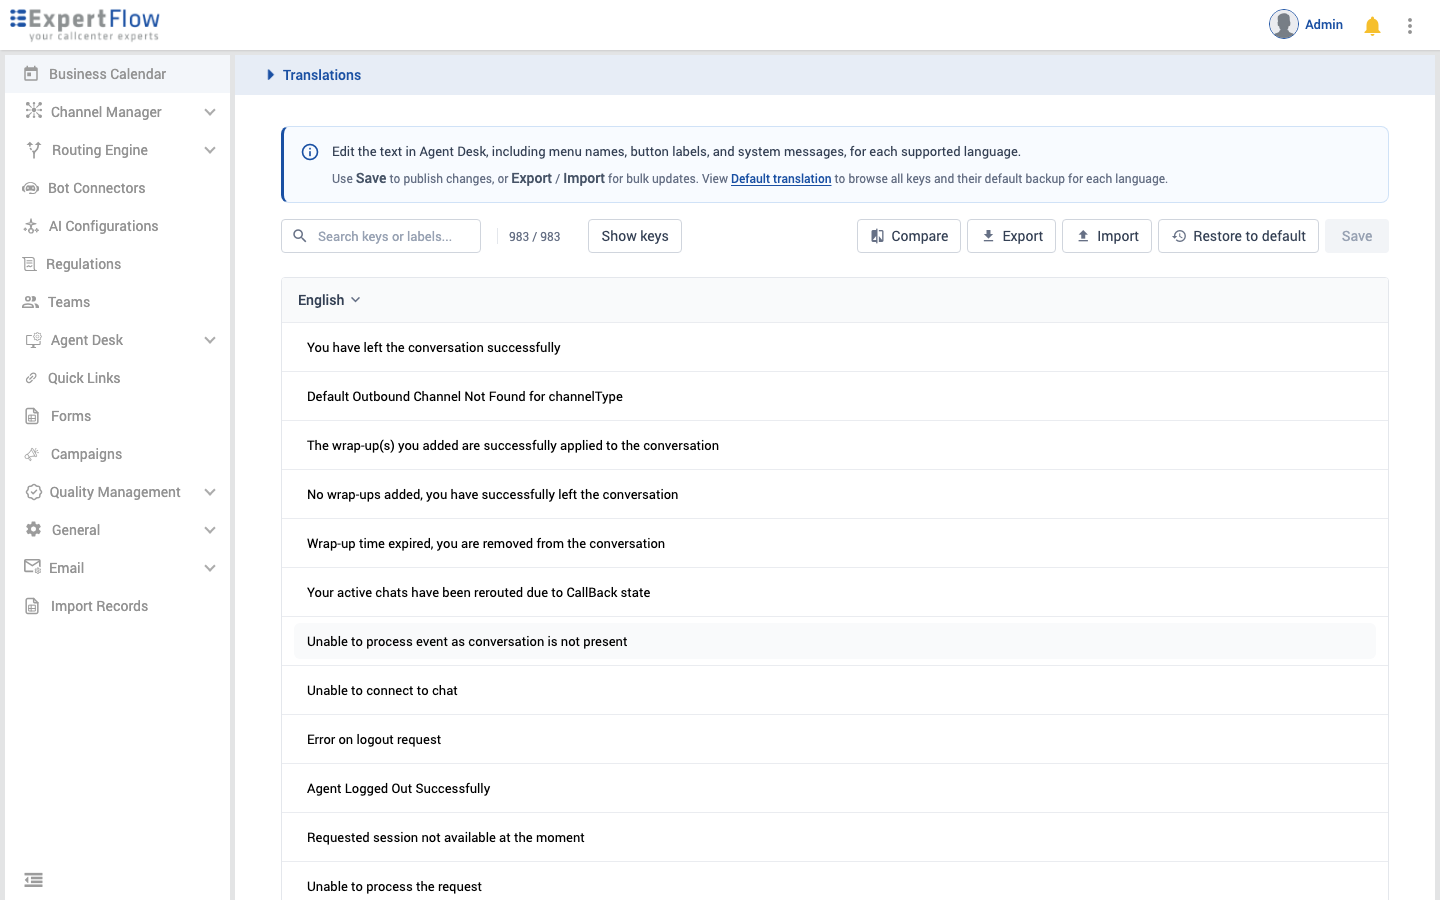
Figure 4 — Translations page with the English language selected
What you can change
-
Menu names and navigation labels
-
Button labels
-
System messages and notifications (for example, "Agent Logged Out Successfully")
Toolbar overview
|
Control |
Purpose |
|---|---|
|
Search keys or labels... |
Filter the list by key name or translated text. |
|
Row count (e.g. |
Shows filtered results vs total keys. |
|
Show keys / Hide keys |
Toggle the Translation Key column. |
|
Language dropdown (column header) |
Switch which language you are editing. |
|
Compare |
Open side-by-side editing of two languages. |
|
Export |
Download translations as JSON, CSV, or Excel. |
|
Import |
Upload a translation file. |
|
Restore to default |
Revert the selected language to factory defaults. |
|
Save |
Publish your changes to AgentDesk. |
|
Unsaved changes chip |
Shows how many edits are pending. Click × to discard. |
Edit a single translation
-
Open AgentDesk → Translations.
-
Use the language dropdown in the column header to pick a language.
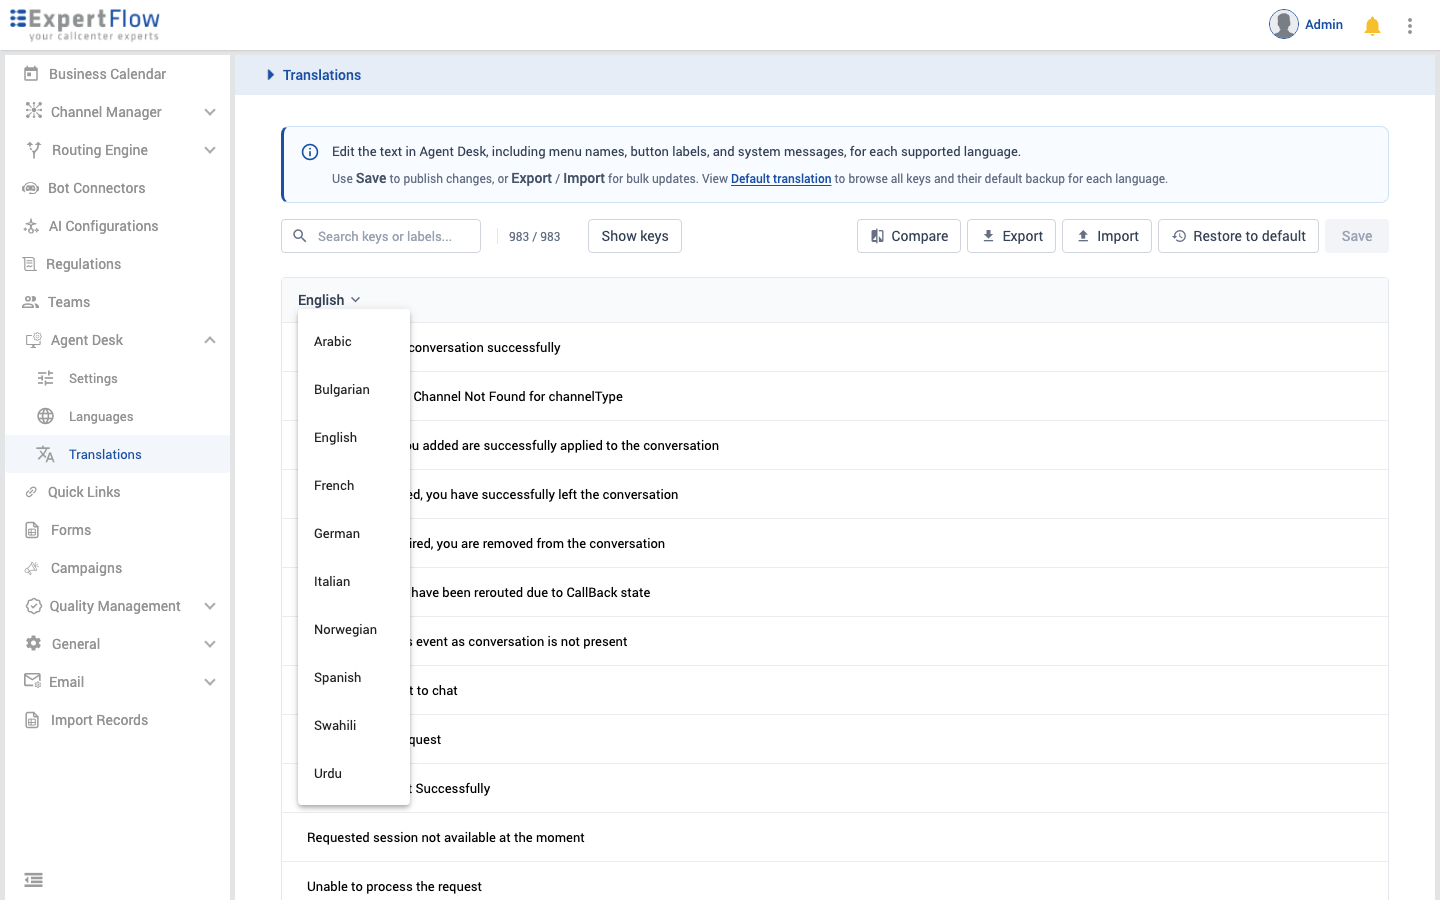
Figure 5 — Switching the language being edited
-
Optionally type in Search keys or labels... to find a label.
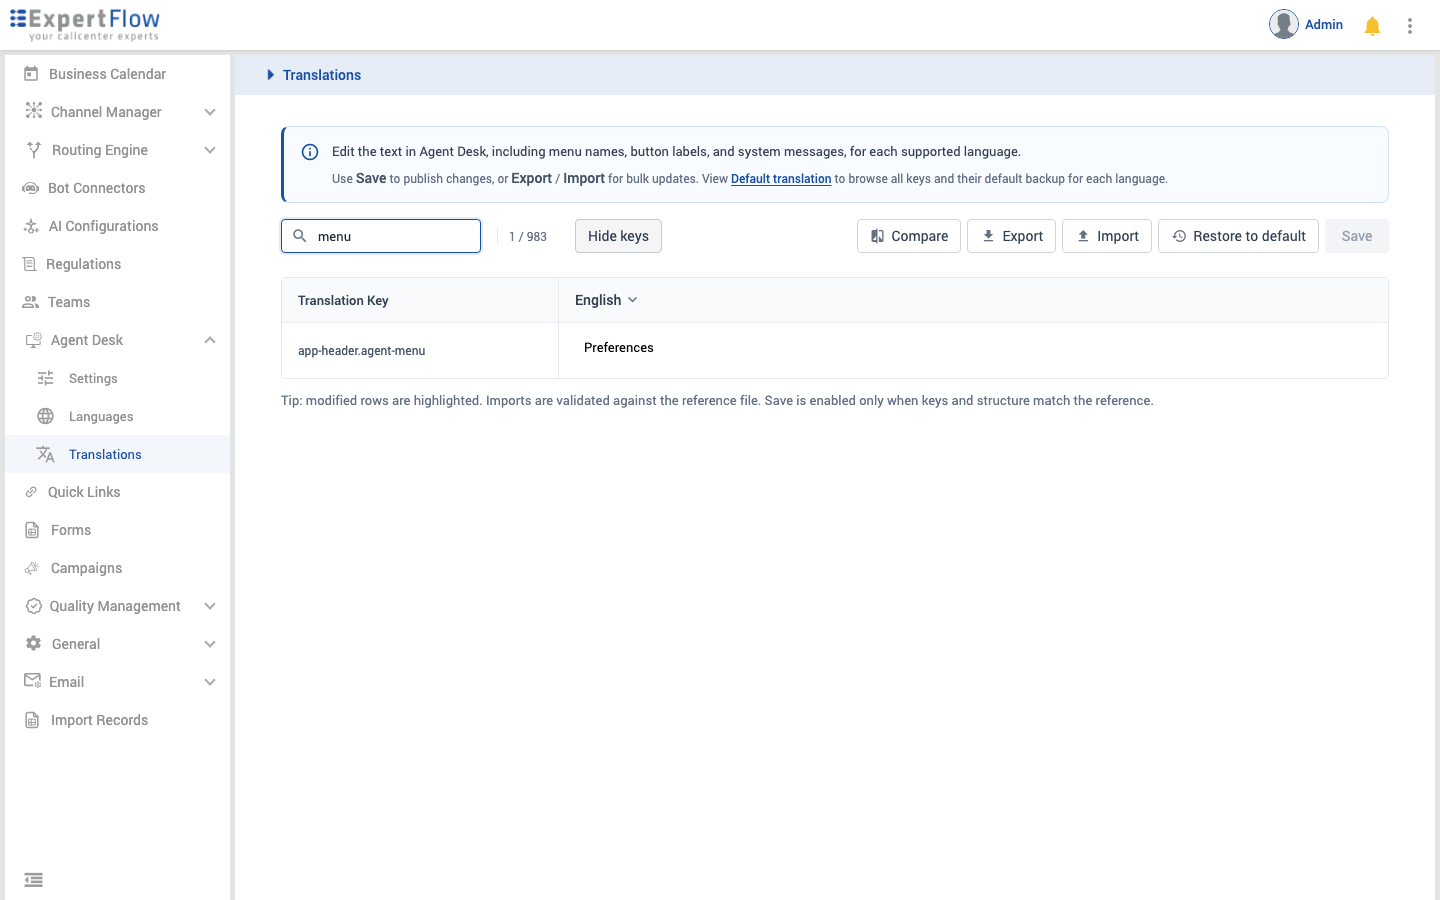
Figure 6 — Searching for a label and showing translation keys
-
Click a row and edit the text.
-
Click Save to publish.
Modified rows are highlighted. An unsaved changes indicator appears in the toolbar until you save or discard.
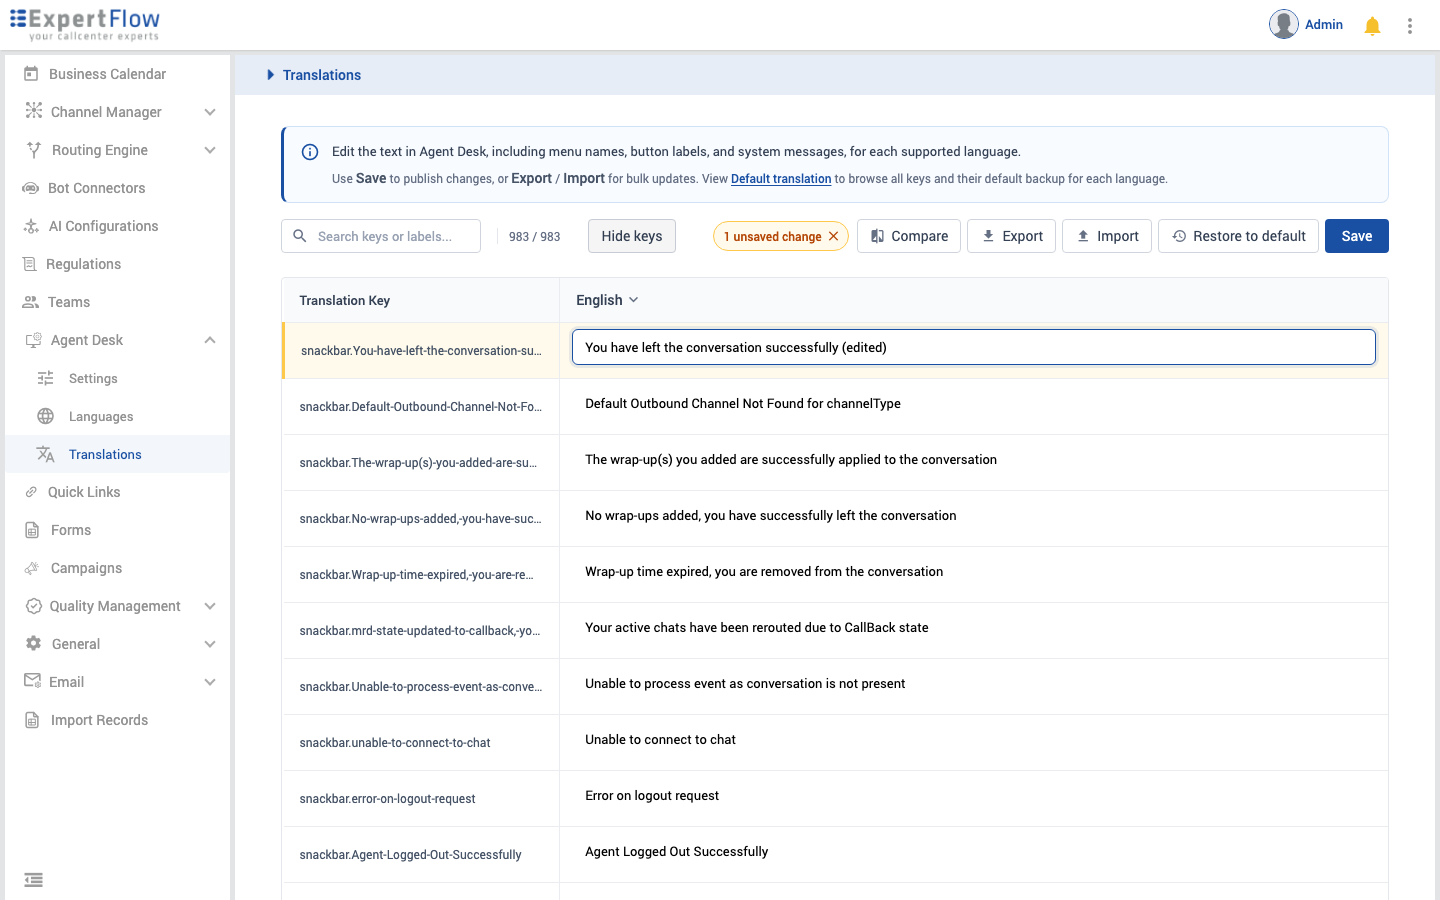
Figure 7 — A modified row with the unsaved changes indicator
Keyboard shortcuts
-
Enter — Move to the next row.
-
Shift + Enter — Insert a new line within the same field.
These are the currently supported editing shortcuts for translation fields.
First-time setup (no translations yet)
If no translation data exists yet, you see an empty state with an Import translations button. You can:
-
Import a translation file directly, or
-
Add supported languages on the Languages page first, then return to Translations.
Import and Export (bulk updates)
Use Export and Import when you need to update many labels at once — for example, when working with an external translator.
Export translations
-
Select the language to export using the column header dropdown.
-
Click Export.
-
Choose JSON, CSV, or Excel.
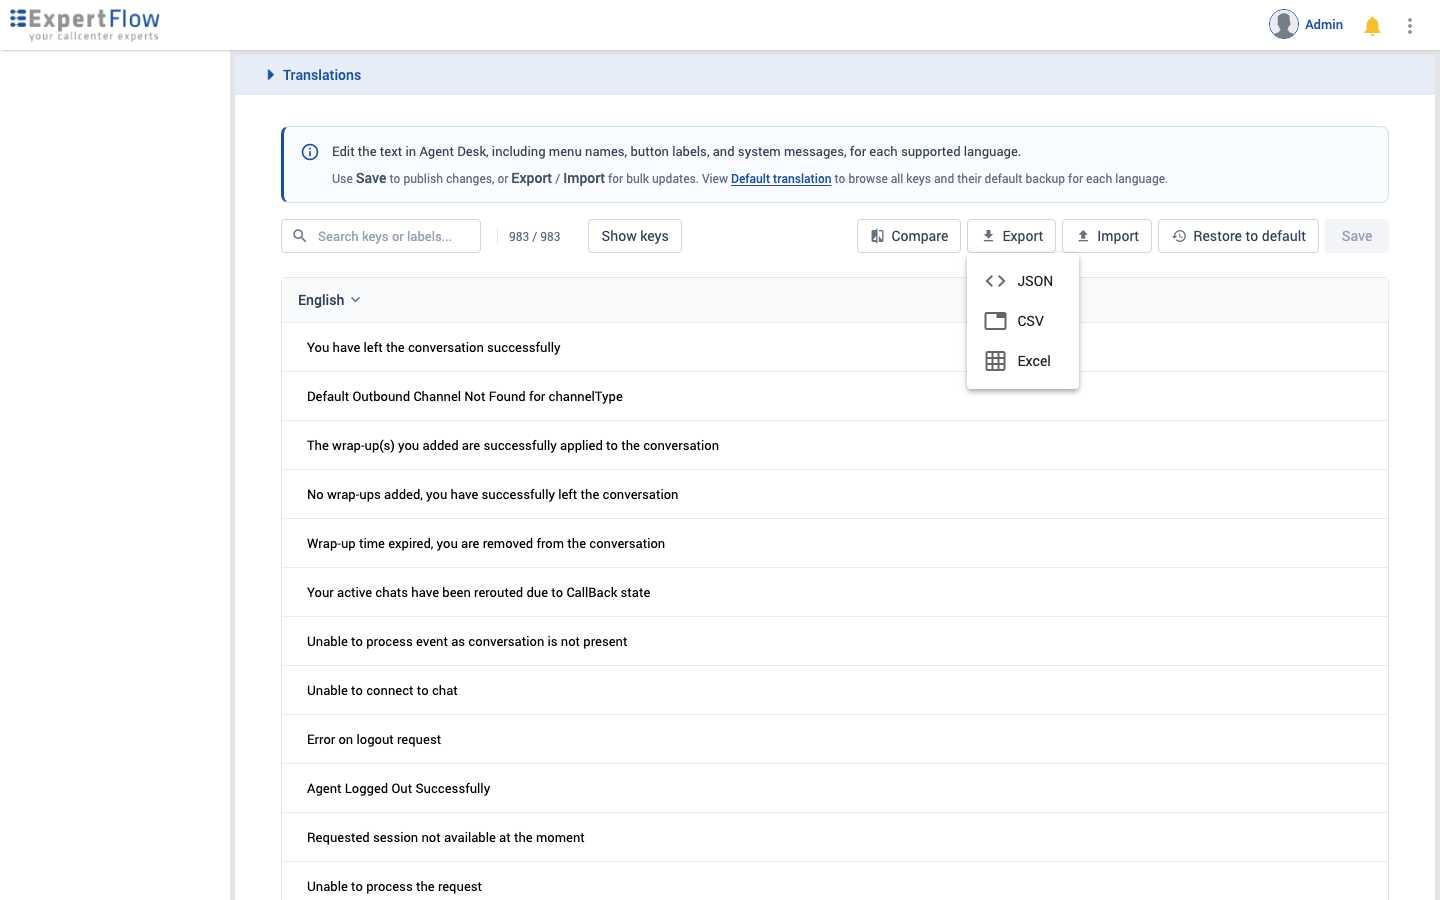
Figure 8 — Export format options
-
Edit the downloaded file offline. CSV or Excel is recommended for translators.
Import translations
-
Click Import.
-
Select a file (
.json,.csv,.xlsx, or.xls). -
Review the imported values in the table.
-
Click Save to publish.
Important: Import loads values into the editor but does not publish them automatically. You must click Save.
File naming for new languages
When importing a language that does not exist yet, name the file with the language locale code. AgentDesk uses ISO 639-1 two-letter language codes for supported languages.
|
File name |
Locale code |
Language |
|---|---|---|
|
|
|
English |
|
|
|
French |
|
|
|
Spanish |
|
|
|
Italian |
|
|
|
German |
|
|
|
Arabic |
|
|
|
Bulgarian |
|
|
|
Urdu |
|
|
|
Swahili |
|
|
|
Norwegian |
CSV and Excel format
Your file must include these columns:
|
Column |
Required |
|---|---|
|
Key |
Yes |
|
Translation |
Yes |
Example CSV/Excel row:
|
Key |
Translation |
|---|---|
|
|
Online |
Import rules
-
You can only edit existing keys. You cannot add new keys through the UI.
-
Imported files must match the required key structure exactly.
-
If keys are missing or extra, a validation message appears and Save is blocked until the issue is fixed.
Compare mode
Use Compare when you want to align a new translation with a reference language (for example, English vs French).
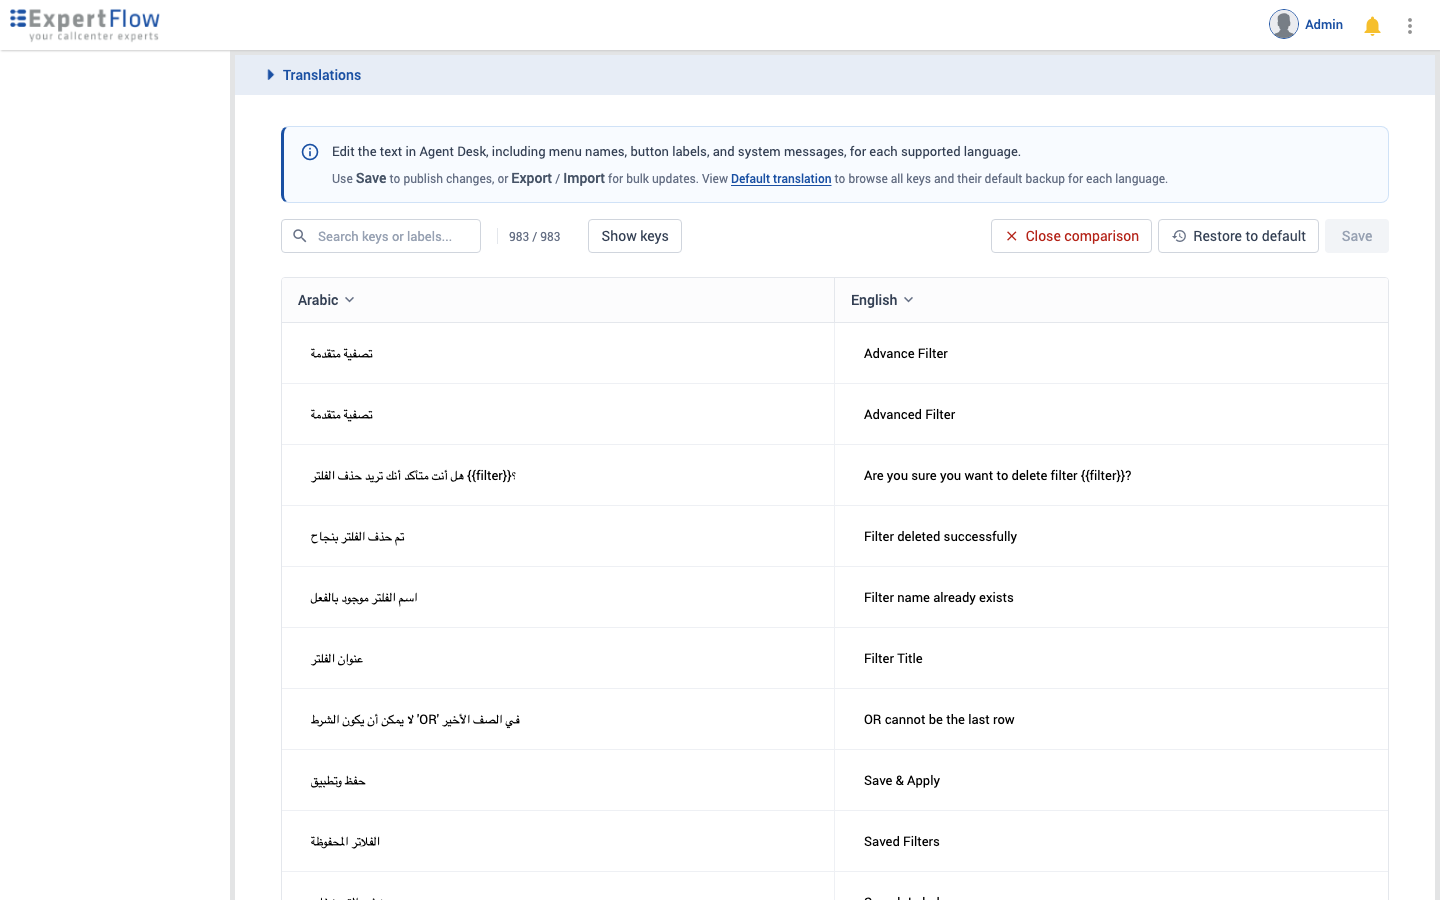
Figure 9 — Side-by-side language comparison
-
Click Compare.
-
Use the dropdown in each column to pick the reference language and the language you are editing.
-
Edit either side as needed.
-
Click Save to publish all unsaved edits visible in Compare mode. If you edited both columns, changes to both languages are saved; if you edited only one column, only that language is changed.
-
Click Close comparison to return to single-language view.
Default translation (read-only)
The Default translation view shows the factory-default text for each language. Use it as a reference before editing or restoring.
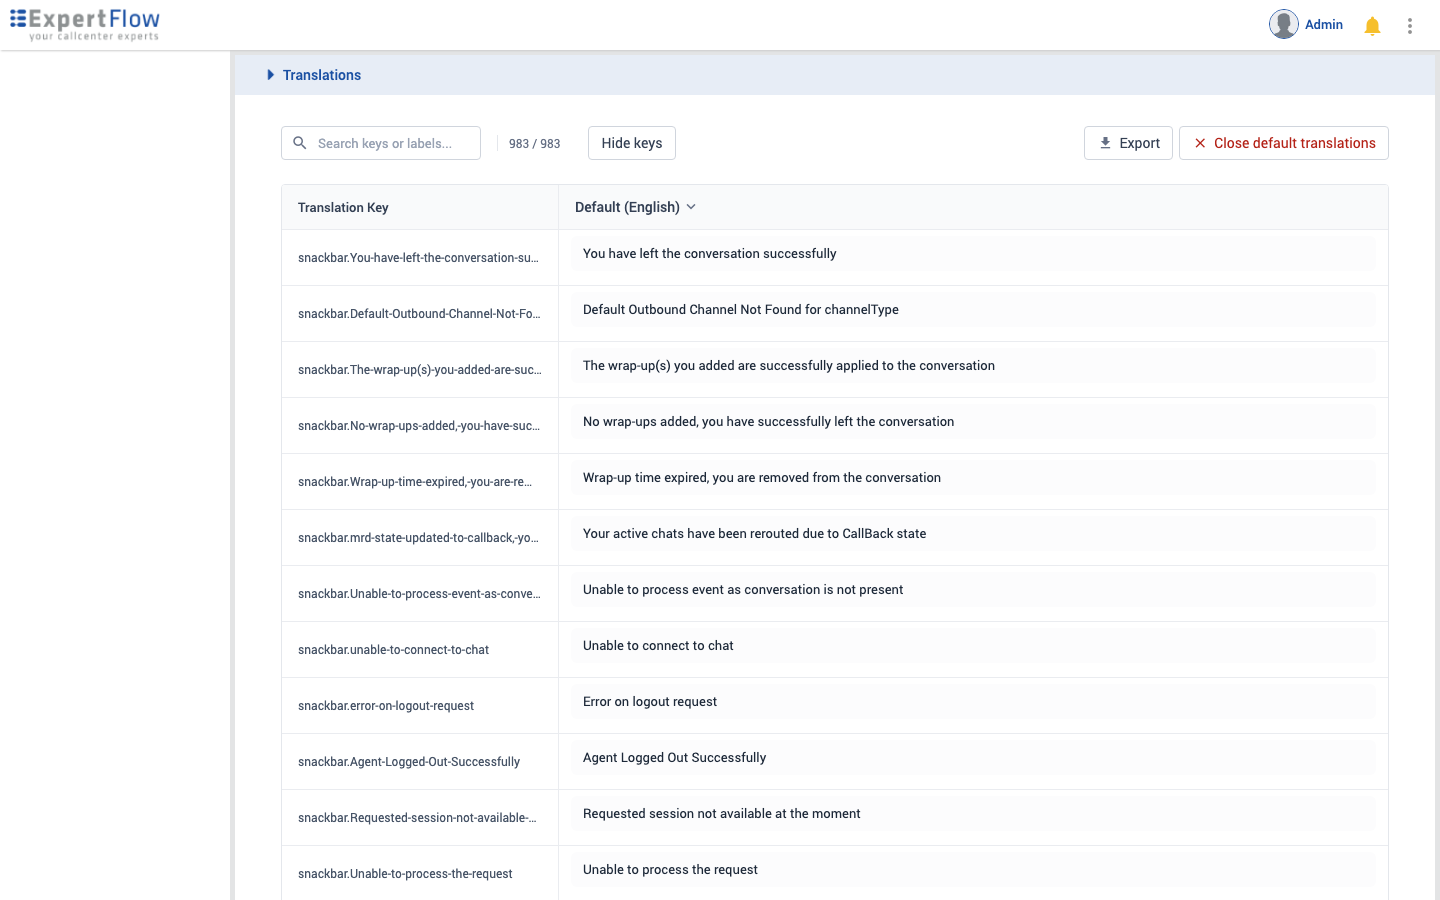
Figure 10 — Read-only default translation view
The Default translation info banner is shown on the Translations page when factory-default translations are available for the selected language and you are viewing editable translations. If you do not see the banner, confirm that translation data has been loaded for the language and that you are not already in the default translation view.
-
On the Translations page, click Default translation in the info banner at the top.
-
Switch language using the column header dropdown.
-
Optionally click Export to download the default text.
-
Click Close default translations to return to edit mode.
Restore to default
Use Restore to default to undo all customizations for a language and revert to factory defaults.
-
Select the language to restore.
-
Click Restore to default.
-
Confirm in the dialog.
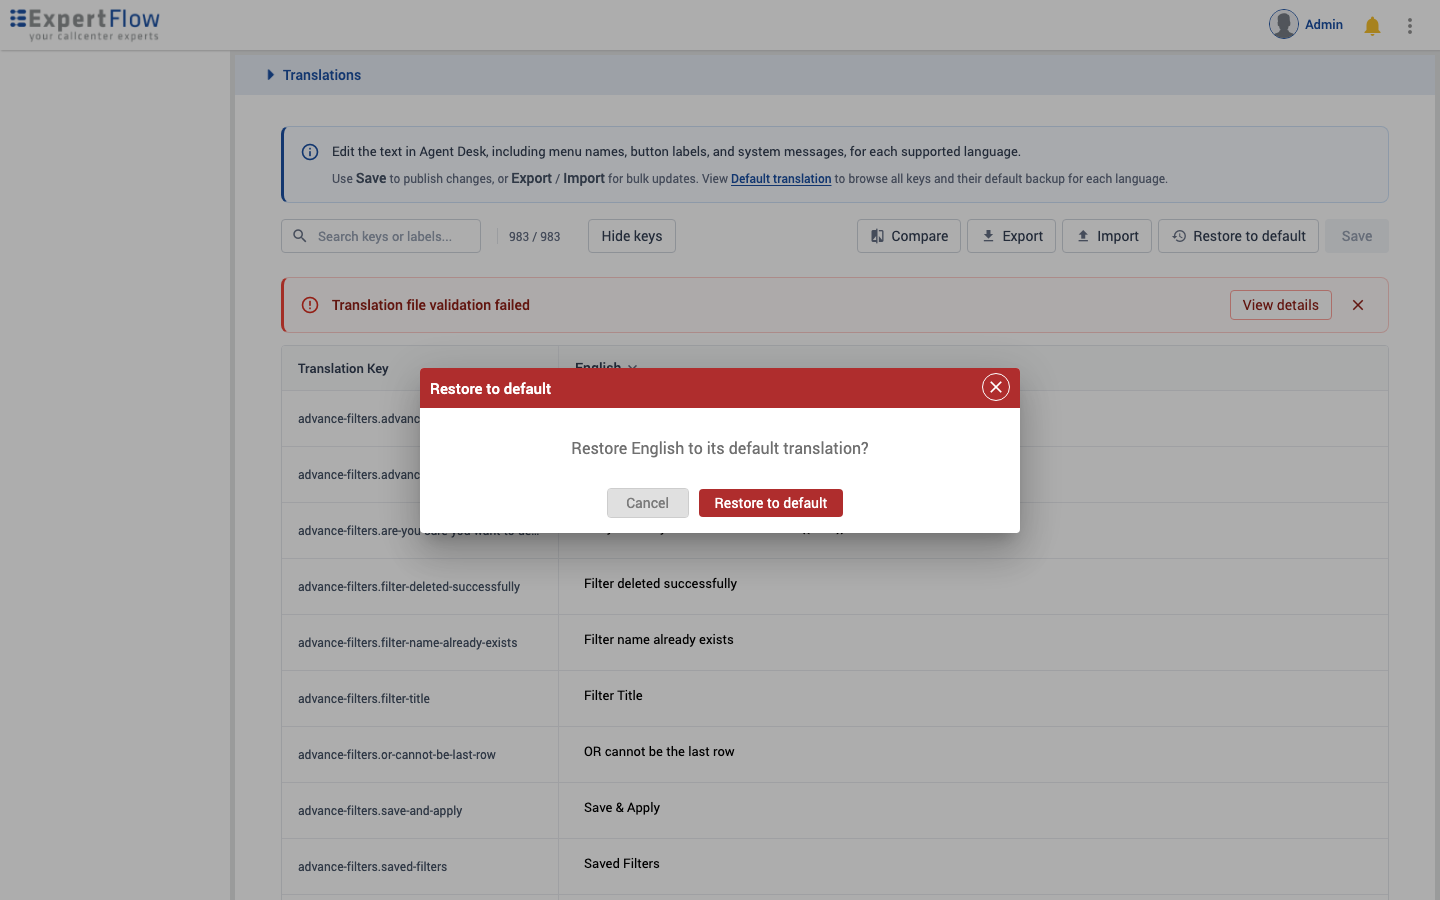
Figure 11 — Restore to default confirmation
Changes take effect immediately after you confirm. You do not need to click Save separately for a restore.
Validation messages
If an imported file does not match the required structure, a red banner appears at the top of the page.
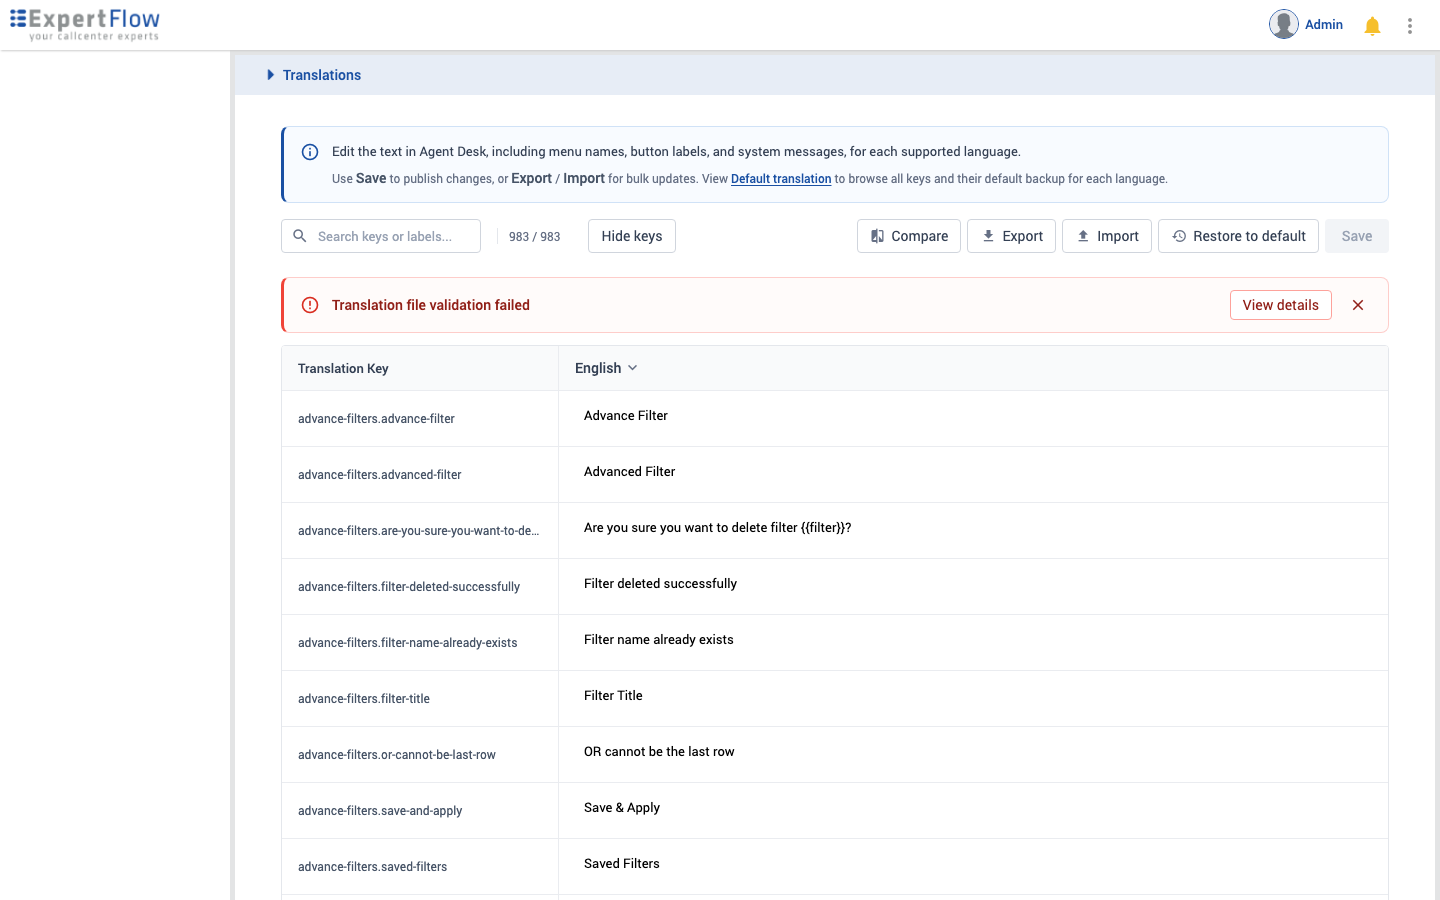
Figure 12 — Validation error banner
Click View details to open a report showing missing keys, extra keys, or structure mismatches.
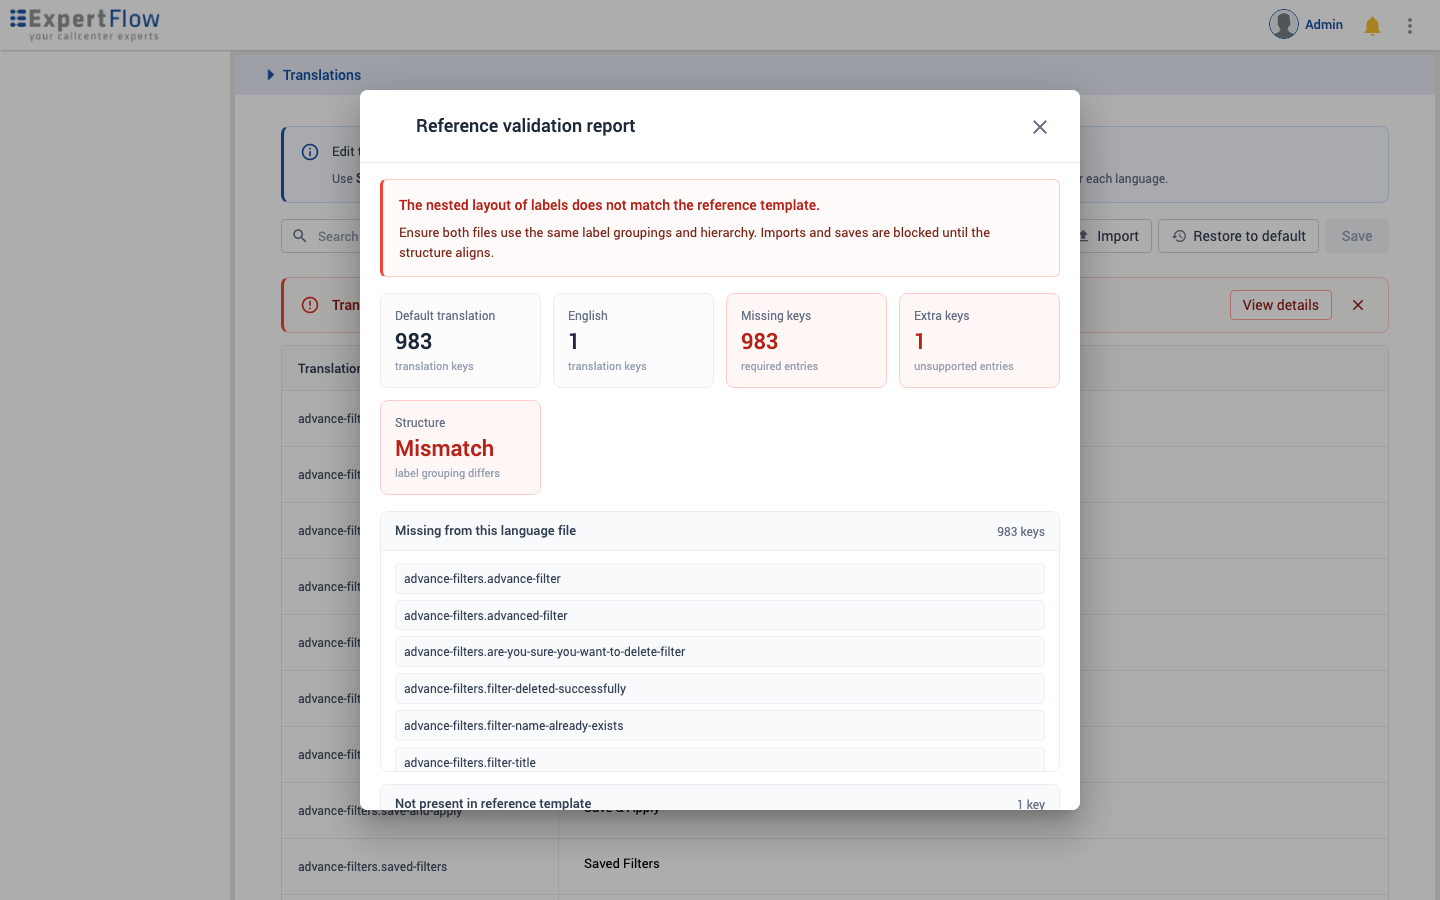
Figure 13 — Detailed validation report
Fix the issues in your file and import again, or adjust values in the table, before Save becomes available.
Tips
-
You cannot deselect all languages. At least one must stay enabled.
-
AgentDesk uses English as the fallback language when a translation key is missing in the selected language.
-
Import loads values into the editor but does not publish them automatically. You must click Save.
-
Use Compare when aligning a new translation with a reference language.
-
CSV or Excel export is best when working with external translators.
Troubleshooting / FAQ
Why is Save disabled?
-
You have not made any changes yet, or
-
There are validation errors (missing keys, extra keys, or structure mismatch). Click View details on the banner to see what needs fixing.
I imported a file but AgentDesk did not change
Import loads values into the editor only. Click Save to publish changes to AgentDesk.
I do not see Import or Save
Your account has view-only access. Ask your administrator for manage permission on AgentDesk settings.
Can I add a new translation key?
No. Translation keys are predefined by the system. If a label is missing, contact your platform team.
What file format should translators use?
-
Export the language as CSV or Excel.
-
Translate the Translation column.
-
Import the updated file.
-
Click Save.
What languages are available?
English, French, Spanish, Italian, German, Arabic, Bulgarian, Urdu, Swahili, and Norwegian. Enable the ones you need on the Languages page.
I removed a language by mistake
Re-add it on the Languages page and click Save. Then check Translations — you may need to import or restore translation data for that language.
What happens to customized translations when a language is disabled?
Disabling a language removes it from the active language list in AgentDesk but does not delete translation keys from the system. If the language is re-enabled later, review the Translations page to confirm whether previous customizations are still available. If the values are missing or outdated, import the saved translation file again or restore the language to default.
Unsaved changes warning when leaving the page
If you navigate away with unsaved edits, Unified Admin asks whether to discard your changes. Click Discard to leave without saving, or go back and click Save.
Quick reference
|
Task |
Steps |
|---|---|
|
Enable a language |
Languages → Supported Languages → Save → Translations (if customizing text) |
|
Edit one label |
Translations → select language → edit row → Save |
|
Bulk edit offline |
Export → edit file → Import → Save |
|
Compare two languages |
Translations → Compare → edit → Save |
|
See factory defaults |
Translations → Default translation |
|
Undo all customizations |
Translations → select language → Restore to default → Confirm |
Last updated: July 2026