Prerequisites
Before configuring the WebRTC channel, ensure the following components are properly deployed and configured:
-
Microphone & camera permissions should be enabled on both the customer and the agent sides.
Recommendations
-
EF Media Server and Expertflow CX Server Time should be synced.
-
It is not recommended to enable WebRTC and Cisco Voice Channel simultaneously; only one voice channel should be configured at any given time.
-
The recommended value for the customer inactivity timeout and Agent Request TTL should be greater than the configured value for a call in the contact center, if any; otherwise, 1 hour (3600 sec) should be set as a minimum value, after which the session expires in our system.
CX System Configurations
-
To update the CTI config variables added in the unified-agent config map, follow this guide.
-
For user extension configuration, follow this guide.
Disclaimer
-
A WebRTC call is always a multichannel call because the web session is initiated first; only then can we initiate audio/video or screen sharing calls. Therefore, the Web channel must be configured before the WebRTC channel.
Limitations
-
The limitations of the multi-channel are mentioned here.
-
Any private browser window is not supported.
Unified Admin Configurations
CX Voice Queue
-
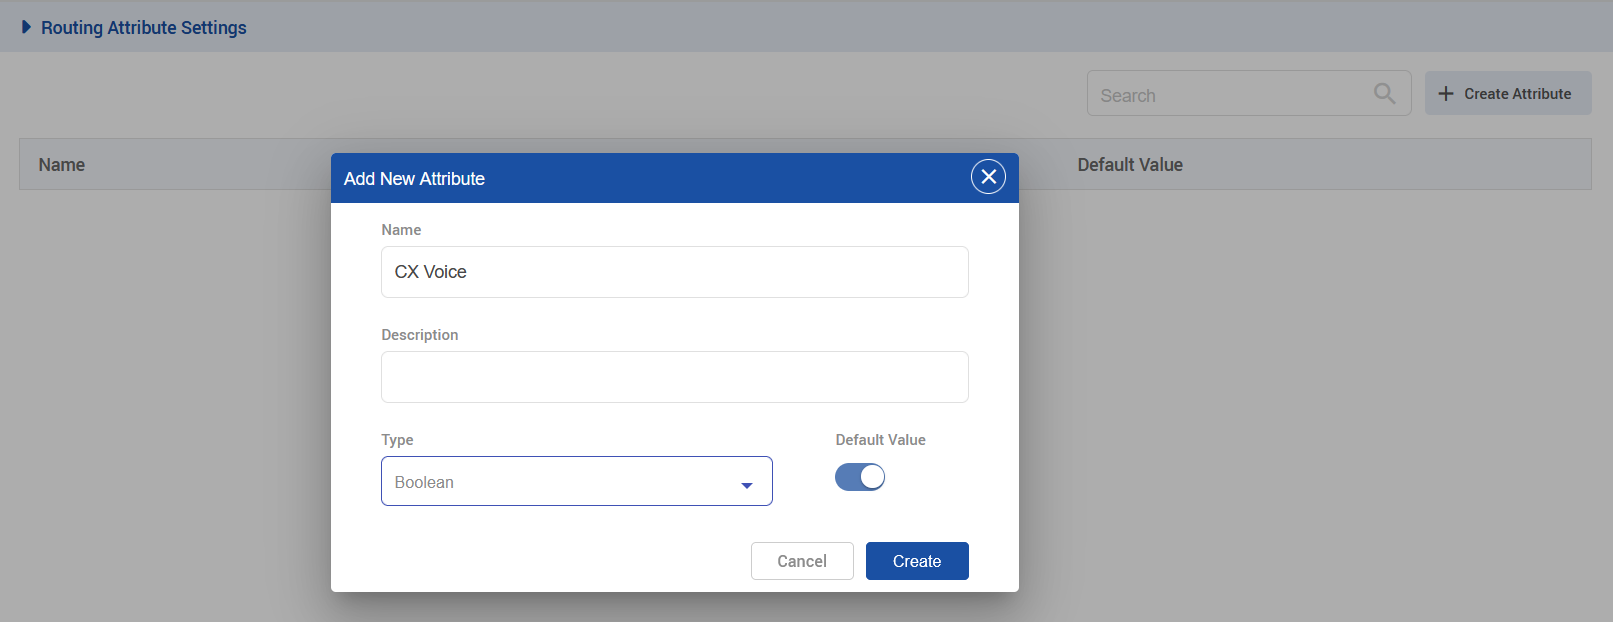
Create a Routing Attribute (you may choose any descriptive name, such as
WebRTC Voice) with the type set toBoolean
|
|
|---|
-
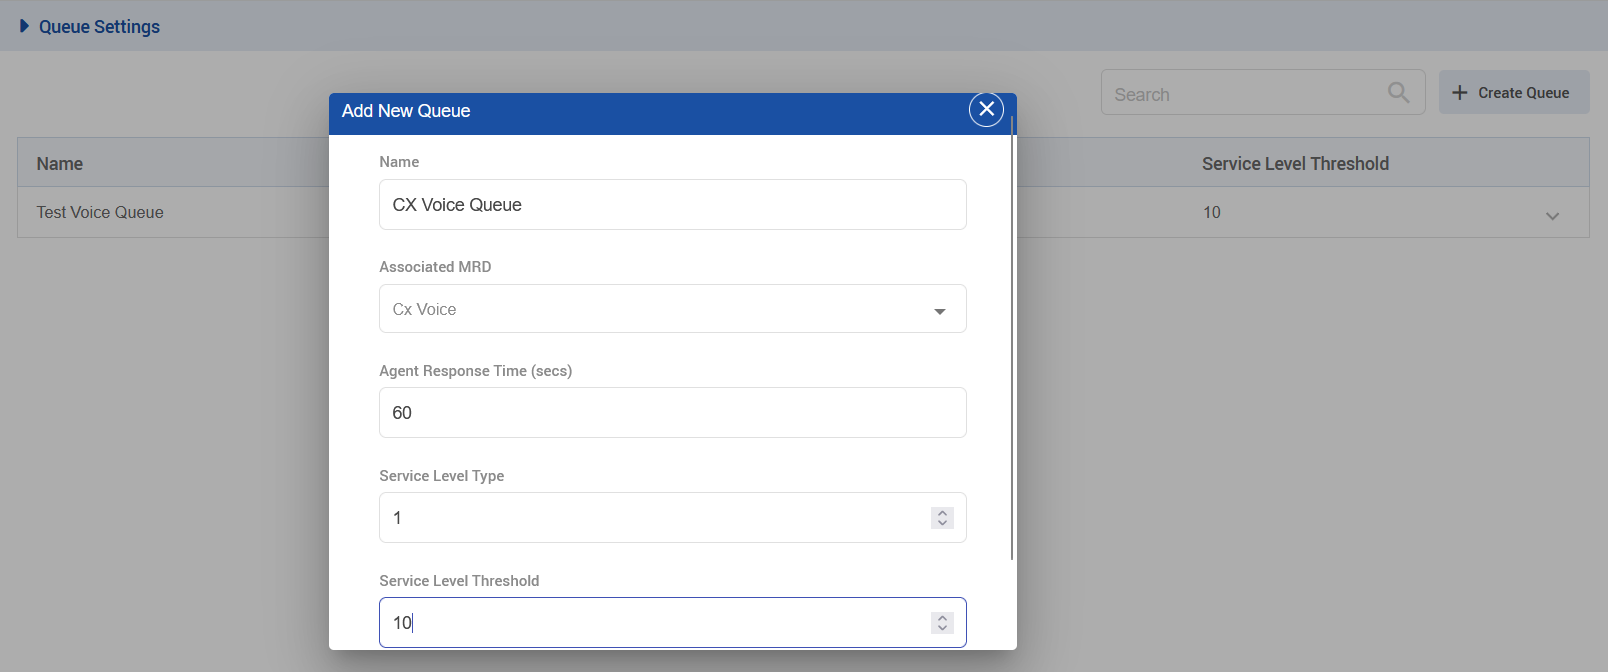
Create a queue (you may assign any descriptive name, such as
WebRTC Queue) and associate it with the MRD typeCX Voice, which is required for routing voice interactions to the Agent Desk.
|
|
|---|
-
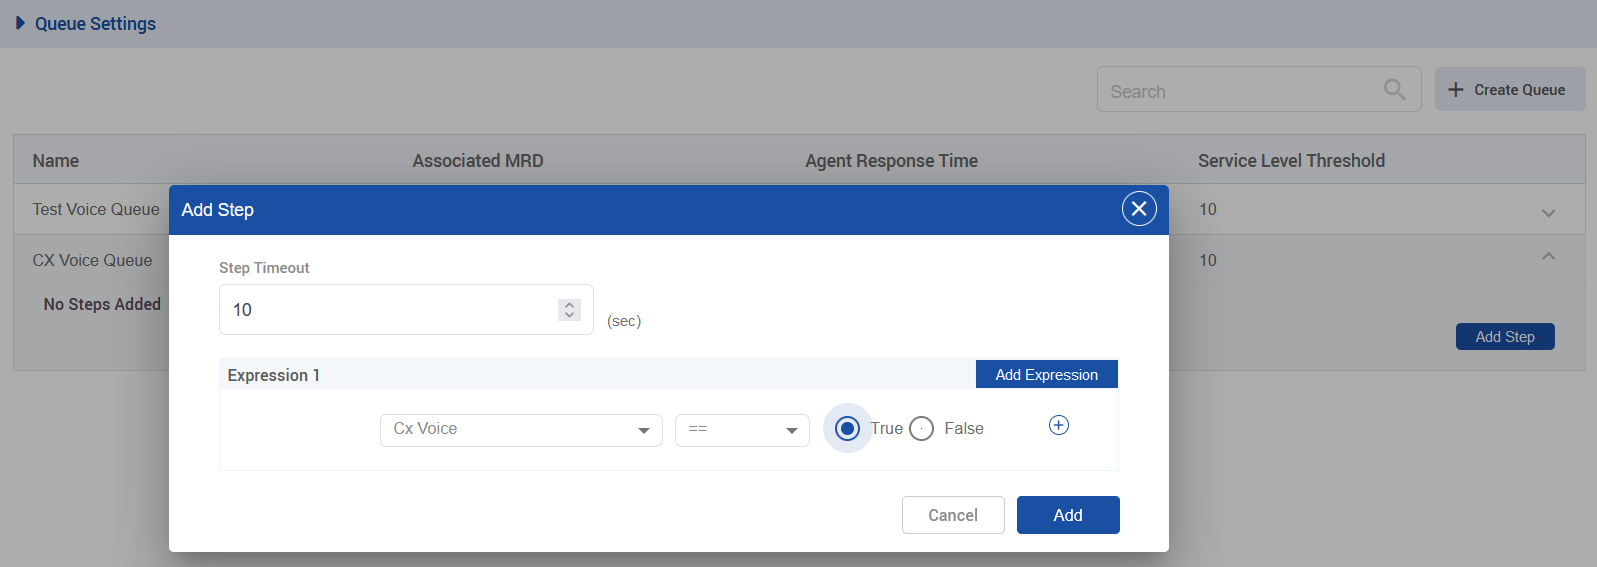
Once the queue is created, click on the drop-down, then click on Add Step, and set the following steps. Ensure the queue is linked to the routing attribute created earlier..
|
|
|---|
-
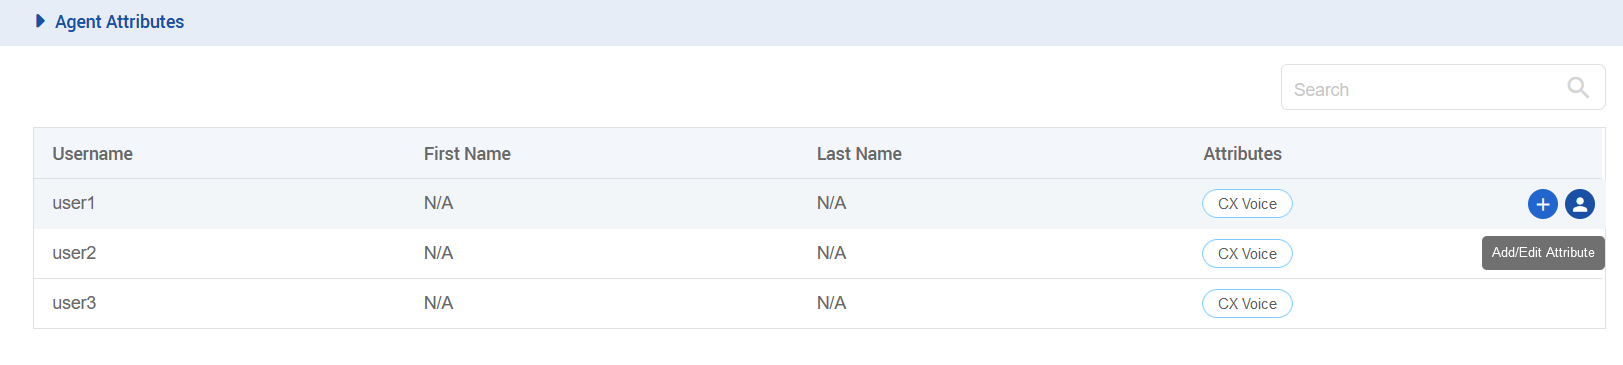
Open the Agent Attributes section and assign the WebRTC Voice attribute to your desired agent.
|
|
|---|
Channel Manager Configuration
-
The following variables need to be added in the channel provider for the WEB_RTC supported channel type on the unified-admin.
-
The provider webhook is required. In this case, it is the callback URL exposed by the Voice connector in the format: http://VC-IP:VC-PORT/ccm-msg/receive
-
.png?cb=c9da847981d32212c9d7a85583472808)
|
|---|
-
Add a channel connector for the provider configured above for the WEB_RTC channel type on the unified-admin.
|
.png?cb=1251b10096e8dd80411a5214f7e25803)
|
|---|
-
Add a channel for the WEB_RTC channel type on the unified-admin.
-
Add the desired channel name.
-
Add the configured DN(Dial Number) for the contact center as a Service identifier (Dialing URI in customer widget) for the channel.
-
Select the configured Bot.
-
Select the configured channel connector.
-
Select Channel Mode, i.e., HYBRID. (supported by the system as of yet.)
-
Select Agent Selection Policy, i.e., LONGEST AVAILABLE (supported by the system as of yet).
-
Configure the activity timeout.
-
Set Routing Mode to PUSH
-
Select the queue that is associated with the CX VOICE MRD.
-
Configure the Agent Request TTL.
-
Pre Chat Form Schema
We have to create a pre-chat form for the customer widget at the Forms tab on the Unified Admin.
-
Pre-chat chat proper format must be followed because this formatted data from the customer server is sent to the FreeSWITCH server, which further sends that data to CCM so it can identify the customer once the call lands on the agent desk.
-
Make sure the proper format is followed for naming conventions.
-
Select the pre-conversation type of forms.

-
Now, add the name field in the pre-conversation form schema.

-
Now, add the phone field in the pre-conversation form schema.

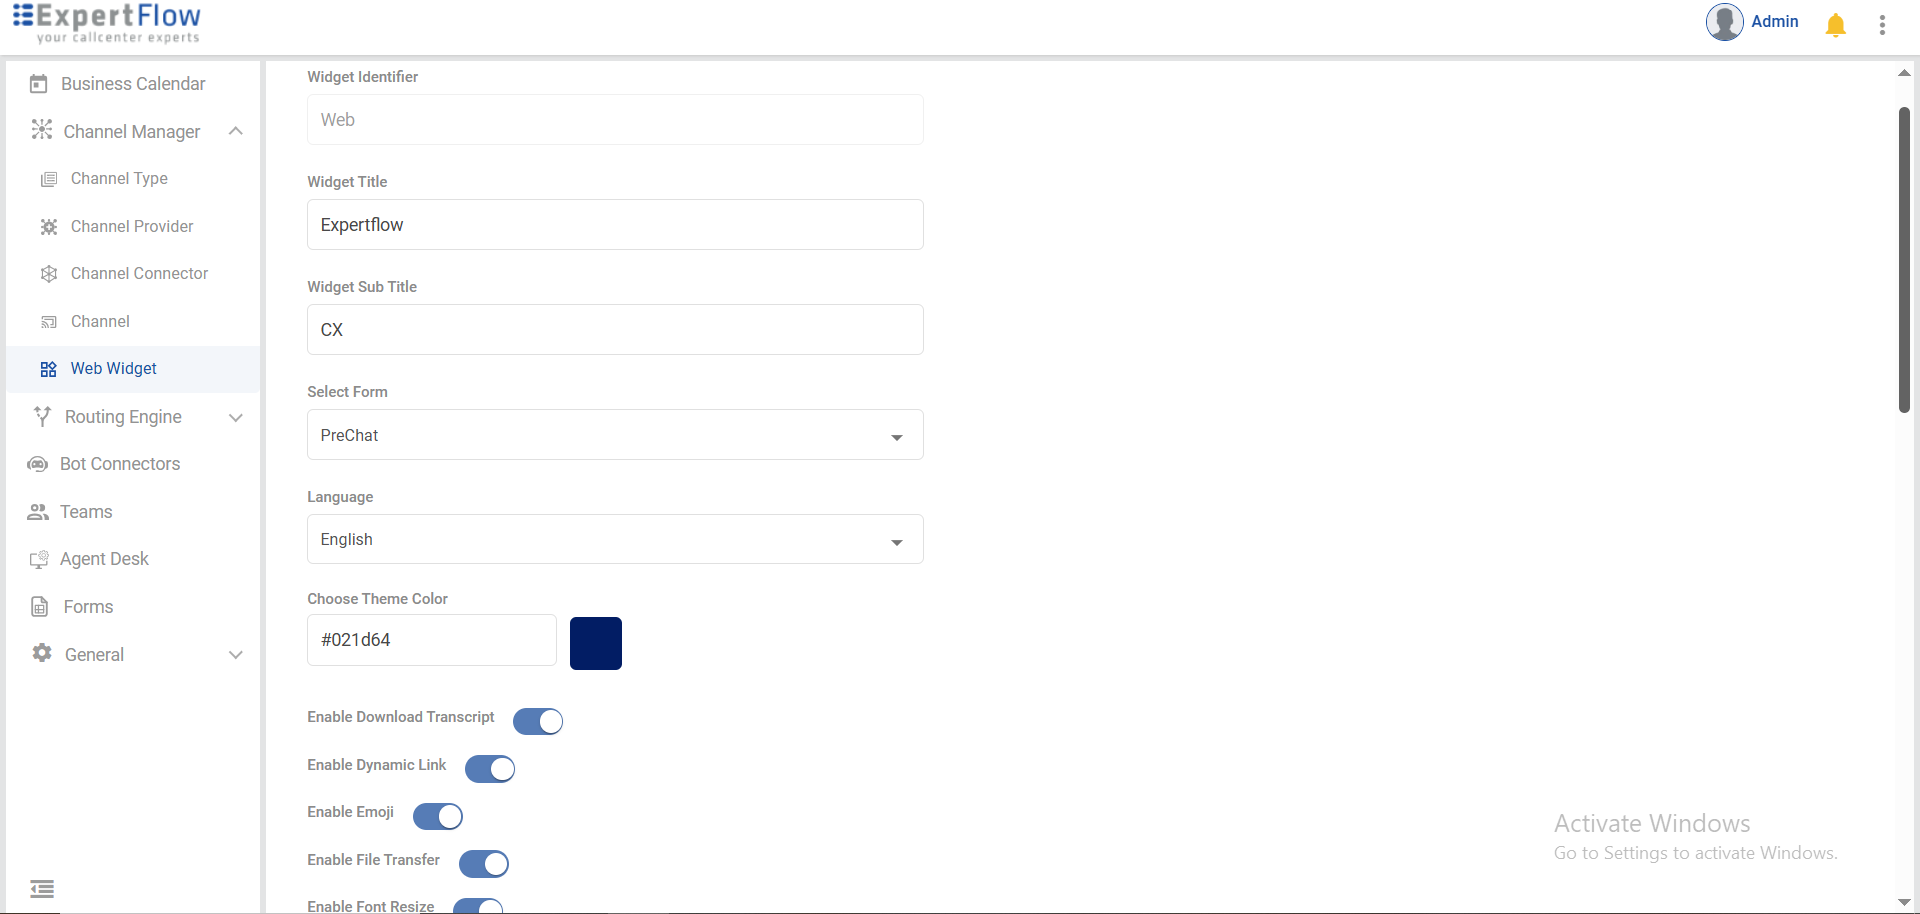
Web Widget Configurations
-
Create a web widget inside the Channel Manager tab.
-
Now add details of web identifier, title, form info, language, etc.
-
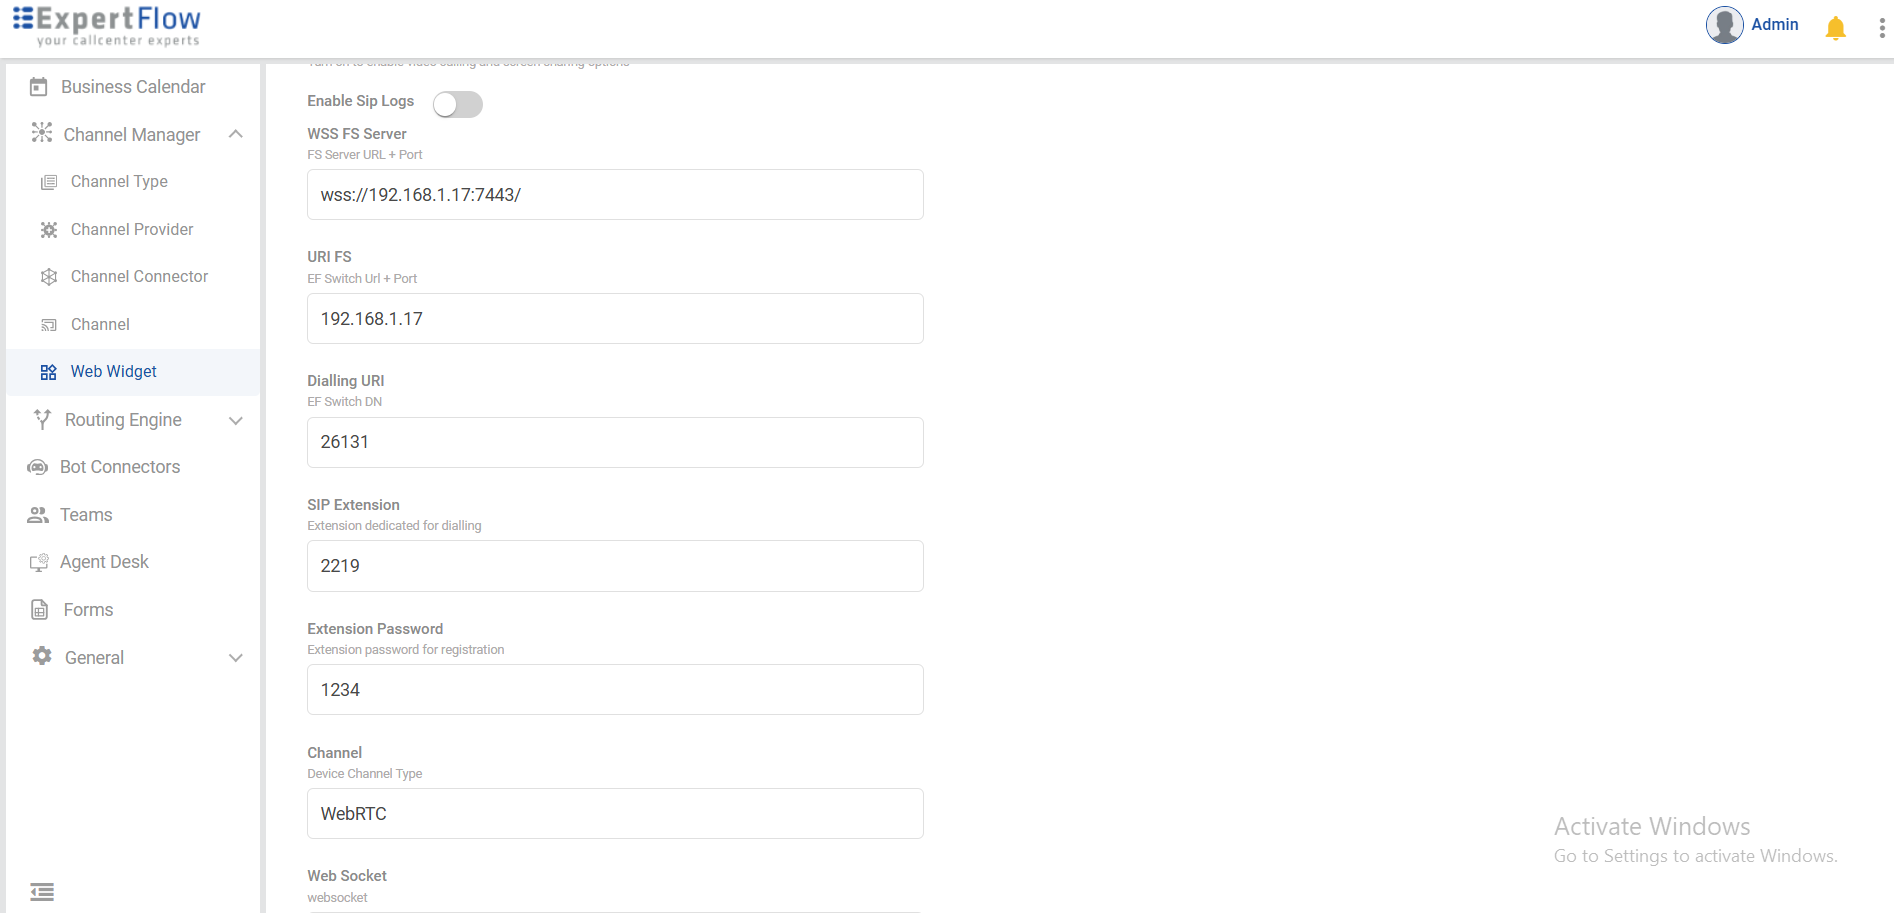
Enable the "Enable WebRTC". (Once enabled, additional fields will appear)
-
Enter the FreeSwitch Server URL & Port of the FreeSwitch (FS) server connected to your instance.
-
Set the Dialing URI as defined in your WebRTC dial plan.
-
Create a new SIP Extension on the FreeSwitch server and provide its corresponding password . In case of MTT use domain name Instead of SIP Extension
-
Specify the name of the Channel you created for WebRTC.
-
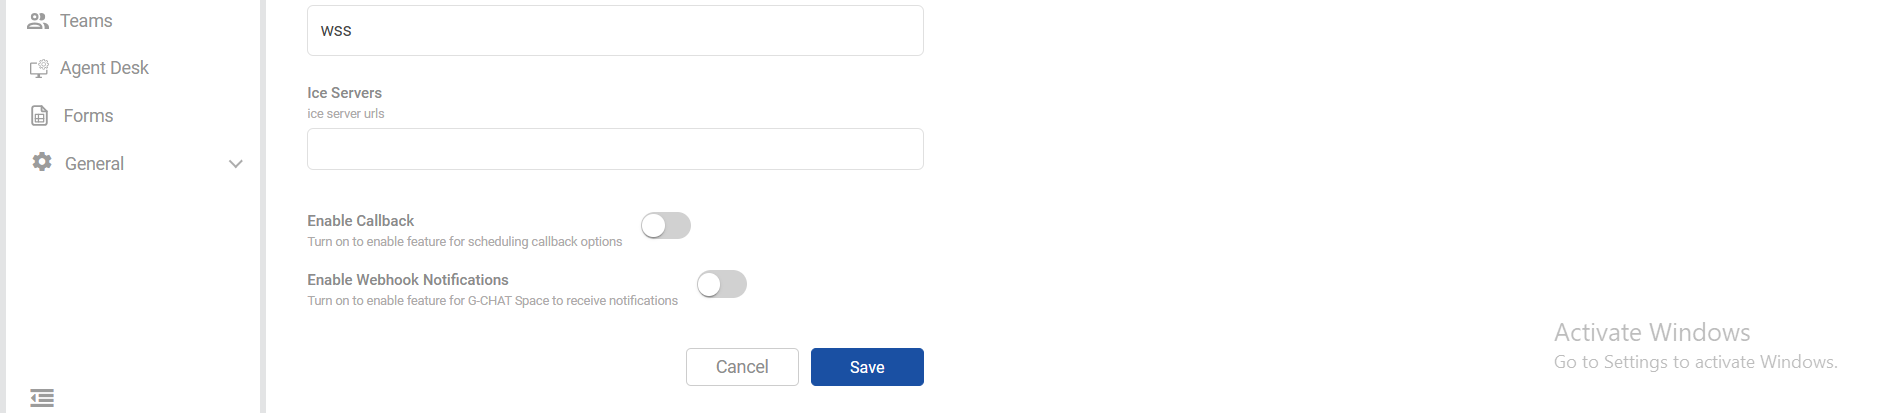
Add the WebSocket Server (WSS) server URL. This is a mandatory requirement for WebRTC to function properly.
-
Now save the changes.