Requirements
Software Requirements
|
Item |
Recommended |
Installation guide |
|
Media Server |
Latest version |
|
|
EFCX |
4.10 |
Install Lua libraries
-
SSH into the Debian server onto which the Media Server is installed.
-
Use command
ssh username@server-ip -
Enter user password and press ENTER.
-
Use command
su -
Enter root password and press ENTER.
-
-
Run the following commands, one at a time:
-
apt install lua-socket
sudo apt install lua-sec
sudo apt-get install lua-json
sudo apt-get install -y lua-dkjson
-
Configure IVR scripts and recordings
Deployment
-
SSH into the Media Server.
-
Use command
ssh username@server-ip -
Enter user password and press ENTER.
-
Use command
su -
Enter root password and press ENTER.
-
-
Confirm git is installed, and install it if is not.
-
Clone the Media Server scripts repository:
git clone -b TAG https://efcx:RecRpsuH34yqp56YRFUb@gitlab.expertflow.com/rtc/freeswitch-scripts.git-
Where TAG is the latest branch tag of the Media Server scripts repository obtained from here.
-
-
Navigate to the cloned repository to access the files:
cd freeswitch-scripts -
Alter the file name of cx_env.lua to cx_env{DN}.lua where {DN} is the dialing number of the IVR (Set in the CxIvr Dialplan section below).
-
e.g. for an IVR with a dialing number of 1555 the file would be named cx_env1555.lua.
mv cx_env.lua cx_env1555.lua
-
-
Move the files ending in .lua to the Media Server scripts folder:
-
mv *.lua /usr/share/freeswitch/scripts -
Move any custom IVR scripts to the Media Server scripts folder:
mv <custom-lua-IVR-script> /usr/share/freeswitch/scripts -
Move the ivr_prompts folder:
mv ivr_prompts /usr/share/freeswitch/sounds/ -
Assign read-write permissions to the ivr_prompts and scripts folder:
chmod 777 -R /usr/share/freeswitch/sounds/ivr_prompts
chmod 777 -R /usr/share/freeswitch/scripts
Configuration
-
Open cx_env{DN}.lua :
vi /usr/share/freeswitch/scripts/cx_env{DN}.lualocal config = {} config = { -- Set to NAME or ID depending on whether queue field contains name or ID of queue queueType = 'NAME', -- Name or ID of queue to reserve agents from queue = 'Voice Queue', -- NOTE: Keeping queue and queueType as '' will cause CX to use the default queue set in the CX Voice channel -- queue = '', -- queueType = '', -- CxFQDN cxFqdn = "https://devops.com", -- API of voice connector for reserving an agent voiceConnectorApi = "http://VC-IP:VC-PORT", -- Path of folder containing sound files that play during the IVR menu, DO NOT CHANGE ivr_prompts_folder = "/usr/share/freeswitch/sounds/ivr_prompts/", } return config -
Press the "I" key to enter editing mode.
-
The queueType field can contain one of two values:
-
'NAME'
-
''
-
-
The queue field can contain one of two types of values, based on what the queueType field above contains:
-
Name of the Agent Queue e.g. Support Queue (If queueType contains 'NAME') This name can be obtained from Unified Admin from the Queues section.
-
Empty string i.e. '' (If queueType contains '')
-
-
If queue and queueType are set to '' , then the call will be routed to the default queue set for the CX Voice channel in Unified Admin.
-
The voiceConnectorApi field will contain a URL in the following format:
-
http://VC-IP:VC-PORT/request-agent
-
Replace VC-IP and VC-PORT with IP address and port of the voice connector.
-
-
The cxFqdn field contains the fully qualified domain name of the EFCX:
-
https://devops.com
-
Replace https://devops.com with the EFCX domain name.
-
-
The ivr_prompts_folder field contains path to the ivr_prompts folder. Leave it at the default value.
-
Save and exit the file by pressing the Esc key, entering :wq and pressing ENTER.
-
Steps 11-15 below are optional, in case Post-Call-Survey is in use.
-
Open pcs1_env.lua:
vi /usr/share/freeswitch/scripts/pcs1_env.lualocal config = {} config = { formId = "form-id123", cxFqdn = "https://devops.expertflow.com", ivr_prompts_folder = "/usr/share/freeswitch/sounds/ivr_prompts/" } return config -
Press the "I" key to enter editing mode.
-
The formId will contain the ID of the PCS Survey form created on Unified Admin (make sure that audio prompts were uploaded for each question).
-
The cxFqdn field contains the fully qualified domain name of the EFCX:
-
Replace devops.expertflow.com with the EFCX domain name.
-
-
The ivr_prompts_folder field contains path to the ivr_prompts folder. Leave it at the default value.
-
Save and exit the file by pressing the Esc key, entering :wq and pressing ENTER.
Configure Dialplans
Domain Creation
-
Login to Media Server web interface.
-
Open in browser: https://IP-addr, where IP-addr is the IP address of the Media Server.
-

-
Add the username and password that was shown upon installation of Media Server and press LOGIN.
-
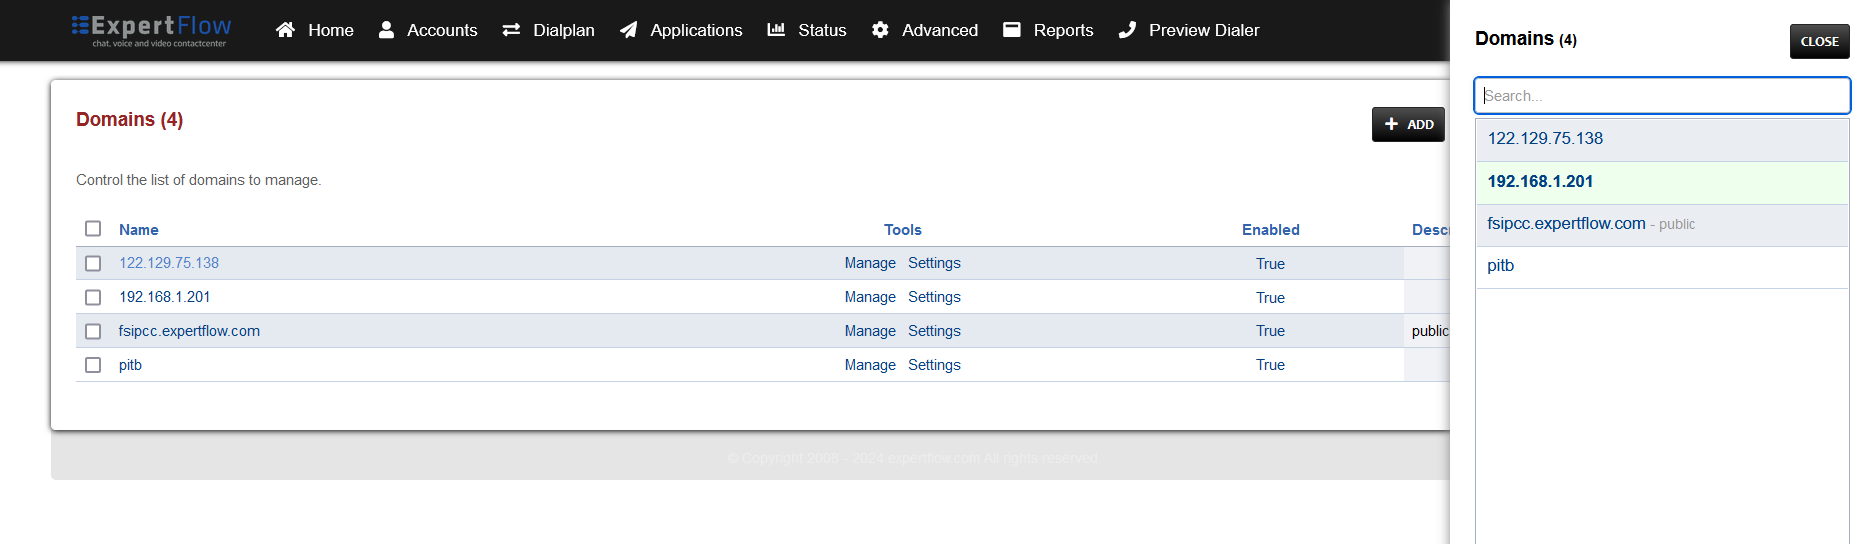
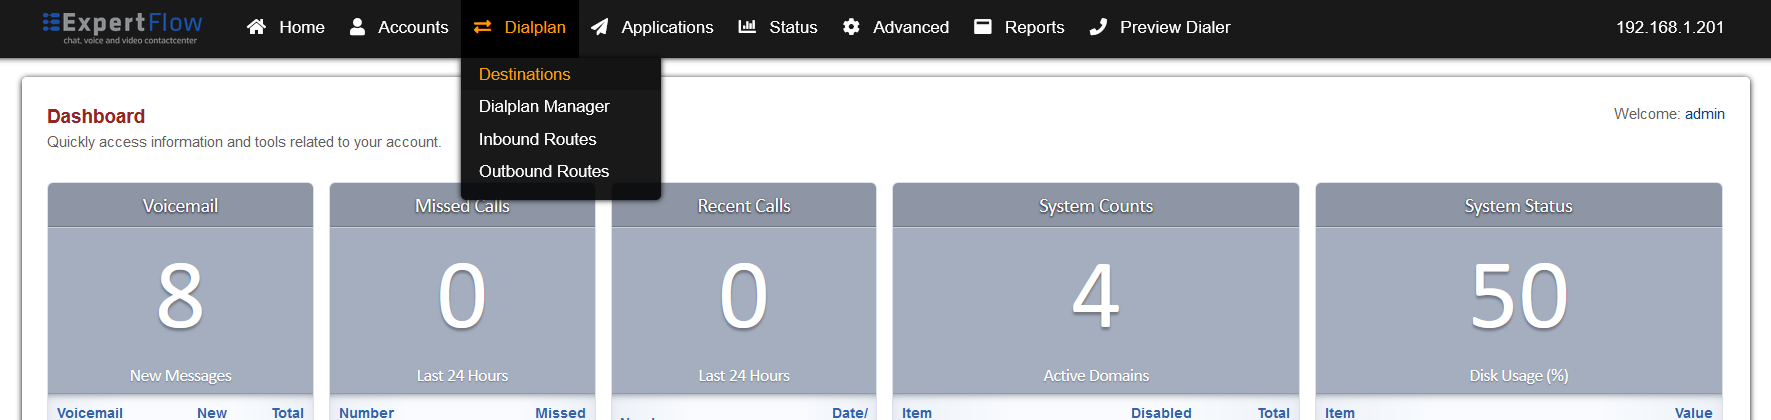
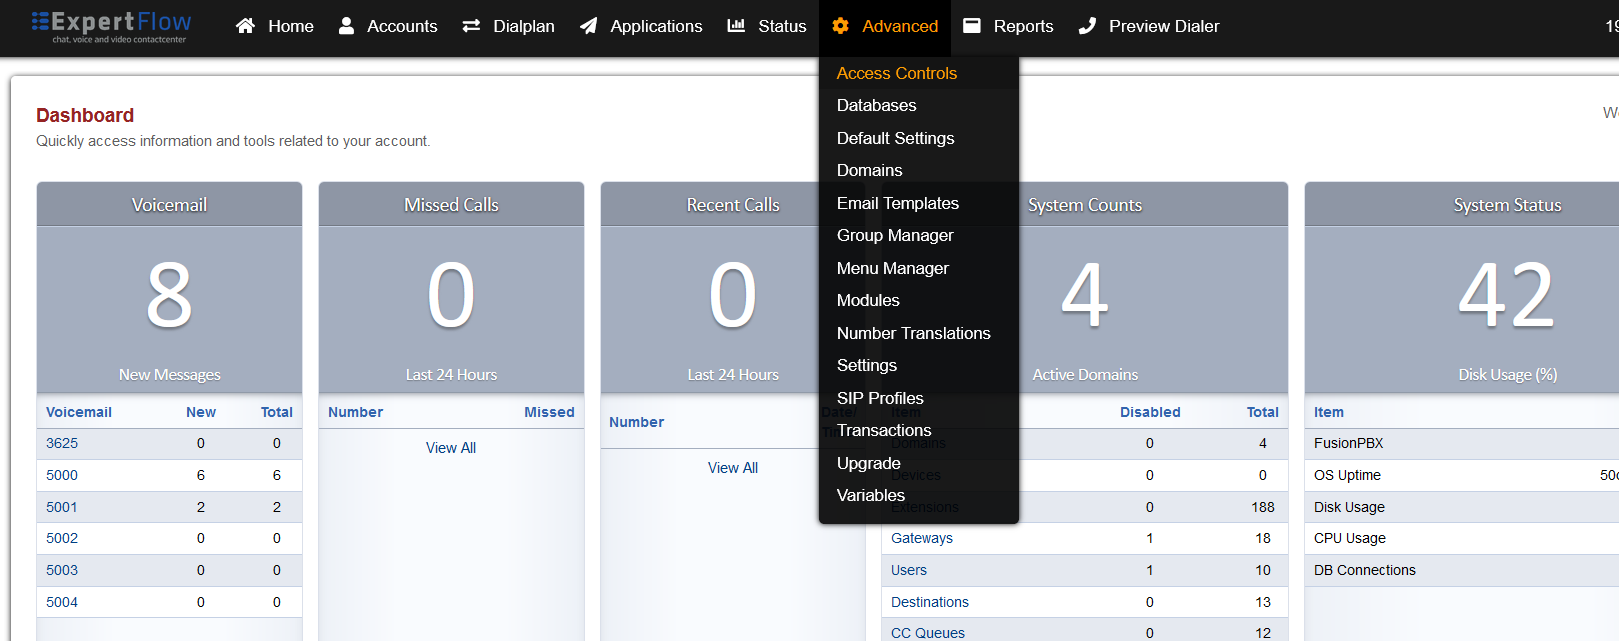
Select the Domains option from the Advanced tab.
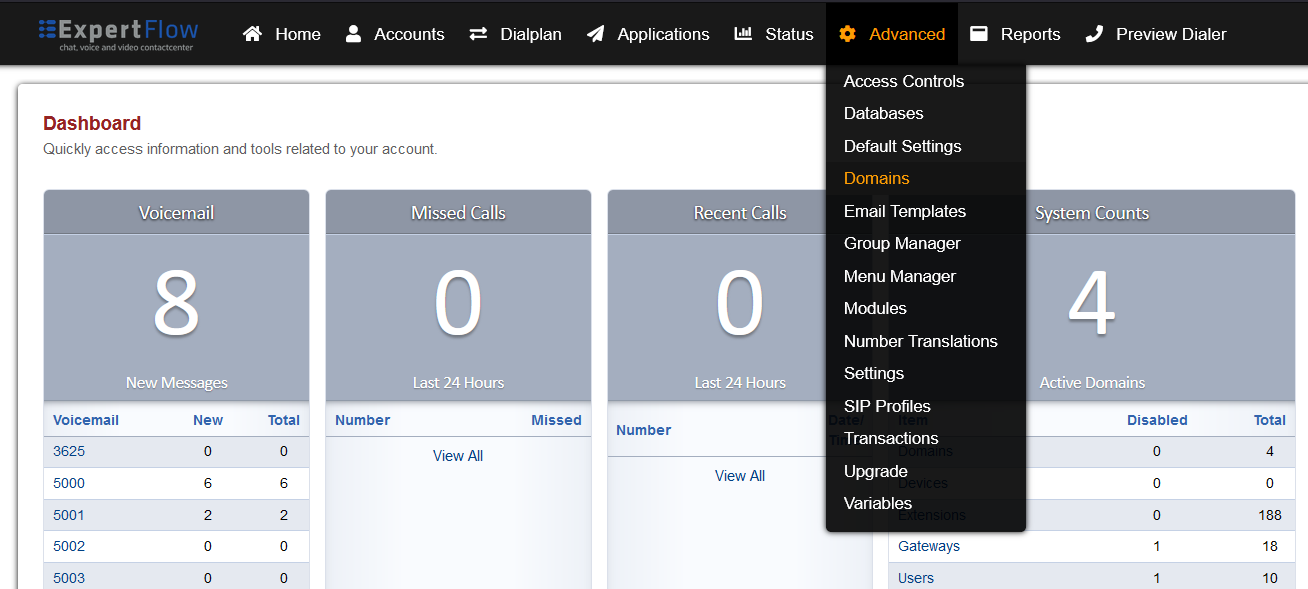
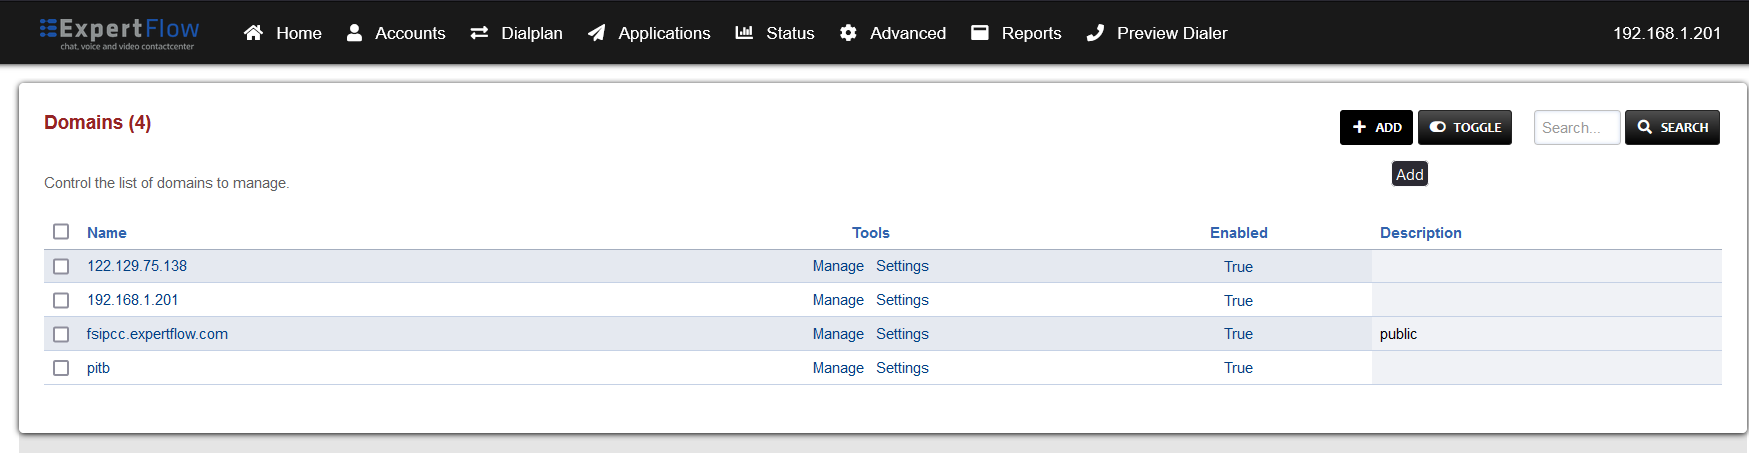
-
Select the ADD button on the top right.
-
Add the Fully Qualified Domain Name(FQDN) that was provided with the Media Server, as shown in the image below:
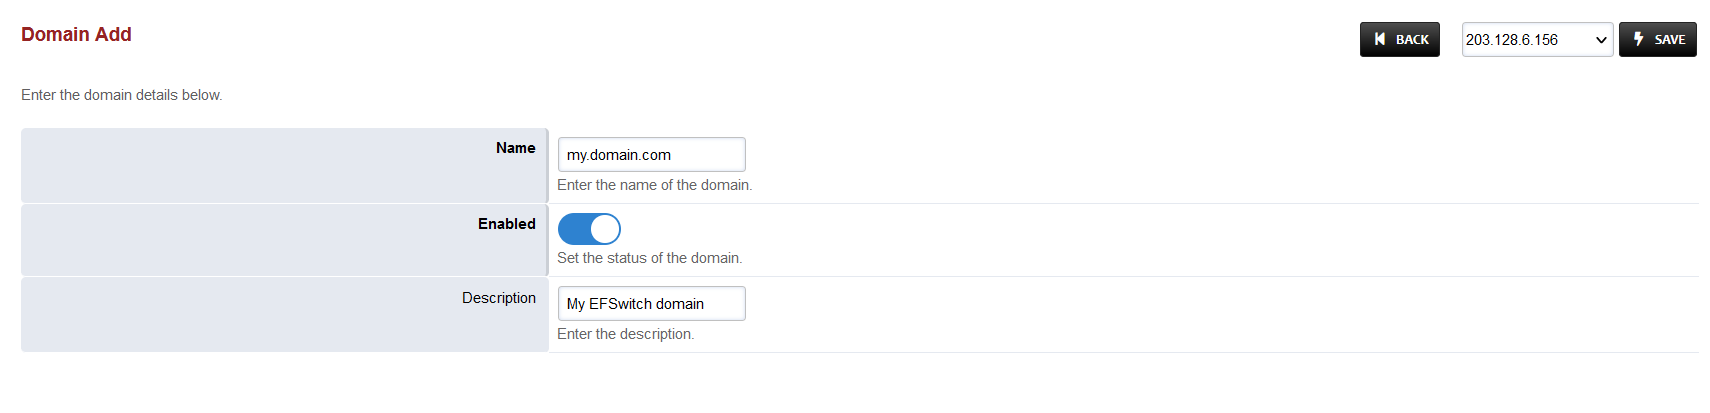
-
Save the changes by pressing SAVE button in top right corner.
Inbound IVR Dialplan
-
Login to Media Server web interface.
-
Open in browser: https://IP-addr, where IP-addr is the IP address of the Media Server.
-

-
Add the username and password that was shown upon installation of Media Server and press LOGIN.
-
Press the IP address in the top right and select the Domain created in the Domain creation section above:

-
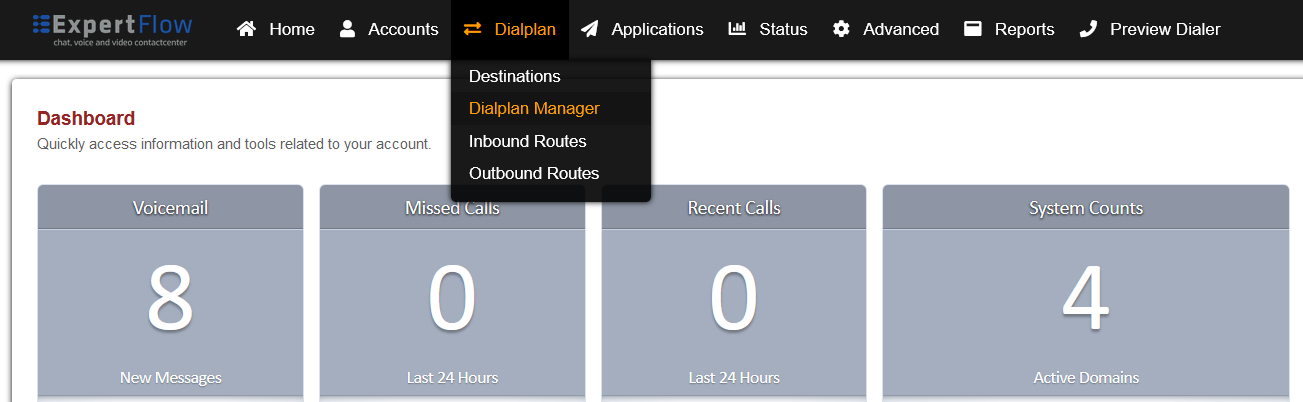
Open the Dialplan Manager section under the Dialplan tab.
-
Add a new Dialplan by pressing the Add Button on the top.
-
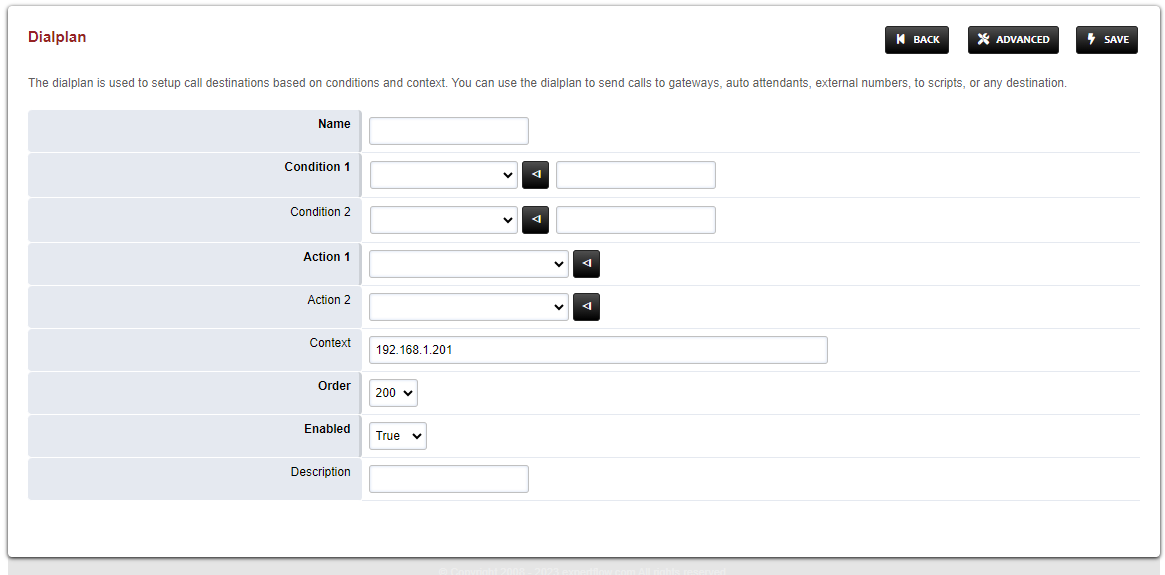
Fill the form with following details :
-
Name = <Name of your choice>
-
Condition 1 = Select destination_number from list and add a dialing number in the format ^dialing_number$, matching the {DN} value in the cx_env{DN}lua script filename set in the IVR scripts section above.
-
e.g. for a dialing number of 1218, the field must have the value ^5555$.
-
-
Action 1 = Select first item from the list
-
-
Save the form by pressing save button on top right Corner.
-
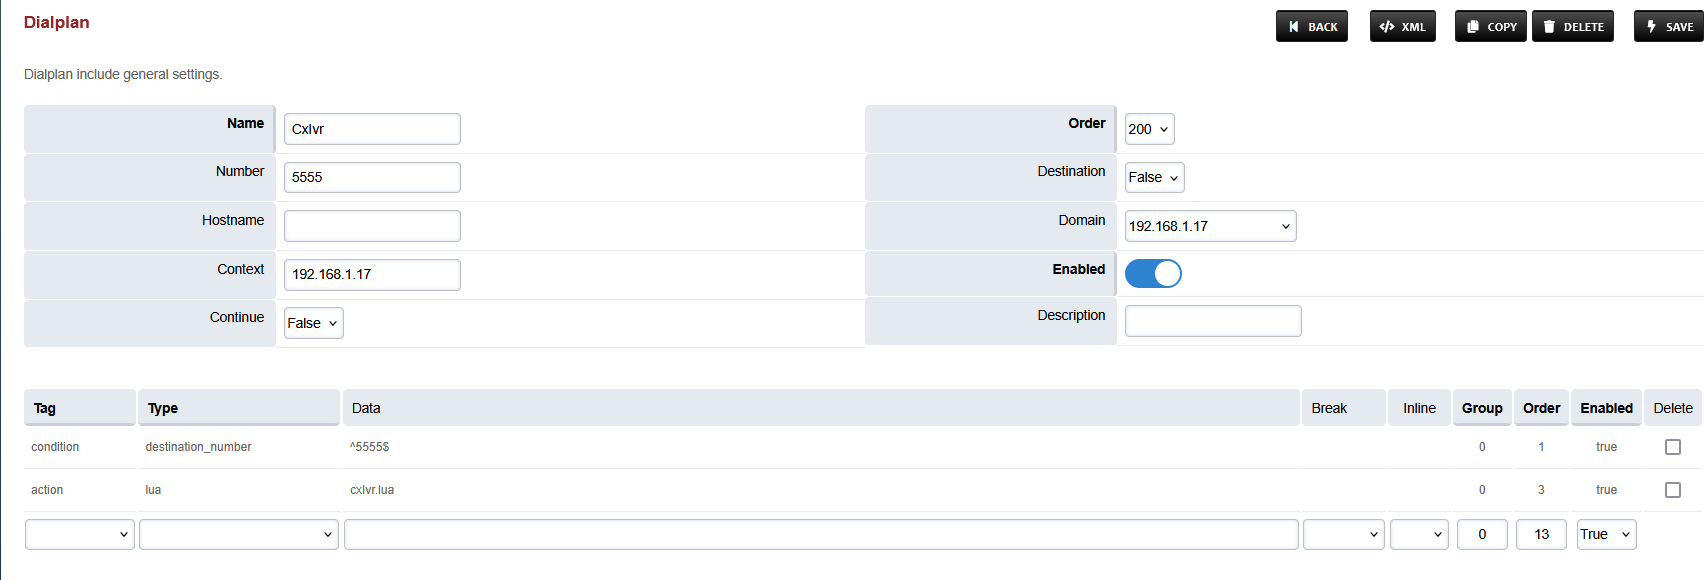
Re-open the dialplan.
-
Change action from transfer to lua and add the name of the custom Inbound IVR script(default is cxIvr.lua) into data column so the result looks like this:
-
Set the Context field to the value of the Domain set in the Domain creation section.
-
Set the Domain field to the value of the Domain set in the Domain creation section.
-
Save the changes by pressing SAVE button in top right corner.
Outbound IVR Dialplan
-
This section is optional, depending on whether the CX Dialer for Campaigns is in use.
-
Login to Media Server web interface.
-
Open in browser: https://IP-addr, where IP-addr is the IP address of the Media Server.
-
-
Add the username and password that was shown upon installation of Media Server and press LOGIN.
-
Press the IP address in the top right and select the Domain created in the Domain creation section above:
-
Open the Dialplan Manager section under the Dialplan tab.
-
Add a new Dialplan by pressing the Add Button on the top.
-
Fill the form with following details :
-
Name = <Name of your choice>
-
Condition 1 = Select destination_number from list and set the value to out_(.*)
-
Action 1 = Select first item from the list
-
-
Save the form by pressing save button on top right Corner.
-
Re-open the dialplan.
-
Delete the line with the Action tag (Click the checkbox in the right and press SAVE in the top right).
-
Add the following information to this dialplan:
|
Tag |
Type |
Data |
Group |
Order |
Enabled |
|---|---|---|---|---|---|
|
action |
wait_for_answer |
|
0 |
10 |
true |
|
action |
set |
sip_h_X-Destination-Number=$1 |
0 |
15 |
true |
|
action |
lua |
<script-name> |
0 |
20 |
true |
-
<script-name> is the name of the Outbound IVR script(default is outboundIvr.lua).
-
Set the Context field to the value of the Domain set in the Domain creation section.
-
Set the Domain field to the value of the Domain set in the Domain creation section.
-
Save the changes by pressing SAVE button in top right corner.
Direct-Transfer Dialplan
-
Login to Media Server web interface.
-
Open in browser: https://IP-addr, where IP-addr is the IP address of the Media Server.
-

-
Add the username and password that was shown upon installation of Media Server and press LOGIN.
-
Press the IP address in the top right and select the Domain created in the Domain creation section above:
-
Open the Dialplan Manager section under the Dialplan tab.
-
Add a new Dialplan by pressing the Add Button on the top.
-
Fill the form with following details :
-
Name = CxQueue
-
Condition 1 = Select destination_number from list and add a random number
-
Action 1 = Select first item from the list
-
-
Save the form by pressing save button on top right Corner.
-
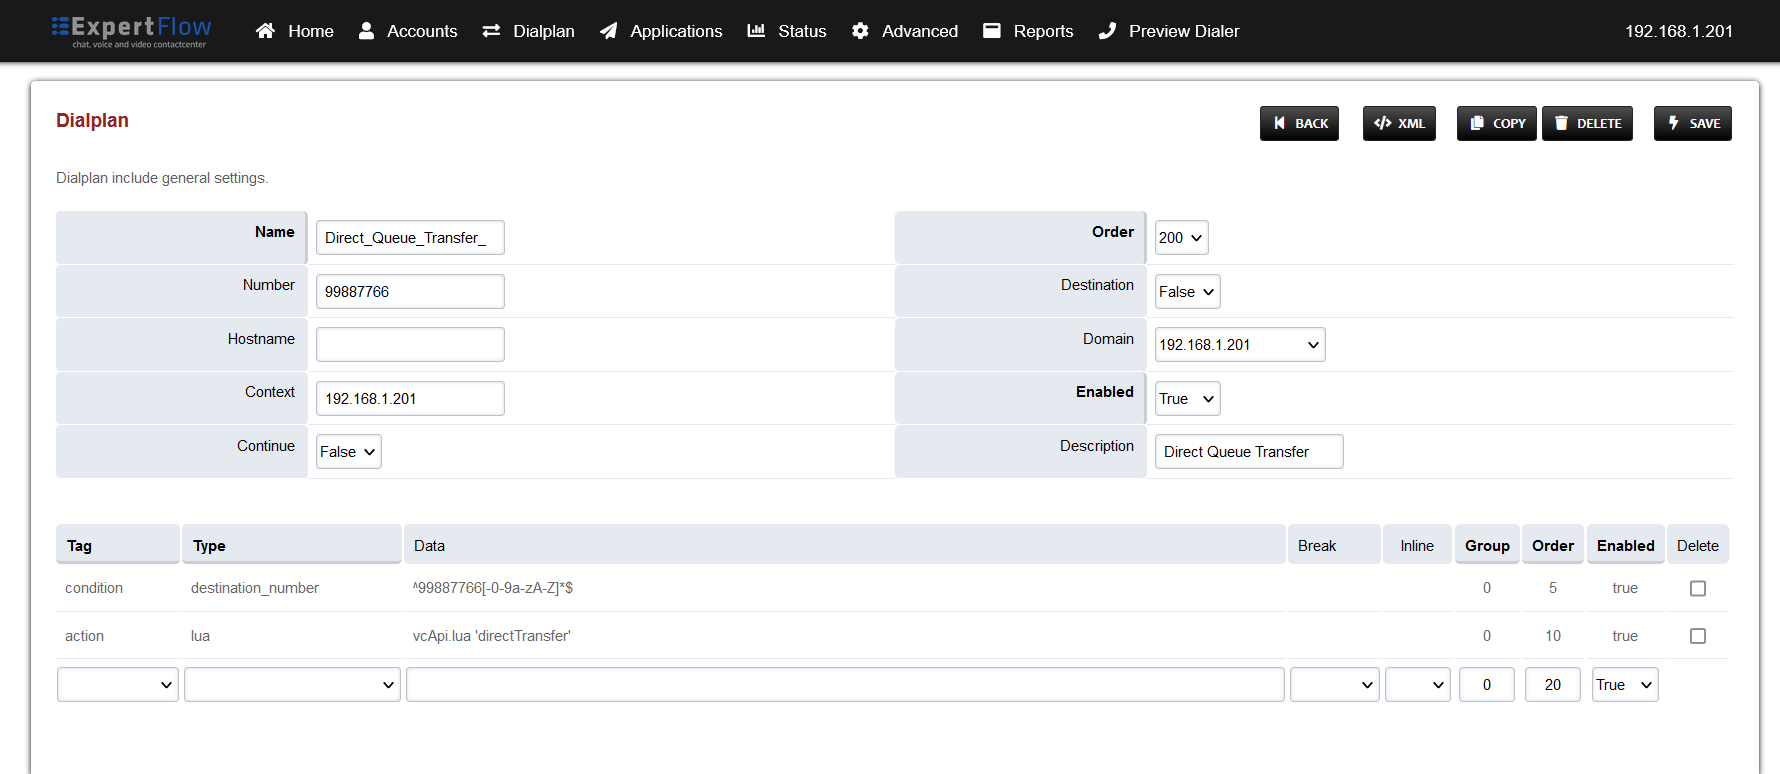
Re-open CxQueue dialplan.
-
Change the value of the Data column in the destination_number row to ^99887766[-0-9a-zA-Z]*$
-
Change the value of the Type column in the Action row to lua and the Data field to vcApi.lua 'directTransfer'
-
Set the Context field to the value of the Domain set in the Domain creation section.
-
Set the Domain field to the value of the Domain set in the Domain creation section.
-
Save the changes by pressing SAVE button in top right corner.
External Consult and Transfer Dialplan
-
Login to Media Server web interface.
-
Open in browser: https://IP-addr, where IP-addr is the IP address of the Media Server.
-
-
Add the username and password that was shown upon installation of Media Server and press LOGIN.
-
Press the IP address in the top right and select the Domain created in the Domain creation section above:
-
Open the Dialplan Manager section under the Dialplan tab.
-
Add a new Dialplan by pressing the Add Button on the top.
-
Fill the form with following details :
-
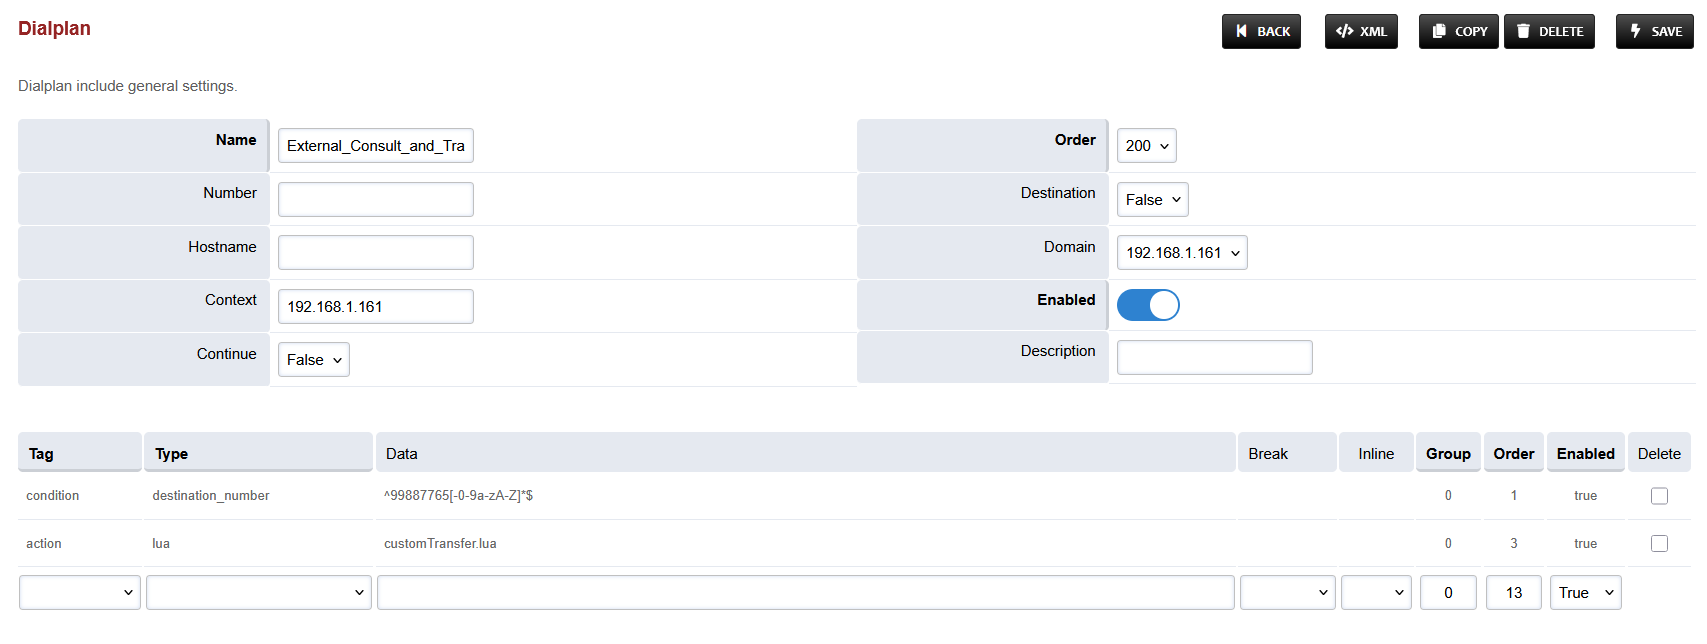
Name = External_Consult_and_Transfer
-
Condition 1 = Select destination_number from list and add a random number
-
Action 1 = Select first item from the list
-
-
Save the form by pressing save button on top right Corner.
-
Re-open the created dialplan.
-
Change the value of the Data column in the destination_number row to ^99887765[-0-9a-zA-Z]*$
-
Change the value of the Type column in the Action row to lua and the Data field to customTransfer.lua
-
Set the Context field to the value of the Domain set in the Domain creation section.
-
Set the Domain field to the value of the Domain set in the Domain creation section.
-
Save the changes by pressing SAVE button in top right corner.
WebRTC Dialplan
-
Login to Media Server web interface.
-
Open in browser: https://IP-addr, where IP-addr is the IP address of the Media Server.
-

-
Add the username and password that was shown upon installation of Media Server and press LOGIN.
-
Press the IP address in the top right and select the Domain created in the Domain creation section above:

-
Open the Dialplan Manager section under the Dialplan tab.
-
Add a new Dialplan by pressing the Add Button on the top.
-
Fill the form with following details:
-
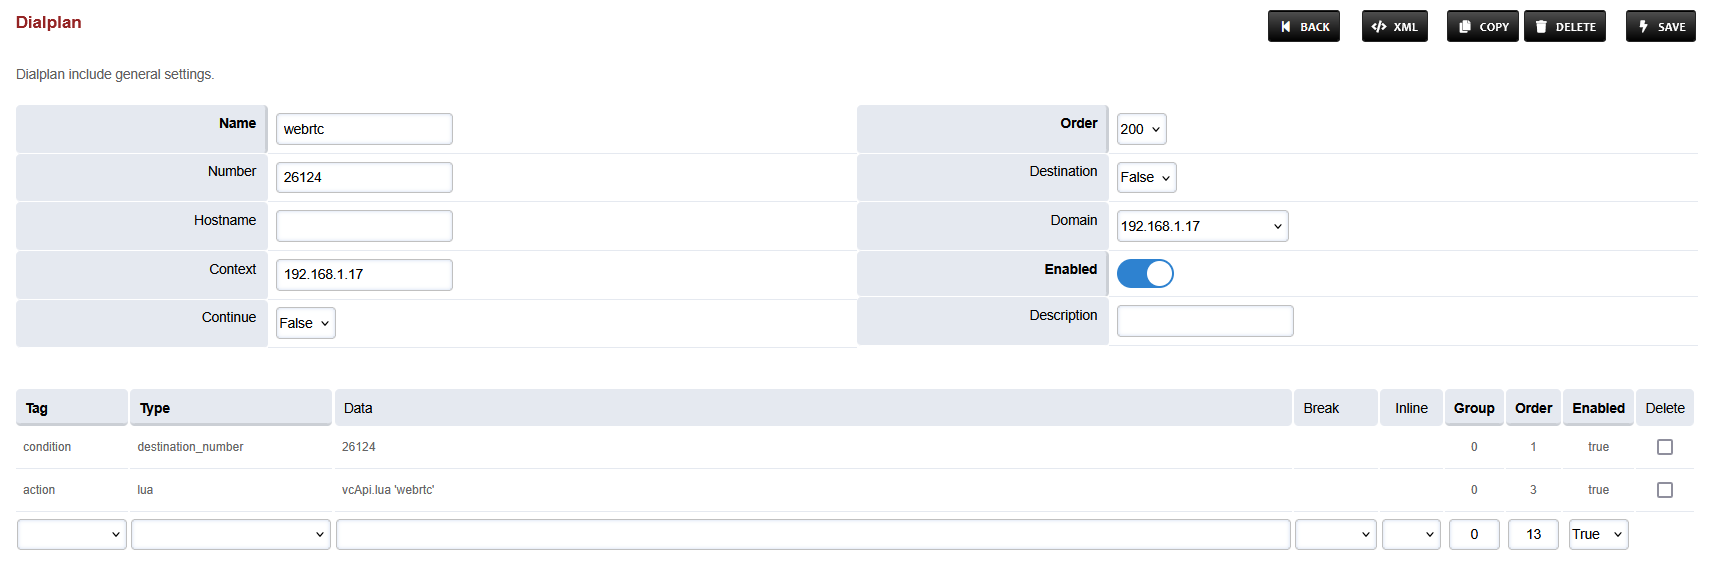
Name = Name of your choice
-
Condition 1 = Select destination_number from list and add the webRTC dialing number(Set in Unified Admin, under Web Widget settings) in the format ^dialing_number$.
-
e.g. for a dialing number of 123456, the field must have the value ^123456$.
-
-
Action 1 = Select first item from the list
-
-
Save the form by pressing save button on top right Corner.
-
Re-open the dialplan.
-
Change action from transfer to lua and add vcApi.lua 'webrtc' into data column so the result looks like this:
-
-
Set the Context field to the value of the Domain set in the Domain creation section.
-
Set the Domain field to the value of the Domain set in the Domain creation section.
-
Save the changes by pressing SAVE button in top right corner.
-
If H264 codec is not added please add this codec. Follow the next step.
Progressive Outbound Dialplan
-
Login to Media Server web interface.
-
Open in browser: https://IP-addr, where IP-addr is the IP address of the Media Server.
-

-
Add the username and password that was shown upon installation of Media Server and press LOGIN.
-
Press the IP address in the top right and select the Domain created in the Domain creation section above:

-
Open the Dialplan Manager section under the Dialplan tab.
-
Add a new Dialplan by pressing the Add Button on the top.
-
Fill the form with following details :
-
Name = Progressive Outbound Agent Transfer
-
Condition 1 = Select destination_number from list and set the value to ^agent$
-
Action 1 = Select first item from the list
-
-
Save the form by pressing save button on top right Corner.
-
Re-open the Progressive Outbound Agent Transfer dialplan.
-
Set the Context field to the value of the Domain set in the Domain creation section.
-
Set the Domain field to the value of the Domain set in the Domain creation section.
-
Change the value of the Type column in the Action row to bridge and the Data field to user/${sip_h_X-agentExtension}@<DOMAIN>
-
Where DOMAIN is the value of the Domain set in the Domain creation section.
-
Manual Outbound Dialplan
-
Login to Media Server web interface.
-
Open in browser: https://IP-addr, where IP-addr is the IP address of the Media Server.
-
-
Add the username and password that was shown upon installation of Media Server and press LOGIN.
-
Press the IP address in the top right and select the Domain created in the Domain creation section above:
-
Open the Dialplan Manager section under the Dialplan tab.
-
Add a new Dialplan by pressing the Add Button on the top.
-
Fill the form with following details :
-
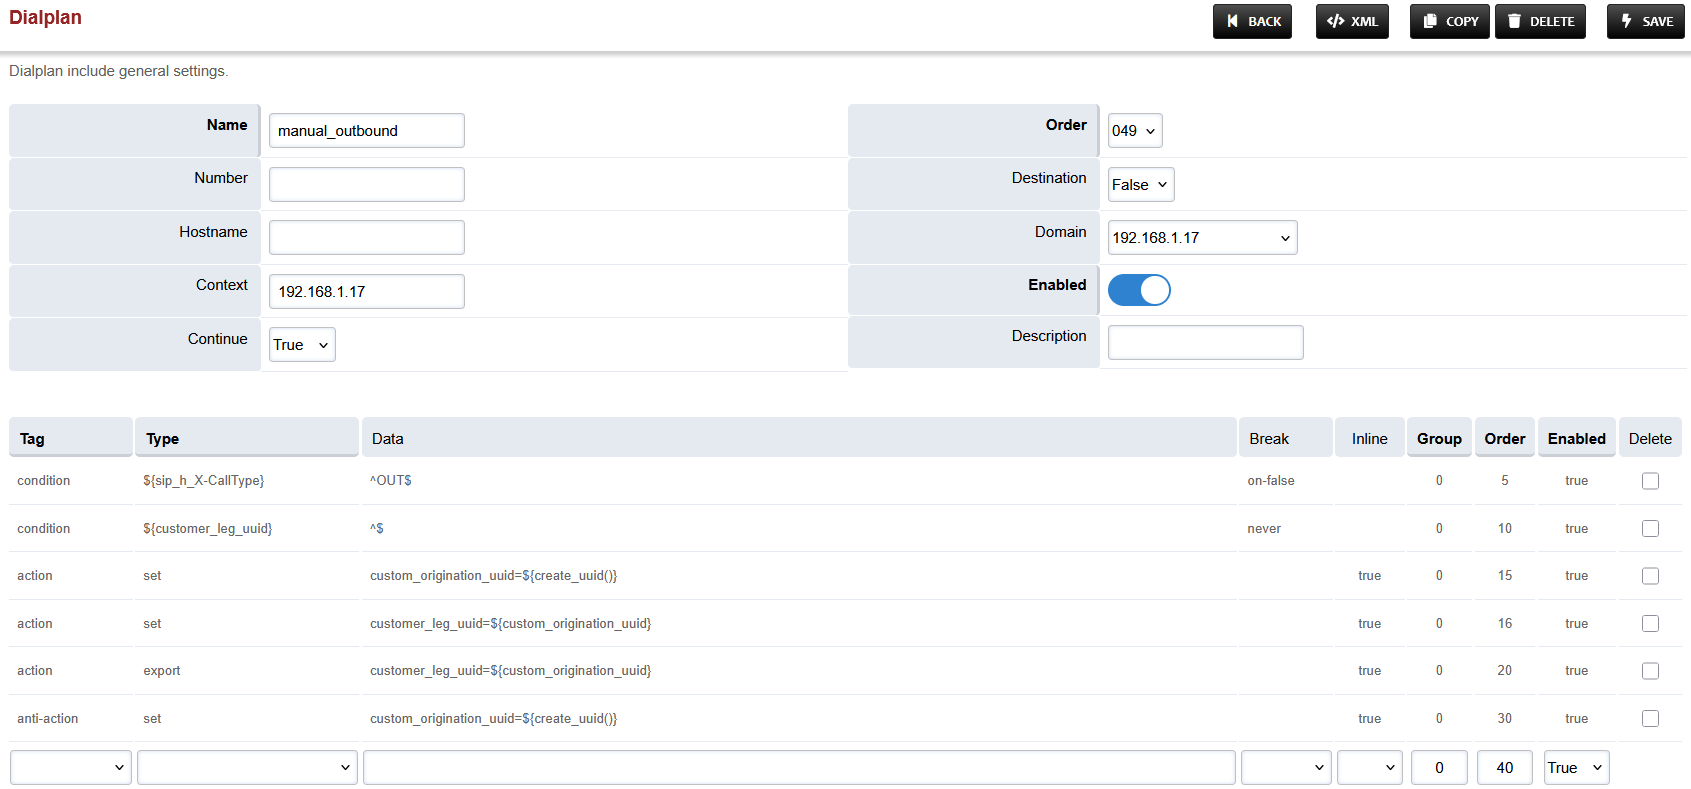
Name = Manual_Outbound
-
Condition 1 = Click the black arrow to the right of the first field. In the first field enter ${sip_h_X-CallType} and in the second field enter ^OUT$.
-
Condition 2 = Click the black arrow to the right of the first field. In the first field enter ${customer_leg_uuid} and in the second field enter ^$.
-
Action 1 = Select first item from the list
-
-
Save the form by pressing save button on top right Corner.
-
Re-open Manual_Outbound dialplan.
-
Delete the line with the Action tag (Click the checkbox in the right and press SAVE in the top right)
-
Add the following information to this dialplan:
|
Tag |
Type |
Data |
Break |
Inline |
Group |
Order |
Enabled |
|---|---|---|---|---|---|---|---|
|
condition |
${sip_h_X-CallType} |
^OUT$ |
on-false |
|
0 |
5 |
true |
|
condition |
${customer_leg_uuid} |
^$ |
never |
|
0 |
10 |
true |
|
action |
set |
custom_origination_uuid=${create_uuid()} |
|
true |
0 |
15 |
true |
|
action |
set |
customer_leg_uuid=${custom_origination_uuid} |
|
true |
0 |
20 |
true |
|
action |
export |
customer_leg_uuid=${custom_origination_uuid} |
|
true |
0 |
25 |
true |
|
anti-action |
set |
custom_origination_uuid=${create_uuid()} |
|
true |
0 |
30 |
true |
-
Set the Context field to the value of the Domain set in the Domain creation section.
-
Set the Domain field to the value of the Domain set in the Domain creation section.
-
Set the Order field to 49.
-
Set the Continue field to True.
-
Save the changes by pressing SAVE button in top right corner.
Post Call Survey Dialplan
-
This section is optional, in case Post-Call-Survey is in use.
-
Login to Media Server web interface.
-
Open in browser: https://IP-addr, where IP-addr is the IP address of the Media Server.
-
-
Add the username and password that was shown upon installation of Media Server and press LOGIN.
-
Press the IP address in the top right and select the Domain created in the Domain creation section above:
-
Open the Dialplan Manager section under the Dialplan tab.
-
Add a new Dialplan by pressing the Add Button on the top.
-
Fill the form with following details :
-
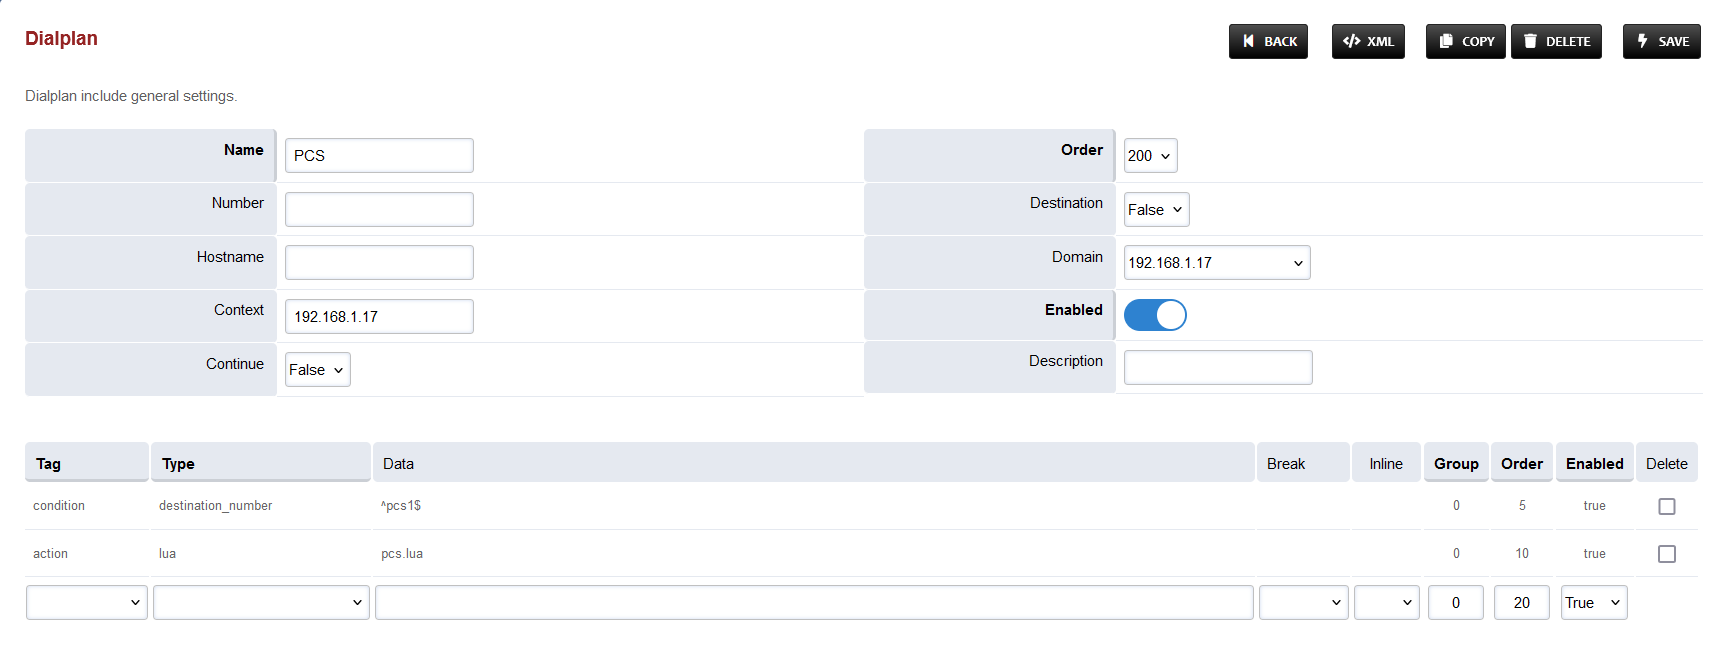
Name = PCS
-
Condition 1 = Select destination_number from list and set the value to ^pcs1$
-
Action 1 = Select first item from the list
-
-
Save the form by pressing save button on top right Corner.
-
Re-open PCS dialplan.
-
Delete the line with the Action tag (Click the checkbox in the right and press SAVE in the top right)
-
Add the following information to this dialplan:
|
Tag |
Type |
Data |
Break |
Group |
Order |
Enabled |
|---|---|---|---|---|---|---|
|
action |
lua |
pcs.lua |
|
0 |
10 |
true |
-
Set the Context field to the value of the Domain set in the Domain creation section.
-
Set the Domain field to the value of the Domain set in the Domain creation section.
-
Set the Order field to 49.
-
Set the Continue field to True.
-
Save the changes by pressing SAVE button in top right corner.
Custom Hangup Dialplan
-
Login to Media Server web interface.
-
Open in browser: https://IP-addr, where IP-addr is the IP address of the Media Server.
-
-
Add the username and password that was shown upon installation of Media Server and press LOGIN.
-
Press the IP address in the top right and select the Domain created in the Domain creation section above:
-
Open the Dialplan Manager section under the Dialplan tab.
-
Add a new Dialplan by pressing the Add Button on the top.
-
Fill the form with following details :
-
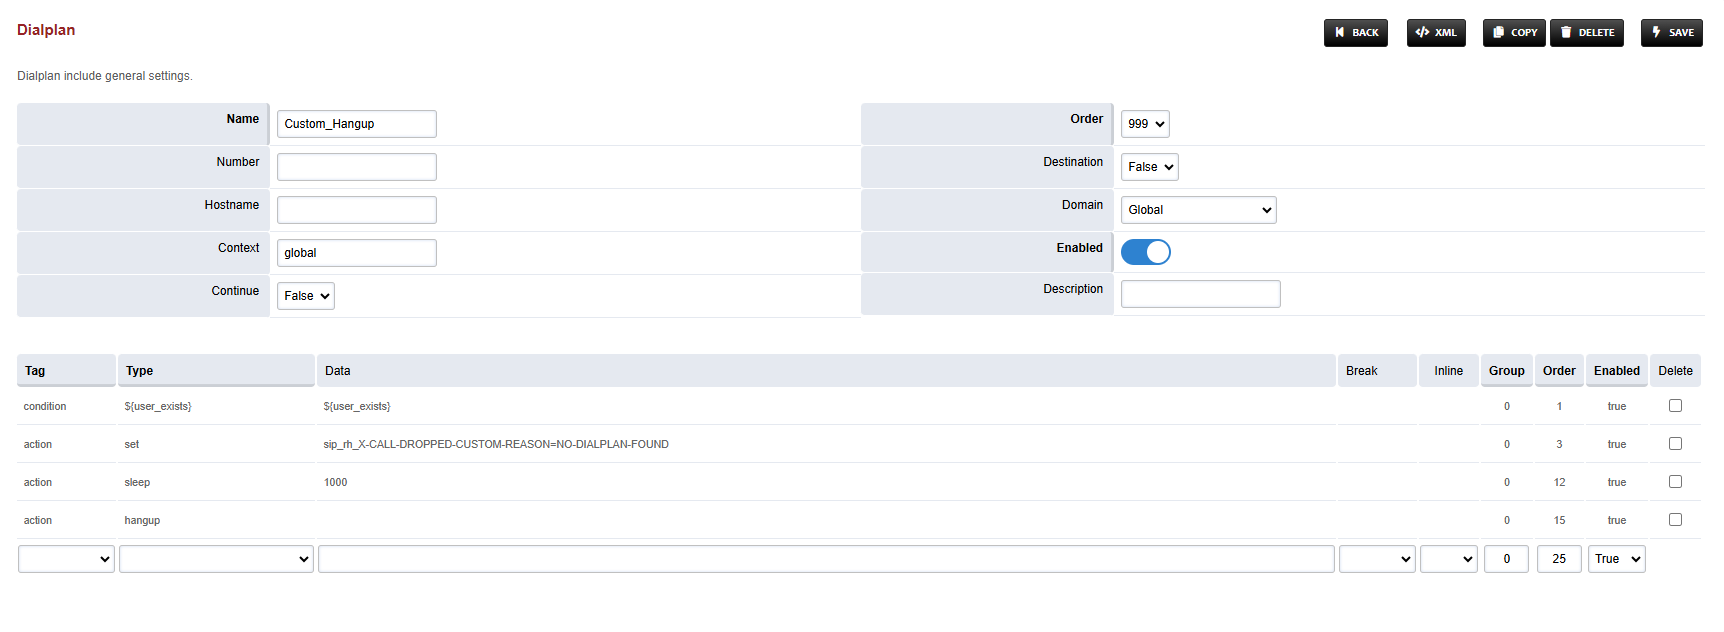
Name = Custom_Hangup
-
Condition 1 = Click the black arrow to the right of the first field. In the first field enter ${user_exists} and in the second field enter ${user_exists}.
-
Action 1 = Select first item from the list
-
-
Save the form by pressing save button on top right Corner.
-
Re-open Custom_Hangup dialplan.
-
Delete the line with the Action tag (Click the checkbox in the right and press SAVE in the top right)
-
Add the following information to this dialplan:
|
Tag |
Type |
Data |
Group |
Order |
Enabled |
|---|---|---|---|---|---|
|
condition |
${user_exists} |
${user_exists} |
0 |
5 |
true |
|
action |
set |
sip_rh_X-CALL-DROPPED-CUSTOM-REASON=NO-DIALPLAN-FOUND |
0 |
10 |
true |
|
action |
sleep |
1000 |
0 |
12 |
true |
|
action |
hangup |
|
0 |
15 |
true |
-
Set the Context field to global.
-
Set the Domain field to Global.
-
Set the Order field to 999.
-
Set the Continue field to False.
-
Save the changes by pressing SAVE button in top right corner.
Silent Monitoring Dialplan
-
Login to Media Server web interface.
-
Open in browser: https://IP-addr, where IP-addr is the IP address of the Media Server.
-
-
Add the username and password that was shown upon installation of Media Server and press LOGIN.
-
Press the IP address in the top right and select the Domain created in the Domain creation section above:
-
Open the Dialplan Manager section under the Dialplan tab.
-
Add a new Dialplan by pressing the Add Button on the top.
-
Fill the form with following details :
-
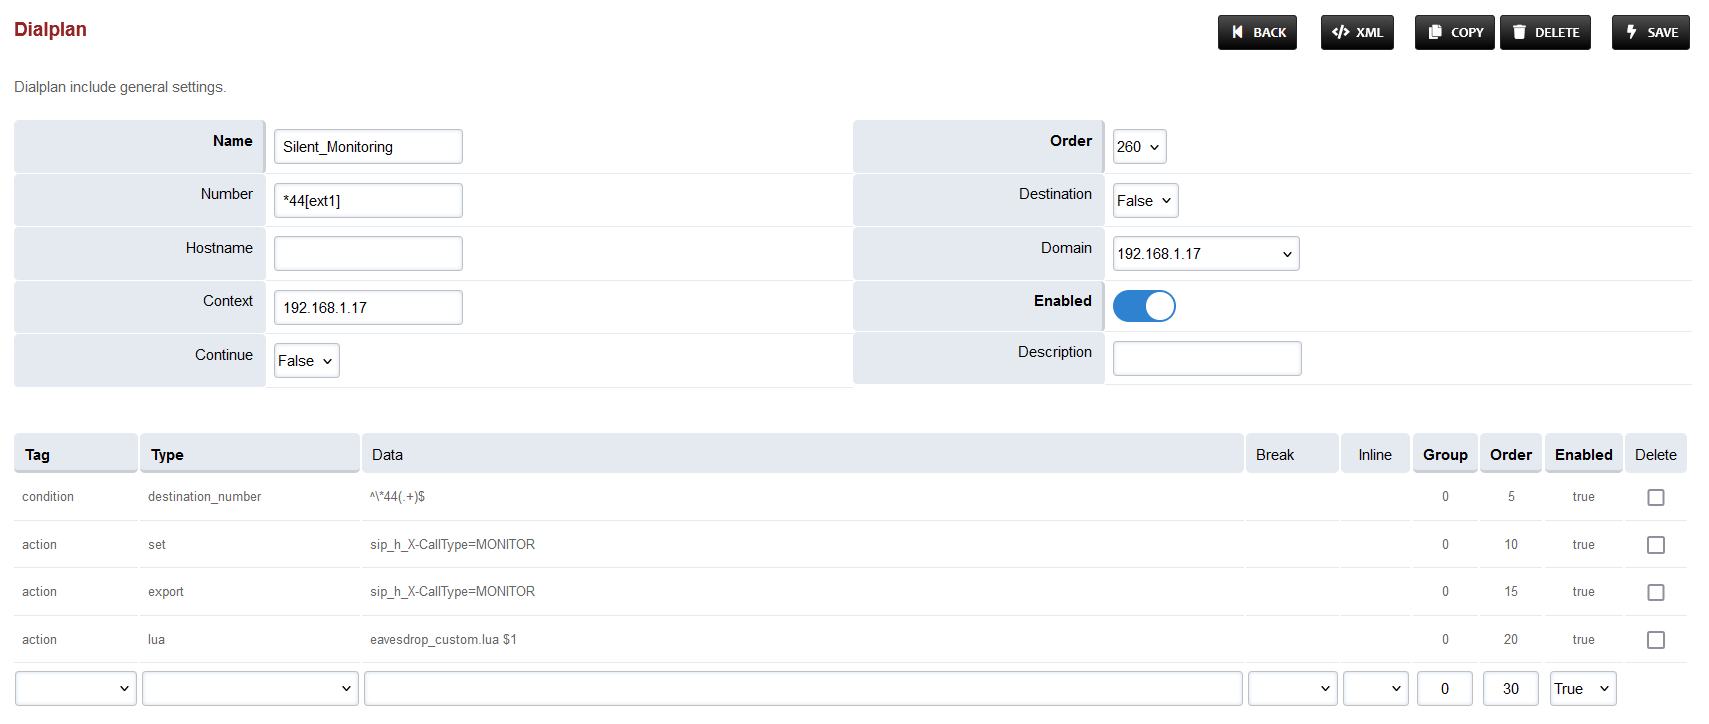
Name = Silent Monitoring
-
Condition 1 = Select destination_number from list and add ^\*44(.+)$
-
Action 1 = Select first item from the list
-
-
Save the form by pressing save button on top right Corner.
-
Re-open Silent Monitoring dialplan.
-
Delete the line with the Action tag (Click the checkbox in the right and press SAVE in the top right)
-
Add the following information to this dialplan:
|
Tag |
Type |
Data |
Group |
Order |
Enabled |
|---|---|---|---|---|---|
|
action |
set |
sip_h_X-CallType=MONITOR |
0 |
10 |
true |
|
action |
export |
sip_h_X-CallType=MONITOR |
0 |
15 |
true |
|
action |
lua |
eavesdrop_custom.lua $1 |
0 |
20 |
true |
-
Set the Context field to the value of the Domain set in the Domain creation section.
-
Set the Domain field to the value of the Domain set in the Domain creation section.
-
Save the changes by pressing SAVE button in top right corner.
Conference Dialplan
-
Login to Media Server web interface.
-
Open in browser: https://IP-addr, where IP-addr is the IP address of the Media Server.
-
-
Add the username and password that was shown upon installation of Media Server and press LOGIN.
-
Press the IP address in the top right and select the Domain created in the Domain creation section above:
-
Open the Dialplan Manager section under the Dialplan tab.
-
Add a new Dialplan by pressing the Add Button on the top.
-
Fill the form with following details :
-
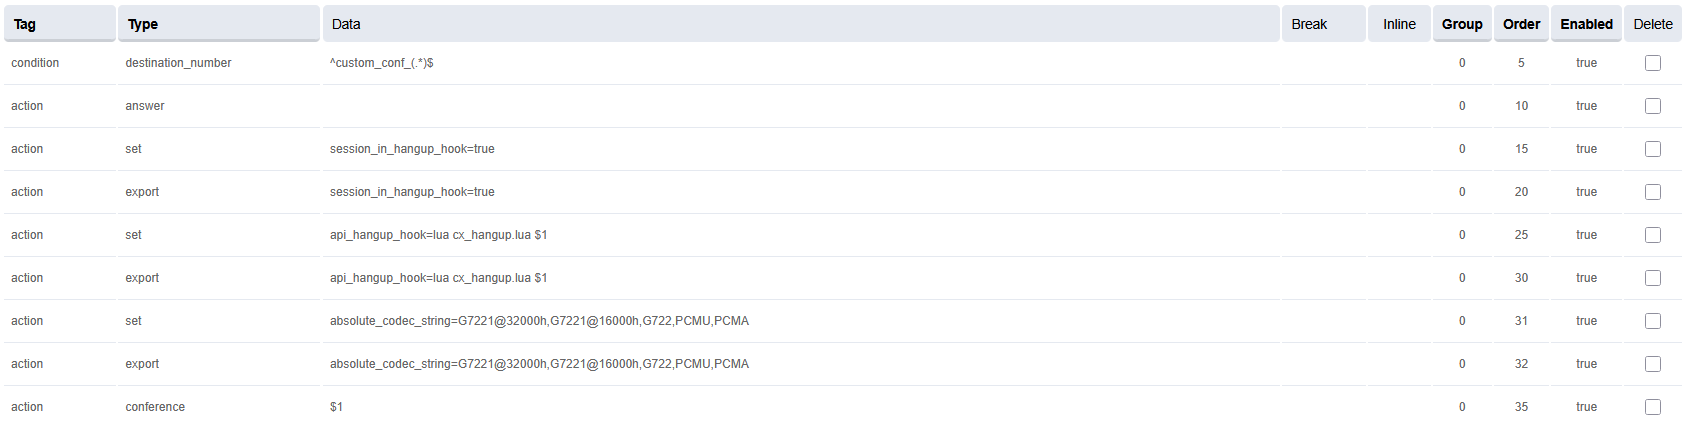
Name = CustomConf
-
Condition 1 = Select destination_number from list and add ^custom_conf_(.*)$
-
Action 1 = Select first item from the list
-
-
Save the form by pressing save button on top right Corner.
-
Re-open CustomConf dialplan.
-
Delete the line with the Action tag (Click the checkbox in the right and press SAVE in the top right)
-
Add the following information to this dialplan:
|
Tag |
Type |
Data |
Group |
Order |
Enabled |
|---|---|---|---|---|---|
|
action |
answer |
|
0 |
10 |
true |
|
action |
set |
session_in_hangup_hook=true |
0 |
15 |
true |
|
action |
export |
session_in_hangup_hook=true |
0 |
20 |
true |
|
action |
set |
api_hangup_hook=lua cx_hangup.lua $1 |
0 |
25 |
true |
|
action |
export |
api_hangup_hook=lua cx_hangup.lua $1 |
0 |
30 |
true |
|
action |
set |
absolute_codec_string=G7221@32000h,G7221@16000h,G722,PCMU,PCMA |
0 |
31 |
true |
|
action |
export |
absolute_codec_string=G7221@32000h,G7221@16000h,G722,PCMU,PCMA |
0 |
32 |
true |
|
action |
conference |
$1 |
0 |
35 |
true |
-
Set the Context field to the value of the Domain set in the Domain creation section.
-
Set the Domain field to the value of the Domain set in the Domain creation section.
-
Save the changes by pressing SAVE button in top right corner.
Changes in User Exists Dialplan
-
Login to Media Server web interface.
-
Open in browser: https://IP-addr, where IP-addr is the IP address of the Media Server.
-

-
Add the username and password that was shown upon installation of Media Server and press LOGIN.
-
Press the IP address in the top right and select the Domain created in the Domain creation section above:

-
Open the Dialplan Manager section under the Dialplan tab.
-
Find and open the user_exists dialplan.
-
Add the following information(to add custom values in the Type column, select a random value then click on it to edit):
|
Tag |
Type |
Data |
Group |
Order |
Enabled |
|---|---|---|---|---|---|
|
condition |
${sip_h_X-CallType} |
^CONSULT$ |
3 |
5 |
true |
|
action |
bind_meta_app |
A a s1 lua::consult_conf.lua CONSULT_TRANSFER |
3 |
10 |
true |
|
action |
bind_meta_app |
C a s1 lua::consult_conf.lua CONSULT_CONFERENCE |
3 |
15 |
true |
-
The result will look like this:

-
Save the changes by pressing SAVE button in top right corner.
Changes in Local extension Dialplan
-
Login to Media Server web interface.
-
Open in browser: https://IP-addr, where IP-addr is the IP address of the Media Server.
-
-
Add the username and password that was shown upon installation of Media Server and press LOGIN.
-
Press the IP address in the top right and select the Domain created in the Domain creation section above:
-
Open the Dialplan Manager section under the Dialplan tab.
-
Find and open the local_extension dialplan.
-
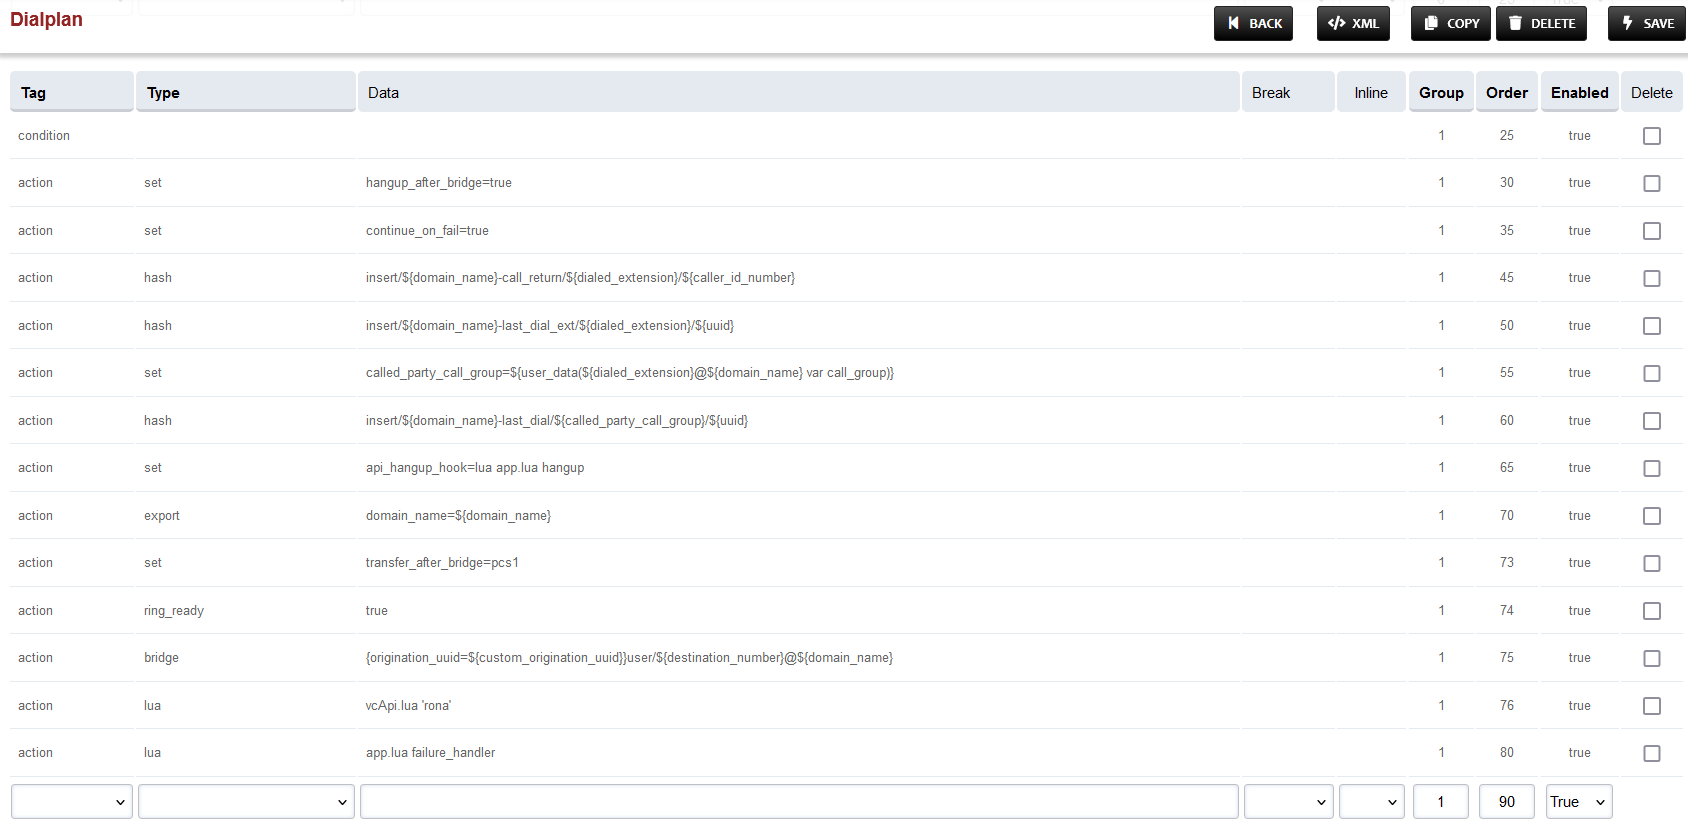
Add the following information to the last group:
|
Tag |
Type |
Data |
Group |
Order |
Enabled |
|
action |
set |
transfer_after_bridge=pcs1 |
1 |
73 |
true |
|
action |
ring_ready |
true |
1 |
74 |
true |
|
action |
lua |
vcApi.lua 'rona' |
1 |
76 |
true |
-
Secondly, replace the Data field in the line with Order 75 with: {origination_uuid=${custom_origination_uuid}}user/${destination_number}@${domain_name}
-
The result will look like this:
-
Save the changes by pressing SAVE button in top right corner.
Changes in Global Variables dialplan
-
Login to Media Server web interface.
-
Open in browser: https://IP-addr, where IP-addr is the IP address of the Media Server.
-
-
Add the username and password that was shown upon installation of Media Server and press LOGIN.
-
Press the IP address in the top right and select the Domain created in the Domain creation section above:

-
Open the Dialplan Manager section under the Dialplan tab.
-
Find and open the global-variables dialplan.
-
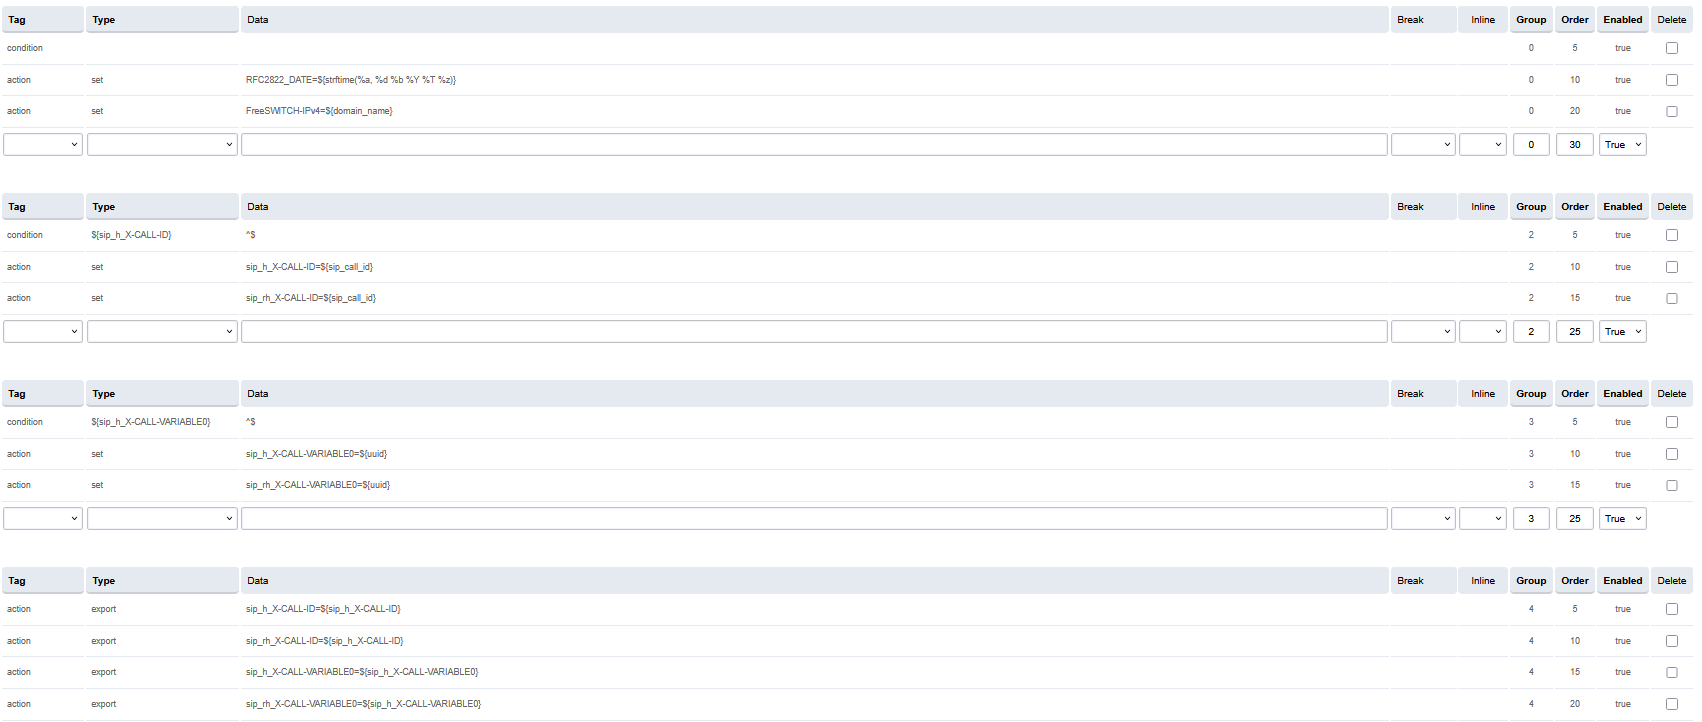
Add the following information to this dialplan (to add custom values in the Type column, select a random value then click on it to edit):
|
Tag |
Type |
Data |
Group |
Order |
Enabled |
|---|---|---|---|---|---|
|
action |
set |
FreeSWITCH-IPv4=${domain_name} |
0 |
20 |
true |
|
Tag |
Type |
Data |
Group |
Order |
Enabled |
|---|---|---|---|---|---|
|
condition |
${sip_h_X-CALL-ID} |
^$ |
2 |
5 |
true |
|
action |
set |
sip_h_X-CALL-ID=${sip_call_id} |
2 |
10 |
true |
|
action |
set |
sip_rh_X-CALL-ID=${sip_call_id} |
2 |
15 |
true |
|
Tag |
Type |
Data |
Group |
Order |
Enabled |
|---|---|---|---|---|---|
|
condition |
${sip_h_X-CALL-VARIABLE0} |
^$ |
3 |
5 |
true |
|
action |
set |
sip_h_X-CALL-VARIABLE0=${uuid} |
3 |
10 |
true |
|
action |
set |
sip_rh_X-CALL-VARIABLE0=${uuid} |
3 |
15 |
true |
|
Tag |
Type |
Data |
Group |
Order |
Enabled |
|---|---|---|---|---|---|
|
action |
export |
sip_h_X-CALL-ID=${sip_h_X-CALL-ID} |
4 |
5 |
true |
|
action |
export |
sip_rh_X-CALL-ID=${sip_h_X-CALL-ID} |
4 |
10 |
true |
|
action |
export |
sip_h_X-CALL-VARIABLE0=${sip_h_X-CALL-VARIABLE0} |
4 |
15 |
true |
|
action |
export |
sip_rh_X-CALL-VARIABLE0=${sip_h_X-CALL-VARIABLE0} |
4 |
20 |
true |
-
The result will look like:
-
Save the changes by pressing SAVE button in top right corner.
Changes in Call Recording Dialplan
-
Login to Media Server web interface.
-
Open in browser: https://IP-addr, where IP-addr is the IP address of the Media Server.
-

-
Add the username and password that was shown upon installation of Media Server and press LOGIN.
-
Press the IP address in the top right and select the Domain created in the Domain creation section above:

-
Open the Dialplan Manager section under the Dialplan tab.

-
Find and open the user_record dialplan.
-
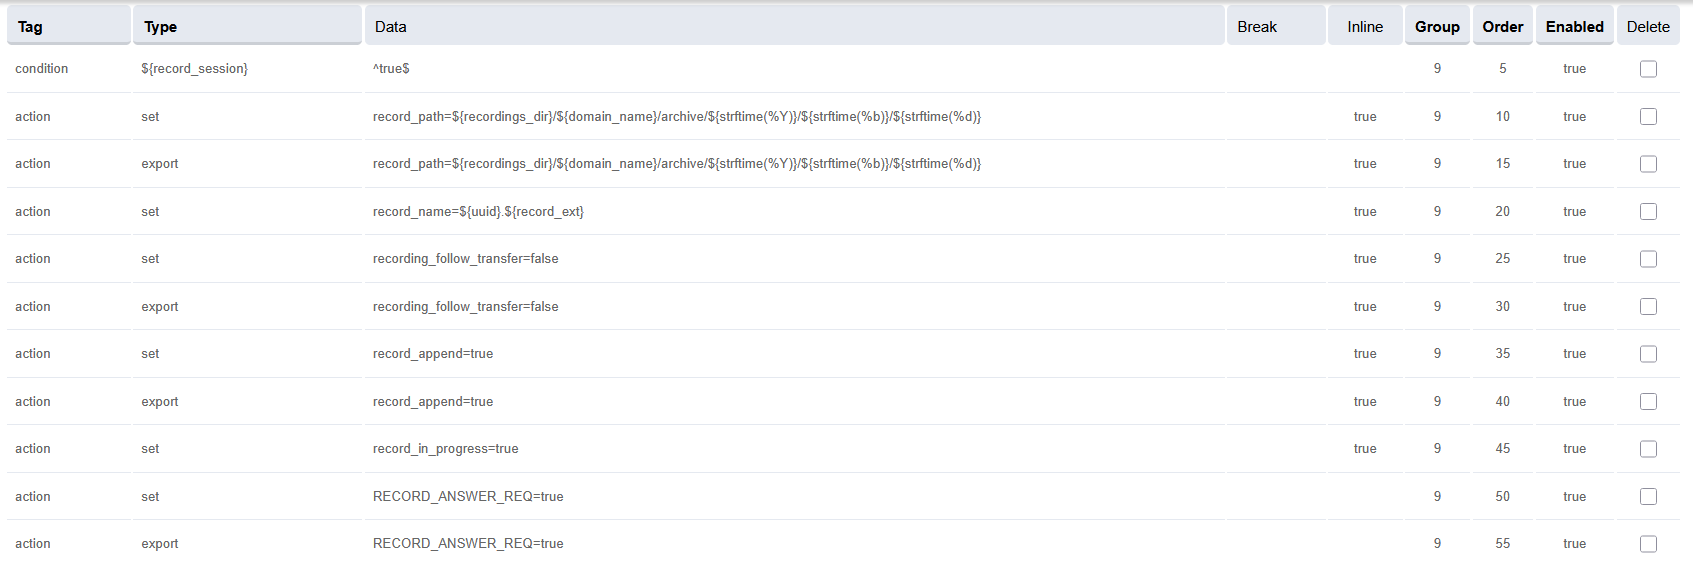
Make sure to delete the lines present previously in Group 9 apart from the first one, and NOT in the table and image below.
-
Add the following data to the table, such that the final version of Group 9 looks like the image below:
|
Tag |
Type |
Data |
Inline |
Group |
Order |
Enabled |
|---|---|---|---|---|---|---|
|
condition |
${record_session} |
^true$ |
|
9 |
5 |
true |
|
action |
set |
record_path=${recordings_dir}/${domain_name}/archive/${strftime(%Y)}/${strftime(%b)}/${strftime(%d)} |
true |
9 |
10 |
true |
|
action |
export |
record_path=${recordings_dir}/${domain_name}/archive/${strftime(%Y)}/${strftime(%b)}/${strftime(%d)} |
true |
9 |
15 |
true |
|
action |
set |
record_name=${uuid}.${record_ext} |
true |
9 |
20 |
true |
|
action |
set |
recording_follow_transfer=false |
true |
9 |
25 |
true |
|
action |
export |
recording_follow_transfer=false |
true |
9 |
30 |
true |
|
action |
set |
record_append=true |
true |
9 |
35 |
true |
|
action |
export |
record_append=true |
true |
9 |
40 |
true |
|
action |
set |
record_in_progress=true |
true |
9 |
45 |
true |
|
action |
set |
RECORD_ANSWER_REQ=true |
- |
9 |
50 |
true |
|
action |
export |
RECORD_ANSWER_REQ=true |
- |
9 |
55 |
true |
-
Save the changes by pressing SAVE button in top right corner.
Disable voicemail Dialplan
-
Login to Media Server web interface.
-
Open in browser: https://IP-addr, where IP-addr is the IP address of the Media Server.
-
-
Add the username and password that was shown upon installation of Media Server and press LOGIN.
-
Press the in the top right and select the Domain created in the Domain creation section above:
-
Once the domain is selected then click on the dilaplan menu and on the drop down section click the dialplan manager. once the dial plan are open search for the
voicemaildilaplan
-
Cline on the voicemail dialplan is opened like below, then turned off the
Enabledbutton to make the dialplan false/turnoff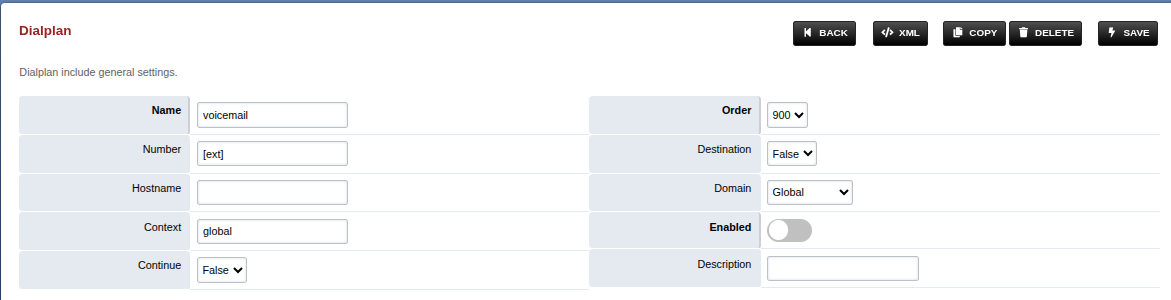
Changes in conference profile
Changes in conference profile
-
Login to Media Server web interface.
-
Open in browser: https://IP-addr, where IP-addr is the IP address of the Media Server.
-
-
Add the username and password that was shown upon installation of Media Server and press LOGIN.
-
Press the IP address in the top right and select the Domain created in the Domain creation section above:
-
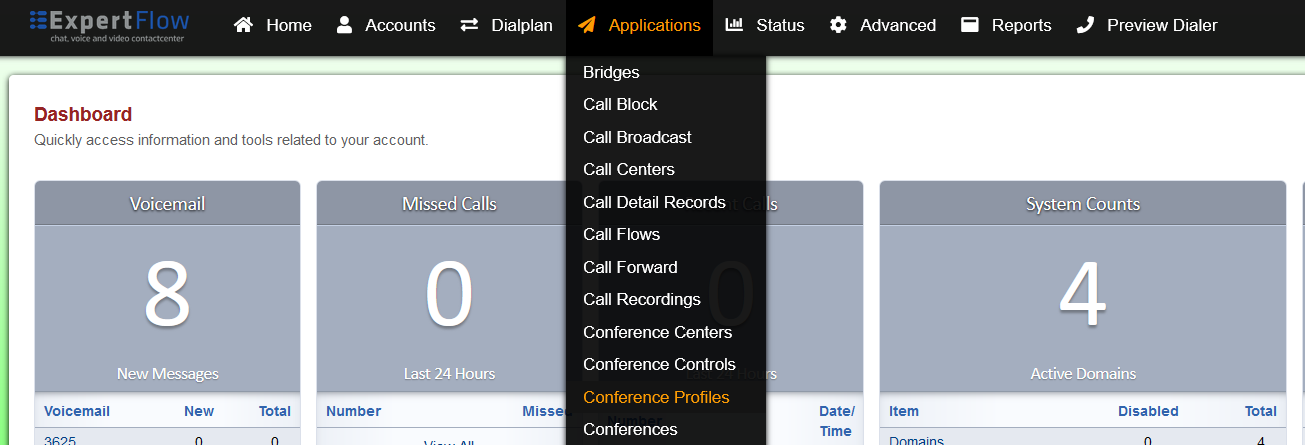
Open the Conference Profiles section under the Applications tab:
-
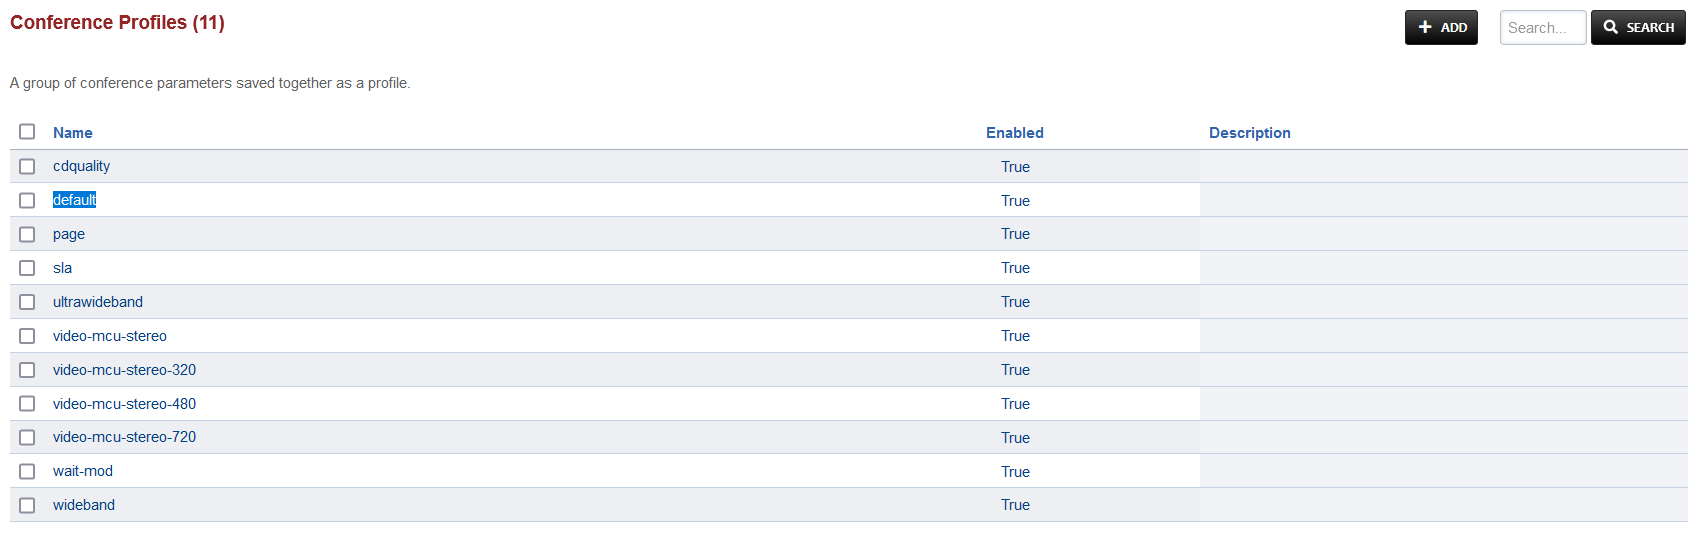
Open the profile named default:
-
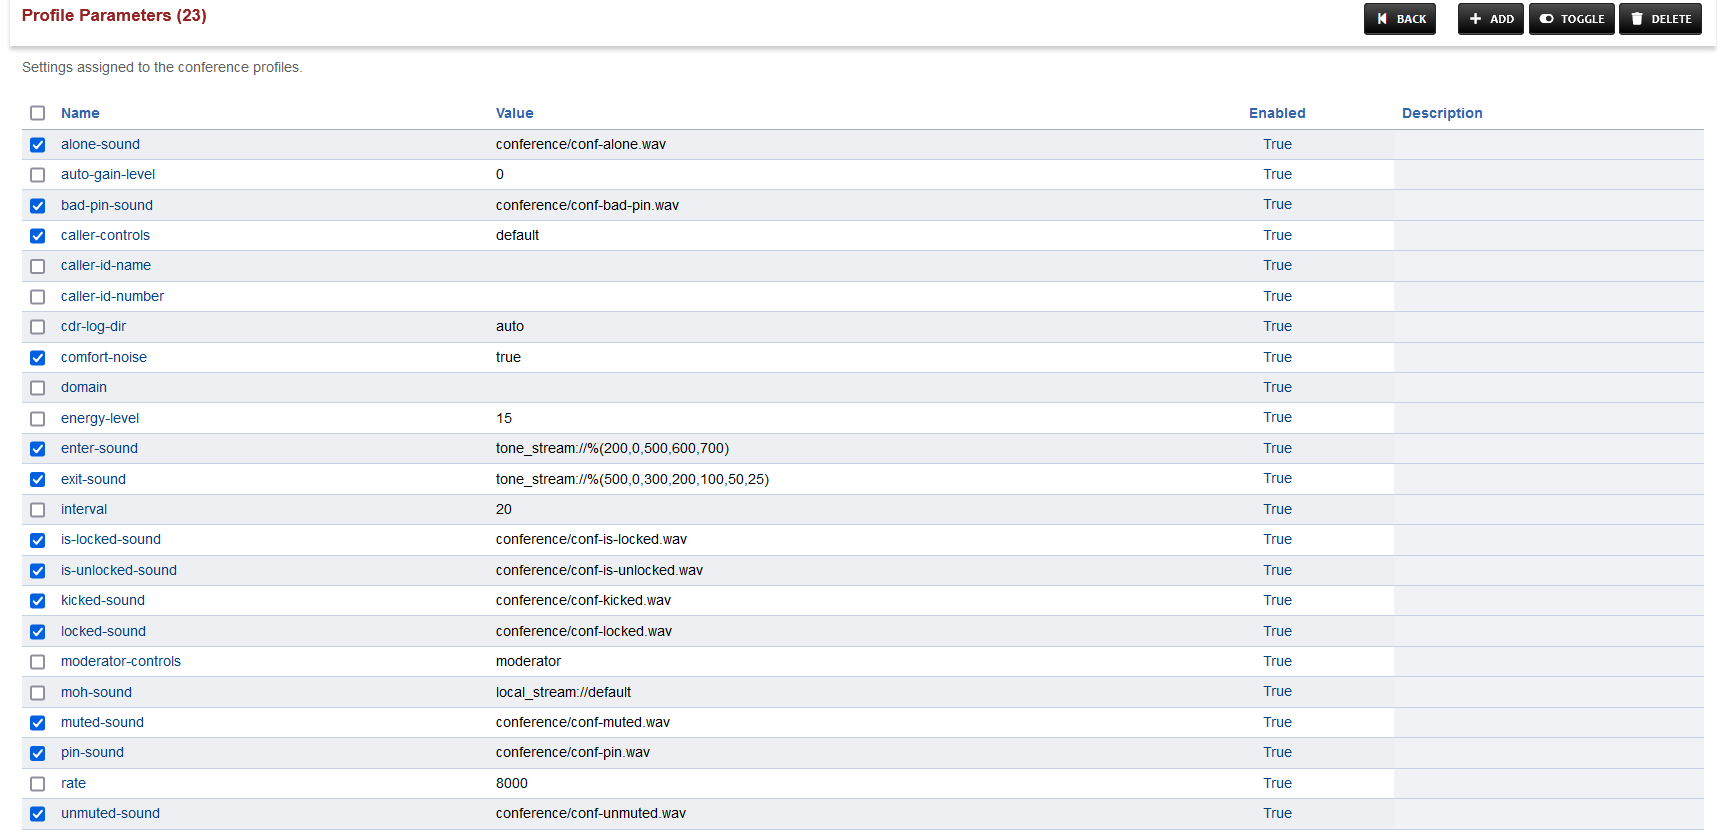
Under the Profile Parameters, find the following keywords under the Name column and click the checkbox:
-
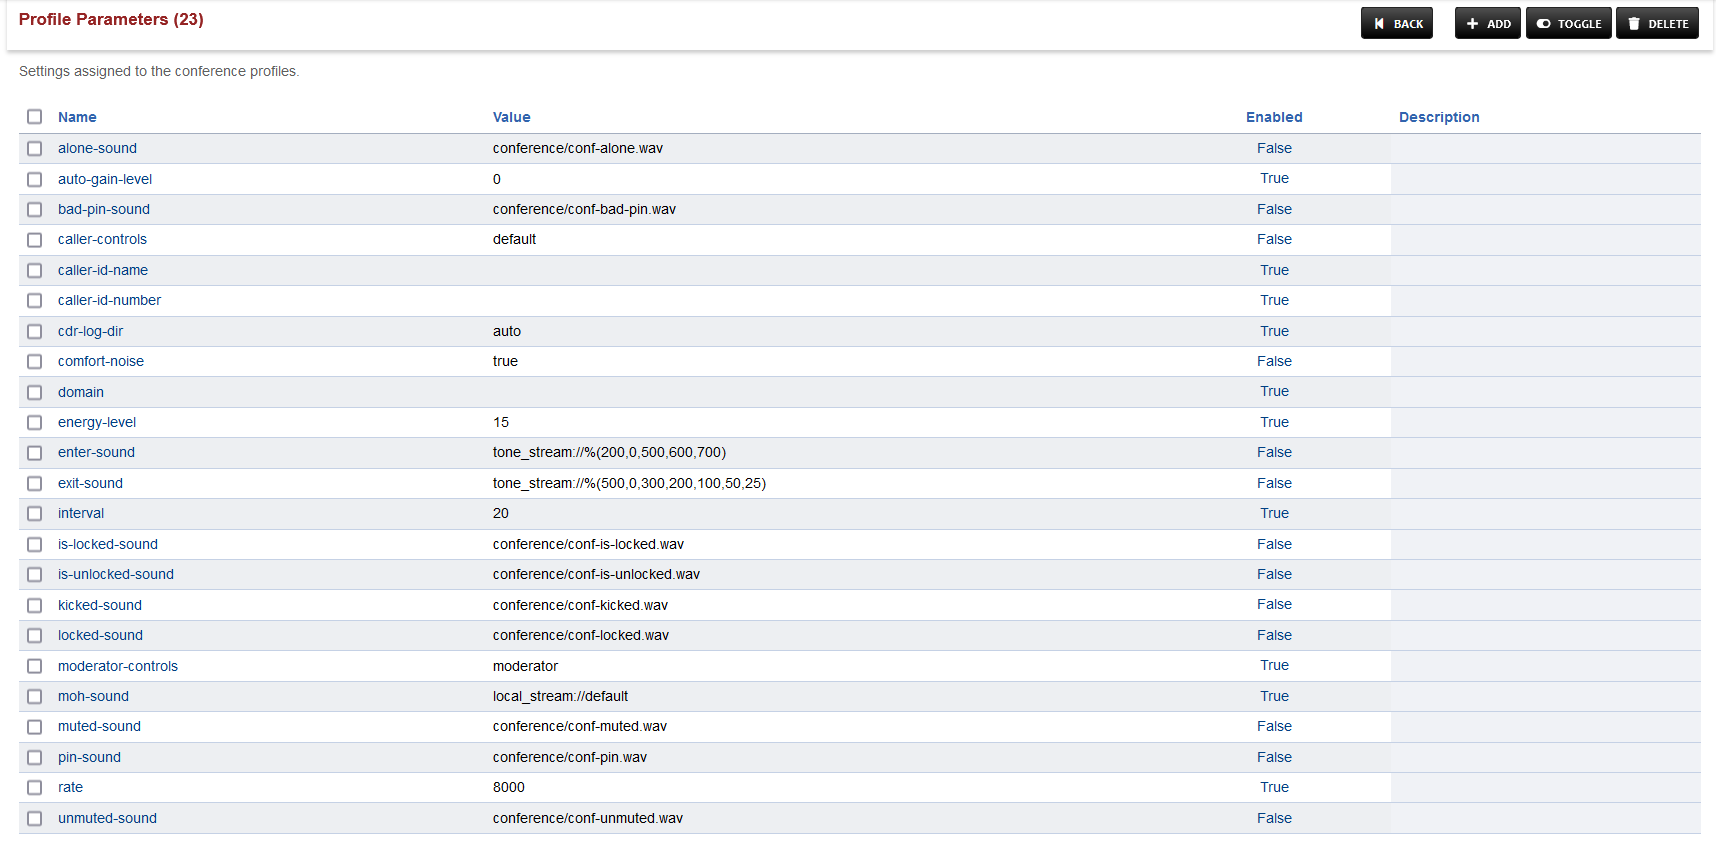
Press TOGGLE in the top right and choose CONTINUE in the prompt shown.
-
Save the changes by pressing SAVE button in top right corner.
Configure SIP Trunk and routes
Configure SIP Trunk(Gateway) for outbound calls
-
Login to Media Server web interface.
-
Open in browser: https://IP-addr, where IP-addr is the IP address of the Media Server.
-

-
Add the username and password that was shown upon installation of Media Server and press LOGIN.
-
Press the IP address in the top right and select the Domain created in the Domain creation section above:
-
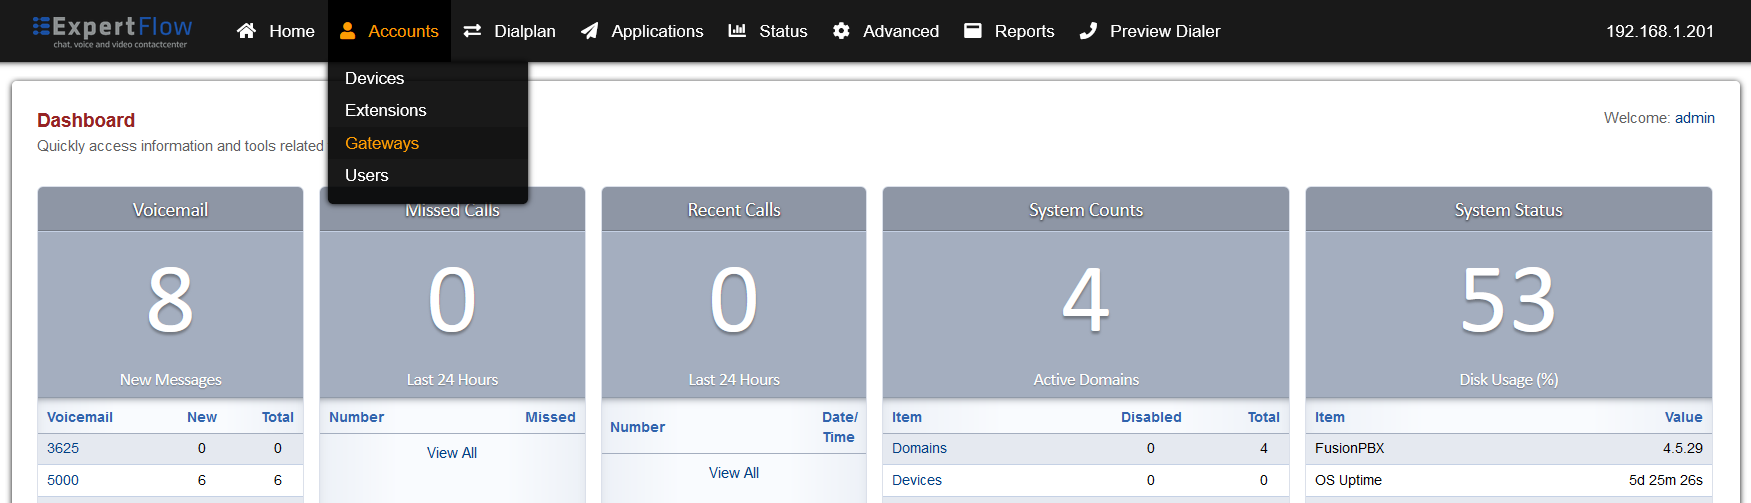
Open the Gateways section under the Accounts tab.
-
Press the ADD button in the top right.

-
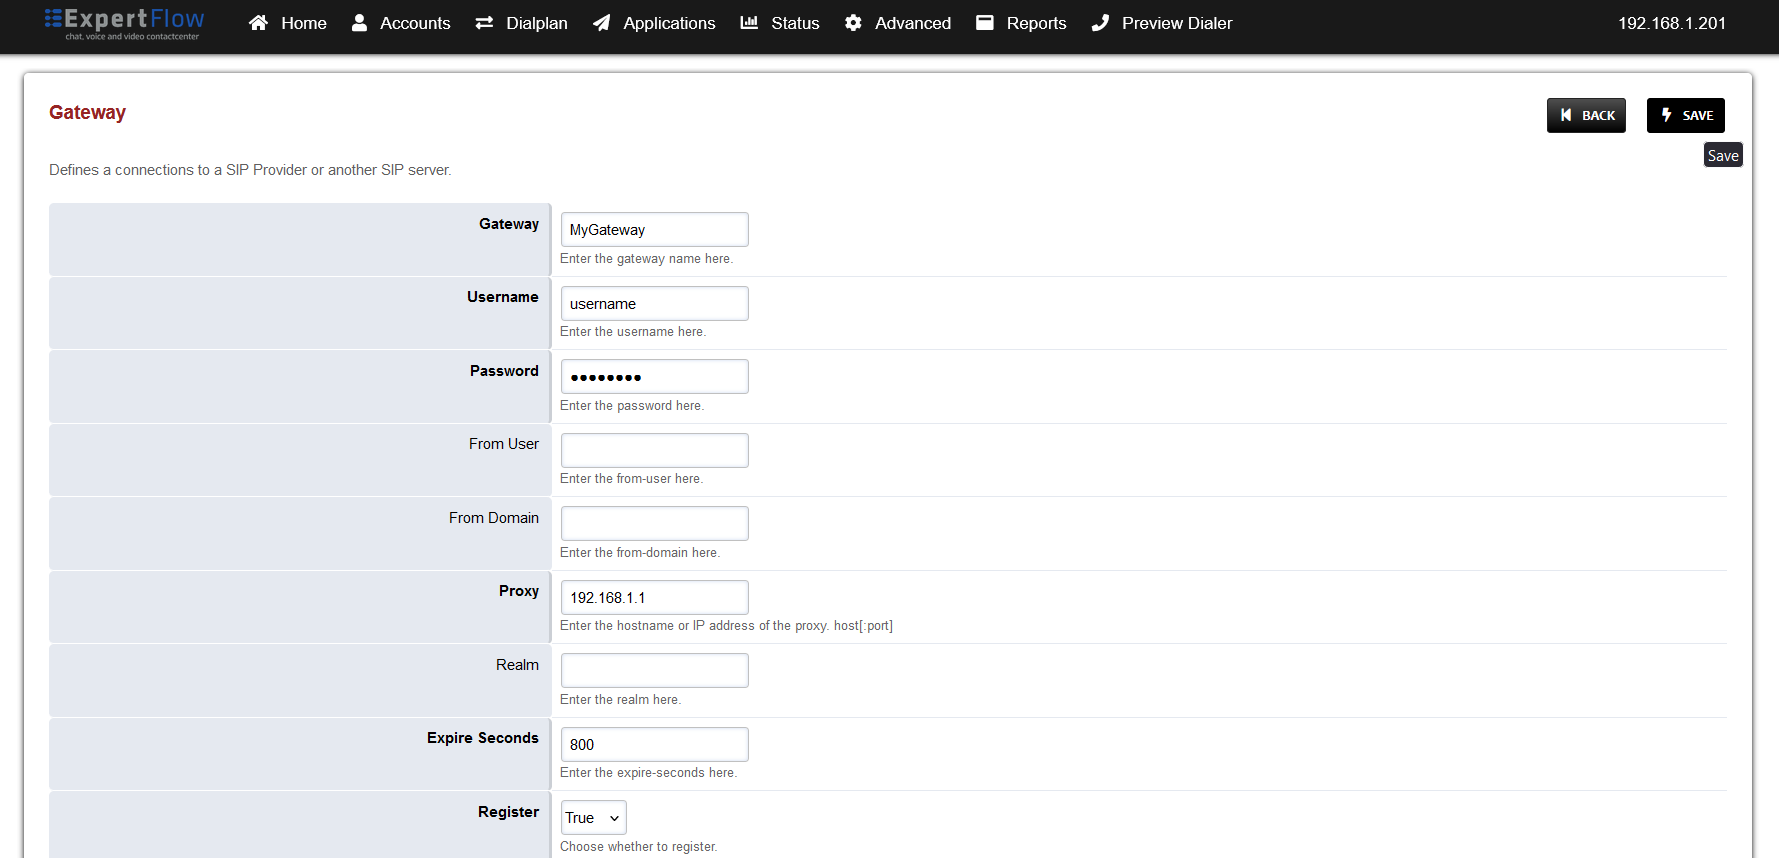
Set the following fields:
-
Gateway: A name of your choice e.g. MySipTrunk
-
Username: The username of the SIP Trunk. Not needed for IP-based SIP trunks.
-
Password: The password of the SIP Trunk. Not needed for IP-based SIP trunks.
-
Proxy: The IP address and port of the SIP trunk e.g. 192.168.25.35:5060.
-
Register: Set to True. Set to False for IP-based SIP trunks.
-
-
Press the SAVE button on the top right.
-
Open this newly created gateway and note the URL opened in the browser.

-
Add the IP address of the SIP trunk to the Media Server ACL:
-
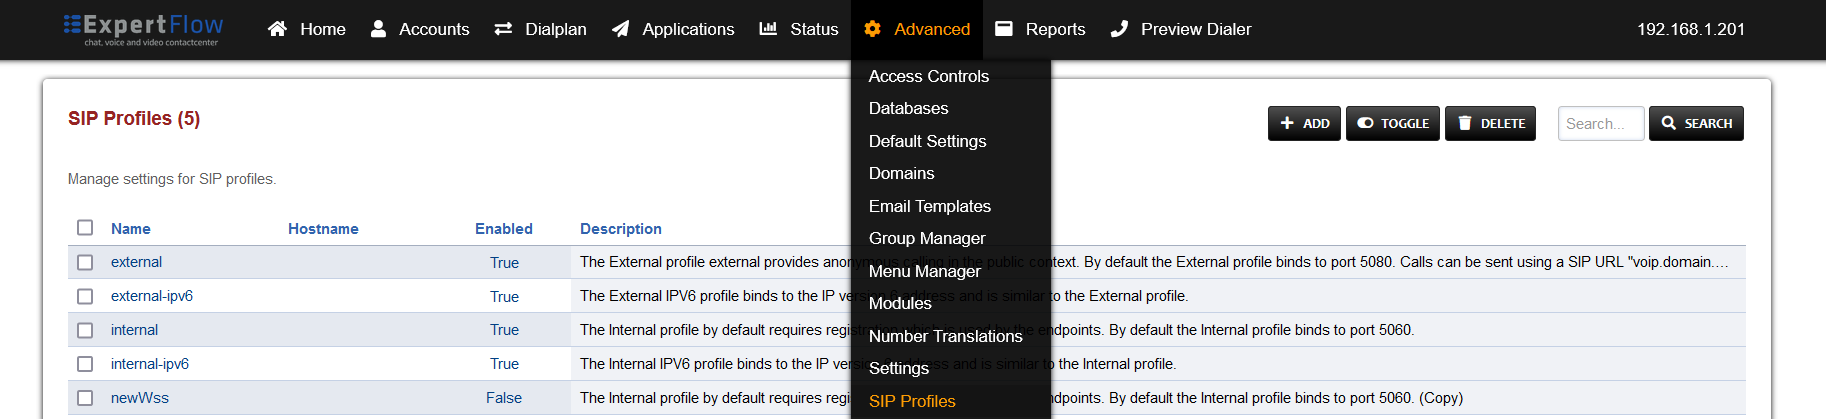
Open SIP Profiles under the Advanced tab.
-
-
Open the external profile and note the value of the apply-register-acl field.

-
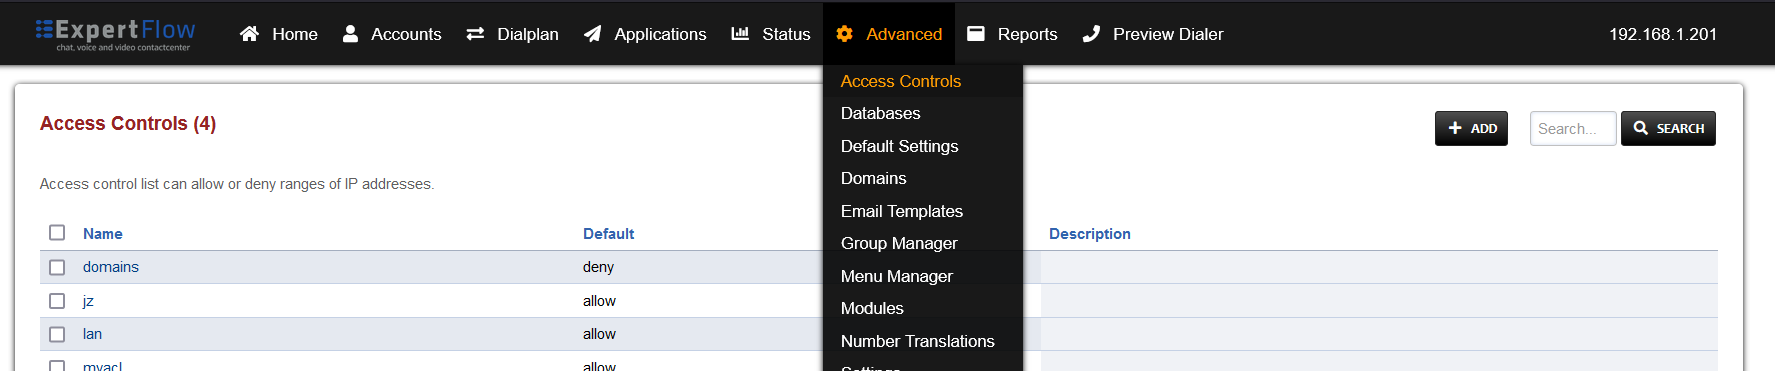
Open Access controls under the Advanced tab.
-
Open the entry that matches the aforementioned apply-register-acl field.
-
At the bottom add an entry where the the Type is set to ‘allow’ and the CIDR field contains the address of the SIP Trunk.
-
Press the SAVE button on the top right.
-
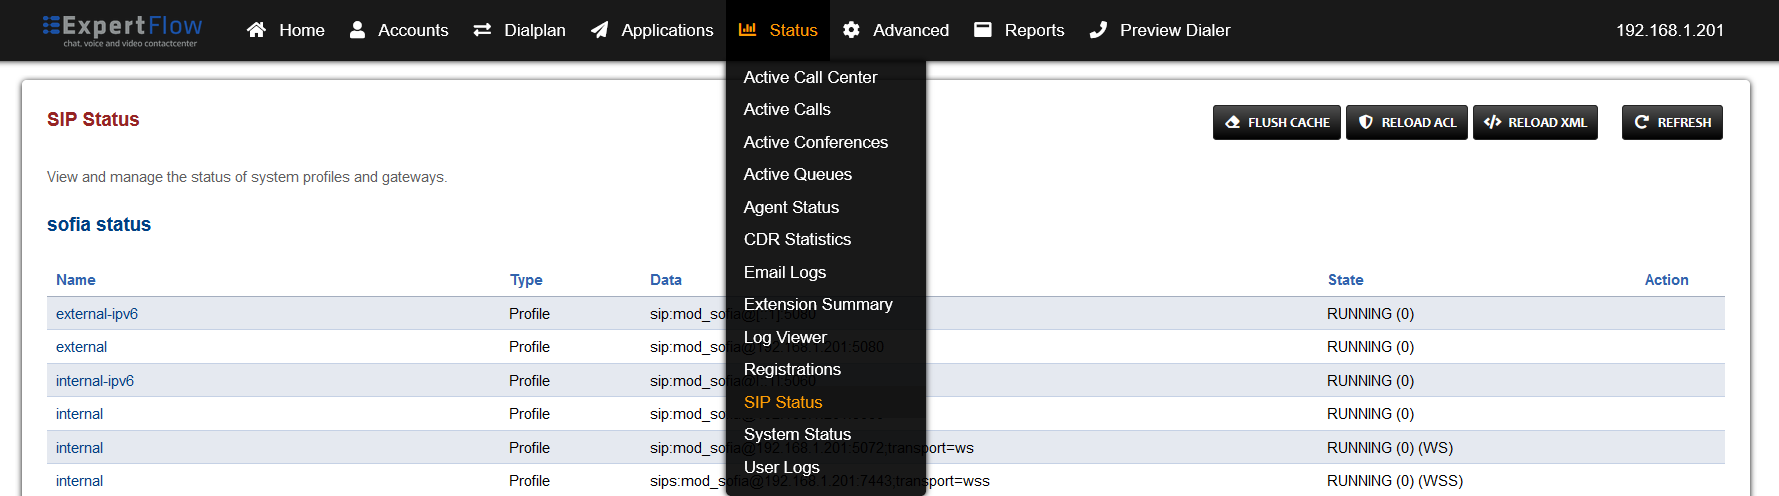
Open SIP Status under the Status tab.
-
Press the Reload ACL button at the top right.
-
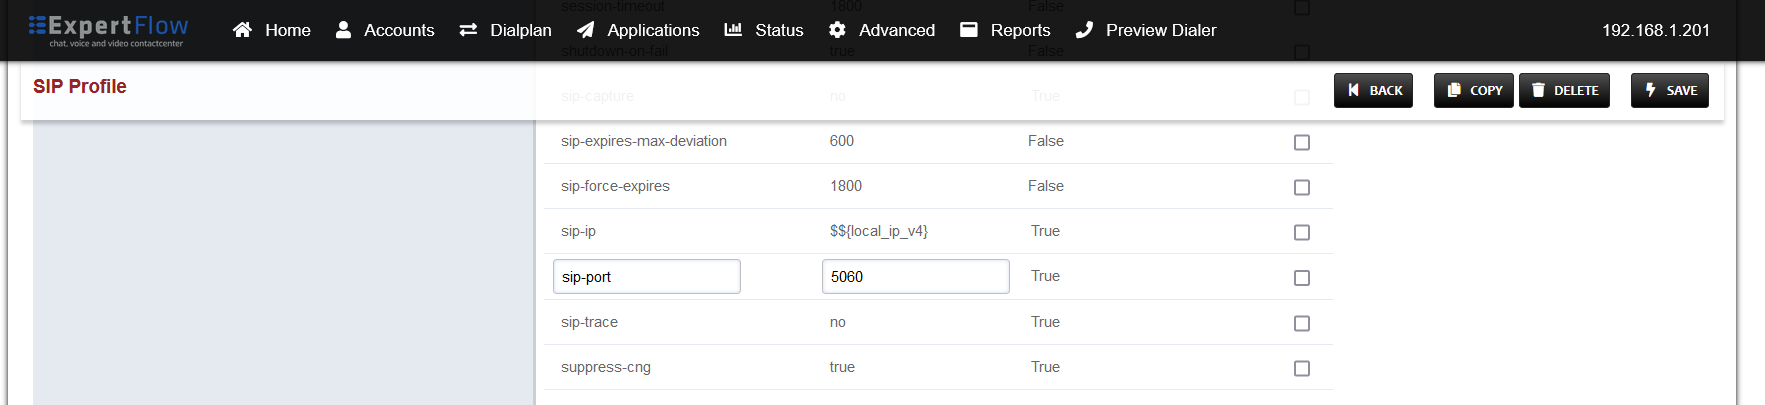
Open SIP Profiles under the Advanced tab.
-
Open the external profile and note the value of the sip-port field.

-
-
Back out via the BACK button on the top right.
-
Open the internal profile and note the value of the sip-port field.
-
Open a terminal and SSH into the Media Server machine via the command
-
ssh Media-Server-Username@Media-Server-IP-Address
-
-
Enter the Media Server SSH password when prompted.
-
Enter and run the command
-
su
-
-
And enter the Media Server root password.
-
Run the command
-
sudo iptables -A INPUT -p tcp -m tcp --dport PORT -j ACCEPT -
Where PORT is the port noted down in the previous steps. Run the command once for each port.
-
-
Run the command
-
sudo iptables-save
-
-
Contact the SIP Trunk provider and have all traffic from the Media Server machine public IP address allowed.
Configuring route For Outbound calls
-
Login to Media Server web interface.
-
Open in browser: https://IP-addr, where IP-addr is the IP address of the Media Server.
-
-
Add the username and password that was shown upon installation of Media Server and press LOGIN.
-
Press the IP address in the top right and select the Domain created in the Domain creation section above:
-
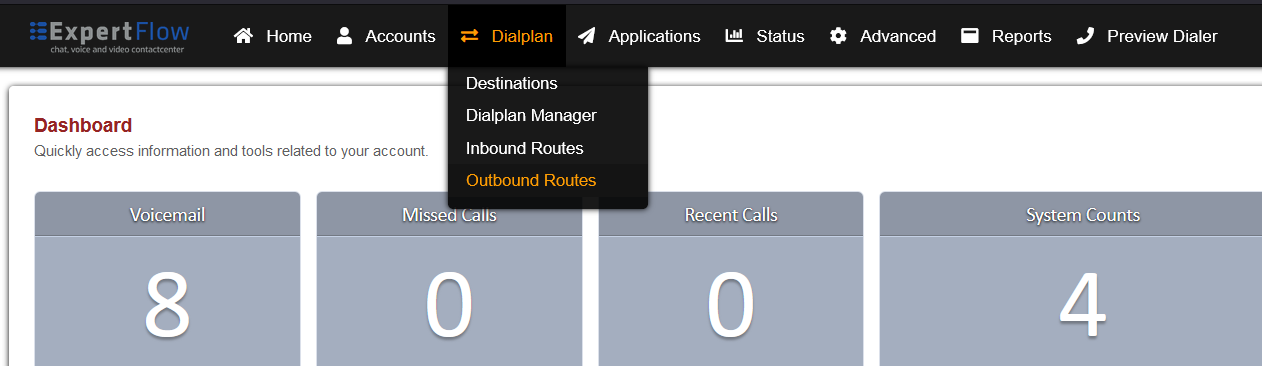
Open the Outbound Routes section under the Dialplans tab.
-
Press the ADD button in the top right.

-
Set the following fields :
-
Gateway = The name of the gateway configured above.
-
Dialplan Expression = The format of the number accepted by the SIP trunk e.g. for 11 digits the format is ^(\d{11})$
-
-
Press the SAVE button on top right corner.
-
Re-open this newly created Outbound Route.
-
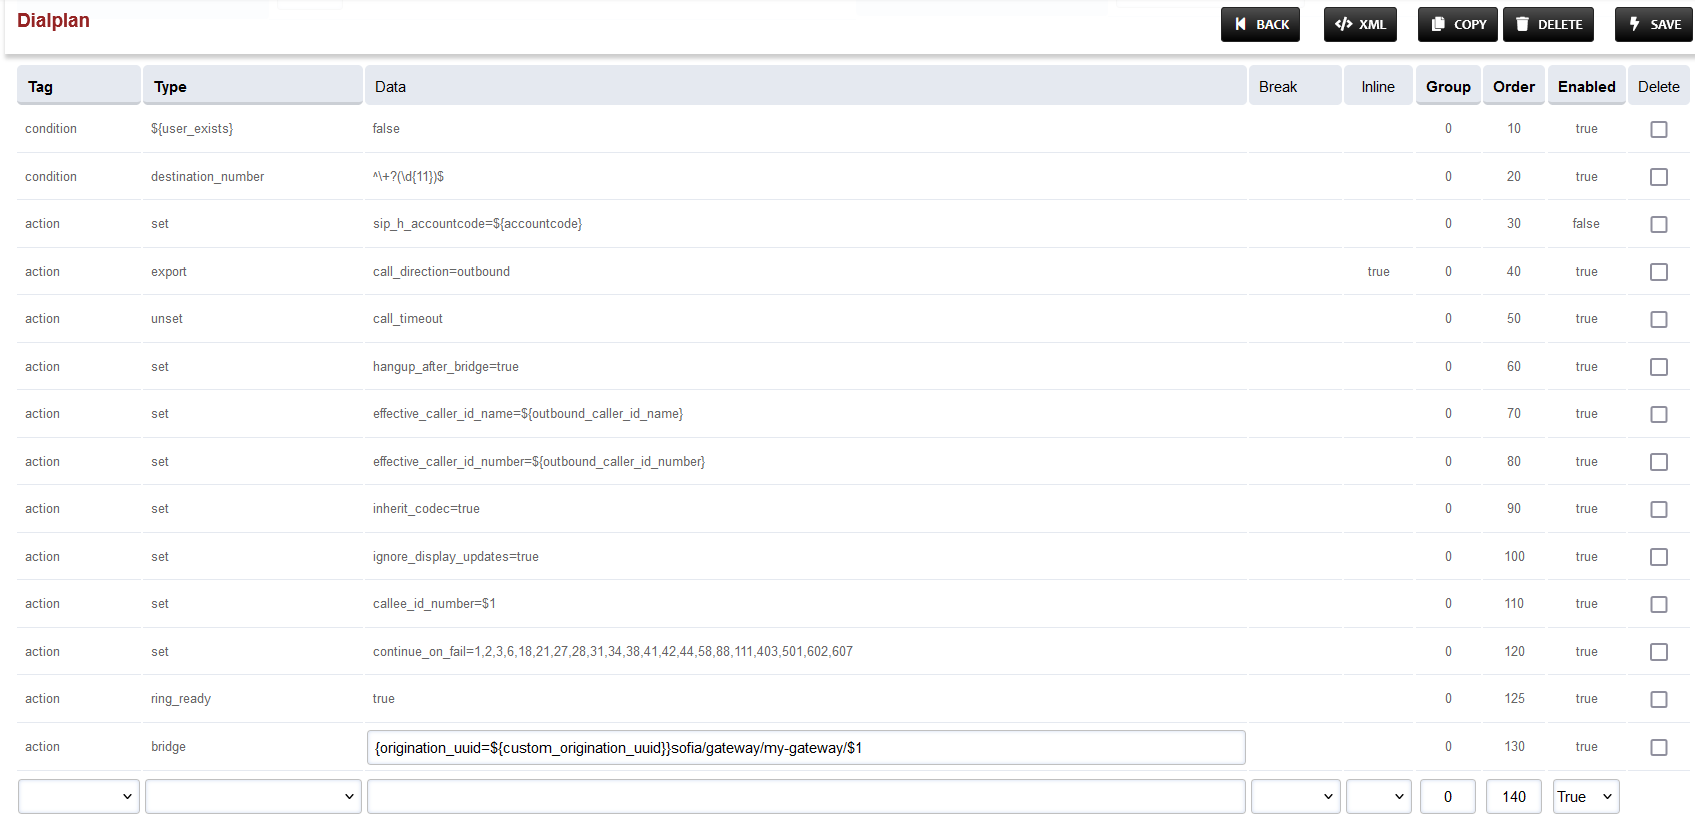
Add the following information to the last group:
|
Tag |
Type |
Data |
Group |
Order |
Enabled |
|
action |
ring_ready |
true |
0 |
125 |
true |
-
To the last row, where the Type field is bridge, append {origination_uuid=${custom_origination_uuid}} to the start of the field in the Data column. The result will look as below:
Configuring route For Inbound calls
-
Login to Media Server web interface.
-
Open in browser: https://IP-addr, where IP-addr is the IP address of the Media Server.
-
-
Add the username and password that was shown upon installation of Media Server and press LOGIN.
-
Press the IP address in the top right and select the Domain created in the Domain creation section above:
-
Open the Destinations section under the Dialplans tab.
-
Press the ADD button in the top right.

-
In the Destination field set the inbound dialing number provided by the SIP trunk provider in the format ^dialing_number$.
-
e.g. for a dialing number of 1234, the field must have the value ^1234$.
-
-
Press the SAVE button on top right Corner.
-
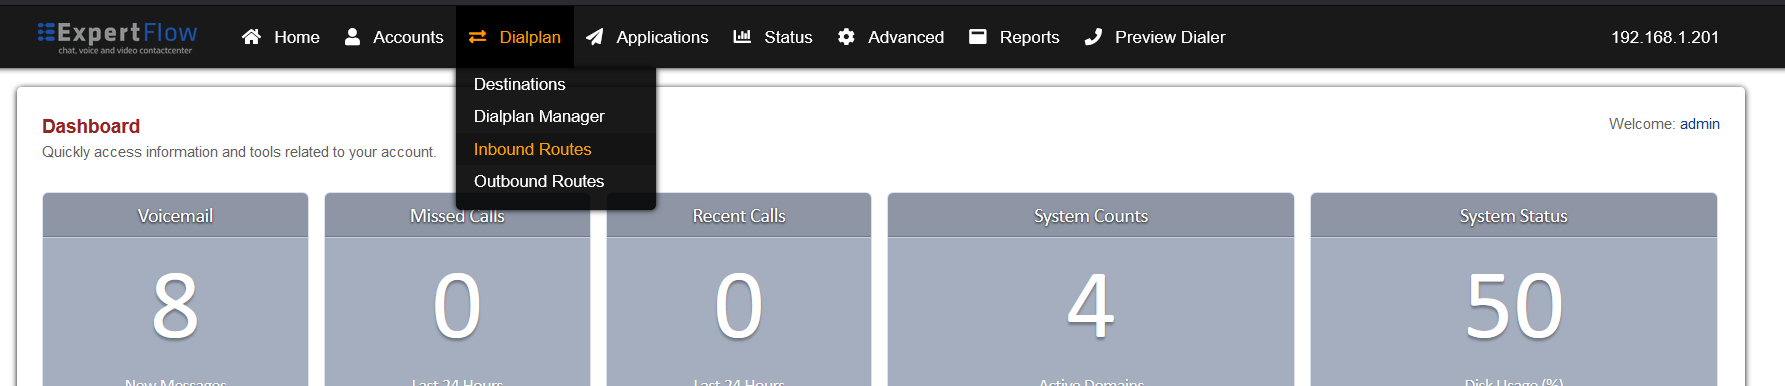
Open the Inbound Routes section under the Dialplans tab.
-
Press the ADD button in the top right.

-
Set the following fields :
-
Name = A name of your choice.
-
Destination Number = The destination created above.
-
Action = From the Extensions list select the number chosen as the destination number in the CxIvr dialplan section above.
-
-
Press the SAVE button on top right Corner.
Changes in SIP Profile
Changes in SIP Profile
-
Login to Media Server web interface.
-
Open in browser: https://IP-addr, where IP-addr is the IP address of the Media Server.
-
-
Add the username and password that was shown upon installation of Media Server and press LOGIN.
-
Press the IP address in the top right and select the Domain created in the Domain creation section above:
-
Open SIP Profiles under the Advanced tab.
-
Open the internal profile, scroll down to the ws-binding and wss-binding fields, and set their Enabled column values to True.

-
Find the disable-transcoding field and its Value and Enabled columns to true.
-
Find the nat-options-ping fields and its Value and Enabled columns to true.
-
Find the liberal-dtmf fields and its Value and Enabled columns to true.
-
At the bottom add the data:
|
Name |
Value |
Enabled |
|---|---|---|
|
apply-candidate-acl |
0.0.0.0/0 |
True |
-
Press the SAVE button on the top right.
-
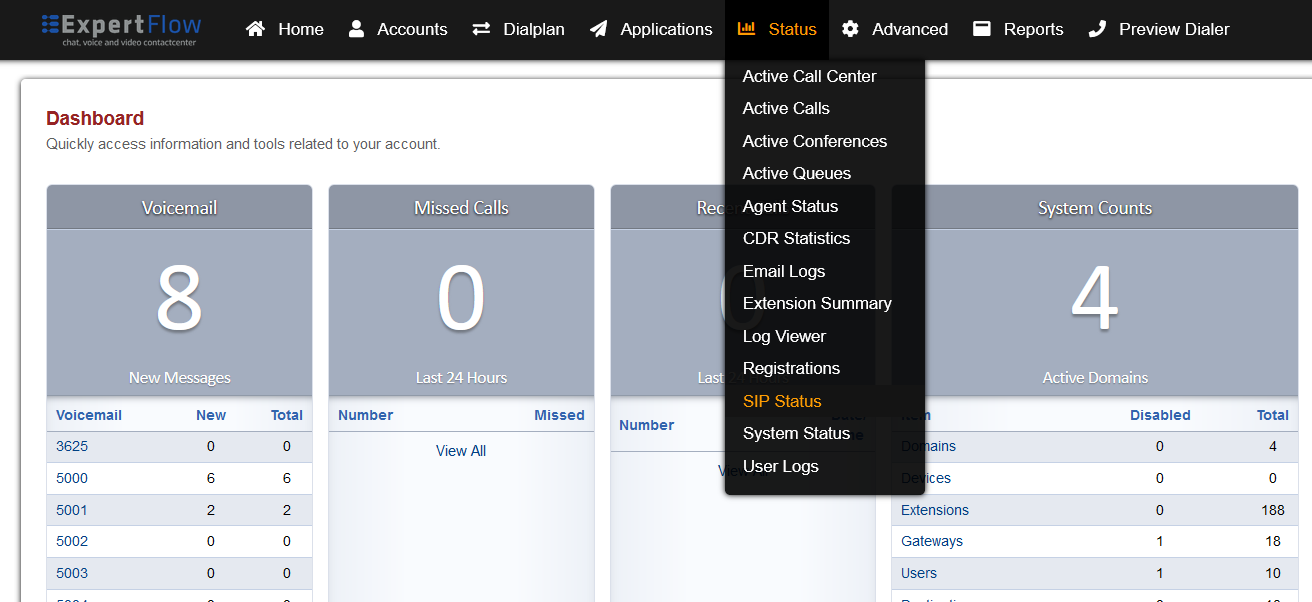
Open SIP Status under the Status tab.
-
Locate the line sofia status profile internal and to its right press the RESCAN button, followed by the RESTART button after the page reloads.

Configure Access Control List (ACL)
Configure Access Control List (ACL)
For the Voice Connector and Dialer to be able to access the Freeswitch ESL for communicating with Media Server, their IP address must be added to the ACL.
-
Login to Media Server web interface.
-
Open in browser: https://IP-addr, where IP-addr is the IP address of the Media Server.
-
-
Add the username and password that was shown upon installation of Media Server and press LOGIN.
-
Press the IP address in the top right and select the Domain created in the Domain creation section above:
-
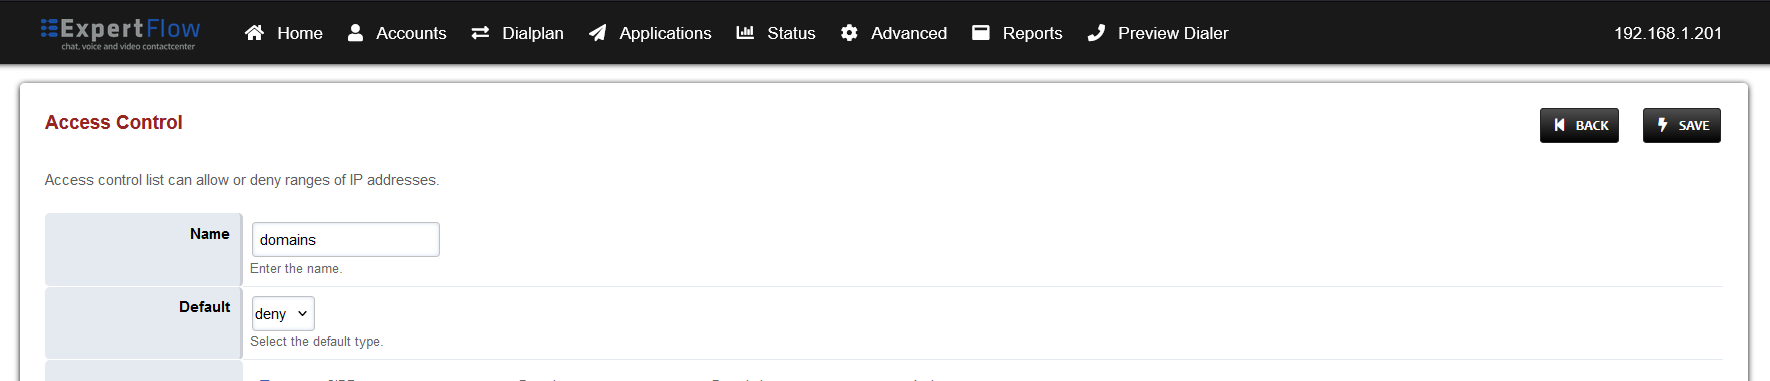
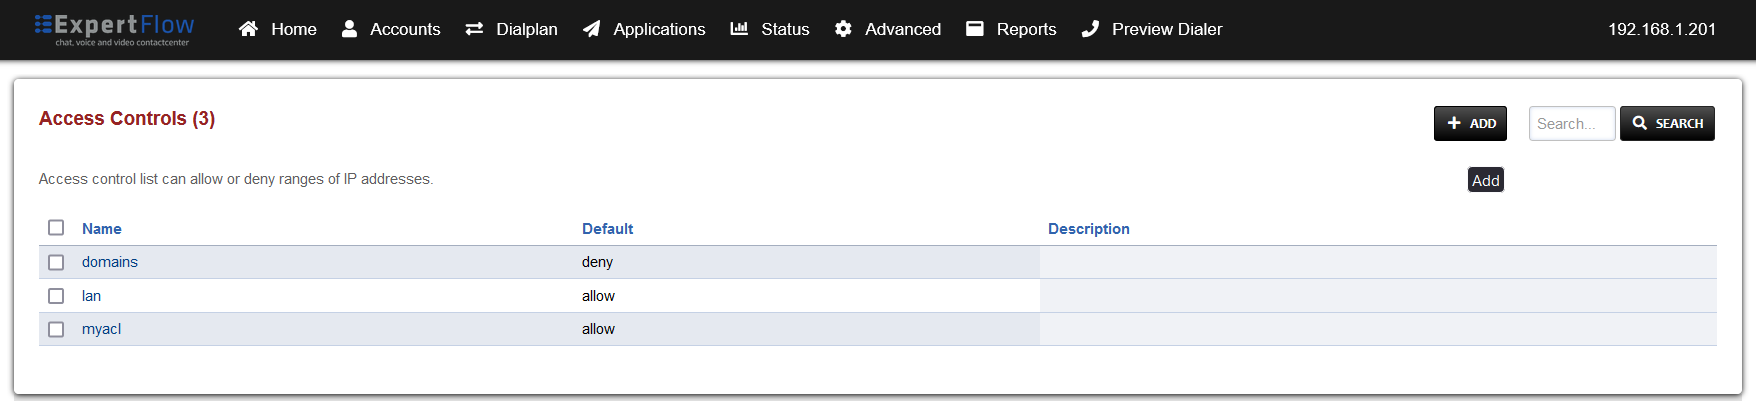
Open the Access Control List from the Advanced tab.
-
Create a new ACL with the Add button.
-
Set the name to esl, the Default to deny and add the following IP addresses, with the Type fields set to allow:
-
127.0.0.1
-
The IP address of the Media Server e.g. 192.168.1.17.
-
The IP address of the server the Voice connector is running on e.g. 192.168.1.201.
-
The IP address of the server the Dialer is running on e.g. 192.168.1.106.
-
Lastly, add the IP addresses of the docker containers for the Voice connector and Dialer.
-
On the Voice connector and Dialer servers, use the command docker ps to list the containers.
-
-

-
Run the command:
-
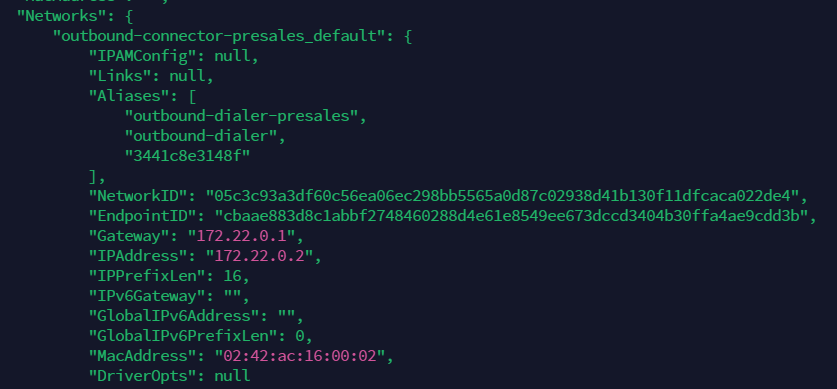
docker inspect containerID -
Scroll down to the Networks object and find the Gateway and IPAddress fields.
-
-
Copy these two addresses to the esl ACL.
-
Make sure to do this process for both the Voice connector and dialer.
-
-
Click the Save button and go to the SIP Status with from the Status tab.
-
Click the Reload ACL button on the top right.

Configure Event Socket Library (ESL)
Configure Event Socket Library (ESL)
-
Login to Media Server web interface.
-
Open in browser: https://IP-addr, where IP-addr is the IP address of the Media Server.
-

-
Add the username and password that was shown upon installation of Media Server and press LOGIN.
-
Press the IP address in the top right and select the Domain created in the Domain creation section above:

-
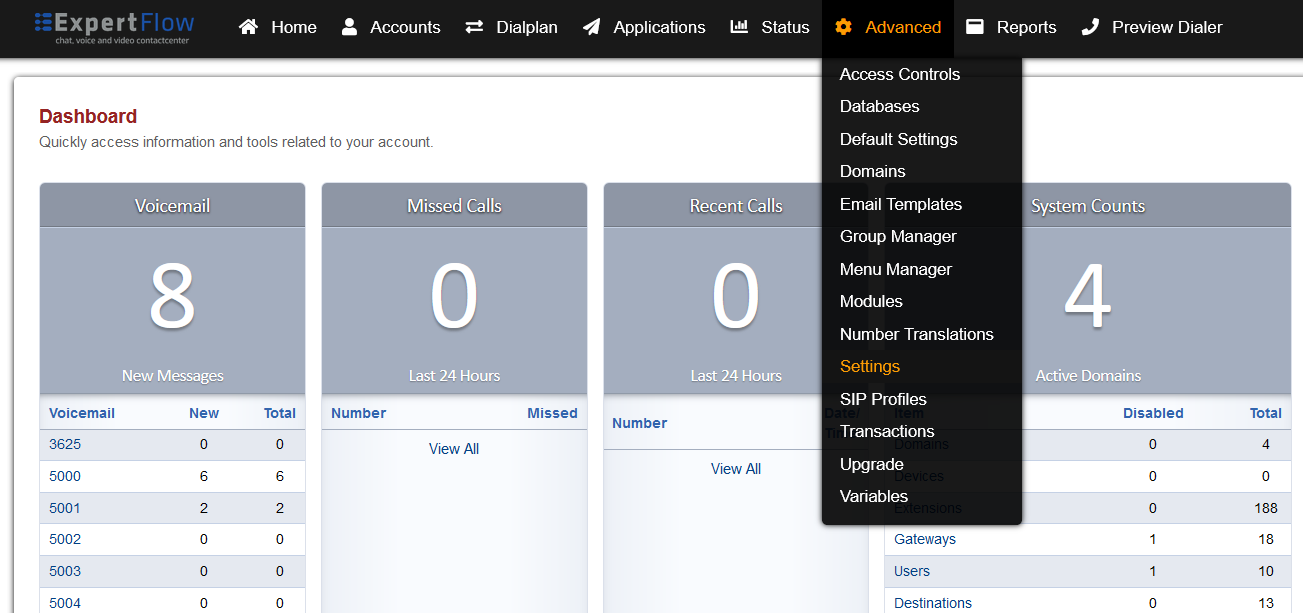
Open Settings from the Advanced tab. (If the option is unavailable, skip to step 6)
-
Change the Event Socket IP Address to 0.0.0.0, and the Event Socket ACL to esl.
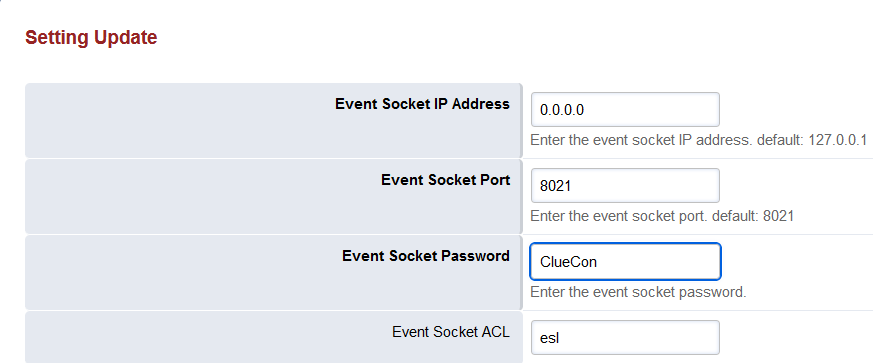
-
Optionally, change the Event Socket Password to the a different value, or leave as default ClueCon.
-
If the password is changed, then the same must be set in the environment files for the voice connector and dialer.
-
If the password is changed, update it in the environment variables for the and Dialer docker containers.
-
-
SSH into the Media Server.
ssh username@server-ip -
Enter user password and press ENTER.
-
Use command
su -
Enter root password and press ENTER.
-
If the Settings option in Step 4 was unavailable, then run the following command
echo '<configuration name="event_socket.conf" description="Socket Client"> <settings> <param name="nat-map" value="false"/> <param name="listen-ip" value="0.0.0.0"/> <param name="listen-port" value="8021"/> <param name="password" value="PASSWORD"/> <param name="apply-inbound-acl" value="esl"/> </settings> </configuration>' > /etc/freeswitch/autoload_configs/event_socket.conf.xml-
In following command replace customEslPass with your chosen password, then run the command
sed -i 's/PASSWORD/customEslPass/g' /etc/freeswitch/autoload_configs/event_socket.conf.xml
-
-
Run the command to restart Media Server with the new ESL settings:
systemctl restart freeswitch -
Run the following command:
echo "switch.event_socket.host = 0.0.0.0 switch.event_socket.port = 8021 switch.event_socket.password = EslPass" | sudo tee -a /etc/fusionpbx/config.conf-
In following command replace customEslPass with the password chosen in Step 6a, then run the command
sed -i 's/EslPass/customEslPass/g' /etc/fusionpbx/config.conf
-
-
Log out of the Media Server web interface and log back in.
Media Server Config Files
CX Voice Recording Components
Follow the guide here to deploy the recording link uploader and middleware components.