Follow the steps below for setting up Keycloak for VRS
-
Go to FQDN:8088/auth and click on the Administration console
-
Log in to the administration console using the password set in environment variables (KEYCLOAK_USER and KEYCLOAK_PASSWORD). The default username is admin, and the password is admin
-
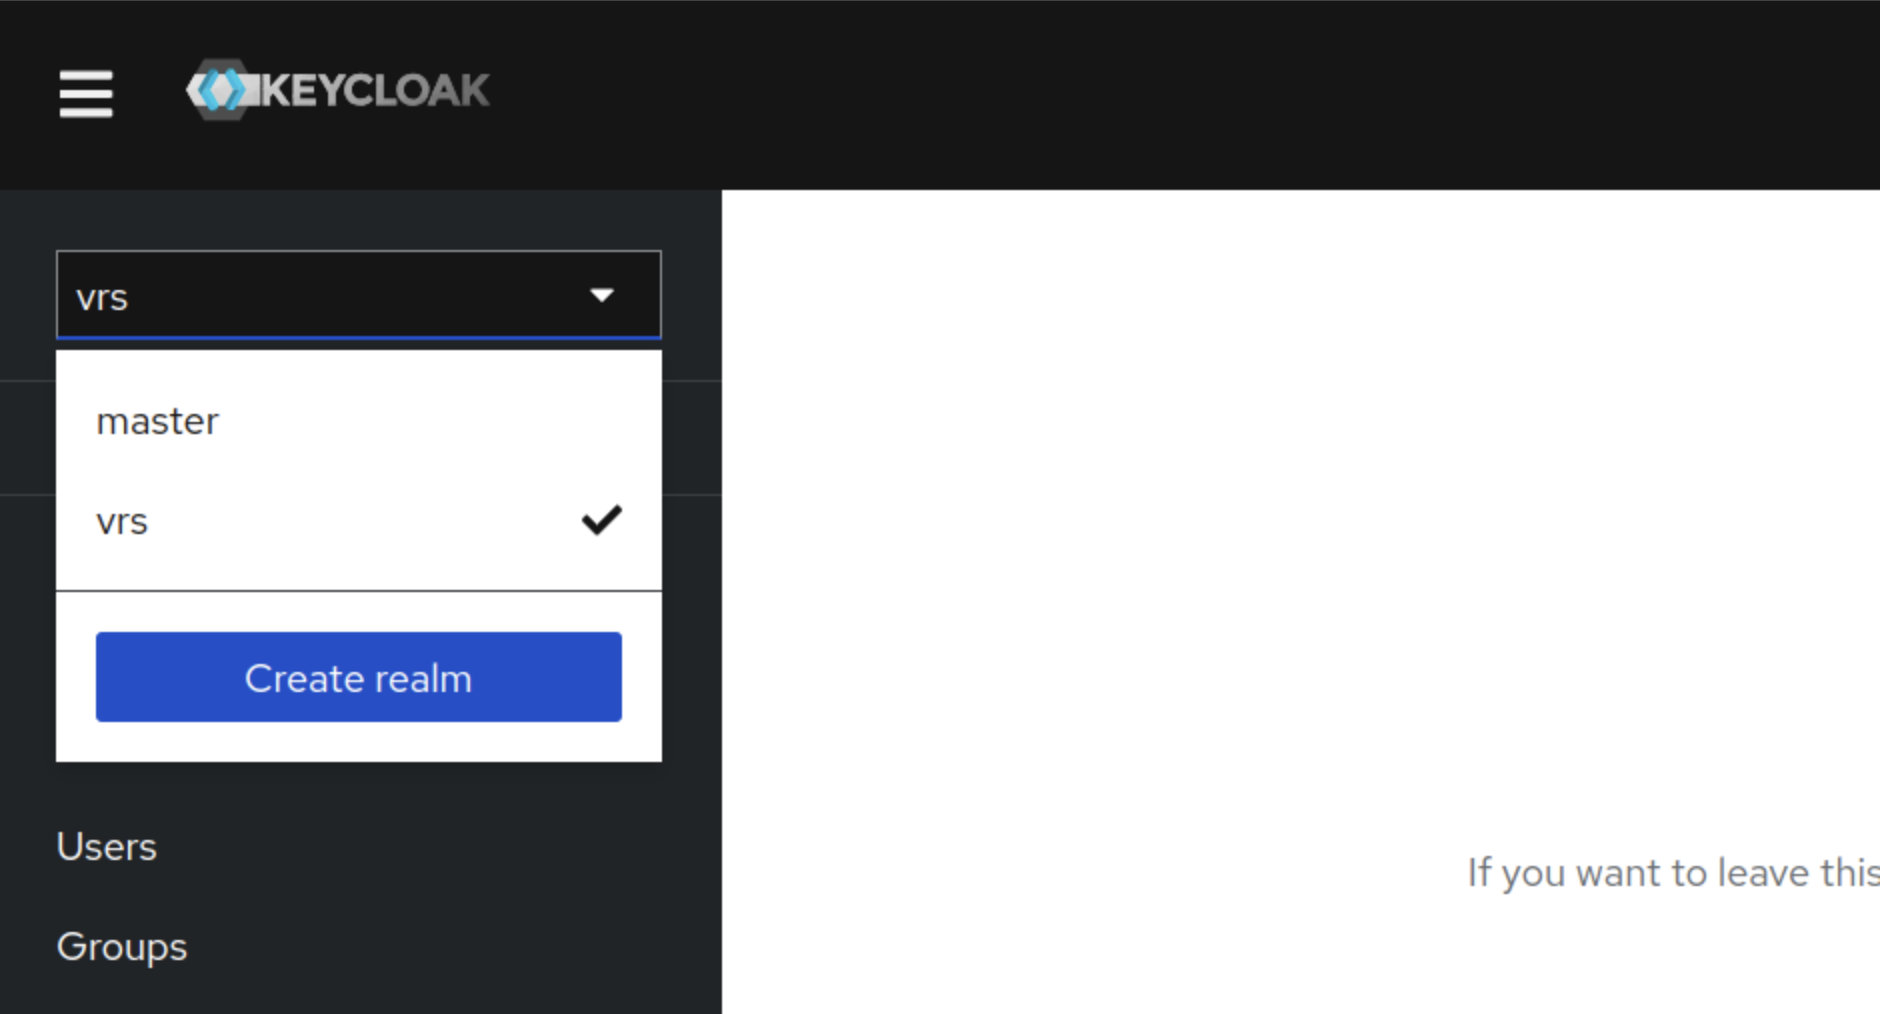
Bring the cursor to the Master (below the Keycloak logo) and click on the Create realm button
-
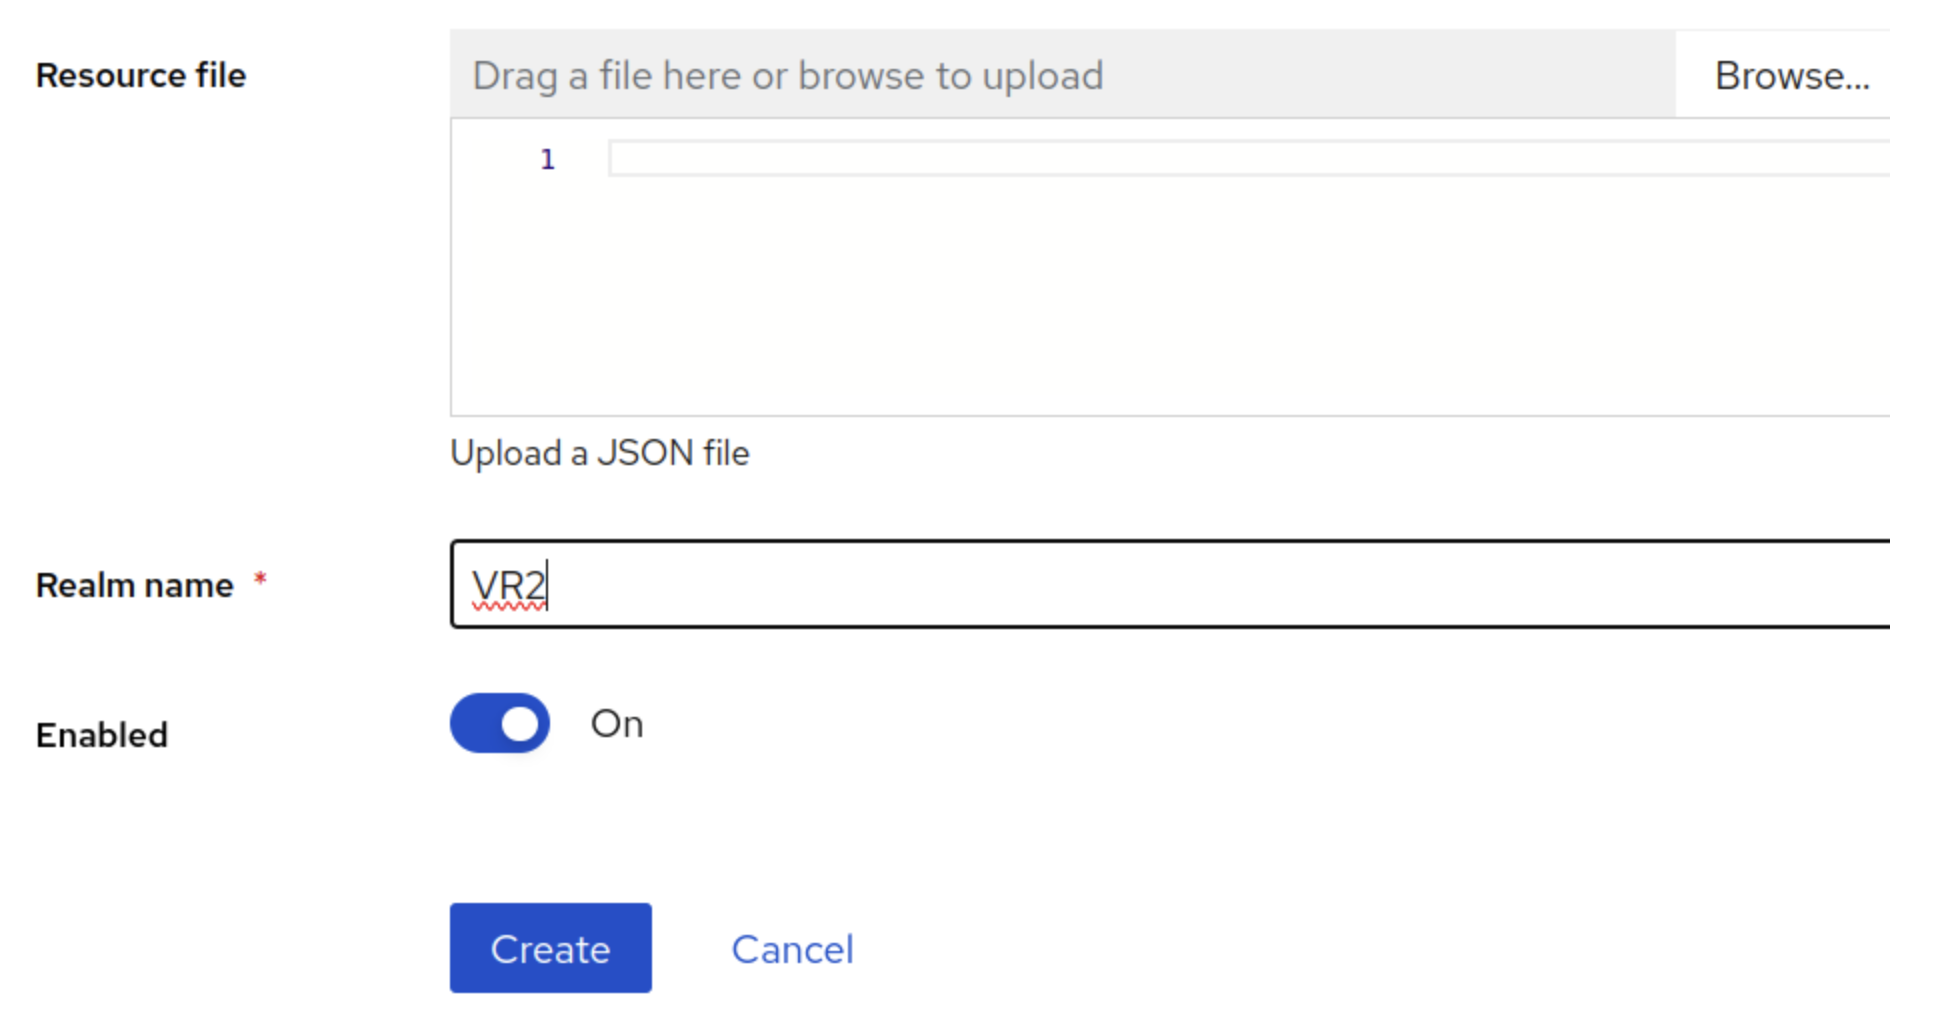
Enter the Realm name and click on the Create button
-
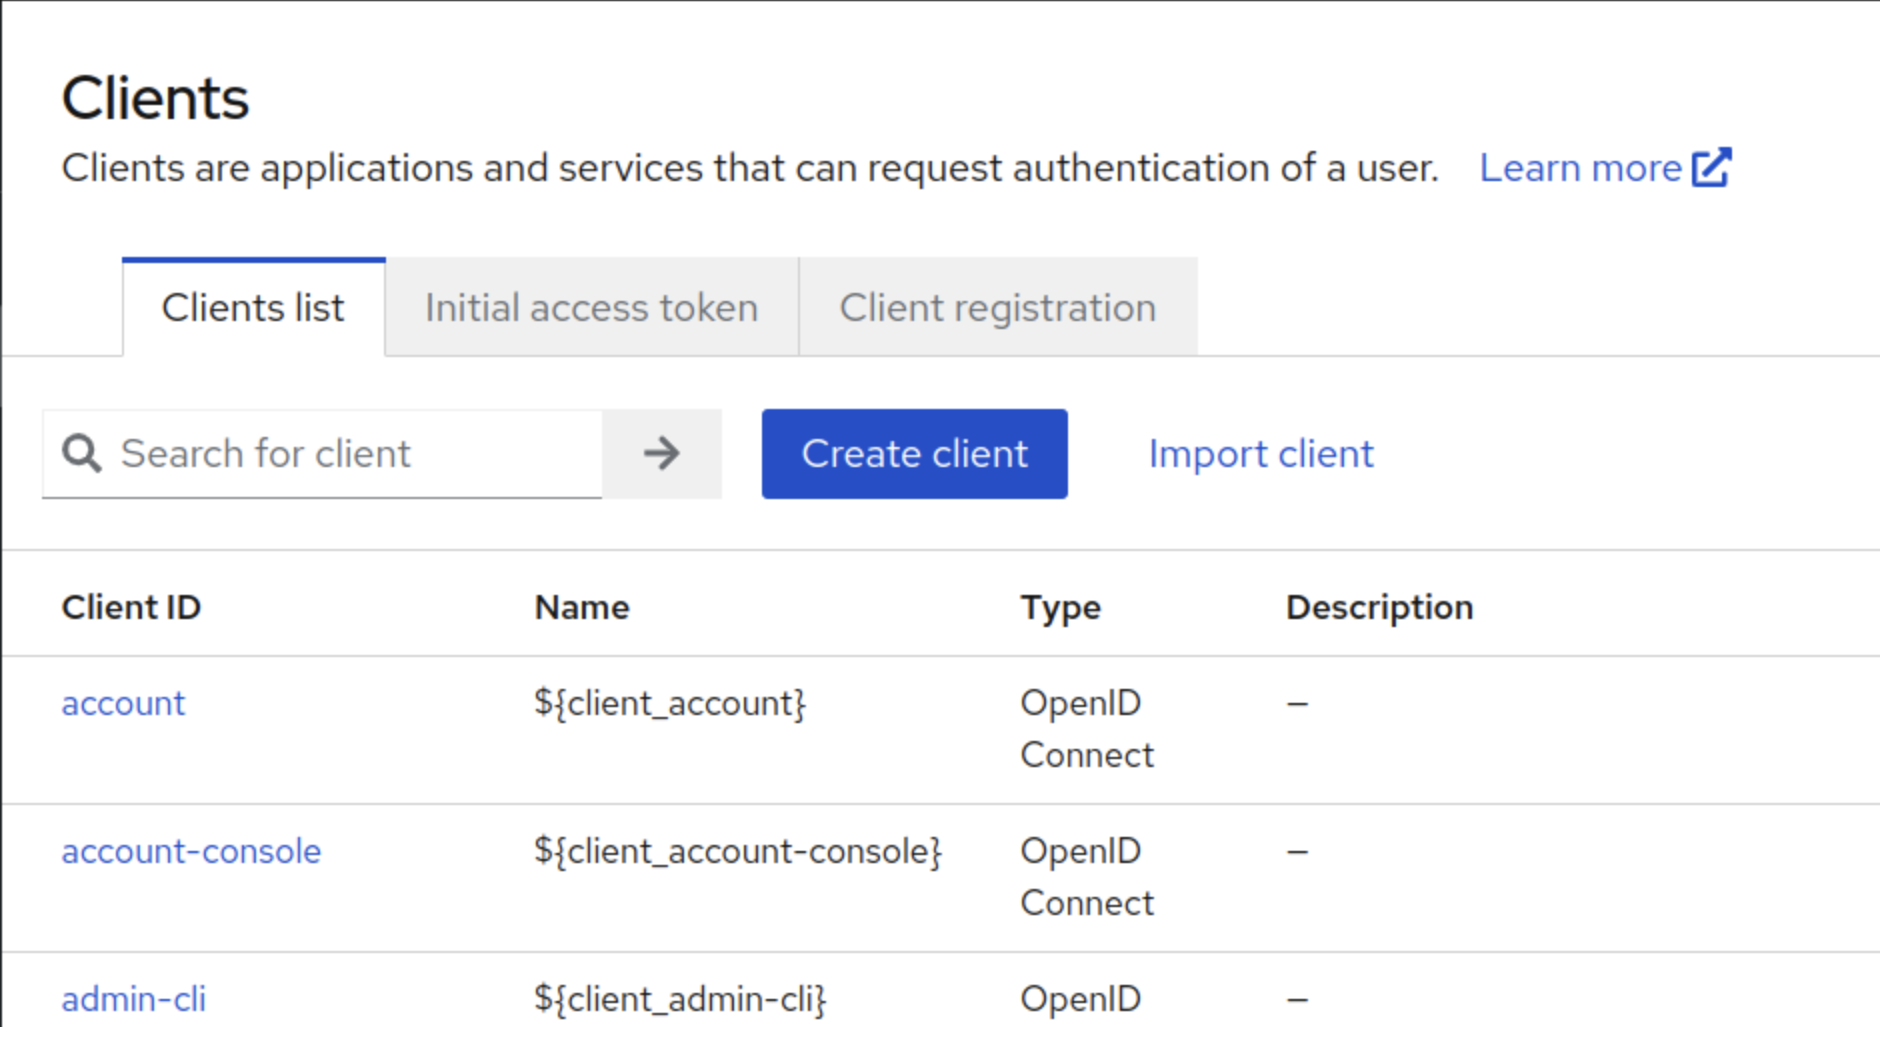
Once the Realm is created, click on clients under the created realm, and then click the create client button
-
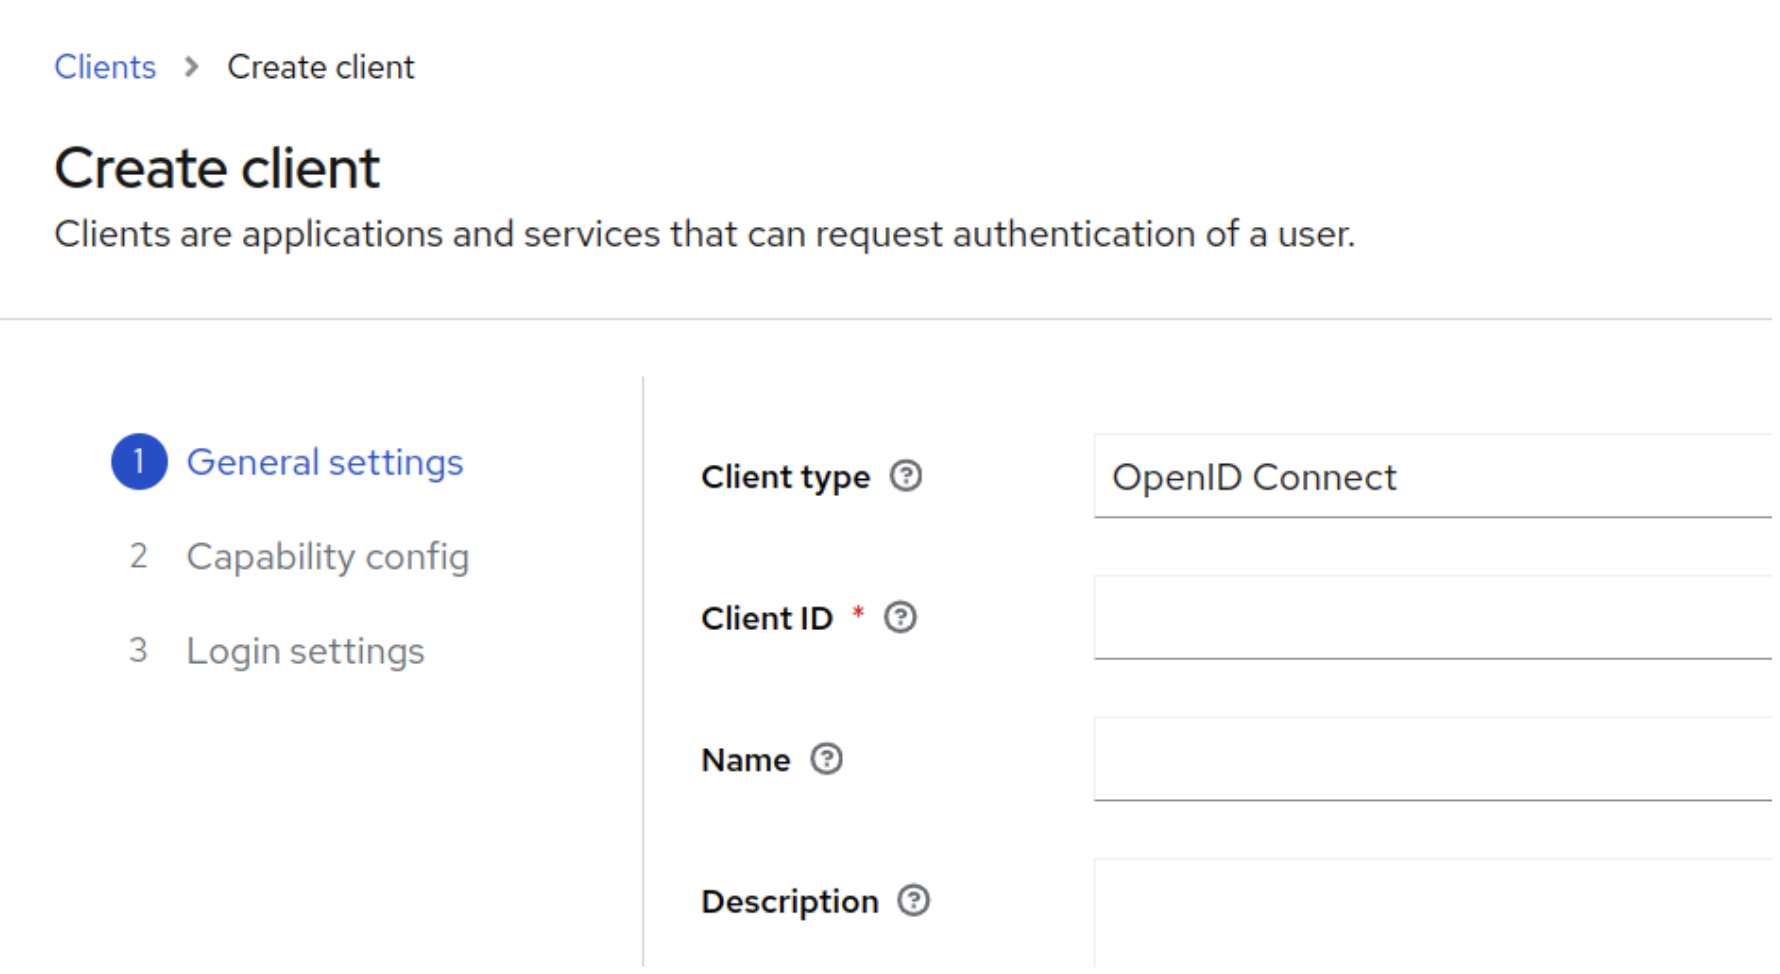
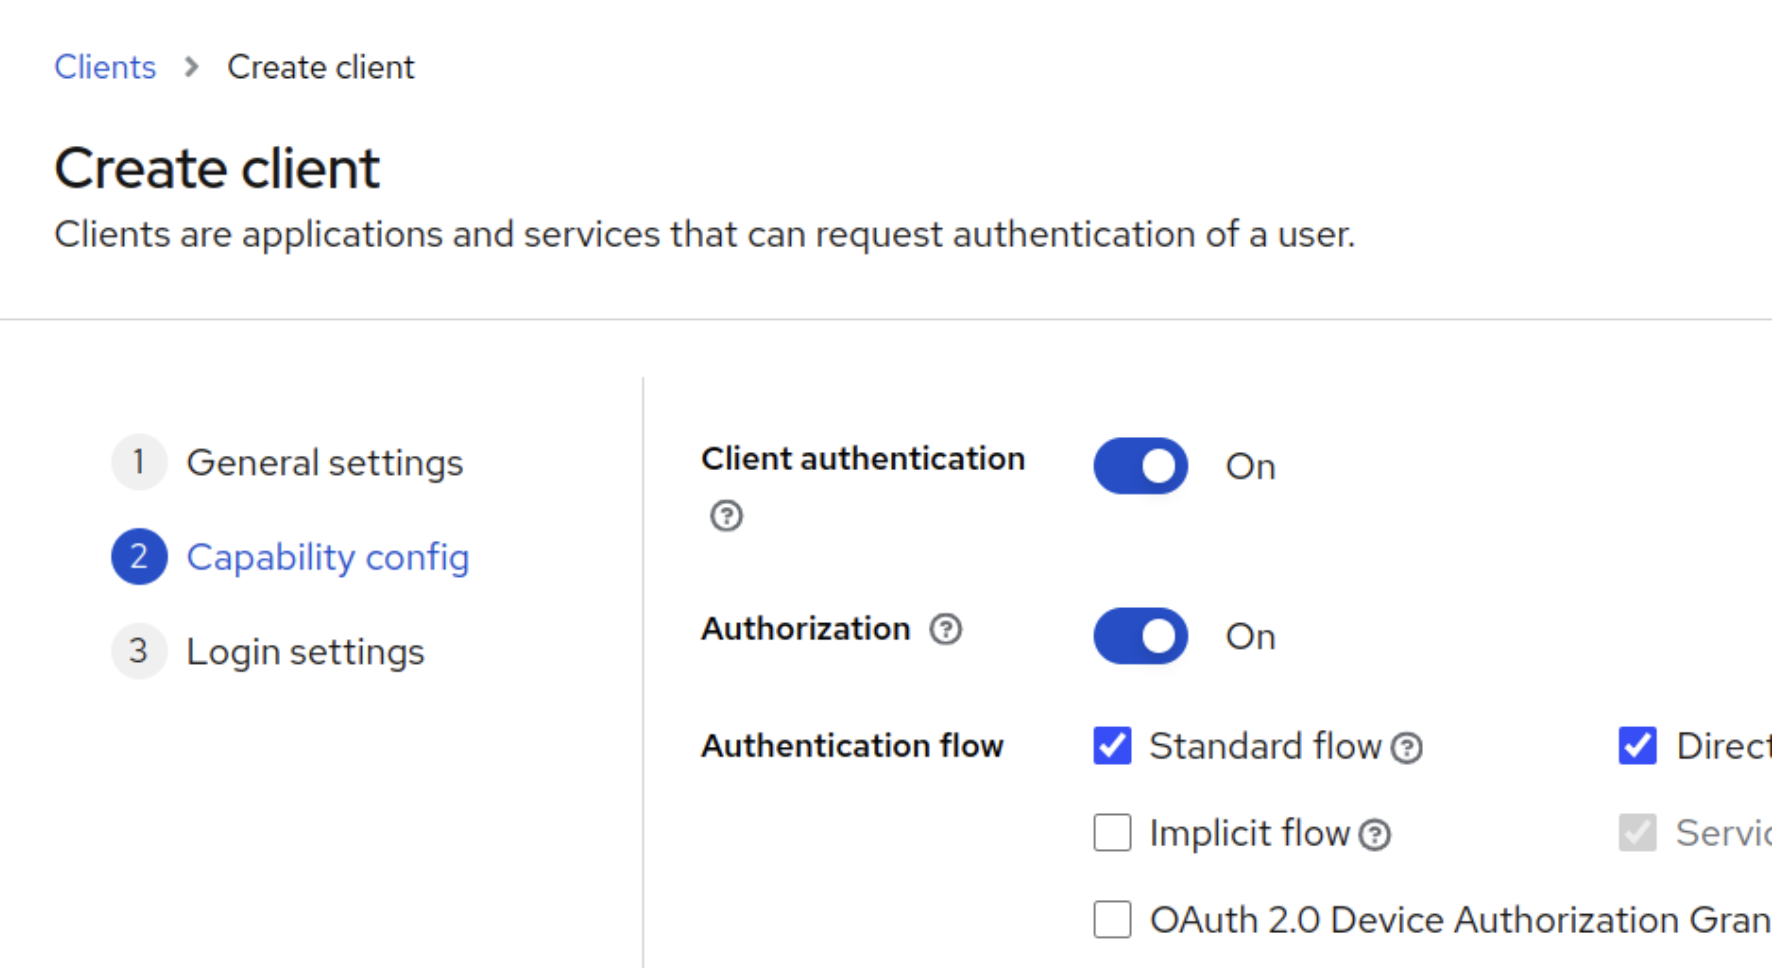
Enter Client ID vrs and click on Next.
-
Toggle the Client authentication and Authorization to ON, click Next, and click Save
-
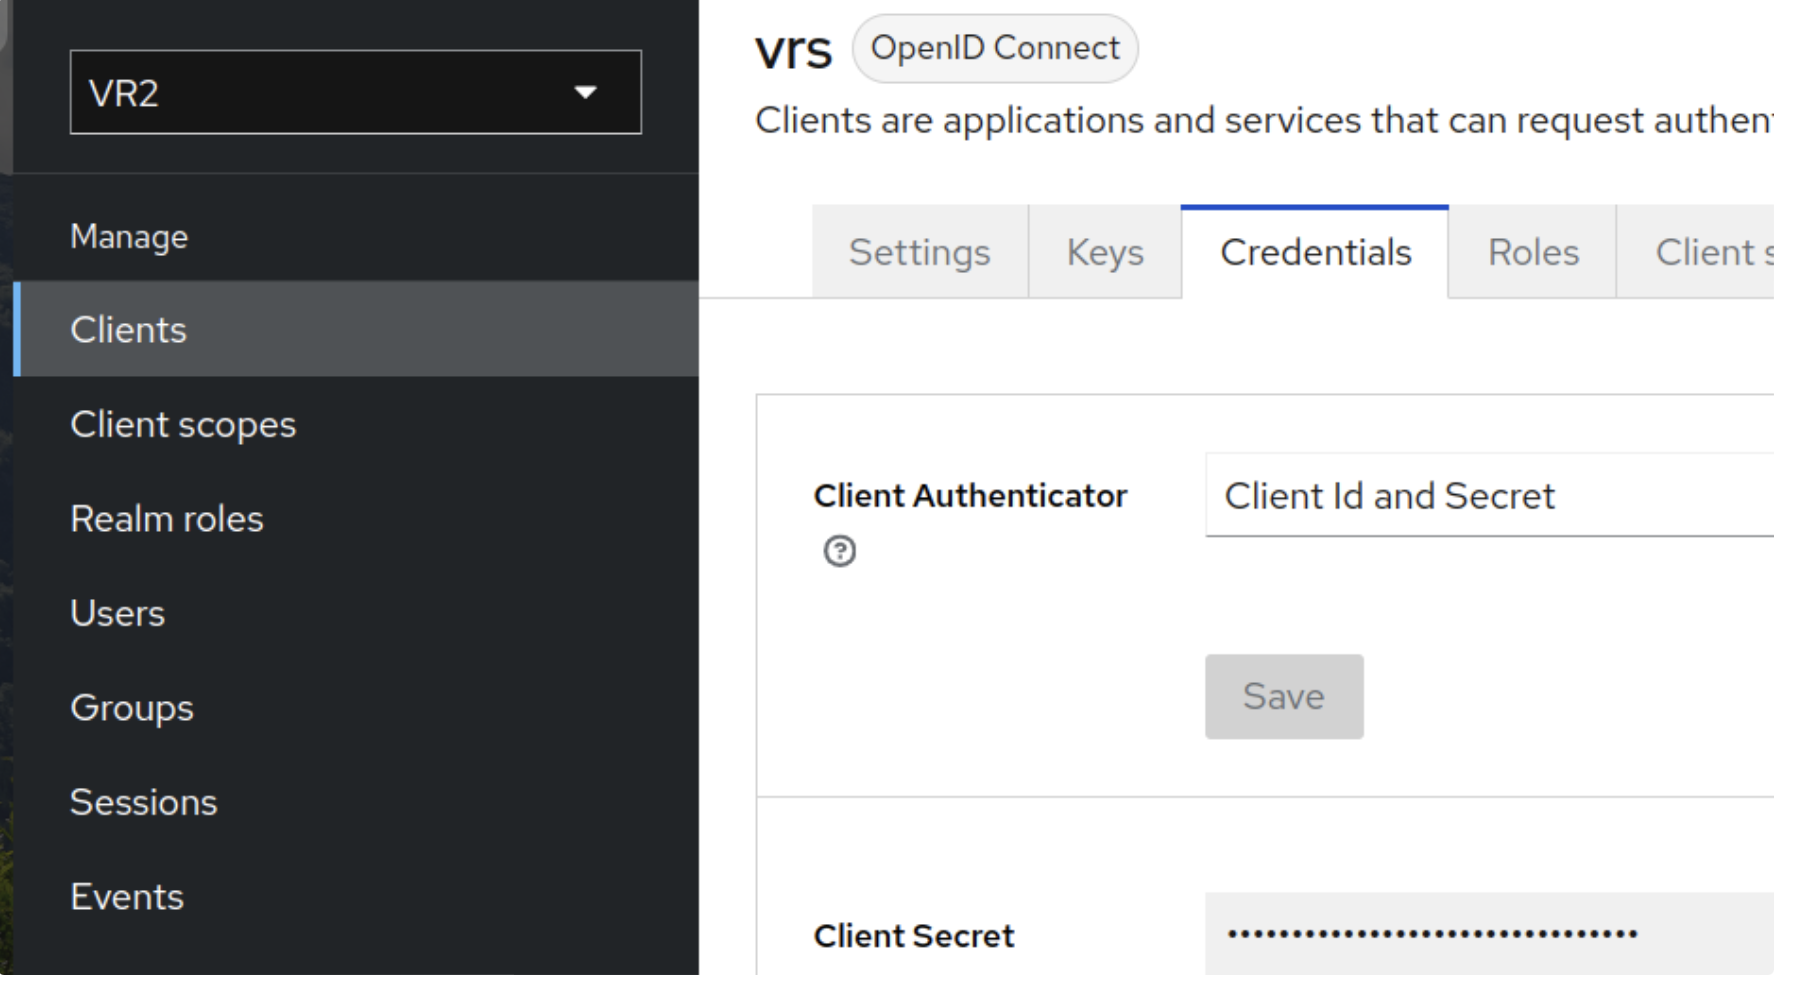
Once the client is saved, go to the Credentials tab and copy the client secret. The Client ID (vrs) and Secret will be used in environment variables (KEYCLOAK_CLIENT_ID and KEYCLOAK_CLIENT_SECRET)
-
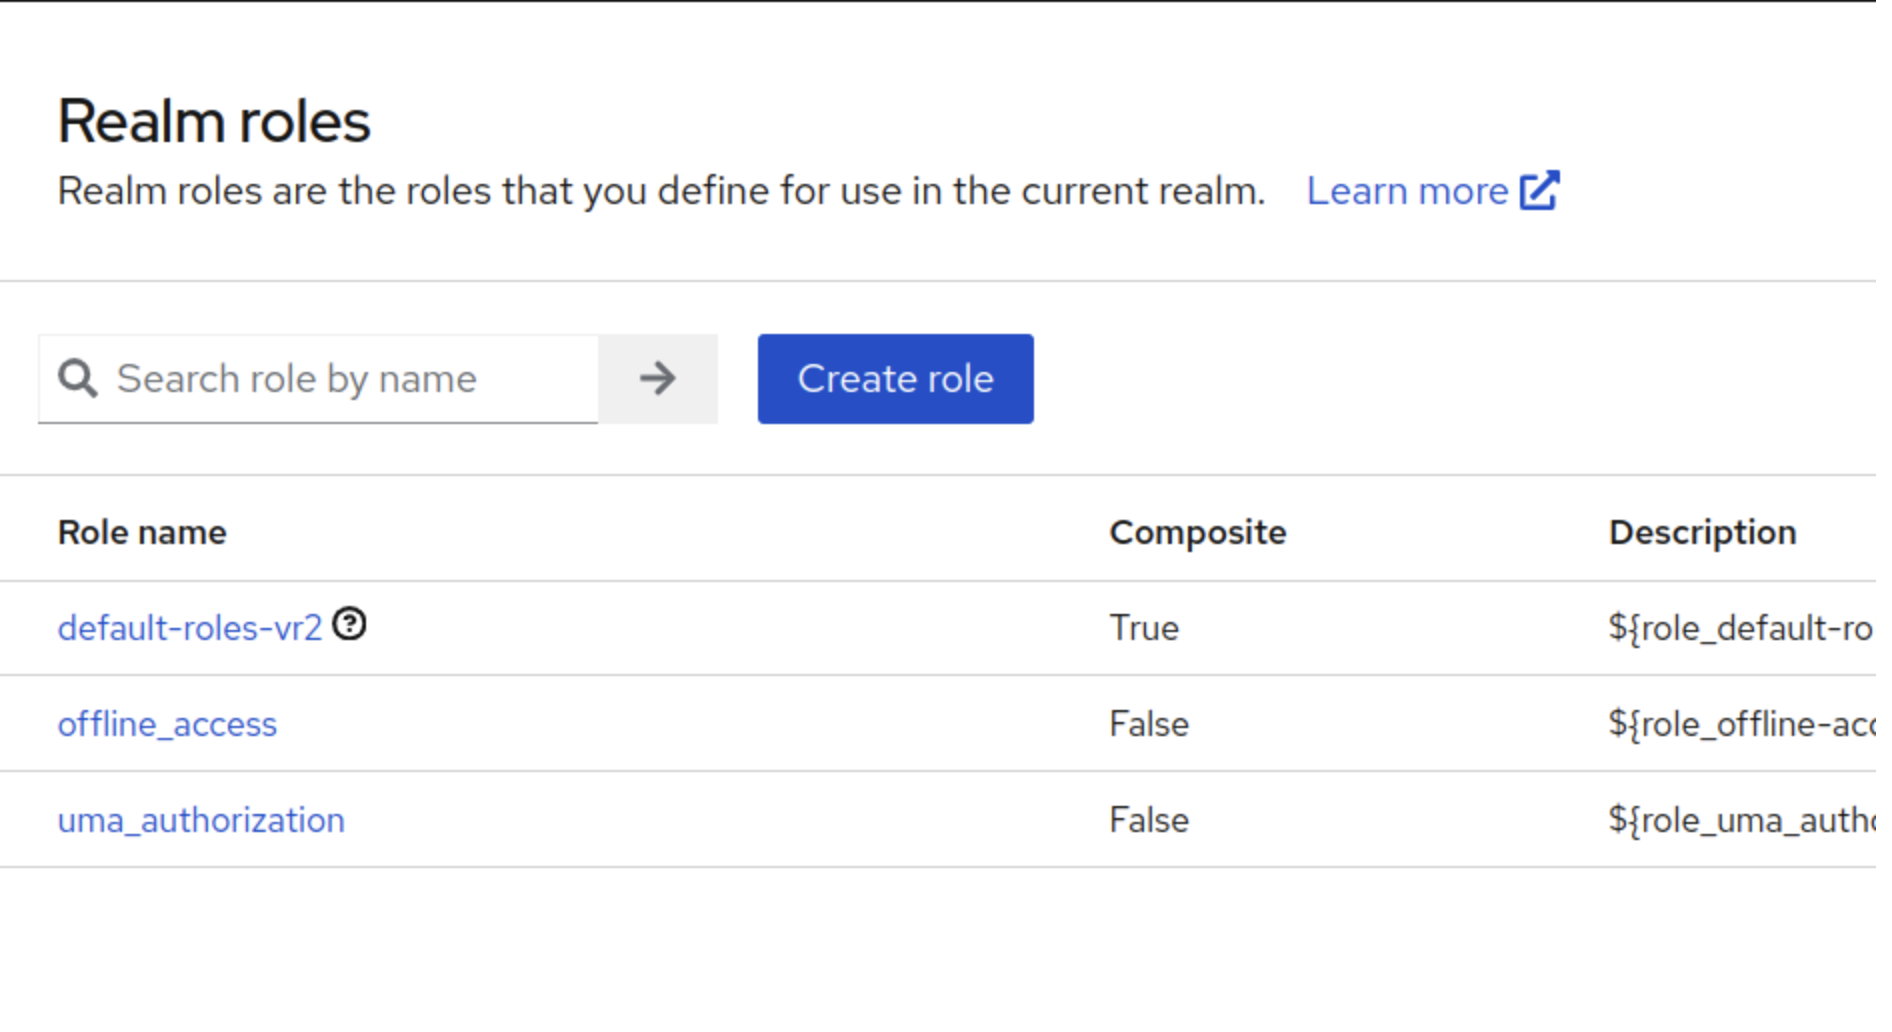
Click on Realm Roles in the left panel and create the desired roles, i.e., admin and agent.
-
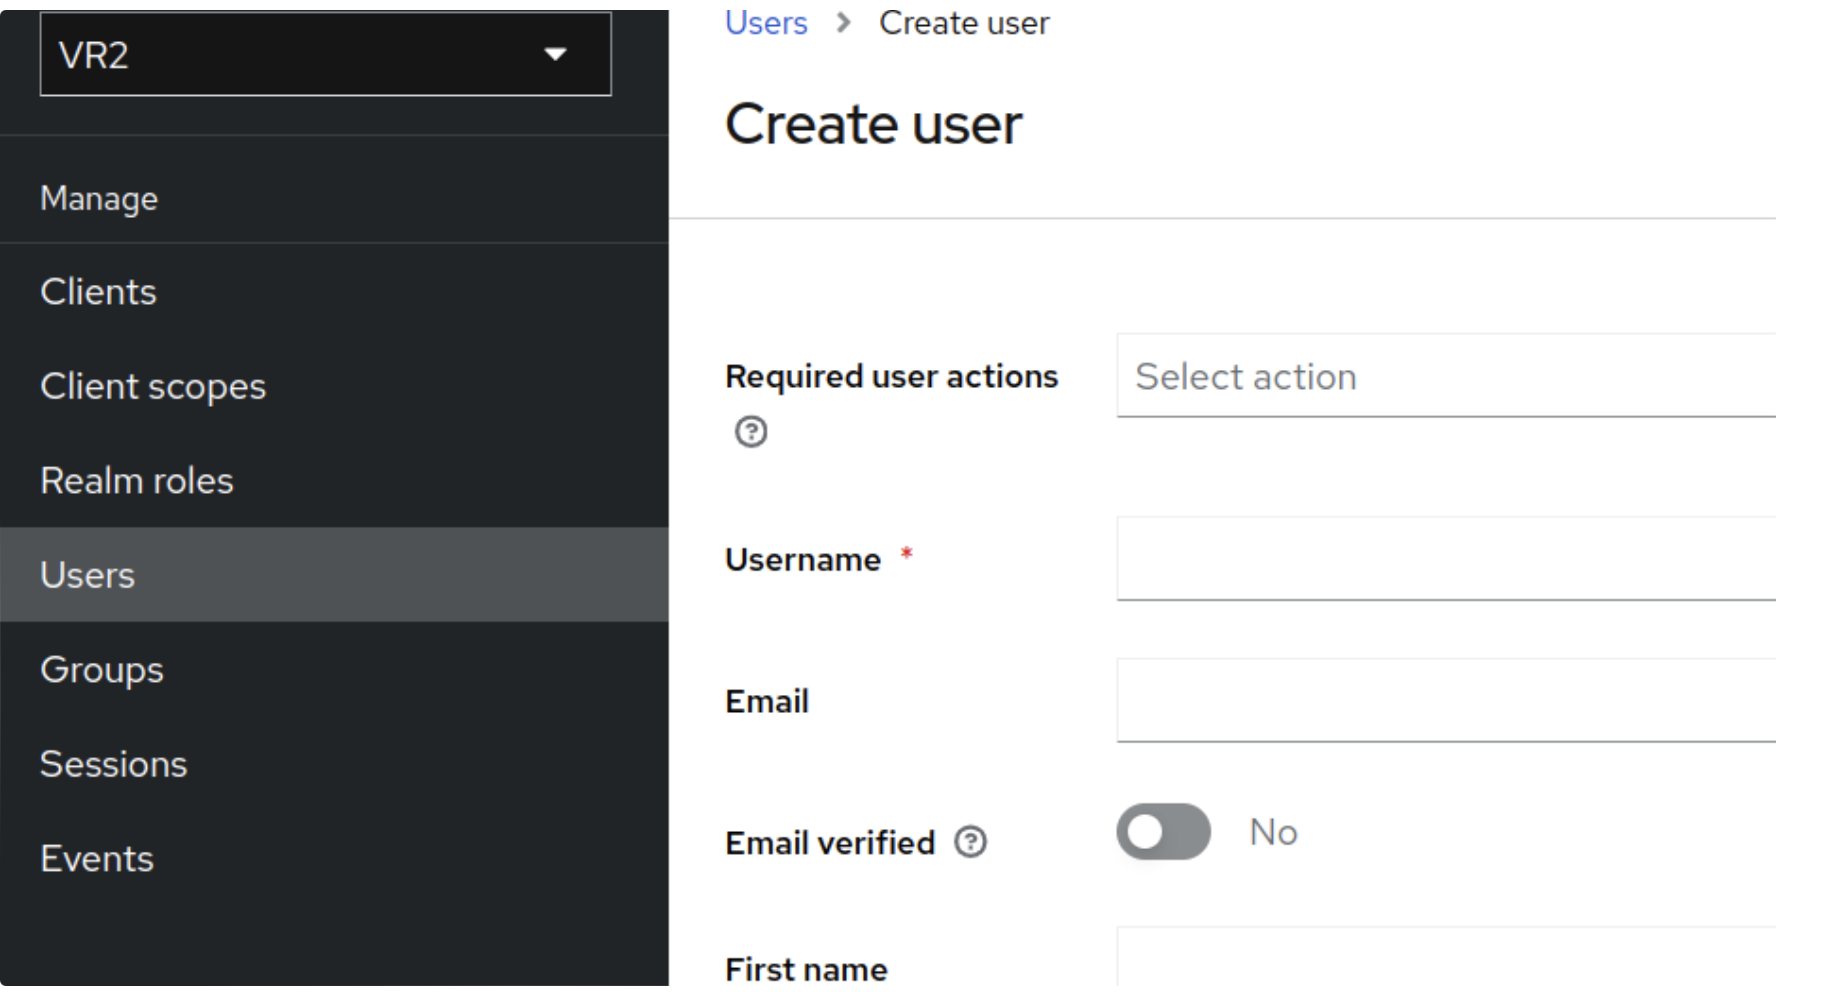
Go to Users and create user by entering Username and click Create.
-
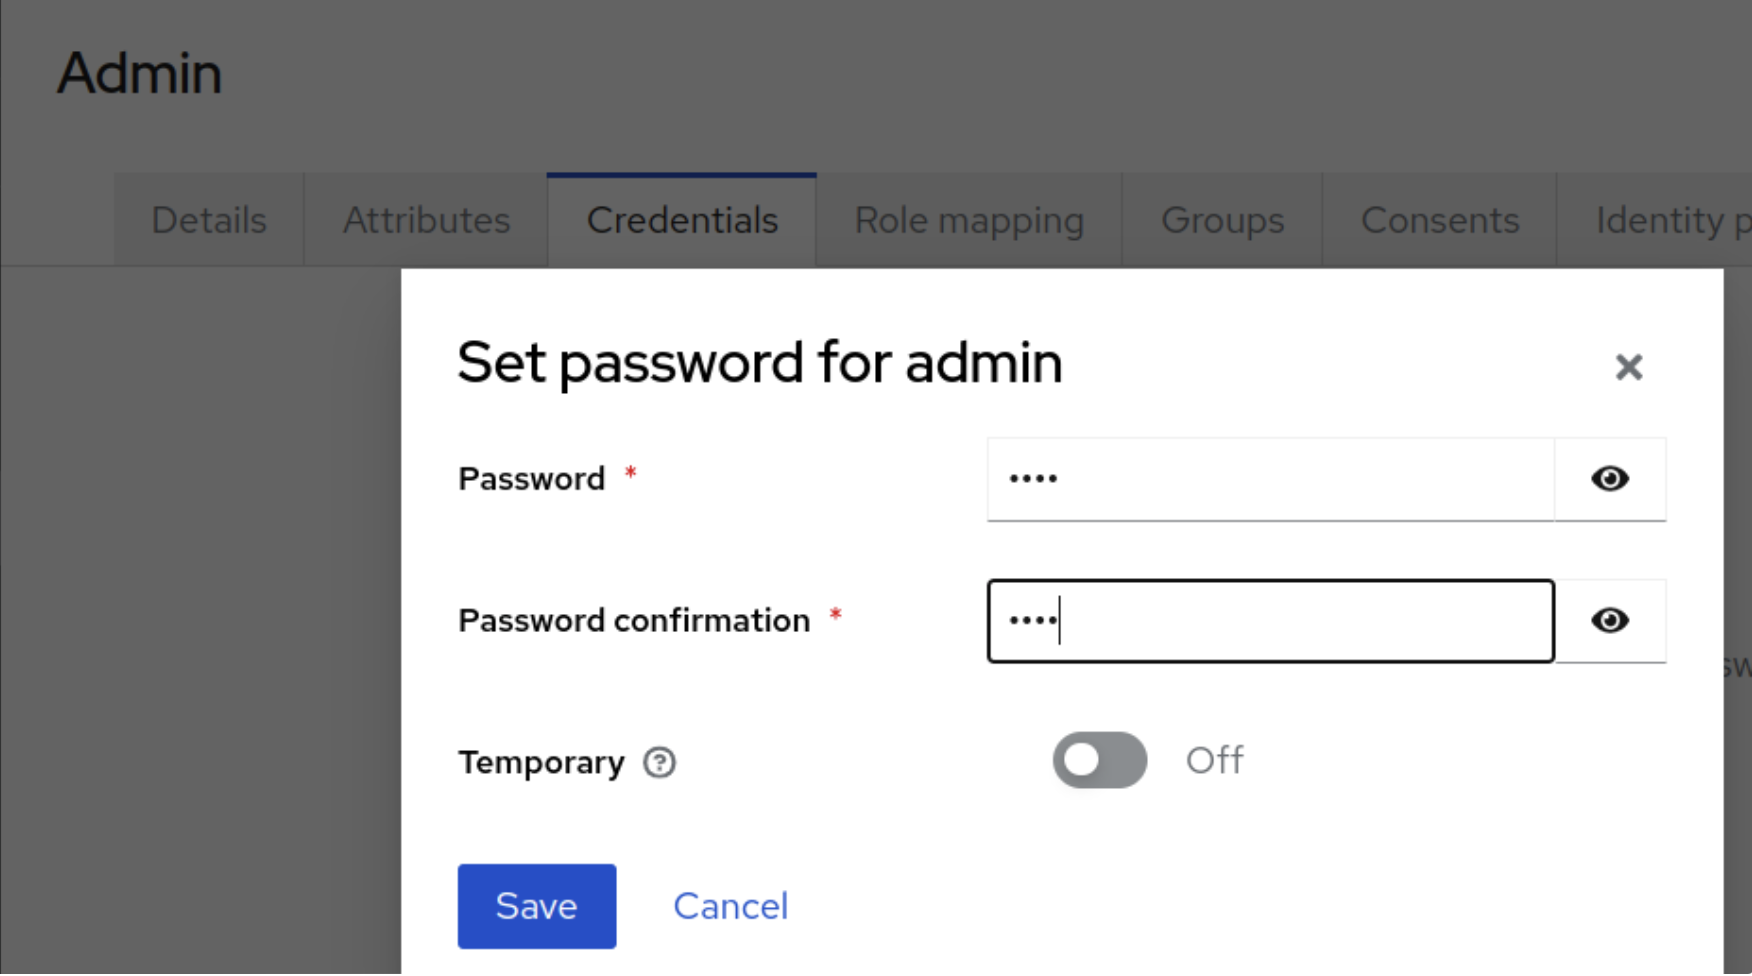
Go to the Credentials tab of the created user and set a password, toggle the Temporary button to OFF, and click Save.
-
Go to the Roles Mappings tab on the created user details, click on Assign Role, select the desired role, and click on Assign.
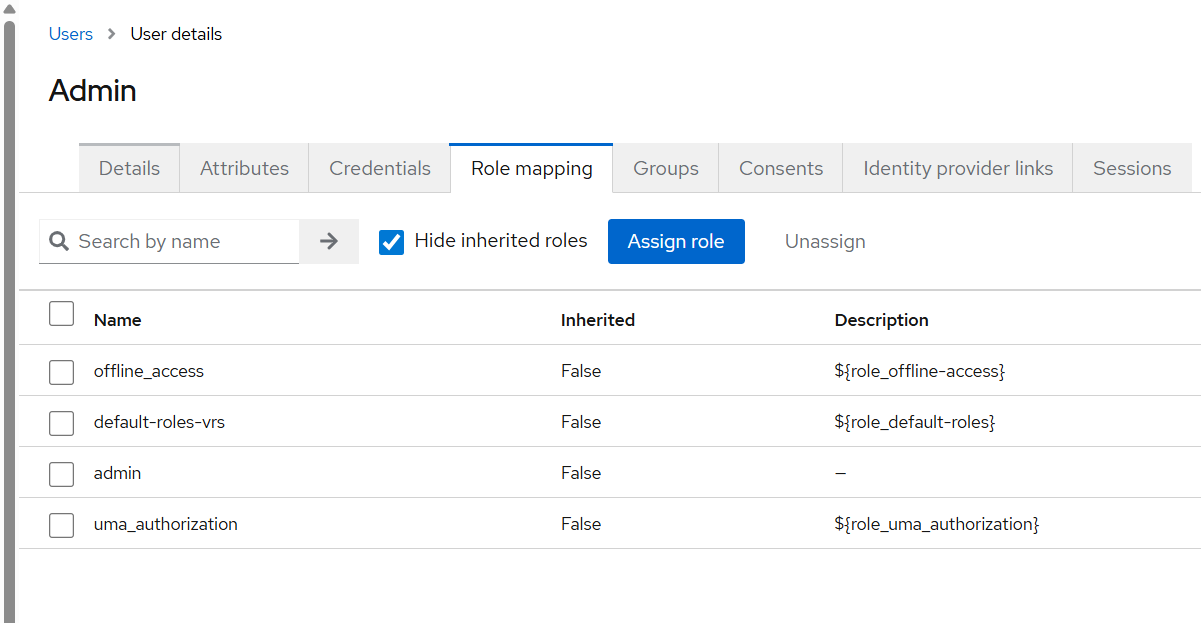
While role mapping, the default roles should be kept assigned to the user for the purpose of authentication and authorization.
-
For Admin user only,
-
Assign the admin role other than the default roles assigned previously.
-
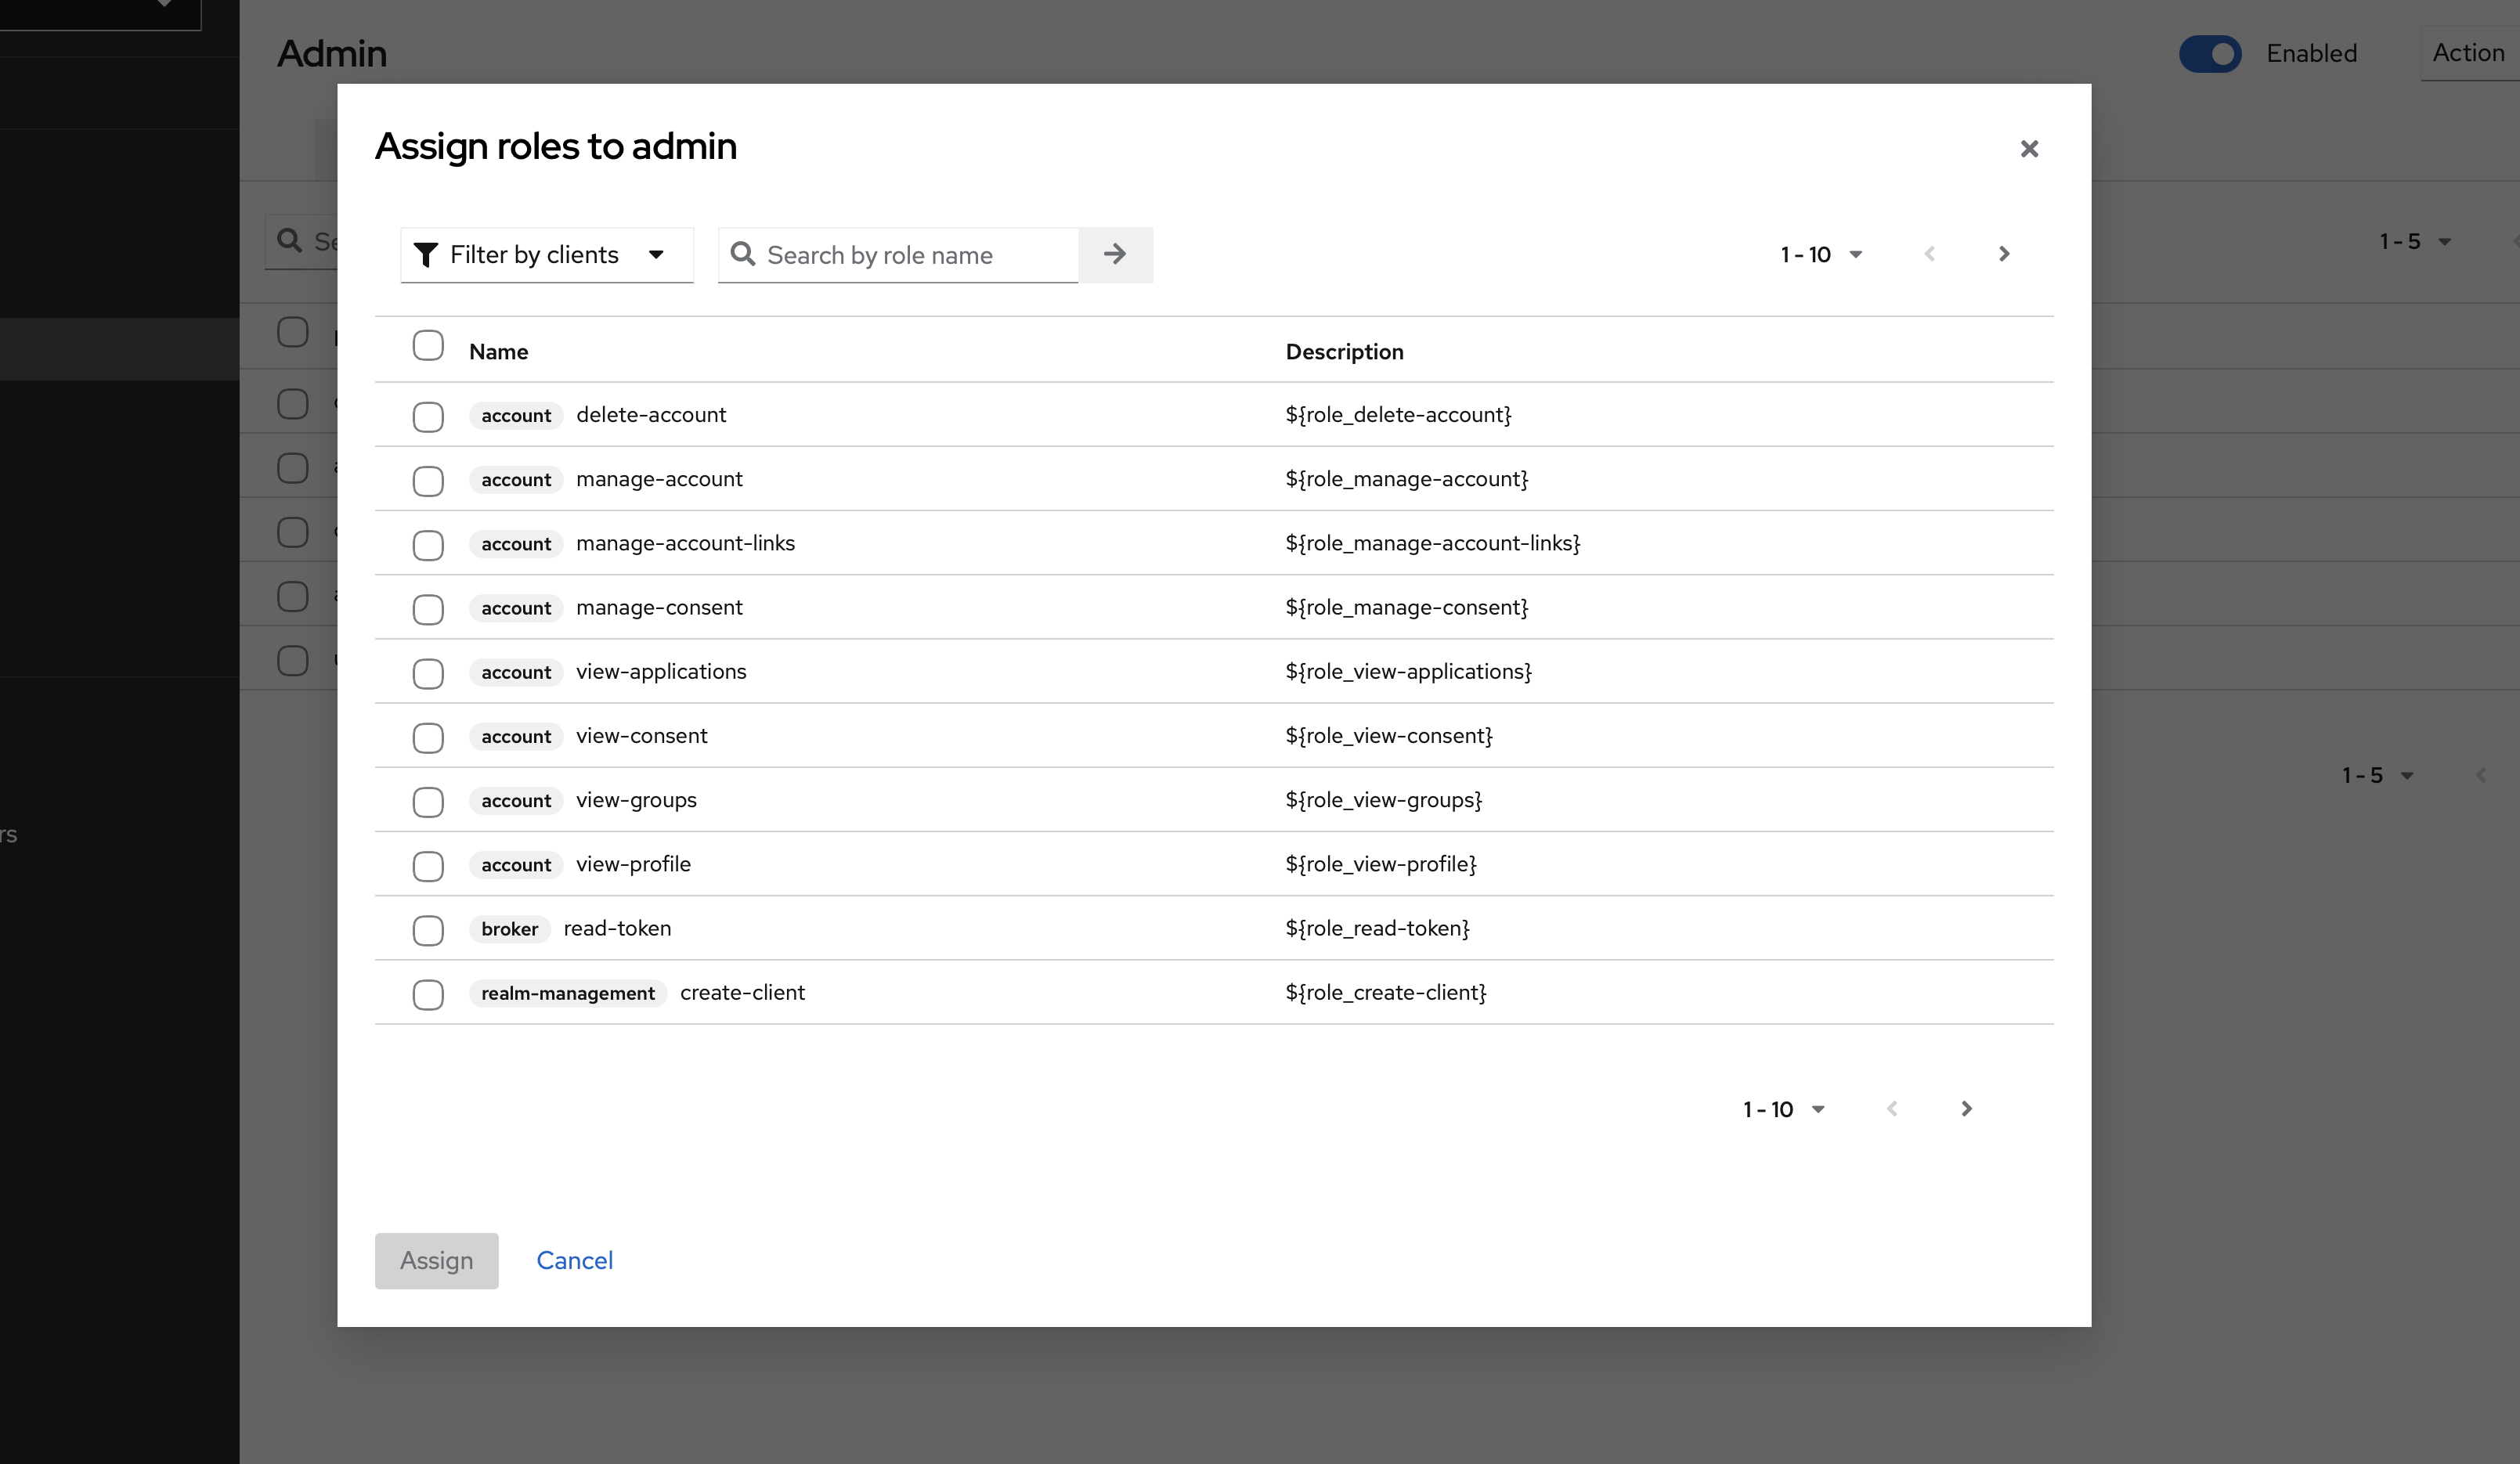
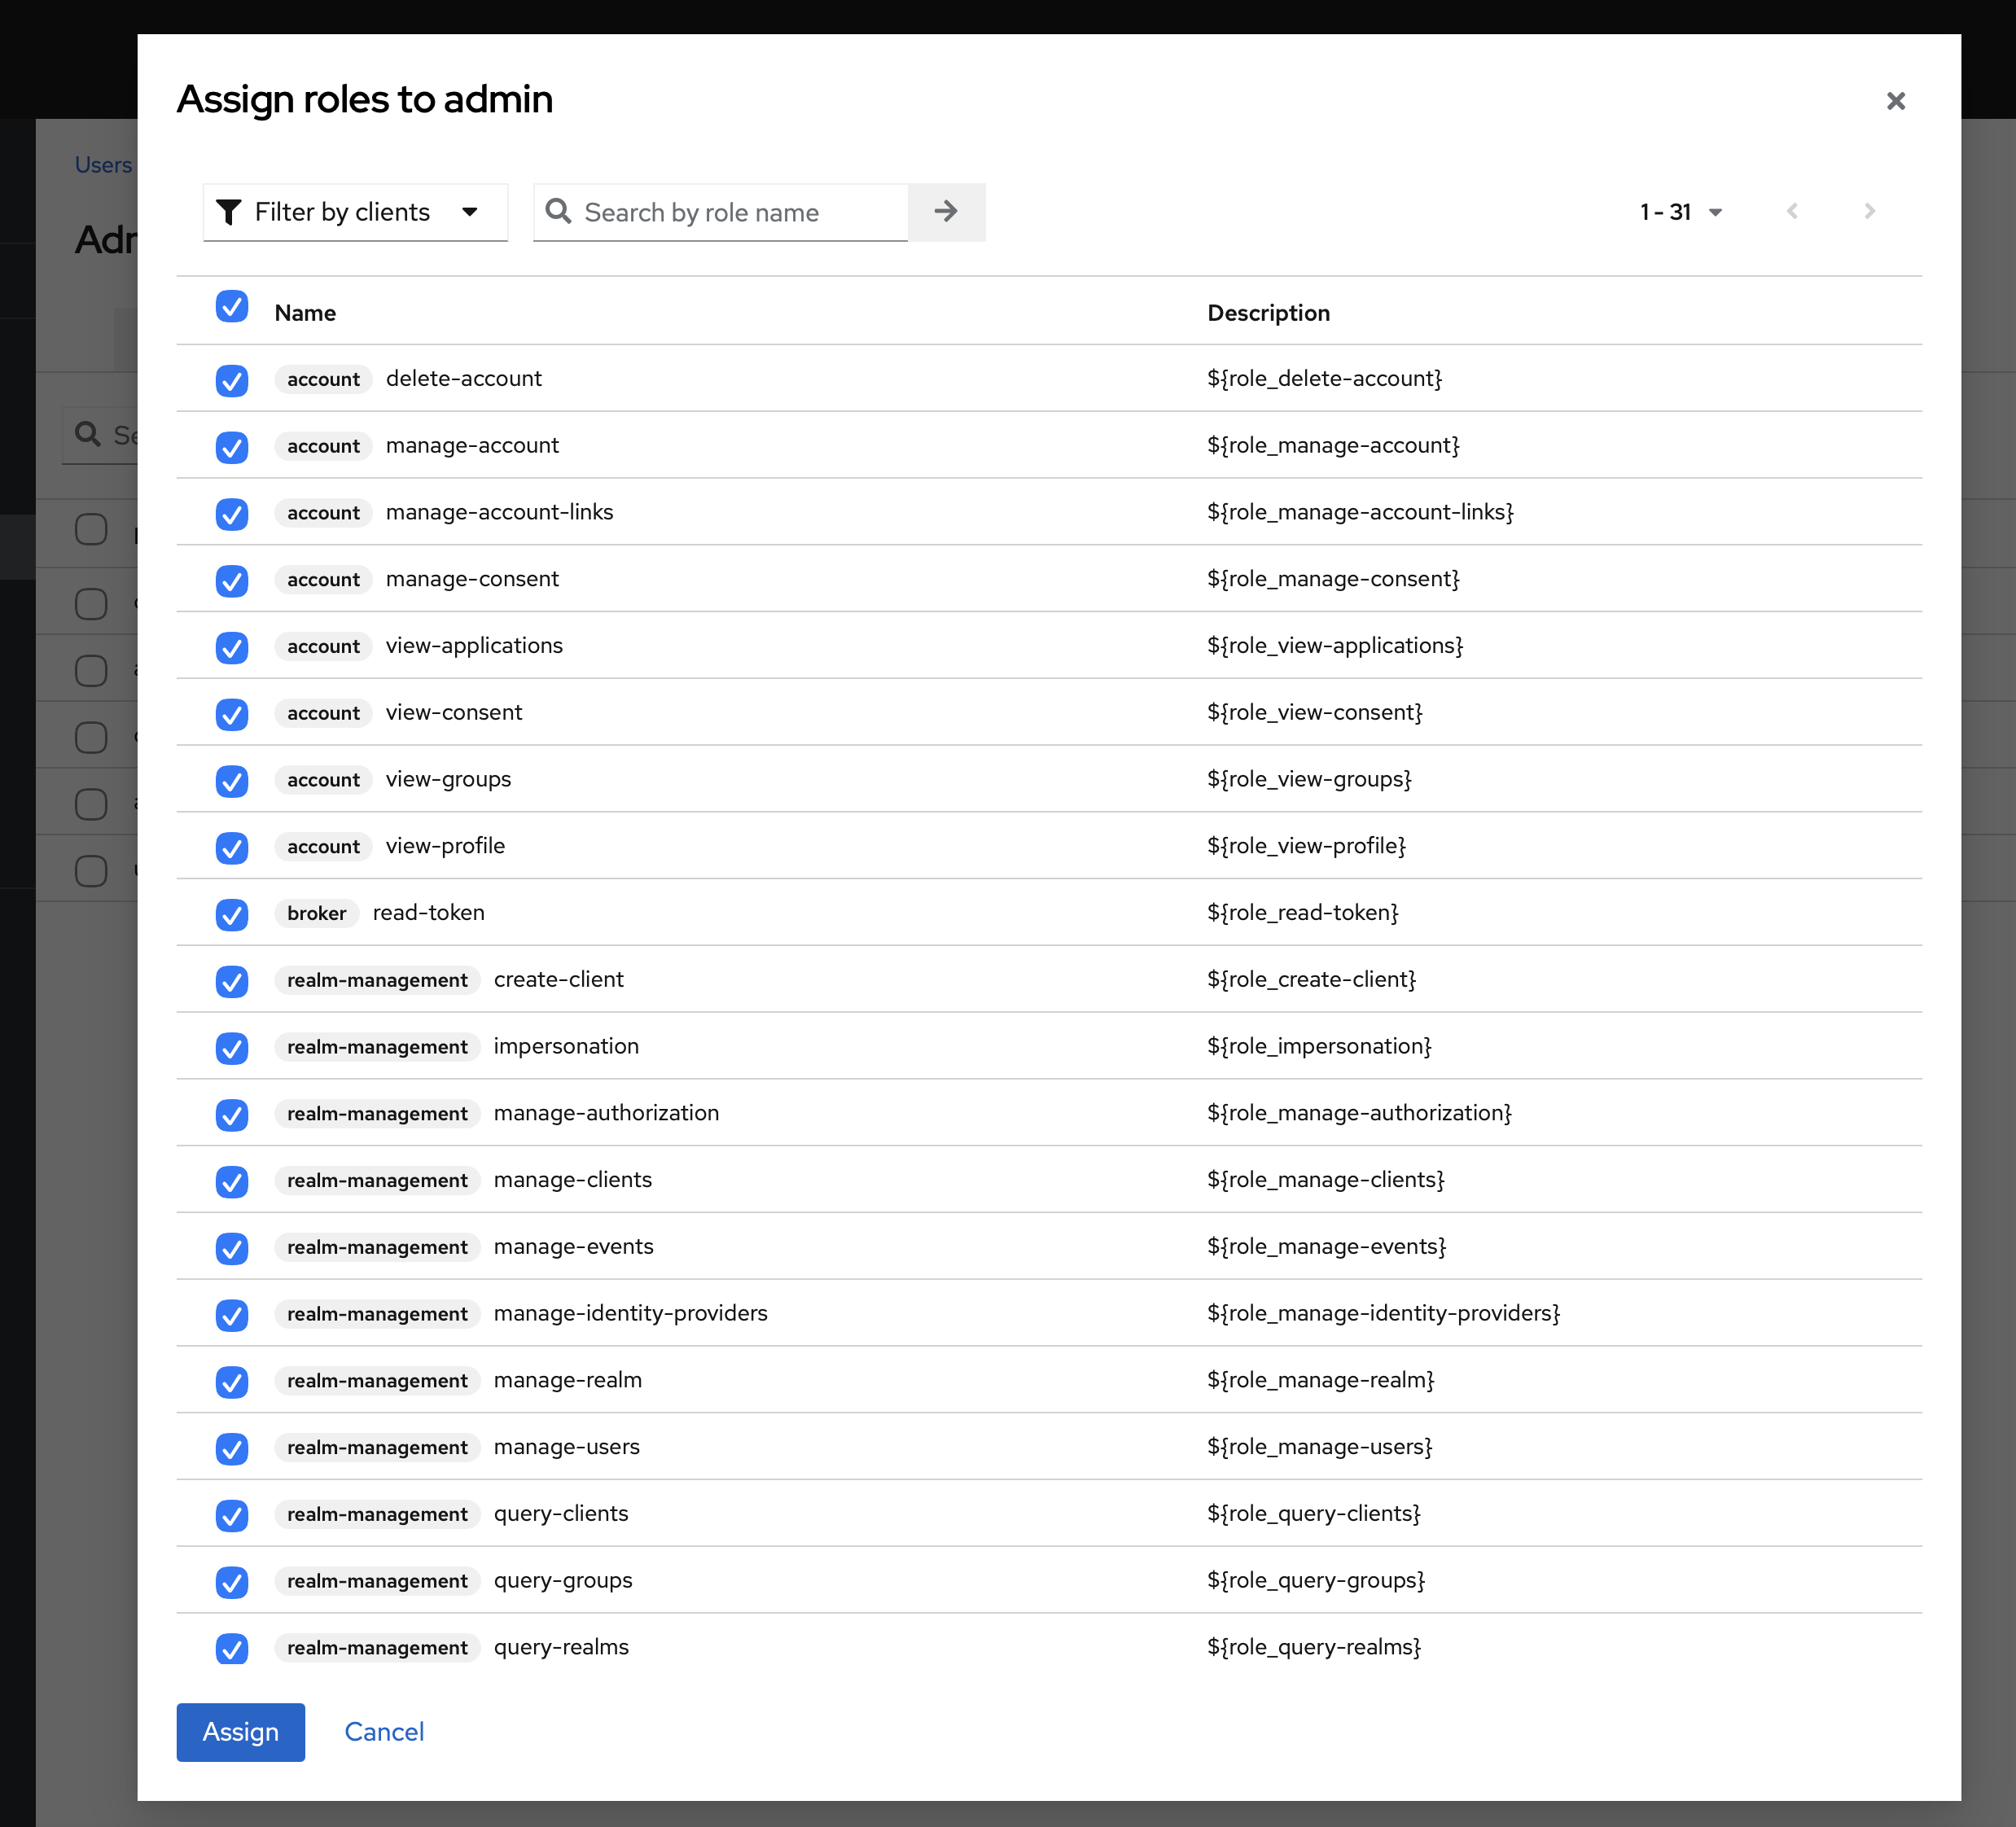
Now, click on the Assign Role button again, and then select the Filter by clients option in the dropdown.
-
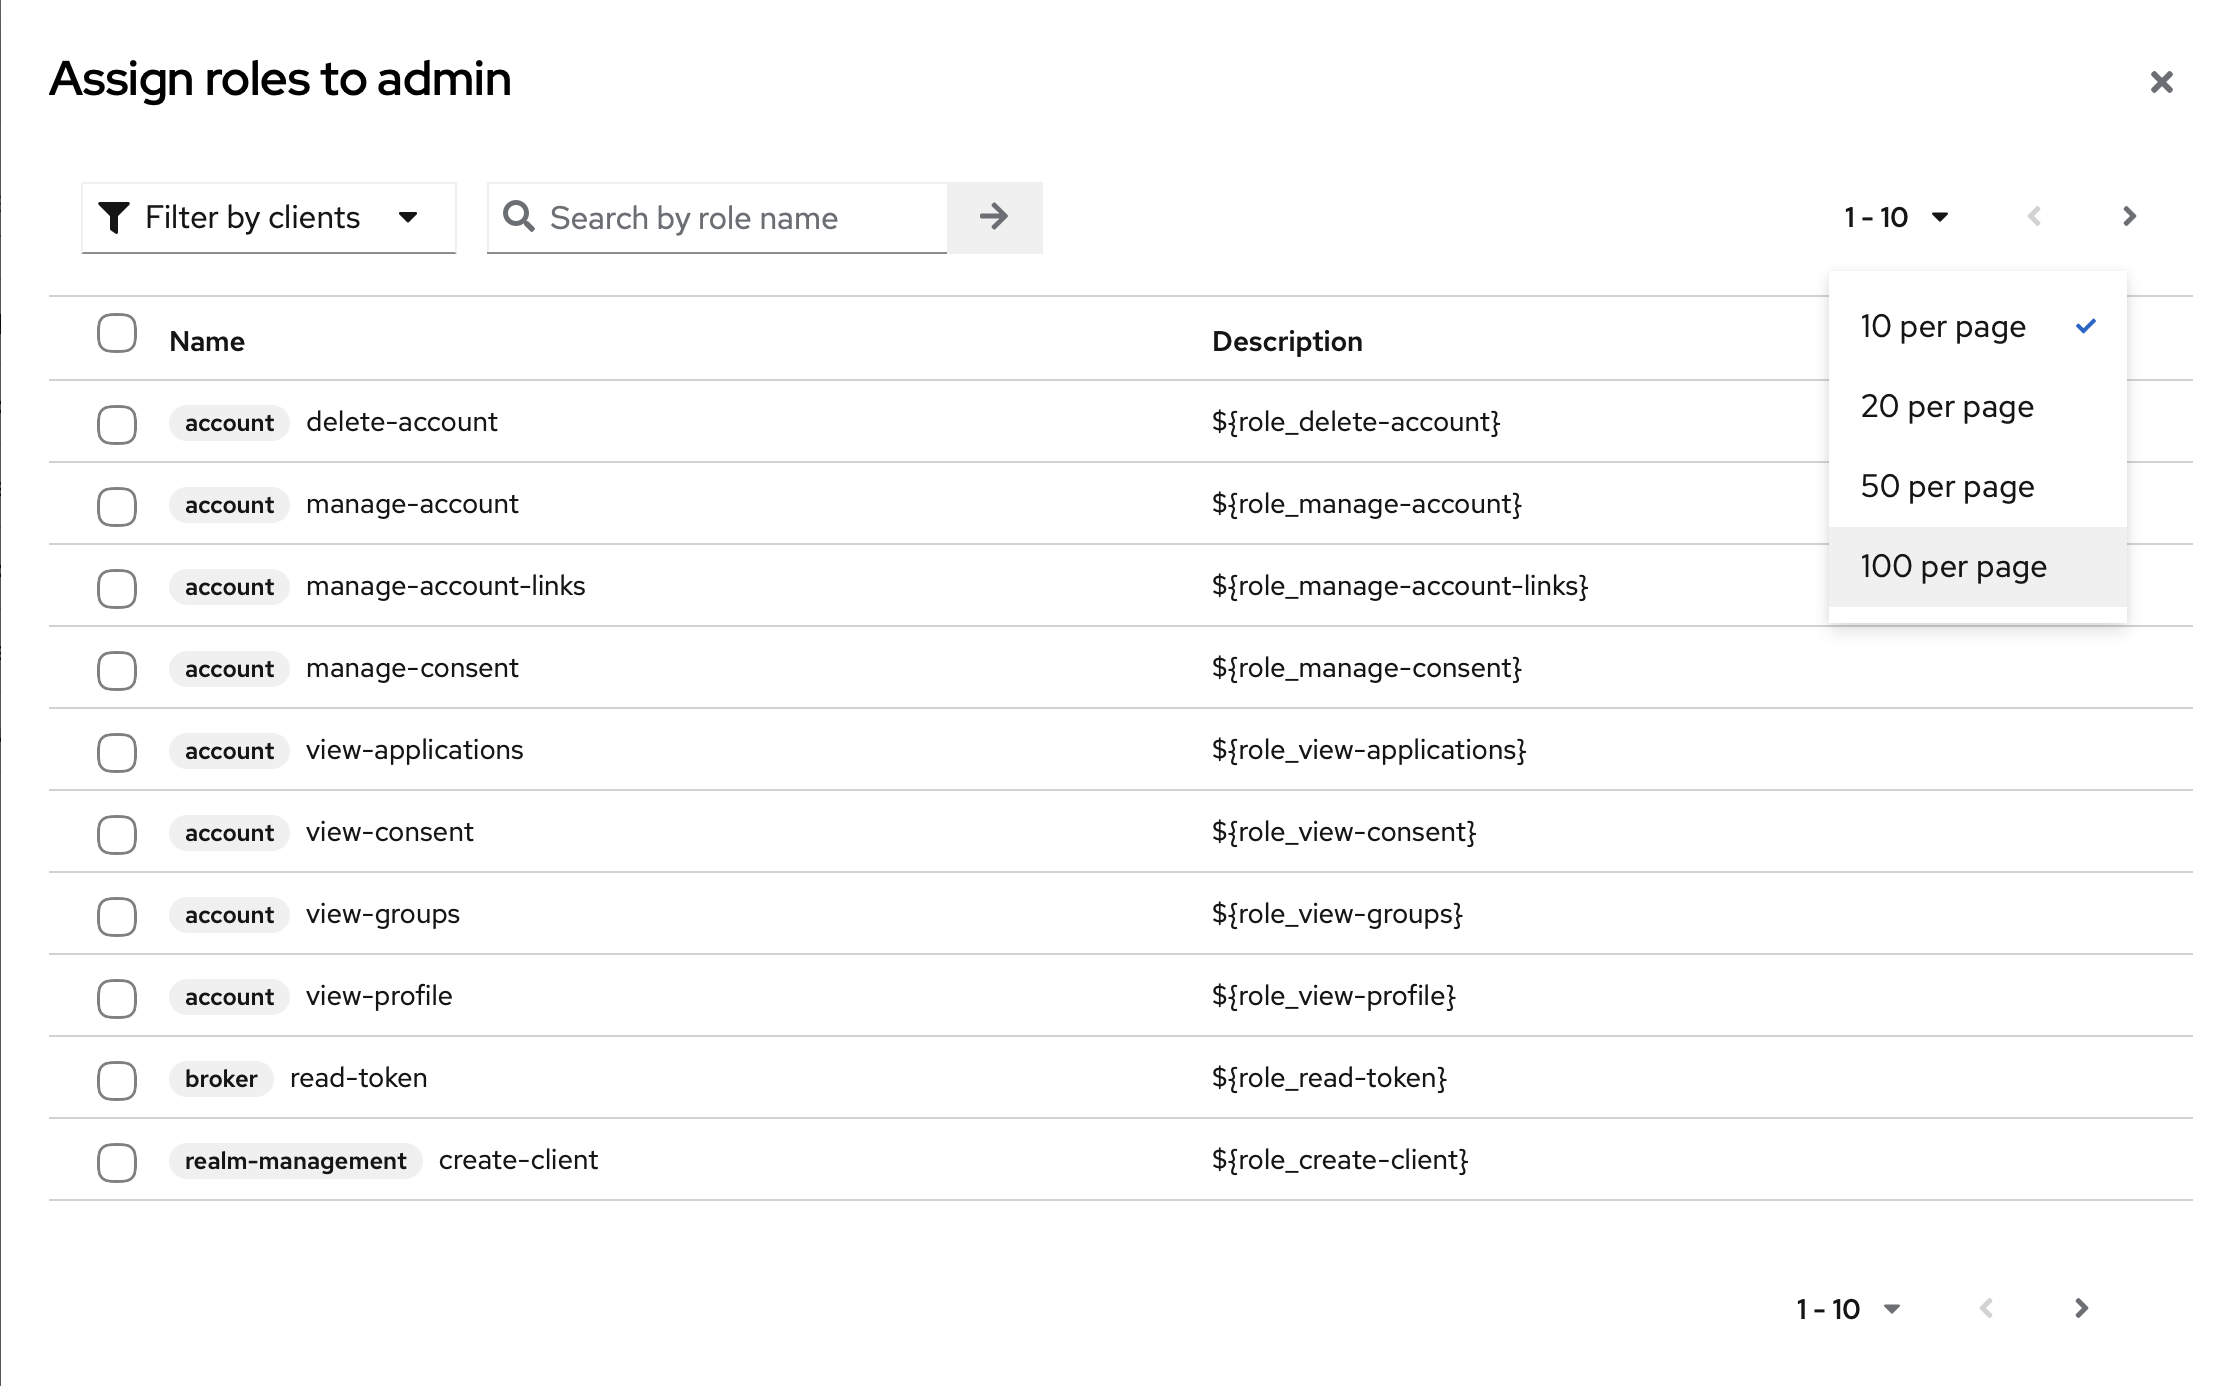
Open the items per page drop-down and select 50 items per page.
-
Now type realm in the search box and press Enter or click the Next button.
-
Upon searching, all the realm-management roles will appear; assign all the realm roles to the Admin user.
-
Creation of Keycloak Agent Group for VRS Finesse Gadget
For deployments using the VRS Finesse gadget. The following steps are required as well:
-
Open the target realm, i.e.,
VRS. -
Navigate to the Groups section in Keycloak.
-
Click the
Create groupbutton. -
Create a group named
AGENT_GROUP. -
Open
AGENT_GROUPand navigate to theRole mappingtab. -
Assign the realm role
agentto this group. -
If the
agentrole does not exist, first create it underRealm roles, then return toAGENT_GROUPand assign it.
-
The group name should be exactly
AGENT_GROUP. -
New users added to this group will inherit the
agentrole through Keycloak group-to-role mapping.