Voice Connector bridges the media server and our EFCX in case of voice channel.
Prerequisites
Ensure you are in the correct VM to deploy Voice Connector. If not, SSH into that Debain VM
-
Use command:
ssh username@server-ip -
Enter the ssh password and press Enter.
-
If you are not root user use command:
su -
Enter the root user's password
Software Requirements
|
Item |
Recommended |
Installation guide |
|
Operating System |
Debian 12 |
|
|
Docker |
v24 or higher |
Download the
OR install manually |
Port Utilization Requirements
The following ports must be open on the server for the voice connector to function.
|
Type |
Application |
Description |
Port |
|
TCP |
Media Server |
ESL port |
8021 |
|
TCP |
Media Server |
Websocket port |
7443 |
|
TCP |
Voice Connector |
Access port |
(Select any random port for VC in the configuration below - compose.yml) |
|
TCP |
Postgres |
Database access port |
5432 |
|
TCP |
Dialer |
Access port |
any port (You configured it during dialer deployment ) |
-
Run the below single command to open 8021, 7443, 5432 listed above:
-
for port in 8021 7443 5432; do iptables -A INPUT -p tcp --dport $port -j ACCEPT && echo "✅ Opened TCP port $port"; done
-
-
Save this port configuration with command:
-
sudo iptables-save
-
Container Deployment
The voice connector is deployed as a docker image.
-
Create a folder voice-connector with the command:
-
mkdir voice-connector
-
-
Enter the folder with the command:
-
cd voice-connector
-
-
Create a file docker-compose.yml.
-
vi docker-compose.yml
-
-
Enter editing mode with the 'I' or 'Insert' keys.
-
Copy the contents below and paste them into the file docker-compose.yml :
version: "3.8" services: voice-connector: image: gitimages.expertflow.com/freeswitch/ecx_generic_connector:TAG deploy: resources: limits: memory: 1024m reservations: memory: 256m container_name: unified-voice-connector ports: - 8115:8080 env_file: - ./env.txt command: ["java", "-Xms256m", "-Xmx1024m", "-XX:+UseG1GC", "-XX:MinHeapFreeRatio=10", "-XX:MaxHeapFreeRatio=30", "-jar", "/app/ecx_generic_connector.jar"] restart: always-
Replace the 'TAG' keyword with the required image tag obtained from the releases page here.
-
The script above uses port 8115 for the VC by default. You can use this port unless you get a "port already in use" error while creating the YAML file. If that happens, choose a different random port and open it using the command below.
-
-
Save and exit by :
-
Press the Esc key.
-
Enter the phrase :wq to save and exit.
-
Now open the voice connector port used in the above YAML file. In below command replace the PORT placeholder with the VC port
-
iptables -A INPUT -p tcp --dport PORT -j ACCEPT && iptables-save/iptables -A INPUT -p tcp --dport PORT -j ACCEPT && iptables-save
-
-
Create a file env.txt
-
vi env.txt
-
-
Enter editing mode with the 'I' or 'Insert' keys.
-
Copy the contents below and paste them into the file env.txt :
CX_FQDN=https://*.expertflow.com ESL_PORT=8021 ESL_PASSWORD=MyEslPass DIALER_API=http://192.168.1.10:6666 LOG_LEVEL=INFO AUTH_ENABLED=false API_USERNAME=admin API_PASS=admin ROOT_DOMAIN=tenant-id # for MTT tenancy it will be rootdomain of efcx solution (eg.. expertflow.com) ESL_DEFAULT_DOMAIN=192.168.1.17-
CX_FQDN: In case of multitenancy, this variable will remain as it is, In case of single tenant its value will be FQDN of your CX instance.
-
ESL_PORT: The port of Media Server ESL (Leave Default 8021, Same as in Media Server settings)
-
ESL_PASSWORD: Leave it for now; we will update it after installing the Media Server.
-
Dialer used for outbound dialling, If you deploy the dialer, follow the Dialer_API step below; otherwise, leave it as is.
-
DIALER_API: API link of the dialer in format: http://IP:PORT (Fill in IP and PORT of dialer)
-
Where IP is the IP address of the current server.
-
And PORT is the external port of the dialer container.
-
Leave at default value if not using the progressive outbound feature.
-
-
LOG_LEVEL: The amount of detail in the logs. Default is INFO, and for more detailed logs the value should be DEBUG.
-
AUTH_ENABLED: By default its false, You can make it true or false depending on whether APISIX authentication is enabled in EFCX. The following settings below are set if this value is true.
-
API_USERNAME: The username created in Keycloak for API authentication.
-
On Keycloak create a user in the Expertflow realm.
-
Assign the admin and default roles to it
-
Assign a non-temporary password to this user as well.
-
-
API_PASS: The password for the above user created in Keycloak for API authentication
-
ROOT_DOMAIN: In multitenancy, the root domain value depends on your organization's root domain. For example, Experflow root domain is experflow.com. For a single tenant, the value is your tenant-id.
-
ESL_DEFAULT_DOMAIN: VM IP where you deploying VC and will deploy Media Server used to establish ESL connection
-
-
Run the command:
-
docker login gitimages.expertflow.com -
Enter your username and password as prompted (make sure that you were granted access to the repository).
-
-
Within the folder run the command:
-
docker compose up -d
-
-
Confirm that the docker container is running by using the command:
-
docker ps
-

-
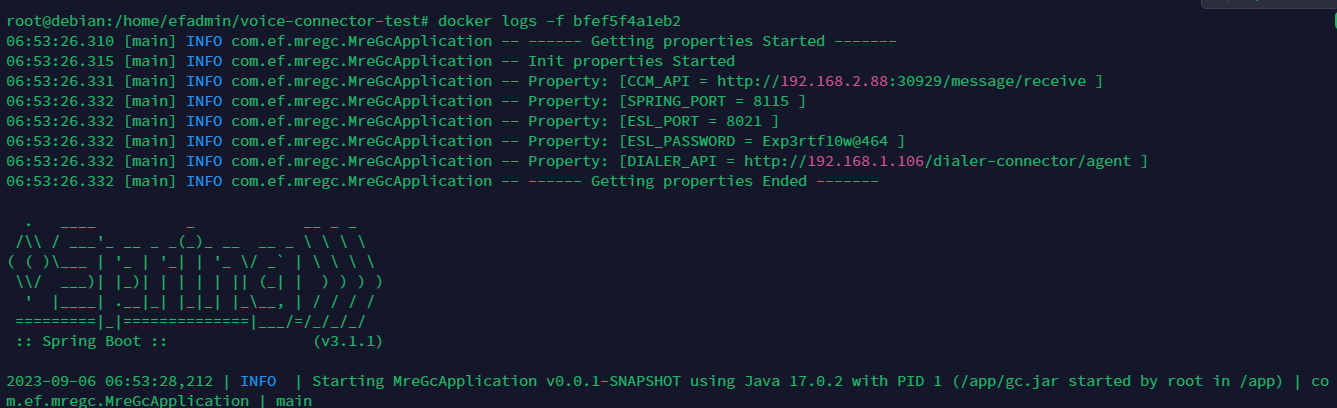
Confirm that the container is running correctly by opening the logs with command:
-
docker logs -f containerID
-