Enables agents to handle inbound email interactions and launch outbound emails.
Handle Inbound Email Interactions
This guide is intended for ExpertFlow agents to handle customer email conversations via the Agent Desk.
It outlines step-by-step procedures for all essential email activities, from viewing an inbound message to composing outbound replies, in a format that mirrors professional contact center workflows.
Use Email Signatures
The business admins can configure signatures in the unified admin. Each email channel may have its own defined signature template. The agent can use pre-configured signatures.

Steps to Configure (Admin-only):
-
Navigate to:
Email > Signature -
Add or edit the Signature Name.
-
Enter the Channel Identifier (agent email).
-
Use
{{AGENT_NAME}}in the signature body to dynamically populate the logged-in agent’s name at runtime.
This makes the signature reusable across all agents in a department.
Basic Table Support (from 4.10.1 onwards)
Agents can copy and paste table content from Excel while typing an email. The system preserves row and column layout, ensuring structured data appears clearly in customer responses. However, it does not retain formatting styles or alignment, such as colors, fonts, cell borders. Also, Excel formulas, conditional formatting, or live data links are not supported. Complex tables may lose visual clarity.
Follow the following steps to draw a table in the email composer:
-
Copy a table from Excel.
-
Paste into the email composition area in Agent Desk.
-
Result: A clean HTML table appears, retaining rows and columns but without, or, limited styling.
.png?cb=27b9c77ca9374fba12caf17a5c89044f)
Full Excel-style table formatting is part of a future release.
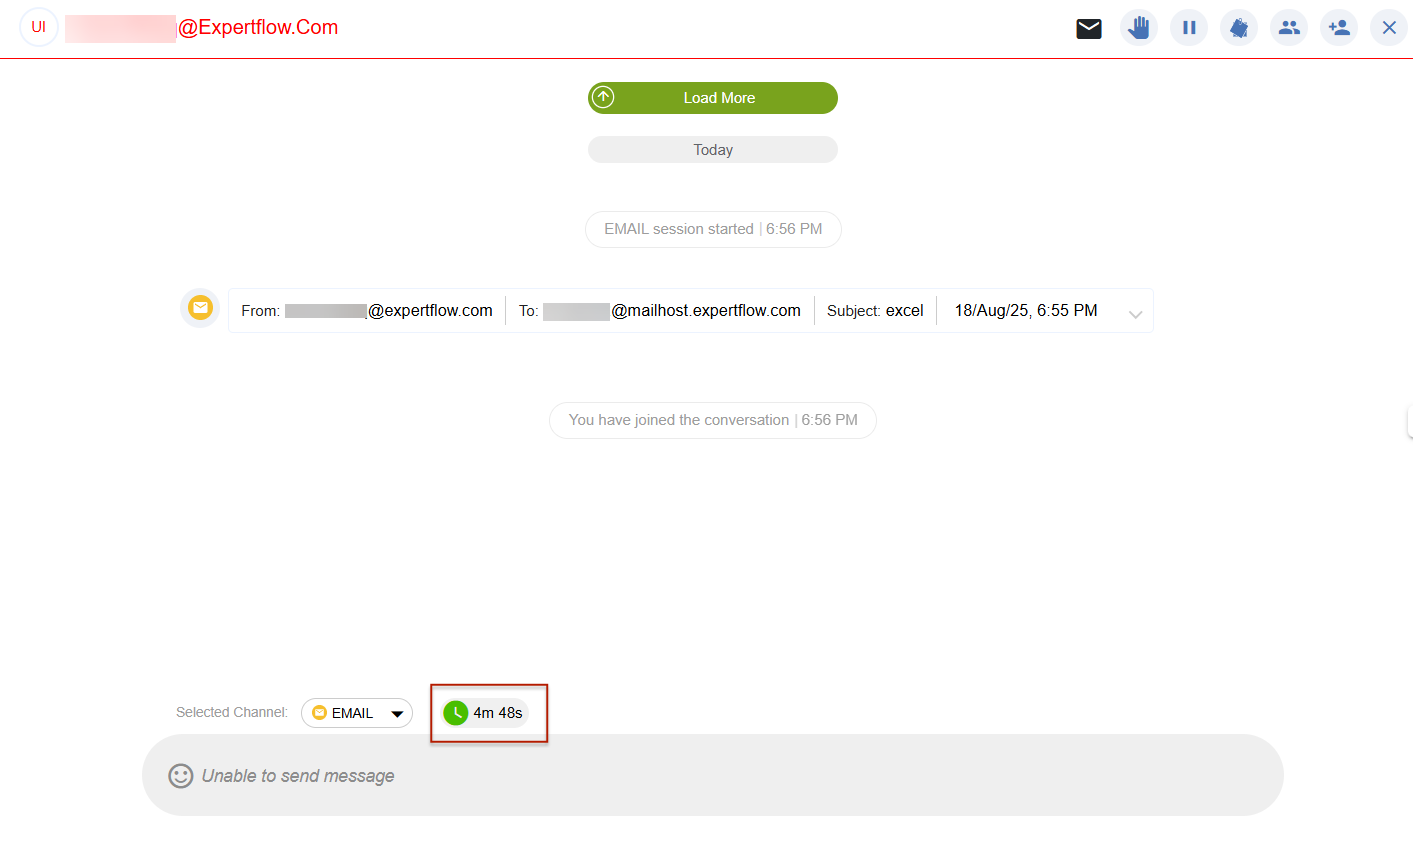
Display Agent Response Time
As an agent opens an email, a visible countdown timer showing the remaining response time is displayed. This helps agents to track the remaining response time, supporting better prioritization and time management.
Receive and View Emails
-
Incoming emails are routed to the Agent Desk.
-
The agent is notified in real-time.
-
Click the customer session to view the email content.
-
Click the expand icon on the right to see the full email, including sender, recipient(s), subject, timestamp, message body, and attachments.
-
Attachments are shown as clickable blocks with file size.
-
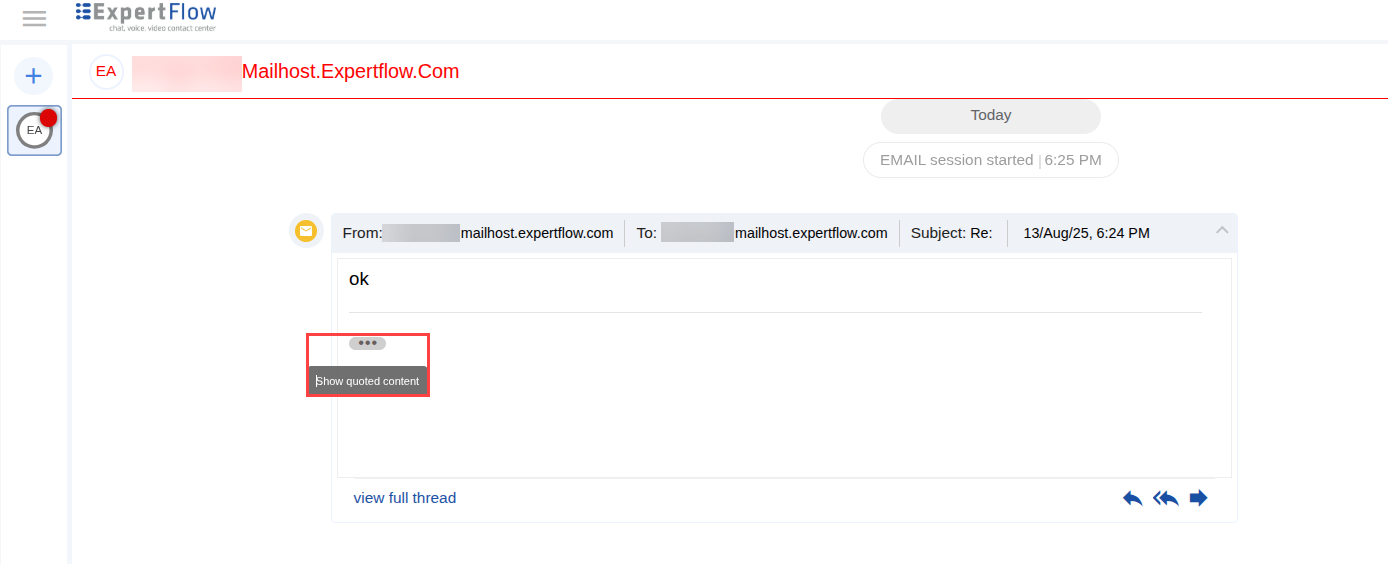
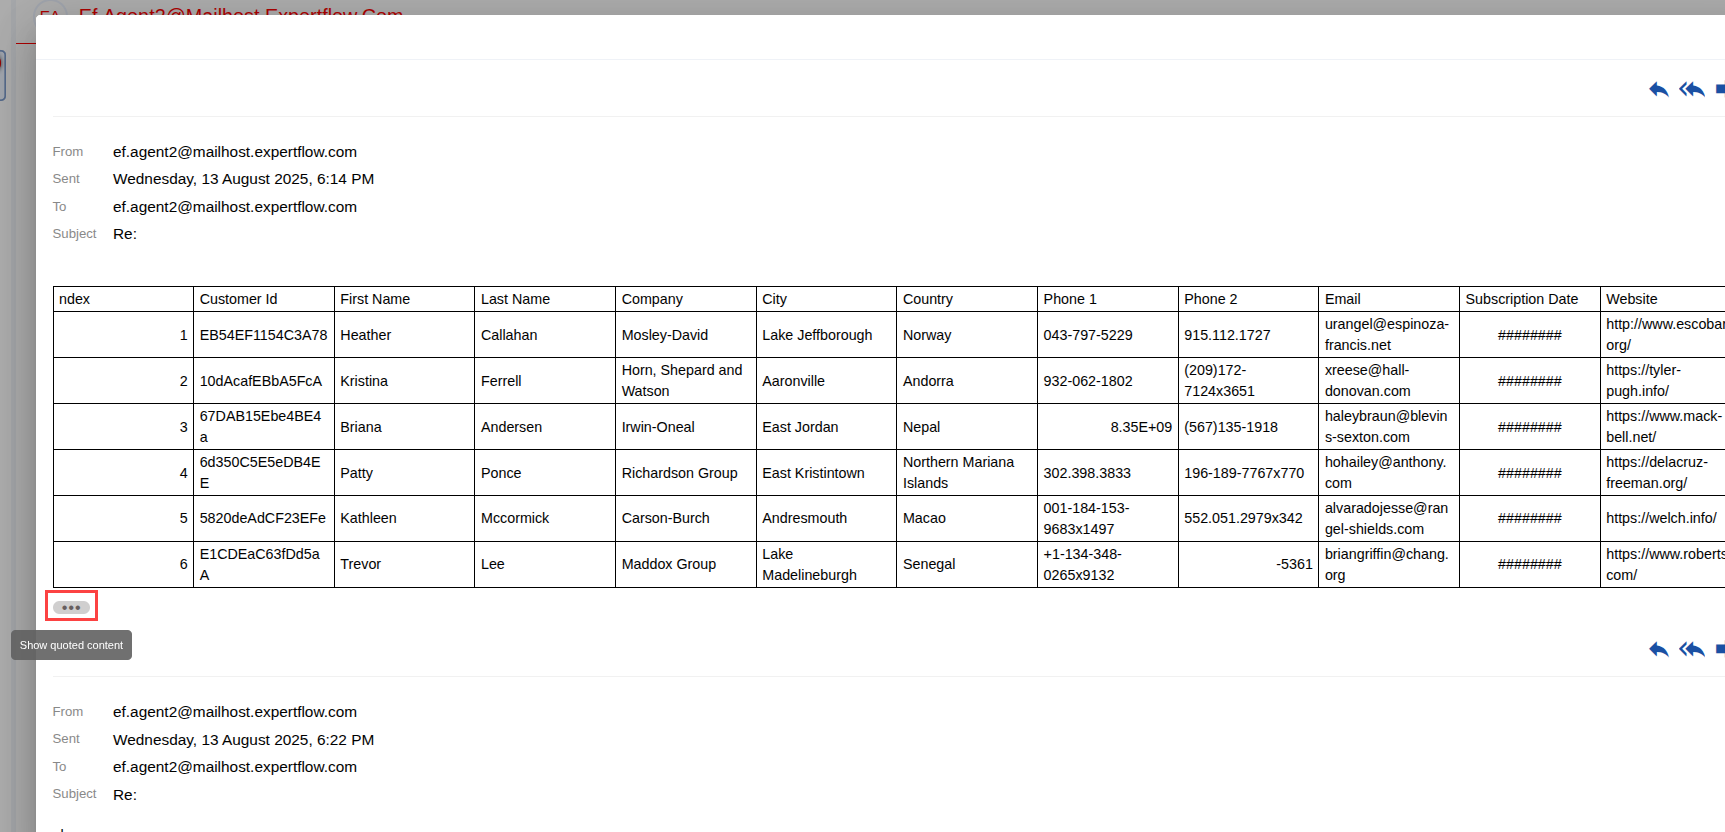
By default, the quoted content of an email will remain hidden, and the agent can toggle between expanding and collapsing the quoted view
Attachments such as PDFs, images, and documents can be downloaded directly from the interface.
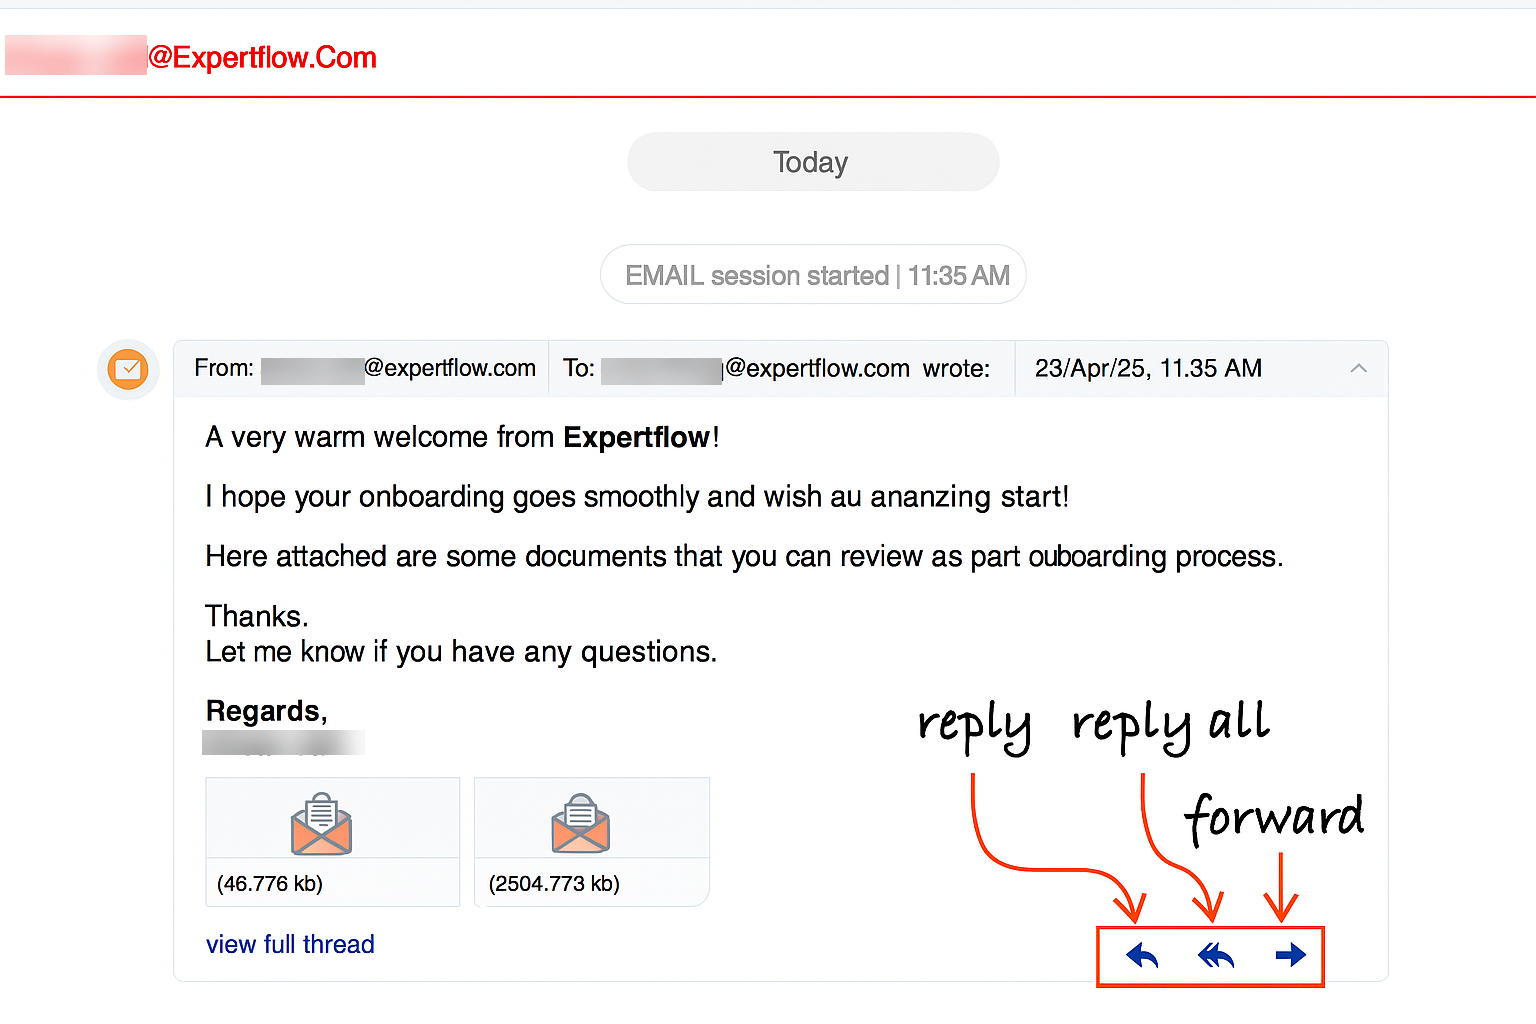
Reply to Customer Emails
To reply to a single sender
-
Open the email in expanded view.
-
Click the Reply icon (leftmost from the bottom-right toolbar).
-
A compose window opens.
-
Type your message. The signature will be auto-populated.
-
Click Send Email.
Agents may format text using bold, italic, underline, etc., or insert links, images, or attachments.
For further information on it, go to this page.
To reply to all original recipients
-
Click the Reply All icon (middle option).
-
The compose window includes:
-
Original sender in the To field
-
All CC’d recipients
-
-
Enter your message, modify recipients if needed, and click Send Email.
Use this when the agent’s response needs visibility across all stakeholders.
For further information on it, go to this page.
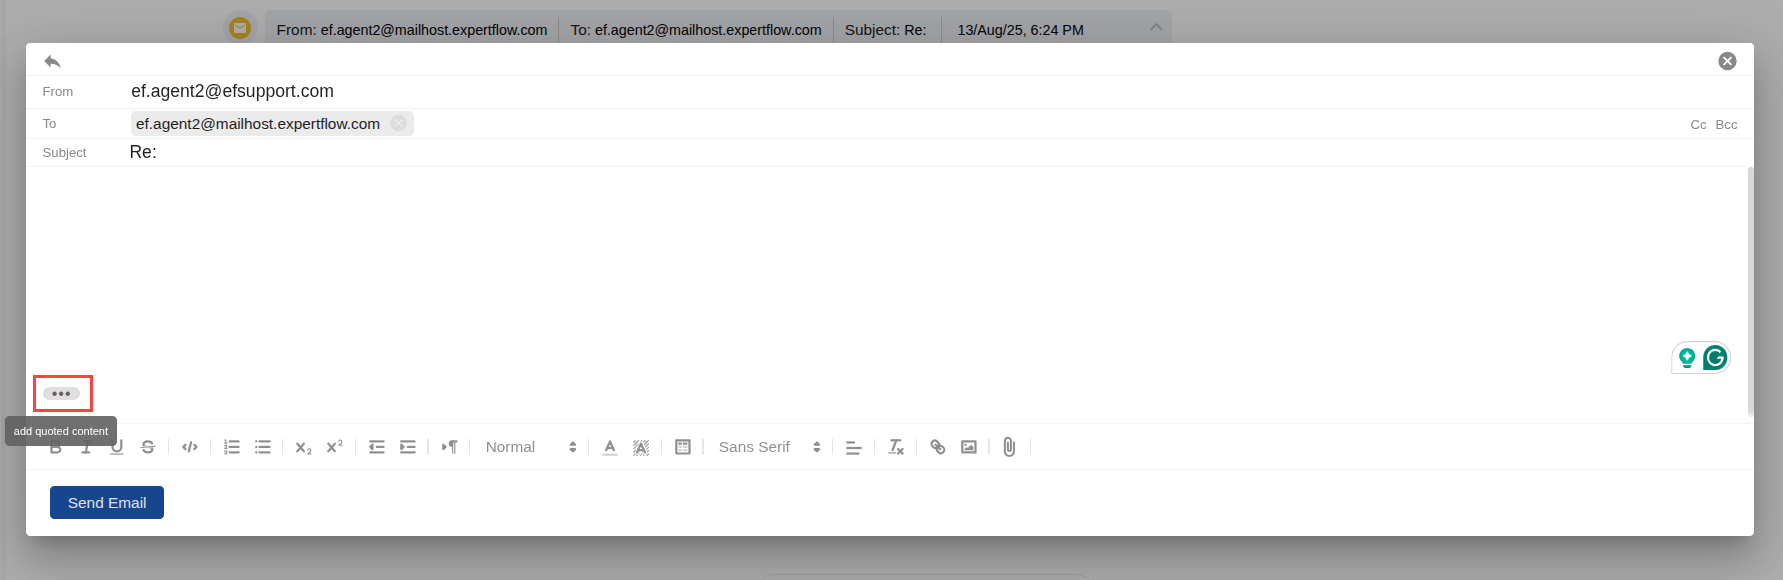
While composing an email, in case of Reply and Reply all, the quoted content of the email will be hidden by default, and the agent can make it a part of the email content upon clicking the (…) three-dot button at the bottom of the composer.
Forward an Email
Allows agents to forward received emails to any recipient, whether internal team members or external contacts. This supports information sharing and collaboration by enabling agents to redirect relevant email content without leaving the conversation interface.
To forward an email to another person (internal or external)
-
Open the email message you wish to forward.
-
Click the Forward icon (located at the far right of the message toolbar).
-
The To, Cc, and Bcc fields will appear blank to add your intended recipient(s).
-
Optionally, write a message to accompany the forwarded email.
-
Click Send Email to complete the action.
The original message content and any attachments will be automatically included in the forwarded email.
For more details, visit this page.
View Full Email Thread
Allows agents to access the complete context of an email conversation by expanding the full thread directly within the interface. Agents can toggle between a condensed view and the full thread to reveal all previous messages, including quoted content. This ensures better visibility into the conversation history, supports informed responses, and reduces the need to switch between views or external tools.
To view the previous email context
-
At the bottom of an expanded email, click View full thread.
-
This opens a chronological timeline of all emails exchanged within the same conversation.
Within any message in the thread, you can:
-
Reply
-
Reply All
-
Forward
This helps agents retain full context before responding. By default, quoted content remains hidden to reduce clutter, but agents can toggle between expanded and collapsed views as needed.
For more details, visit this page.
Initiate Outbound Email Communication
To start a new email interaction with a customer (not as a reply)
-
Ensure the customer session is active.
-
Click the Email icon located in the top-right toolbar.
-
Compose your message, add recipient(s), and enter a subject line.
-
Click Send Email to initiate the outbound communication.
This option is only available for customers with an active session.
For more details, visit this page.

Rich Text Support in Email Composer
|
Feature(s) |
Icon (as shown) |
Description |
|---|---|---|
|
Bold |
B |
Makes the selected text bold. |
|
Italic |
I |
Italicizes the selected text. |
|
Underline |
U |
Underlines the selected text. |
|
Text Color |
A with a color bar |
Allows for changing the color of text. |
|
Font Size |
Drop-down (Normal) |
Adjusts the font size (e.g., Normal, Heading, Small). |
|
Font Family |
Sans Serif drop-down |
Allows selection between font styles (e.g., Serif, Sans Serif, Mono). |
|
Bulleted List |
|
Creates a list with bullet points. |
|
Numbered List |
1.2.3. icon |
Creates a list with numbers. |
|
Text Alignment |
Left-align icon |
Aligns text to left, center, or right. |
|
Insert Link |
🔗 (link icon) |
Embeds a clickable URL. |
|
Insert Image |
🖼️ (image icon) |
Embeds an inline image in the email body. |
|
Attach File |
📎 (paperclip icon) |
Uploads and attaches files from a local system (PDFs, PNGs, Docs, etc.). |
Supported File Types for Attachments
|
Direction |
Supported File Types |
|---|---|
|
Agent Desk → Email |
|
|
Email → Agent Desk |
|
Other file types may be supported depending on server or connector configuration, but the above list includes tested and verified formats.