Voice Connector
Voice connector upgrade
-
SSH onto the Debian server on which the Voice connector is installed.
-
Use command
ssh <username>@<server-ip> -
Enter user password and press ENTER.
-
Use command
su -
Enter root password and press ENTER.
-
-
Run the command to see the list of running containers
docker ps -
Note the container ID of the current deployed 4.5.1 Voice connector.
-
Note the port of that container i.e. for 0.0.0.0:8116->8080/tcp, :::8116->8080/tcp, the port of the container is 8116.
-
Run the command to stop the container
docker stop <container-ID> -
Run the command to remove the container
docker rm <container-ID> -
Navigate to the folder where the docker-compose.yml and env.txt files are located for the voice connector.
-
Open the docker-compose.yml file and replace the text inside with text below:
version: "3.8" services: voice-connector: image: gitimages.expertflow.com/freeswitch/ecx_generic_connector:4.5.2 container_name: unified-voice-connector ports: - PORT:8080 env_file: - ./env.txt restart: always -
Replace the PORT keyword with the port noted above in step 4.
-
Open the env.txt file and remove the fields MIDDLEWARE_API, DB_NAME, DB_URL, DB_PORT, DB_USERNAME, DB_PASS, DB_CONN_TIMEOUT and DB_DRIVER.
-
Run the command
docker compose up -d -
Confirm that the docker container is running by using the command
docker ps
-
Confirm that the container is running correctly by opening the logs with command
docker logs -f containerID
Media Server configuration
Scripts
-
SSH onto the Debian server on which the Voice connector is installed.
-
Use command
ssh <username>@<server-ip> -
Enter user password and press ENTER.
-
Use command
su -
Enter root password and press ENTER.
-
-
Confirm git is installed, and install it if is not.
-
Clone the Media Server scripts repository:
git clone -b 4.5.2-ptcl https://efcx:RecRpsuH34yqp56YRFUb@gitlab.expertflow.com/rtc/freeswitch-scripts.git -
Navigate to the cloned repository to access the files:
cd freeswitch-scripts -
Move scripts to the Media Server scripts folder:
mv *.lua /usr/share/freeswitch/scripts -
Run the following command:
chmod -R 777 /usr/share/freeswitch/scripts
Silent Monitoring Dialplan
-
Login to Media Server web interface.
-
Open in browser: https://IP-addr, where IP-addr is the IP address of the Media Server.
-
-
Add the username and password that was shown upon installation of Media Server and press LOGIN.
-
Press the IP address in the top right and select the Domain being used:

-
Open the Dialplan Manager section under the Dialplan tab.

-
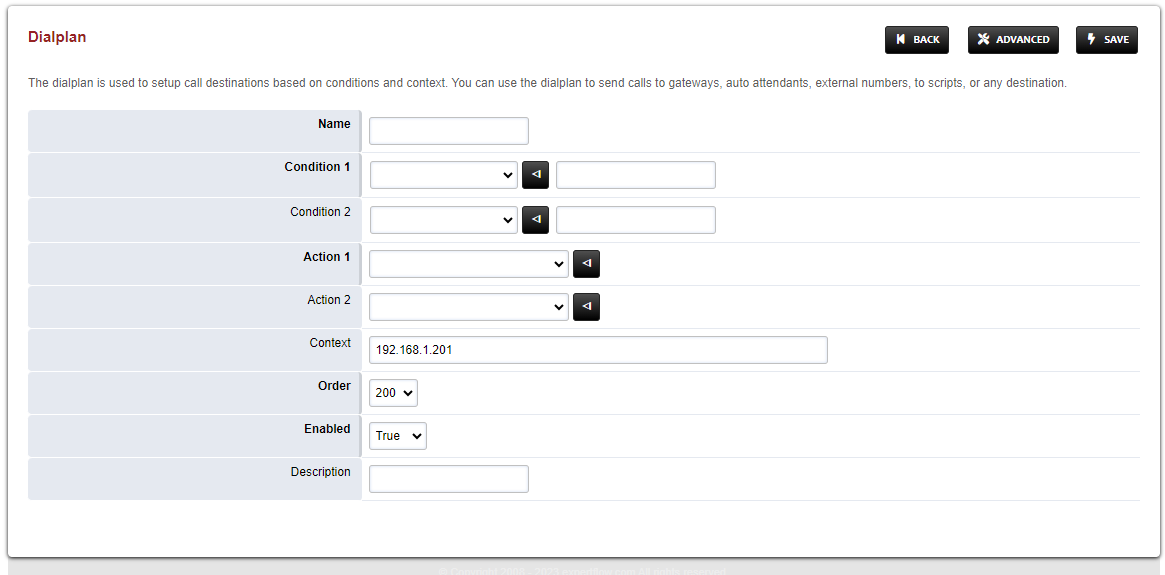
Add a new Dialplan by pressing the Add Button on the top.
-
Fill the form with following details :
-
Name = Silent_Monitoring
-
Condition 1 = Select destination_number from list and add ^\*44(\d{2,15})$
-
Action 1 = Select first item from the list
-
-
Save the form by pressing save button on top right Corner.
-
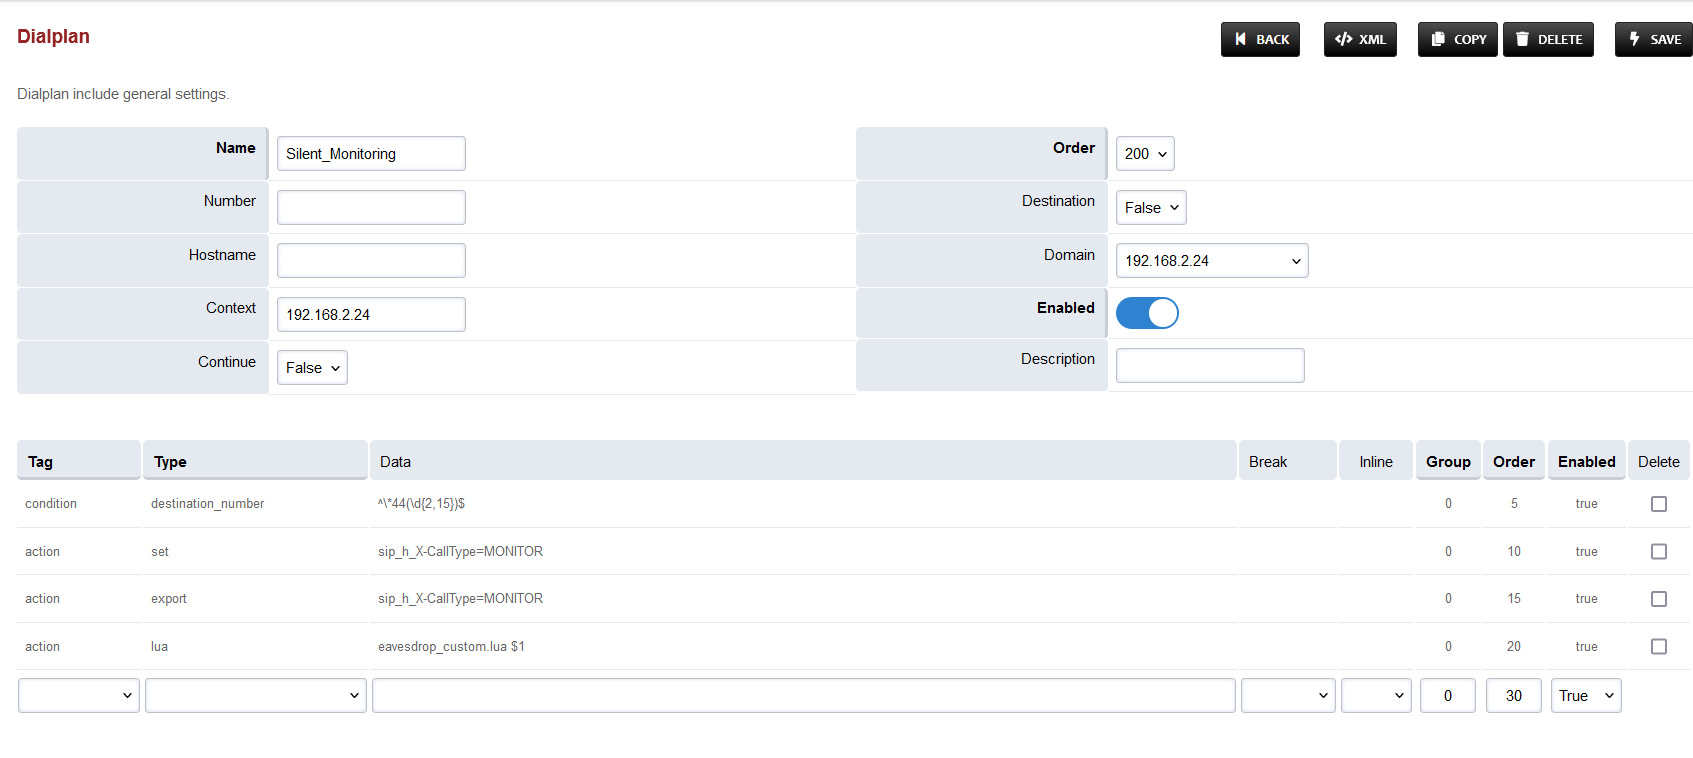
Re-open Silent_Monitoring dialplan.
-
Delete the line with the Action tag (Click the checkbox in the right and press SAVE in the top right)
-
Add the following information to this dialplan:
|
Tag |
Type |
Data |
Group |
Order |
Enabled |
|---|---|---|---|---|---|
|
action |
set |
sip_h_X-CallType=MONITOR |
0 |
10 |
true |
|
action |
export |
sip_h_X-CallType=MONITOR |
0 |
15 |
true |
|
action |
lua |
eavesdrop_custom.lua $1 |
0 |
20 |
true |
-
Set the Context field to the value of the Domain being used.
-
Set the Domain field to the value of the Domain being used.
-
Save the changes by pressing SAVE button in top right corner.
Conference Dialplan
-
Login to Media Server web interface.
-
Open in browser: https://IP-addr, where IP-addr is the IP address of the Media Server.
-

-
Add the username and password that was shown upon installation of Media Server and press LOGIN.
-
Press the IP address in the top right and select the Domain being used:

-
Open the Dialplan Manager section under the Dialplan tab.

-
Add a new Dialplan by pressing the Add Button on the top.

-
Fill the form with following details :
-
Name = CustomConf
-
Condition 1 = Select destination_number from list and add ^custom_conf_(.*)$
-
Action 1 = Select first item from the list
-
-
Save the form by pressing save button on top right Corner.
-
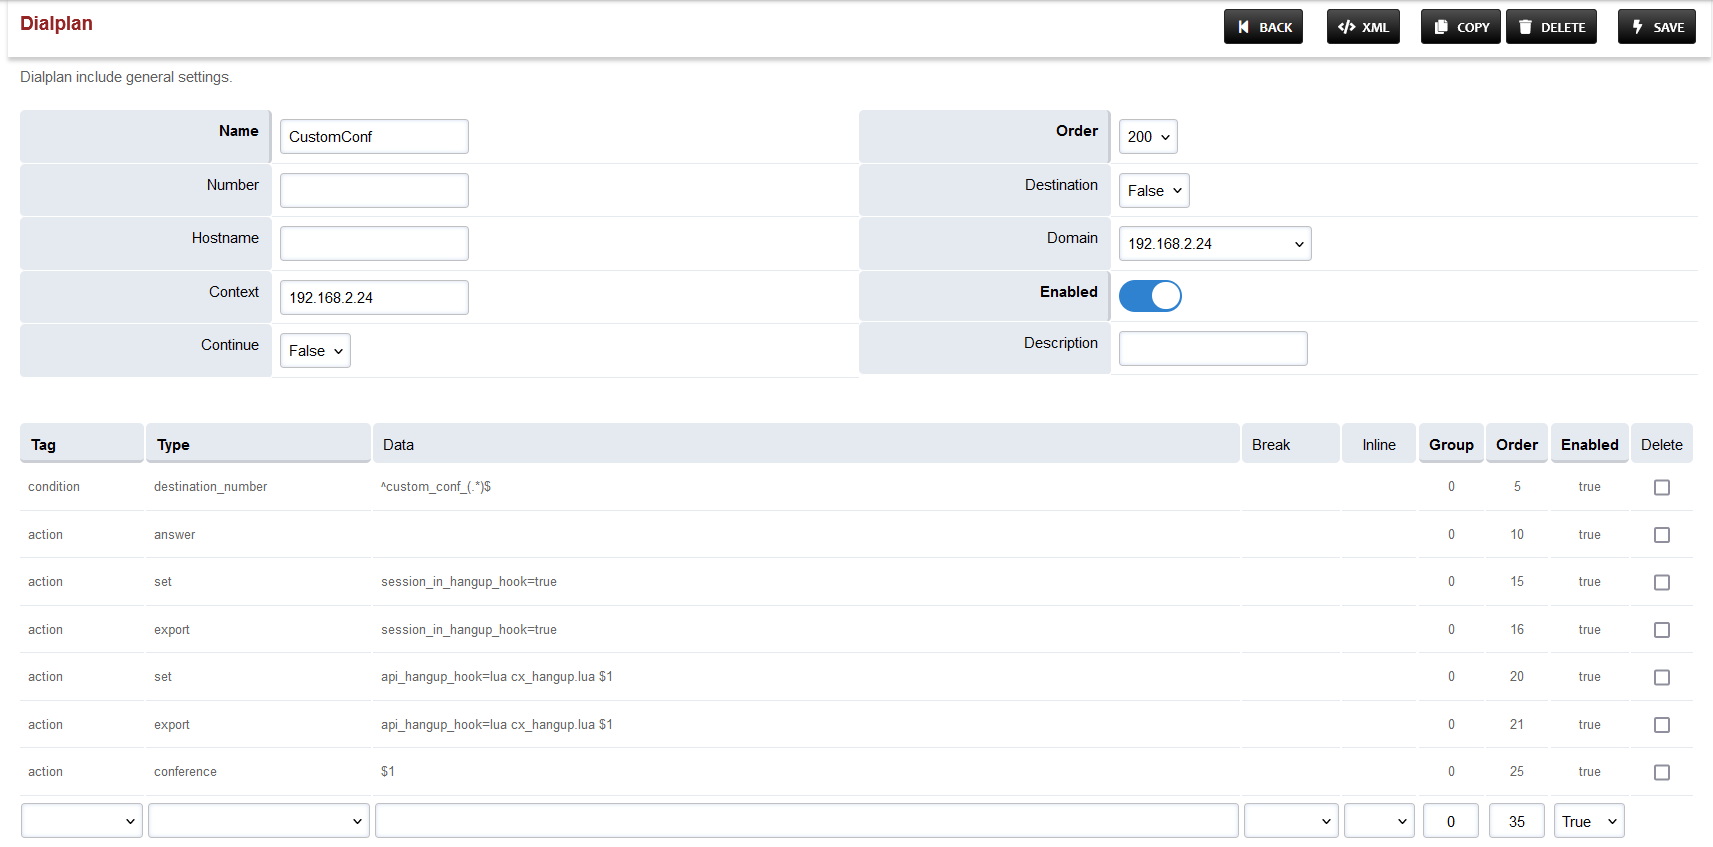
Re-open CustomConf dialplan.
-
Delete the line with the Action tag (Click the checkbox in the right and press SAVE in the top right)
-
Add the following information to this dialplan:
|
Tag |
Type |
Data |
Group |
Order |
Enabled |
|---|---|---|---|---|---|
|
action |
answer |
|
0 |
10 |
true |
|
action |
set |
session_in_hangup_hook=true |
0 |
15 |
true |
|
action |
export |
session_in_hangup_hook=true |
0 |
20 |
true |
|
action |
set |
api_hangup_hook=lua cx_hangup.lua $1 |
0 |
25 |
true |
|
action |
export |
api_hangup_hook=lua cx_hangup.lua $1 |
0 |
30 |
true |
|
action |
conference |
$1 |
0 |
35 |
true |
-
Set the Context field to the value of the Domain being used.
-
Set the Domain field to the value of the Domain being used.
-
Save the changes by pressing SAVE button in top right corner.
Changes in User Exists Dialplan
-
Login to Media Server web interface.
-
Open in browser: https://IP-addr, where IP-addr is the IP address of the Media Server.
-
-
Add the username and password that was shown upon installation of Media Server and press LOGIN.
-
Press the IP address in the top right and select the Domain being used:

-
Open the Dialplan Manager section under the Dialplan tab.

-
Find and open the user_exists dialplan.
-
Add the following information(to add custom values in the Type column, select a random value then click on it to edit):
|
Tag |
Type |
Data |
Group |
Order |
Enabled |
|---|---|---|---|---|---|
|
condition |
${sip_h_X-CallType} |
^CONSULT$ |
3 |
5 |
true |
|
action |
bind_meta_app |
A a s1 lua::consult_conf.lua CONSULT_TRANSFER |
3 |
10 |
true |
|
action |
bind_meta_app |
C a s1 lua::consult_conf.lua CONSULT_CONFERENCE |
3 |
15 |
true |
-
The result will look like this:

-
Save the changes by pressing SAVE button in top right corner.
Changes in conference profile
-
Login to Media Server web interface.
-
Open in browser: https://IP-addr, where IP-addr is the IP address of the Media Server.
-

-
Add the username and password that was shown upon installation of Media Server and press LOGIN.
-
Press the IP address in the top right and select the Domain being used:

-
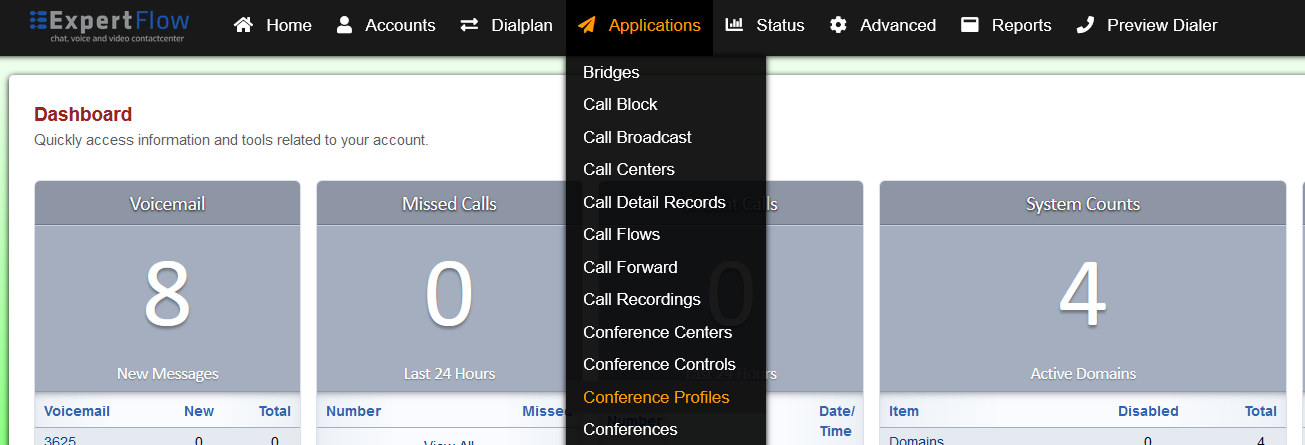
Open the Conference Profiles section under the Applications tab:
-
Open the profile named default:

-
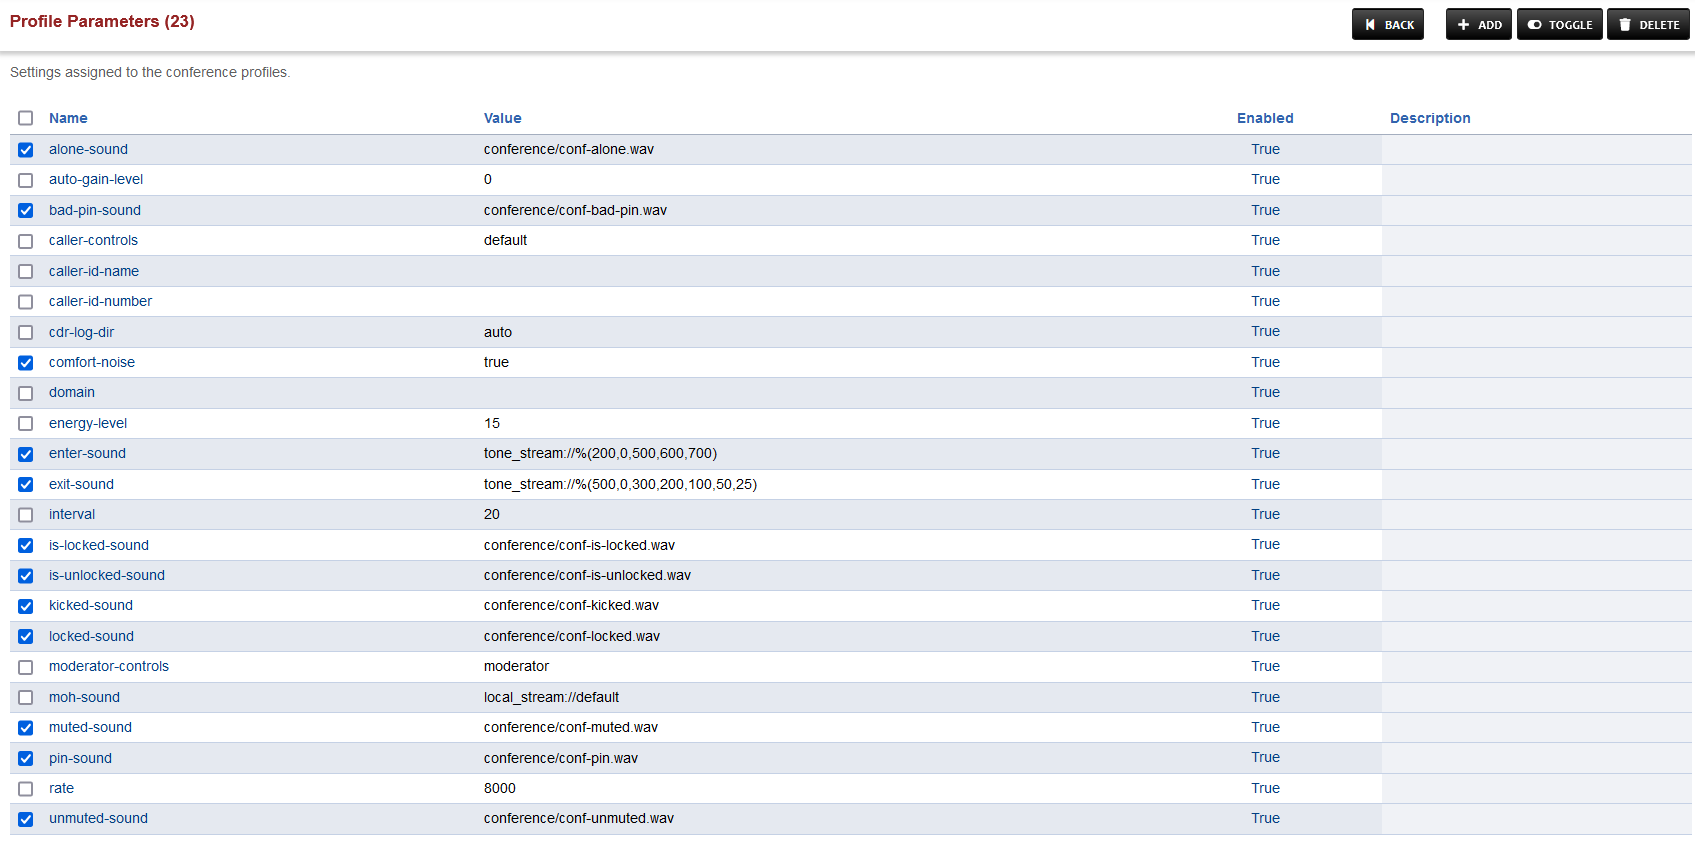
Under the Profile Parameters, find the following keywords under the Name column and click the checkbox:
-
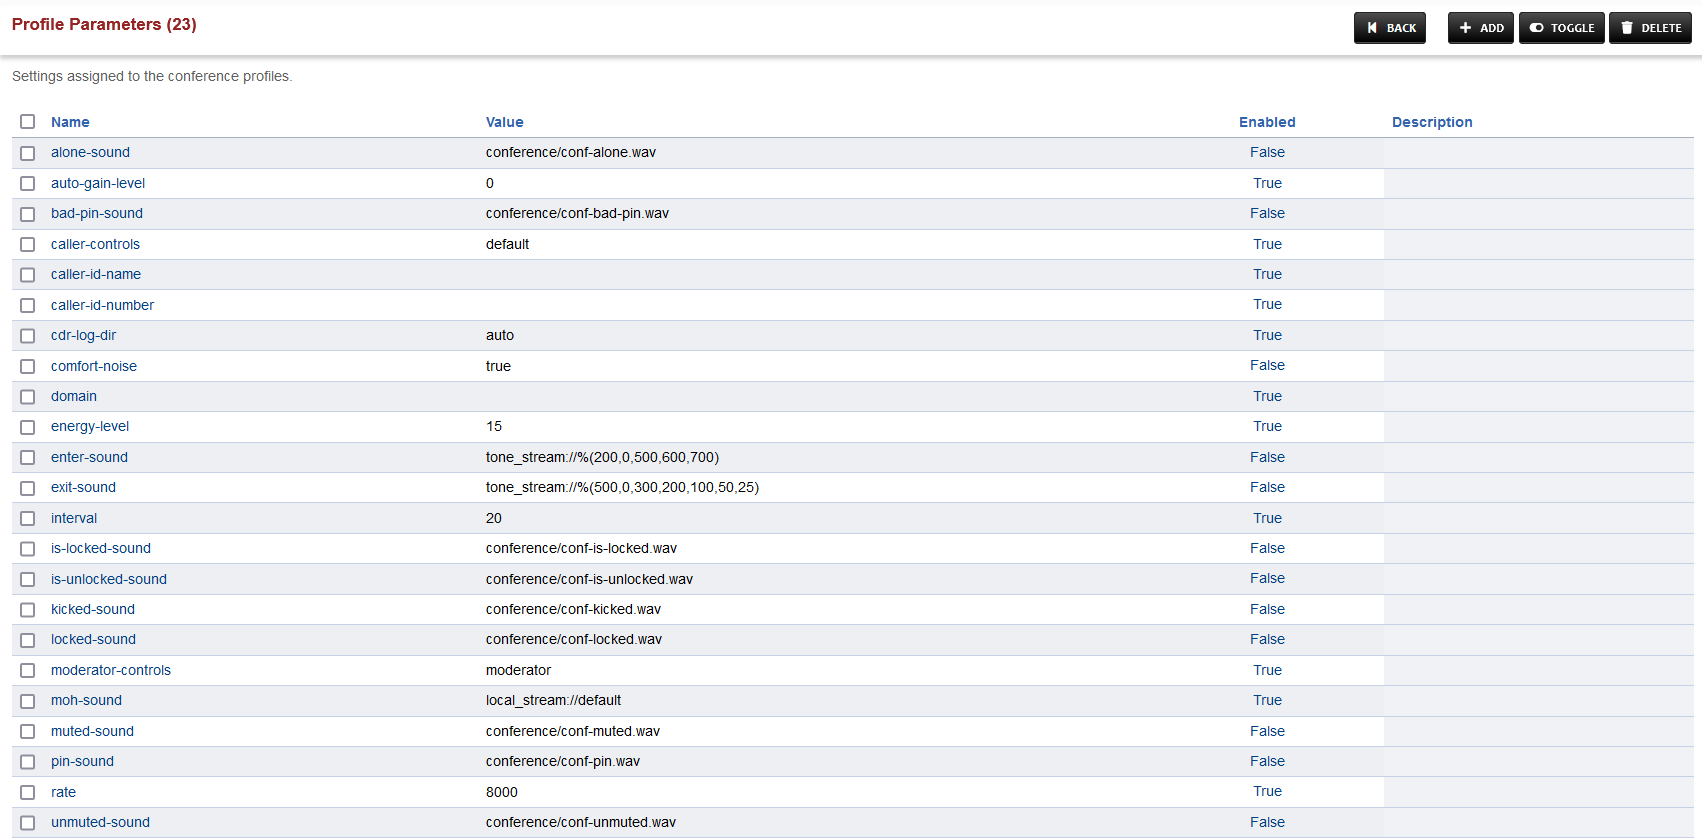
Press TOGGLE in the top right and choose CONTINUE in the prompt shown.
-
Save the changes by pressing SAVE button in top right corner.
Changes in SIP Profile
-
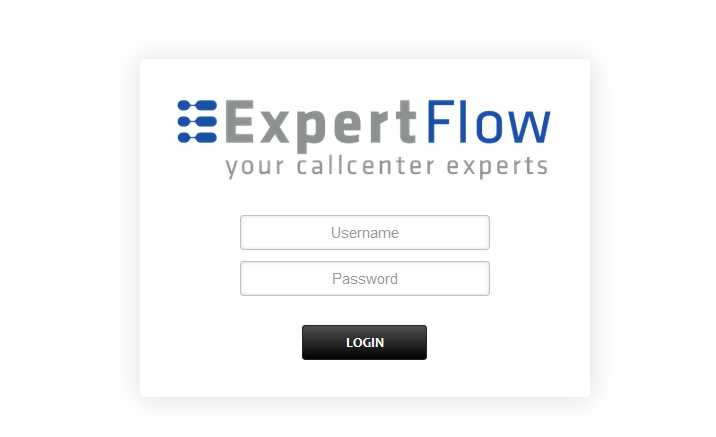
Login to Media Server web interface.
-
Open in browser: https://IP-addr, where IP-addr is the IP address of the Media Server.
-
-
Add the username and password that was shown upon installation of Media Server and press LOGIN.
-
Press the IP address in the top right and select the Domain being used:

-
Open SIP Profiles under the Advanced tab.

-
Open the newtest profile, scroll down to the ws-binding and wss-binding fields, and set their Enabled column values to True.

-
Find the liberal-dtmf fields and its Value and Enabled columns to true.
-
At the bottom add the data:
|
Name |
Value |
Enabled |
|---|---|---|
|
apply-candidate-acl |
0.0.0.0/0 |
True |
-
Press the SAVE button on the top right.
-
Open SIP Status under the Status tab.
-
Locate the line sofia status profile newtest and to its right press the RESCAN button, followed by the RESTART button after the page reloads.