The LinkedIn Developer Platform facilitates integration of Expertflow CX with LinkedIn. Expertflow CX interacts with content generated by a LinkedIn Page so third-party application must use an Access Token to authorise API requests on behalf of a LinkedIn member or organisation. The Access Token carries the scope of permissions granted to the application, such as reading page posts, comments or publishing content. To enable this integration, developers must create and configure a LinkedIn App through the LinkedIn Developer Portal, which allows Expertflow CX to communicate with the LinkedIn platform.
Pre-Requisite for LinkedIn Channel
Generating an Access Token for LinkedIn's API
Assuming you already have a verified app on the LinkedIn Developer Portal, also you have requested for the standard upgrade.
-
Go to the LinkedIn OAuth Token Generator.
-
Sign in with your LinkedIn account if you aren’t already logged in.
-
If you have multiple apps in your LinkedIn Developer account, select the app you want to generate a token for from the dropdown menu.
-
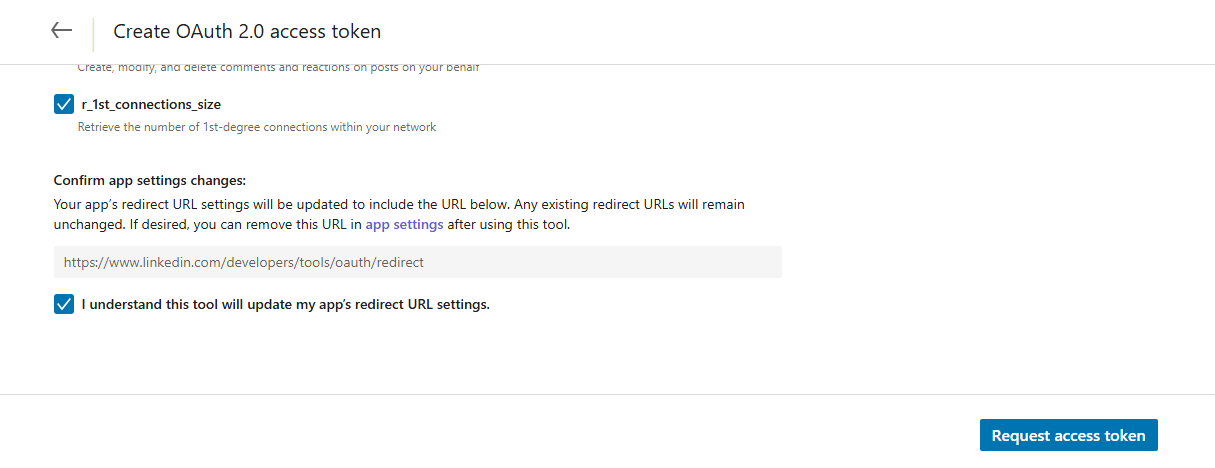
Under "Select OAuth 2.0 Scopes", choose all the permissions for your app.
-
Check the button 'I understand this tool will update my app’s redirect URL settings.'
-
Click the "Request access token" button.
-
If you are not already login on linkedIn then it will ask you to login,
-
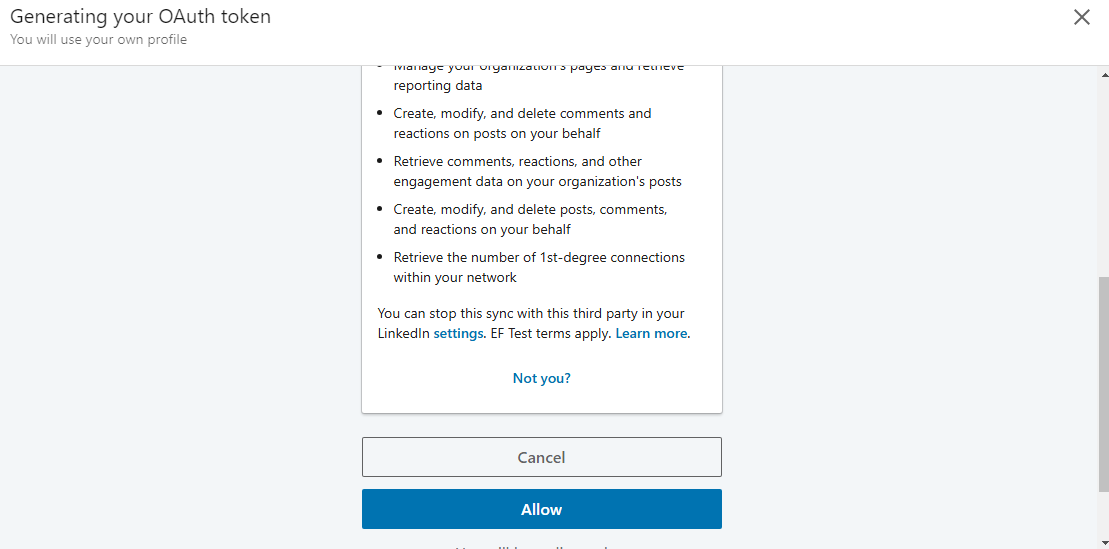
LinkedIn will prompt you to authorize the app. Review the permissions and click "Allow".
-
Copy the generated Access Token from the tool.
Unified Admin Configuration
To set up the LinkedIn Channel, the LinkedIn connector needs to be configured in the Unified Admin of the Expertflow CX's application.
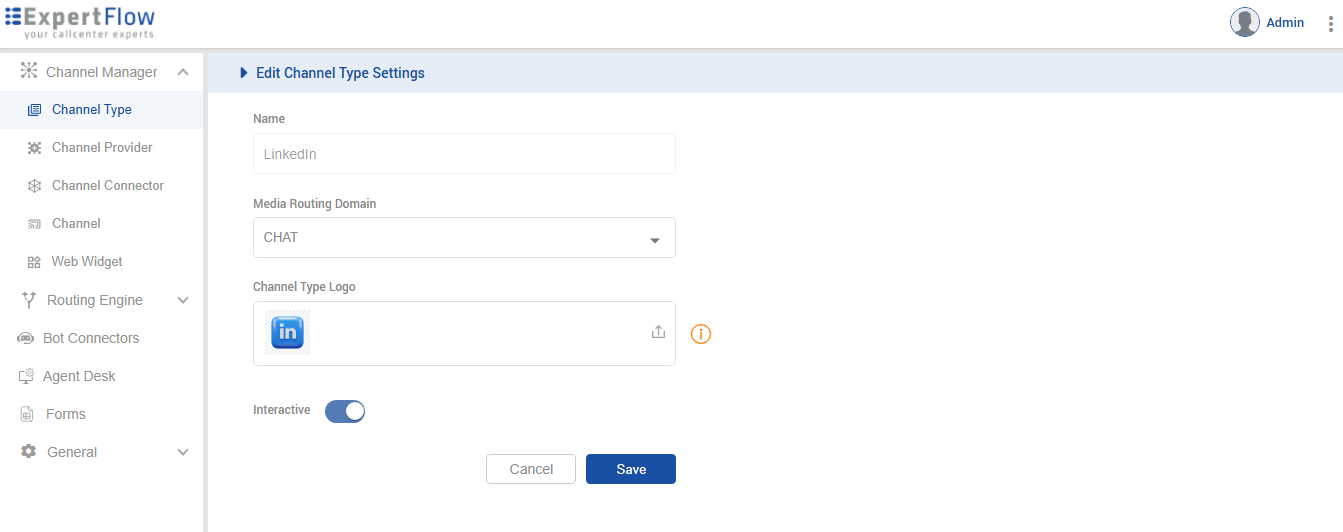
Channel Type
-
Create a new Channel Type (if it doesn't exist).
-
Select a Chat in the MRD.
Channel Provider
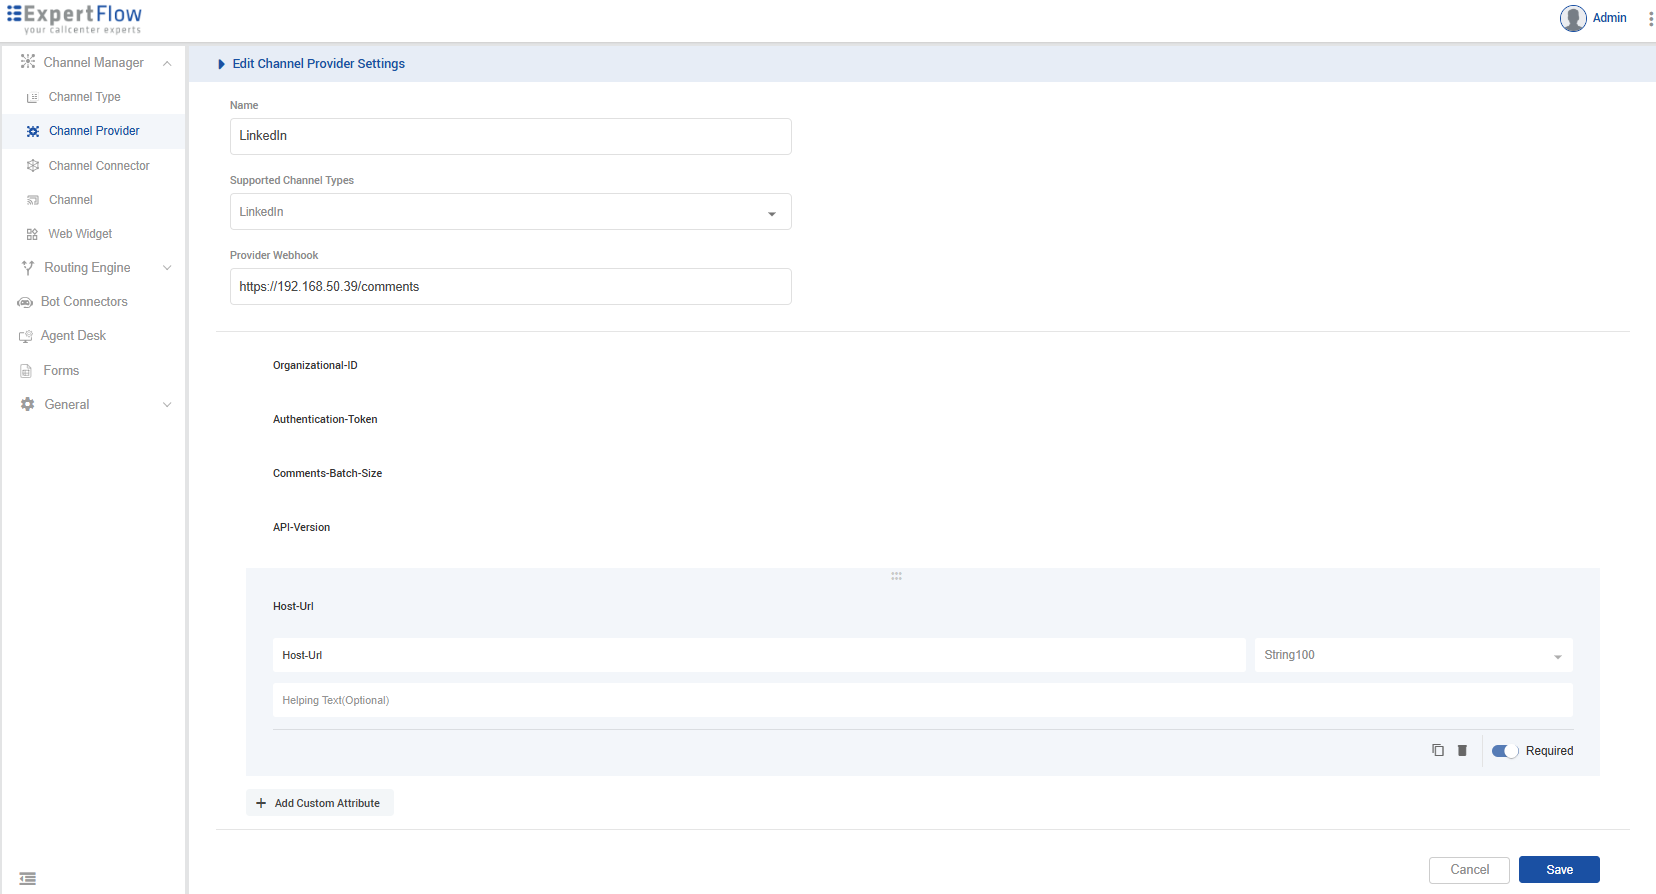
It's recommended that the component’s service name be used in the "Channel Provider -> Provider's Webhook" field. However, FQDN can also be used with some additional custom configurations.
-
Create a Channel Provider and give it the name "LinkedIn Provider"
-
Provide the service name of LinkedIn Connector in the Provider Webhook field as http://{SERVICE-NAME}:{SERVICE-PORT}/comments. Replace the {SERVICE-NAME} and {SERVICE-PORT} in the URL with the component's k3s-based service name and port (It can be fetched using k get svc -n expertflow)
-
Create the following additional attributes
|
Name |
Type |
|---|---|
|
Organizational-ID |
PositiveNumber |
|
Authentication-Token |
String2000 |
|
Comments-Batch-Size |
PositiveNumber |
|
API-Version |
PositiveNumber |
|
Host-Url |
String100 |
-
Click Save
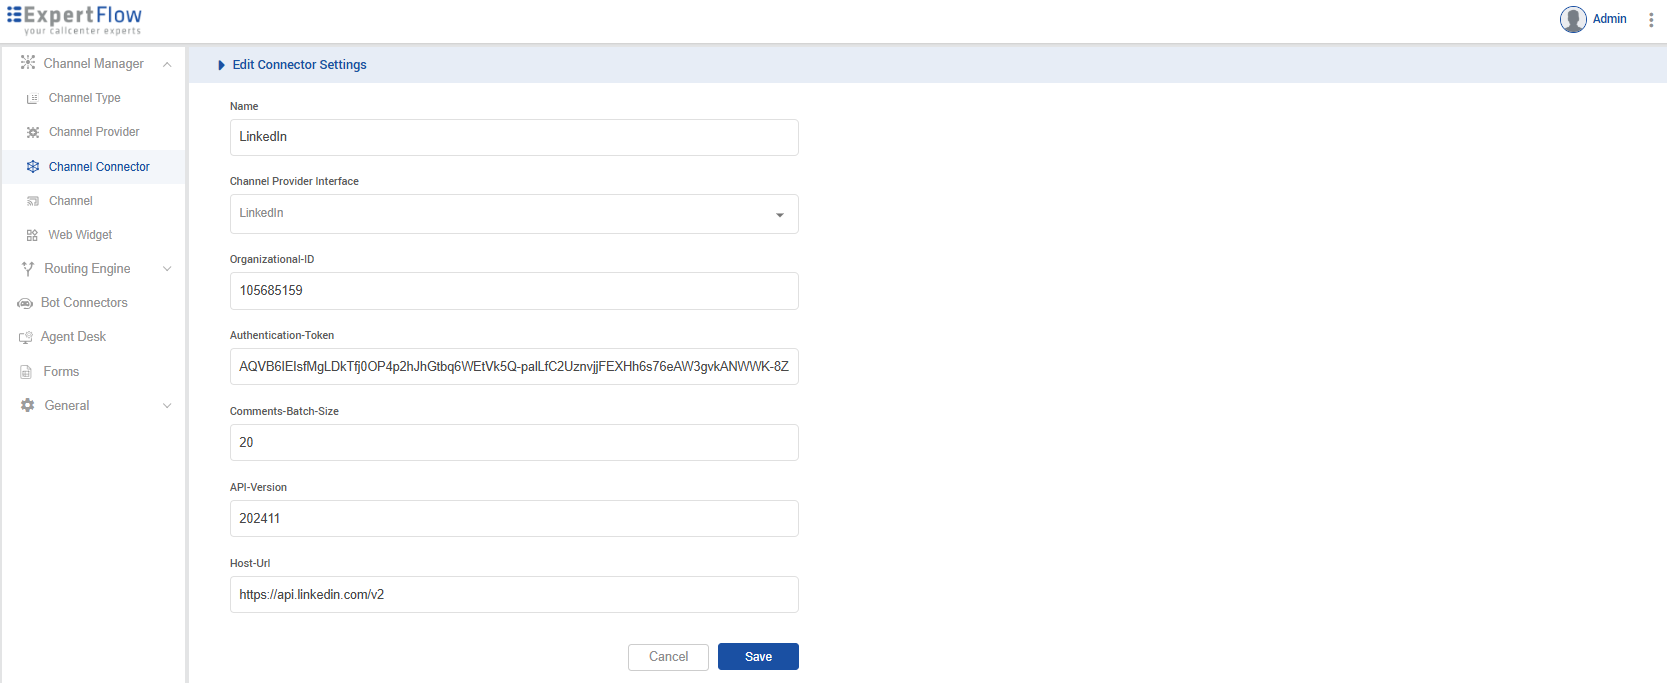
Channel Connector
-
Create a Channel Connector and give it the name "LinkedIn Connector"
-
Select LinkedIn in the Channel Provider Interface.
-
Update
Organizational-ID,Authentication-Token,Comments-Batch-Size,API-Version,Host-Urlvalues.
|
Properties |
Description |
|---|---|
|
|
You can get this from the organisation’s LinkedIn page dashboard URL
|
|
|
Generate using the OAuth token generator tool |
-
Click Save
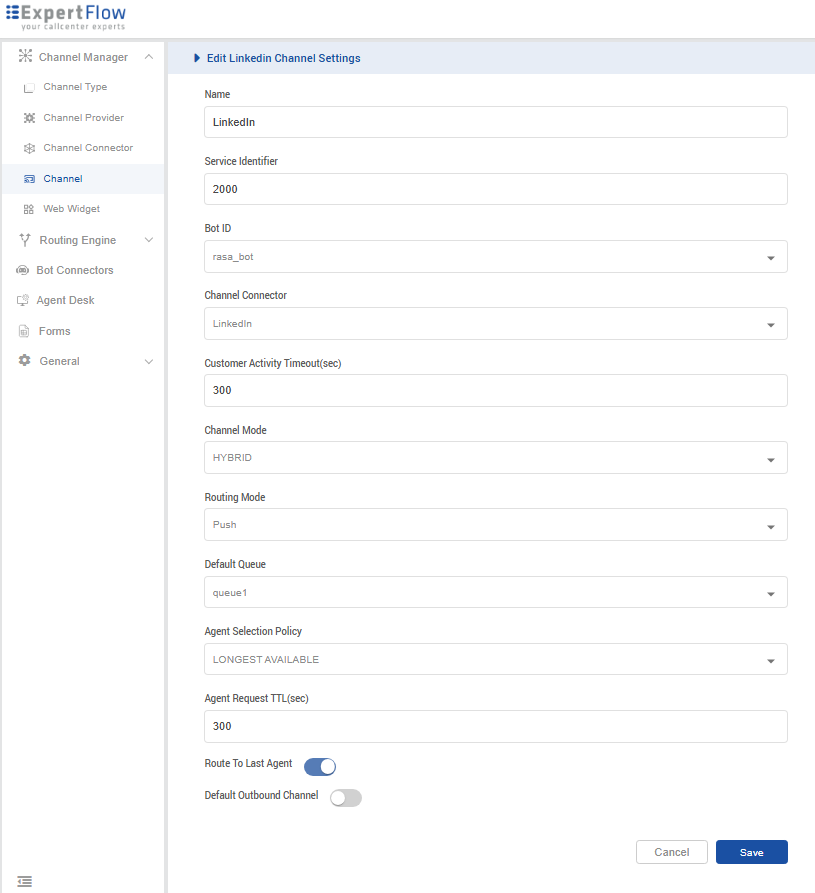
Channel
-
Add a Channel and give it a name like “LinkedIn”.
-
Add Service Identifier as your organisation ID.
-
Select the Bot ID with only the available Rasa Bot.
-
Select the recently created “LinkedIn Connector” in Channel Connector.
-
Set 300 sec as Customer Activity Timeout(sec).
-
Set Channel Mode as HYBRID.
-
Set the Routing Mode as per your need. PUSH or PULL.
-
Set the required Queue where you want to route the LinkedIn Chats.
-
Select LONGEST AVAILABLE as Agent Selection Policy.
-
Set 300 sec as Agent Response Time(sec).
-
Save.
You have to restart the LinkedIn connector after adding the LinkedIn channel configuration in the unified admin.
Webhook Registration
This feature is only valid in CX4.9.5.
-
Only available if your LinkedIn app has standard tier access available.
-
Disable scheduler using APIs before enabling webhook.Unknown Attachment
Webhooks allow real-time comments notification events. To receive notifications at your webhook, your webhook must be registered and validated.
-
Webhook endpoint must be a public FQDN, ngrok URIs are not supported “https://{FQDN}linkedin-connector/linkedin/webhook”
-
Both GET and POST requests should be enabled on this endpoint.
Developer portal
-
Register your webhook in the "Webhooks" tab of your application in the developer portal.
Unknown Attachment
-
Press create new button
-
Add your valid webhook, and check the Social action check box
Unknown Attachment
-
Press Test this Url button if you have provided a valid client ID and secret. It will return a validated token, and you can see it validated.
Unknown Attachment
-
Press Save webhook button. You can see this webhook registered in the webhook tab
Unknown Attachment
Social Media Event Subscription.
To receive notifications on your validated webhook, you must also subscribe your members using the Subscription API Unknown Attachment
|
Key |
Value |
|---|---|
|
developer application ID |
It will be available from the URL.
|
|
member ID |
You can get admin memberId from the Following get api |
|
organization ID |
You can get this from the organisation's’s LinkedIn page dashboard URL
|
HTTP
https://api.linkedin.com/v2/eventSubscriptions/(developerApplication:urn%3Ali%3AdeveloperApplication%3A{developer application ID},user:urn%3Ali%3Aperson%3A{member ID},entity:urn%3Ali%3Aorganization%3A{organization ID},eventType:ORGANIZATION_SOCIAL_ACTION_NOTIFICATIONS)
JSONCopy
{
  "webhook": "https://{FQDN}linkedin-connector/linkedin/webhook"
}
Subscription Lifetime
Your app’s subscriptions for a member are only valid for as long as the member's authorisation grant is valid for your application. If the grant expires or if the member revokes their grant for your application, the subscriptions for the member will be removed. A subscription will also be removed in the case that the member is no longer an administrator of the company they are subscribed to.