Overview
Email provides support to various features. Sending and receiving emails are the basic features that comes along with some additional features like Reply, Reply all, Forward, Email Attachments, Email threading and Email Signature features to make the experience richer.
Pre-Requisites
Email is implemented using On-Prem MS Exchange (Primarily 2019) for sending and receiving emails using EWS (Exchange Web Service). Pull mode mechanism is used to pull the emails every certain number of time via EWS. An On-Prem MS Exchange account is required to integrate it with CX application. Also, we need to ensure that the account is publicly accessible or otherwise, you can only test it within that exchange. Along with that EWS should be enabled on this On-Prem MS Exchange server to make it accessible from Third Party Applications like CX application.
Required Items from MS Exchange Server
Once your IT-Admin has setup your account on On-Prem MS Exchange then you should also ask them the following details.
-
Exchange URI e.g. <exchange-fqdn>/EWS/Exchange.asmx
-
Username or email address of the account to be connected with CX application
-
Password associated with the account to be connected with CX application
Unified Admin Configuration
In our CX application, we need to setup email same like we setup any other connector. The detailed setups are mentioned below.
Setup MRD
-
Create MRD from Unified Admin → Routing Engine → MRD menu.
-
Set the name and description.
-
Select MRD Type: EMAIL.
-
Set Max Task Request = 5 (Or any other as needed)
-
Save.
Note: Go to Unified Admin → Channel Manager menu to setup the further configurations.
Setup Channel Type
-
Email channel type should be already shown in the list here as out-of-the-box Channels. If not please add one.
-
Select the MRD as EMAIL.
-
Upload the icon (if not already uploaded).
-
Save.
Setup Channel Provider
It's recommended to use the service name of the component in the "Channel Provider -> Provider's Webhook" field. However, FQDN can also be used with some additional custom configurations.
-
Set any name i.e. MS Exchange Email Provider.
-
Select Channel Type as “EMAIL”.
-
Provide the service name of the Email Connector in the Provider Webhook field as http://{SERVICE-NAME}:{SERVICE-PORT}. Replace the {SERVICE-NAME} and {SERVICE-PORT} in the URL with the component's k3s-based service name and port (It can be fetched using k get svc -n expertflow)
-
Example: Set the “Provider Webhook” field as http://cx-channels-ms-email-connector-svc:8080
-
-
Add 3 Attributes as Custom Attributes
-
USERNAME type String(100)
-
PASSWORD type Password
-
EXCHANGE-URI type String(2000)
-
-
Save
Setup Channel Connector
-
Set any name i.e. MS Exchange Email Connector.
-
Select Channel Provider as “MS Exchange Email Provider”.
-
In USERNAME field, insert the username/email-address received from IT Team
-
In PASSWORD field, insert the password of username/email-address received from IT Team
-
In EXCHANGE-URI field, insert the exchange-uri received from IT Team
-
Save.
Setup Channel
-
Click on Email to expand the panel and click on “Add new Channel”.
-
Set any name i.e. MS Exchange Email Channel.
-
Set Service Identifier as your email address that you have used in USERNAME while setting up Channel Connector.
-
Select the Bot from the drop down list.
-
Select the connector name you have created i.e. “MS Exchange Email Connector“ from Channel Connector drop down list.
-
Set any value in seconds as Customer Activity Timeout(sec). (You can change it as per your need. Normally it would be 300sec (5mins))
-
Set Channel Mode as HYBRID.
-
Set Routing Mode as PULL. (As it works best in PULL mode but it also works in PUSH mode as well)
-
Set Queue or List (As required based on PUSH or PULL mode).
-
Set Agent Selection Policy as LONGEST AVAILABLE.
-
Set any value as Agent Request TTL (sec). (You can change it as per your need. Normally it would be 300sec (5mins))
-
Save.
Setup Webhook
Once the MS Exchange based Email account is setup and Configurations on unified admin is already finished with working ms-email-connector on some instance, then we need to setup the webhook using this postman request.
Snapshot is shown below:
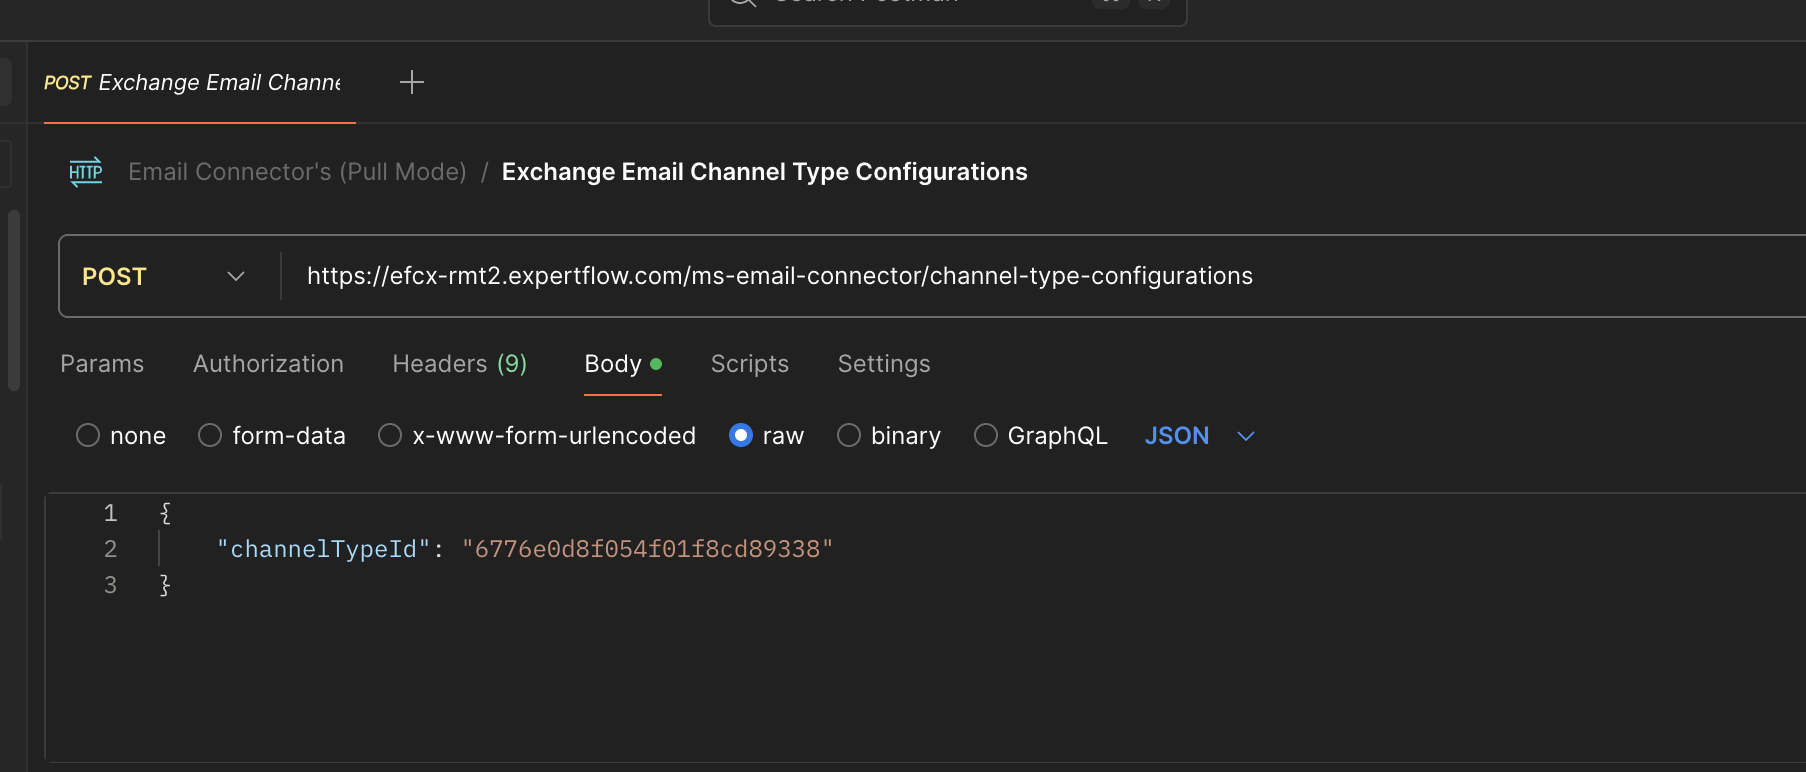
Post Url
https://<FQDN>/ms-email-connector/channel-type-configurations
Post Body
{ “channelTypeId”: “id-of-channel-type” }
Post Response

Note: You can fetch the ChannelTypeId from this channels list API, and search for the EMAIL channel Type from the list and then use that ChannelTypeId.
Setting up the Scheduler for Pooling of Data
The time interval after which the connector pools the data from email server via EWS is configurable. You can set it using config map param via helm/Channels/values.yaml or helm-values/cx-channels-custom-values.yaml file with key SCHEDULER_FIXED_RATE_IN_MS. Its in milliseconds. Default value is 60000ms which is 1minute. It is highly recommended to use more than a minute to ensure the proper pooling of data in case of high volume of emails.
Conclusion
This will setup MS Exchange based EMAIL as a channel in CX Solution.