Overview
Twitter is a supported customer channel in Expertflow CX, allowing businesses to interact with users through public tweet replies, comments, and DMs. To enable this, businesses must set up a Twitter Developer Account and configure the connector in the Unified Admin interface.
Part 1: Setting Up a Twitter Developer Account (API v2)
After completing these steps, the Twitter Channel Connector will be active and integrated into Expertflow CX, enabling agents to handle Twitter interactions within the unified agent experience. For any updates, usage limits, or additional configurations, refer to the Twitter API Docs.
Feel free to consult the Unified Admin Setup Guide for general configuration help.
-
Ensure you understand and comply with Twitter's API usage policies, including rate limits and guidelines specific to Twitter API v2.
-
Regularly check the Developer Portal for updates, announcements, or changes in policies related to the v2 API.
Step 1: Sign in or Create a Twitter Account
-
Visit Twitter and log in or create a new account.
Step 2: Apply for a Developer Account
-
Go to the Twitter Developer Portal.
-
Log in with your Twitter credentials.
-
Click Apply and follow the application process.
Step 3: Enable API v2 and Create a Project
-
Once your developer account is approved, you’ll receive an email confirmation.
-
In the Developer Portal:
-
Navigate to Projects & Apps > Set up Project
-
Enter a project name and describe its intended use
-
Step 4: Create an App and Generate Keys
-
Inside your project dashboard:
-
Click Create App
-
Fill out the app details (name, description, use case)
-
-
Once the app is created:
-
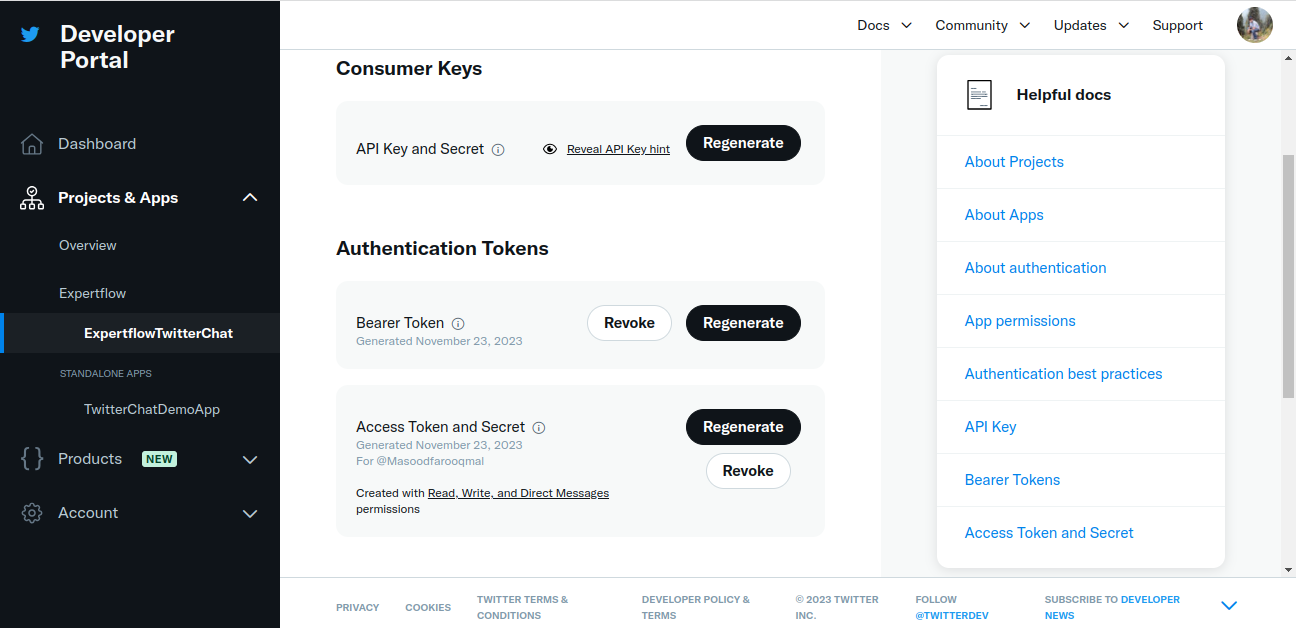
Go to Keys and Tokens tab
-
Generate the following credentials:
-
API Key
-
API Secret Key
-
Bearer Token
-
Access Token
-
Access Token Secret
-
-
Step 5: Development Access
-
Use these credentials in your application to authenticate and interact with Twitter API v2.
-
Refer to Twitter API Documentation for detailed info on endpoints, methods, and limits.
Twitter Channel Configuration in Unified Admin
Step 1: Initial Setup
-
Log in to Unified Admin.
-
Create the following:
-
MRD (Media Routing Domain) for Twitter
-
Routing Attribute
-
Queue (dedicated to Twitter)
-
Assign the MRD to an agent and define the agent attributes
-
Step 2: Channel Manager Configuration
Channel Type
-
Should be auto-created during connector bootstrapping
-
Name:
TWITTER
Channel Provider
-
Create a new provider, e.g.,
Twitter Channel Provider -
Select
TWITTERas the channel type -
Webhook URL:
http://ef-twitter-connector-svc:8080 -
For Helm Based :
http://cx-channels-twitter-connector-svc:8080 -
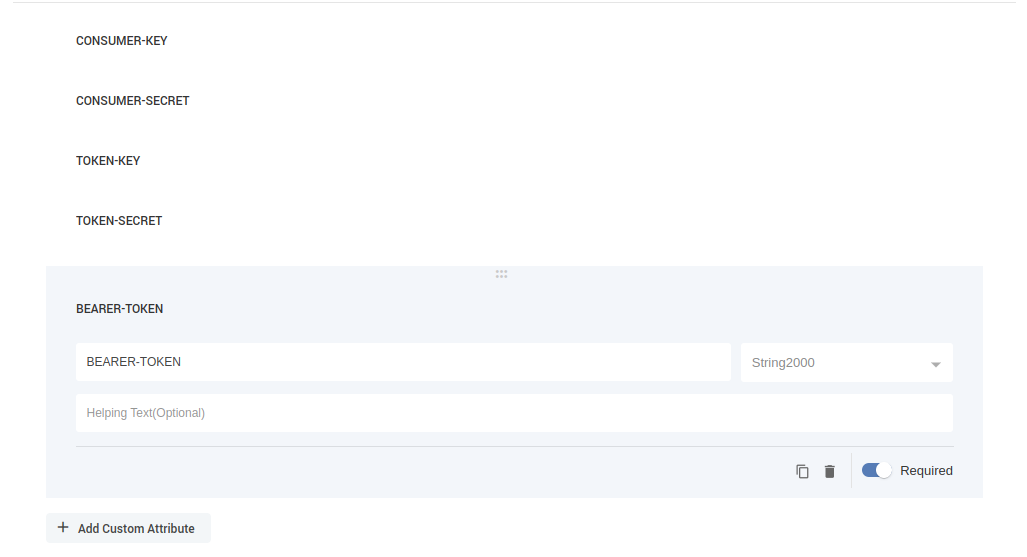
Add the following 5 custom attributes (all type =
String2000, marked as Required):-
CONSUMER-KEY -
CONSUMER-SECRET -
TOKEN-KEY -
TOKEN-SECRET -
BEARER-TOKEN
-
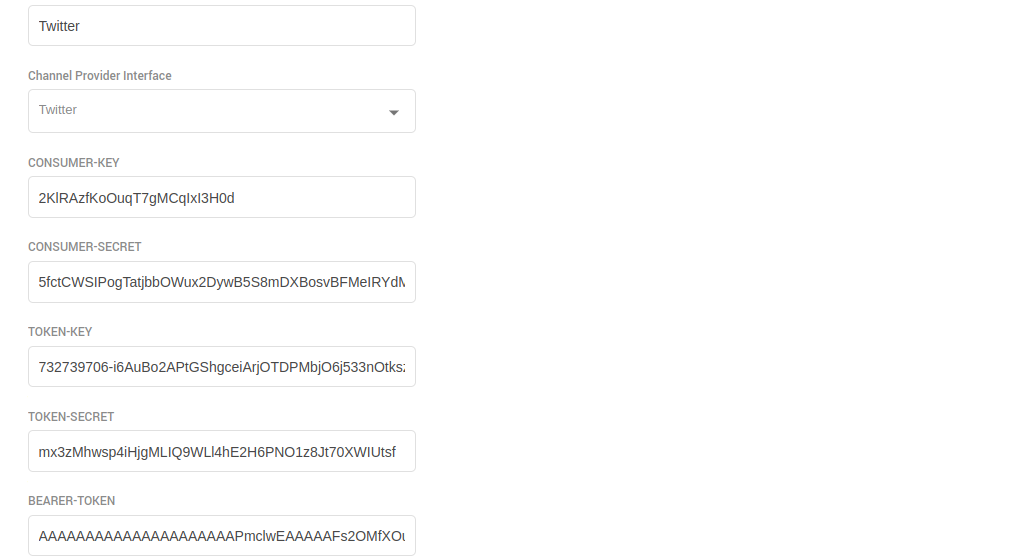
Channel Connector
-
Add a connector named
Twitter Channel Connector -
Choose the previously created Twitter Channel Provider
-
Input the 5 API credentials into their respective fields
Channel
-
Expand the
TWITTERchannel section and click Add new channel -
Suggested name:
Twitter -
Service Identifier: Twitter Account ID
-
Bot ID: Select EF-Bot or another default bot
-
Channel Connector: Select
Twitter Channel Connector -
Customer Activity Timeout: 180 seconds
-
Channel Mode: HYBRID
-
Agent Selection Policy: LONGEST AVAILABLE
-
Agent Request TTL: 100 seconds
-
Routing Mode: PUSH or PULL
-
Choose a Queue or List depending on routing mode
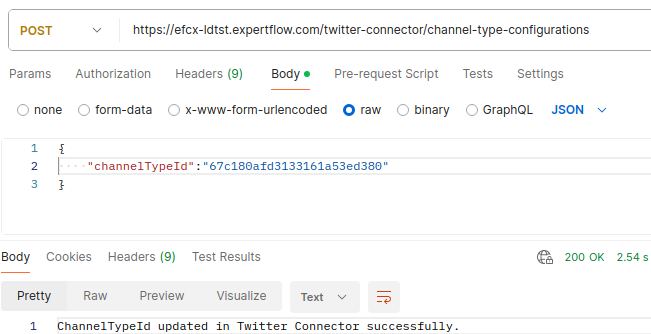
Twitter Connector Runtime Behavior
-
After launching the Twitter Connector application
-
Fetch ChannelTypeID of Twitter from the link.
-
Register the channel type using the provided API link
-
The connector runs in PULL MODE, fetching Twitter messages periodically based on API rate limits
Media Upload Behavior
Images: Max size = 5 MB
GIFs: Max size = 15 MB
Videos: Twitter allows up to 512 MB, but Expertflow CX limits it to 25 MB
Limitation
Twitter supports multiple media uploads per tweet/comment, but the current implementation in CIM only processes one attachment per message due to limitations in CIMMessage structure
Summary
Twitter's Developer Portal and API documentation provide detailed information about utilizing the v2 API endpoints and functionalities. Be sure to refer to these resources for the most accurate and updated information.