Add a Channel Category
You can create, edit, and delete Channel Categories from the Unified Admin.
How to create:
-
Go to the Routing Engine menu on the left and click Channel Categories.
-
While creating a channel category, provide the following information:
|
Field |
Description |
|---|---|
|
Name |
Give a name to the channel category. |
|
Description |
Provide an optional description of the channel category. |
|
Max Tasks Request |
Specify the maximum number of task requests that any agent can handle on this channel category. When this count is reached, the agent's channel category state will turn to |
|
Interruptible |
Reserved for future. When available, this will allow us to turn the flag to ON if the requests on this channel category are considered to be interruptible. This means that the system may interrupt the agent on this channel category (during an active conversation) to route him to a conversation from a different channel category if required. |
Notes:
-
If a channel category is associated with a precision queue or with a Channel Type, it cannot be deleted until the association is removed.
-
If some conversations are already active on a channel category, it cannot be deleted.
-
Channel category names are case-sensitive.
Map Channel Category to Channel Type
-
Map one Channel Type to the channel category created above.
-
Go to Channel Manager → Channel Types.
-
Choose a channel type to associate the channel category with. You can map one channel category to multiple channel types.
-
If an Channel Category is associated with a precision queue or with a Channel Type, it cannot be deleted until the association is removed.
-
If some conversations are already active on an Channel Category, it cannot be deleted.
-
Channel Category names are case-sensitive.
Learn more about Channel Types in Channel related terms
The following channel types are available by default.
-
WhatsApp
-
Web
-
Facebook
-
Voice
Channel Connectors
Add a Channel Provider
Channel providers are supported only for Web, WhatsApp via 360, and Facebook channels.
Channel providers are used to configure the third-party vendors who will be used to send/receive messages to/from a channel. For instance, Dialog 360 and Twilio could be the two-channel providers for WhatsApp channel.
Tip
Learn more about channel providers in Channel related terms
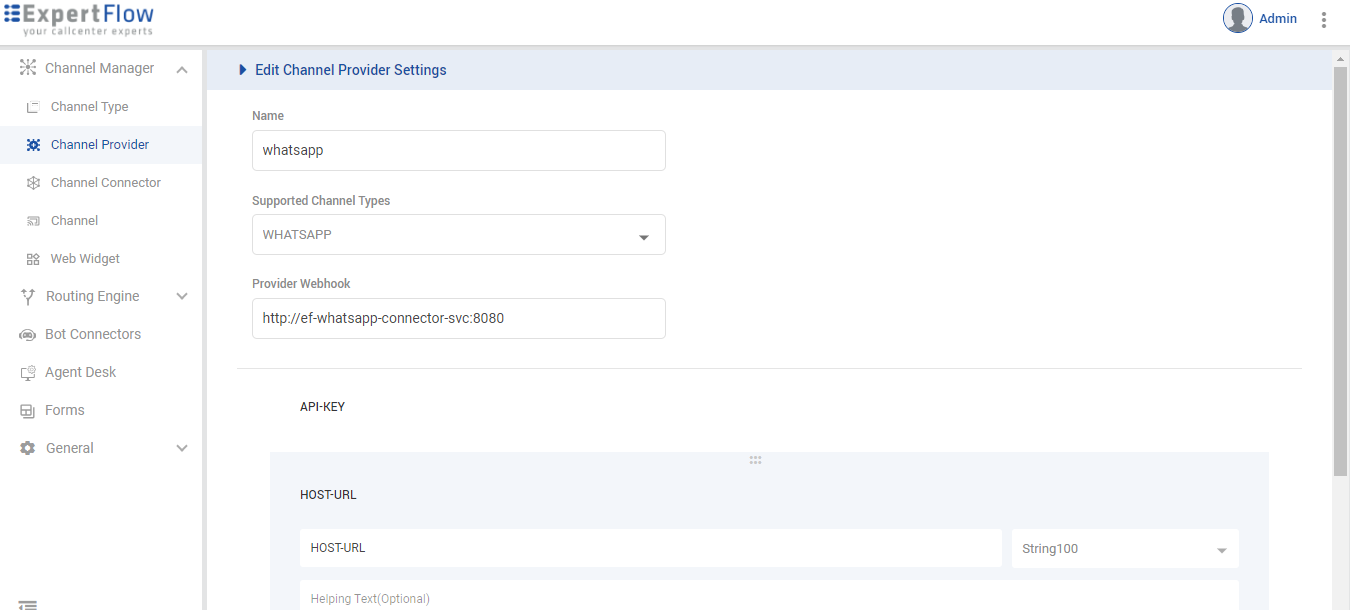
To add a new channel provider, go to Channel Manager → Channel Providers.
While adding a new channel provider, provide the following information.
|
Field |
Description |
|---|---|
|
Name |
Provide a name for the channel provider such as Dialog 360 for WhatsApp. |
|
Supported Channel Types |
This setting is used to determine which channel types this channel provider will support. For instance, you could configure one channel provider to support both WhatsApp and Facebook messages. So one channel provider can be used to serve both types of channels. Based on the supported channel types, you can add corresponding channel connectors and use them while configuring new channels. |
|
Provider Webhook |
Give a webhook URL for the Channel Provider where this channel provider will listen to the events:
The provider webhook URL is given in the following format: For Web provider Kubernetes based: HELM based: For WhatsApp Kubernetes based: HELM based: For Facebook Kubernetes based: HELM based: |
Social Media Action Permissions ( Optional )
This section defines the custom boolean attributes used to manage agent capabilities across social media channels within the Connector Provider configuration.
Default Behavior
By default, all social media actions are enabled. To restrict a specific action for an Agent, you must manually add the corresponding attribute to the Connector Provider configuration and set its value to false in Channel Connector Configurations.
Permission Attribute Matrix
|
Attribute Name |
Action Controlled |
Type |
|
|
Liking a comment |
Boolean |
|
|
Hiding a comment |
Boolean |
|
|
Deleting a comment |
Boolean |
|
|
Viewing the full post |
Boolean |
|
|
Sending a private reply |
Boolean |
|
|
Editing a SM comment message |
Boolean |
|
|
Posting a public reply |
Boolean |
Add a Channel Connector
-
Go to Channel Manager → Channel Connector.
-
Click Add New Connector and fill out the following:
|
Field |
Description |
|---|---|
|
Name |
This is the name of the channel connector. |
|
Channel Provider |
Select the desired Channel Provider (created in the above step) to configure this channel connector for the channel provider. Based on the selected channel provider, you'll see the corresponding configuration attributes to be specified for this channel connector. |
|
Custom Attributes |
This shows the list of other custom attributes created while defining the Channel Provider you selected above. Available only if some custom attributes were added while defining the Channel Provider in the above step. For example, for the default Dialog 360, |
Notes:
-
If a Channel Connector for a particular Channel Provider exists, the system does not allow deletion of such a Channel Provider until the association is removed.
-
If a Channel Connector for a particular Channel Provider exists, the system does not allow to delete such a Channel Provider until the association is removed.
Follow the 360-Connector Configuration Guide to configure WhatsApp via Dialog 360.
See Facebook Comment/DM Connector - Configuration Guide for configuring Facebook Social Media.
Set up a New Channel
-
Go to the Channel section in Unified Admin.
-
Expand the desired channel type (e.g., Web, WhatsApp, Facebook).
-
Click Add New Channel and fill out the following:
|
Field |
Description |
|---|---|
|
Channel Name |
Specify a channel name. |
|
Service Identifier |
This is the service identifier of the service that the customer dialed or reached. It could be a DN (Dialed Number) such as a WhatsApp number, any website URL, Facebook ID, Viber ID. |
|
Bot ID |
This is the Bot Connector that was added under Bot Settings. You need to choose a bot connector here regardless of the Channel Mode. |
|
Channel Connector |
This is the Channel Connector that should be used to send/receive messages to/from the channel. Choose the desired channel connector created in the above step to be associated with this channel. This list is rendered based on the Channel Type. |
|
Customer Activity Timeout |
This is the time in seconds that the system waits for the customer's response against a message sent by the agent or bot. When this time reaches, the system considers the chat as inactive. The bot closes the channel session of the customer and the agent receives |
|
Channel Mode |
Choose a channel mode. Possible values are:
|
|
Routing Mode |
This determines if the channel needs to push incoming requests to a queue to be routed to agents, or, broadcast to a Pull-based List to be taken up by any agents subscribed to the List. Possible values are:
|
|
Agent Selection Policy |
This determines how to select an agent when multiple agents match the criteria. Possible values are:
This is applicable only if the channel mode selected above is other than Bot and the selected Routing Mode is Push. |
|
Agent Request TTL (time-to-leave) |
This is the time in seconds that the system waits for an agent to be assigned to a queued request. Once this TTL is elapsed, the Disclaimer:
When the |
|
Default Queue |
This is the default queue where requests coming on the channel will be enqueued. This is enabled only if you have selected the Routing Mode as Push. |
|
Default List |
This is the default list where requests coming on the channel will be published. This is enabled only if you have selected the Routing Mode as Pull. |
|
Route to the last agent |
Reserved for future. This setting is used to route the request to the last agent who previously handled a request from the same customer. |
On the Channels list, you can see a dropdown for each channel type defined in the system. Expand a channel type to add a new channel of this channel type.
Follow Add a Web Channel guide to add your web channel
See Add a Web Widget to learn more about how to add a new web widget for your end customers to start a web chat.
Change Max Tasks Limit for Agents' Channel Categories
By default, each agent added to the system becomes a part of all MRDs with the default max tasks limit set as per the Maximum Tasks Requests per MRD. See Step 2 for more details.
To change an agent's tasks limit on each MRD, go to Routing Engine → Agent MRDs page.
All MRDs that are created are listed on Agent MRDs along with the list of all users created in the system. By default, all agents who are added become a part of all MRDs.
Select one user to change the maximum number of tasks that the agent can handle on an MRD. The dropdown contains the max limit as per the limit defined in the MRD definition (created in Step 2). Set the limit to 0 to make an agent unavailable for an MRD.