Voice Connector
VRS
Media Server configuration
Manual Outbound Dialplan
-
Login to Media Server web interface.
-
Open in browser: https://IP-addr, where IP-addr is the IP address of the Media Server.
-

-
Add the username and password that was shown upon installation of Media Server and press LOGIN.
-
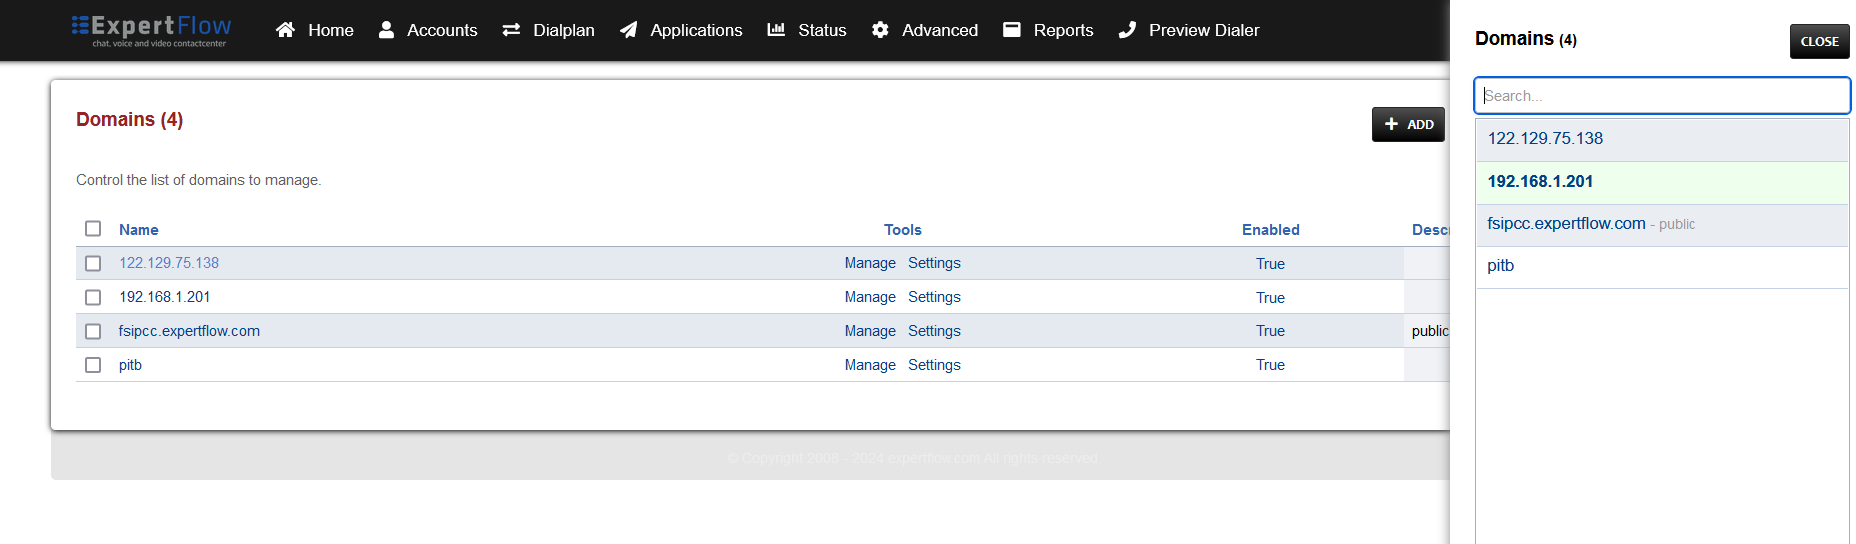
Press the IP address in the top right and select the Domain created in the Domain creation section above:
-
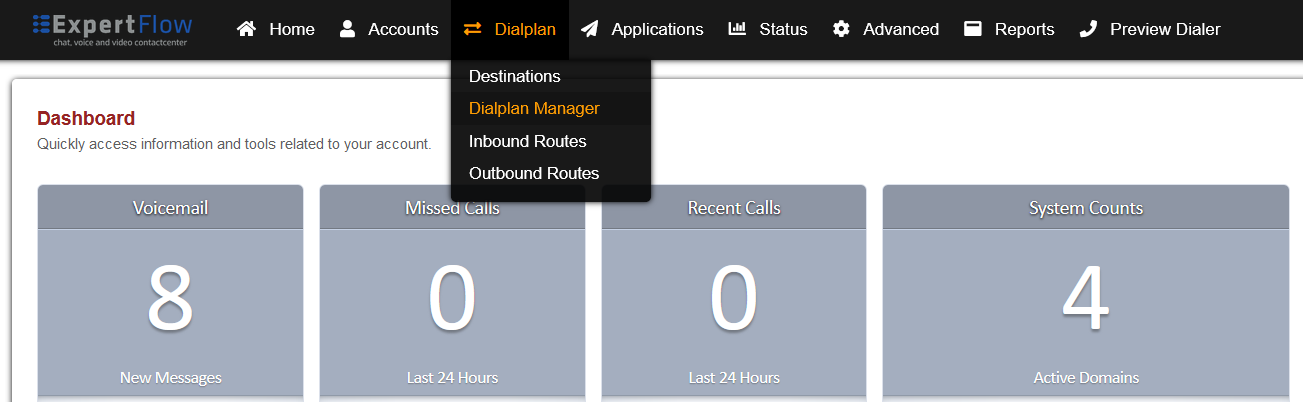
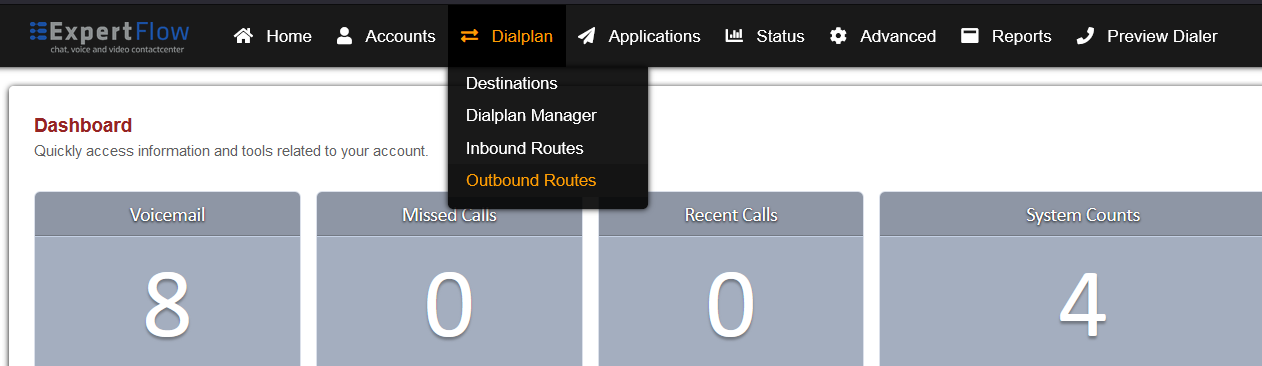
Open the Dialplan Manager section under the Dialplan tab.
-
Add a new Dialplan by pressing the Add Button on the top.
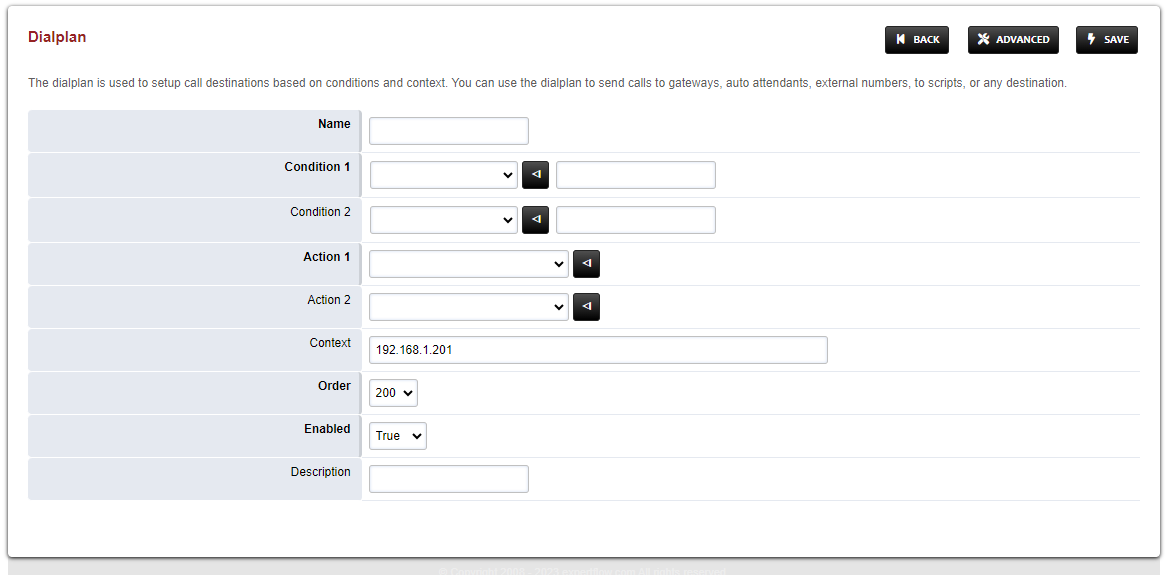
-
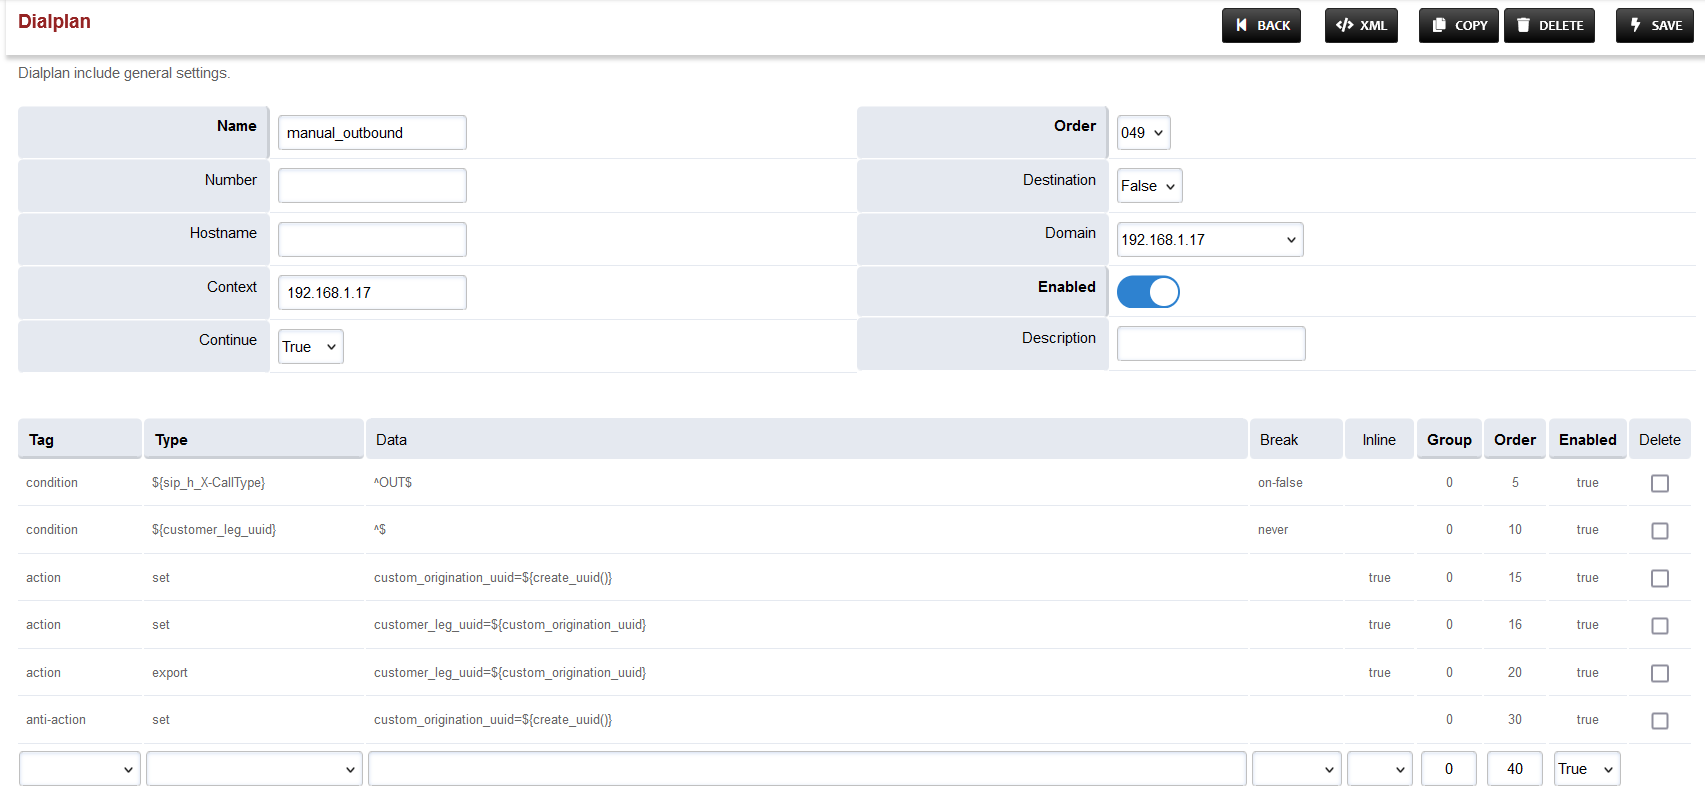
Fill the form with following details :
-
Name = Manual_Outbound
-
Condition 1 = Click the black arrow to the right of the first field. In the first field enter ${sip_h_X-CallType} and in the second field enter ^OUT$.
-
Condition 2 = Click the black arrow to the right of the first field. In the first field enter ${customer_leg_uuid} and in the second field enter ^$.
-
Action 1 = Select first item from the list
-
-
Save the form by pressing save button on top right Corner.
-
Re-open Manual_Outbound dialplan.
-
Delete the line with the Action tag (Click the checkbox in the right and press SAVE in the top right)
-
Add the following information to this dialplan:
|
Tag |
Type |
Data |
Break |
Inline |
Group |
Order |
Enabled |
|---|---|---|---|---|---|---|---|
|
condition |
${sip_h_X-CallType} |
^OUT$ |
on-false |
|
|
5 |
true |
|
condition |
${customer_leg_uuid} |
^$ |
never |
|
|
10 |
true |
|
action |
set |
custom_origination_uuid=${create_uuid()} |
|
true |
0 |
15 |
true |
|
action |
export |
customer_leg_uuid=${custom_origination_uuid} |
|
true |
0 |
20 |
true |
|
action |
set |
customer_leg_uuid=${custom_origination_uuid} |
|
true |
0 |
25 |
true |
|
anti-action |
set |
custom_origination_uuid=${create_uuid()} |
|
|
|
30 |
true |
-
Set the Context field to the value of the Domain set in the Domain creation section.
-
Set the Domain field to the value of the Domain set in the Domain creation section.
-
Set the Order field to 49.
-
Set the Continue field to True.
-
Save the changes by pressing SAVE button in top right corner.
Changes in Local extension Dialplan
-
Login to Media Server web interface.
-
Open in browser: https://IP-addr, where IP-addr is the IP address of the Media Server.
-
-
Add the username and password that was shown upon installation of Media Server and press LOGIN.
-
Press the IP address in the top right and select the Domain created in the Domain creation section above:

-
Open the Dialplan Manager section under the Dialplan tab.
-
Find and open the local_extension dialplan.
-
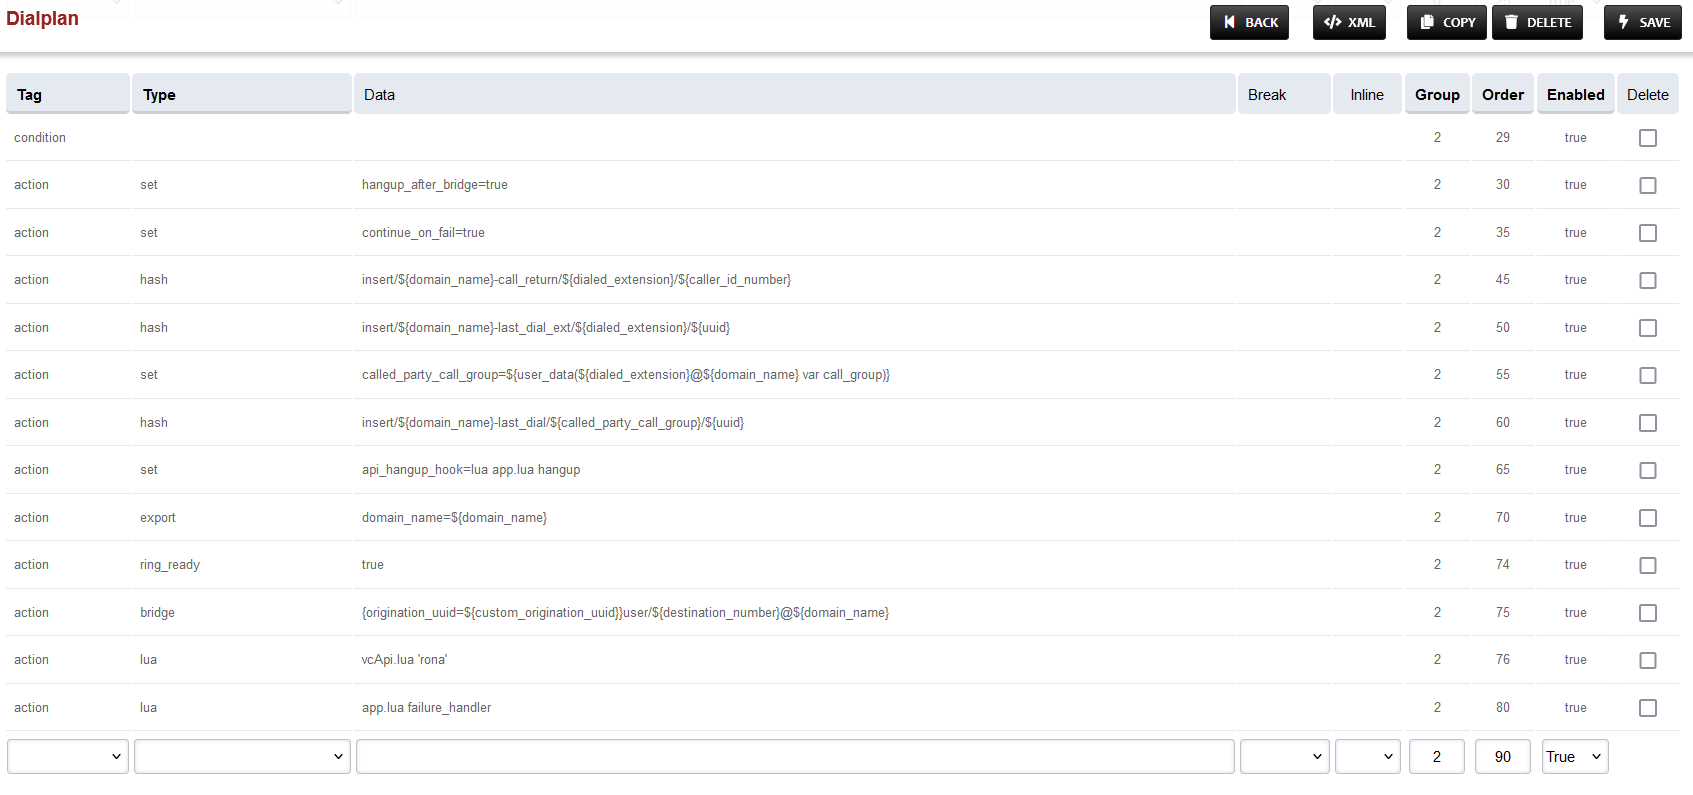
Add the following information to the last group:
|
Tag |
Type |
Data |
Group |
Order |
Enabled |
|
action |
ring_ready |
true |
1 |
74 |
true |
-
Secondly, replace the Data field in the line with Order 75 with: {origination_uuid=${custom_origination_uuid}}user/${destination_number}@${domain_name}
-
The result will look like this:
-
Save the changes by pressing SAVE button in top right corner.
Changes in Call Recording Dialplan
-
Login to Media Server web interface.
-
Open in browser: https://IP-addr, where IP-addr is the IP address of the Media Server.
-
-
Add the username and password that was shown upon installation of Media Server and press LOGIN.
-
Press the IP address in the top right and select the Domain created in the Domain creation section above:
-
Open the Dialplan Manager section under the Dialplan tab.
-
Find and open the user_record dialplan.
-
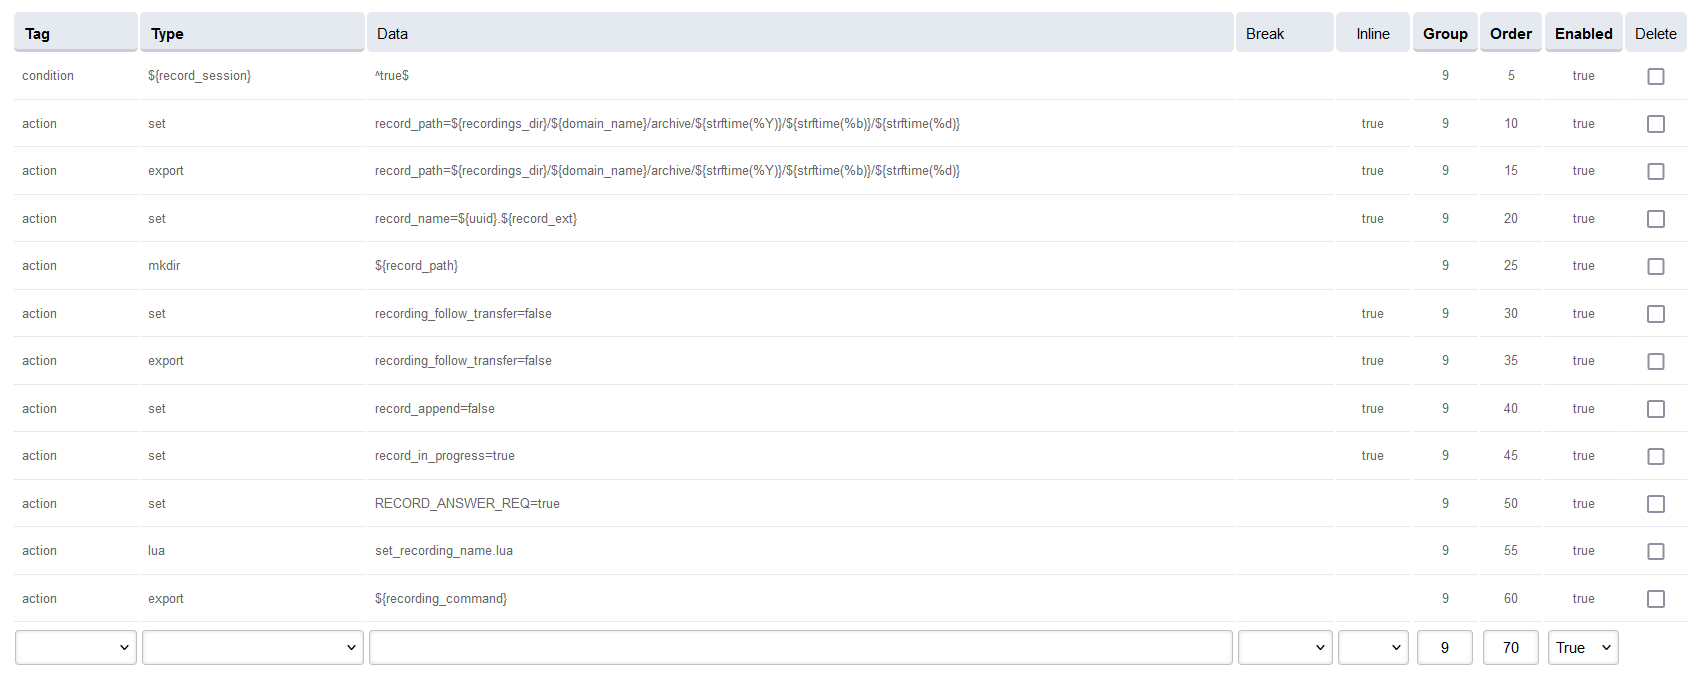
Add the following data to the table, such that the final version looks like the image below:
|
Tag |
Type |
Data |
Inline |
Group |
Order |
Enabled |
|---|---|---|---|---|---|---|
|
action |
set |
record_path=${recordings_dir}/${domain_name}/archive/${strftime(%Y)}/${strftime(%b)}/${strftime(%d)} |
true |
9 |
10 |
true |
|
action |
export |
record_path=${recordings_dir}/${domain_name}/archive/${strftime(%Y)}/${strftime(%b)}/${strftime(%d)} |
true |
9 |
15 |
true |
|
action |
set |
record_name=${uuid}.${record_ext} |
true |
9 |
20 |
true |
|
action |
mkdir |
${record_path} |
|
9 |
25 |
true |
|
action |
set |
recording_follow_transfer=false |
true |
9 |
30 |
true |
|
action |
export |
recording_follow_transfer=false |
true |
9 |
35 |
true |
|
action |
set |
record_append=false |
true |
9 |
40 |
true |
|
action |
set |
record_in_progress=true |
true |
9 |
45 |
true |
|
action |
set |
RECORD_ANSWER_REQ=true |
|
9 |
50 |
true |
|
action |
lua |
set_recording_name.lua |
|
9 |
55 |
true |
|
action |
export |
${recording_command} |
|
9 |
60 |
true |
-
Save the changes by pressing SAVE button in top right corner.
Configuring route For Outbound calls
-
Login to Media Server web interface.
-
Open in browser: https://IP-addr, where IP-addr is the IP address of the Media Server.
-

-
Add the username and password that was shown upon installation of Media Server and press LOGIN.
-
Press the IP address in the top right and select the Domain created in the Domain creation section above:

-
Open the Outbound Routes section under the Dialplans tab.
-
Press the ADD button in the top right.

-
Set the following fields :
-
Gateway = The name of the gateway configured above.
-
Dialplan Expression = The format of the number accepted by the SIP trunk e.g. for 11 digits the format is ^(\d{11})$
-
-
Press the SAVE button on top right corner.
-
Re-open this newly created Outbound Route.
-
Add the following information to the last group:
|
Tag |
Type |
Data |
Group |
Order |
Enabled |
|
action |
ring_ready |
true |
0 |
125 |
true |
-
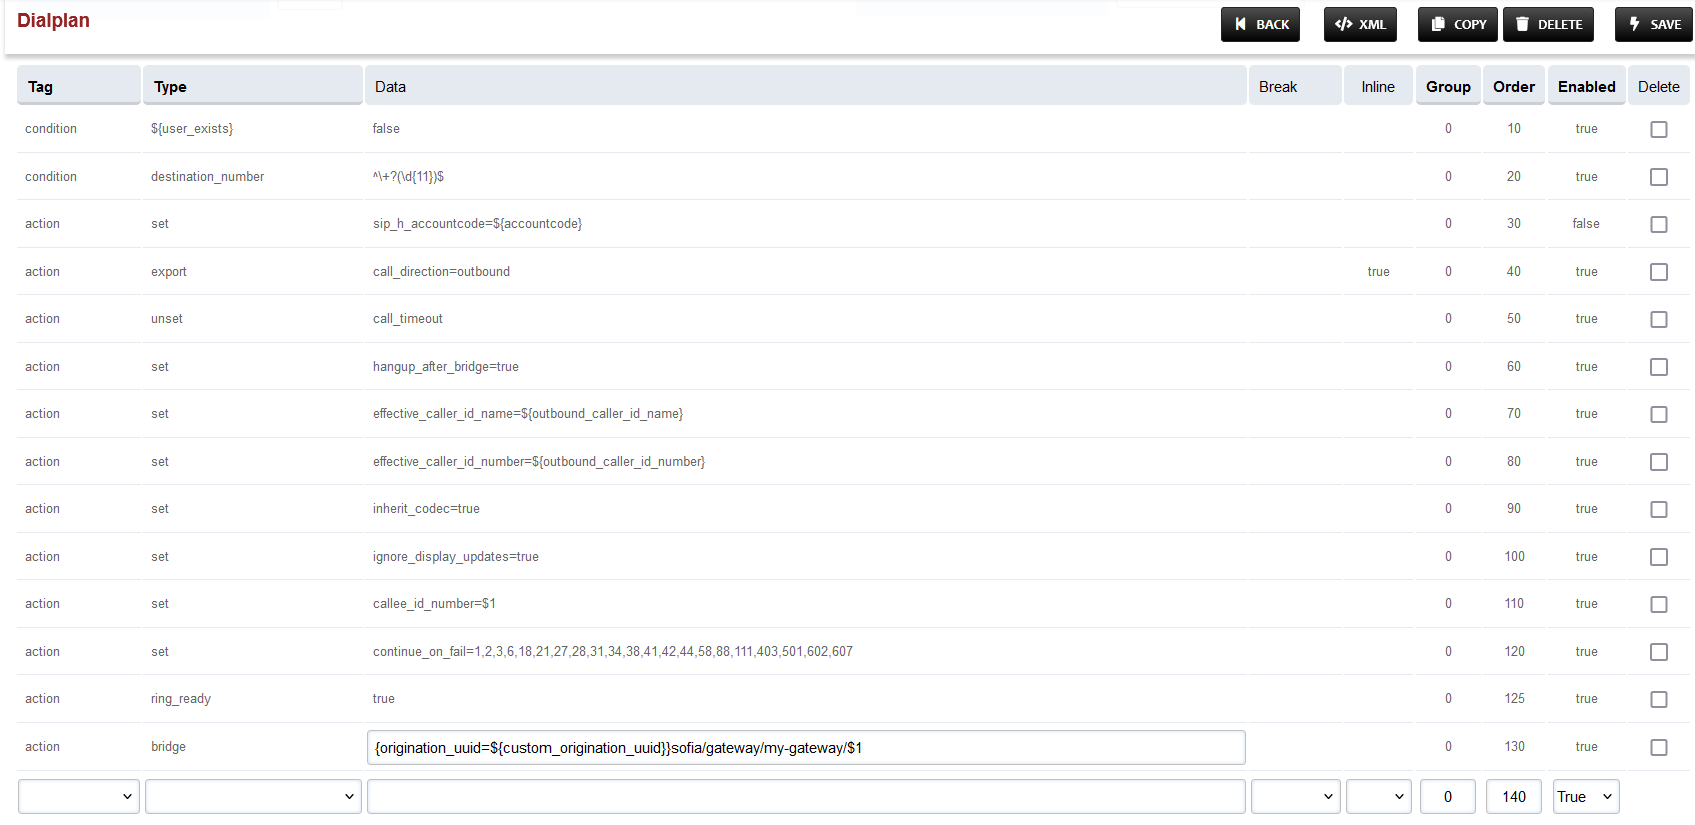
To the last row, where the Type field is bridge, append {origination_uuid=${custom_origination_uuid}} to the start of the field in the Data column. The result will look as below:
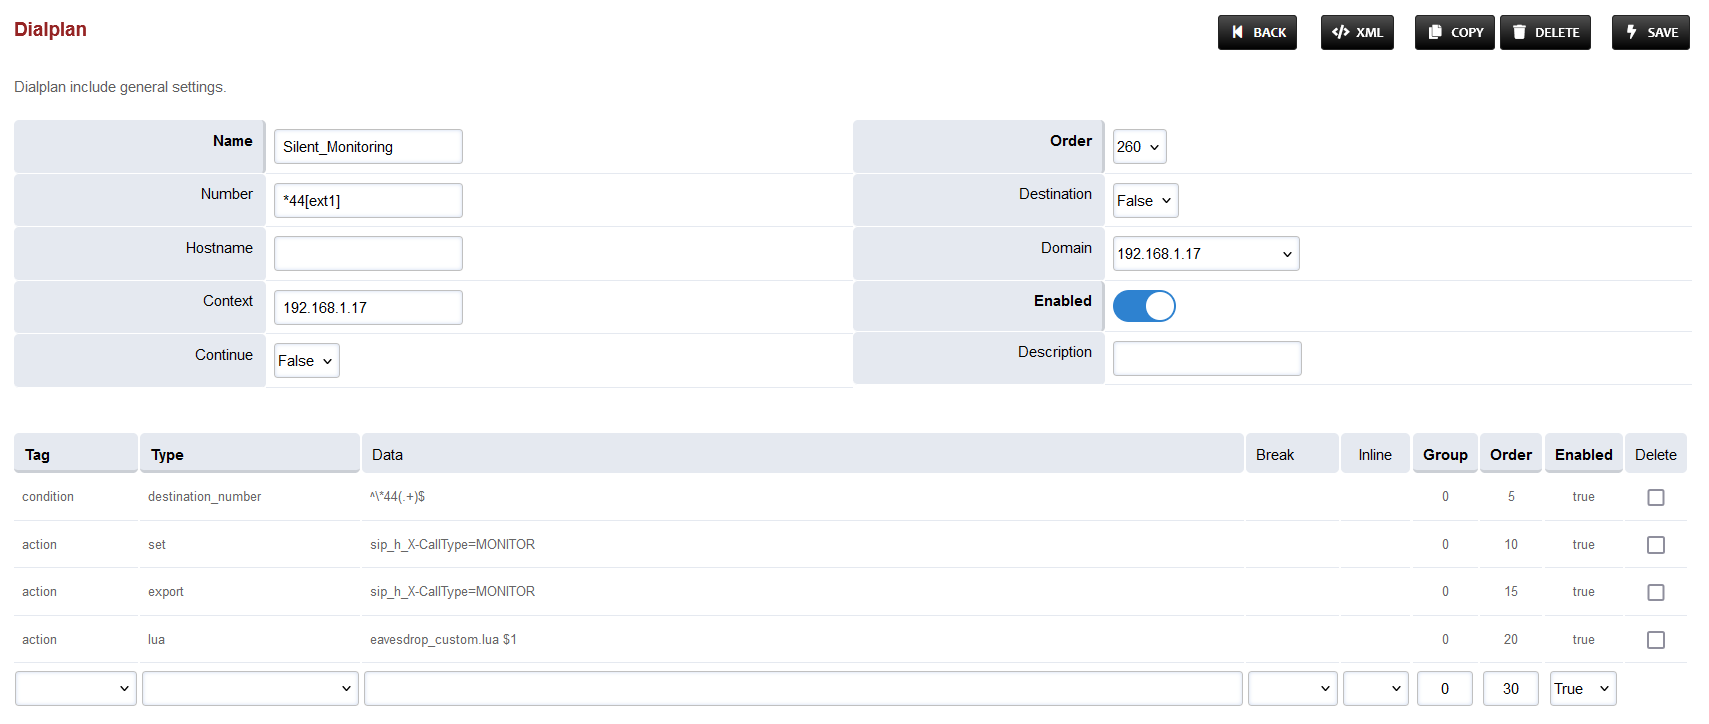
Change in Silent Monitoring Dialplan
-
Login to Media Server web interface.
-
Open in browser: https://IP-addr, where IP-addr is the IP address of the Media Server.
-
-
Add the username and password that was shown upon installation of Media Server and press LOGIN.
-
Press the IP address in the top right and select the Domain created in the Domain creation section above:
-
Open the Dialplan Manager section under the Dialplan tab.
-
Find and open the Silent_Monitoring dialplan.
-
Edit the Data column of the first row to have the value ^\*44(.+)$